The mask feature in PTGui simplifies the process of selecting areas from different images. This is not just for overlapping regions in panoramic photos, but it can also be applied to basic focus stacking.
Focus stacking involves taking multiple pictures with different focus areas.
To achieve focus across all objects, a small aperture is needed, but this may not be ideal or sufficient under certain lighting conditions to achieve the required depth of field. Thus, when not all objects are in focus, focus stacking becomes a practical solution.
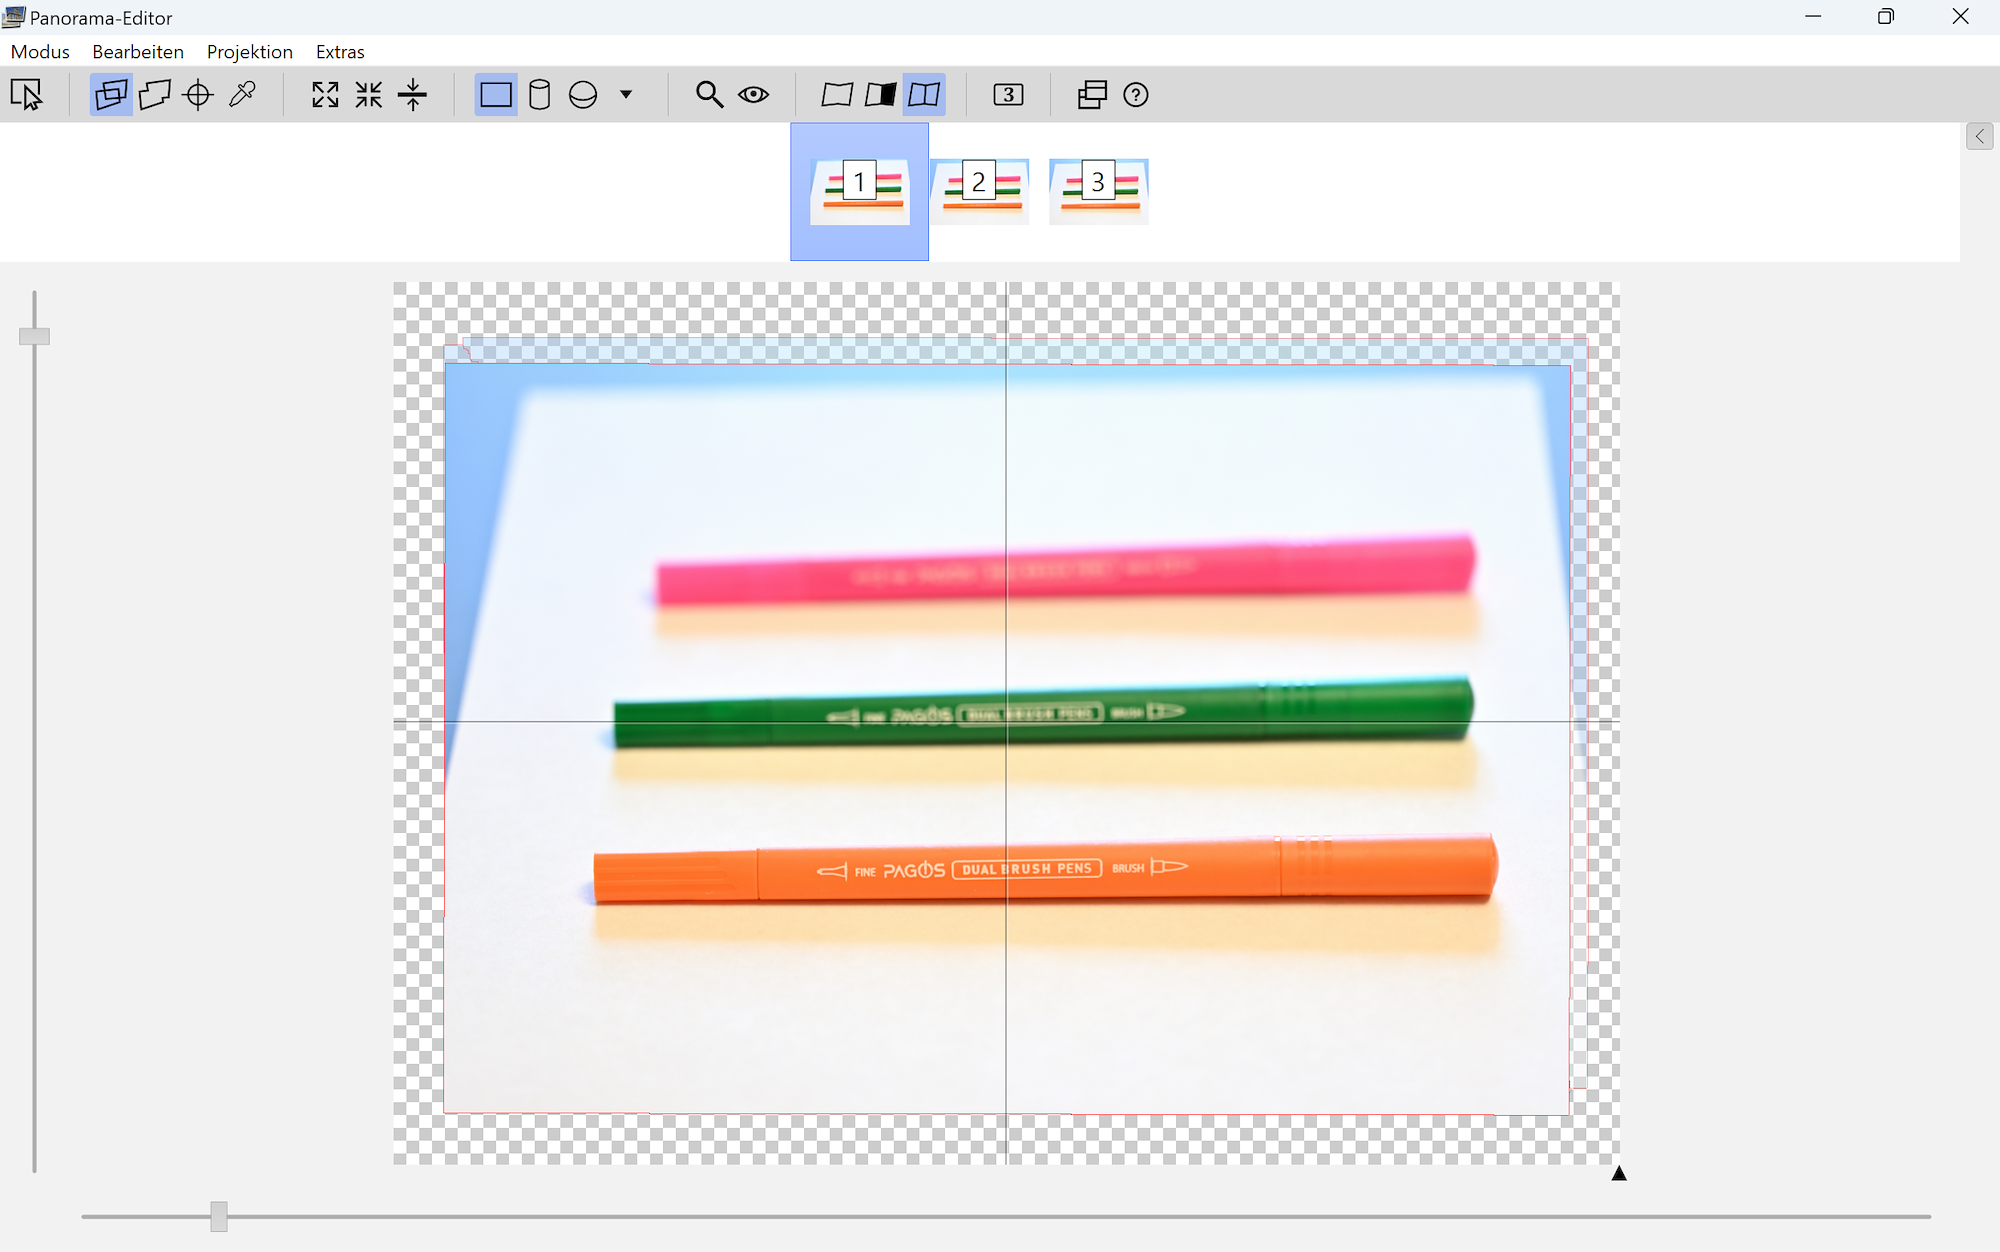
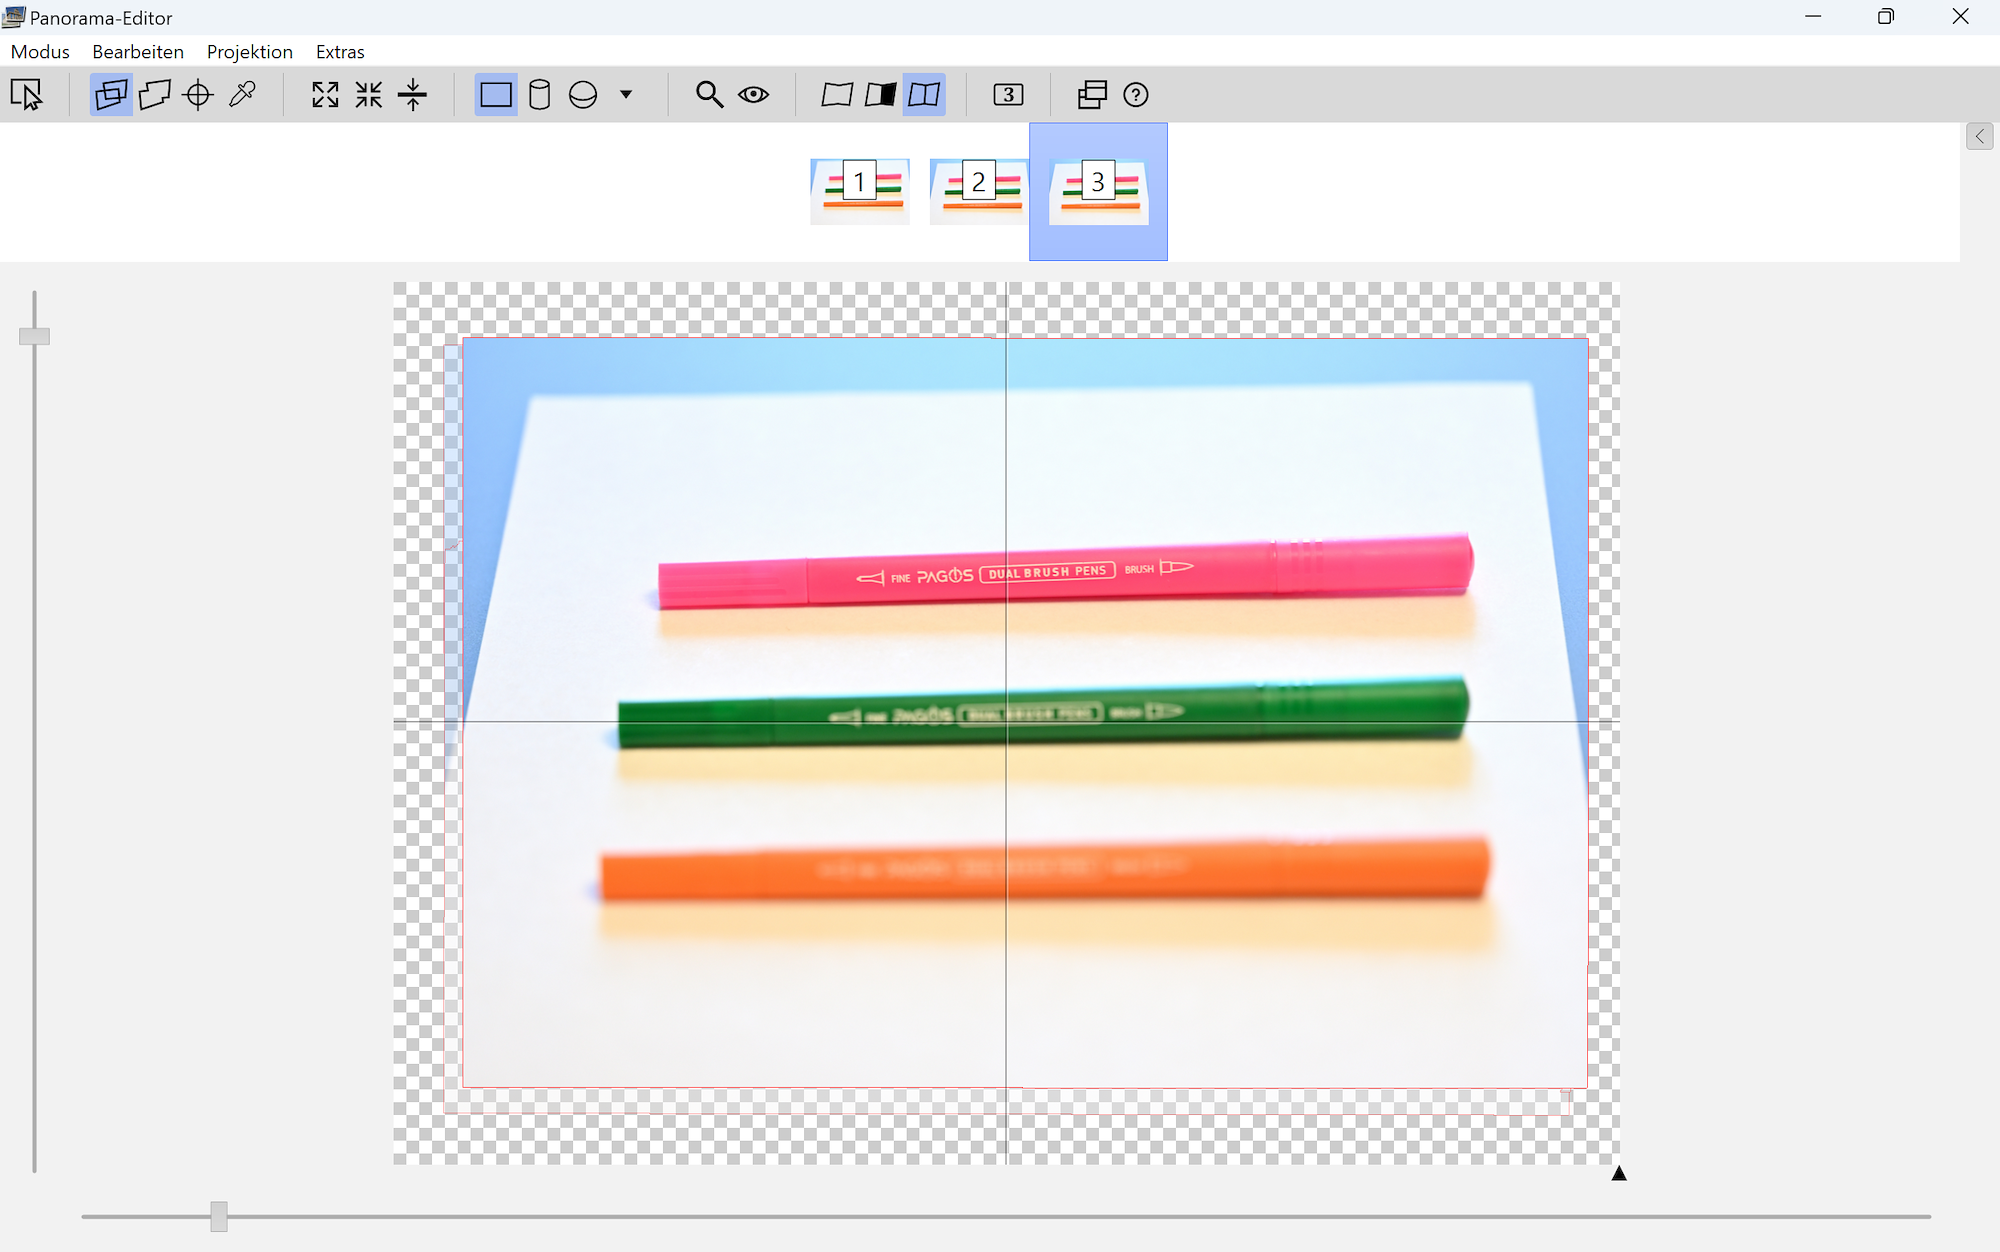
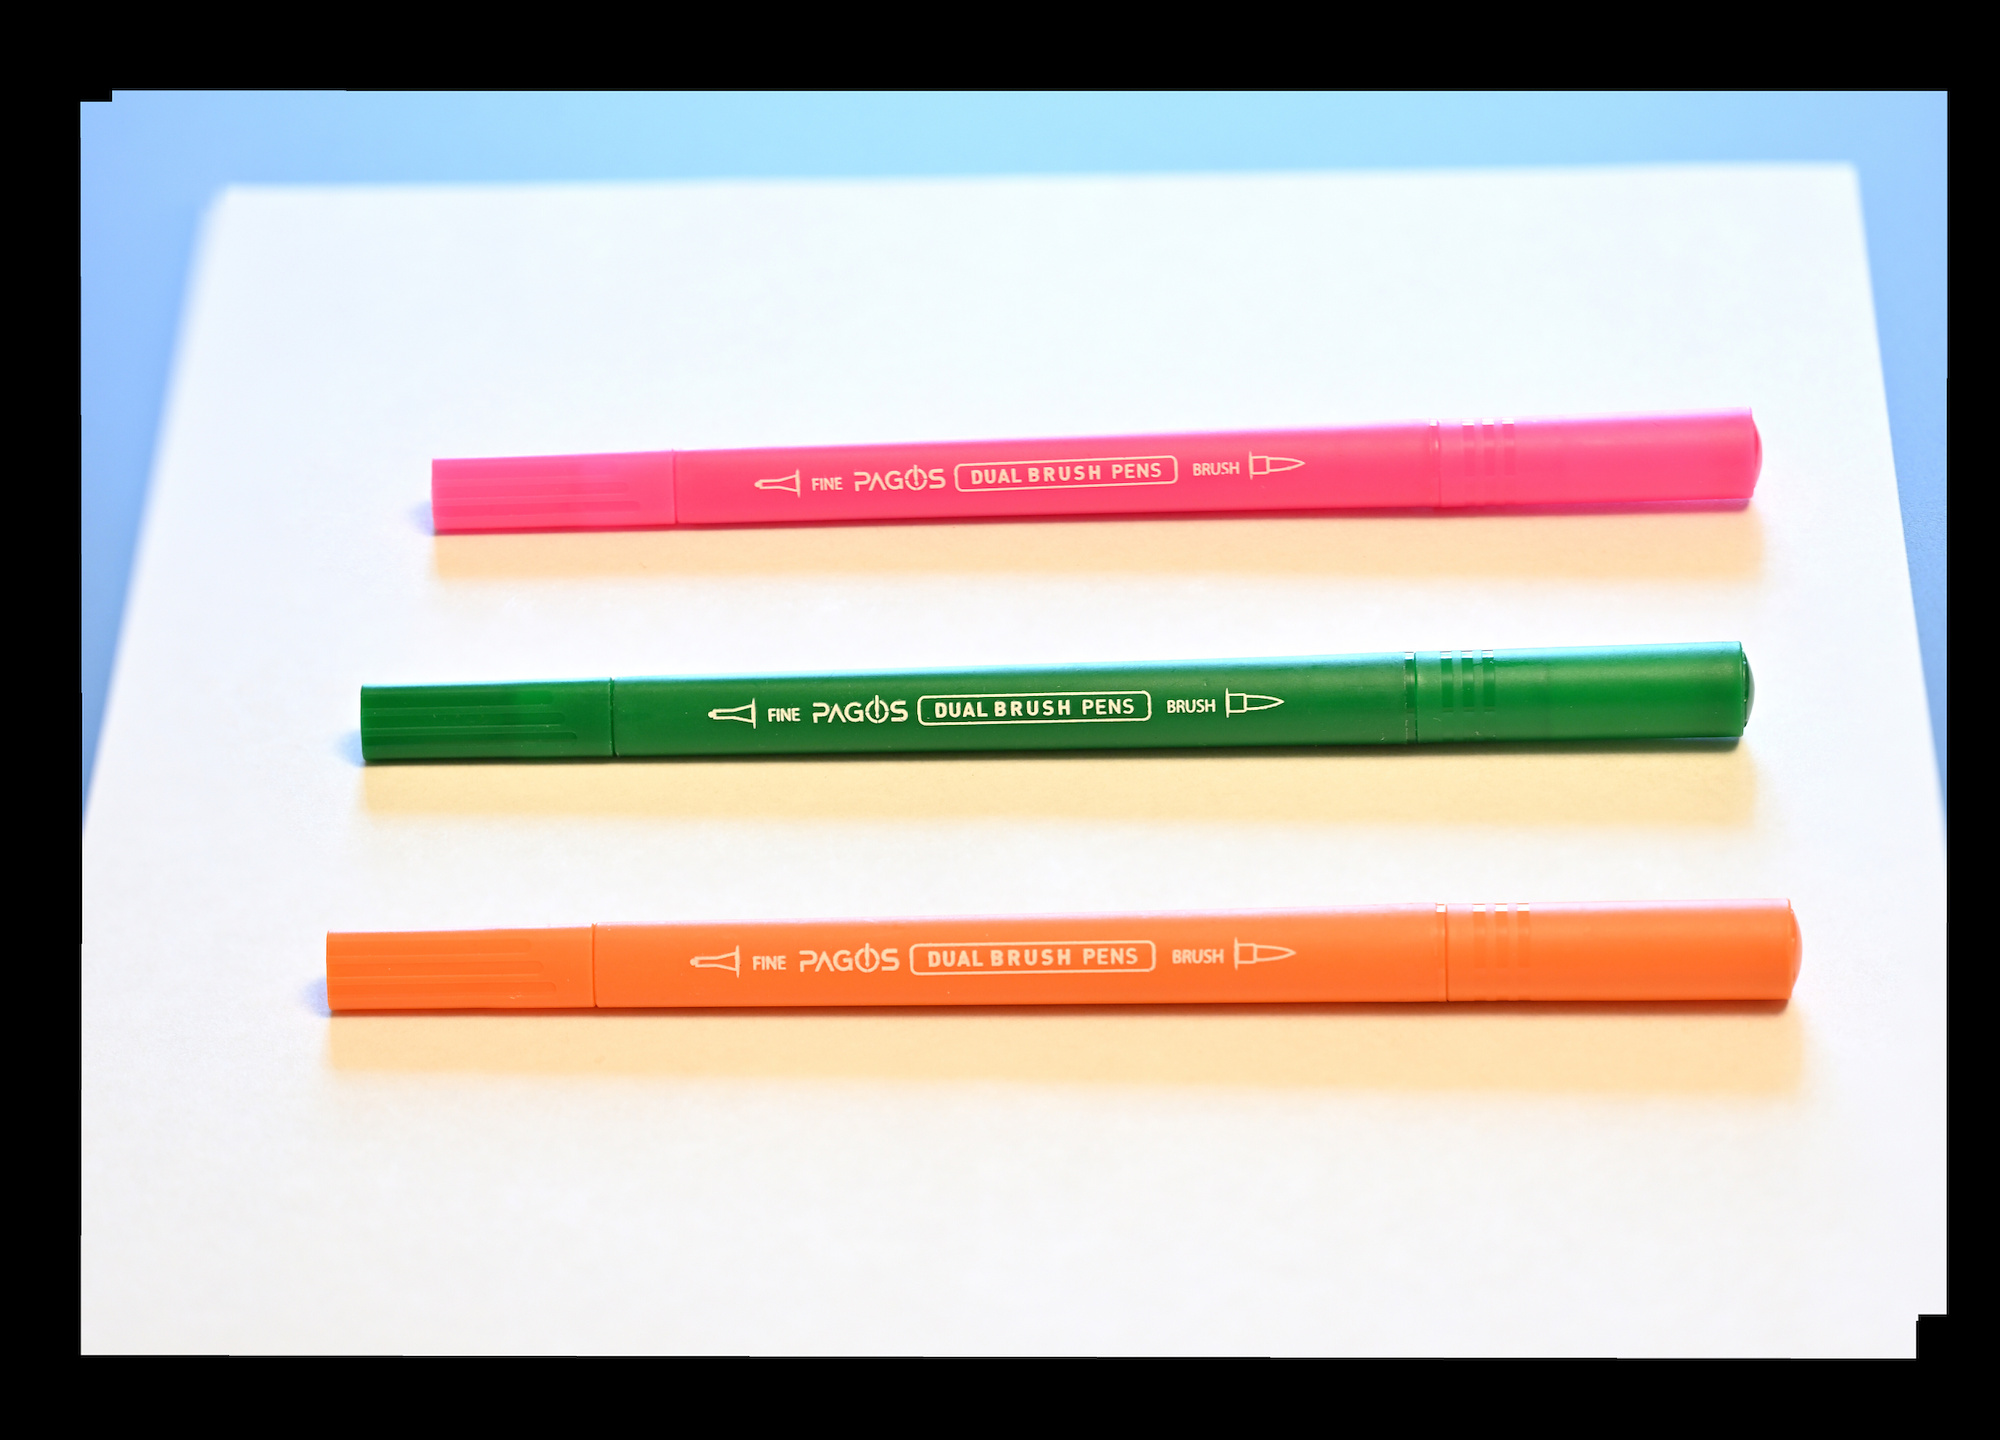
For instance, consider these pictures each with a different focus point:
Orange in focus:
Green in focus:

Pink in focus:
For each image, apply a mask to the object that is in focus:

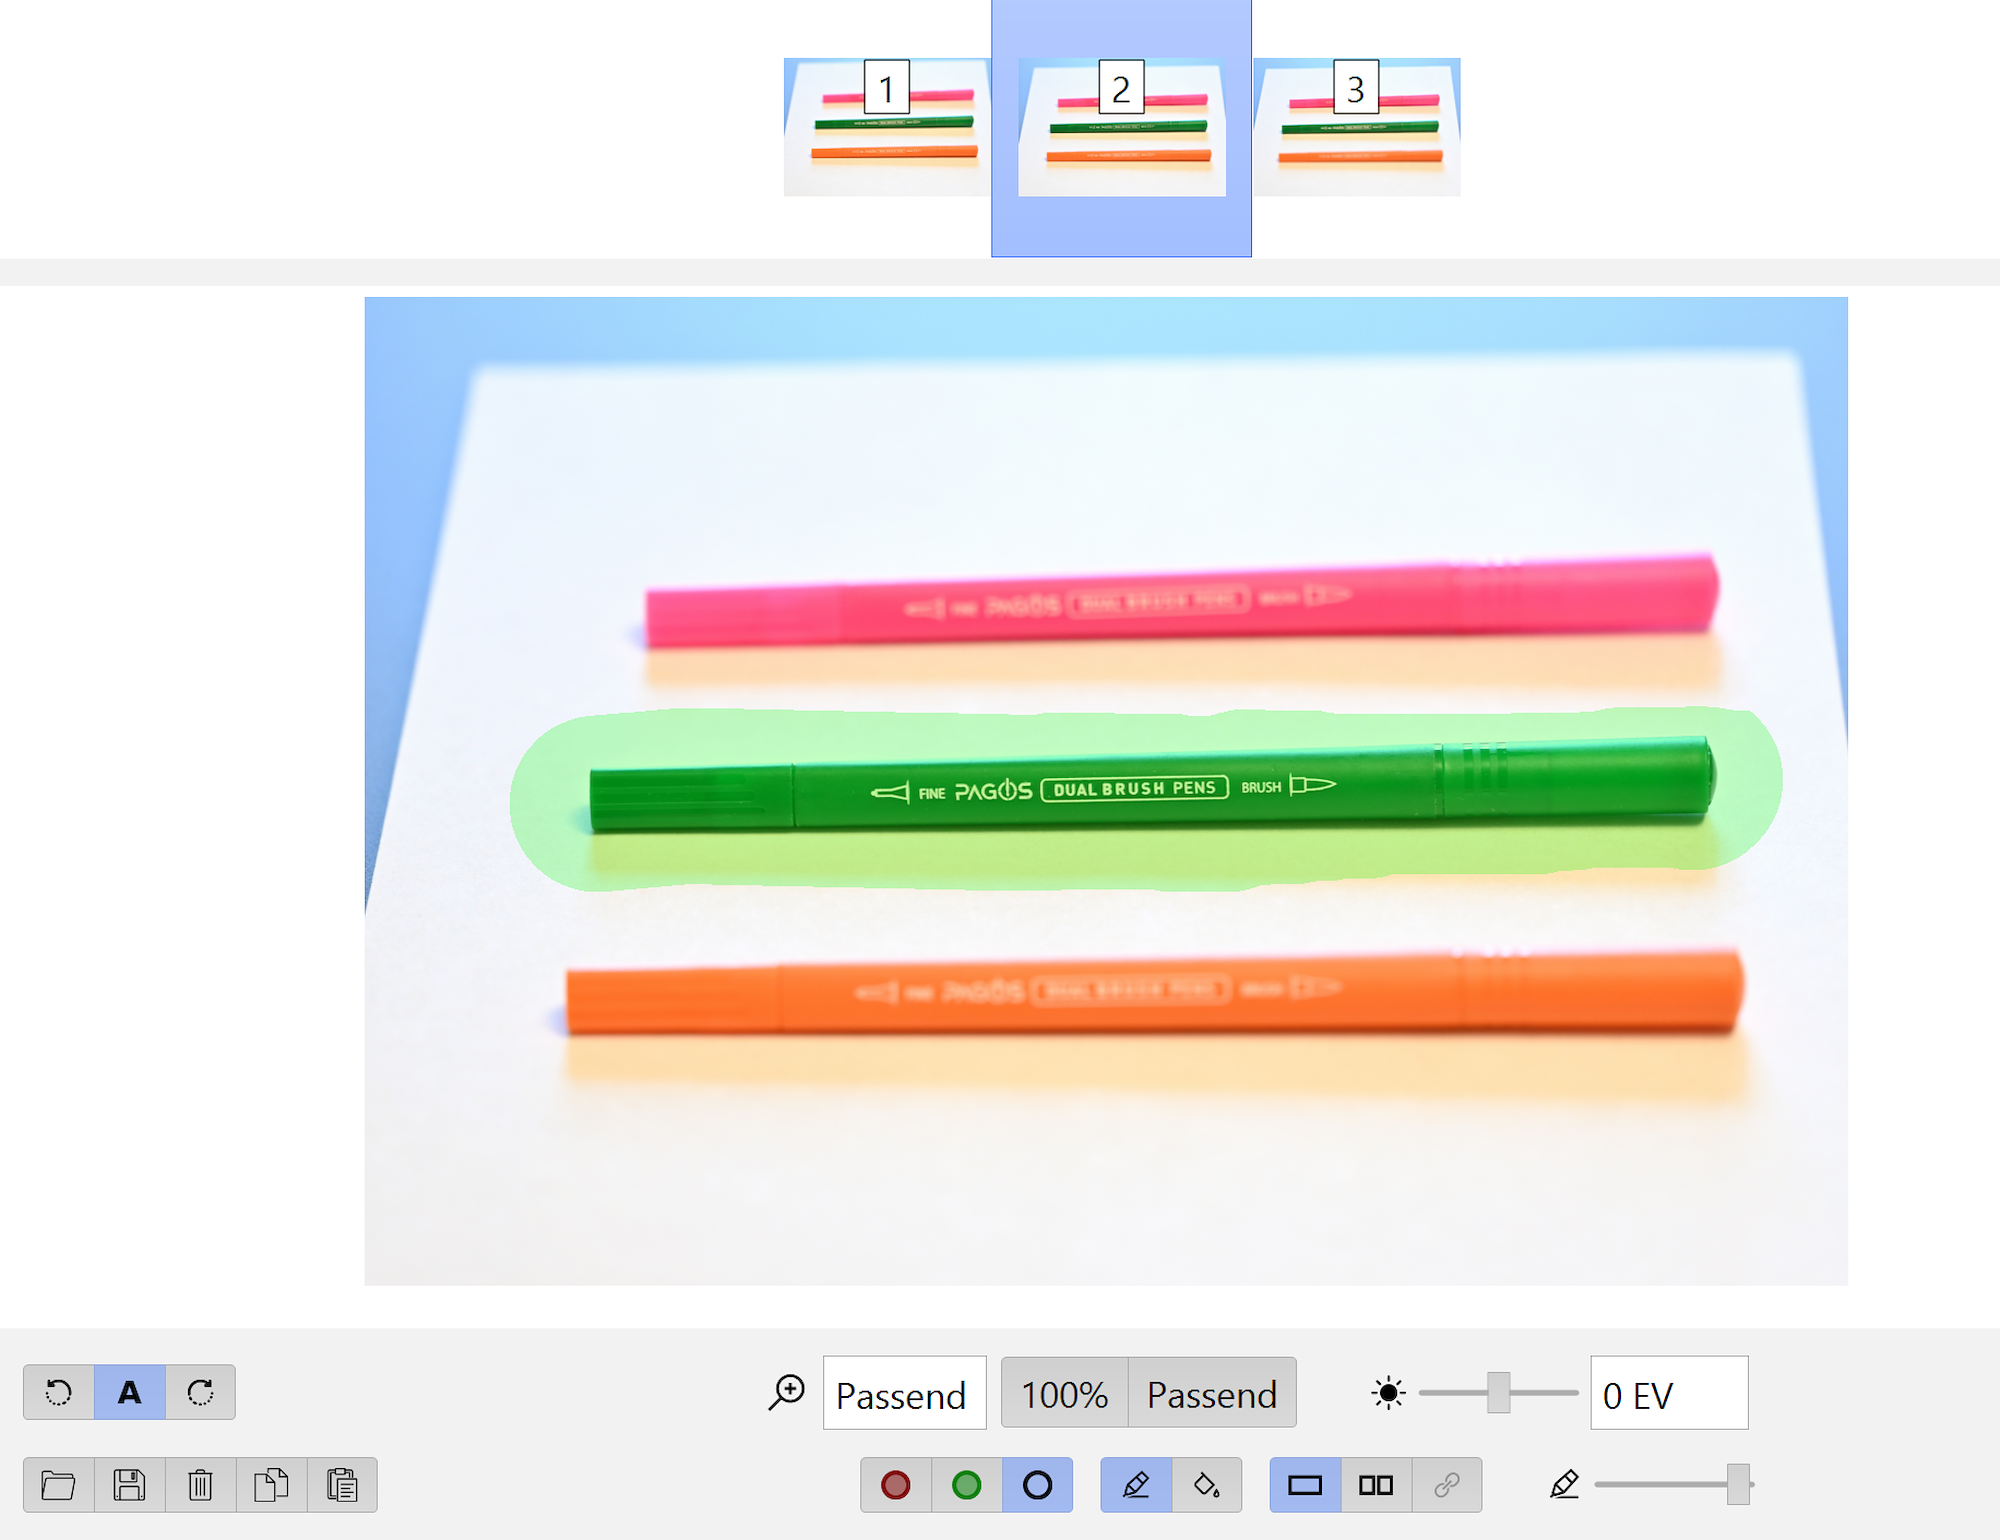

Run optimize with only the basic optimization for rol, pitch and yaw, but not for the parameters a, b or c.
The seam line will be perfectly set:

The focus stacked picture:
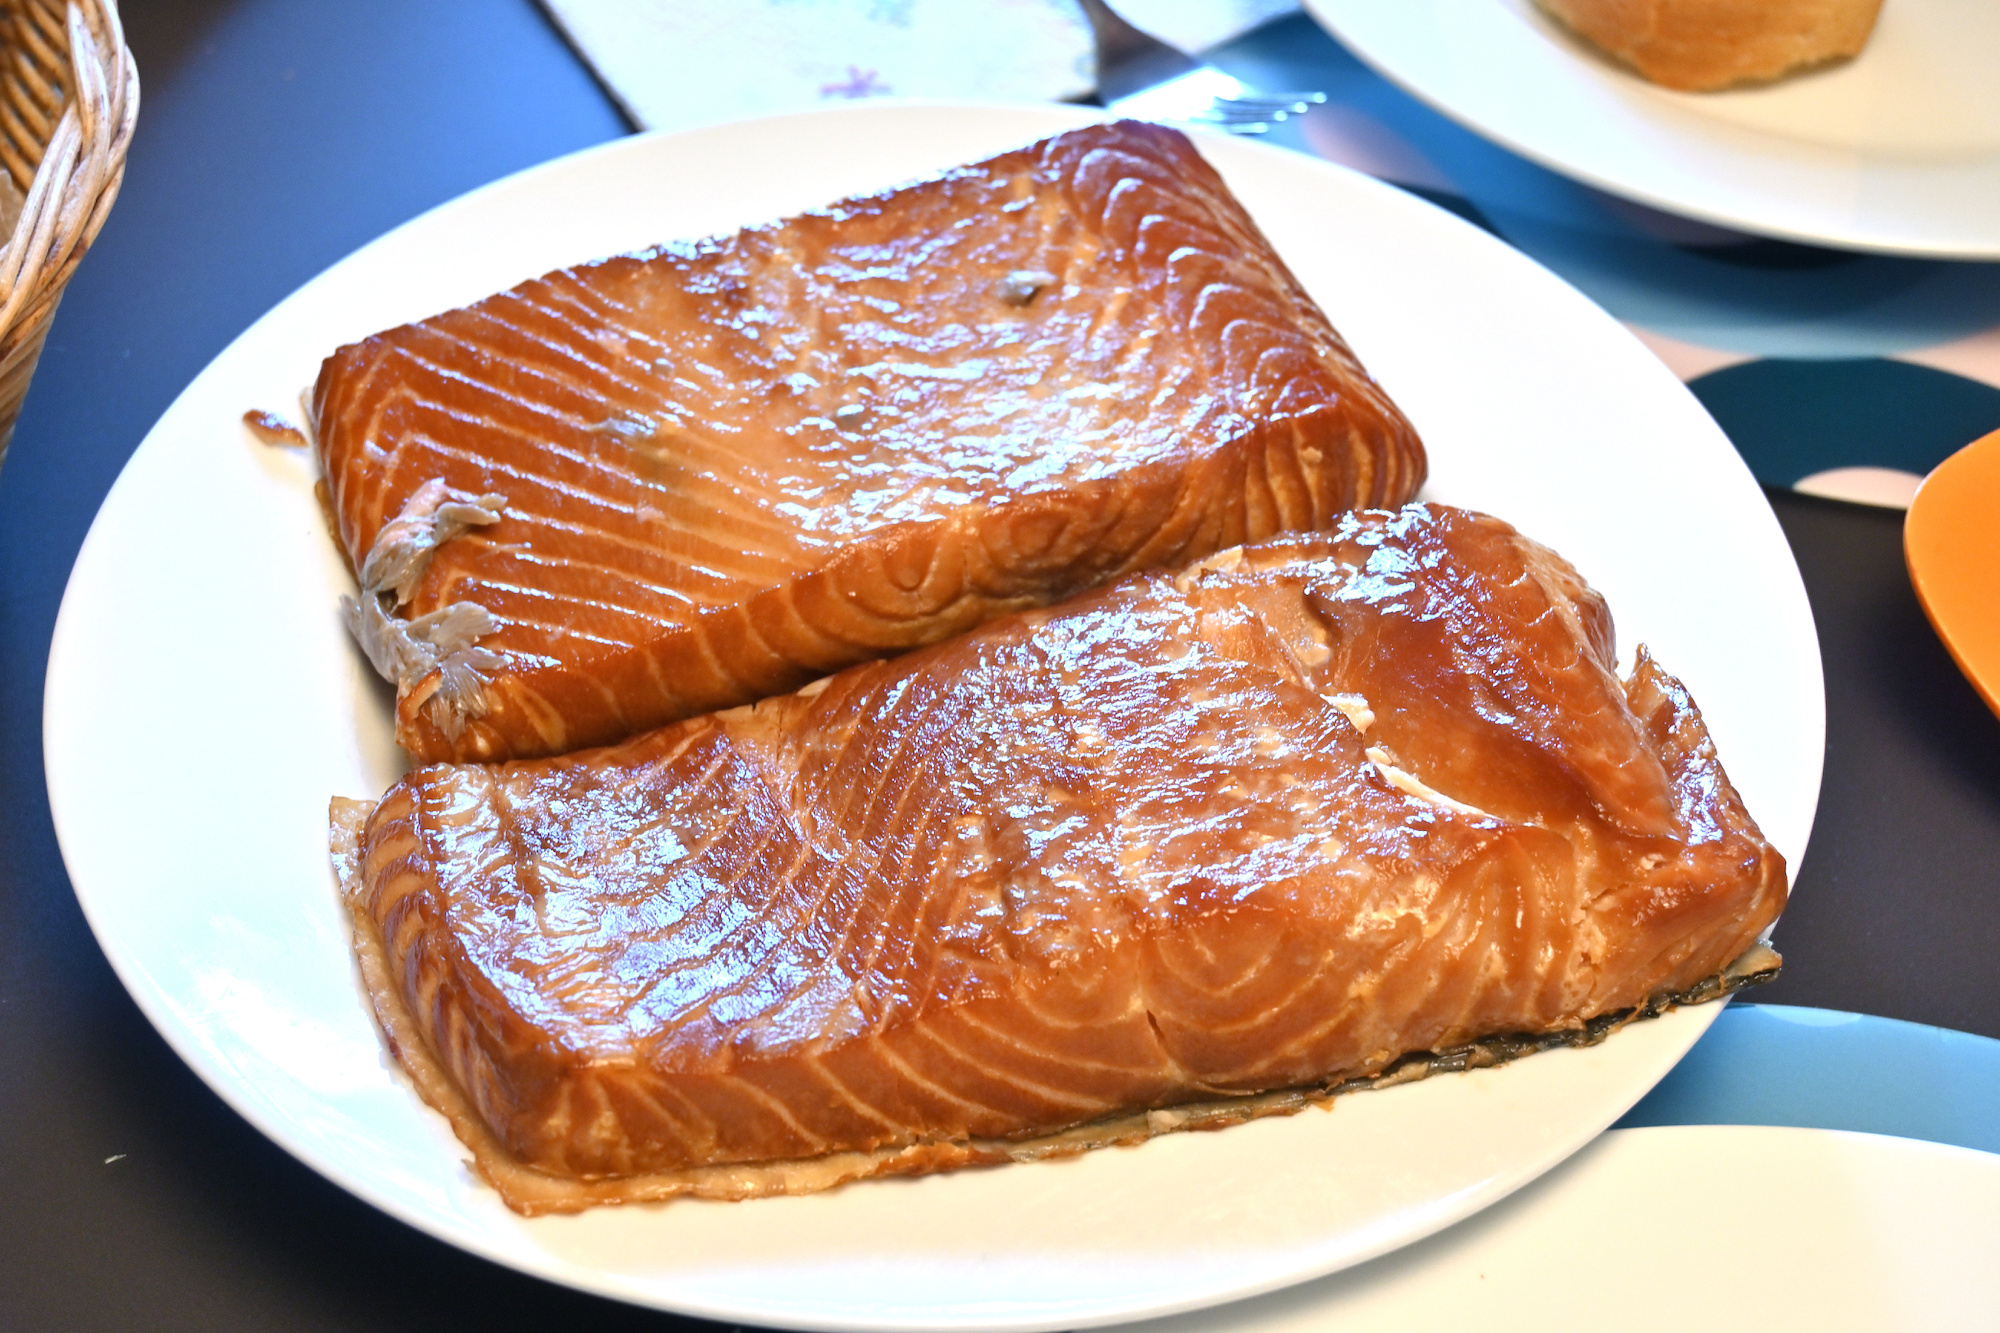
Another example:
Even a small aperture was not enough to bring everything into focus.
Only the lower part is in focus:
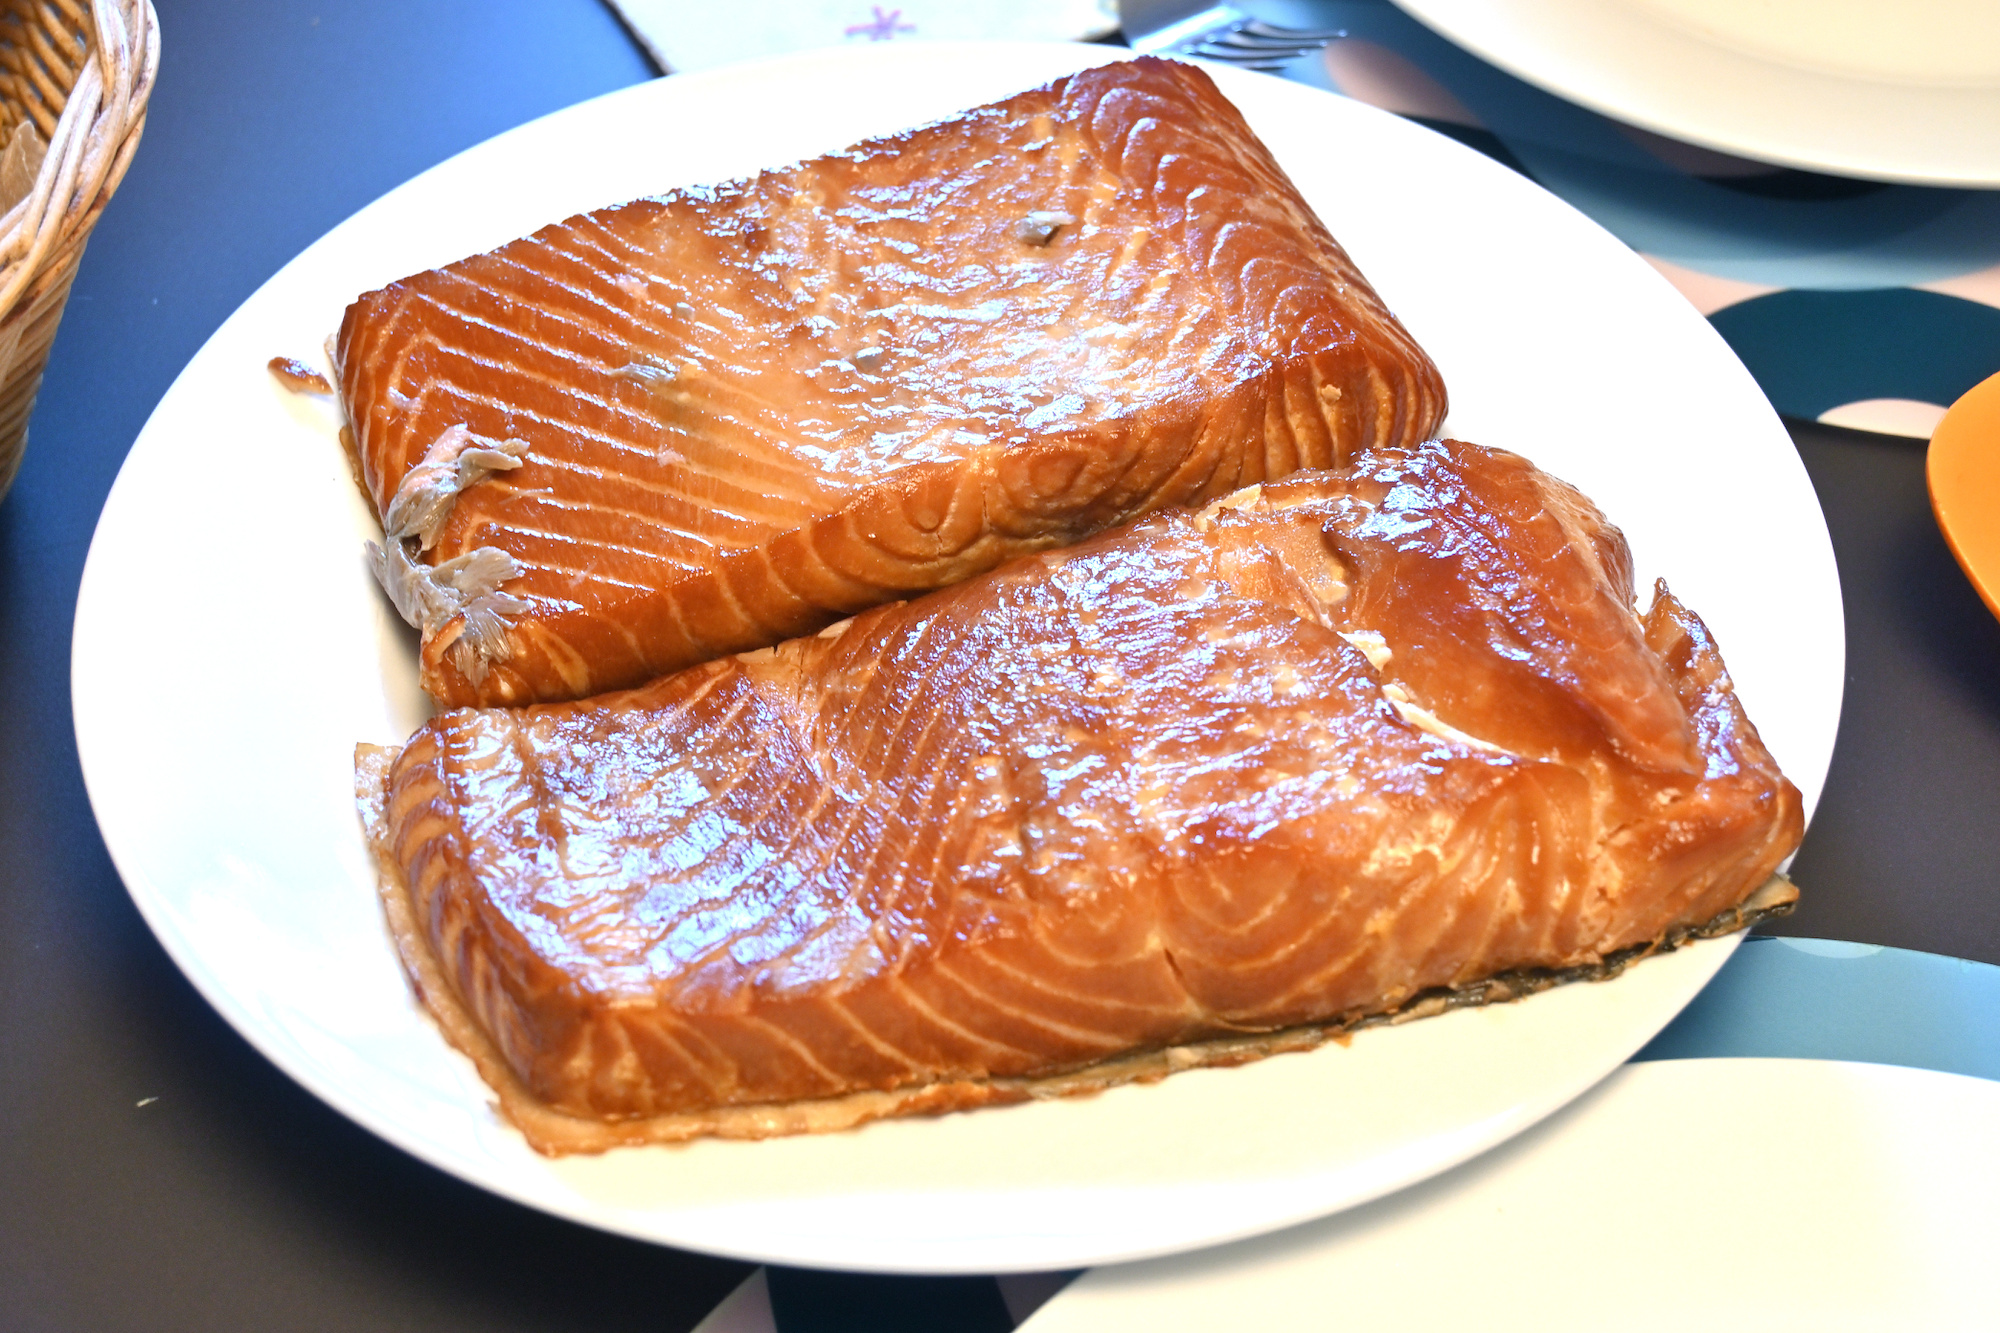
Only the upper part is in focus:
Rather than selecting the object in focus as in the previous example (using the green mask), you can deselect the object that is not in focus (using the red mask):
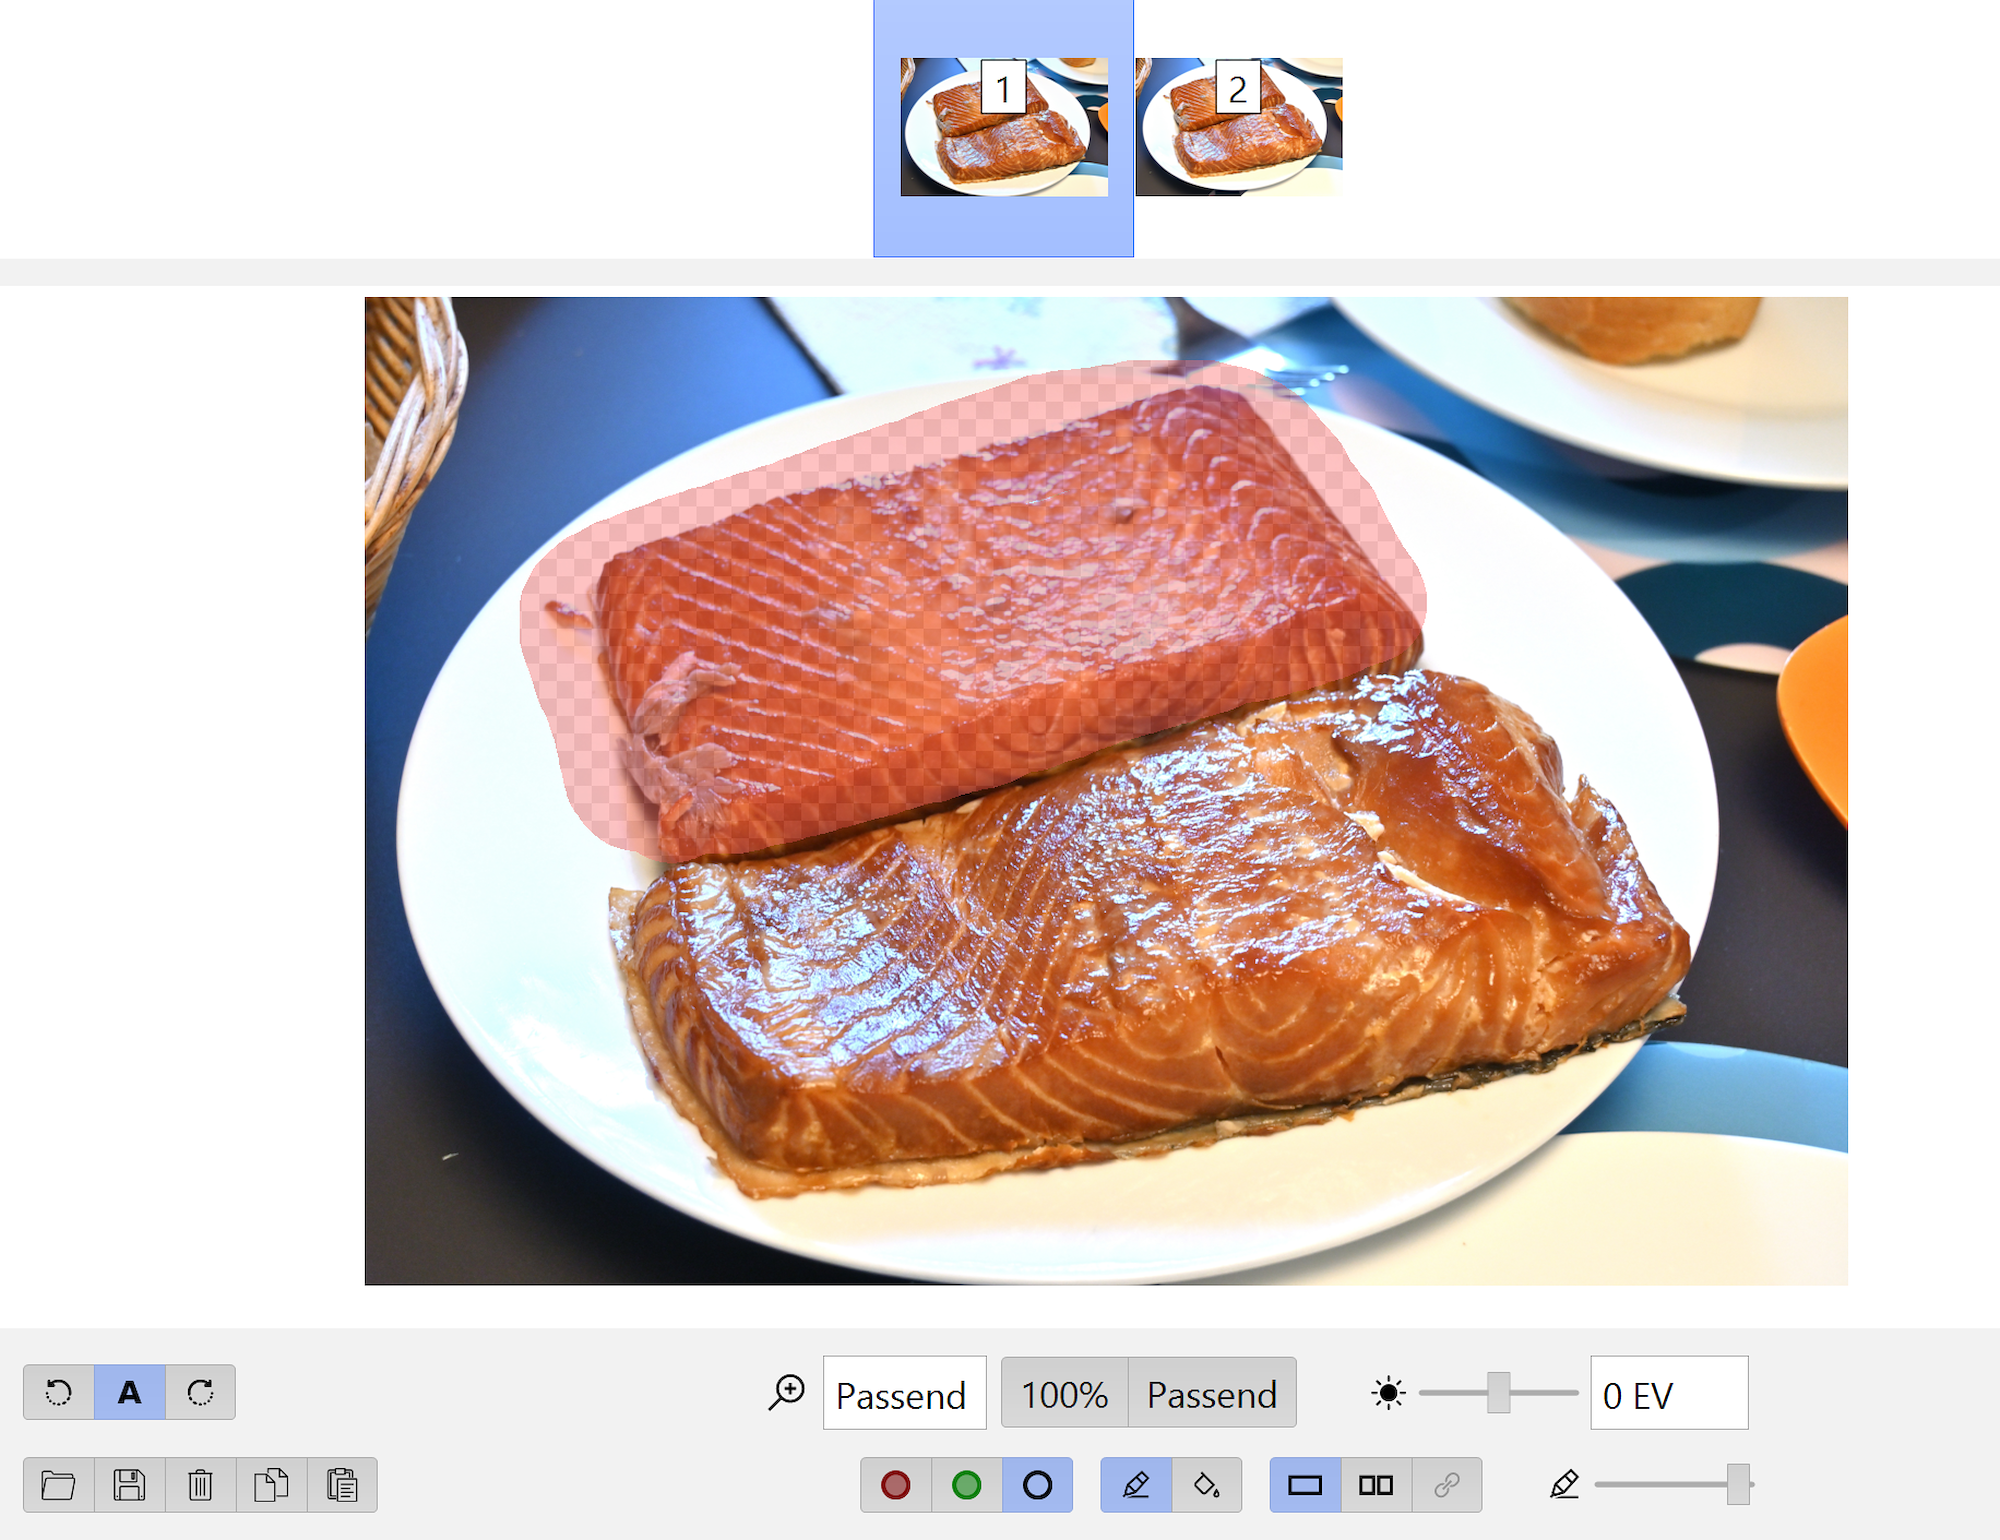
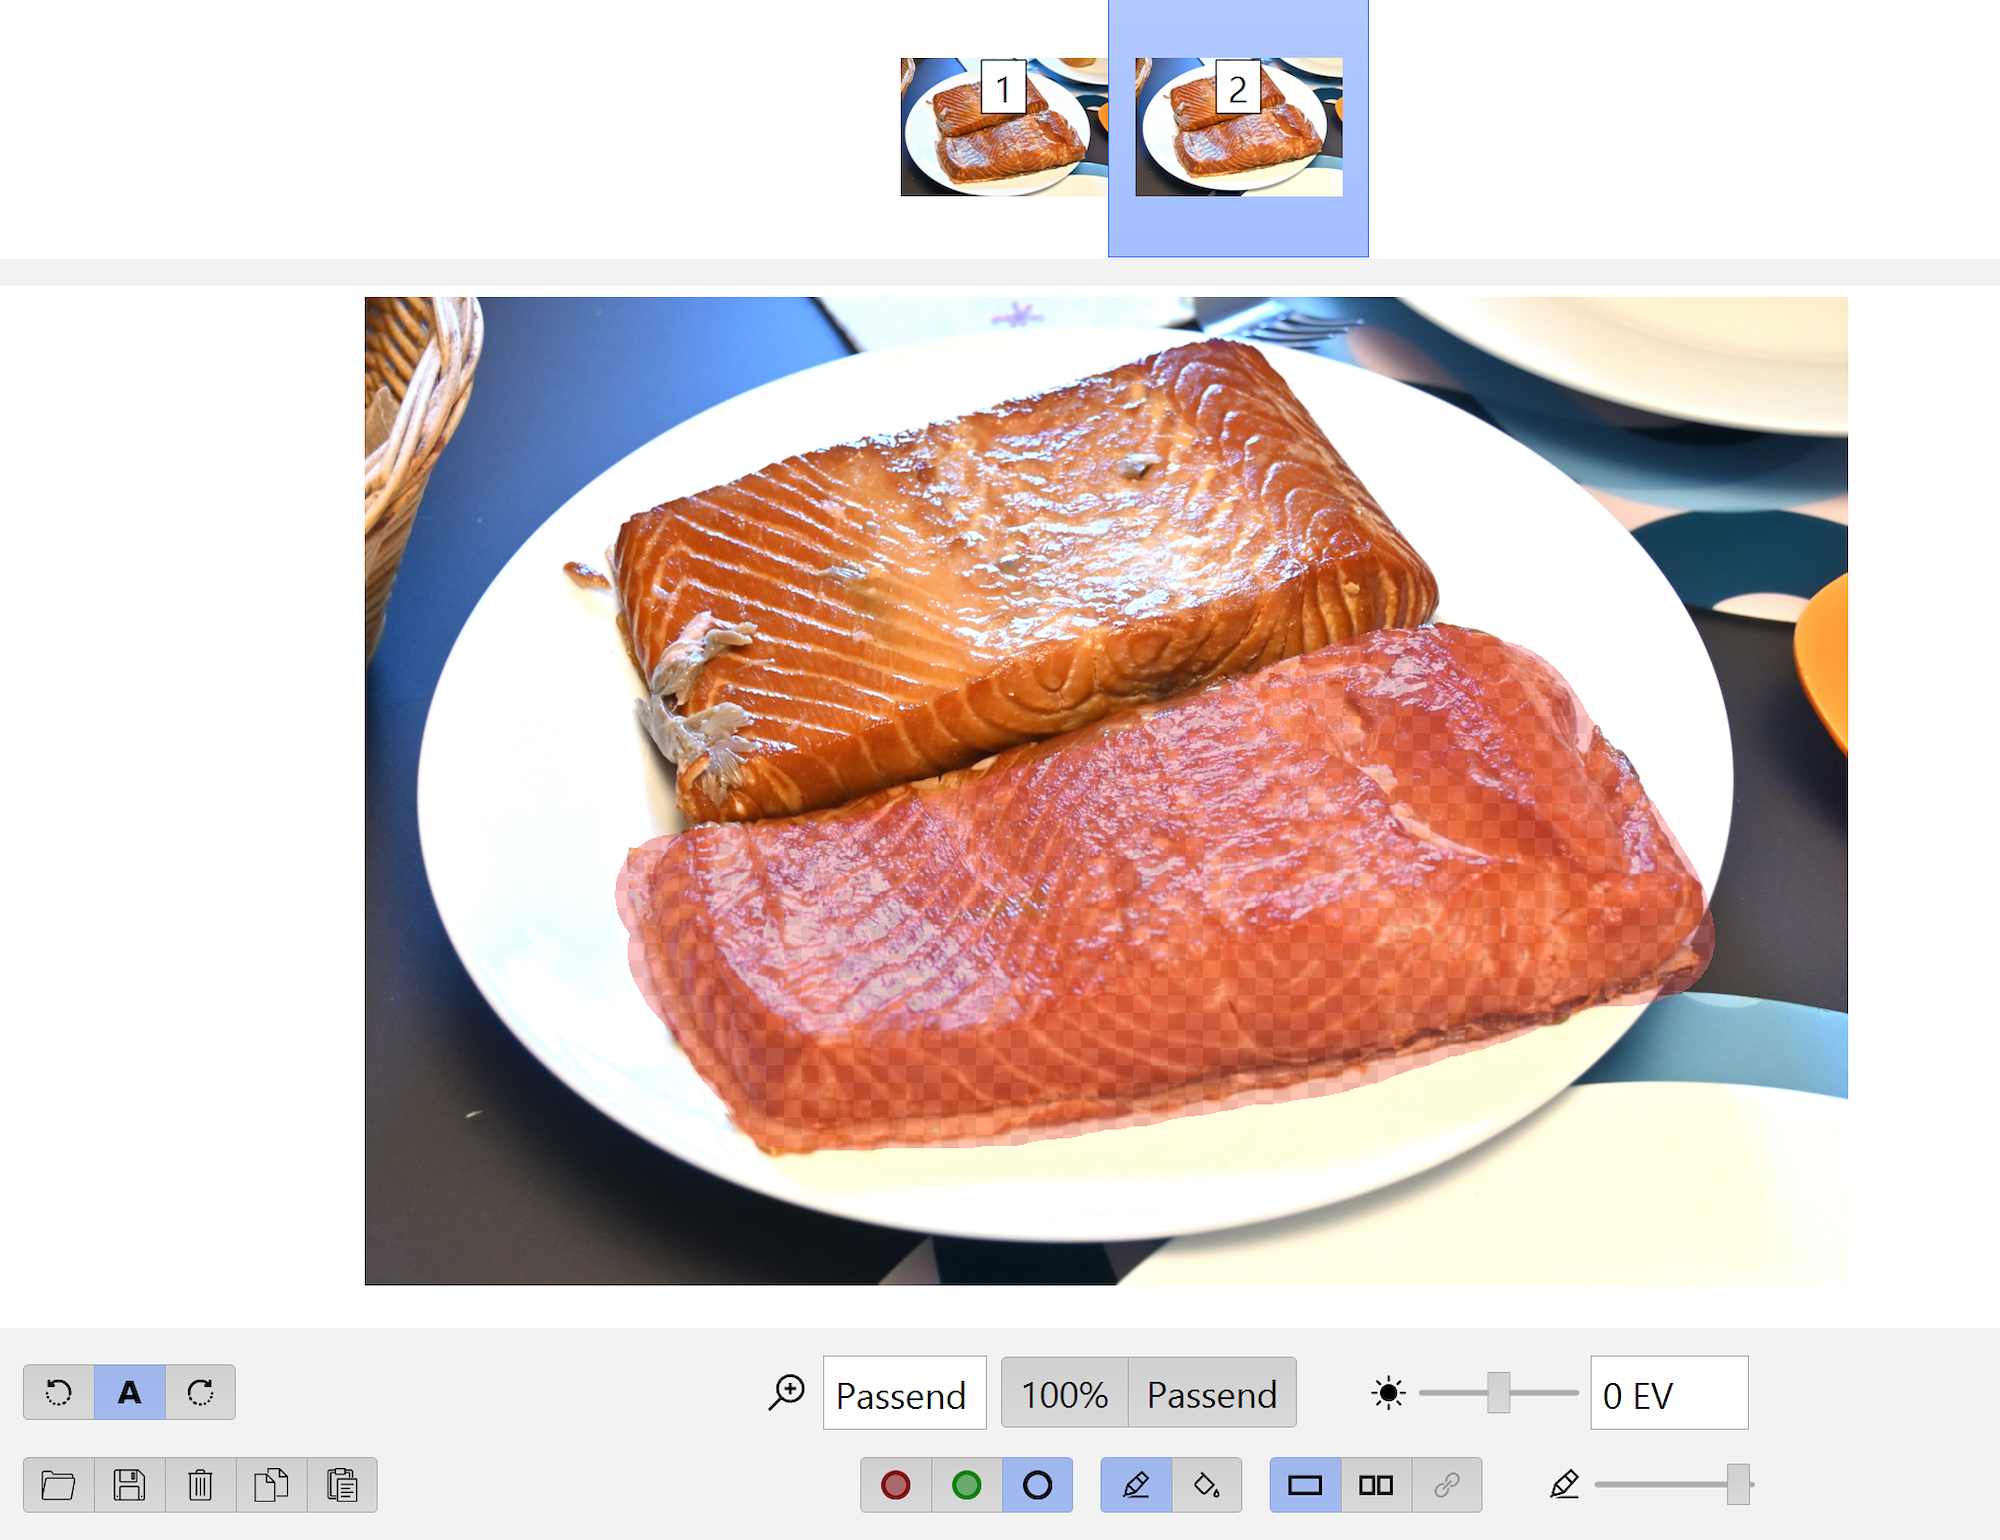
The seam line runs directly between the objects:
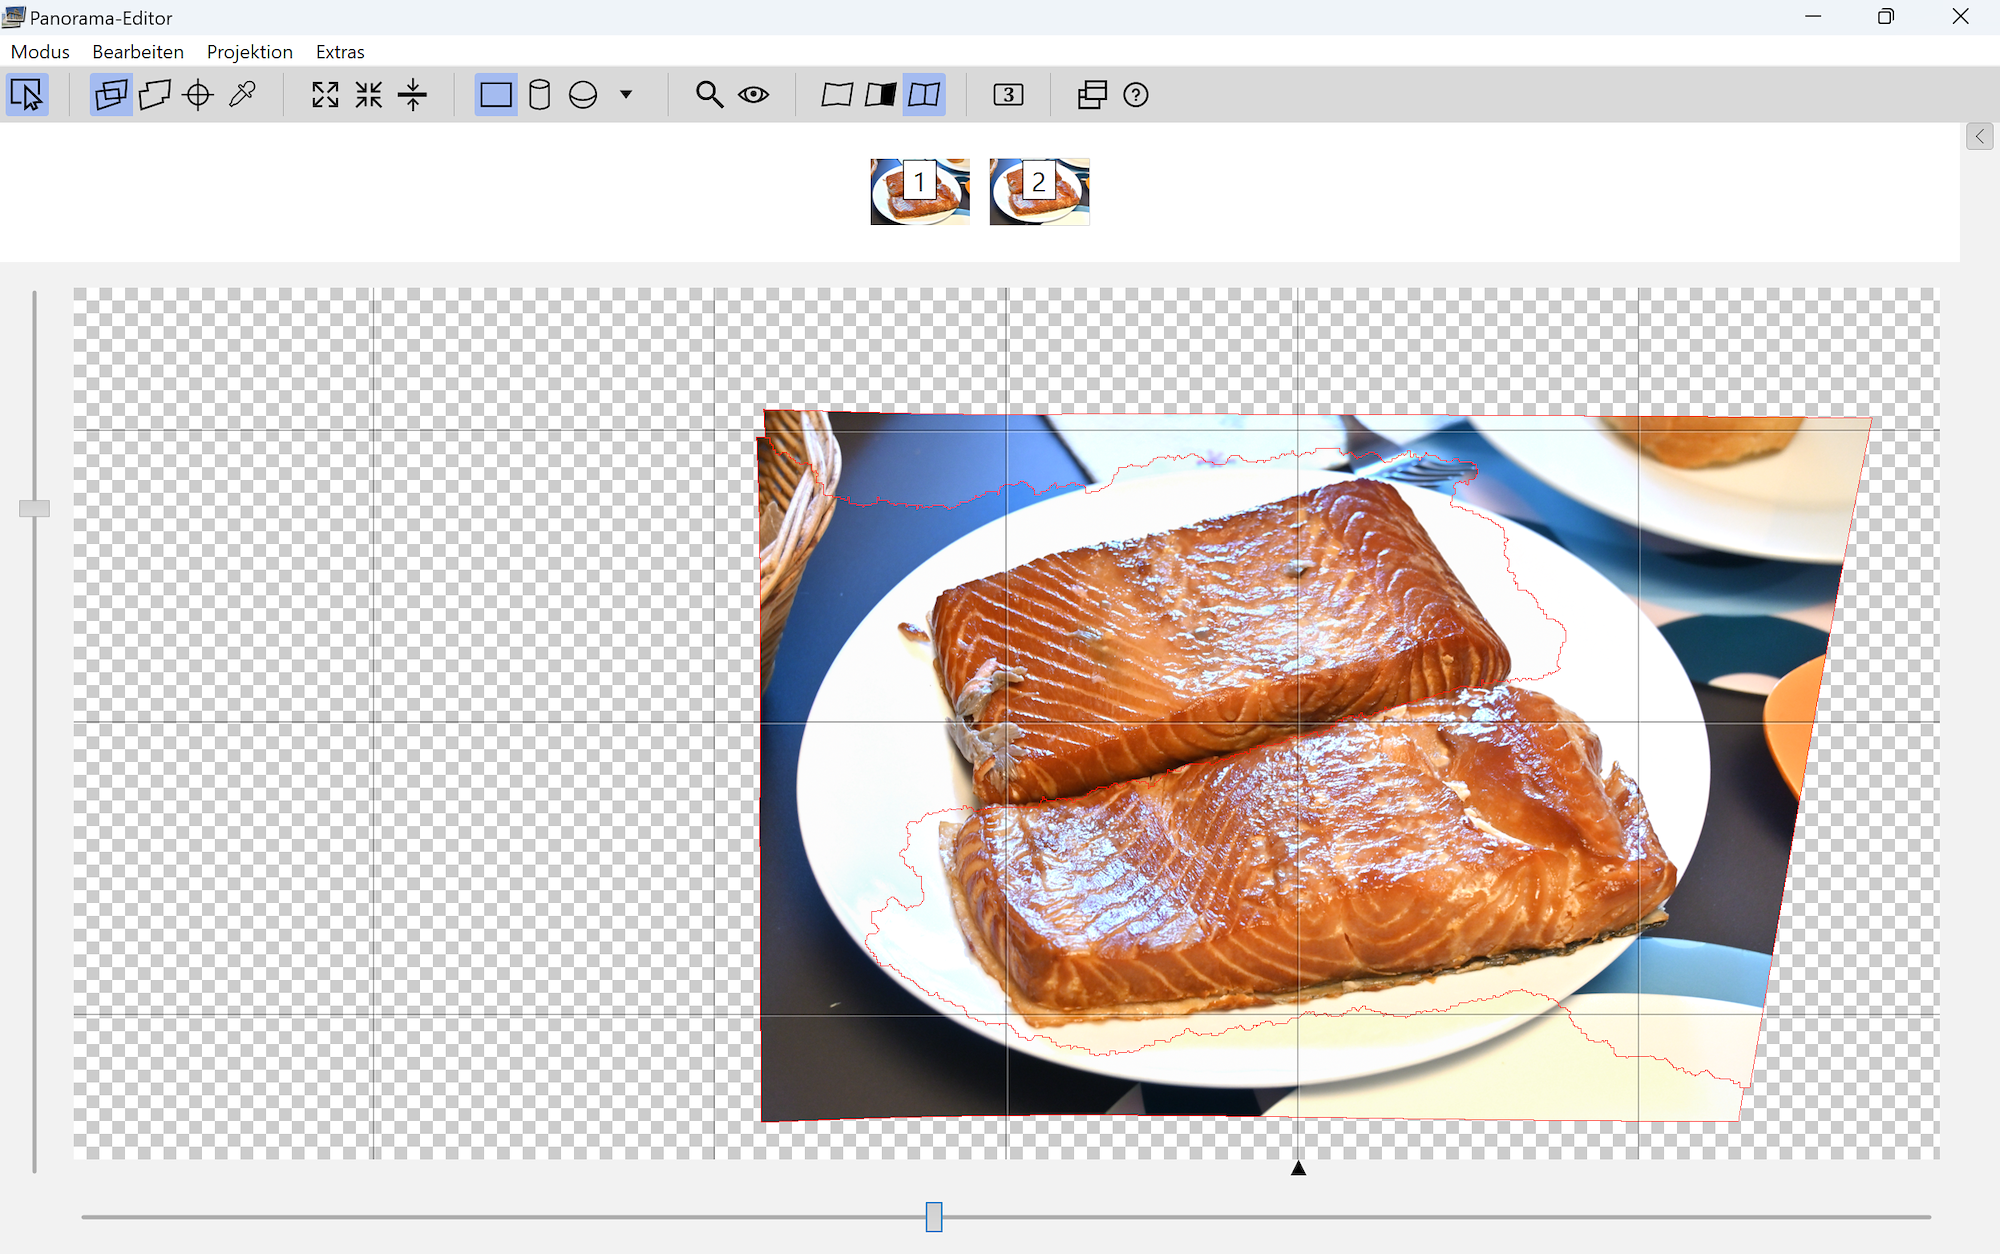
The final focus stacked result:
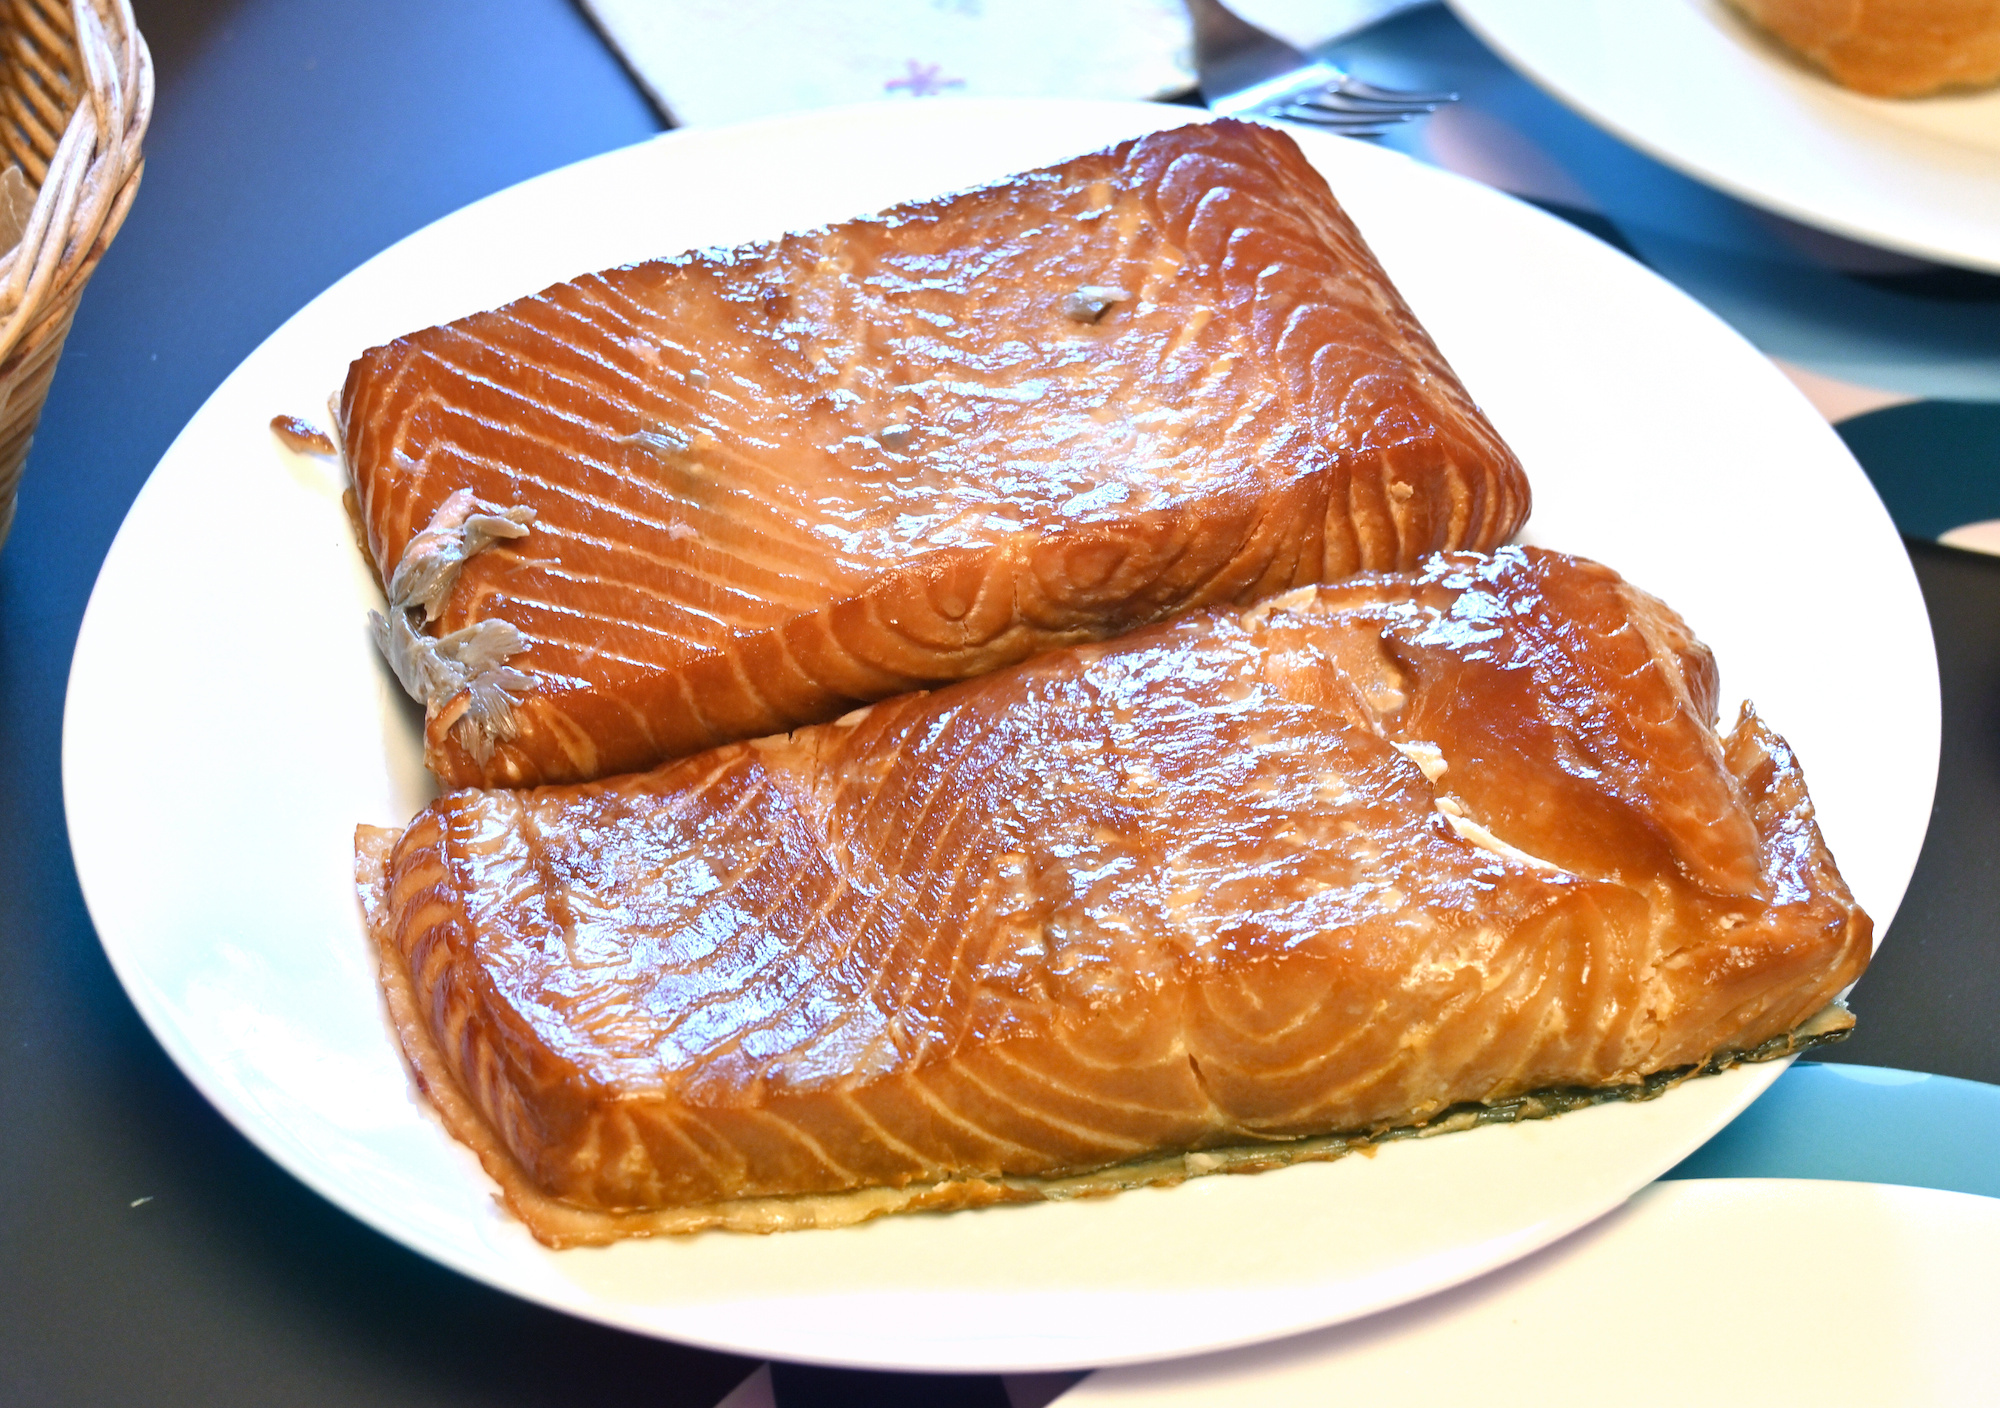
The source of the focus stacked result:
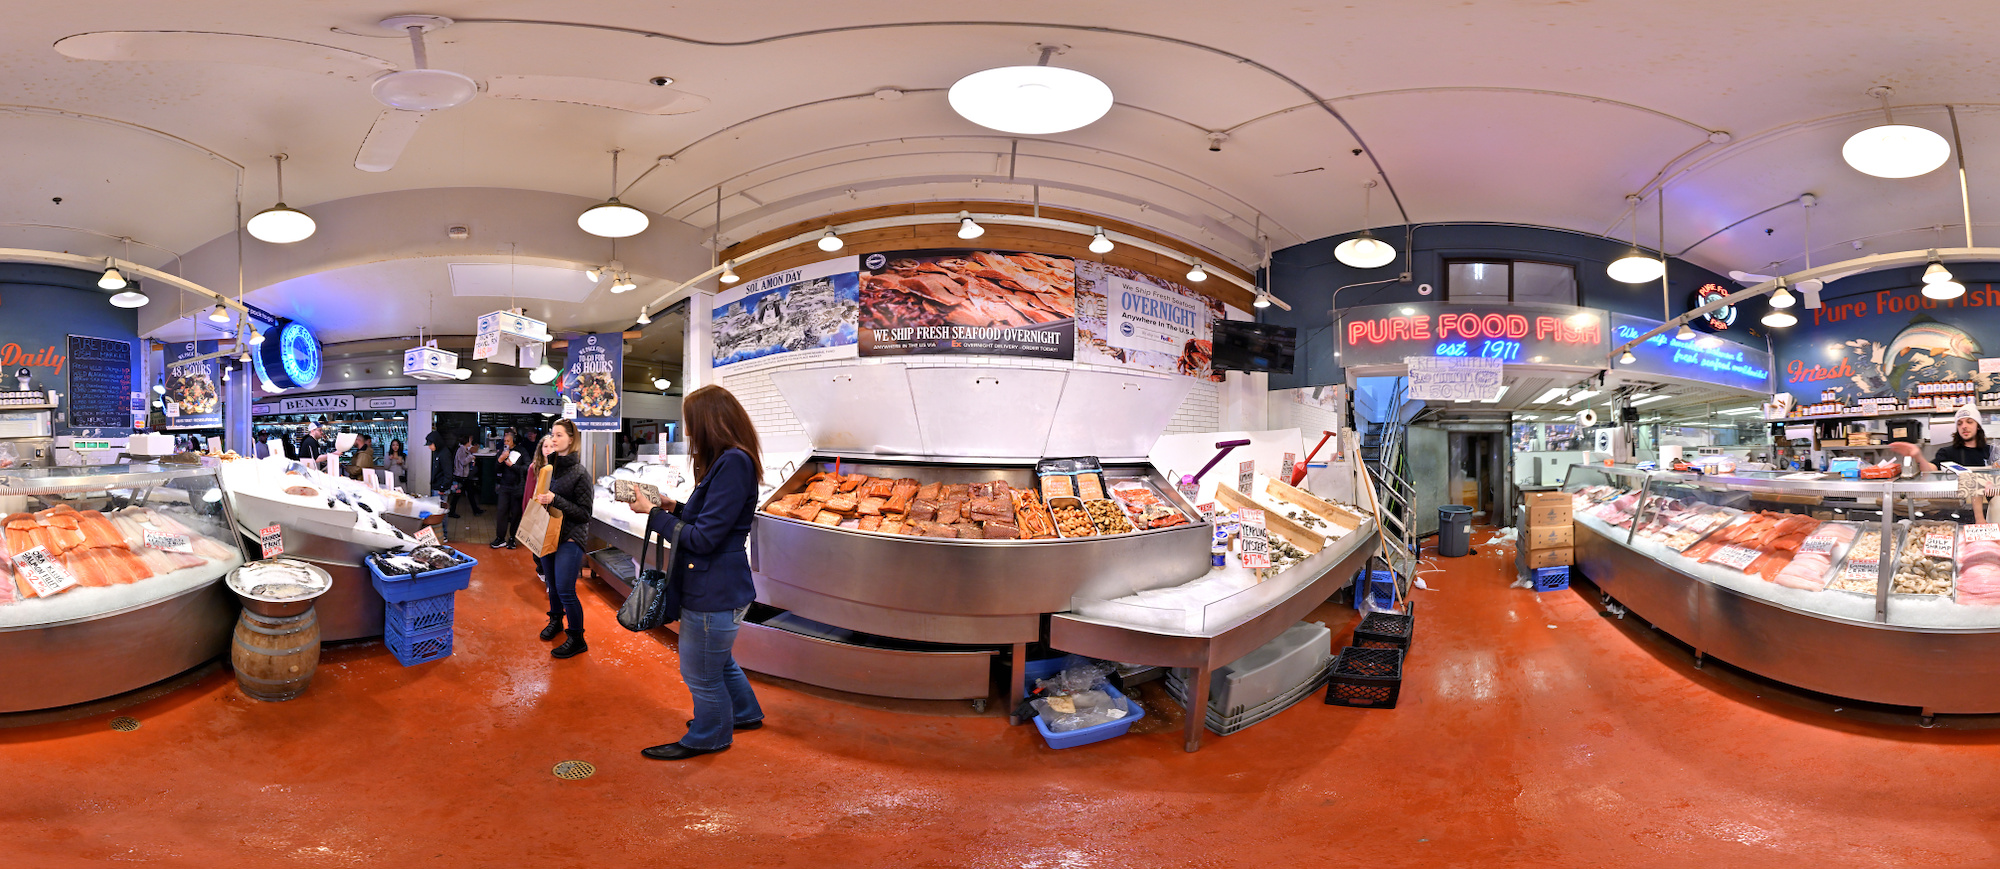
Interactive Panorama Pike Place Market Fischladen
Another example:
Torte - 2x24 🥳🎉🎂
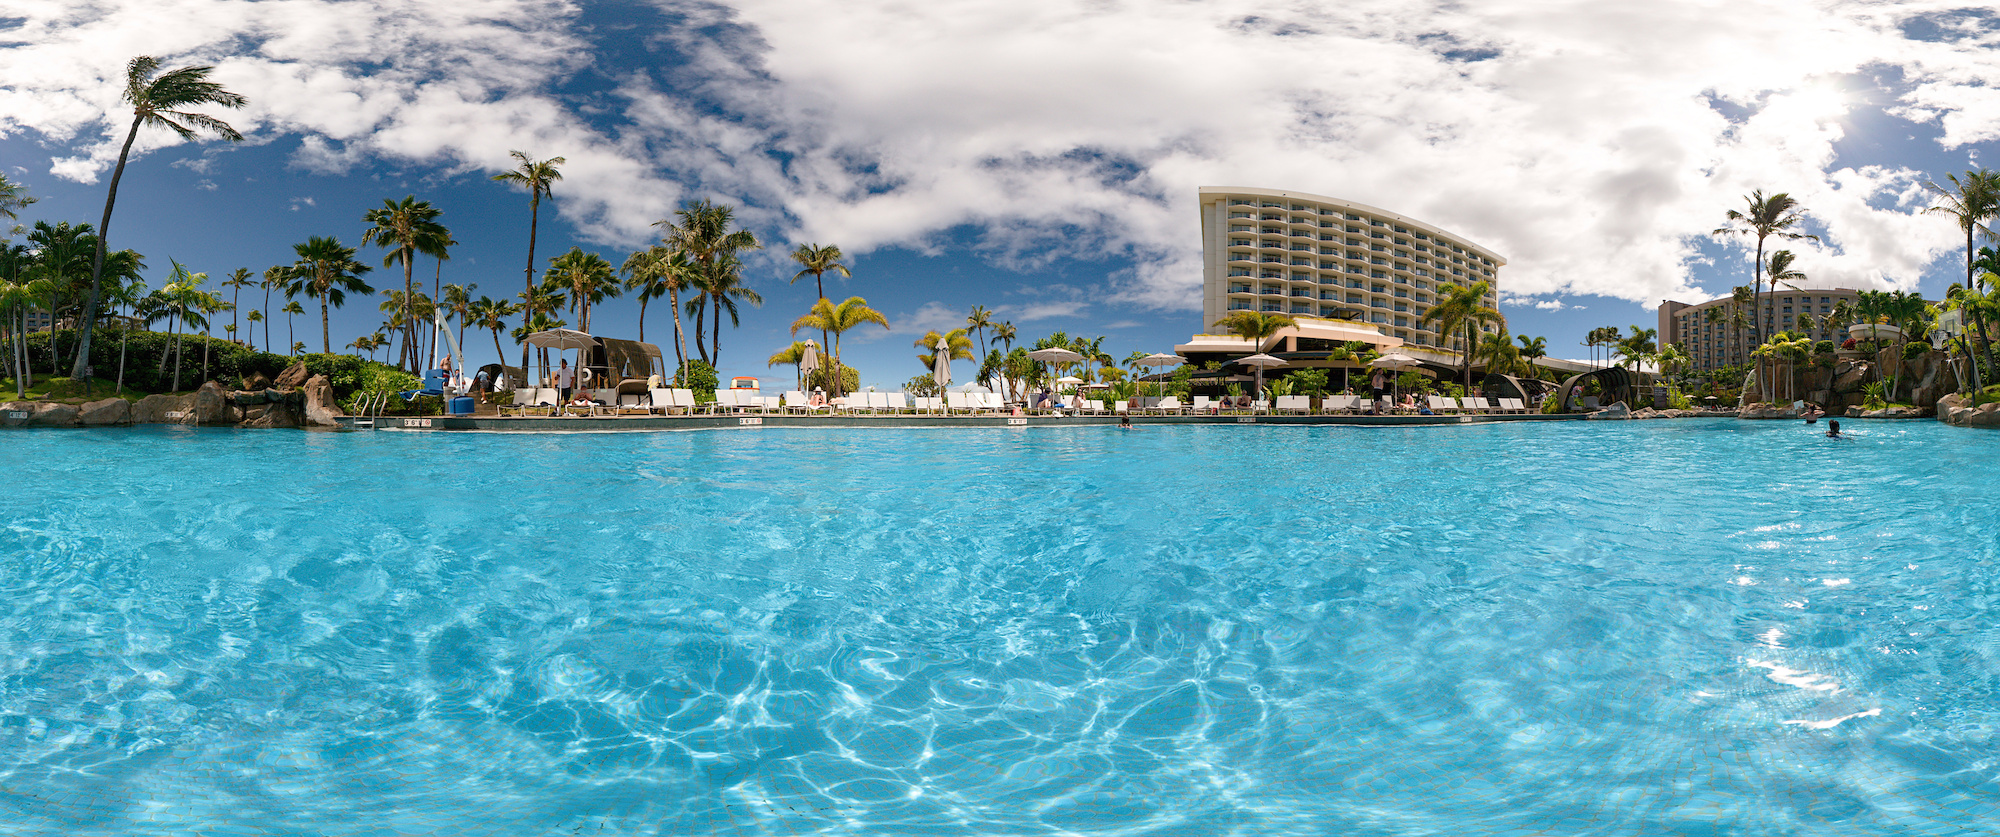
2024 Equinox, the first spring sun appeared over the large intersection of 1st Avenue and Pike Street in the otherwise cloudy and rainy Pacific Northwest.
This panorama is the March 2024 equinox contribution for the 'Wrinkle March' event of WorldWidePanorama.
Interactive Panorama Pike Place Market
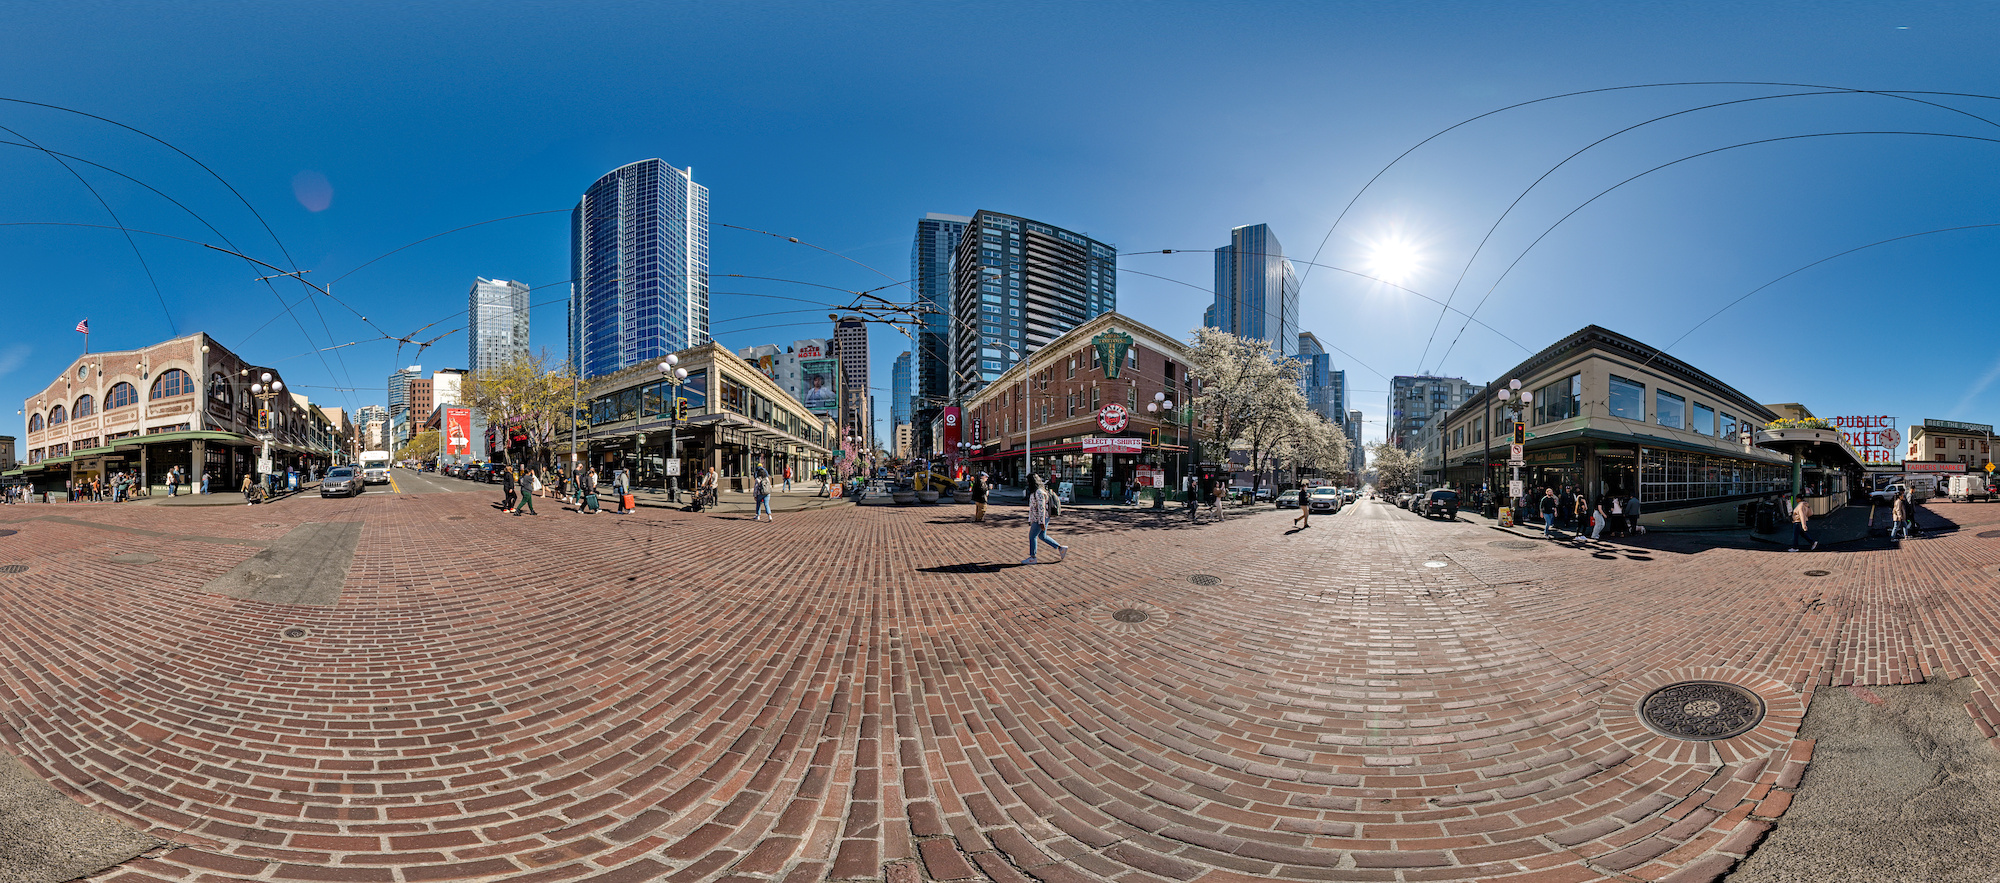
This panorama is a contribution for the '20 Years' event of WorldWidePanorama and taken at the same place as the original panorama from 2009.
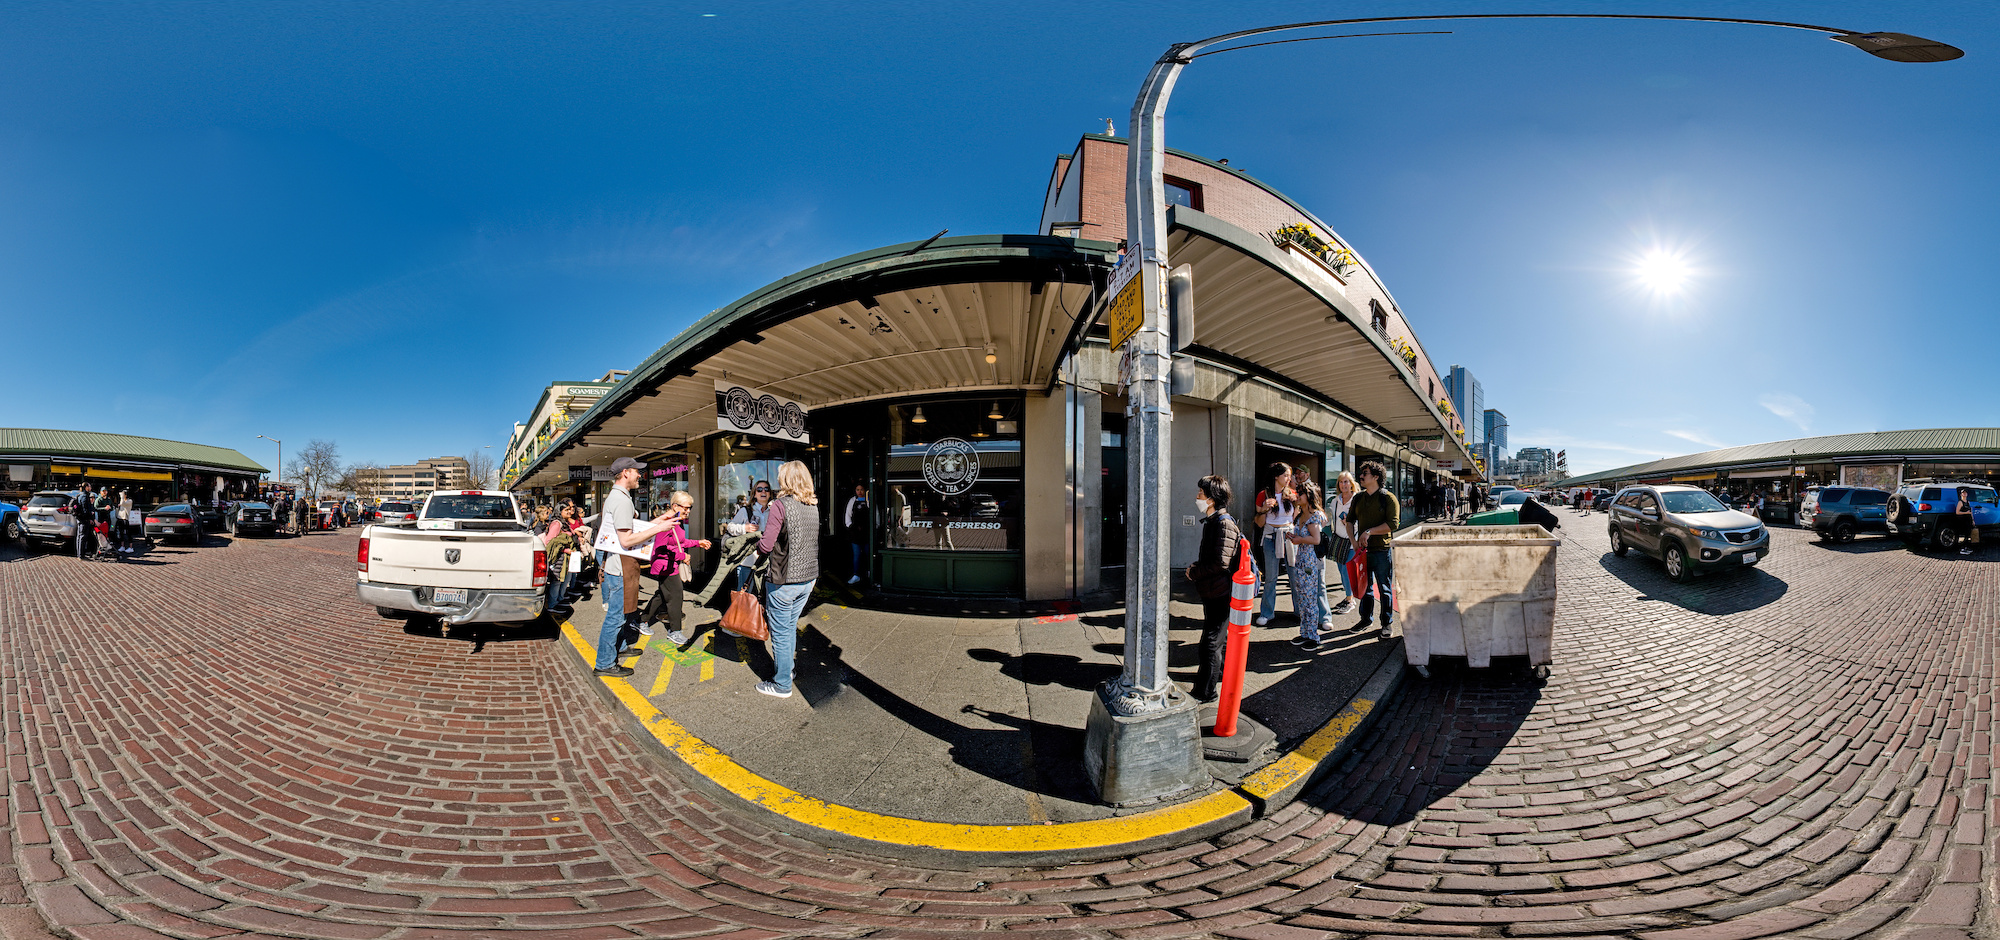
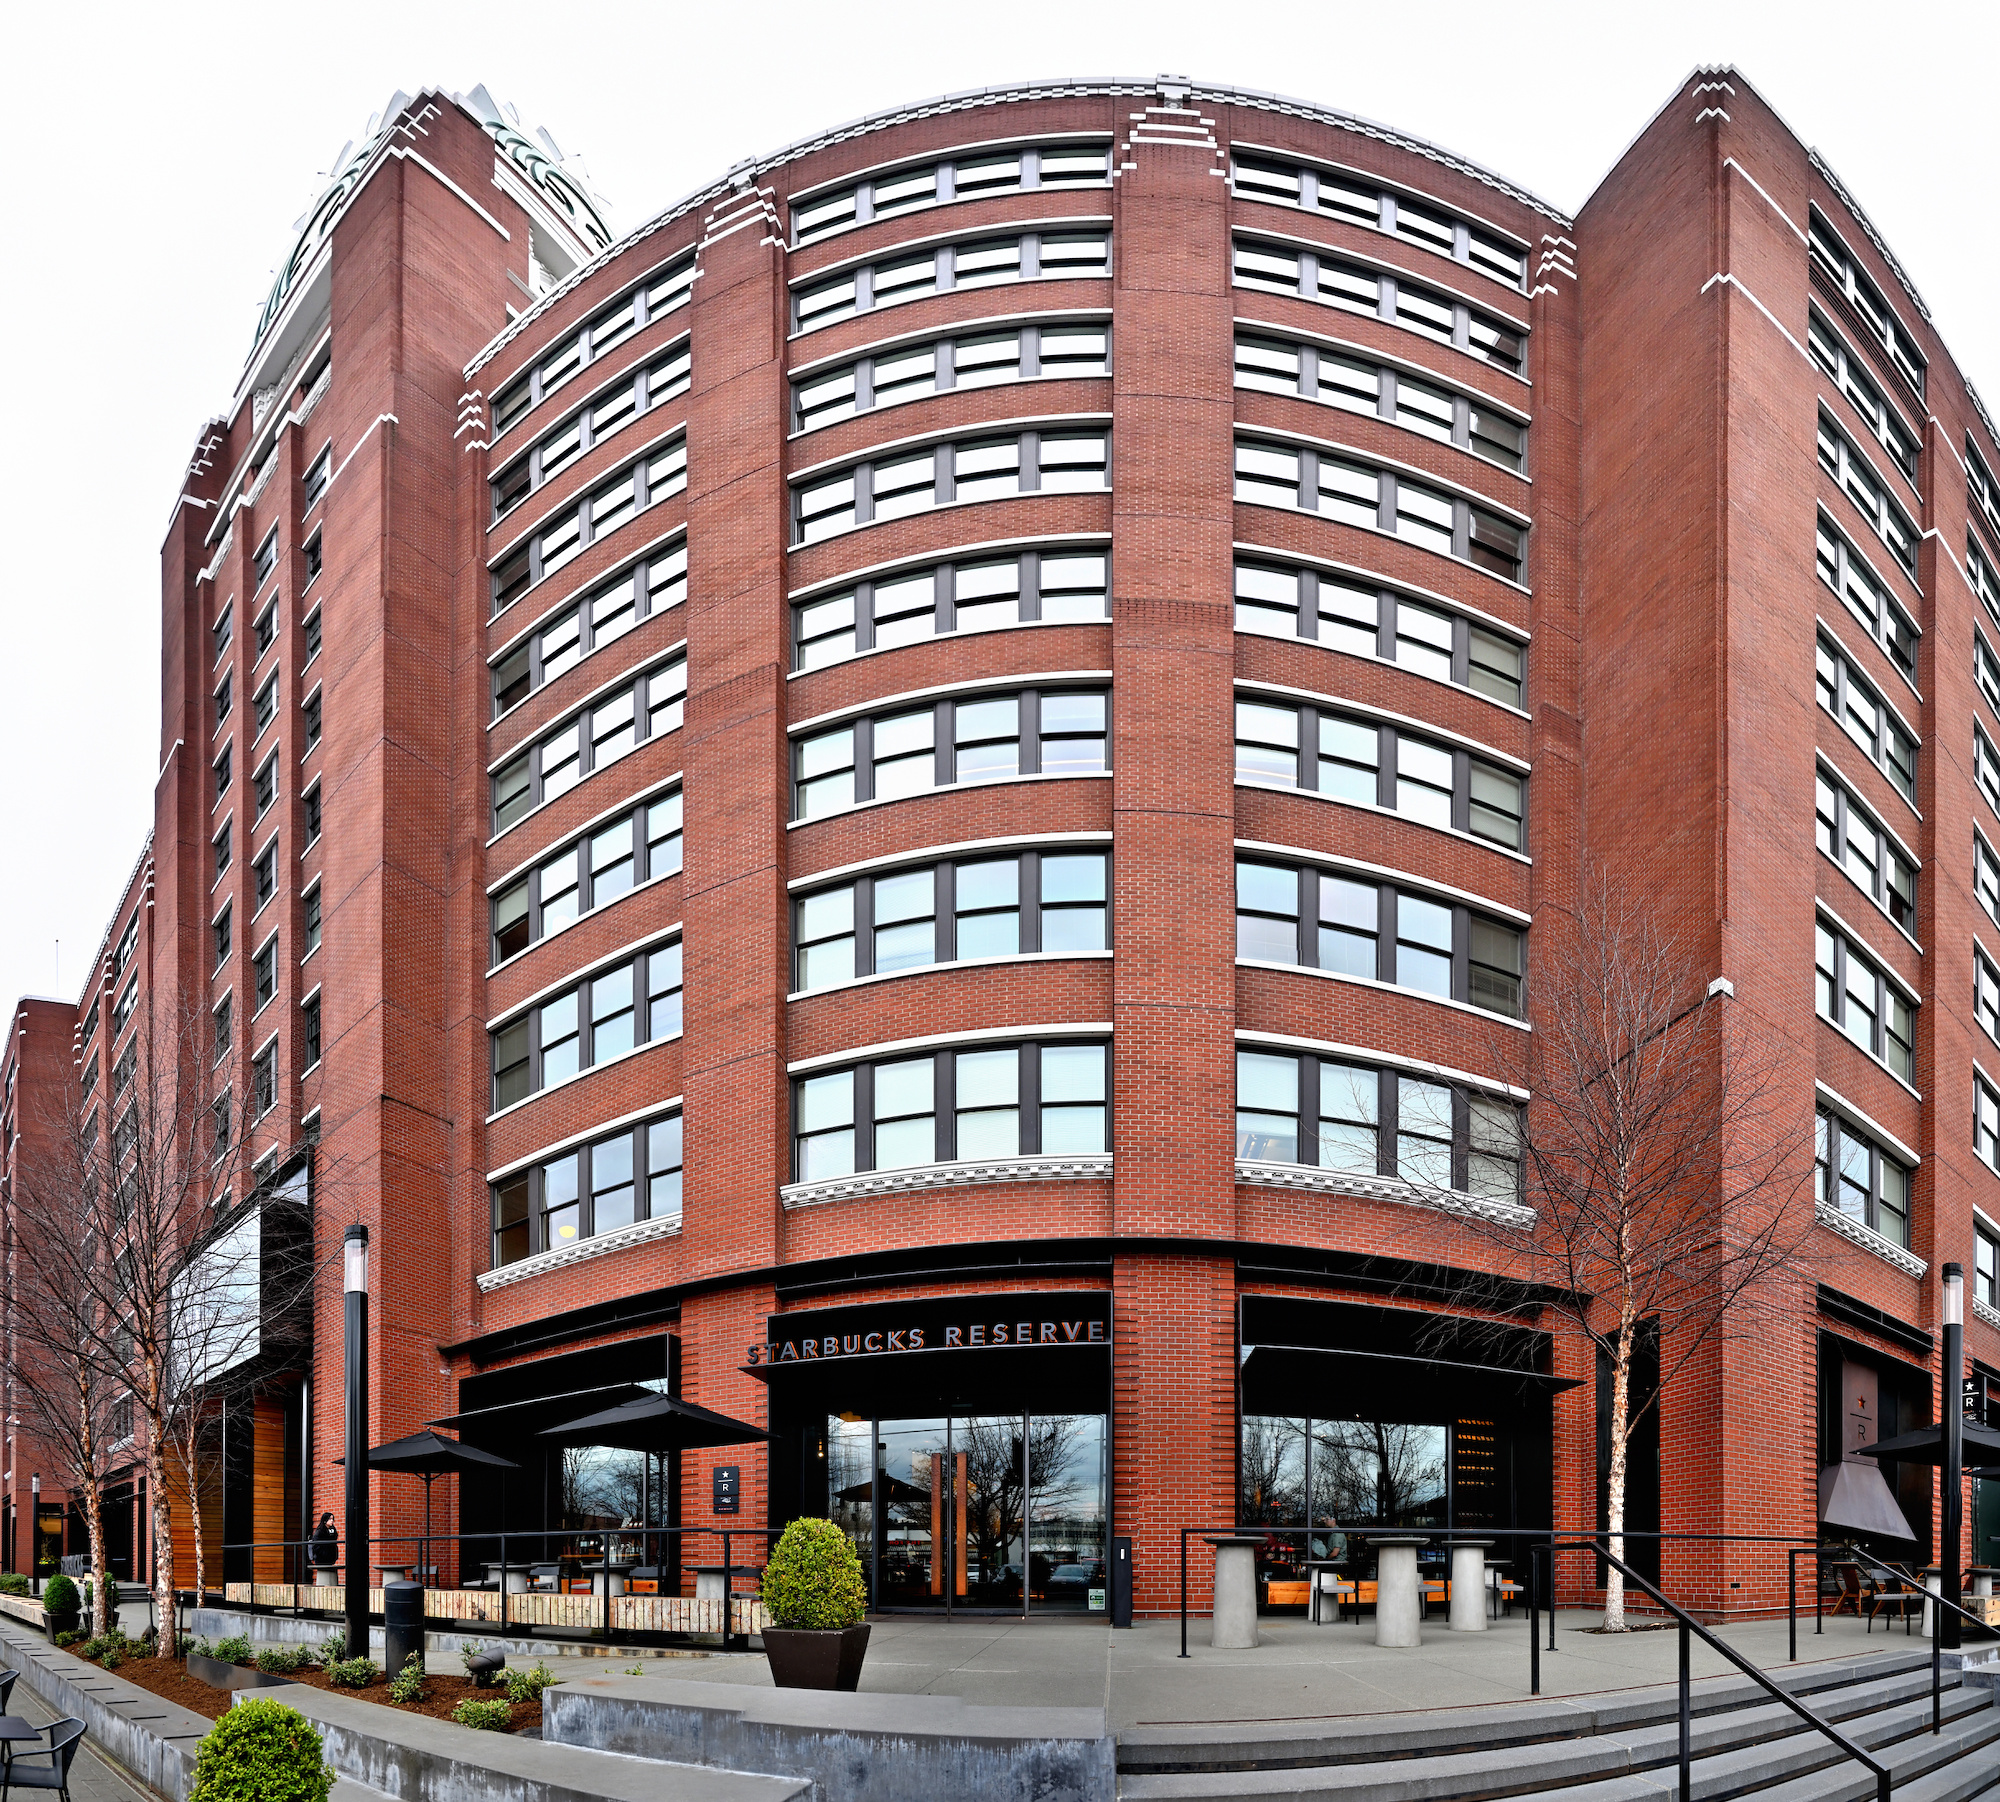
Interactive Panorama Starbucks at Pike Place Market
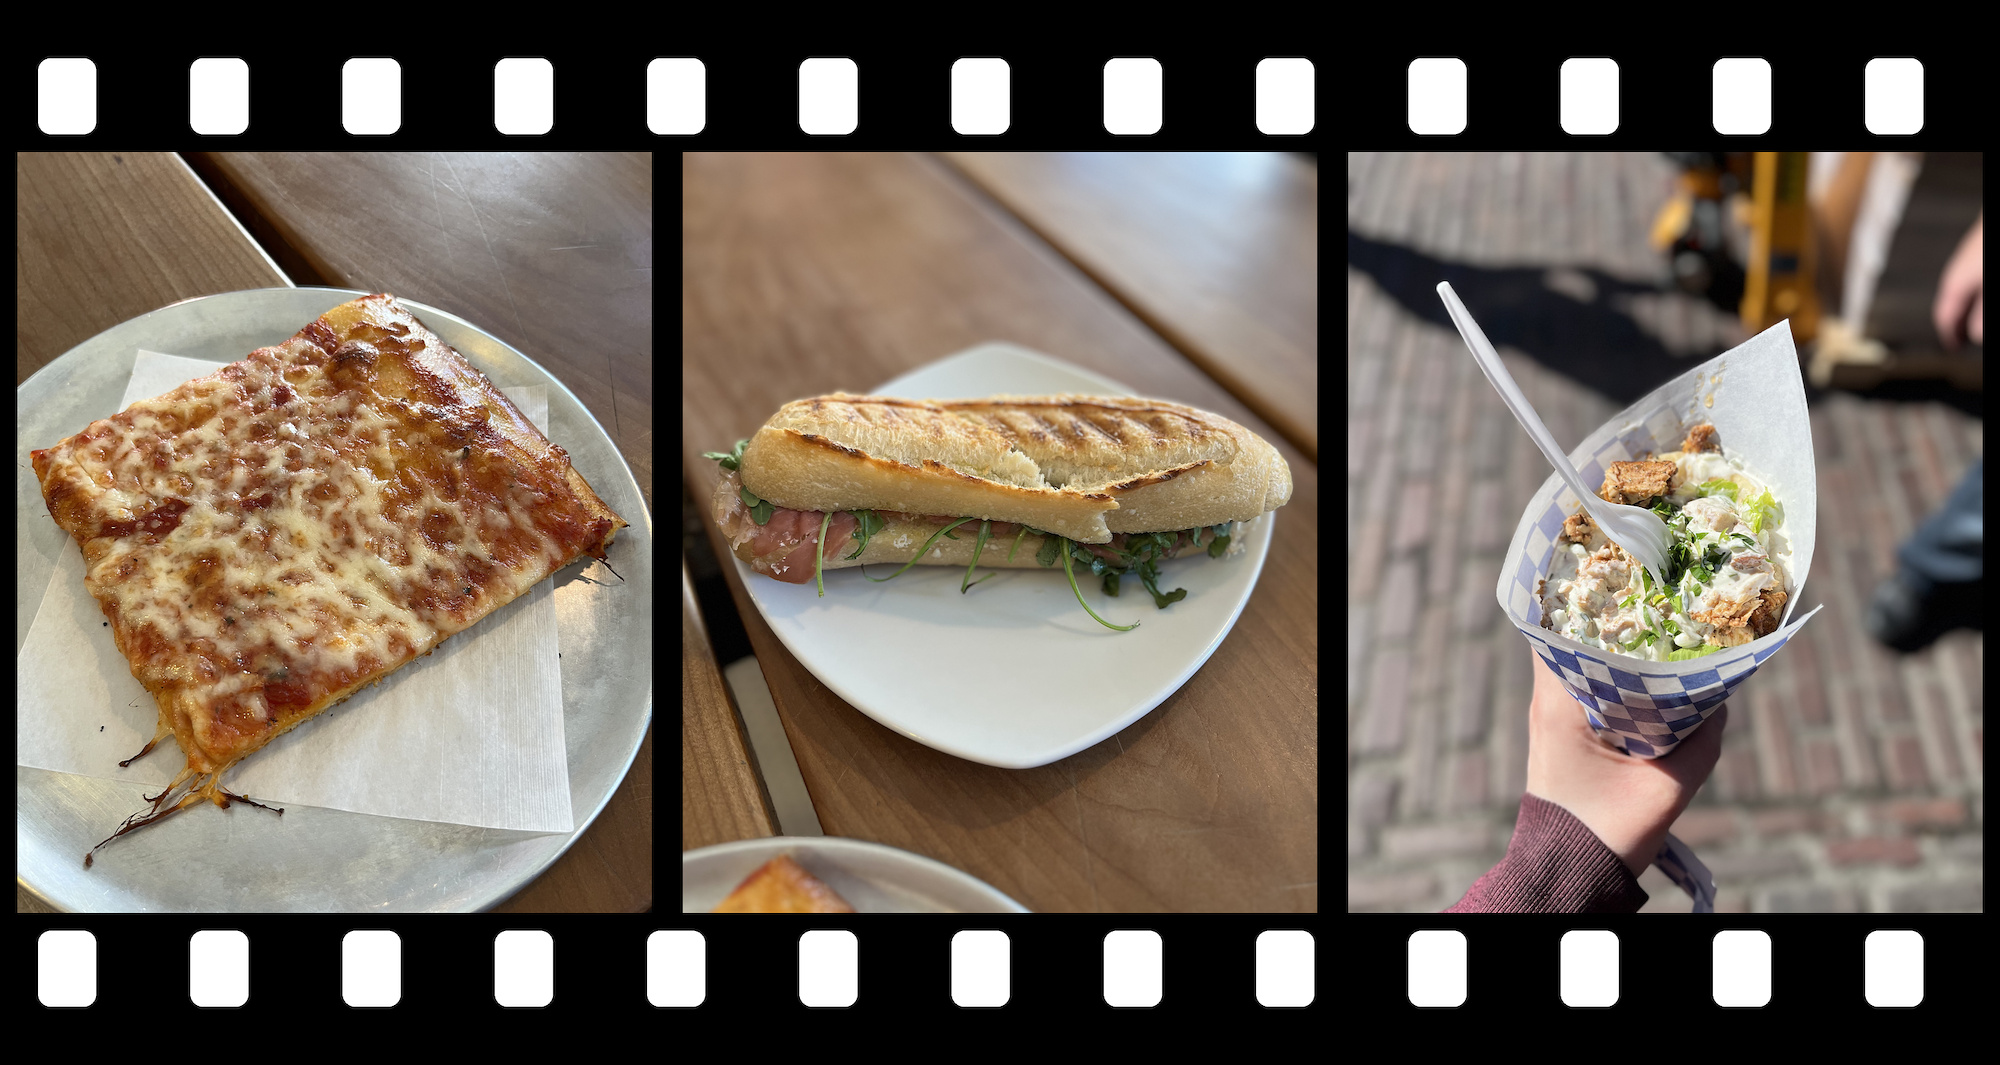
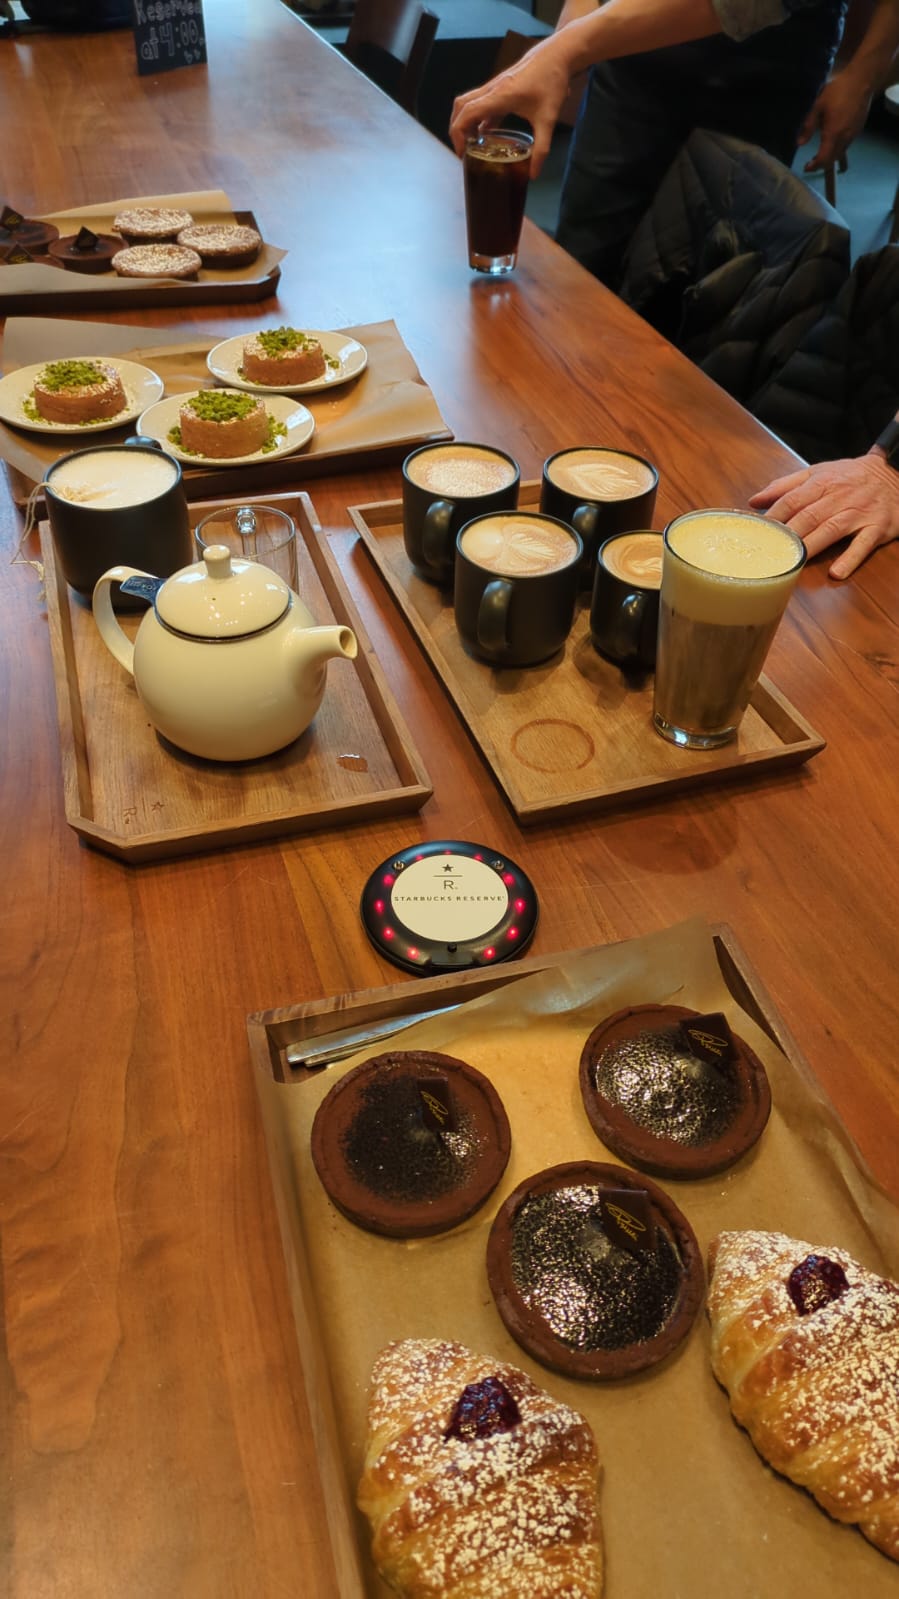
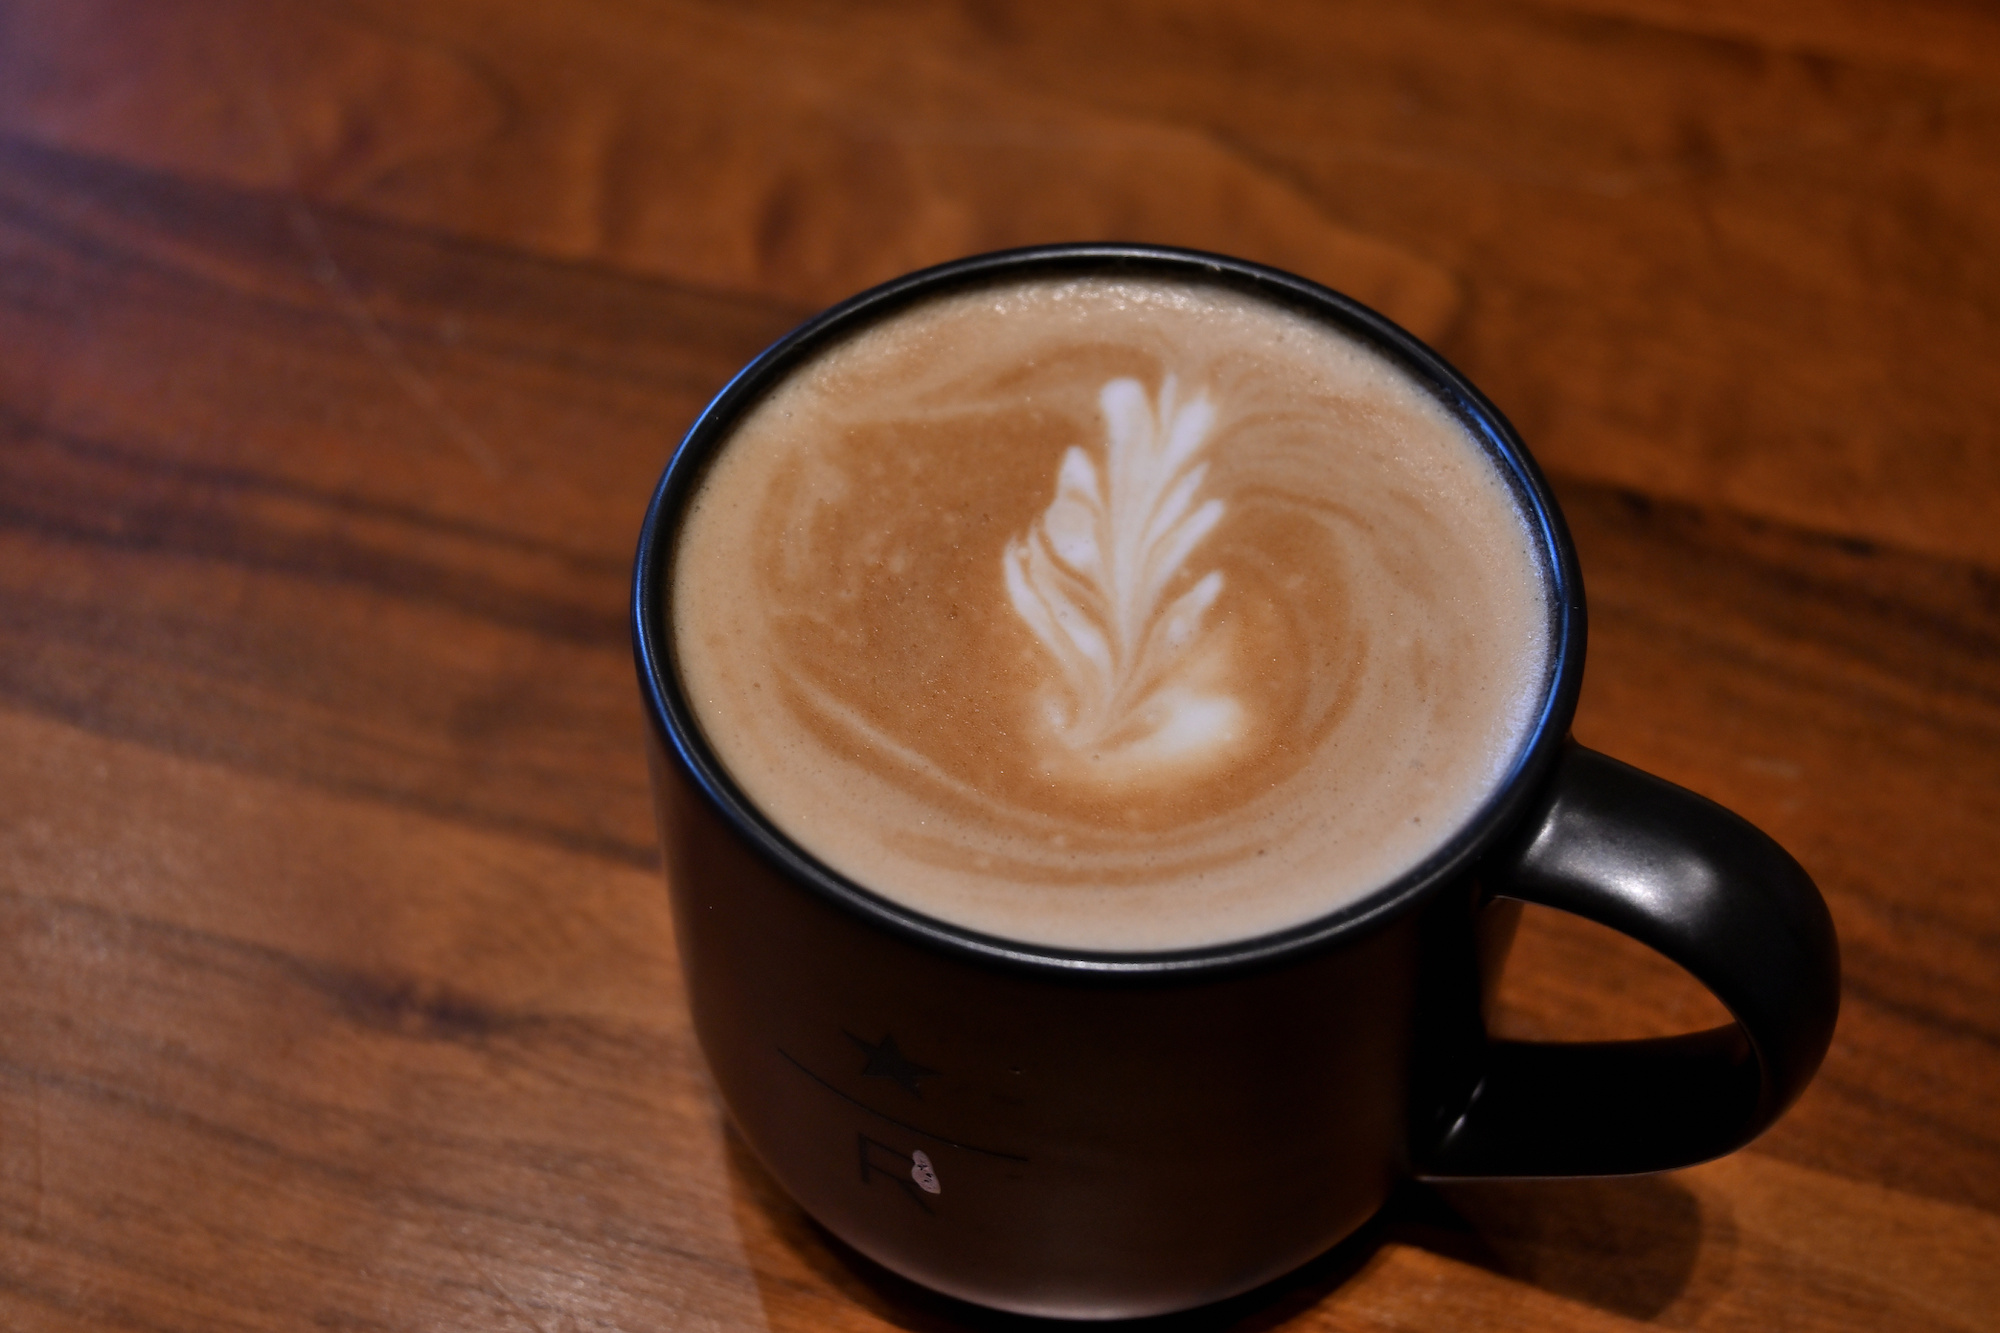
And the Market Food, one of the best of its class.
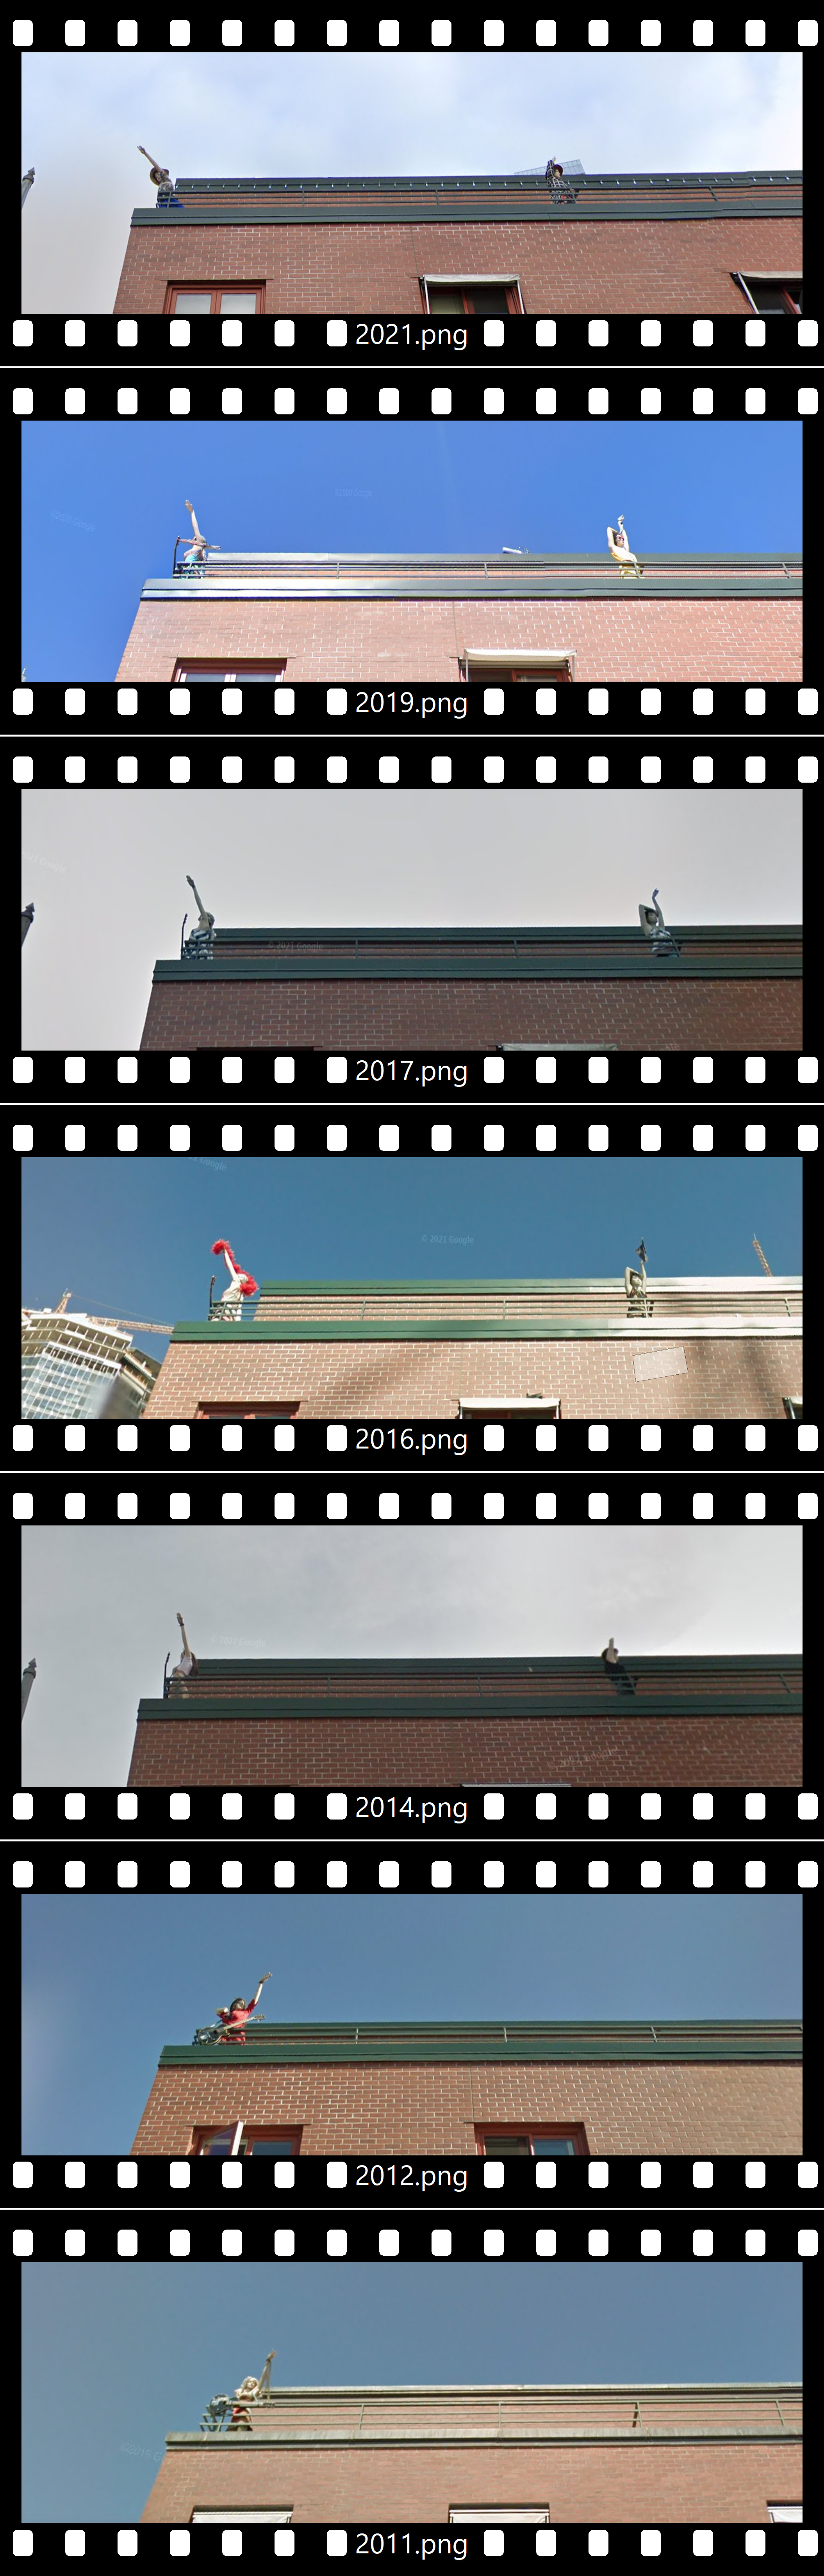
Notice the observers on the roof balcony:

They have been watching the scene for quite some time, from the street view:
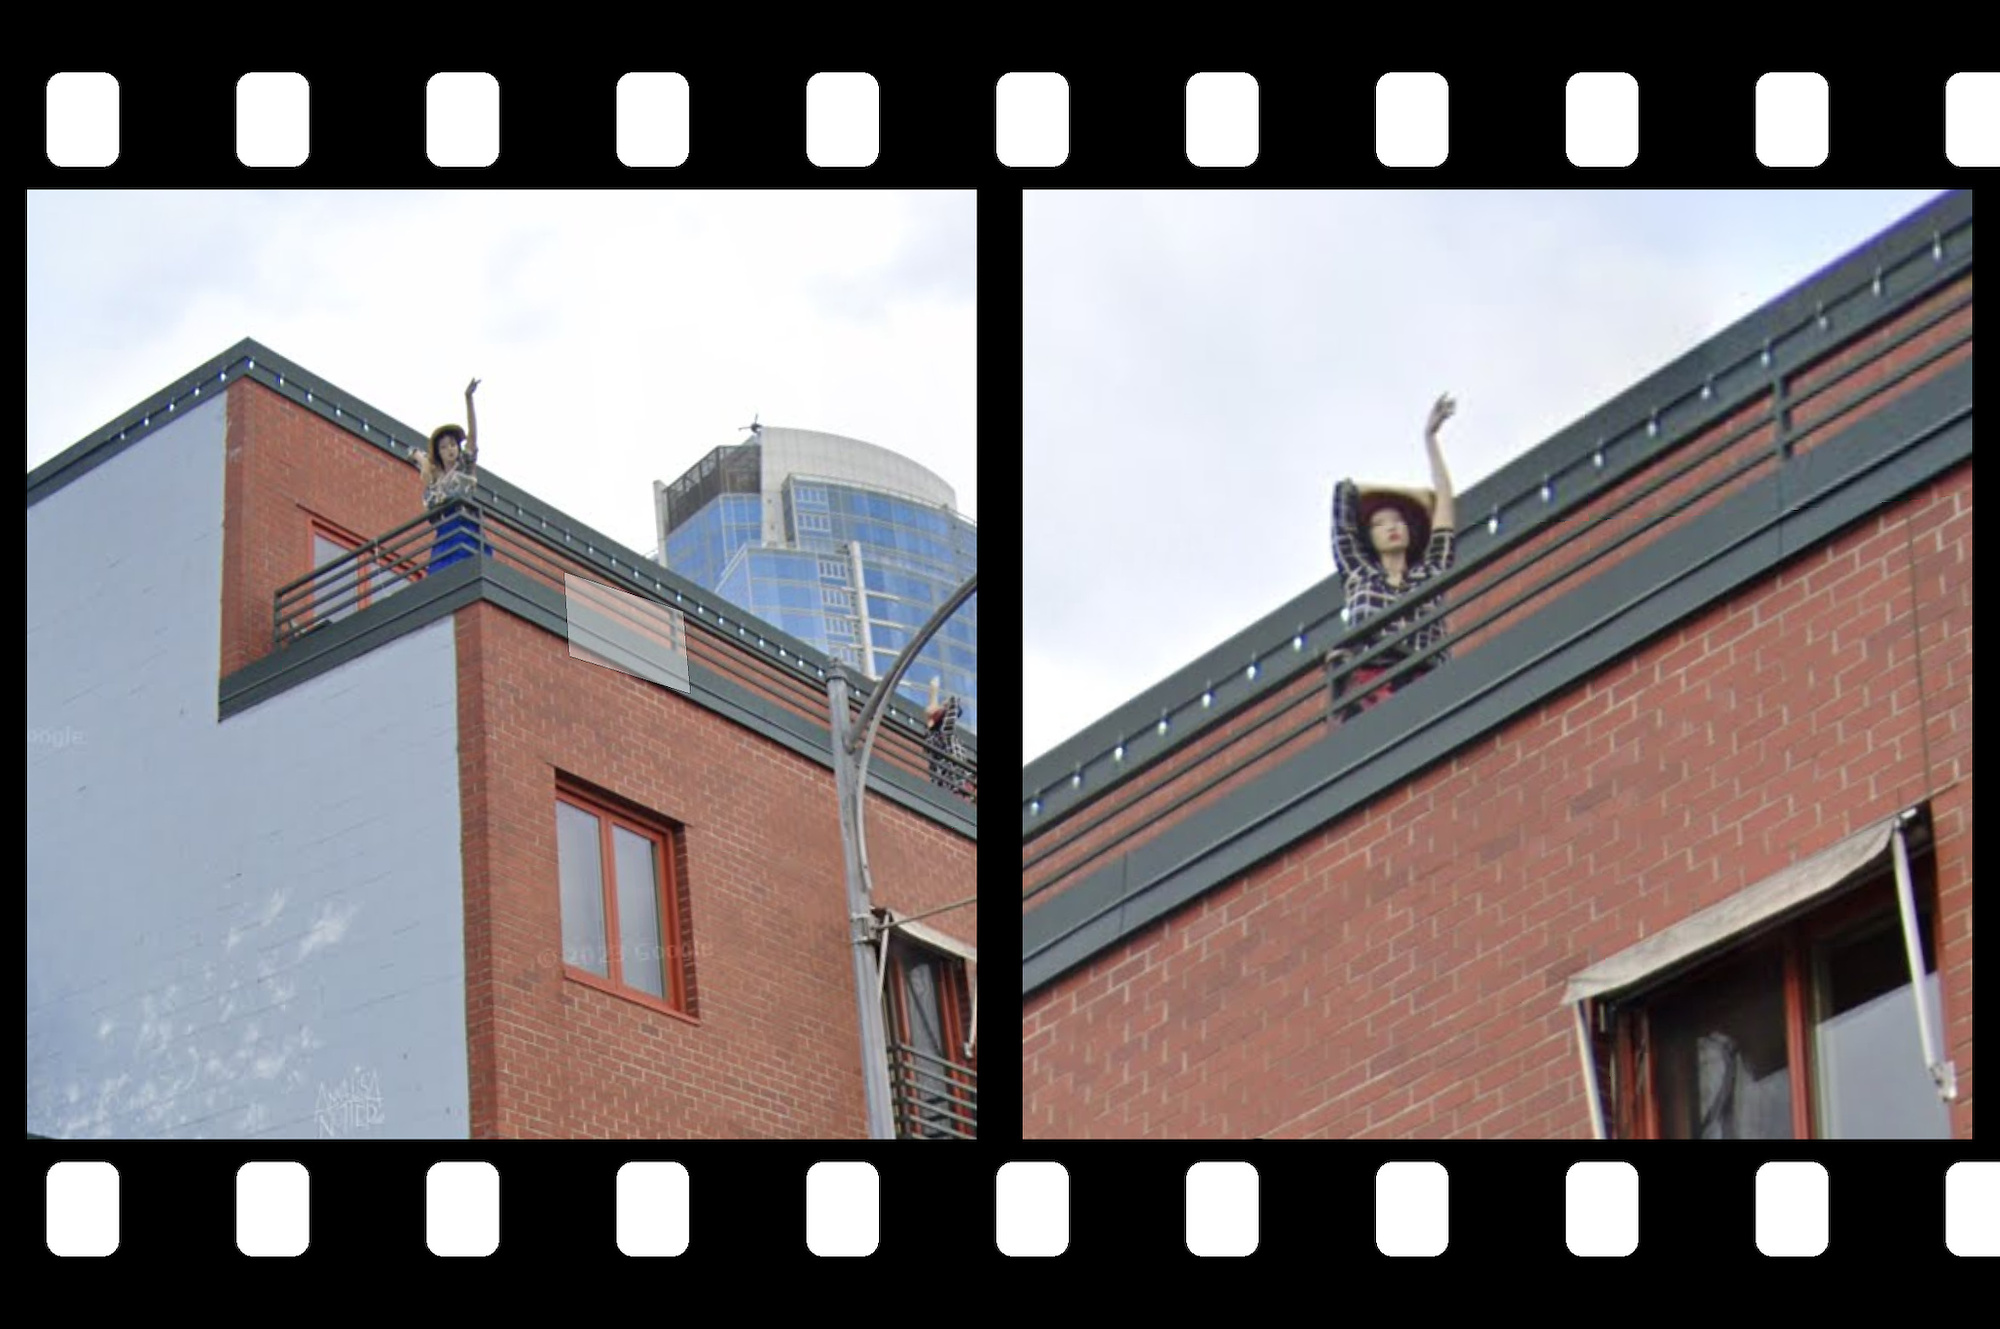
The girls go with the fashion:
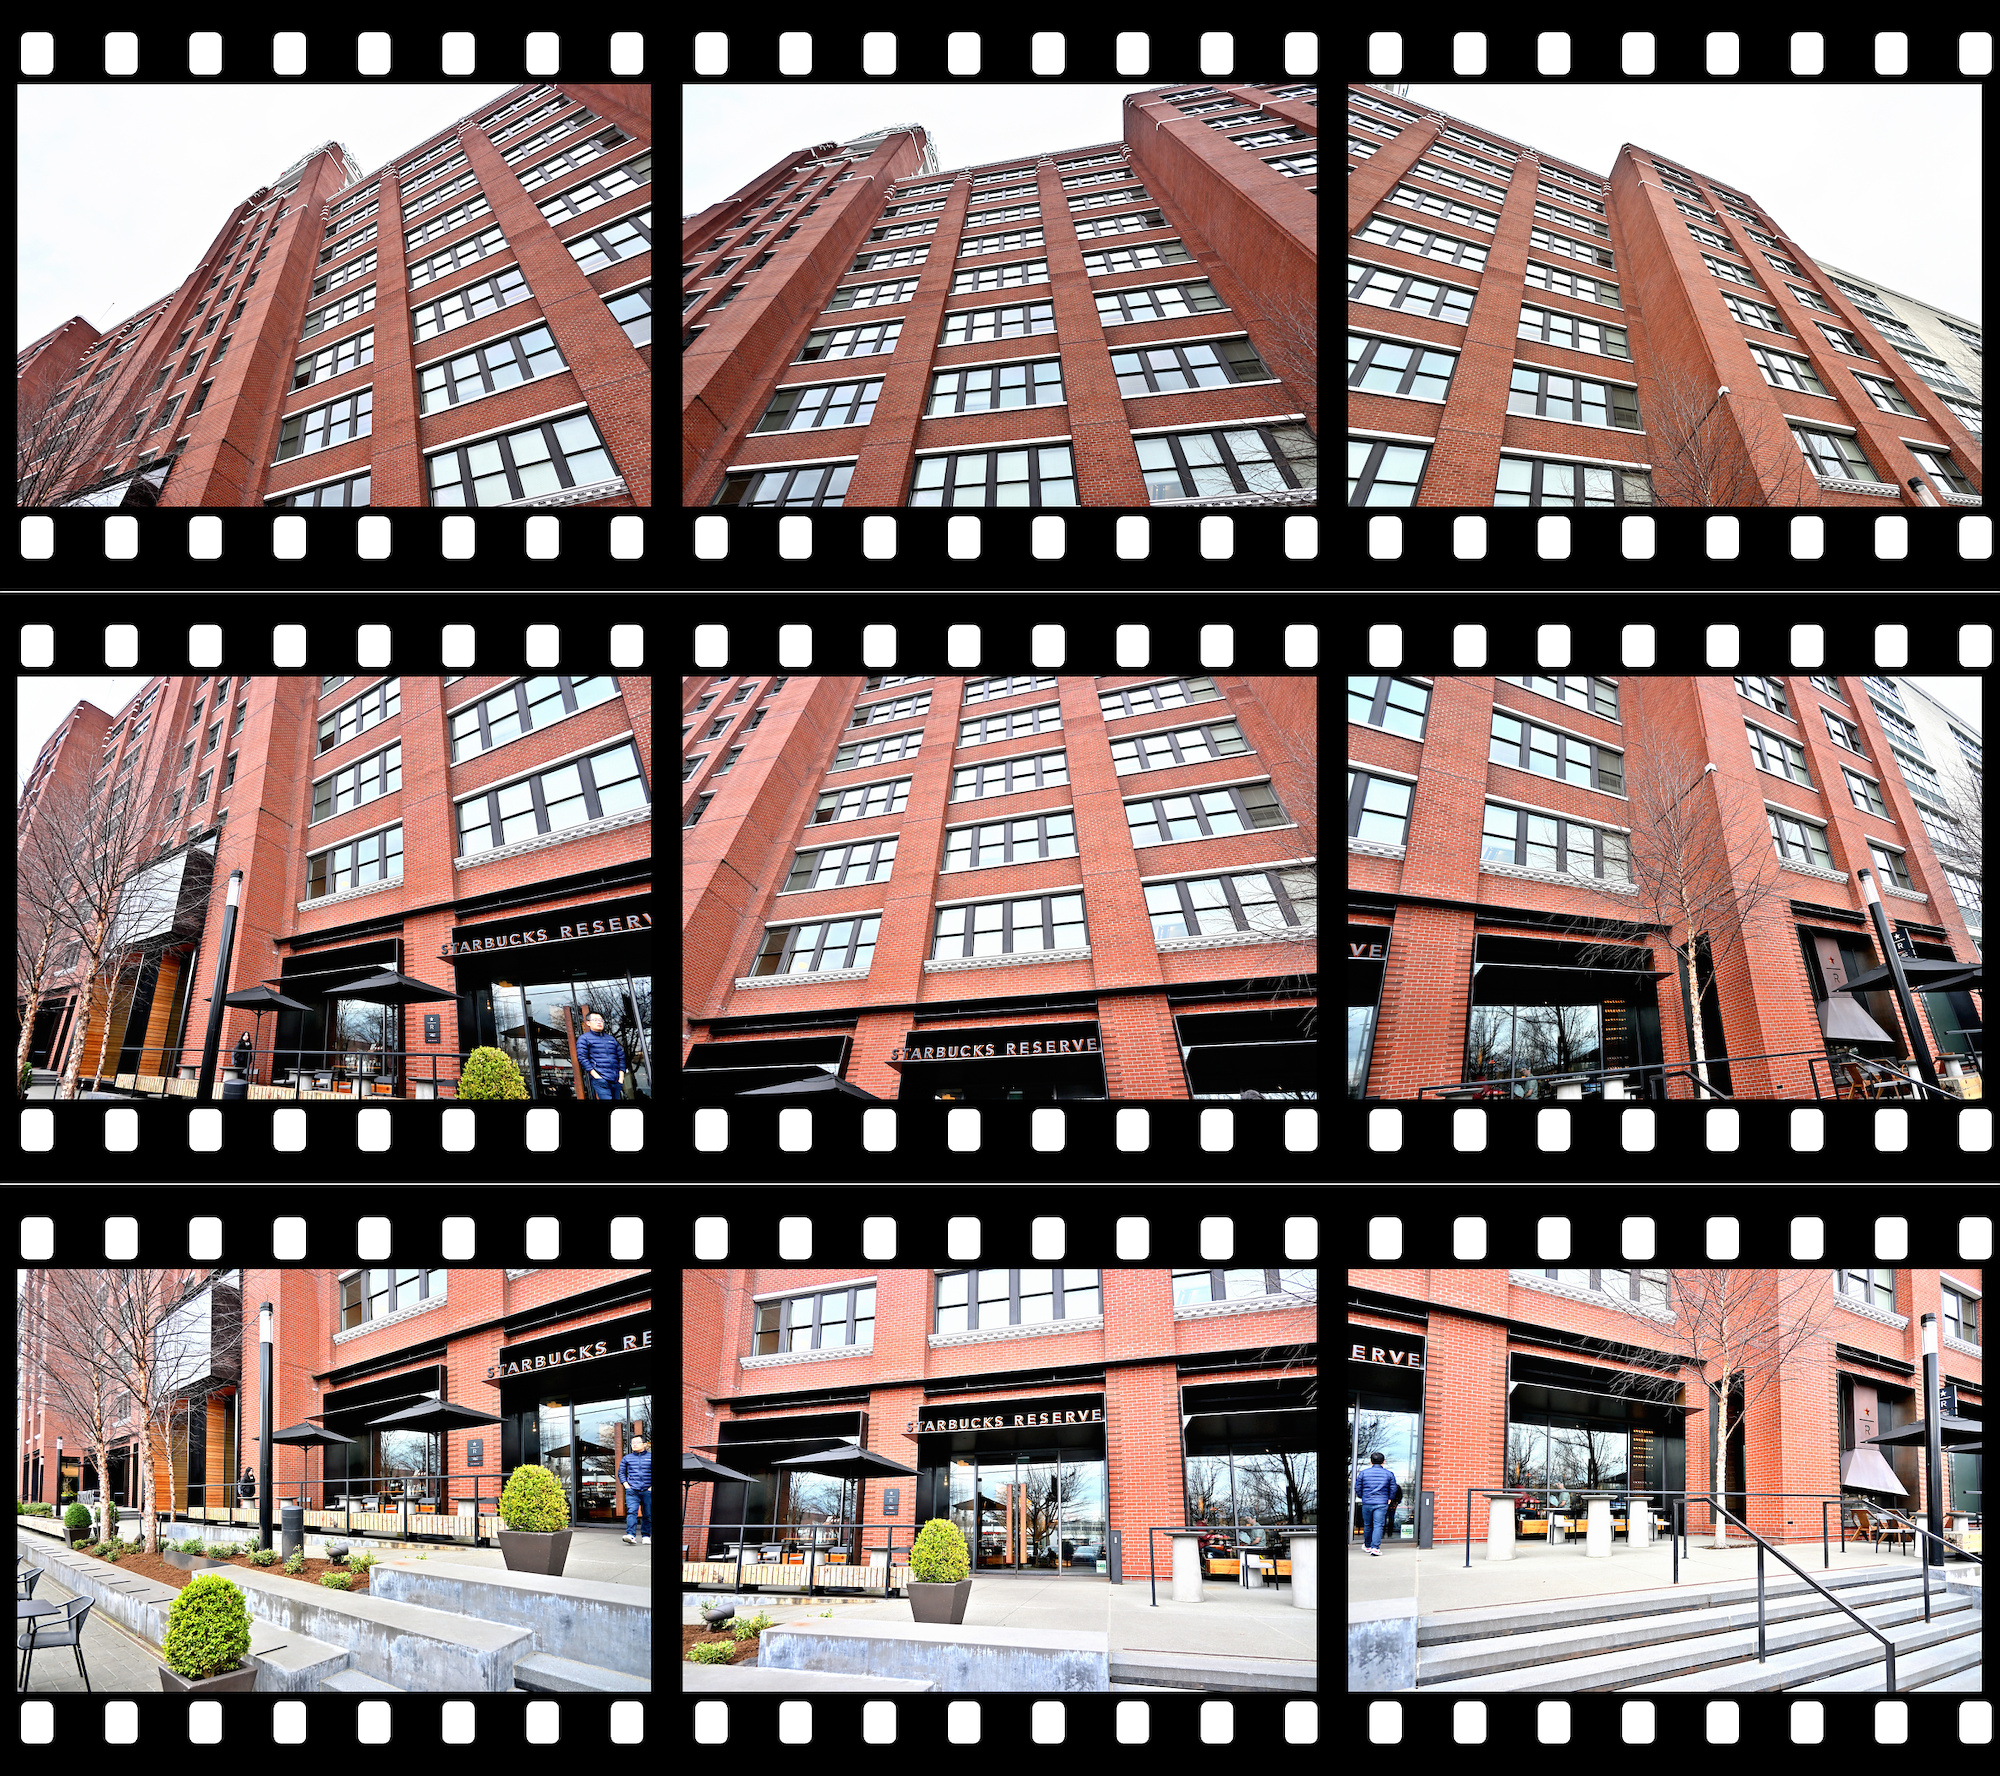
Pictures taken for panoramic images should always have the same exposure by using the manual exposure setting on the camera, but sometimes this is not always the case as in Uneven Exposures.
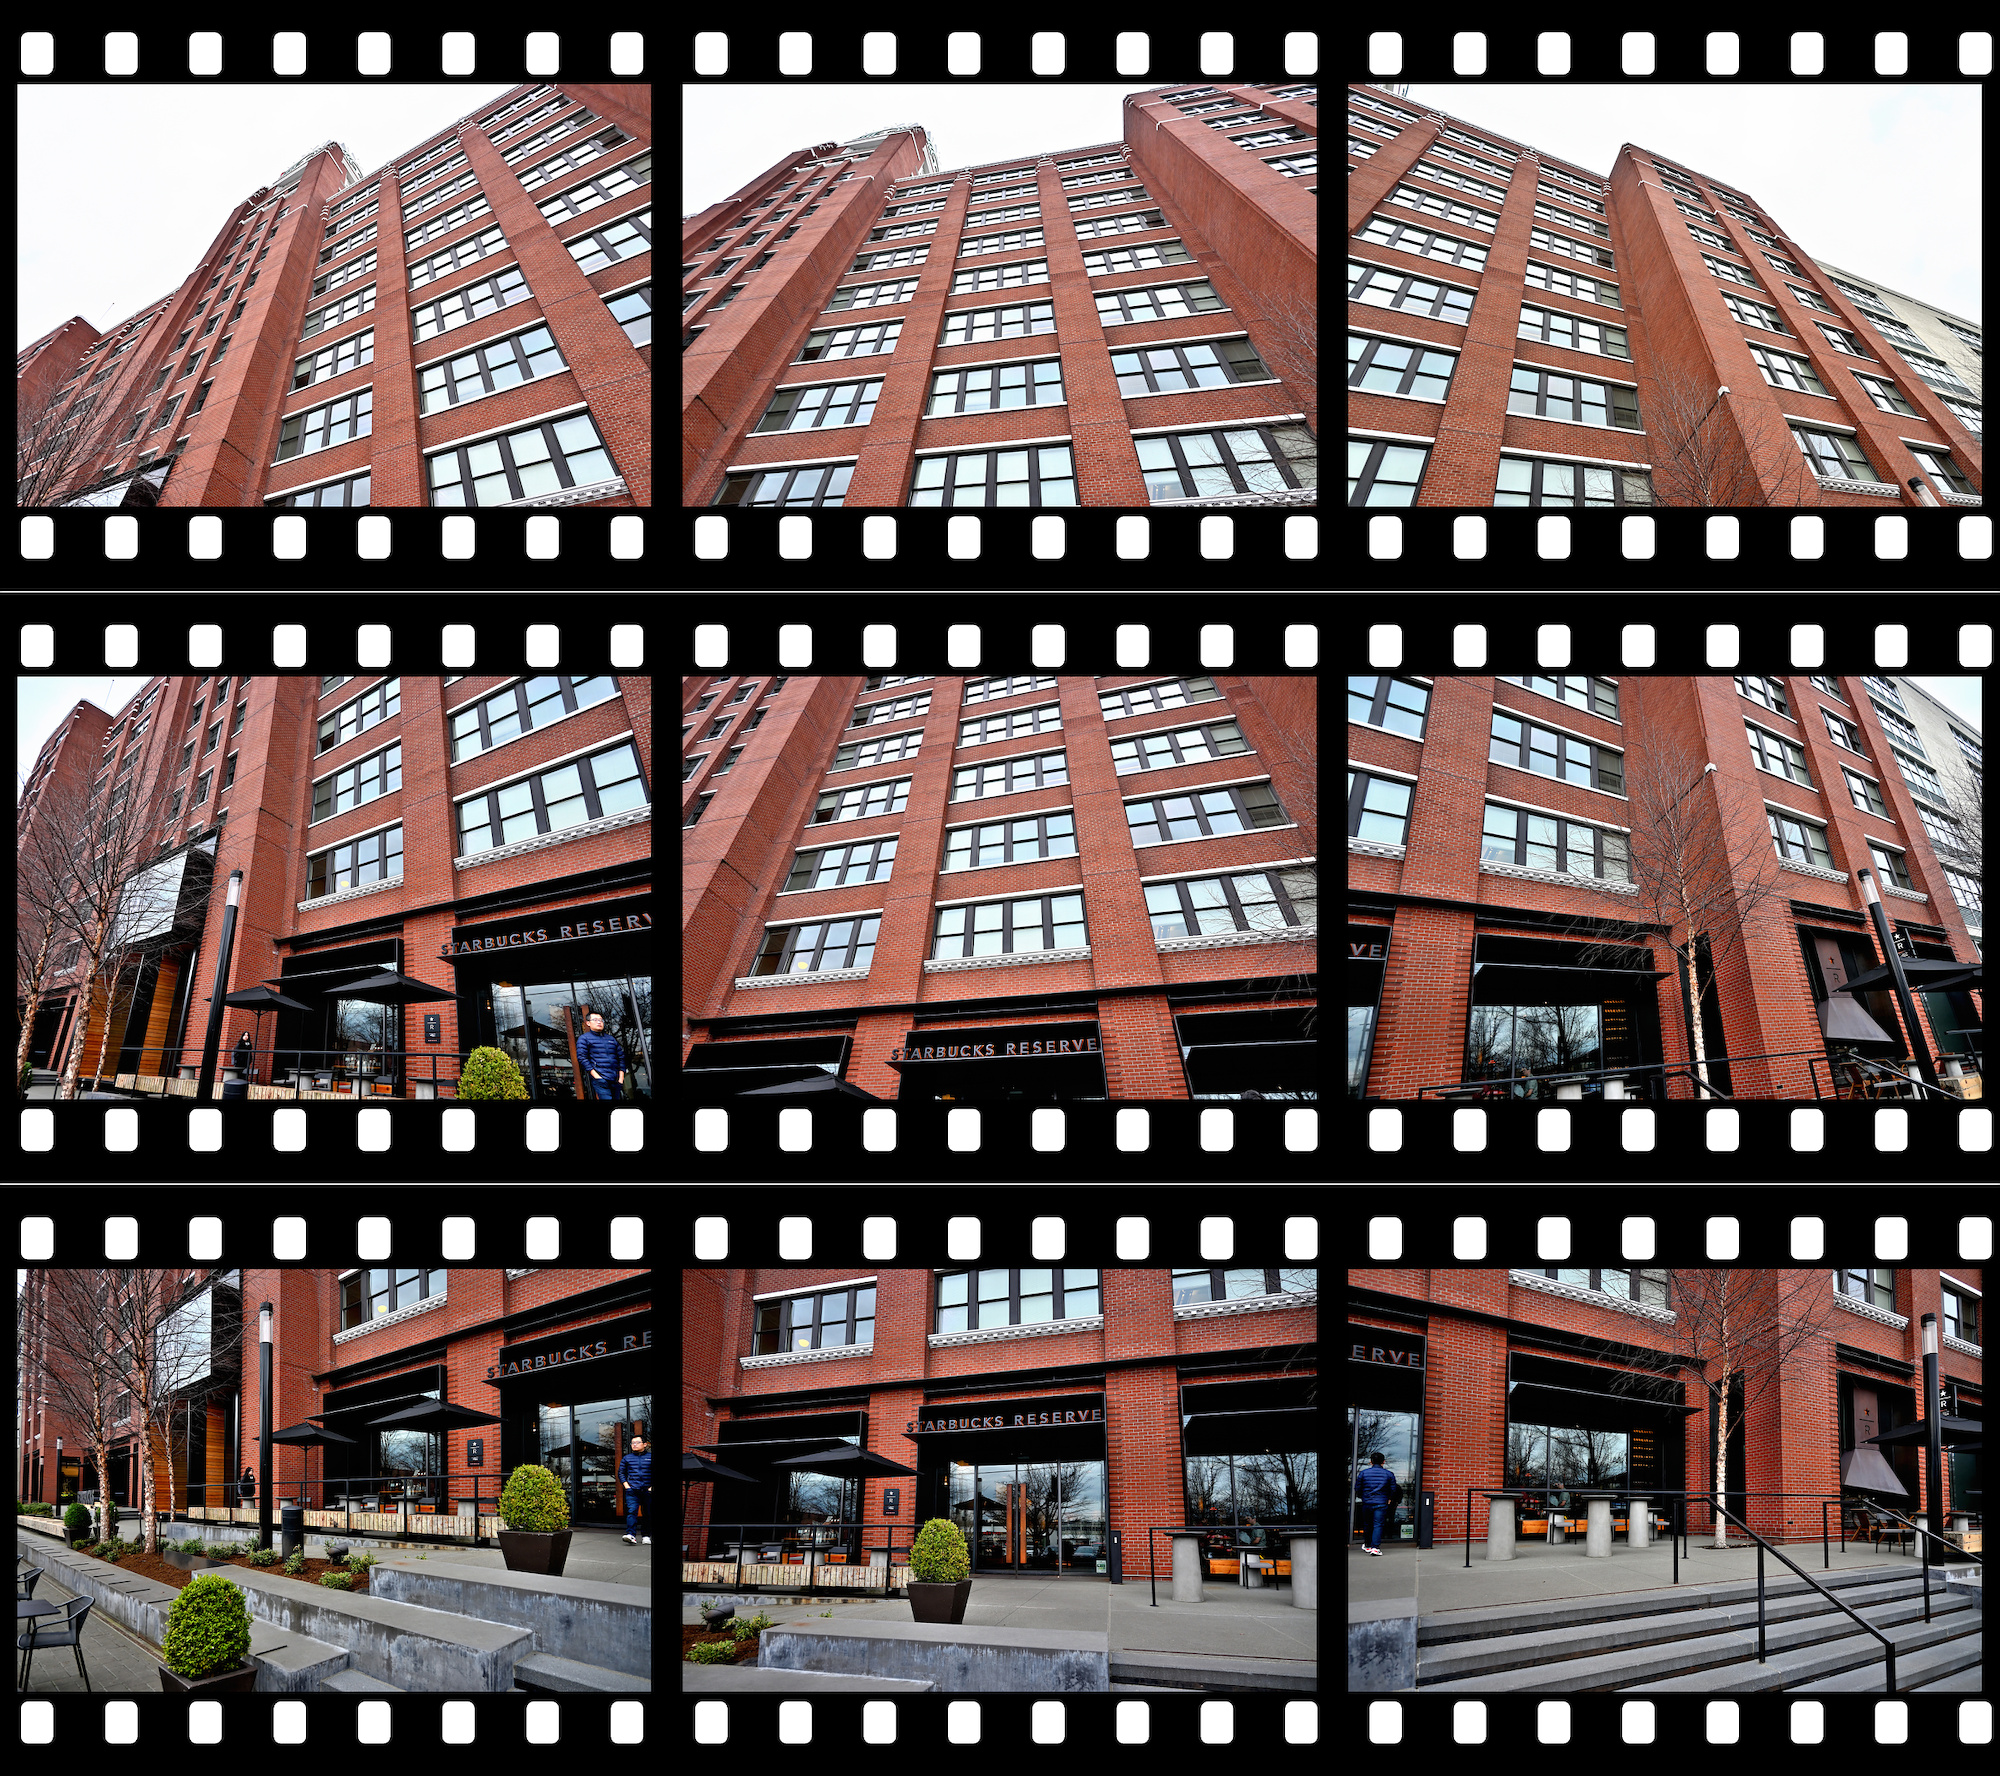
In this example of a classical building panorama, the pictures were all automatically exposed by the camera and are different.
16-50mm f/3,5-6,3 VR lens on the NIKON Z30 at f=16mm/24mm
Actual exposure values using the Index print feature in cPicture.
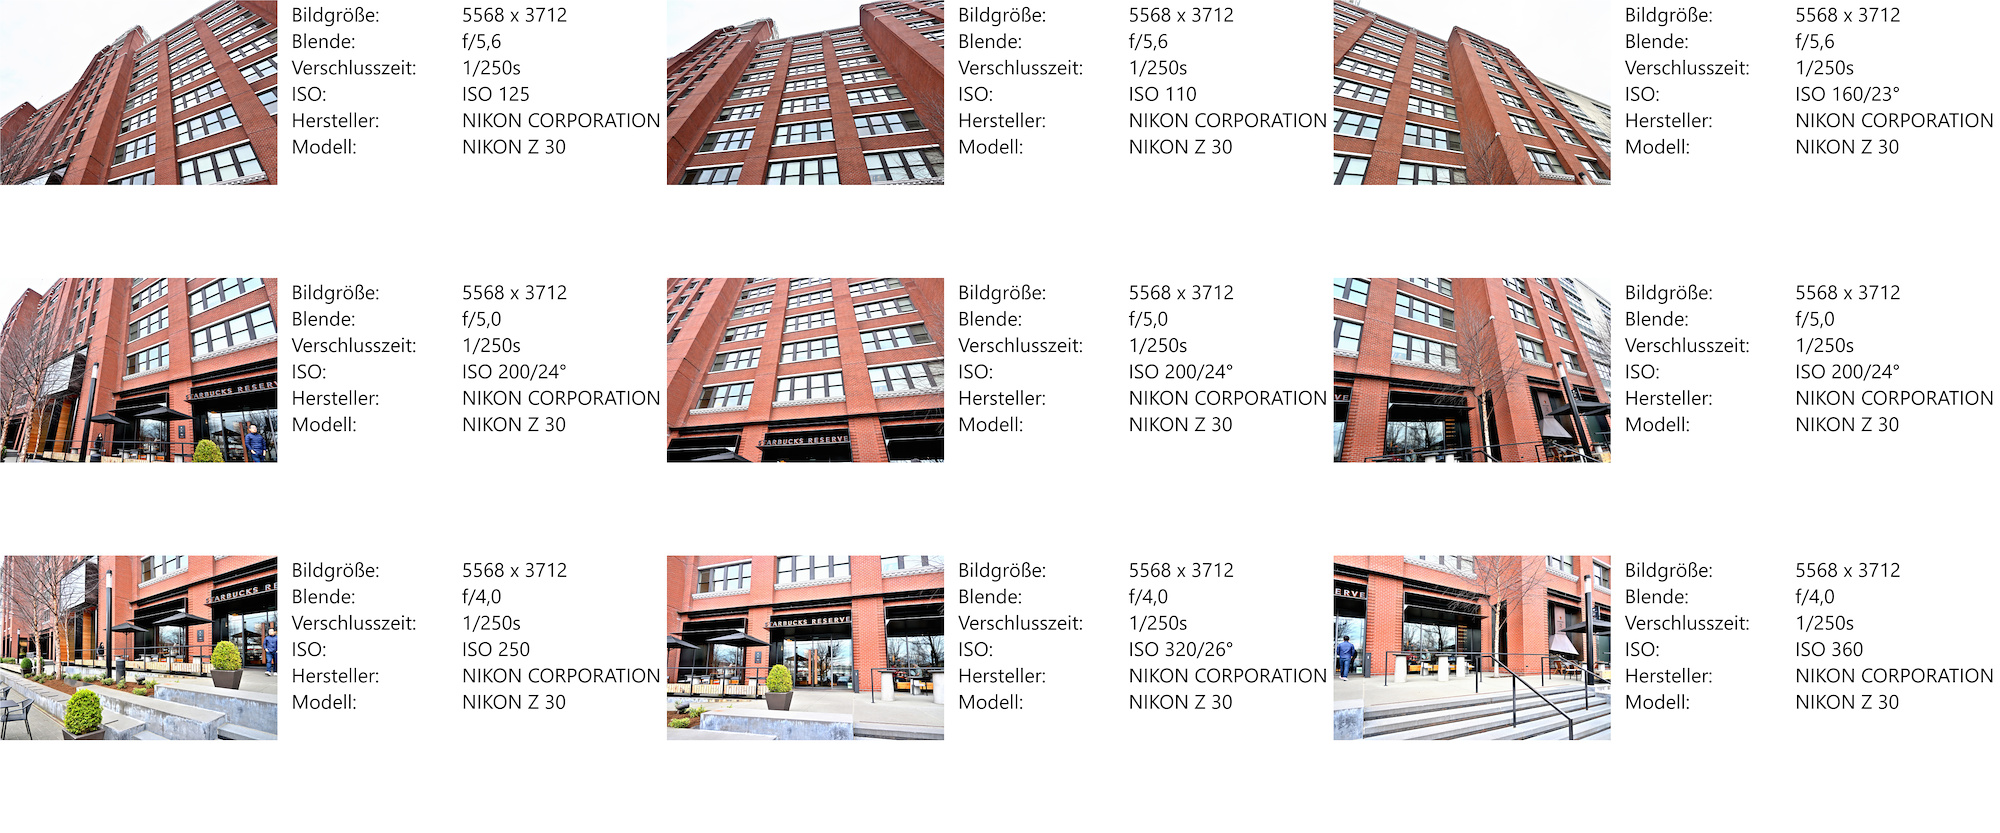
Required exposure correction values:
| |
|
|
f/5,6 ISO125
0EV
|
f/5,6 ISO110
+0,18EV
|
f/5,6 ISO160
-0,36EV
|
f/5,0 ISO200
-1EV
|
f/5,0 ISO200
-1EV
|
f/5,0 ISO200
-1EV
|
f/4,0 ISO250
-2EV
|
f/4,0 ISO320
-2,3EV
|
f/4,0 ISO360
-2,5EV
|
The corrected set of pictures:
To calculate the exposure correction values, you can use the Exposure calculator, but for a larger picture set it is easier to use a script to calculate all the exposure correction that need to be applied to match the exposure of the reference picture.
Script to calculate the exposure adjustments:
# Set up the list of pictures with the exposure settings.
$picturesEV = @(
    # Name, Speed, Aperture, ISO
    @("DSC_4121.NEF", 250, 4.0, 320),
    @("DSC_4122.NEF", 250, 5.0, 200),
    @("DSC_4123.NEF", 250, 5.6, 110),
    @("DSC_4124.NEF", 250, 4.0, 360),
    @("DSC_4125.NEF", 250, 5.0, 200),
    @("DSC_4126.NEF", 250, 5.6, 180),
    @("DSC_4127.NEF", 250, 5.6, 160),
    @("DSC_4128.NEF", 250, 4.0, 250),
    @("DSC_4129.NEF", 250, 5.0, 200),
    @("DSC_4130.NEF", 250, 5.6, 140),
    @("DSC_4131.NEF", 250, 5.6, 125)
)

# Set the reference picture to which all other pictures will be aligned to.
$refPictureName = "DSC_4131.NEF"

# Get the data for the reference picture.
foreach ($pictureEV in $picturesEV) {
    if ($refPictureName -eq $pictureEV[0]) {
        $refPictureEV = $pictureEV
        break
    }
}

function log2([double]$x) {
    [Math]::Log($x) / [Math]::Log(2.0)
}

function Get-ExposureText($EV) {
    "1/$($EV[1])s f/$($EV[2]) ISO$($EV[3])"
}

[string]$expRef = Get-ExposureText $refPictureEV

"Adjust exposure to match $refPictureName [$expRef]:"

# Calulate the exposure correction for each picture.
foreach ($pictureEV in $picturesEV) {

    [string]$name = $pictureEV[0]

    # Example a to b:
    # 1/(250) to 1/(500) = -1EV , (log2 250) - (log2 500)
    # f5.6 to f4 = +1EV , 2*((log2 5.6) - (log2 4))
    # ISO200 to ISO100 = -1EV , (log2 100) - (log2 200)

    # Calulate correction values from speed, f-stop and iso.
    [double]$speedEV = (log2 $pictureEV[1]) - (log2 $refPictureEV[1])
    [double]$fEV = 2 * ((log2 $pictureEV[2]) - (log2 $refPictureEV[2]))
    [double]$isoEV = (log2 $refPictureEV[3]) - (log2 $pictureEV[3])

    [double]$EV = [math]::Round($speedEV + $fEV + $isoEV, 2)
    [string]$sign = if ($eV -gt 0.0) { "+" } else { "" }
    [string]$exp = Get-ExposureText $pictureEV

    # Output result.
    "$name [$exp] = $sign{0:g2}EV" -f $EV
}
The results:
Adjust exposure to match DSC_4131.NEF [1/250s f/5.6 ISO125]:
DSC_4121.NEF [1/250s f/4 ISO320] = -2,3EV
DSC_4122.NEF [1/250s f/5 ISO200] = -1EV
DSC_4123.NEF [1/250s f/5.6 ISO110] = +0,18EV
DSC_4124.NEF [1/250s f/4 ISO360] = -2,5EV
DSC_4125.NEF [1/250s f/5 ISO200] = -1EV
DSC_4126.NEF [1/250s f/5.6 ISO180] = -0,53EV
DSC_4127.NEF [1/250s f/5.6 ISO160] = -0,36EV
DSC_4128.NEF [1/250s f/4 ISO250] = -2EV
DSC_4129.NEF [1/250s f/5 ISO200] = -1EV
DSC_4130.NEF [1/250s f/5.6 ISO140] = -0,16EV
DSC_4131.NEF [1/250s f/5.6 ISO125] = 0EV
An easy way to get the exposure data for all pictures is to use cPicture to export the data as a XML file:
<?xml version="1.0" encoding="utf-8" ?>
<List>
    <Picture File="DSC_4121.JPG" Aperture="f/4,0" Shutterspeed="1/250s" Iso="ISO 320/26°" />
    <Picture File="DSC_4122.JPG" Aperture="f/5,0" Shutterspeed="1/250s" Iso="ISO 200/24°" />
    <Picture File="DSC_4123.JPG" Aperture="f/5,6" Shutterspeed="1/250s" Iso="ISO 110" />
    <Picture File="DSC_4124.JPG" Aperture="f/4,0" Shutterspeed="1/250s" Iso="ISO 360" />
    <Picture File="DSC_4125.JPG" Aperture="f/5,0" Shutterspeed="1/250s" Iso="ISO 200/24°" />
    <Picture File="DSC_4127.JPG" Aperture="f/5,6" Shutterspeed="1/250s" Iso="ISO 160/23°" />
    <Picture File="DSC_4128.JPG" Aperture="f/4,0" Shutterspeed="1/250s" Iso="ISO 250" />
    <Picture File="DSC_4129.JPG" Aperture="f/5,0" Shutterspeed="1/250s" Iso="ISO 200/24°" />
    <Picture File="DSC_4131.JPG" Aperture="f/5,6" Shutterspeed="1/250s" Iso="ISO 125" />
</List>
To use the exposure data from the cPicture list, you can use this conversion script and use this instead of the static data list. The full script is here.
# Load the exported picture list from cPicture bilder.xml
[xml]$pictureXML = New-Object xml
$pictureXML.Load("$PSScriptRoot\blog\bilder.xml")

$picturesEVxml = @()

# Get the picture exposure data from the xml file.
$pictureXML.List.Picture | ForEach-Object {
    # File="DSC_4121.JPG" Aperture="f/4,0" Shutterspeed="1/250s" Iso="ISO 320/26°"
    if ($_.Aperture -match "f/(\d(?:,\d+)?)") {
        $Aperture = [double]($matches[1].Replace(",", "."))

        if ($_.Shutterspeed -match "1/(\d+)s") {
            $Shutterspeed = [double]($matches[1])

            if ($_.Iso -match "ISO (\d+)(?:/d+°)?") {
                $Iso = [double]($matches[1])

                $picturesEVxml += ,@($($_.File), $Shutterspeed, $Aperture, $Iso)
            }
        }
    }
}
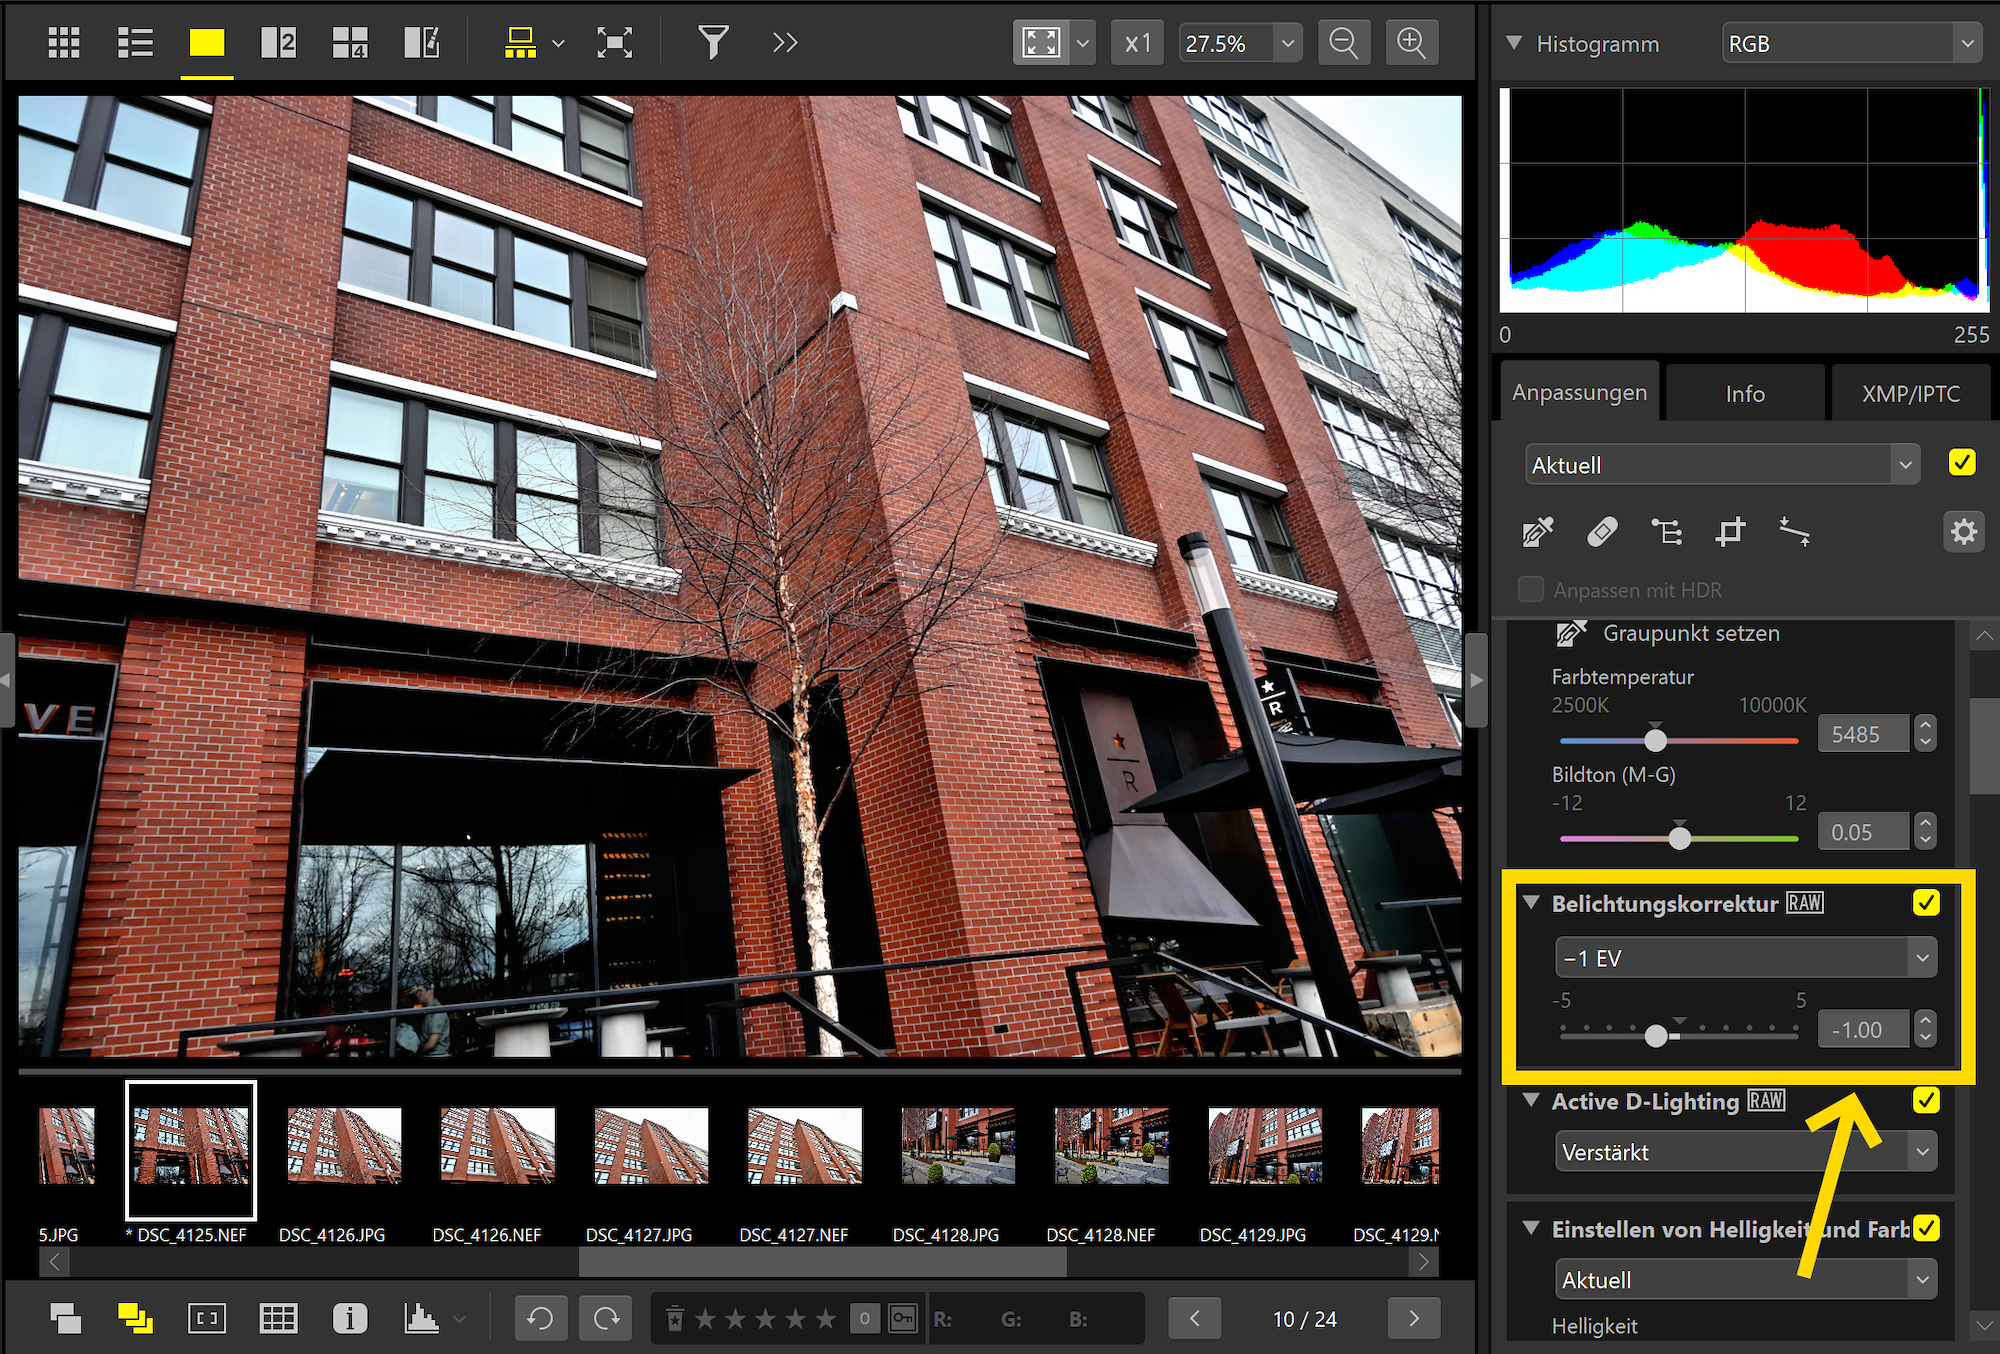
The correction can be automated using a command line tool or done in the editor, for example NX Studio in my case:
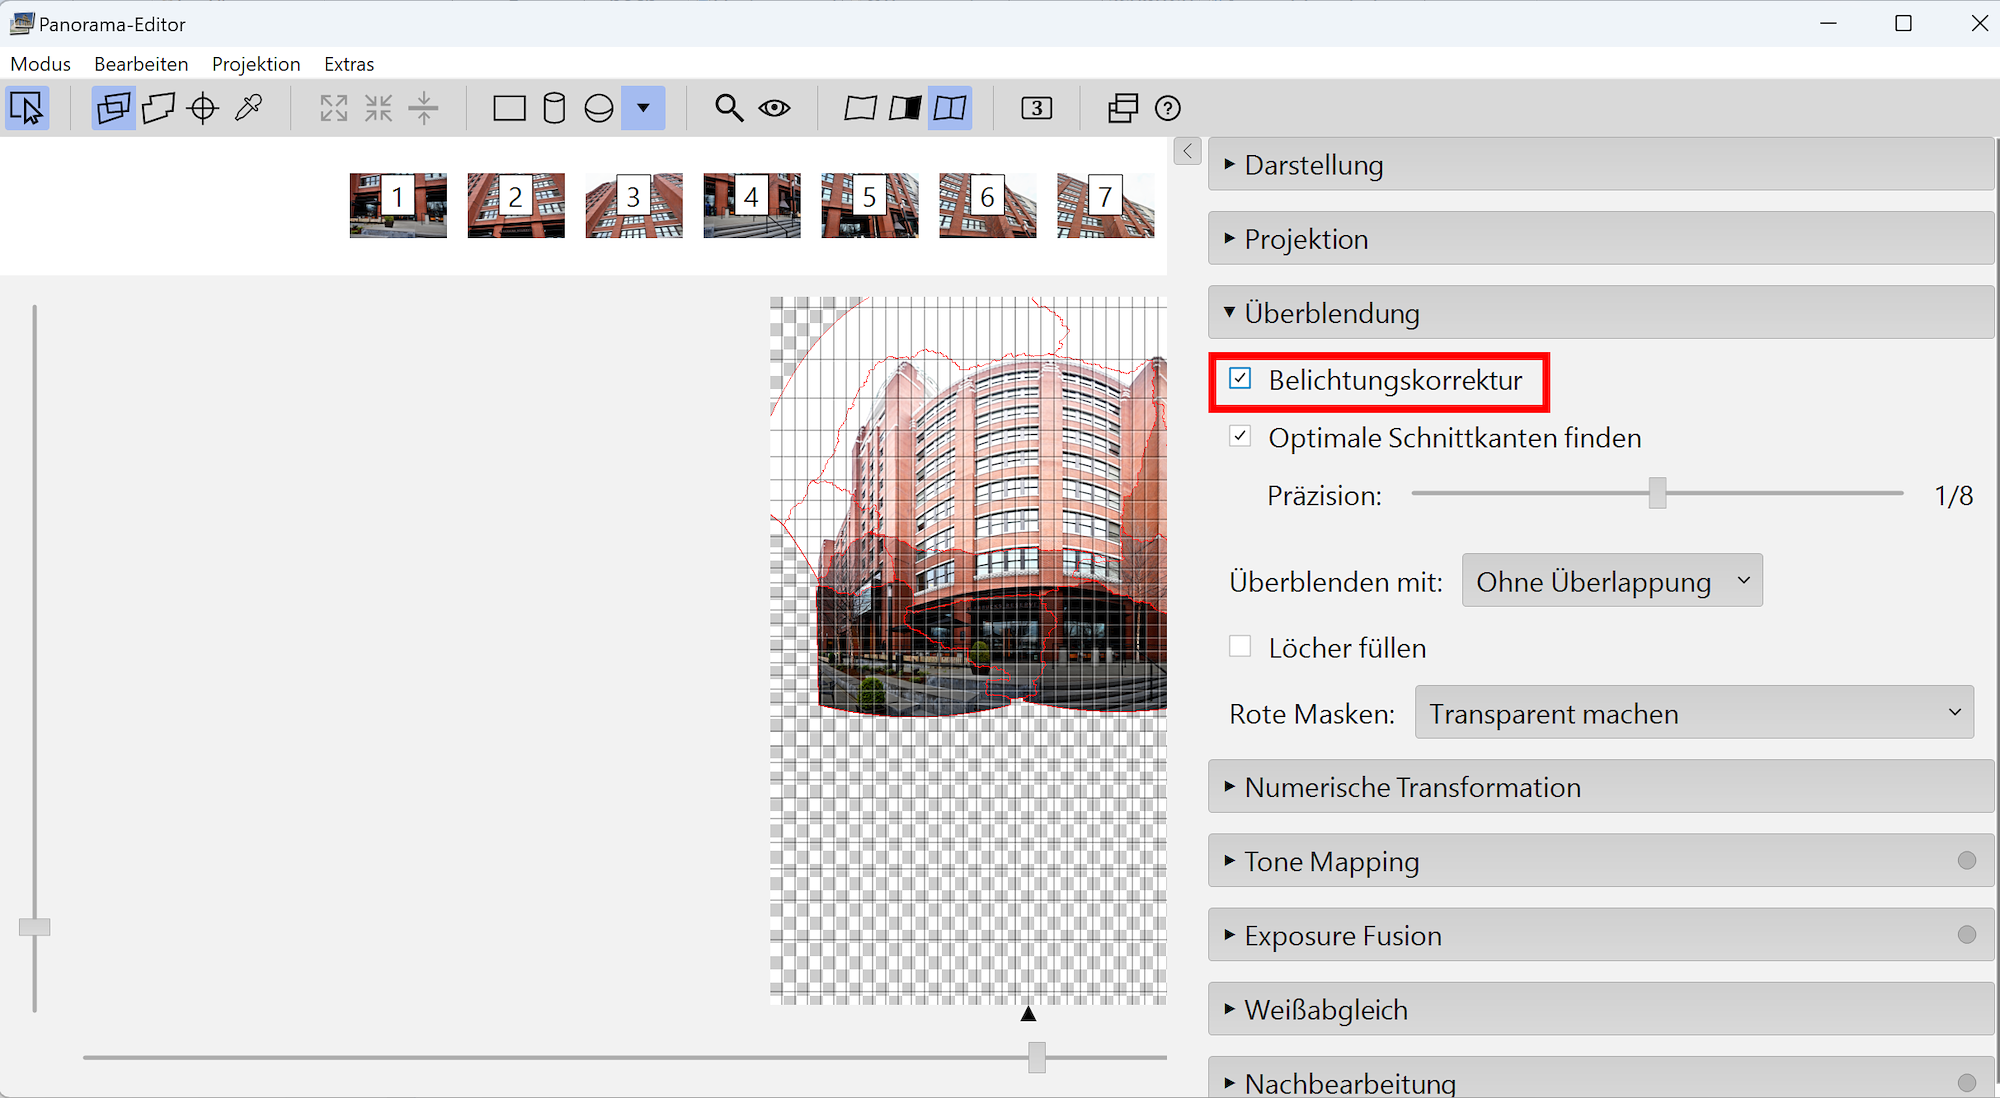
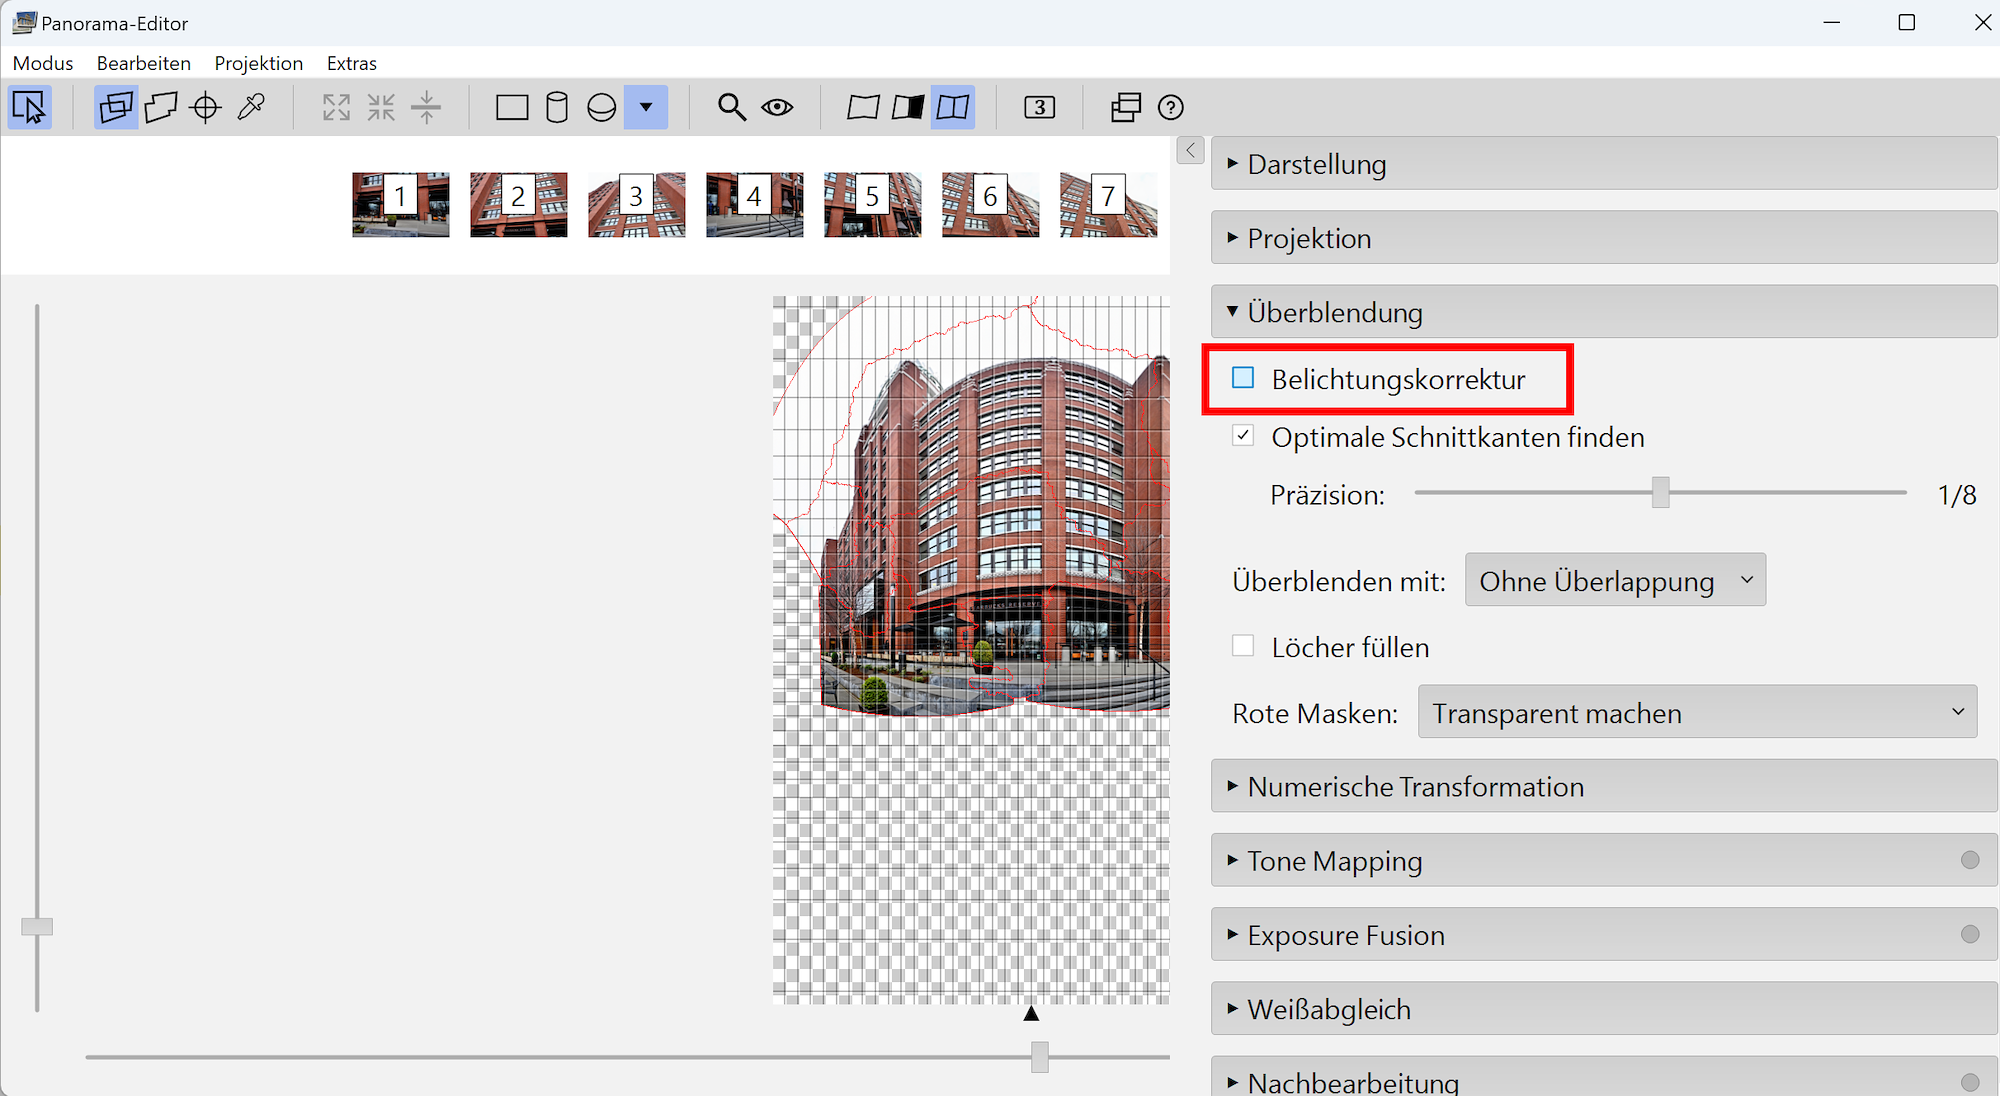
Once all correction are applied, the option to correct exposure in the Blending option in PTGui needs to be changed from enabled
to disabled:
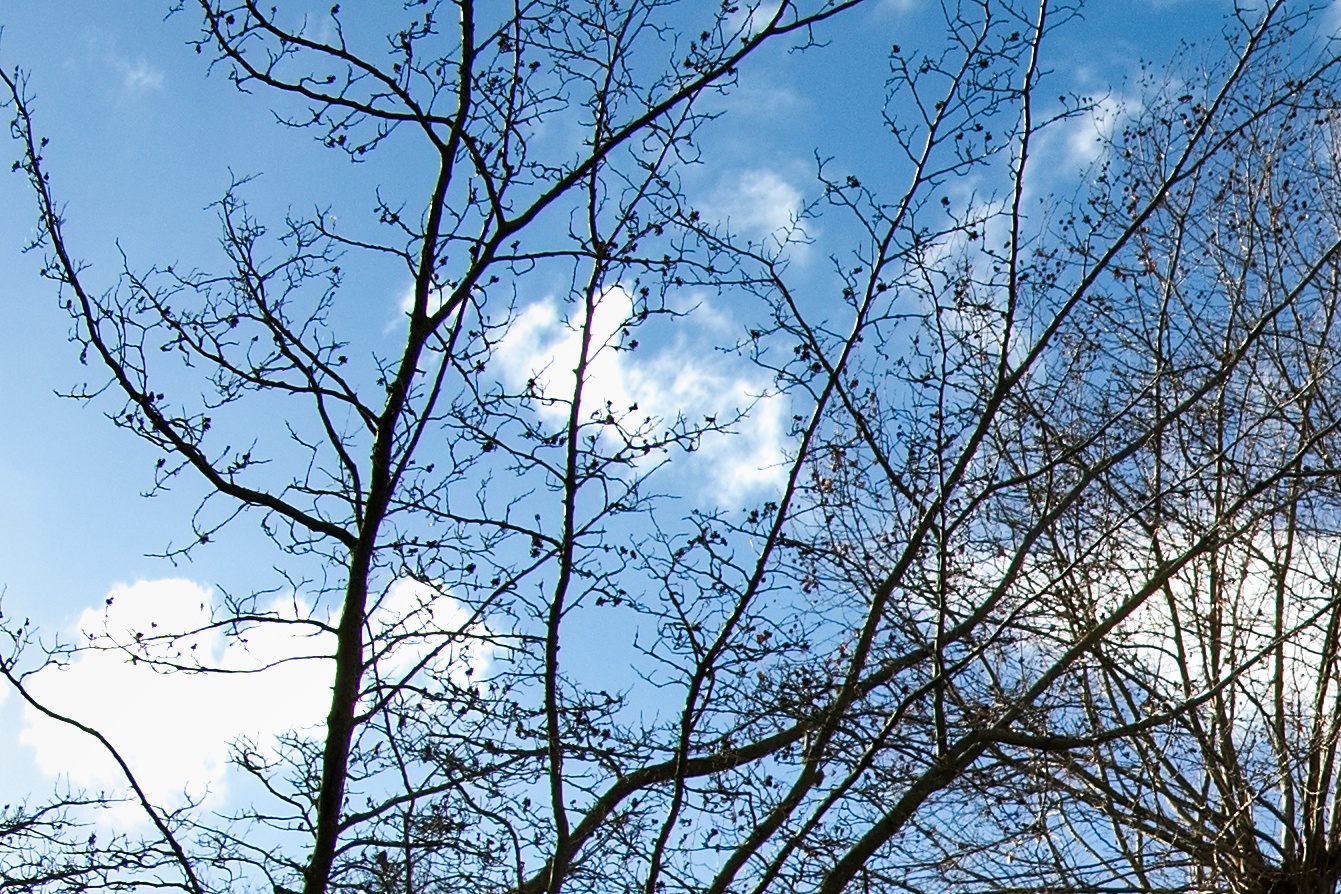
The pictures were aligned using the auto control point feature in PTGui. Only a few vertical control points were added.
Using the Equirectangular projection:
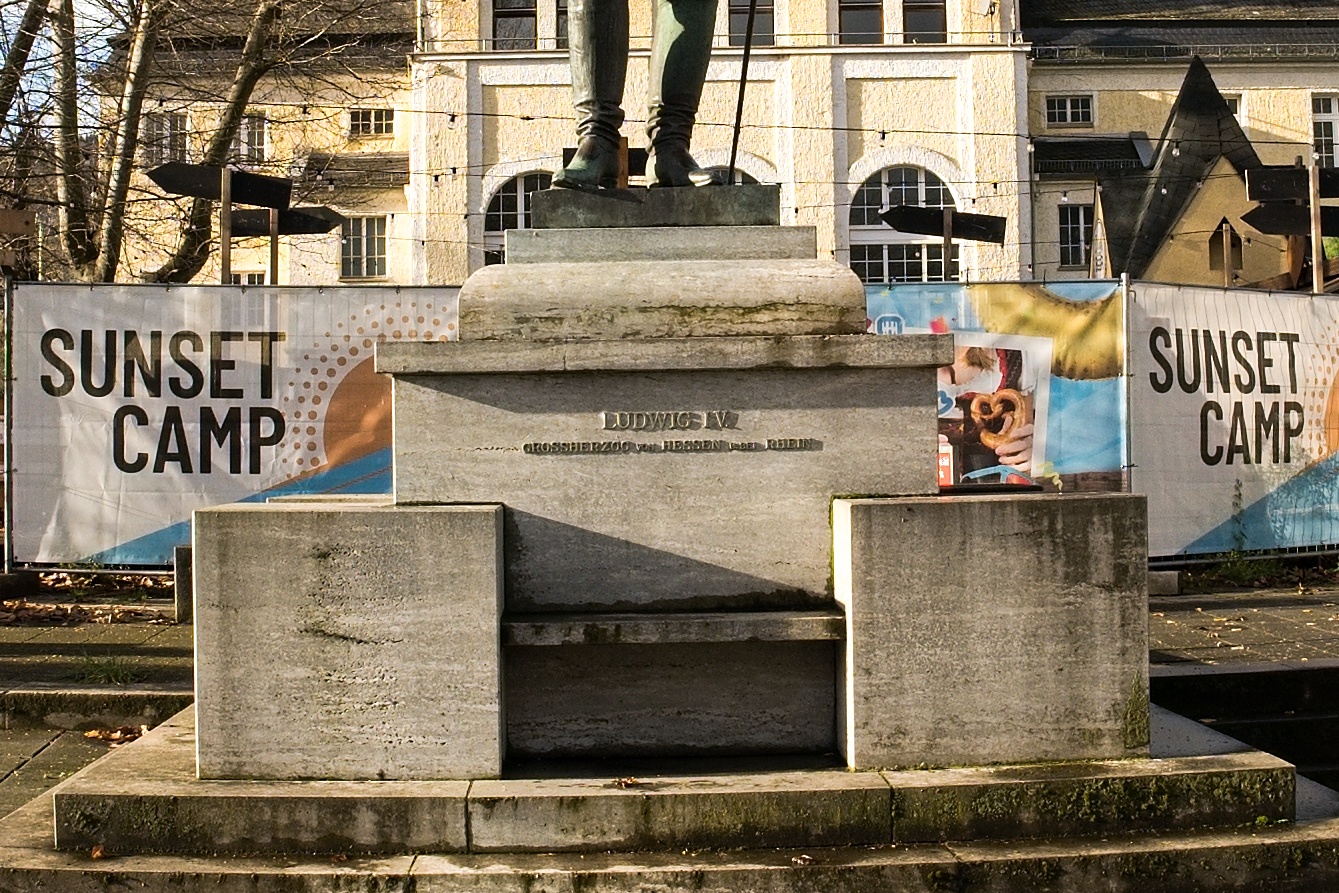
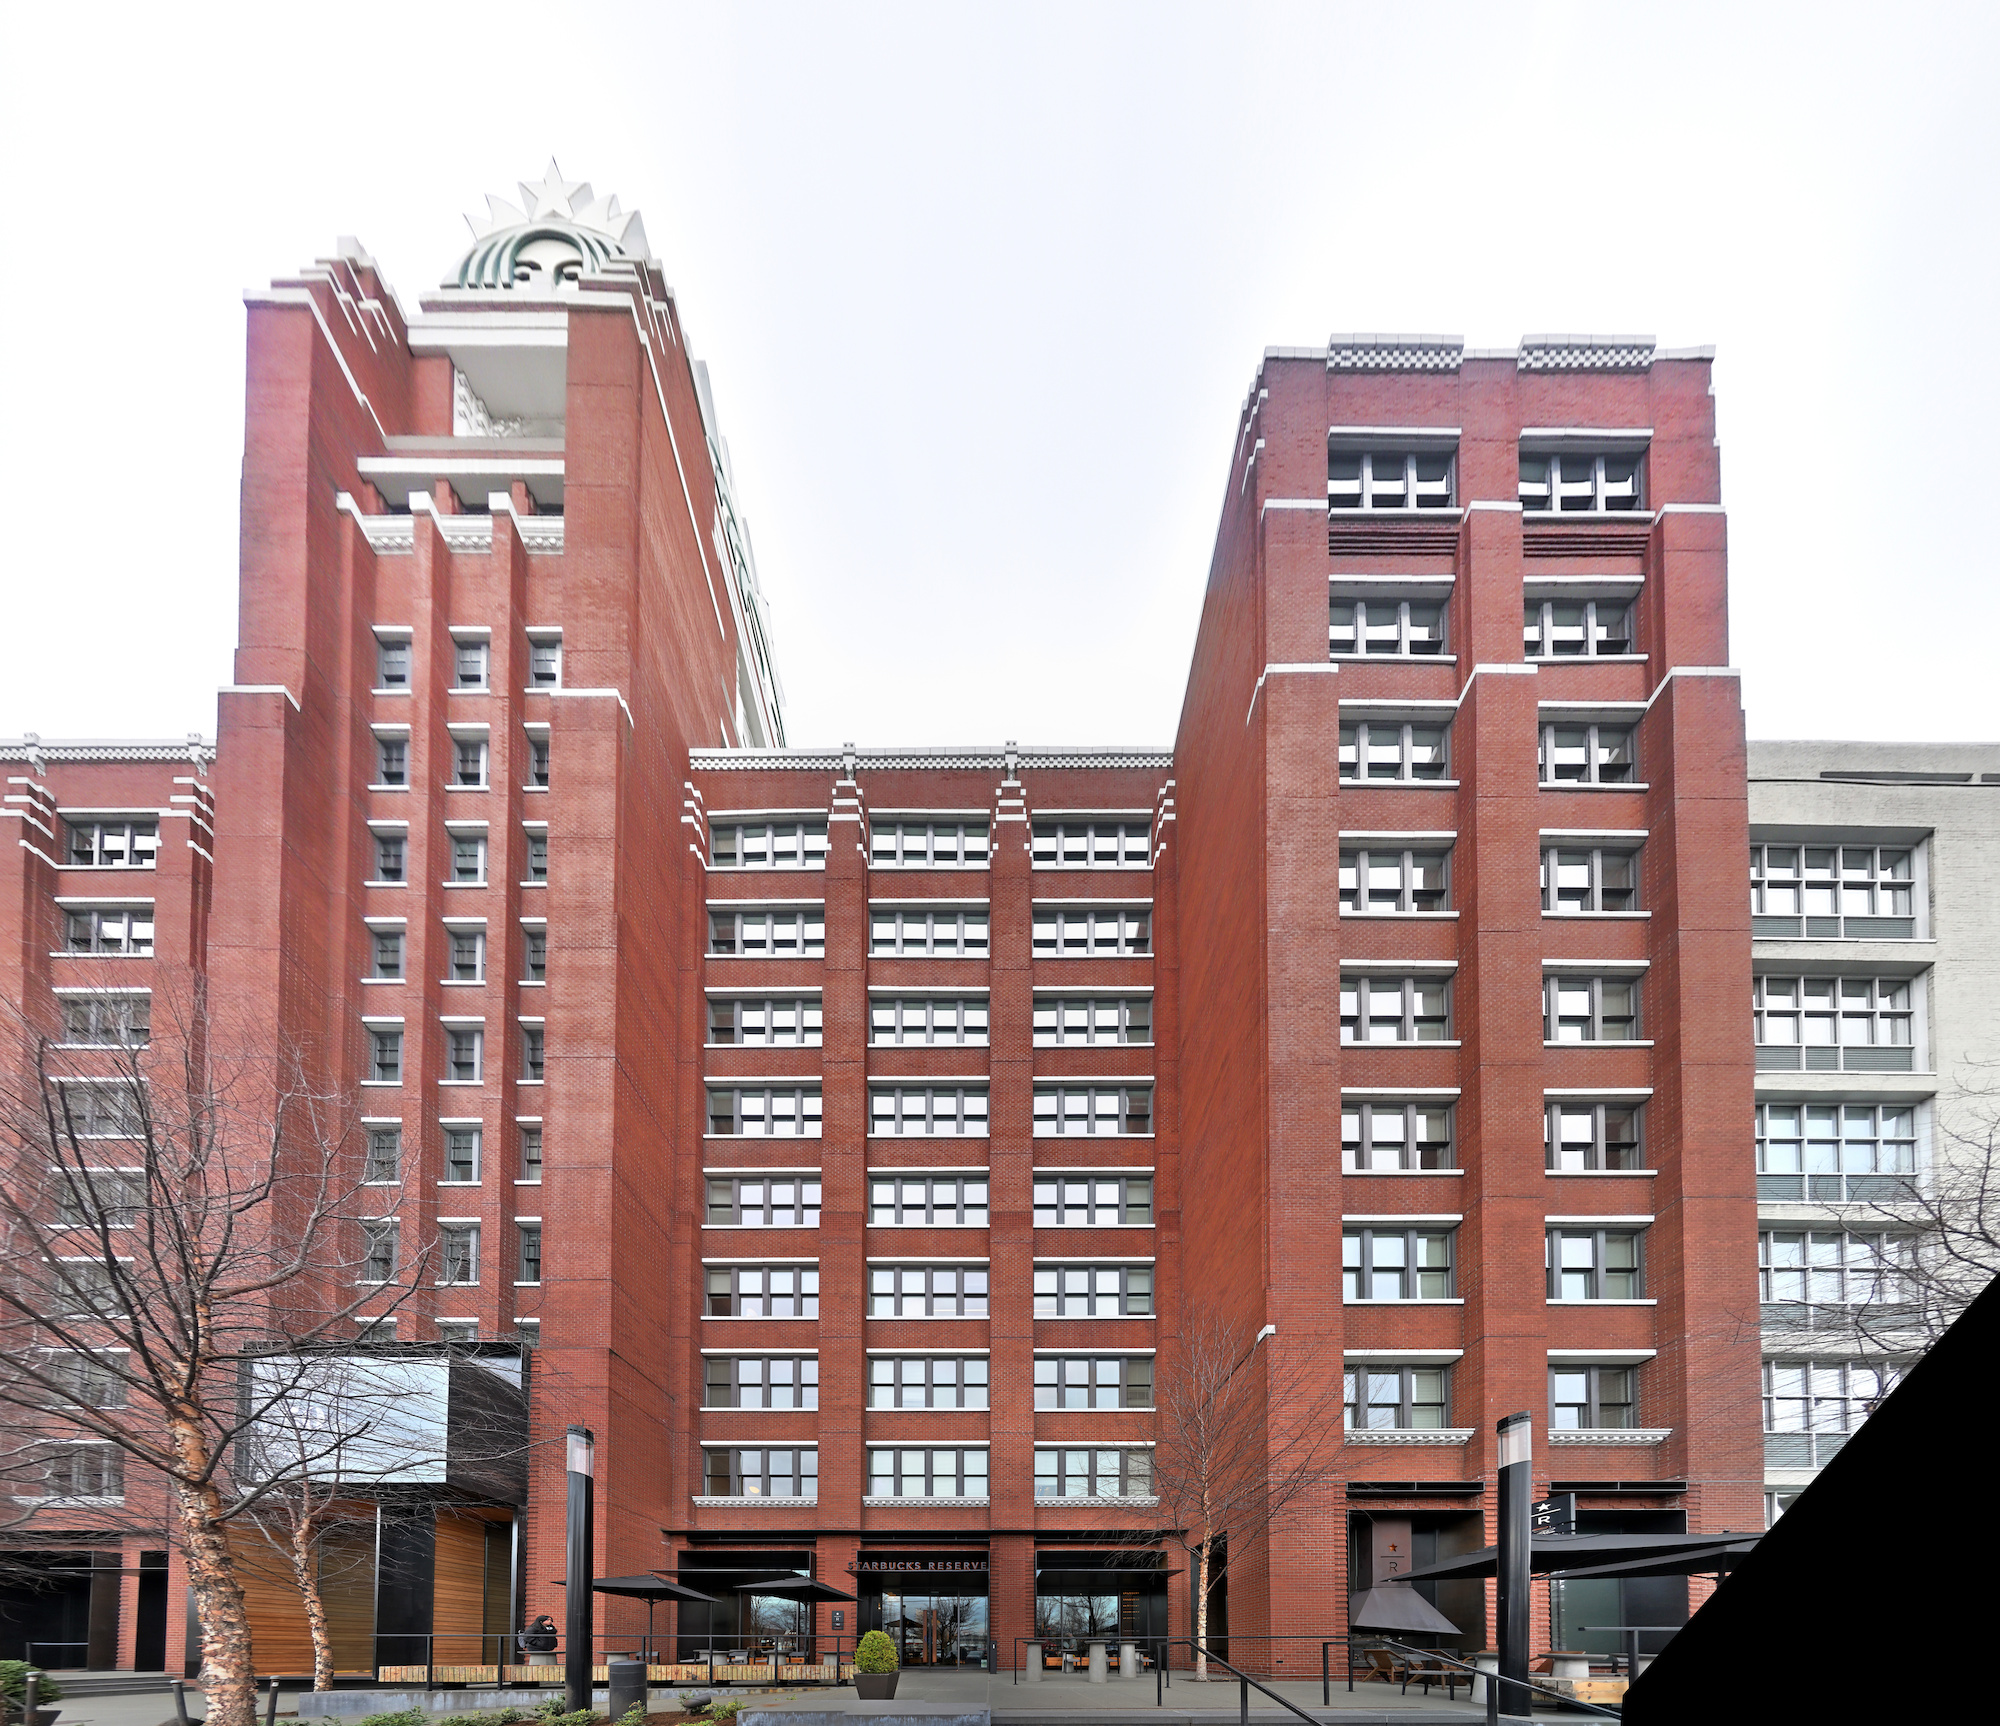
Using the Rectilinear projection.
Note the Company logo on top of the left tower:
Panorama outside, ☕🥧🥐 inside
The most common Panotools projections are Equirectangular to make interactive 360°x180° panoramas and Rectilinear to fix distortions of photos. But what about the others?
With a small Field of View (FoV) the difference isn't that obvious, but with a large Field of View things change quite a bit.
Imagine yourself standing in front of a large object and try to take a photo. Using a wide angle lens will get you visible distortions once you go above 100° FoV because of the Rectilinear projection.
Here is where the other projections come into place to map large Field of View objects to a print.
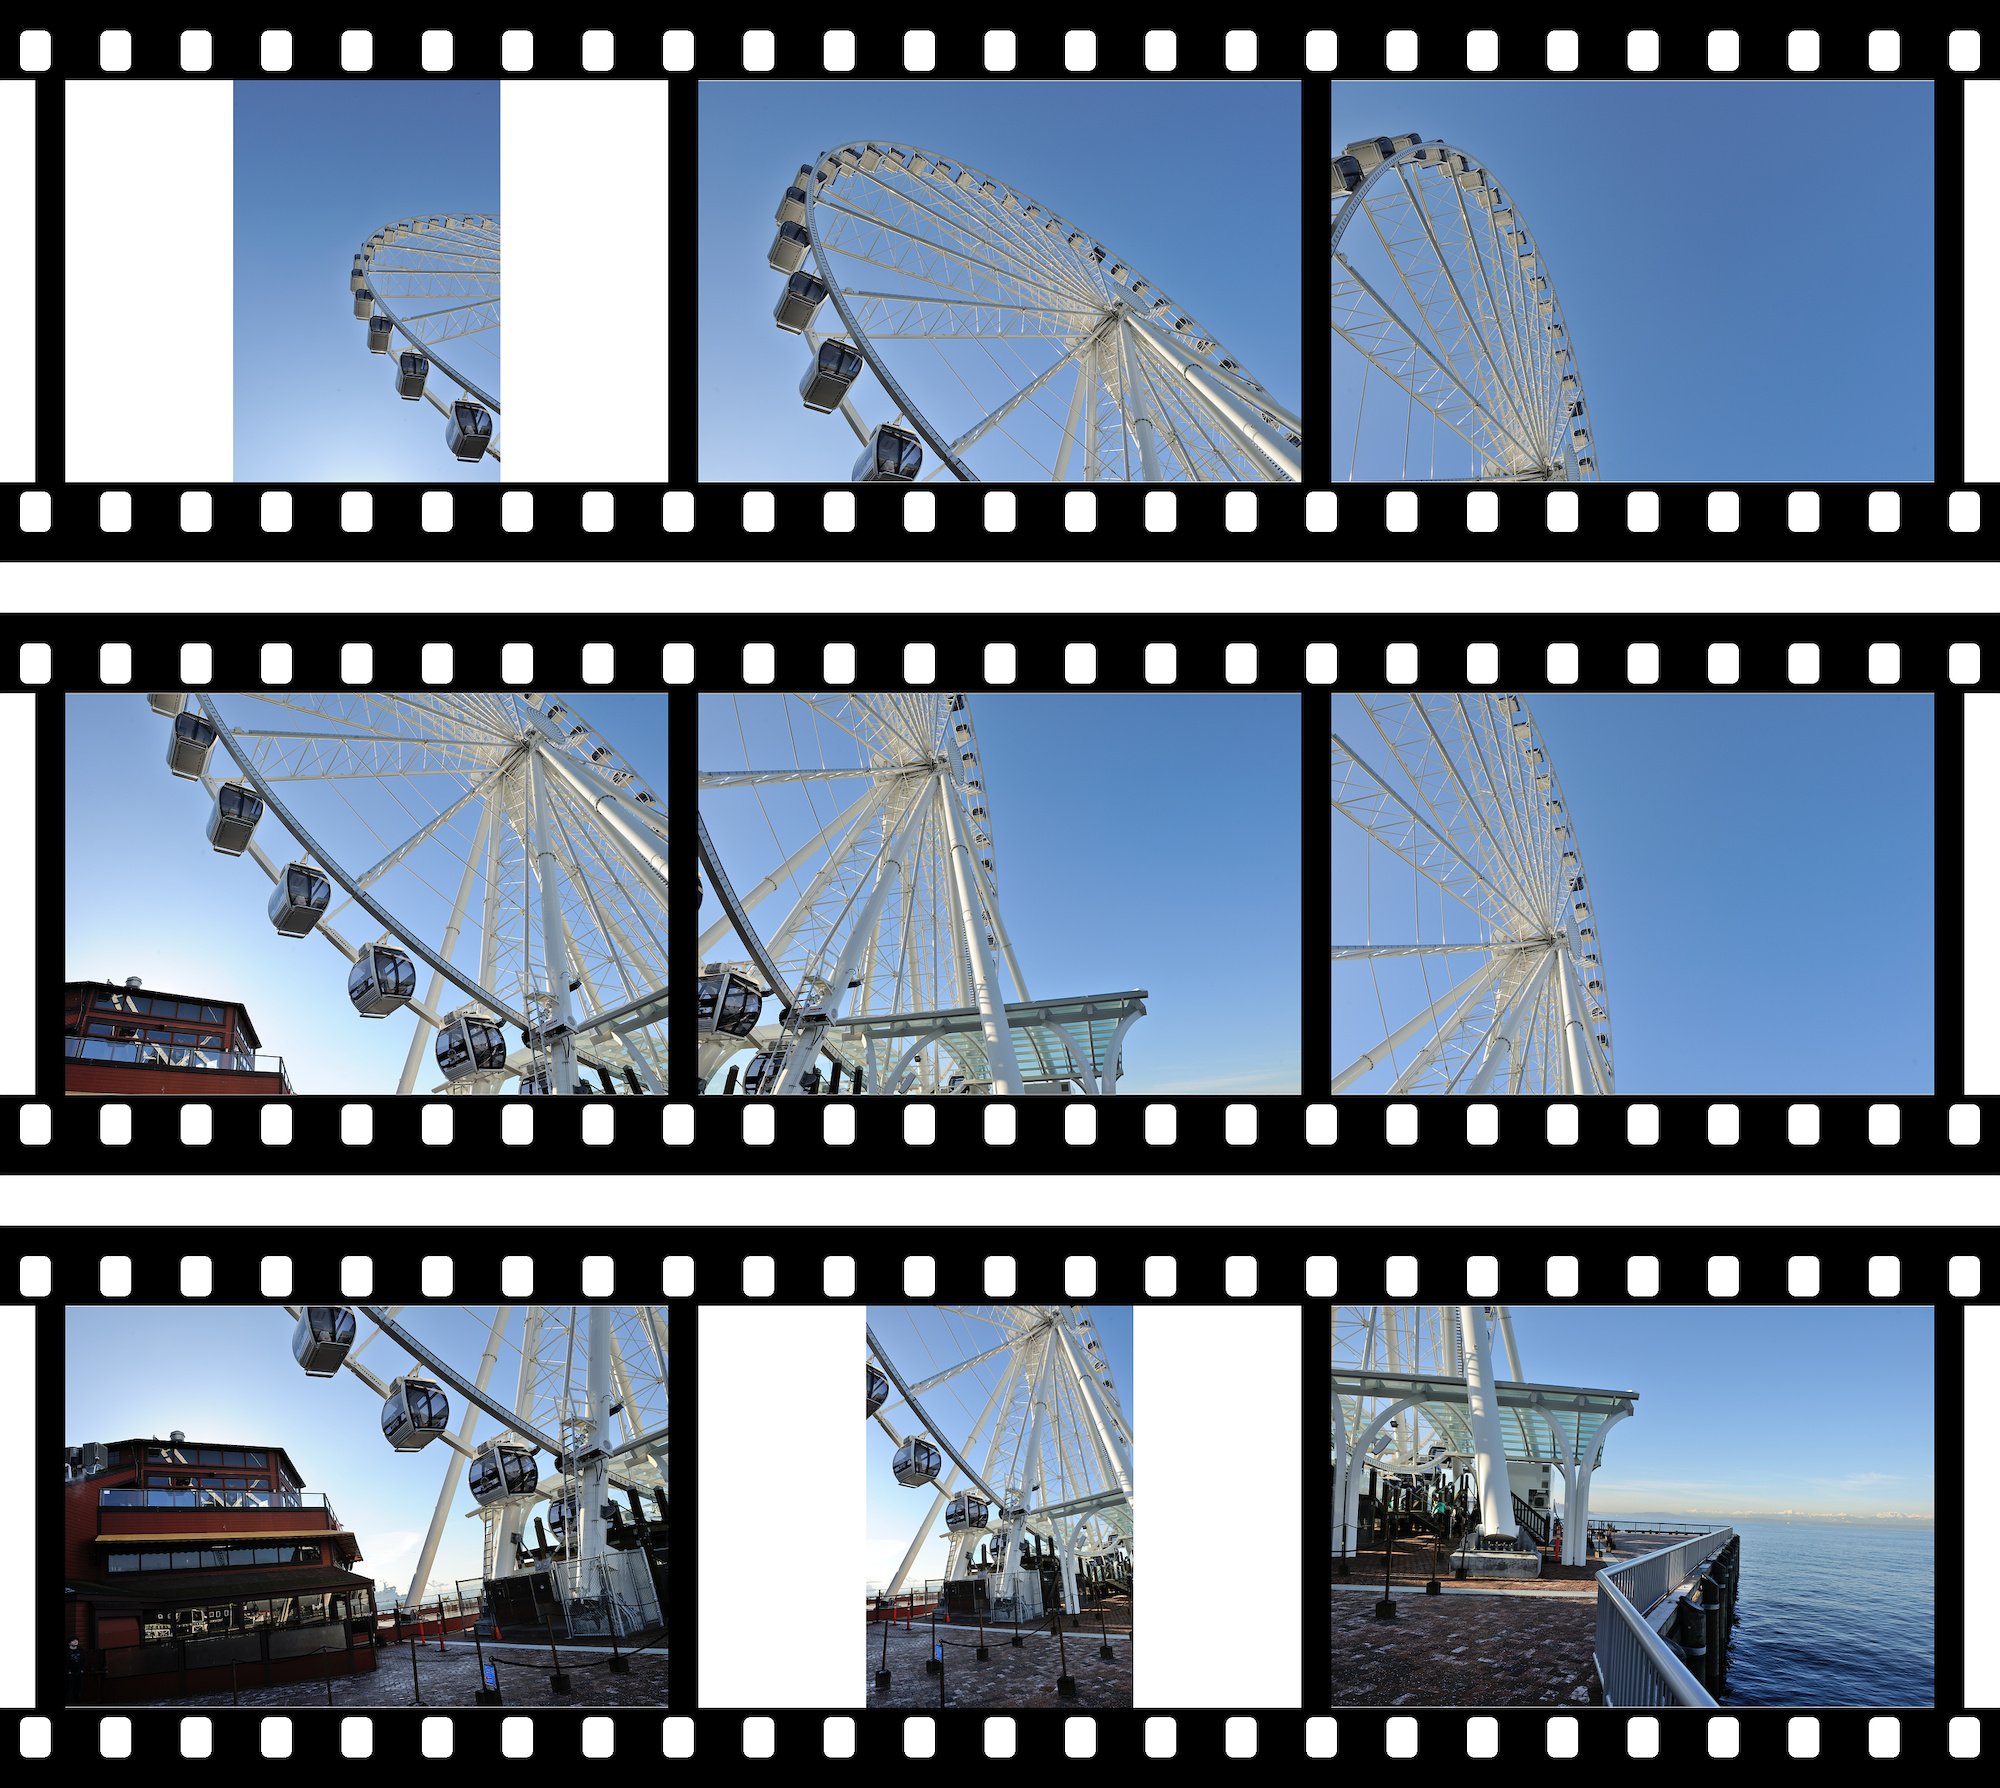
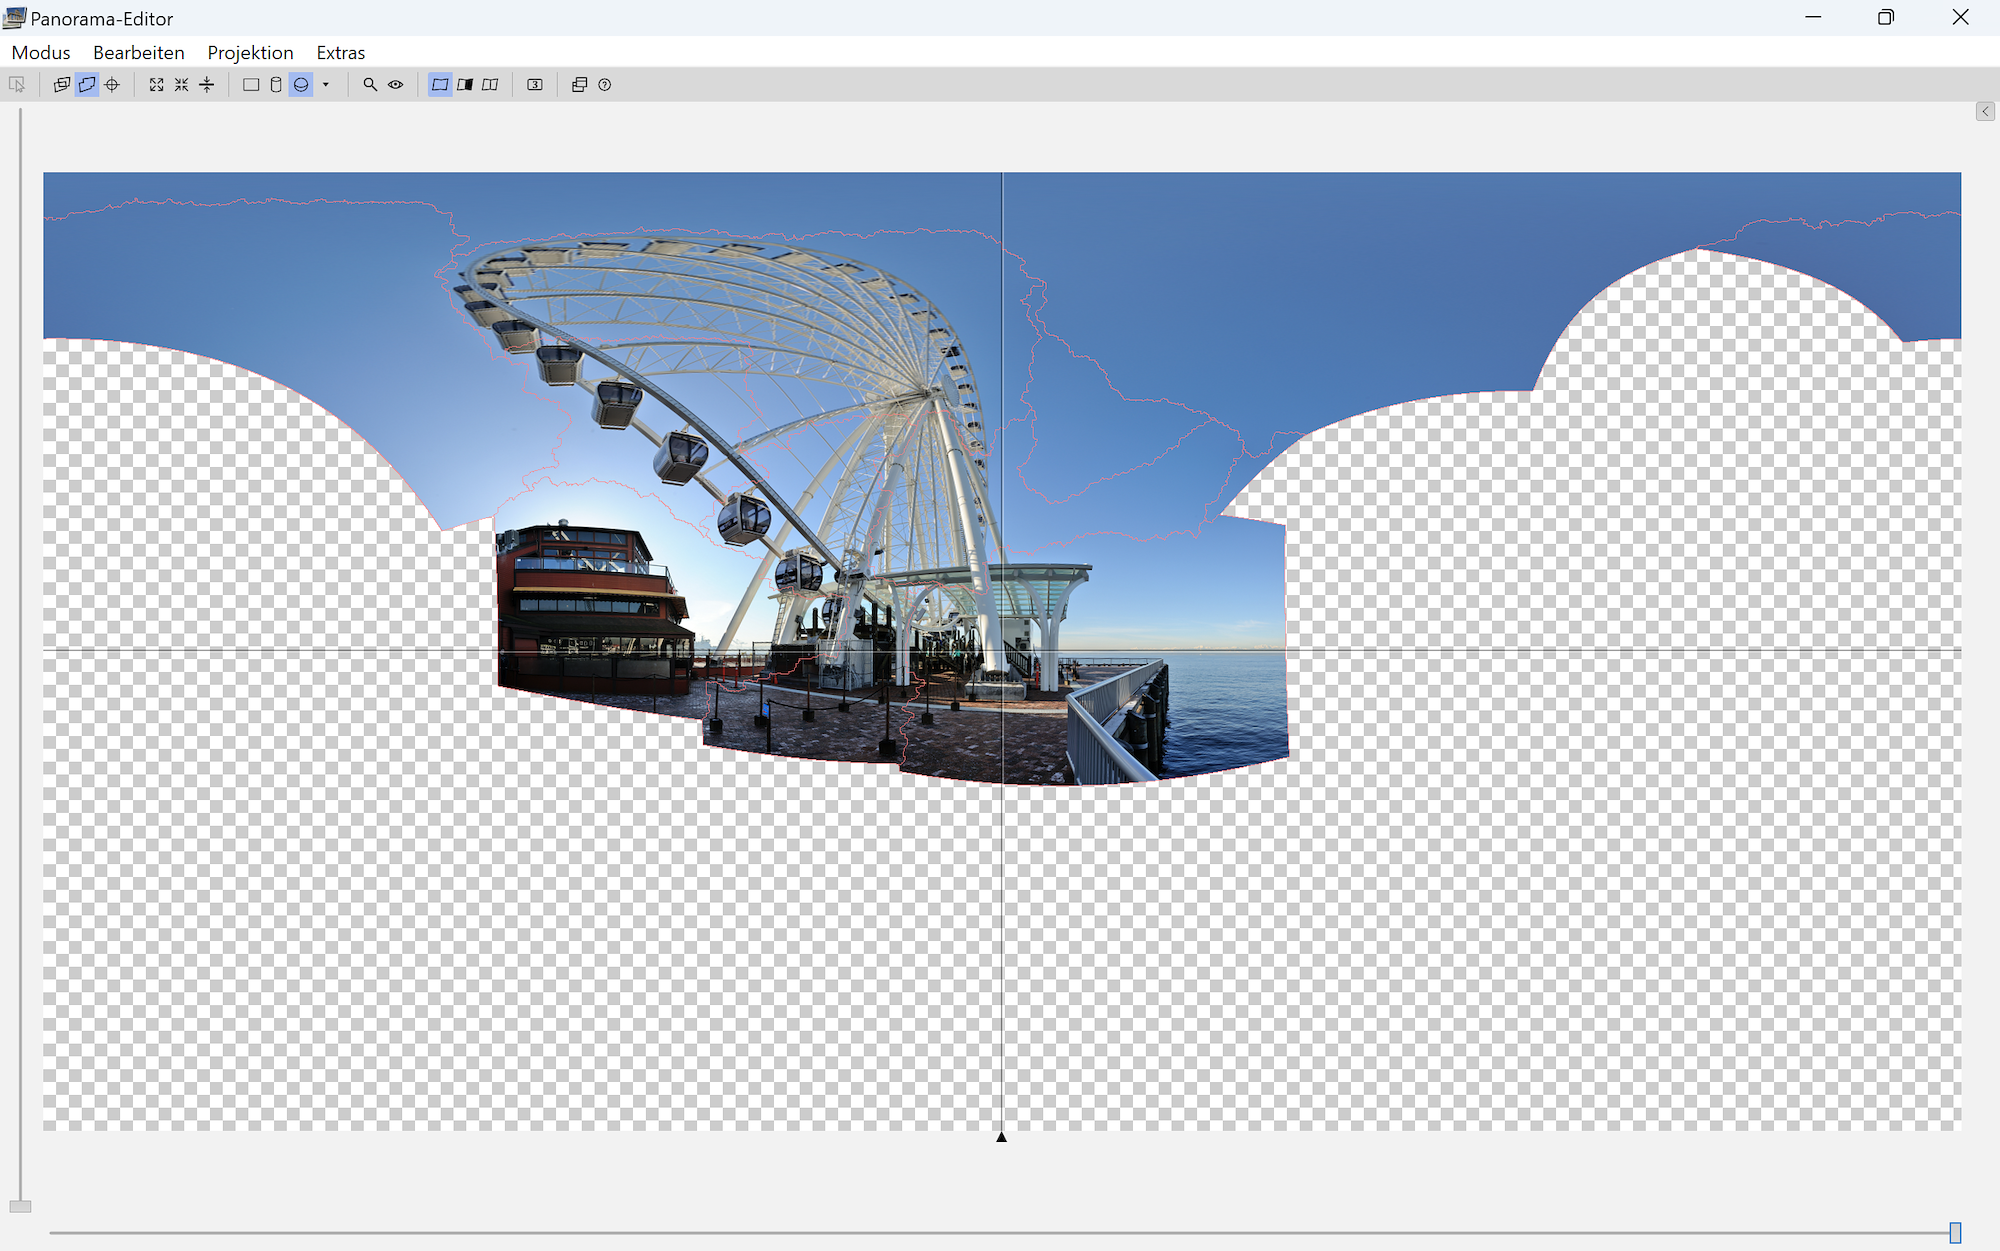
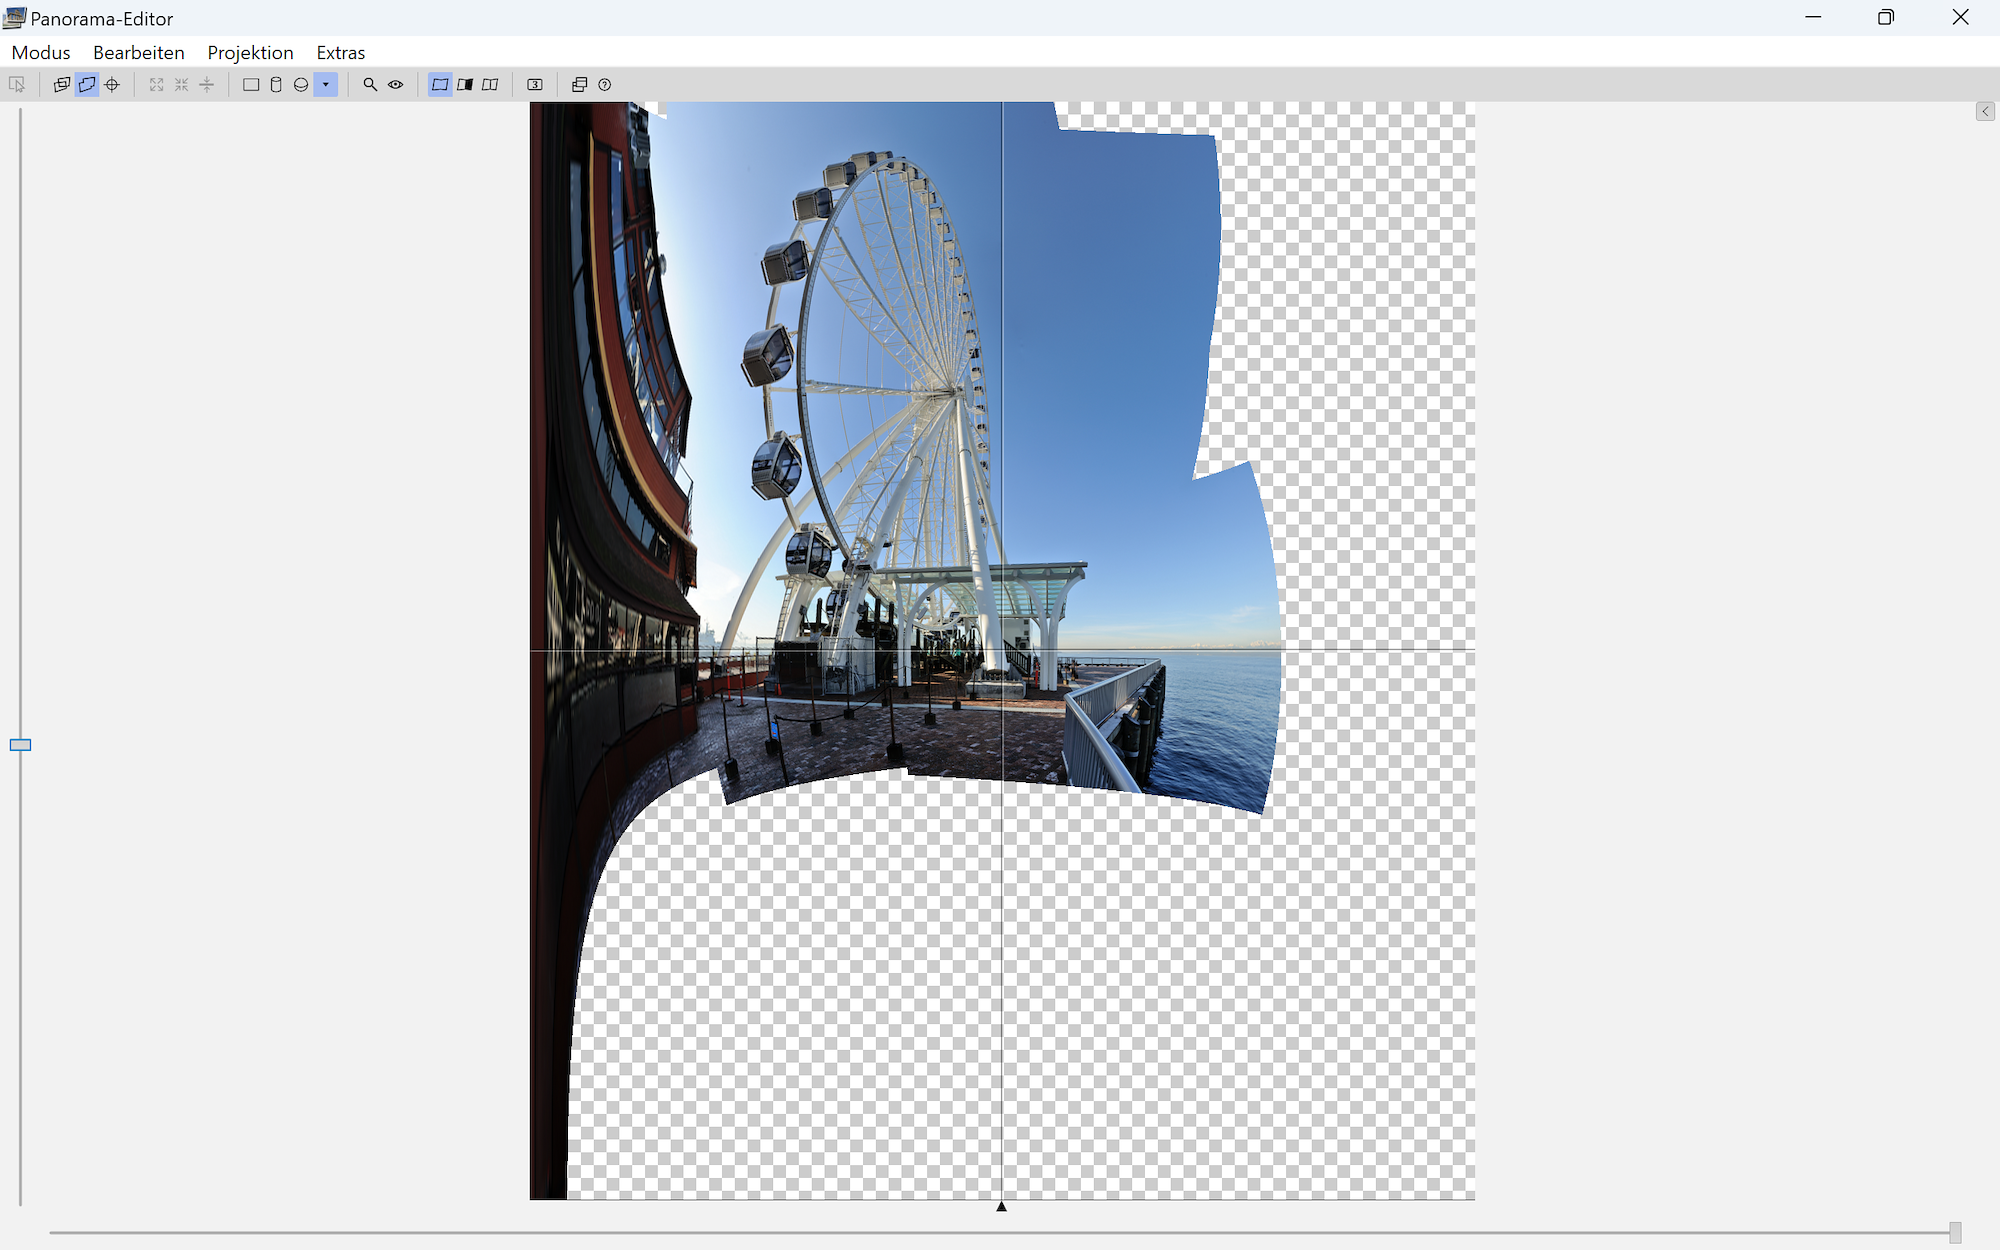
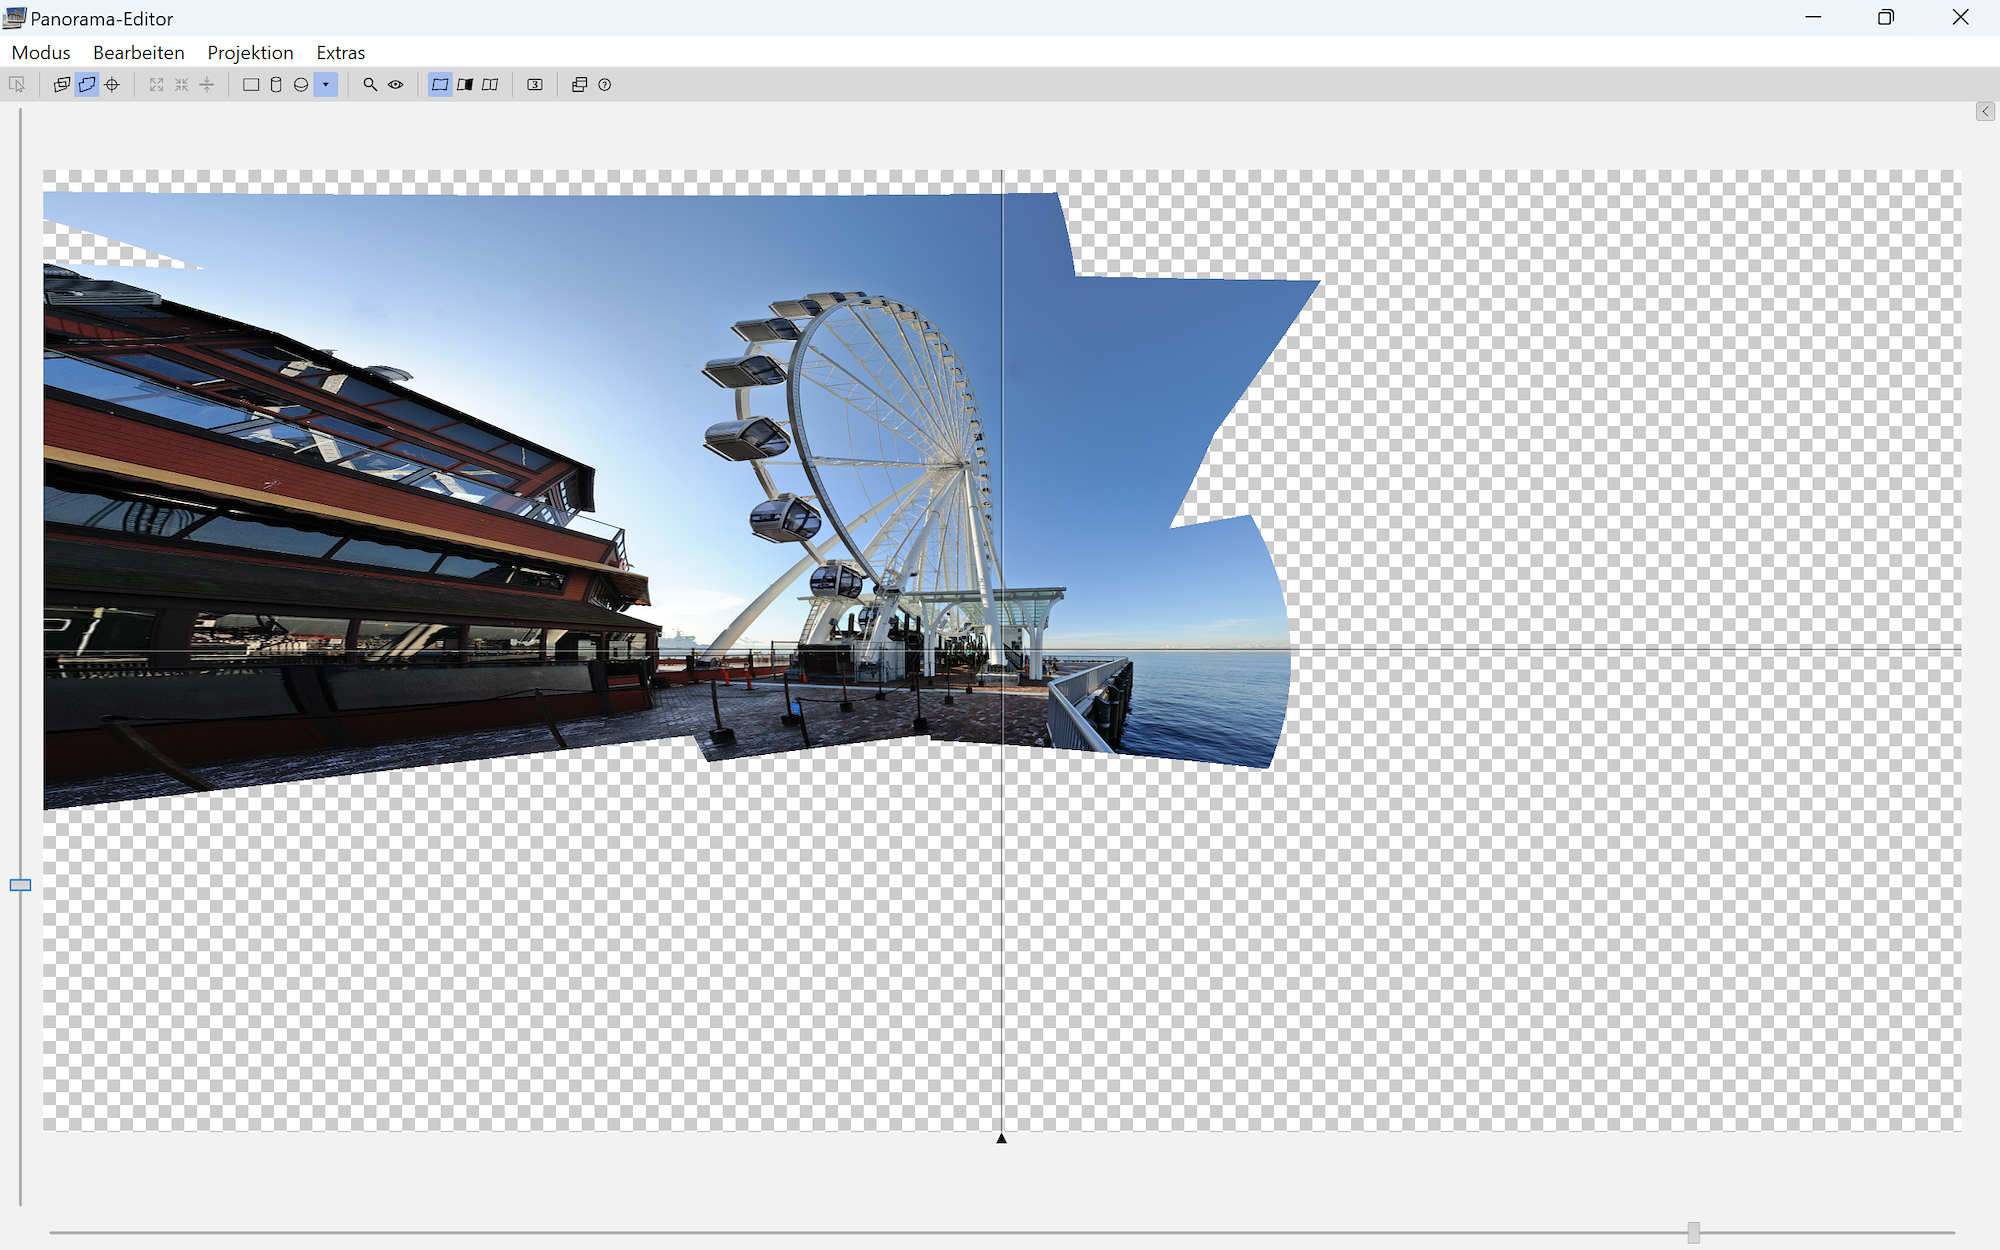
This is an example of an extreme Field of View, standing right in front of a Ferris Wheel
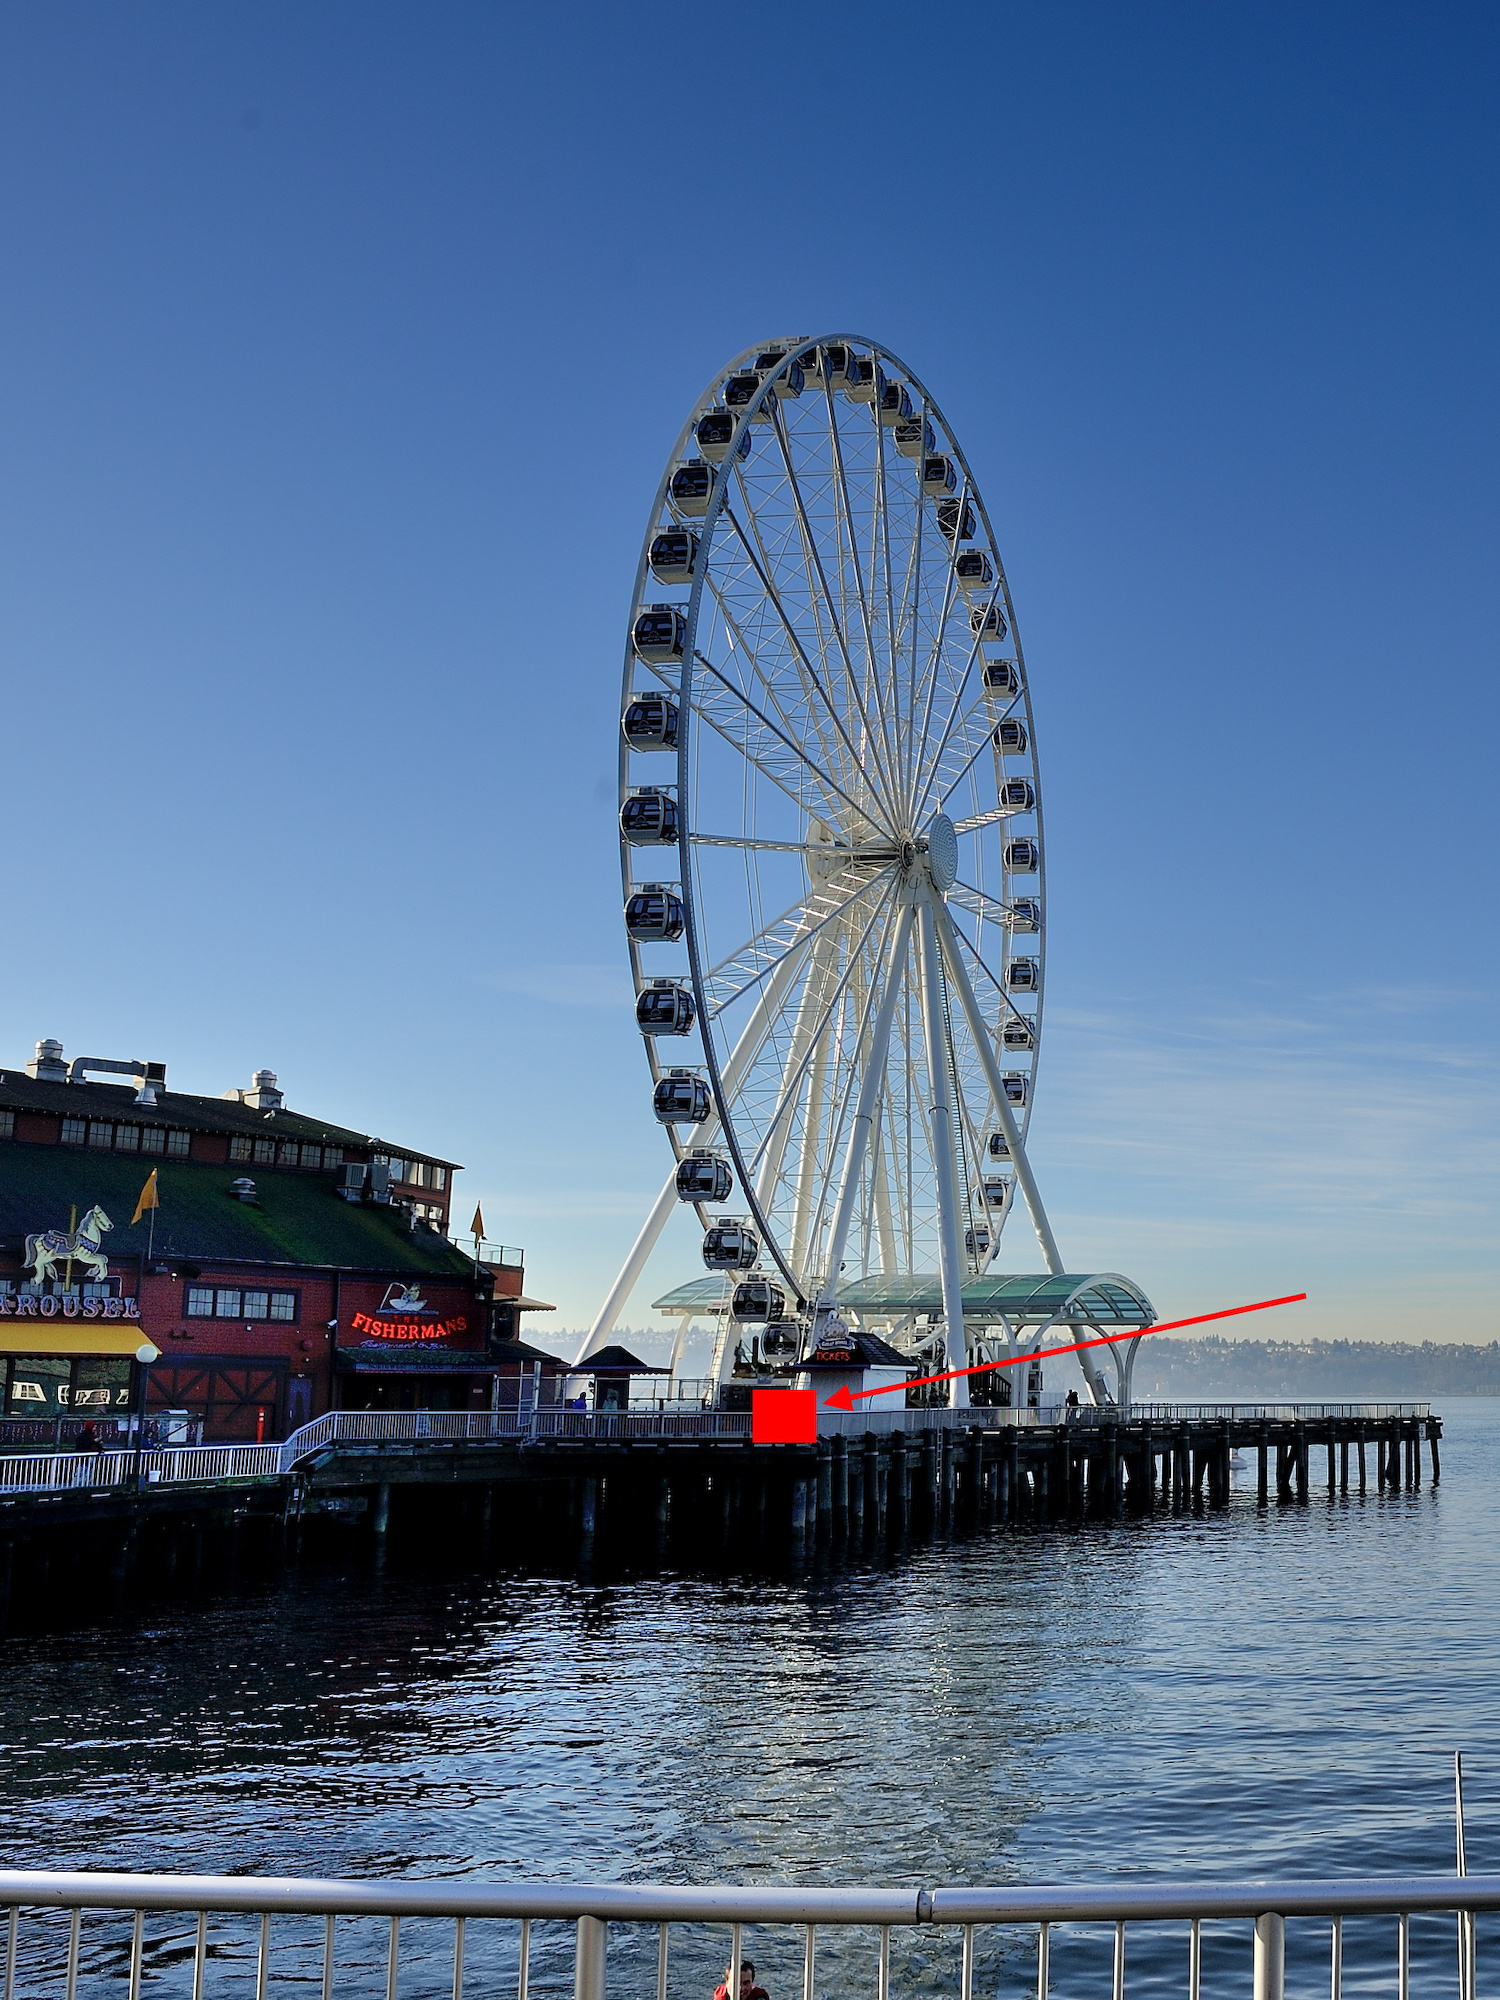
and taking several pictures using a 24mm lens:
There is no perfect print projection for this, but depending on the purpose, one of the Panotools projections supported by PTGui might do the trick. On the other hand, using an interactive panoramic viewer working off an Equirectangular projection will render a Rectilinear output in the viewer window. Close to perfect as possible, but not printable as one complete unit.
Here is a list of the projections and their appearance for extreme FoV.
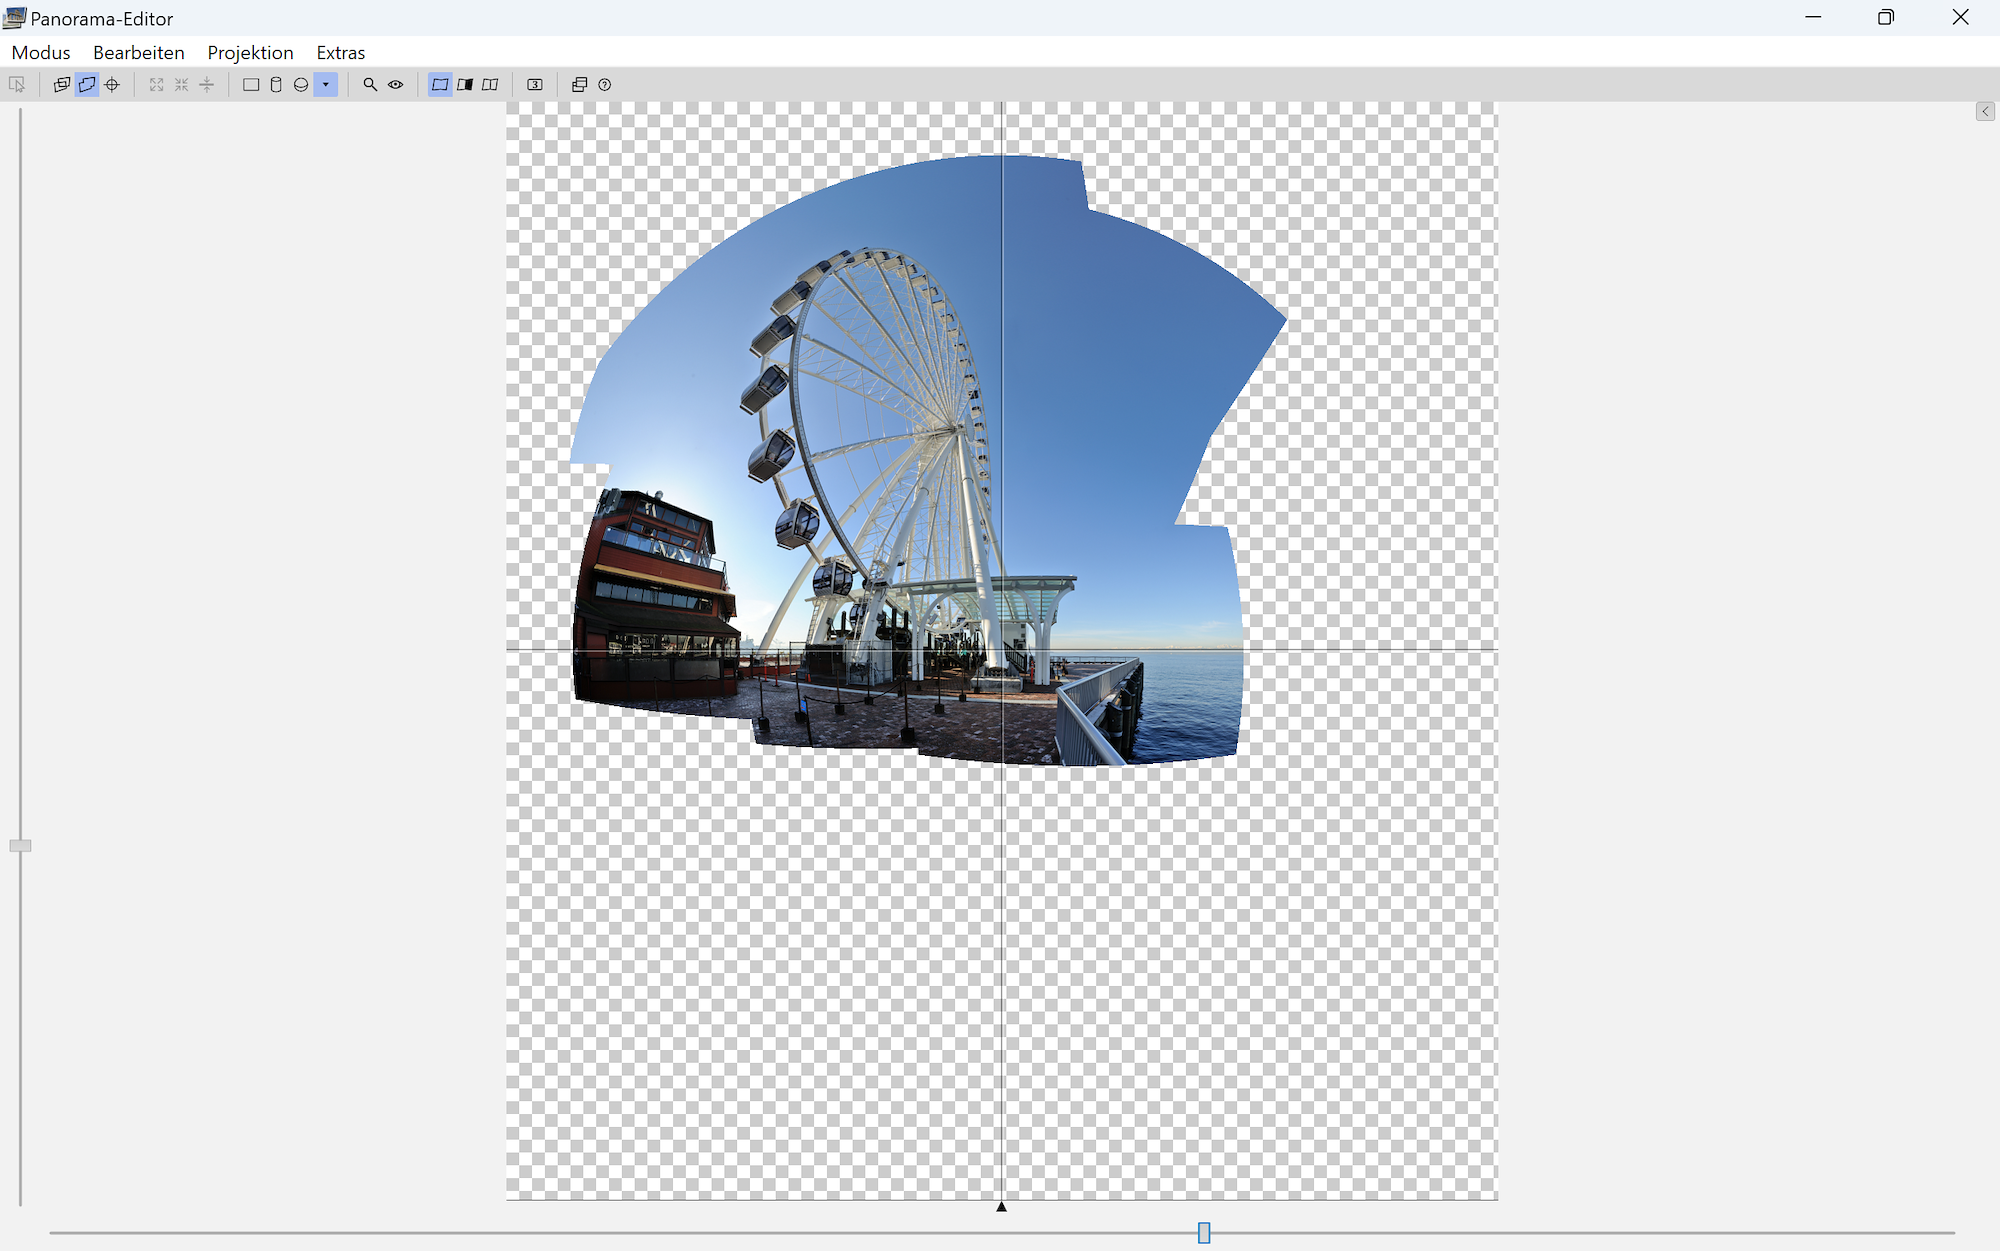
Stereographic
Projection of a sphere to a plane. Angles are preserved, but distances and figures are distorted.

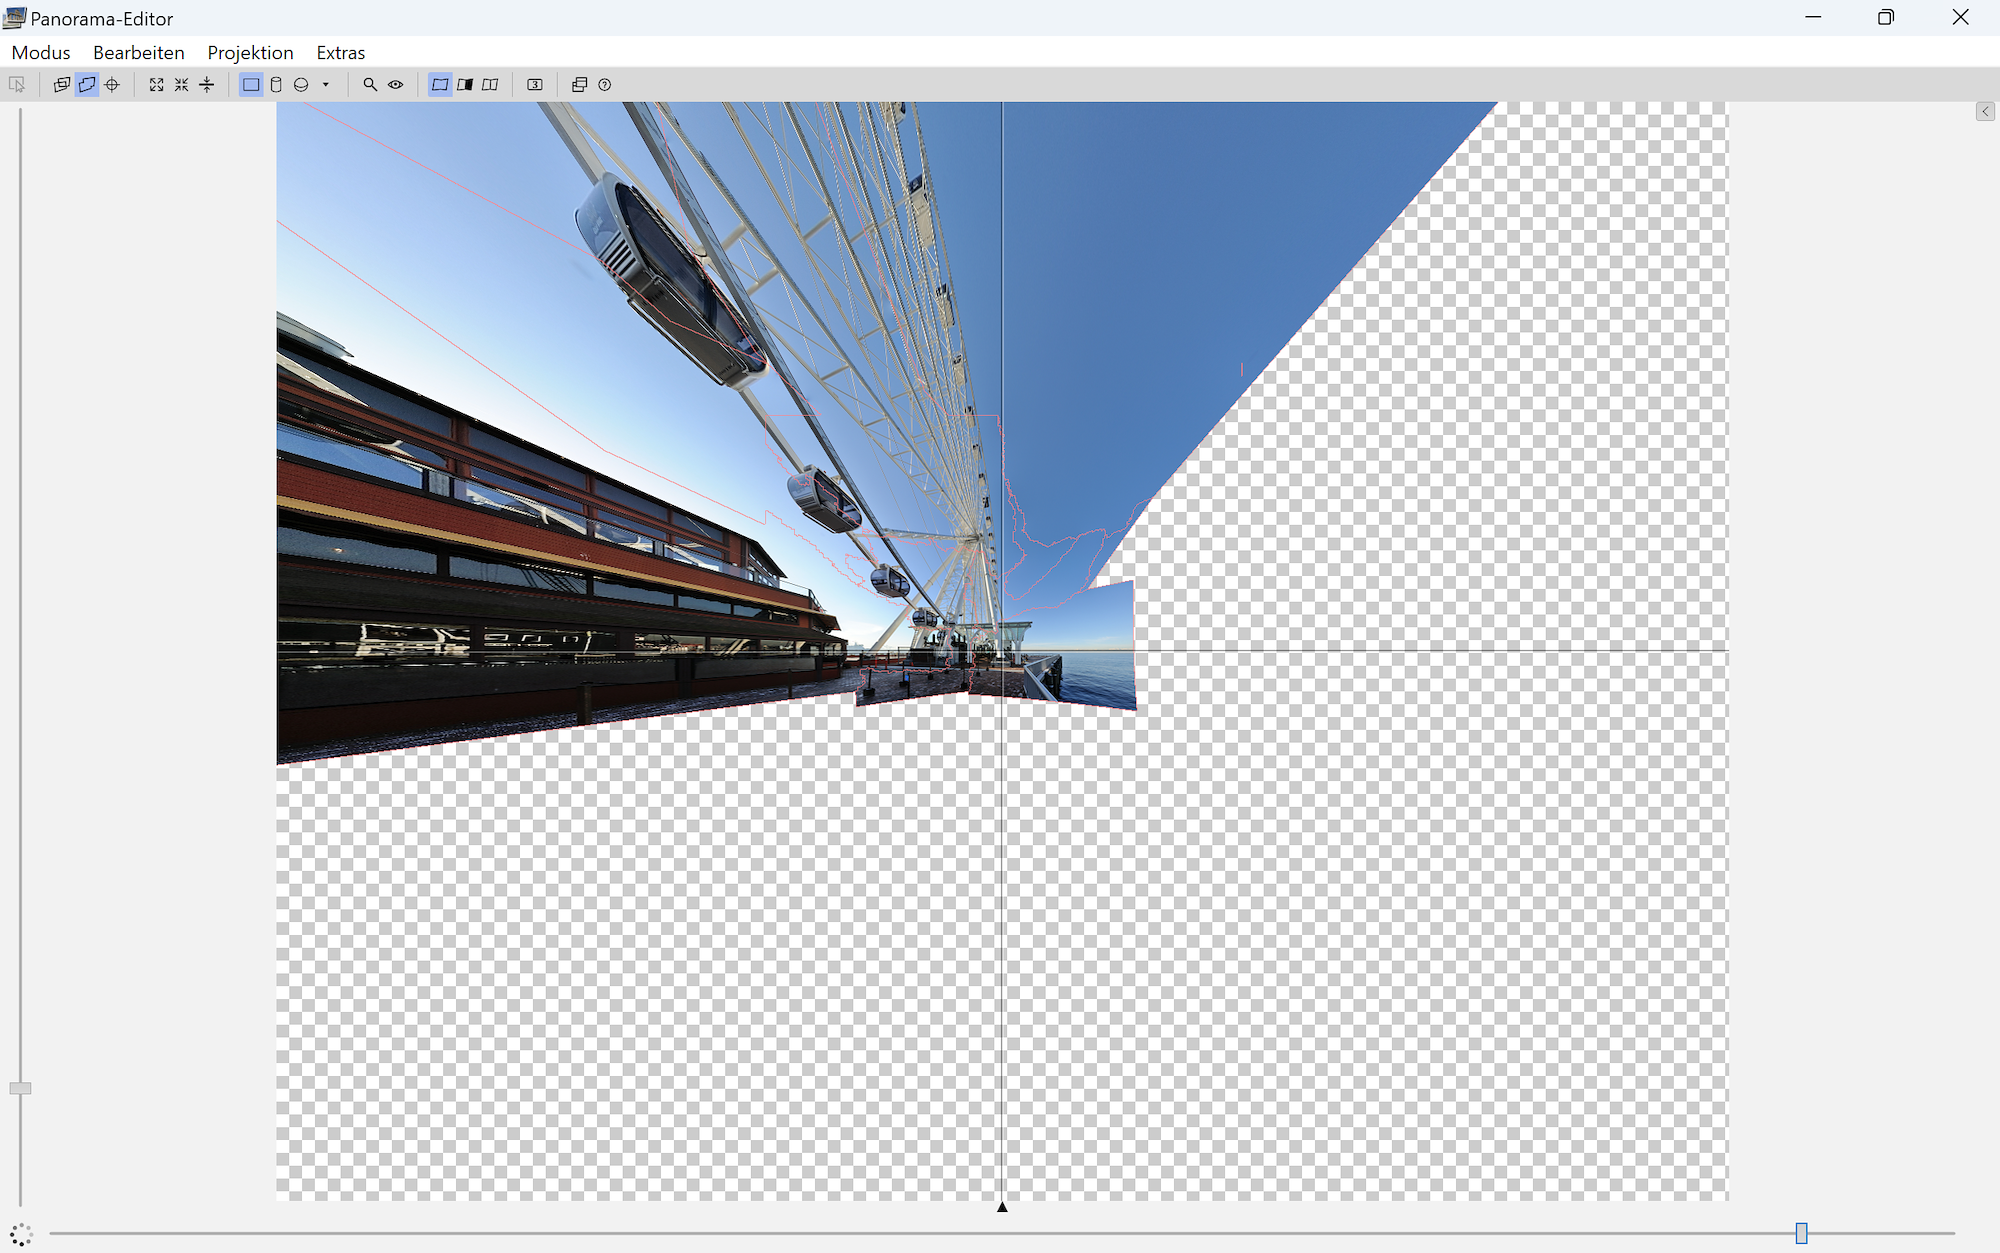
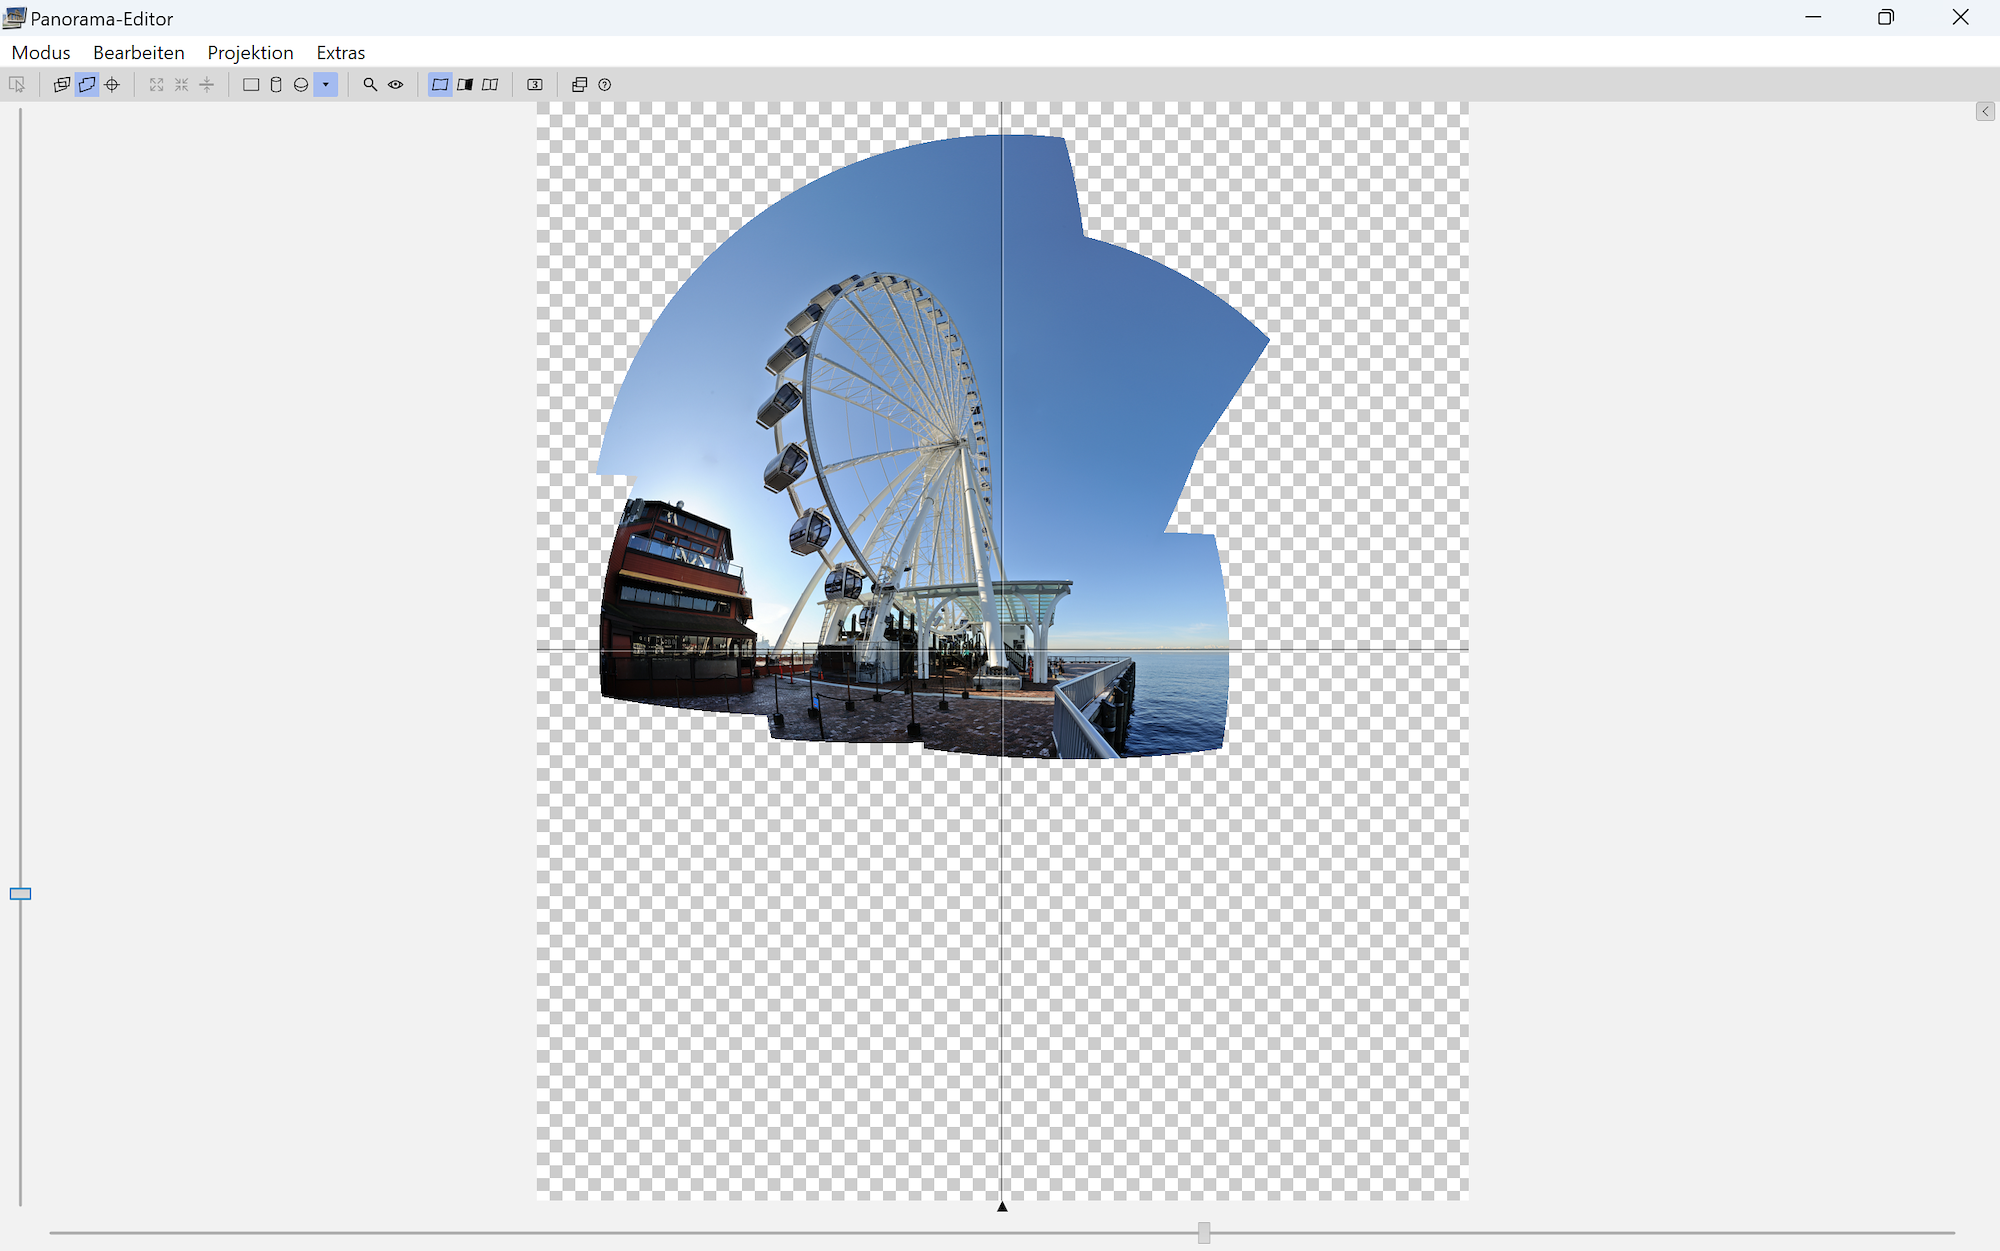
Rectilinear
The projection of a standard camera lens and has progressive visible distortion for increasing Field of View.
Vertical and horizontal lines are preserved.
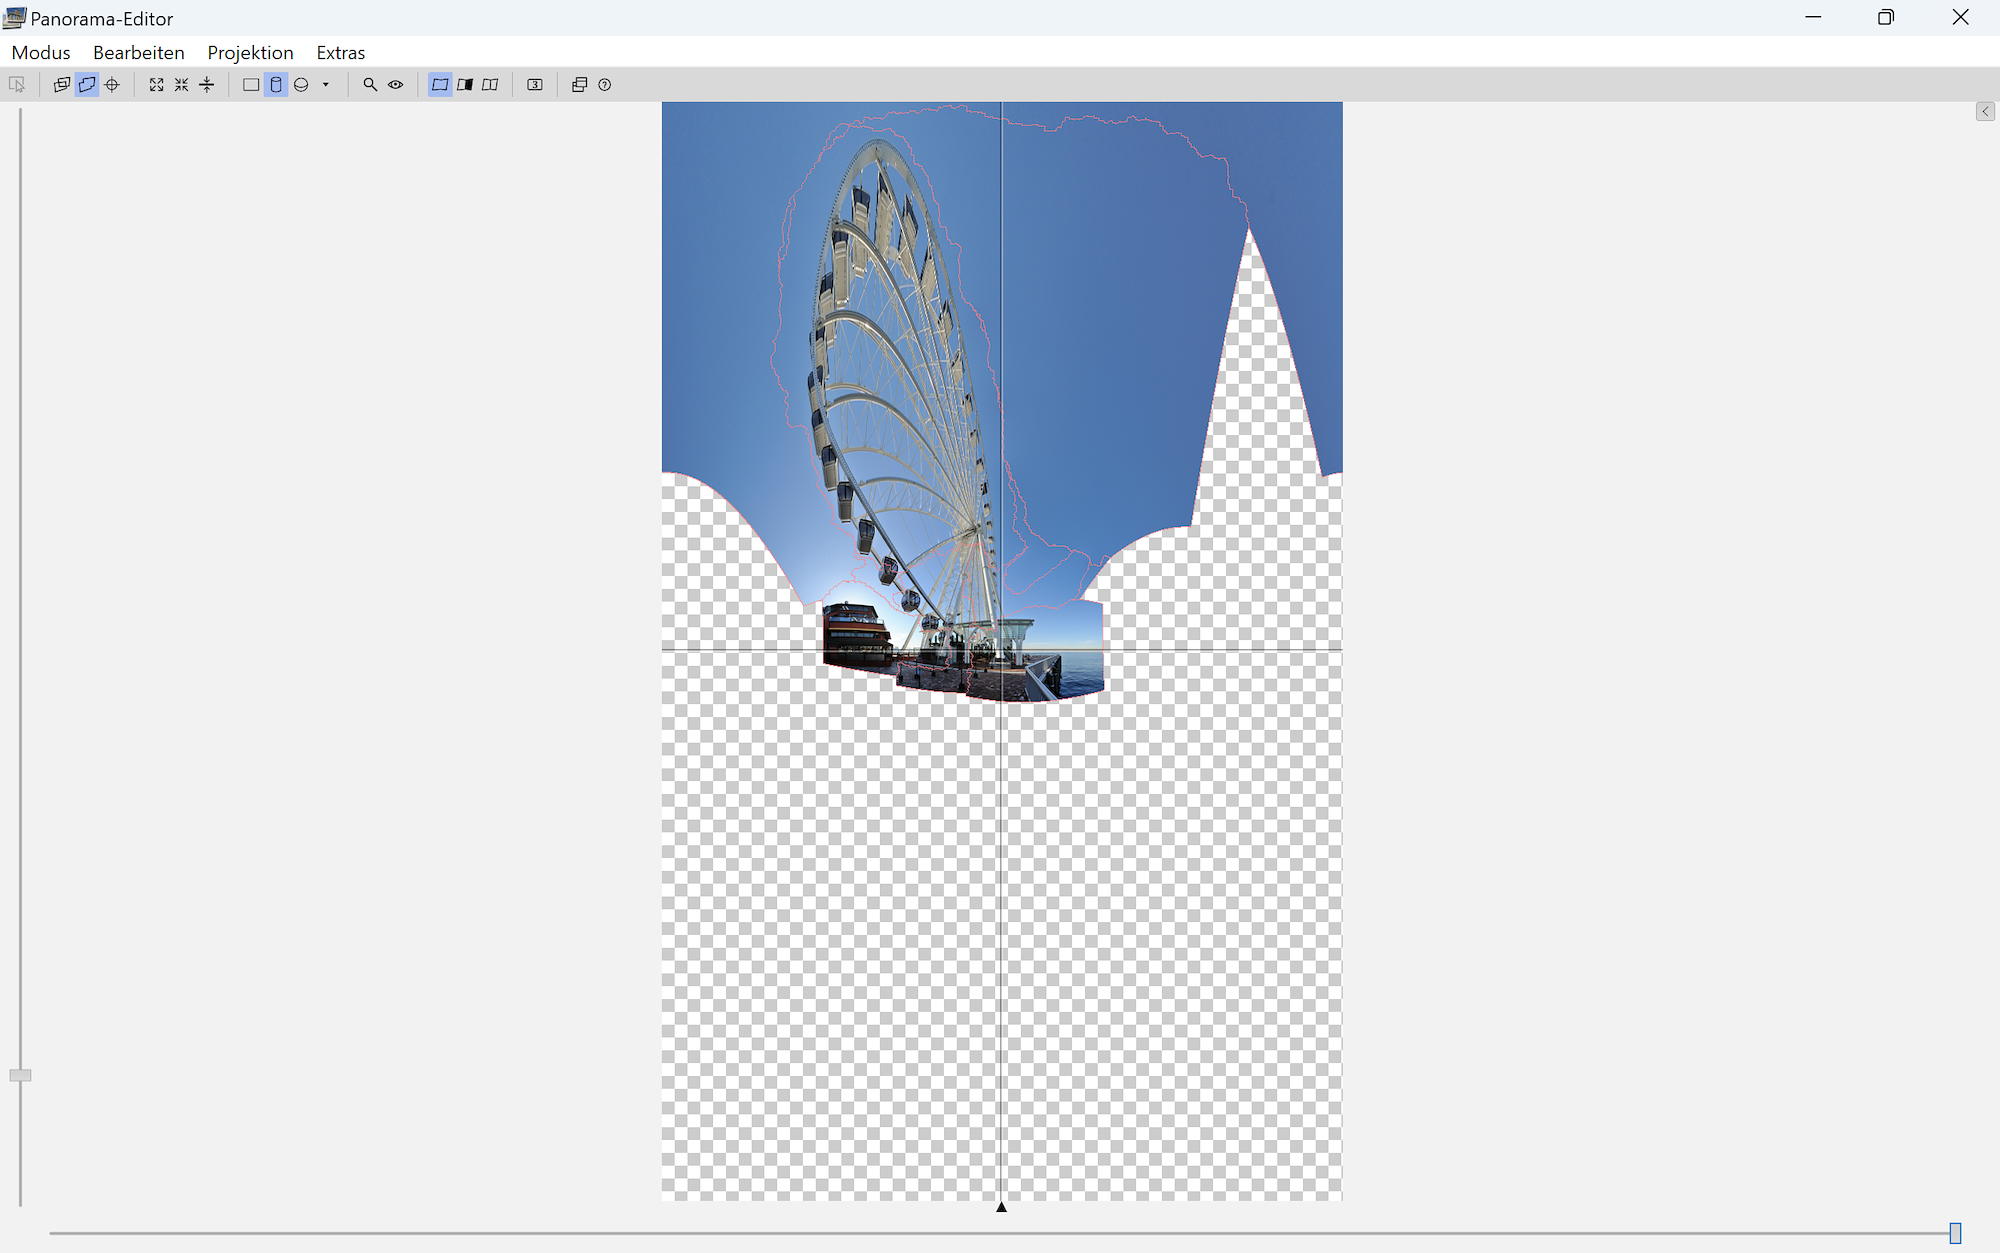
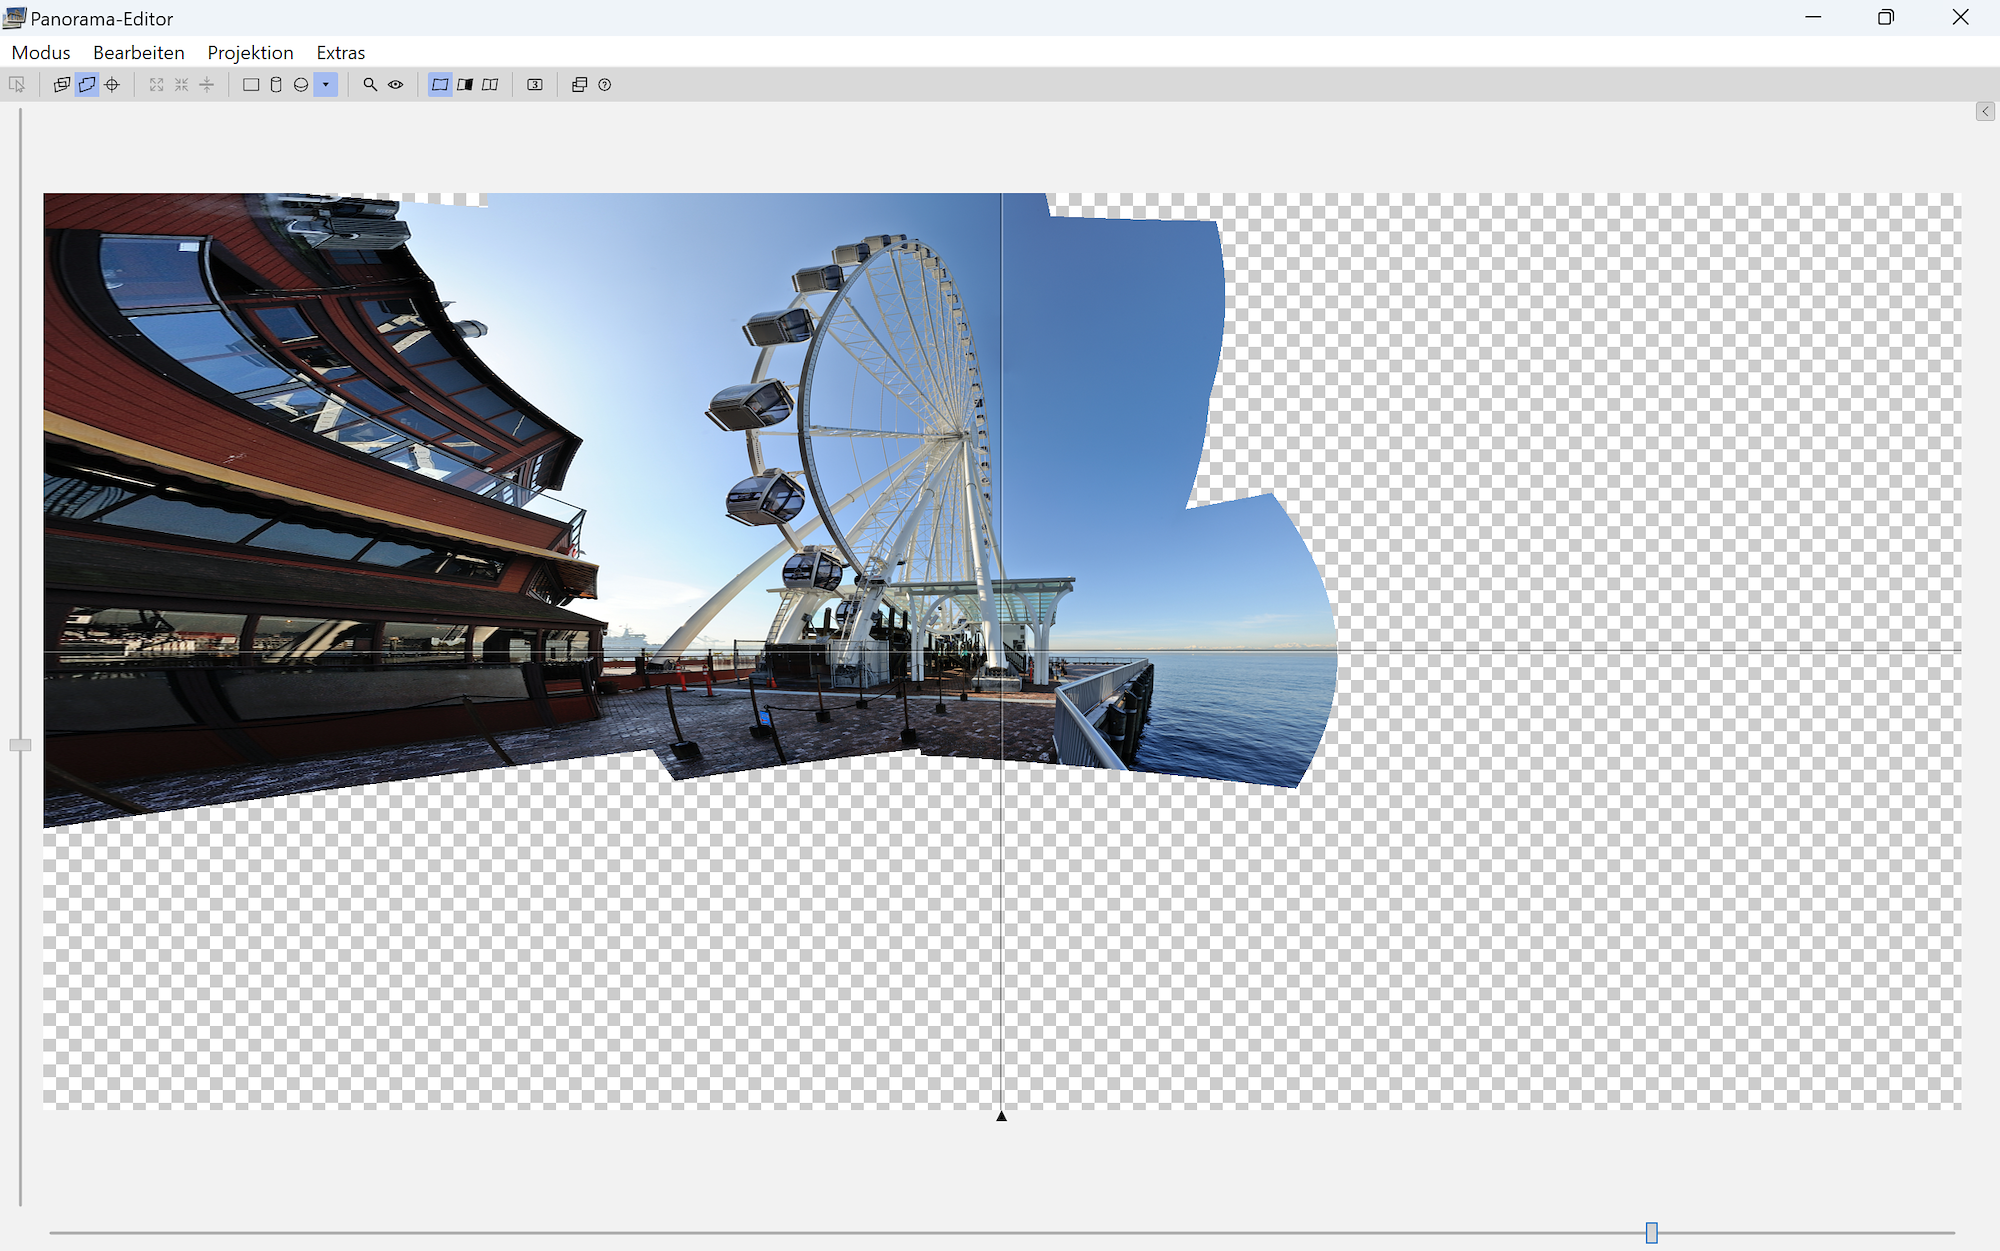
Cylindrical
The vertical projection is rectilinear and therefore has the same limitations as the Rectilinear projection for the vertical field of view. The horizontal projection is linear and perfectly suited for a 360° view. Nothing is distorted from left to right (horizontally), but from bottom to top (vertically).
Vertical lines and the center horizontal line are preserved.
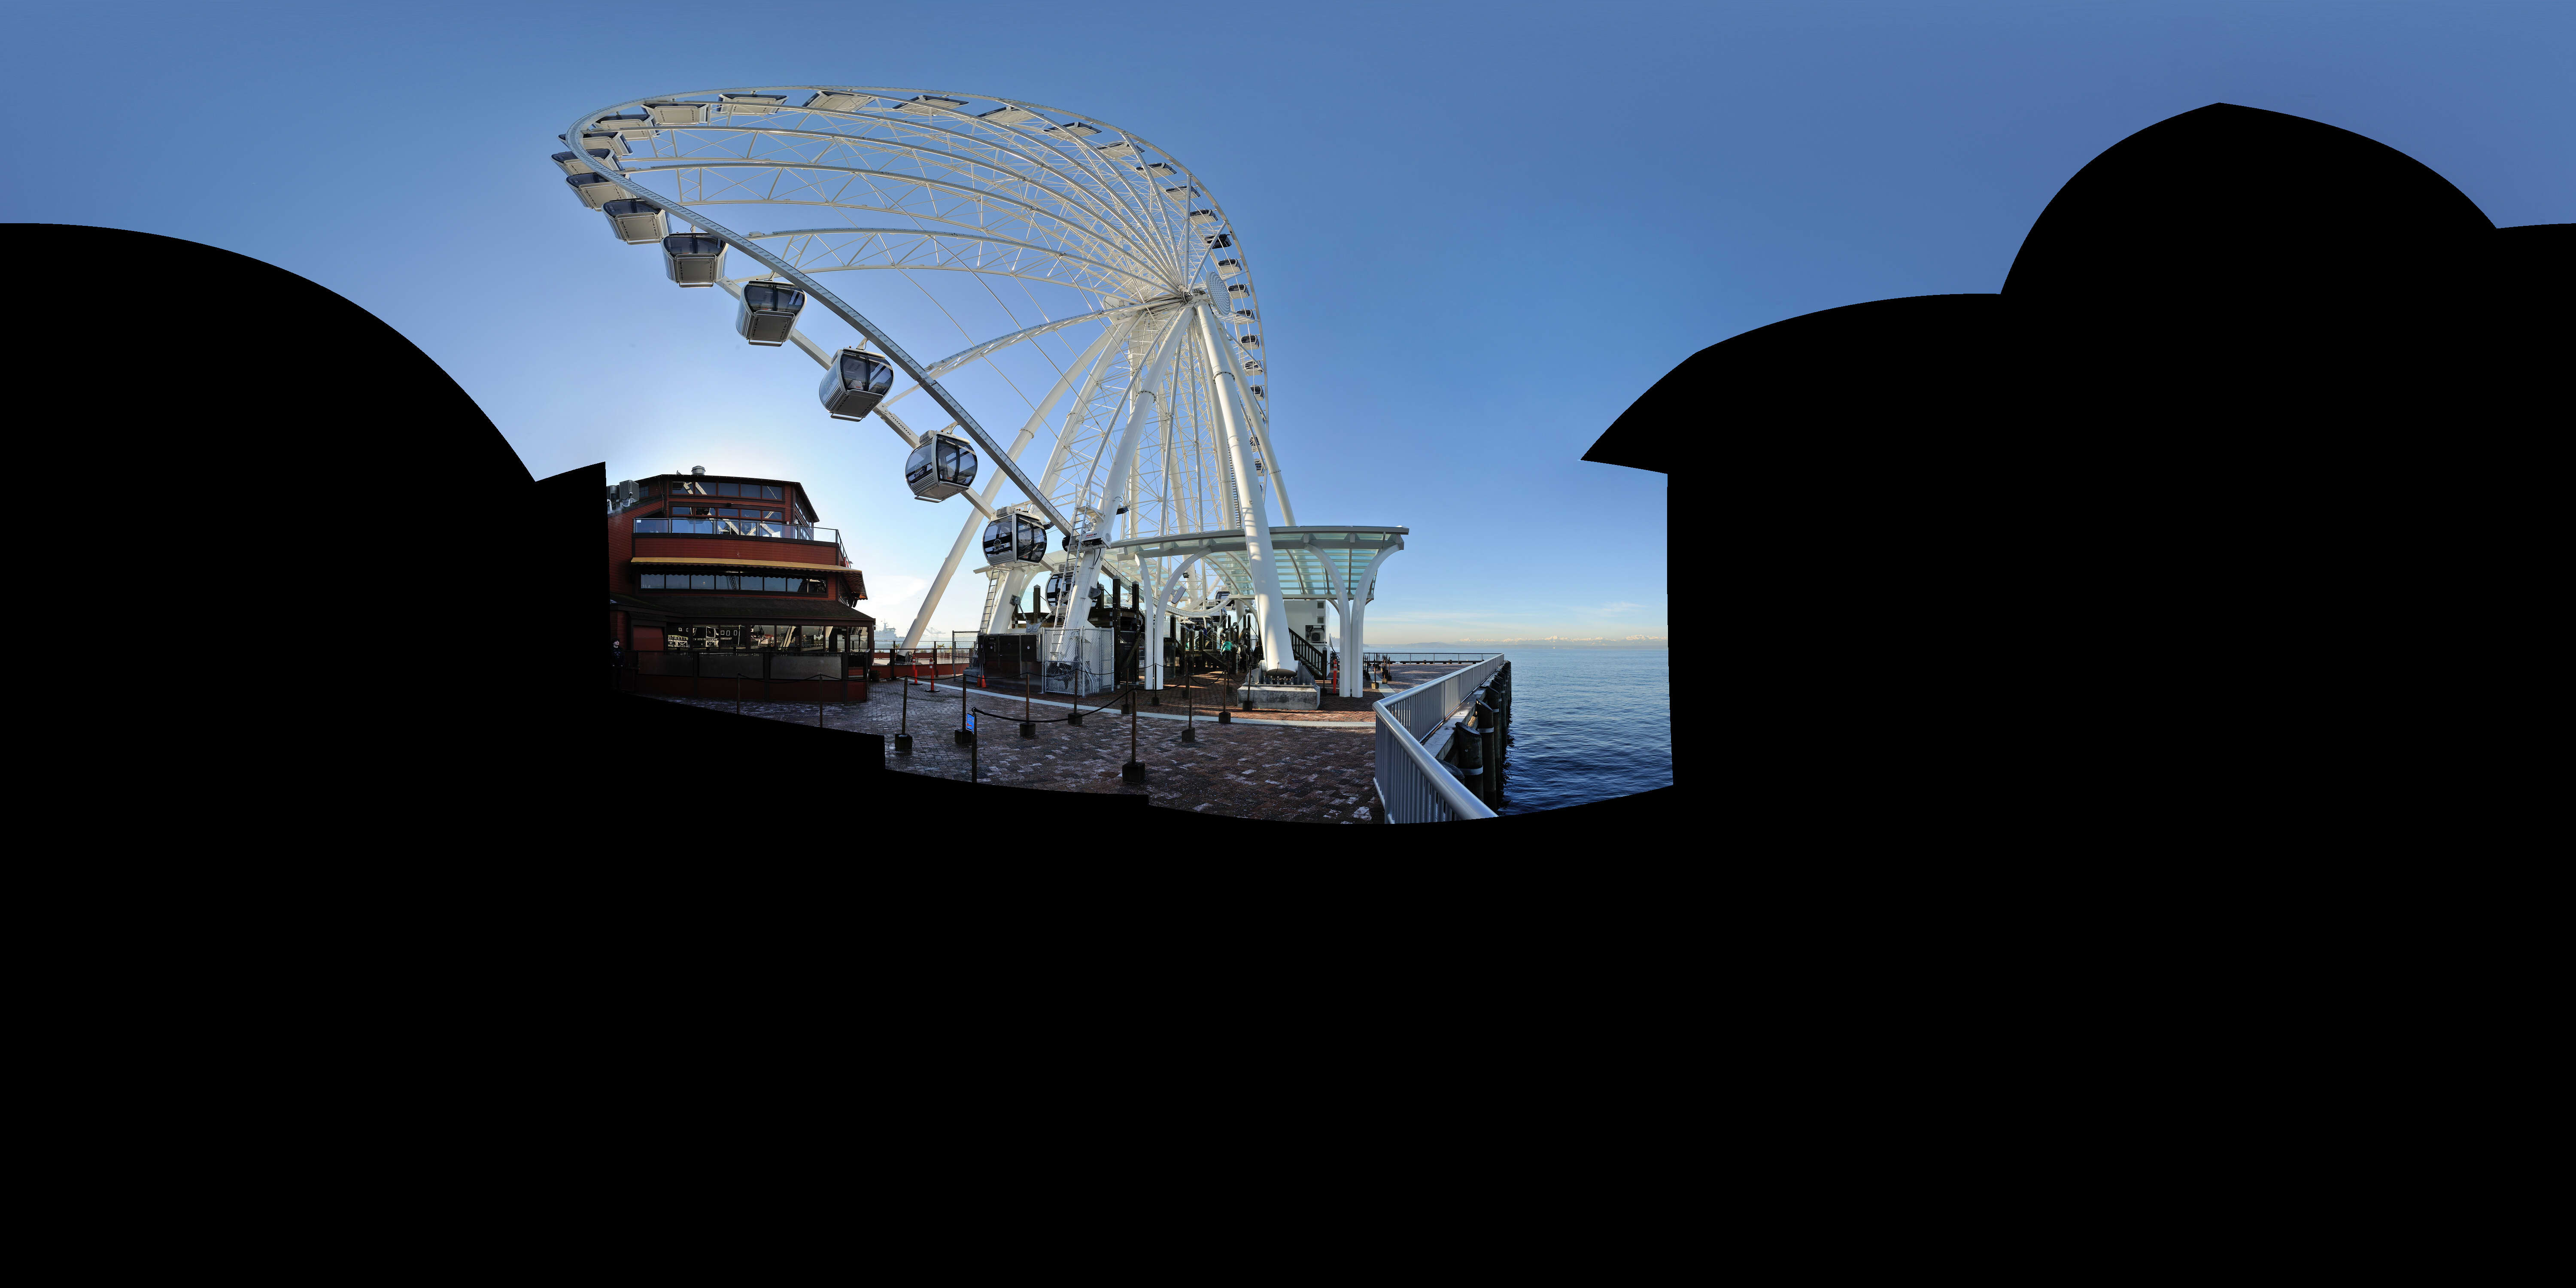
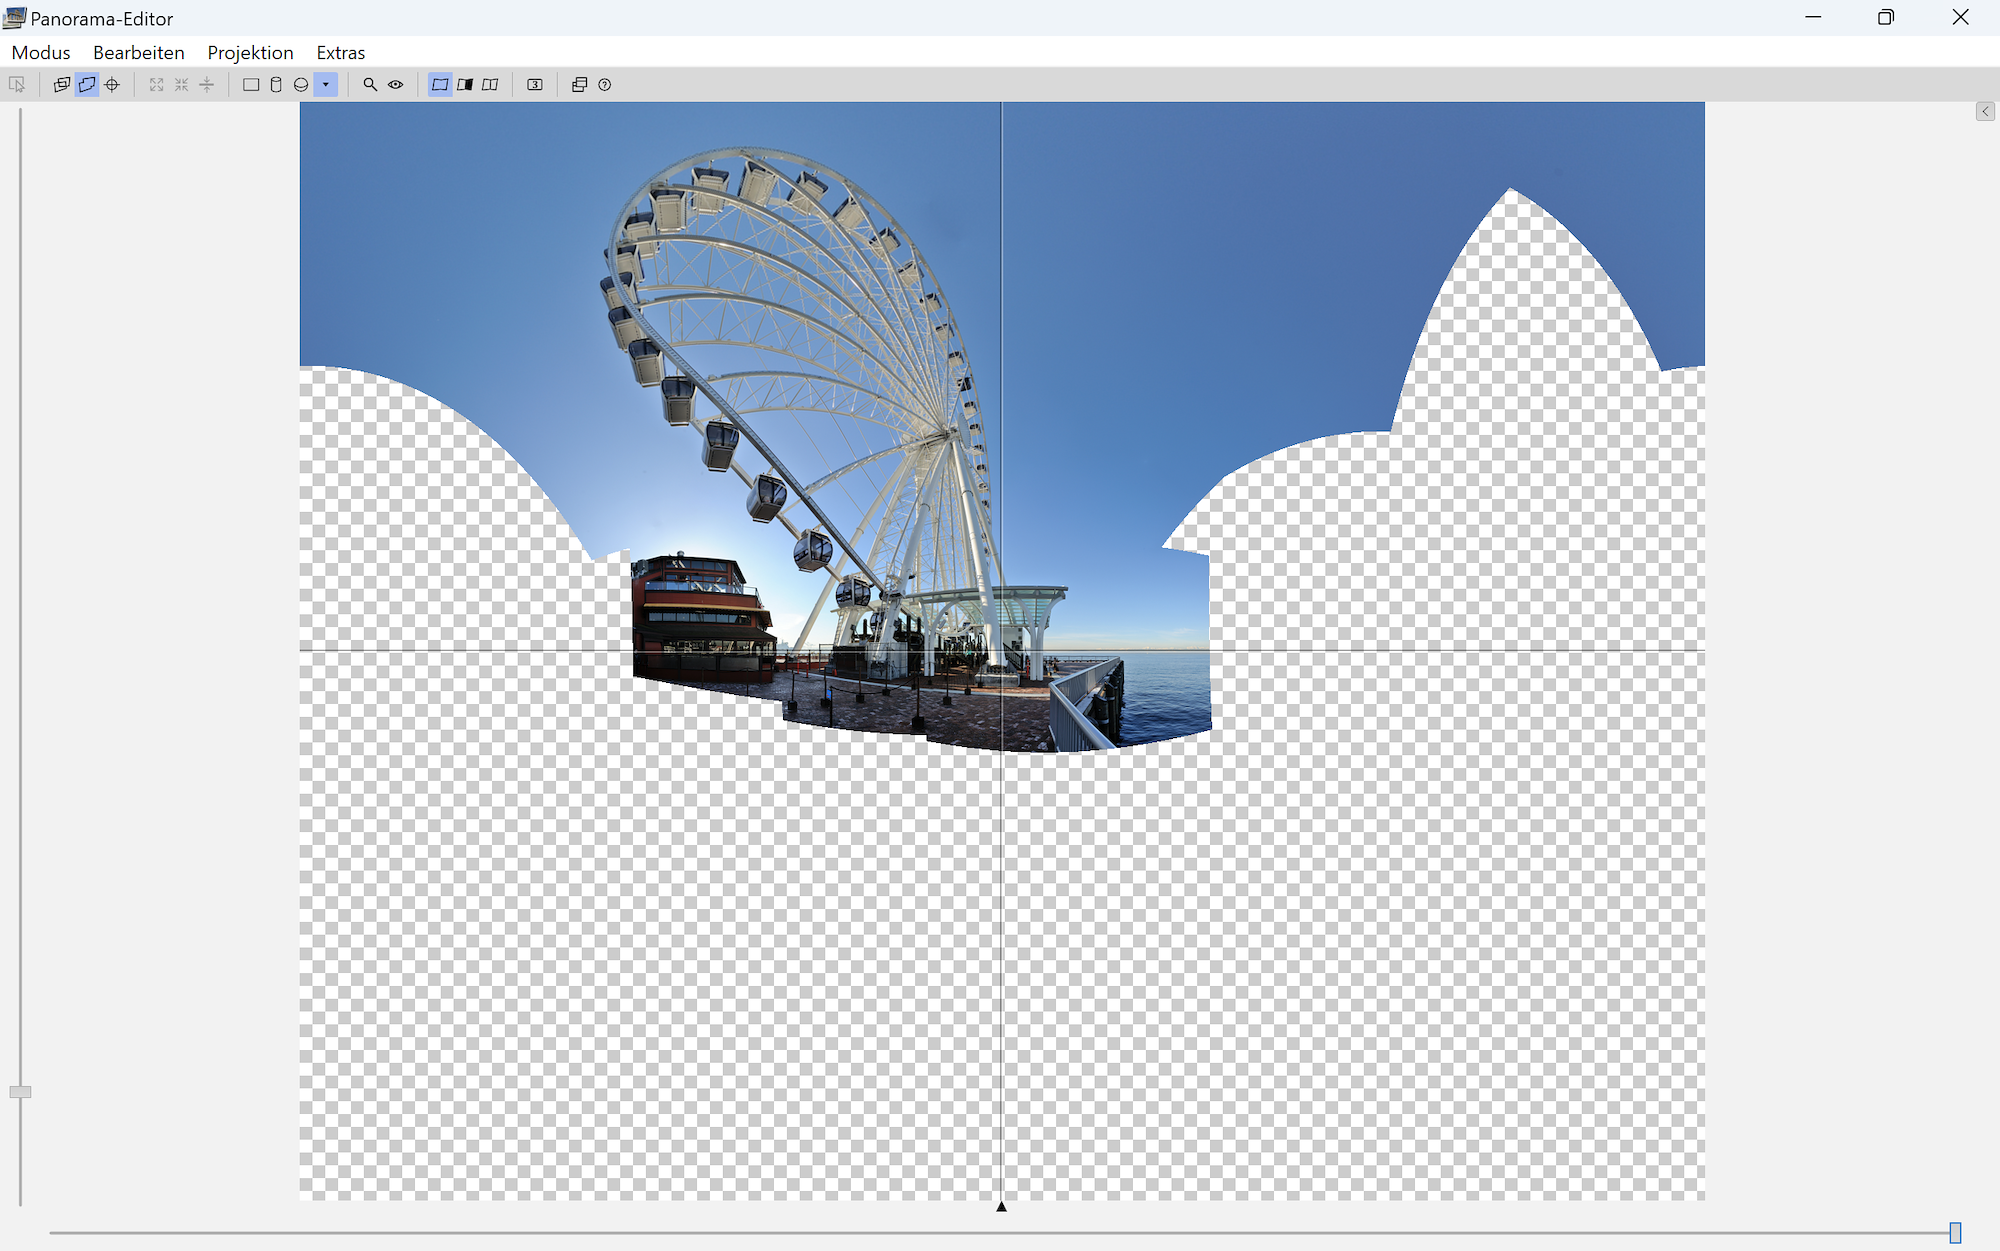
Equirectangular
Similar to the Cylindric projection, but the vertical projection maps the 180° FoV and is used for 360°x180° (full sphere) panoramic images.
Vertical lines and the center horizontal line are preserved.
Equirectangular 360°x180° Example
Interactive Panorama Example
Circular
Fish eye projection.
Fullframe
Fish eye projection with limited Field of View.
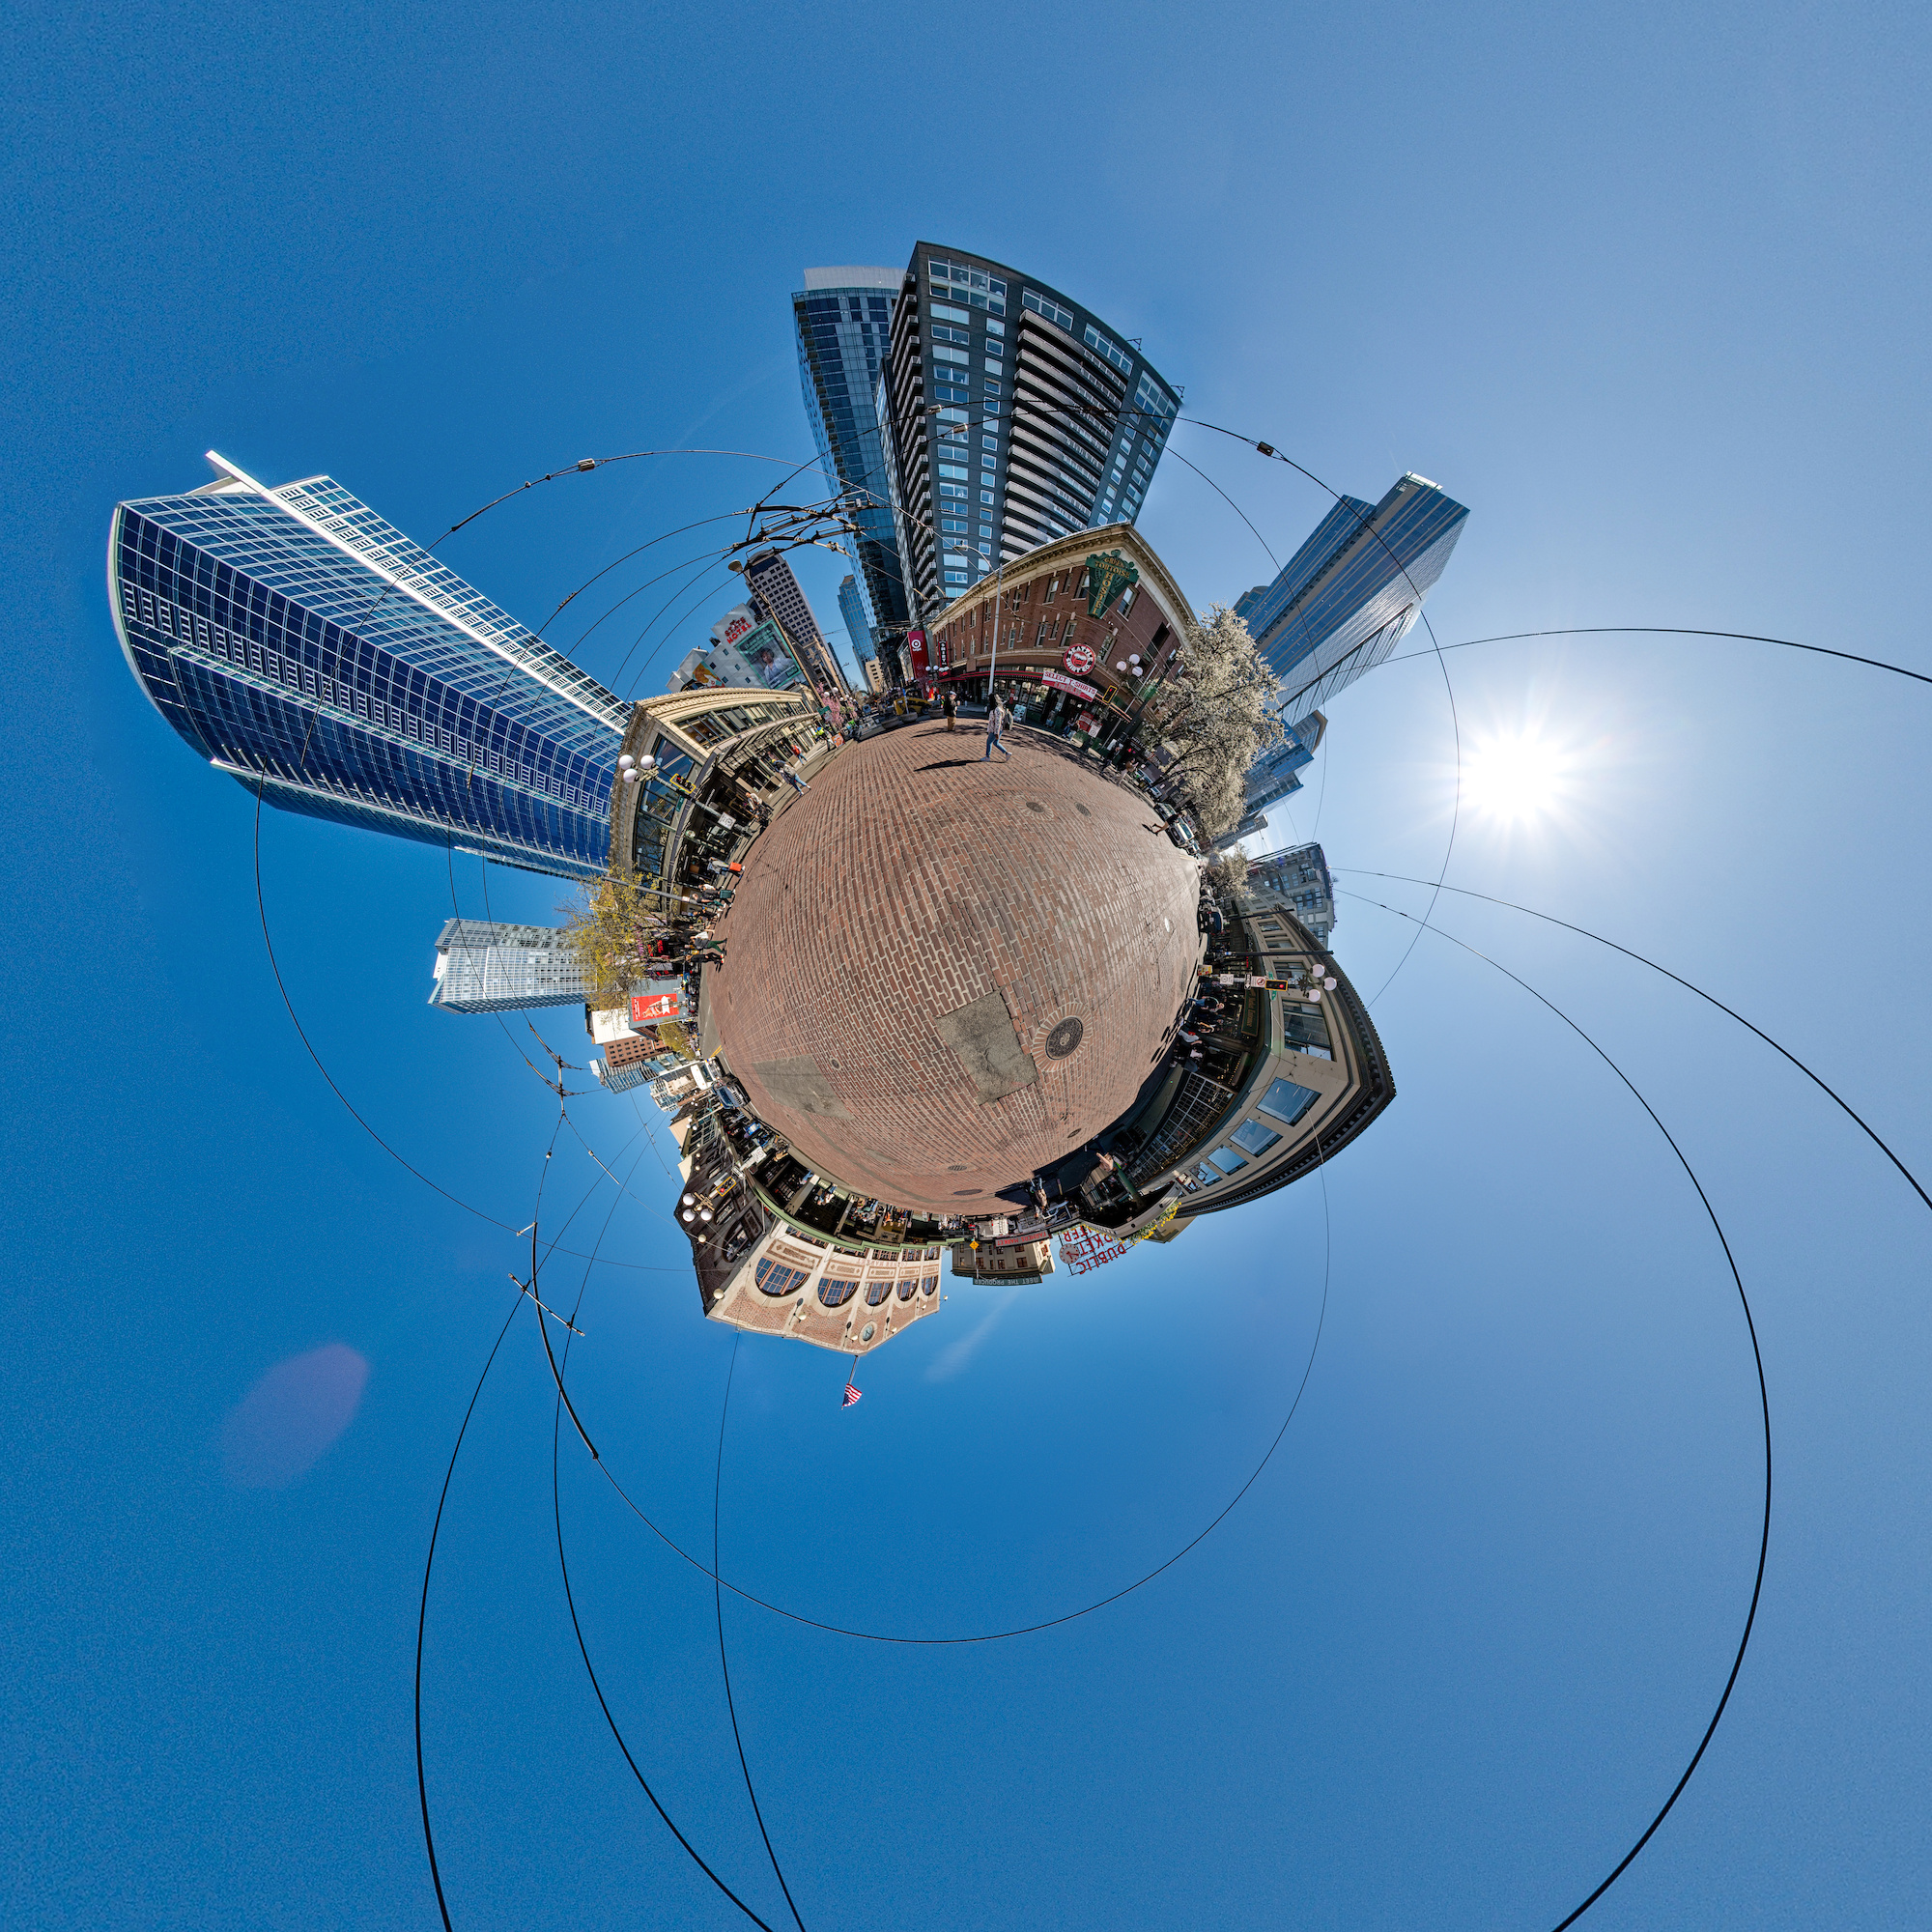
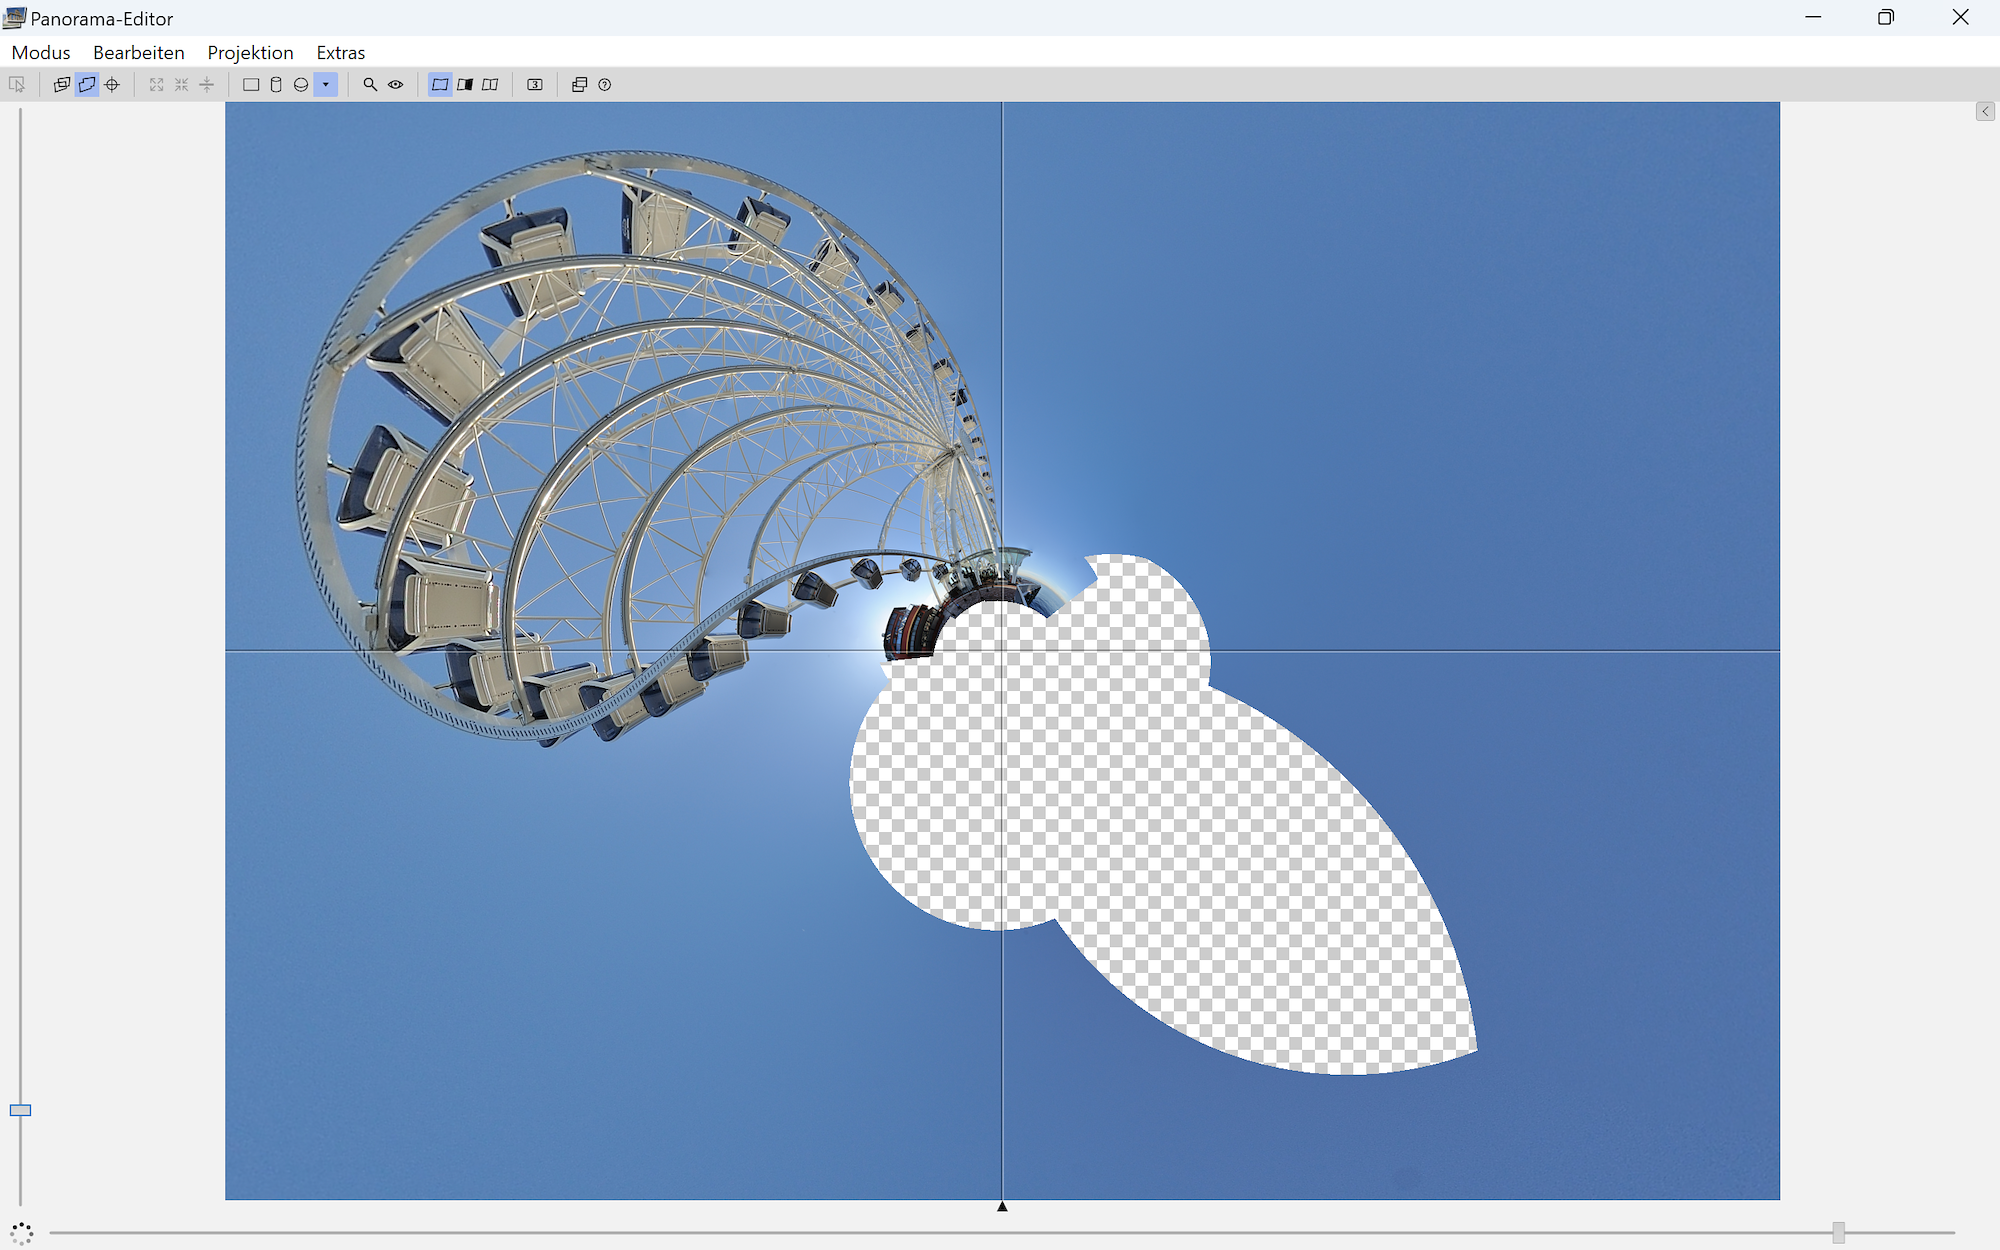
Little Planet
Use this to complement a 360°x180° Equirectangular panorama!
Mercator
Similar to the Cylindric projection, but with less vertical stretching.
Vedutismo
Diagonal lines through the center are preserved.
All Transverse projections are rotated 90° and can map the vertical to a 360° Field of View.
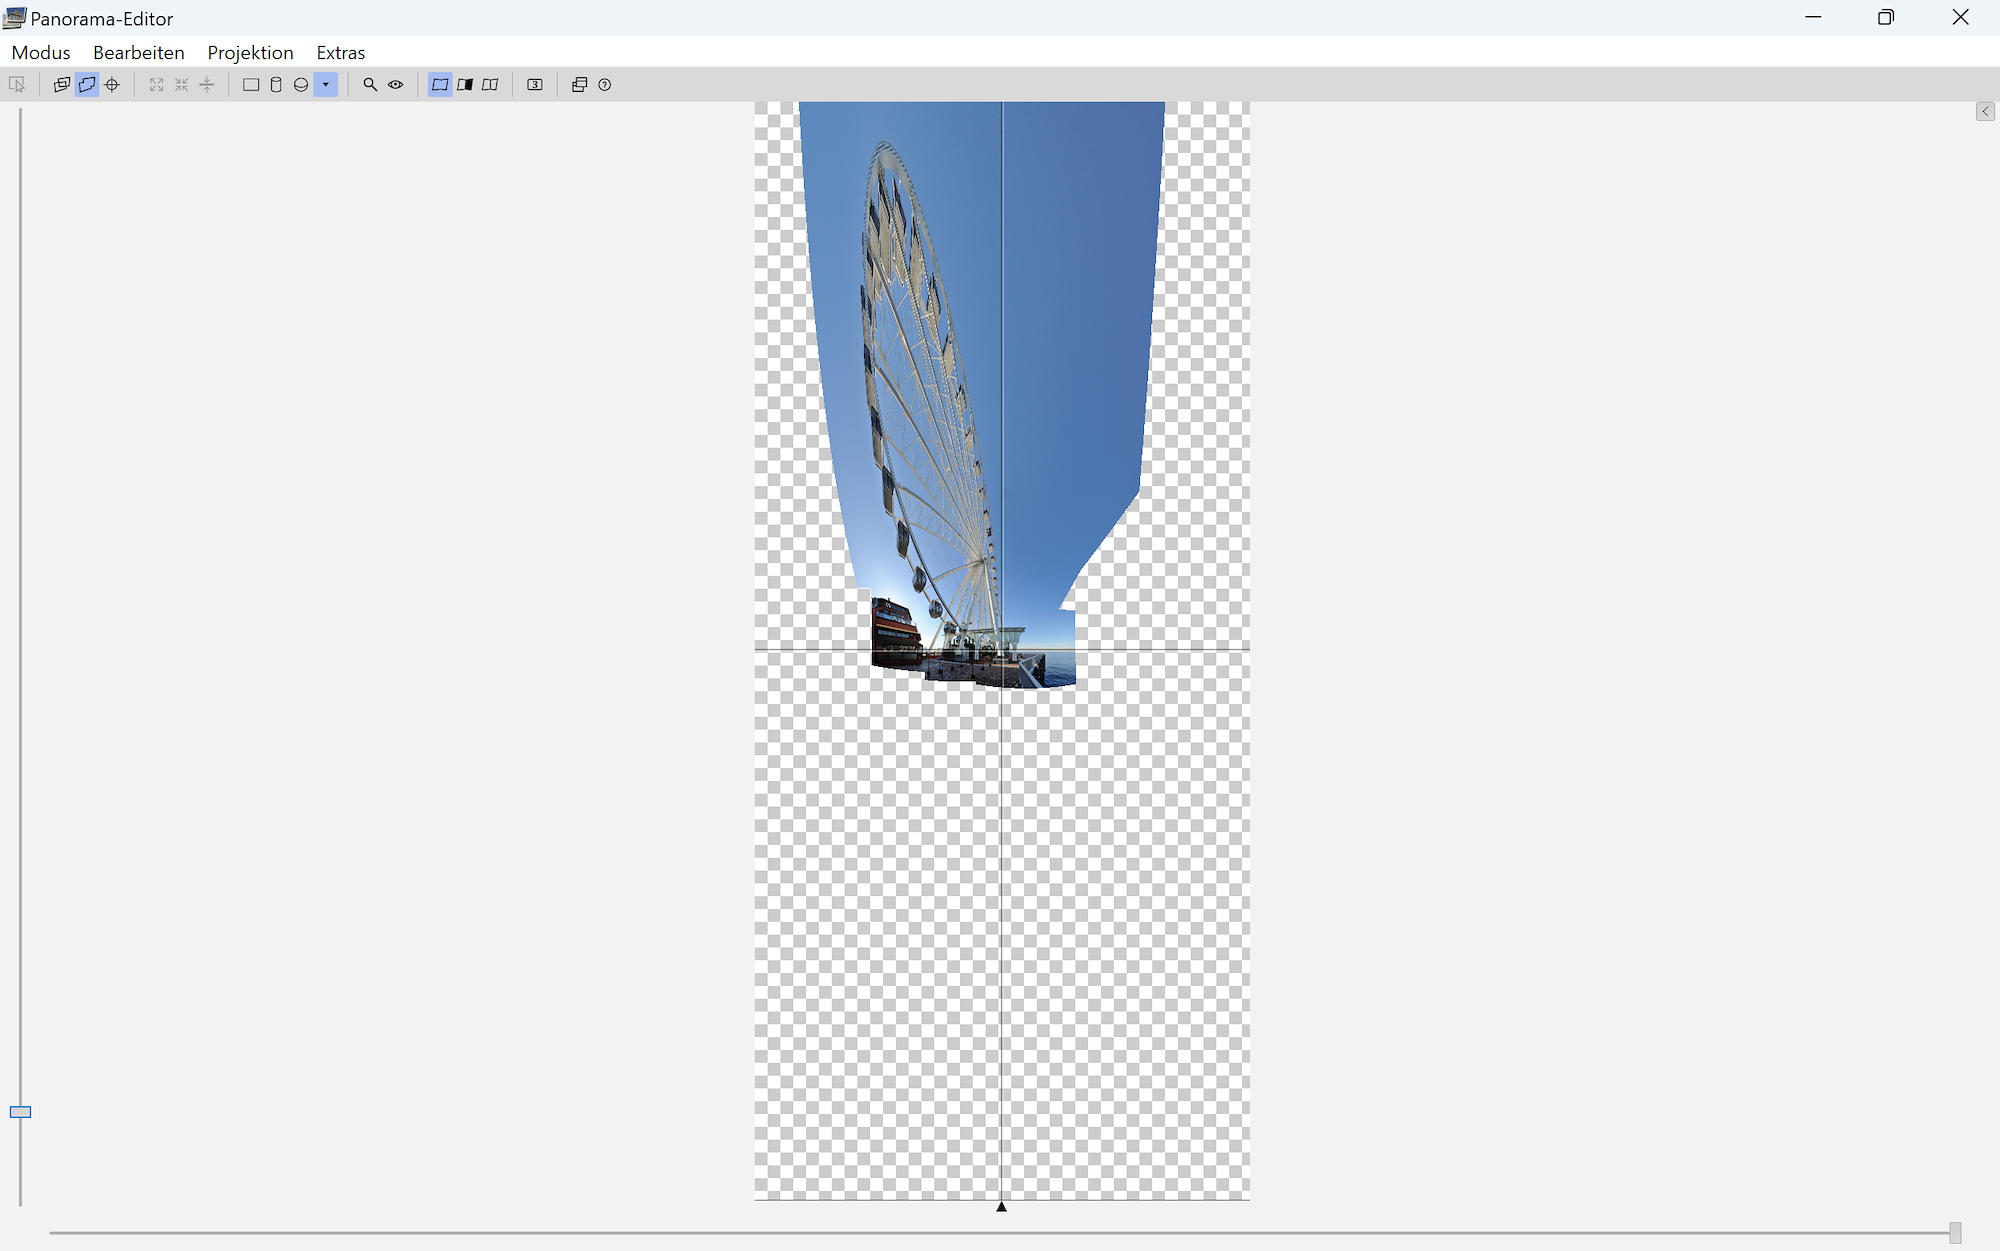
Transverse Cylindrical
Cylindrical rotated 90°
Transverse Equirectangular
Equirectangular rotated 90°
Transverse Mercator
Mercator rotated 90°

Transverse Vedutismo
Vedutismo rotated 90°
See also The Balcony Panorama, Panotools projections example and Stereographic projection.
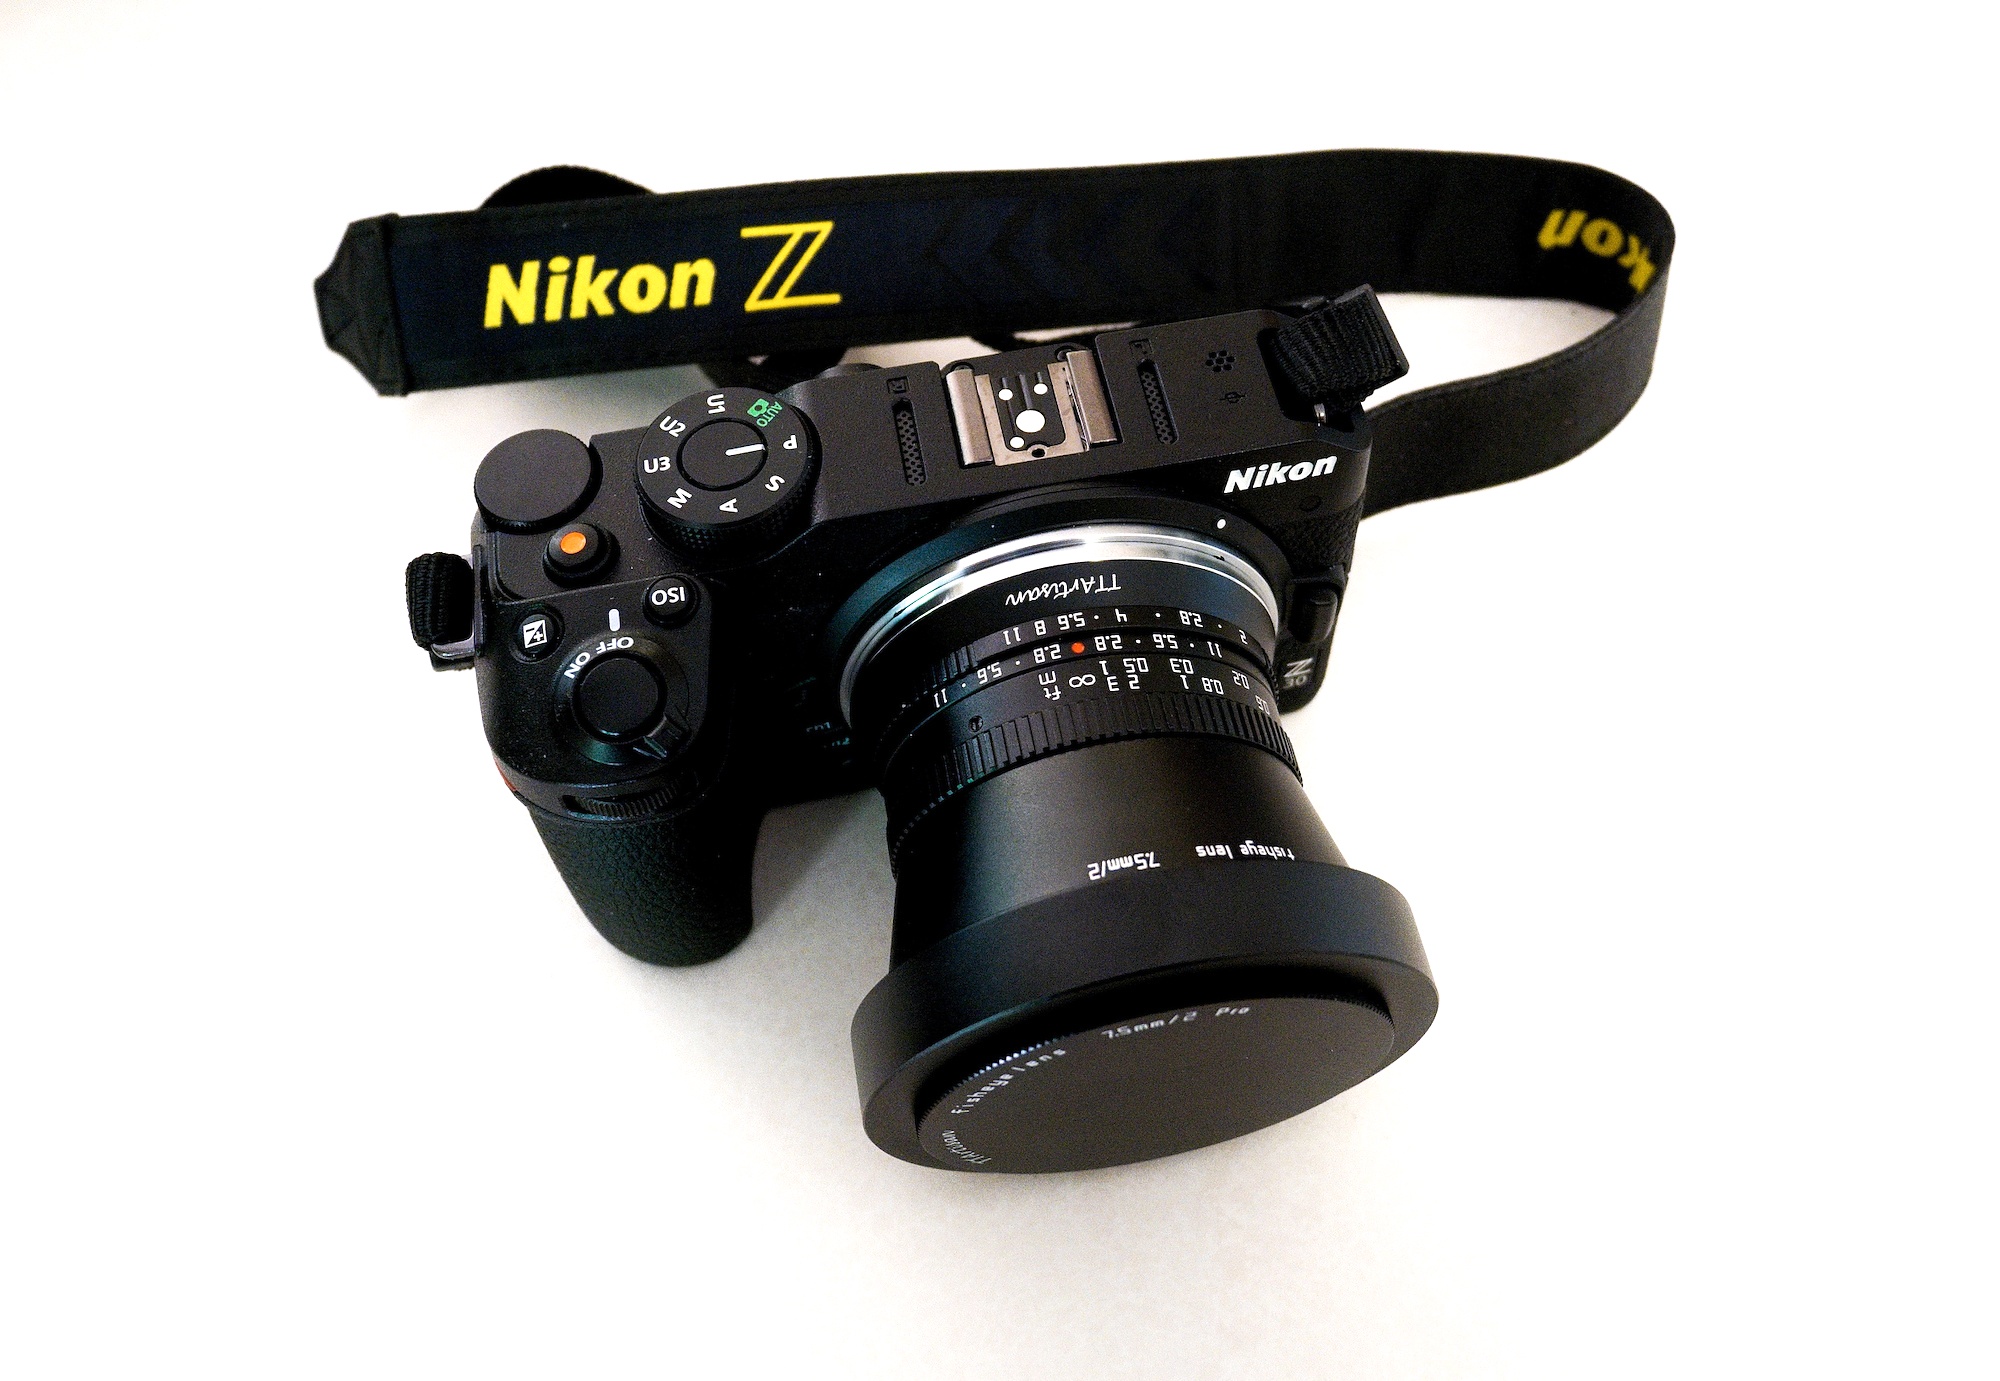
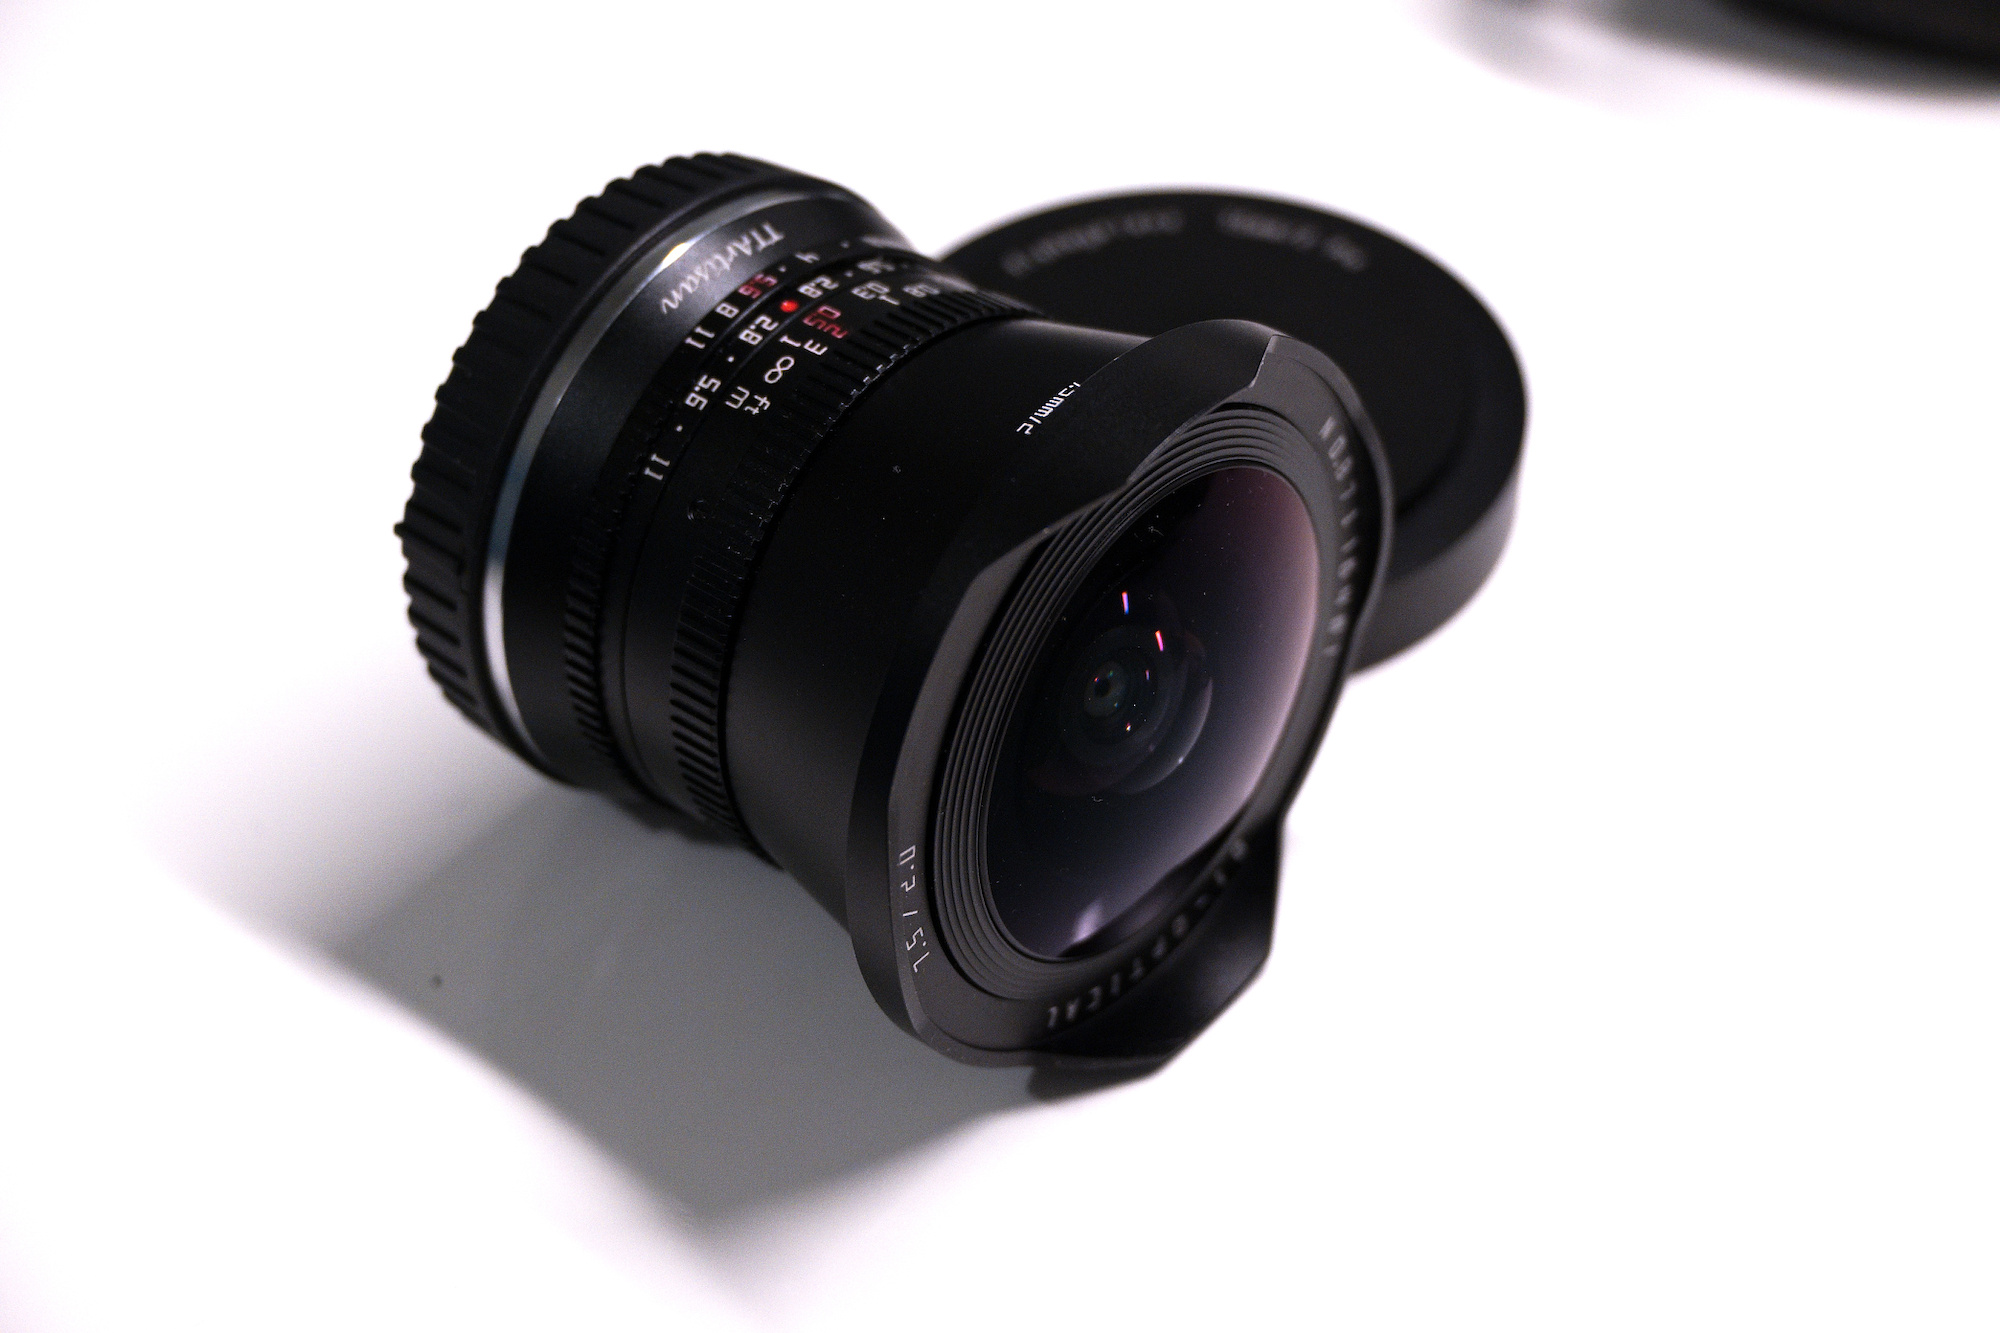
The TTArtisan 7.5mm f/2.0 is a manual focus full frame fisheye lens for APS-C cameras or a circular fisheye lens for full frame cameras. This lens was used for all my
Panoramas since Summer 2023.
The lens is remarkably sharp wide open and has an optimal Aperture of f/5.6 and much better compared to the 7Artisans 7.5mm f/2.8.
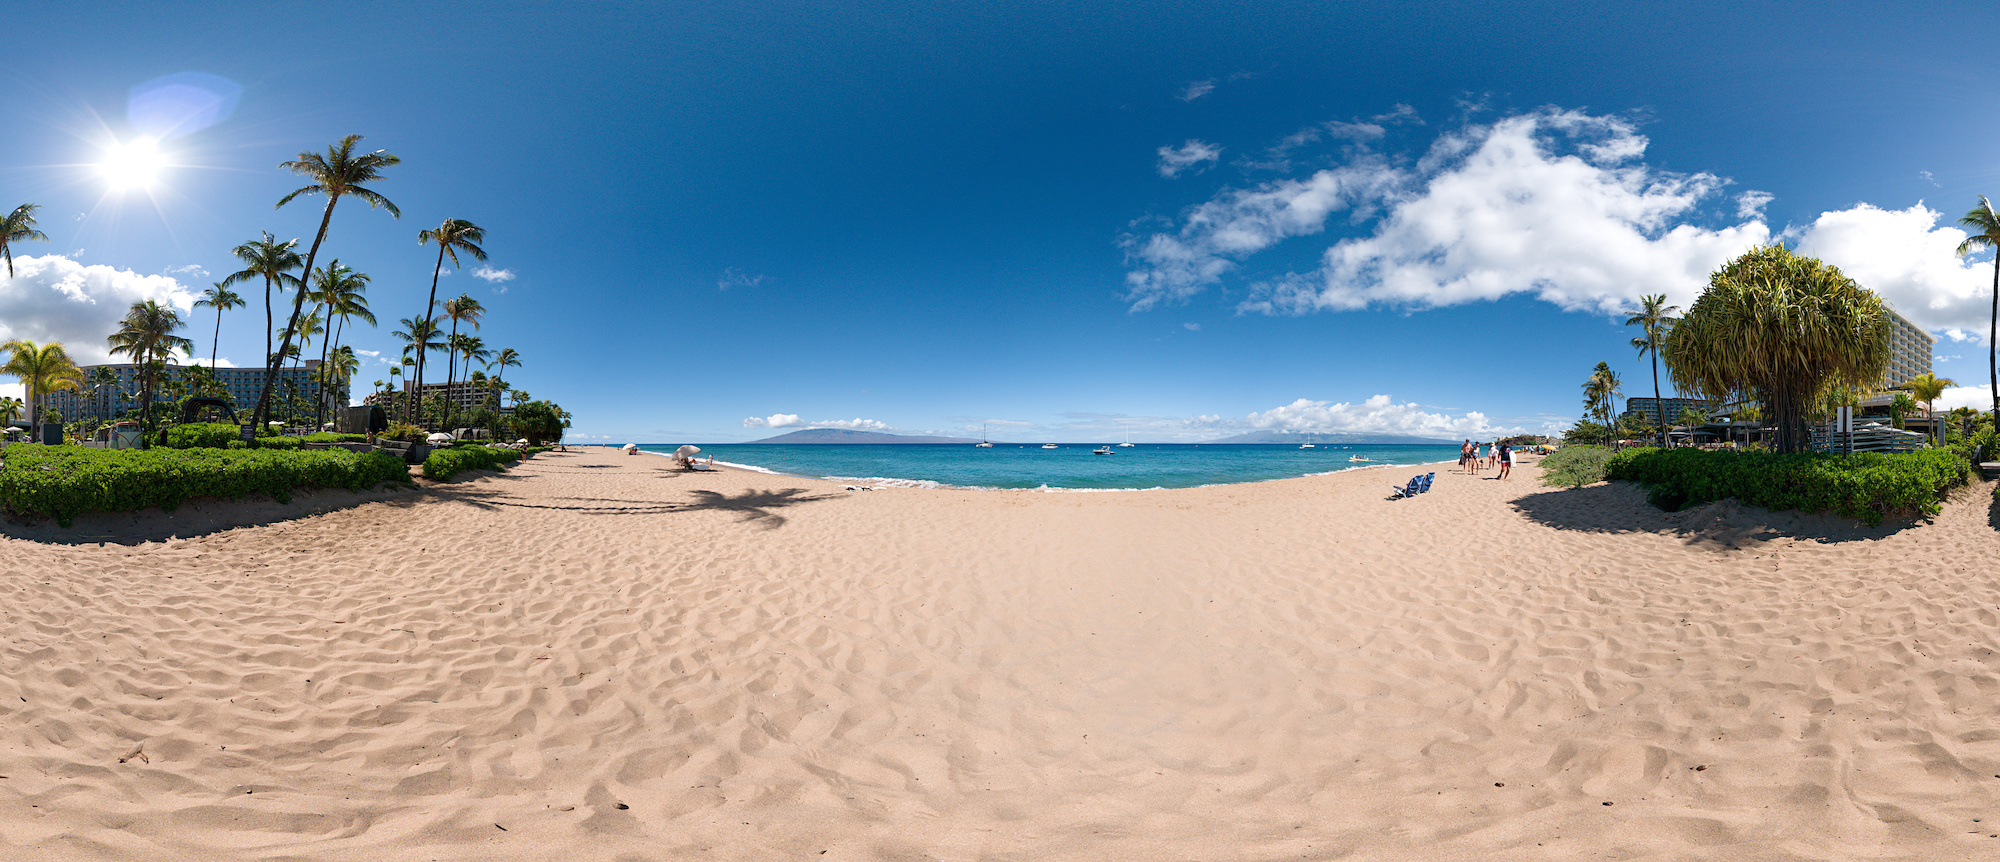
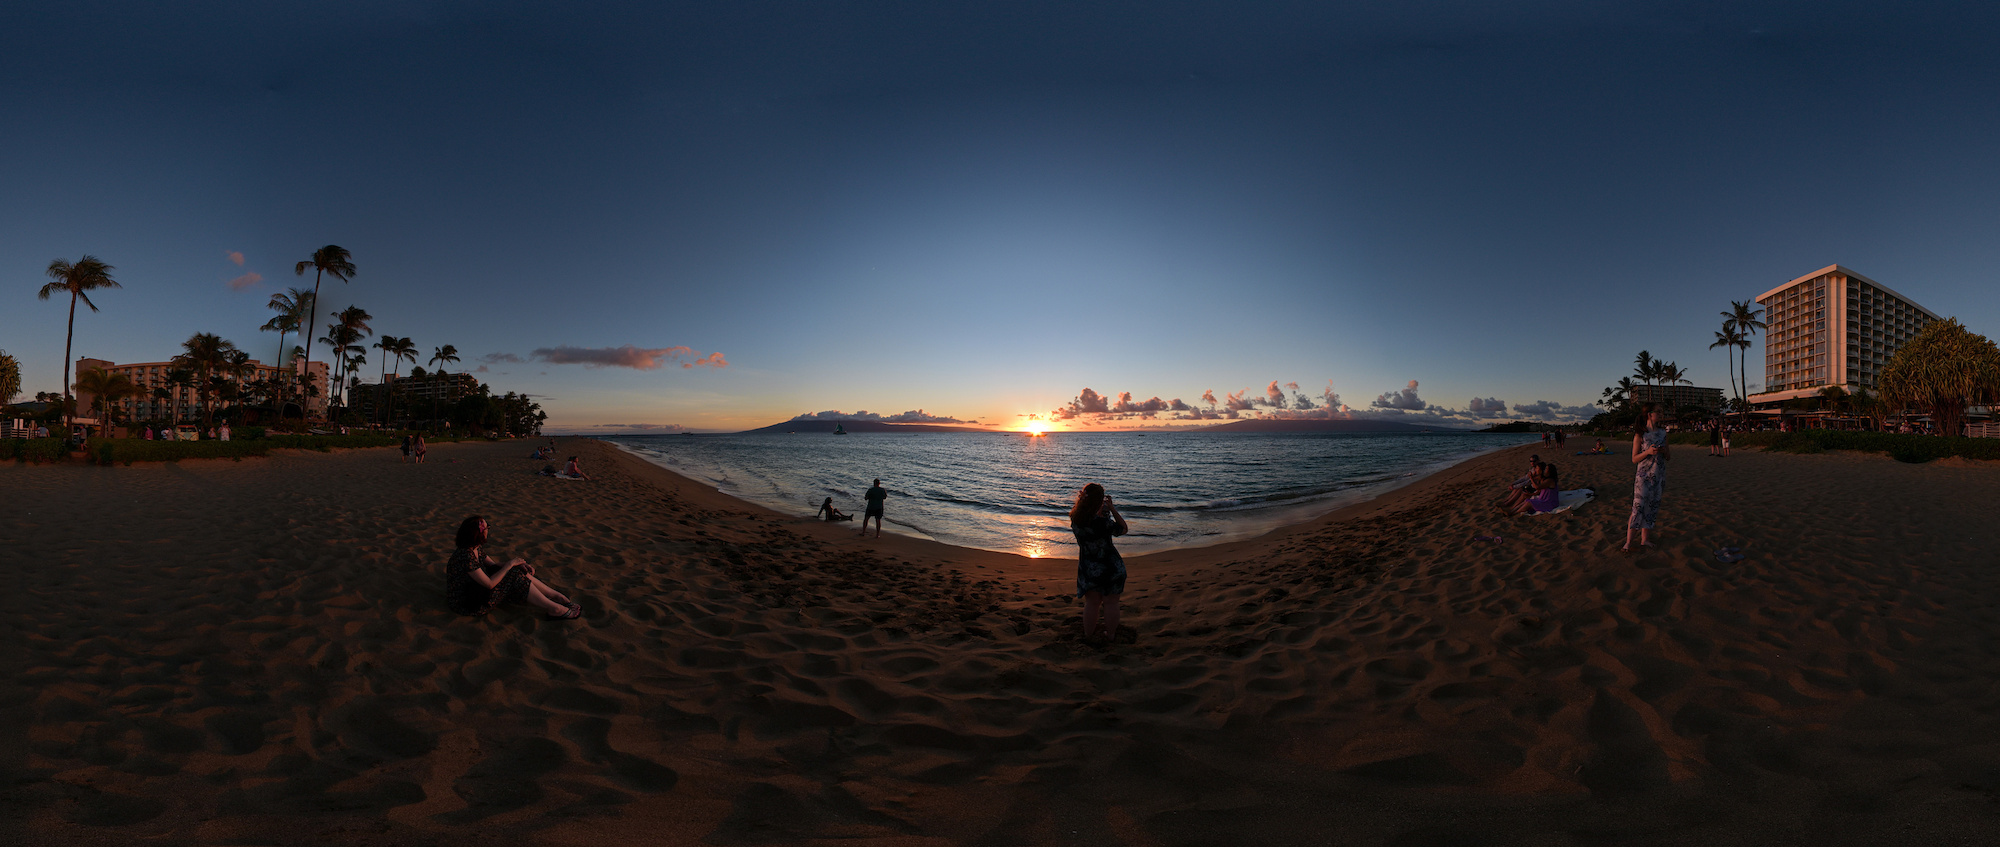
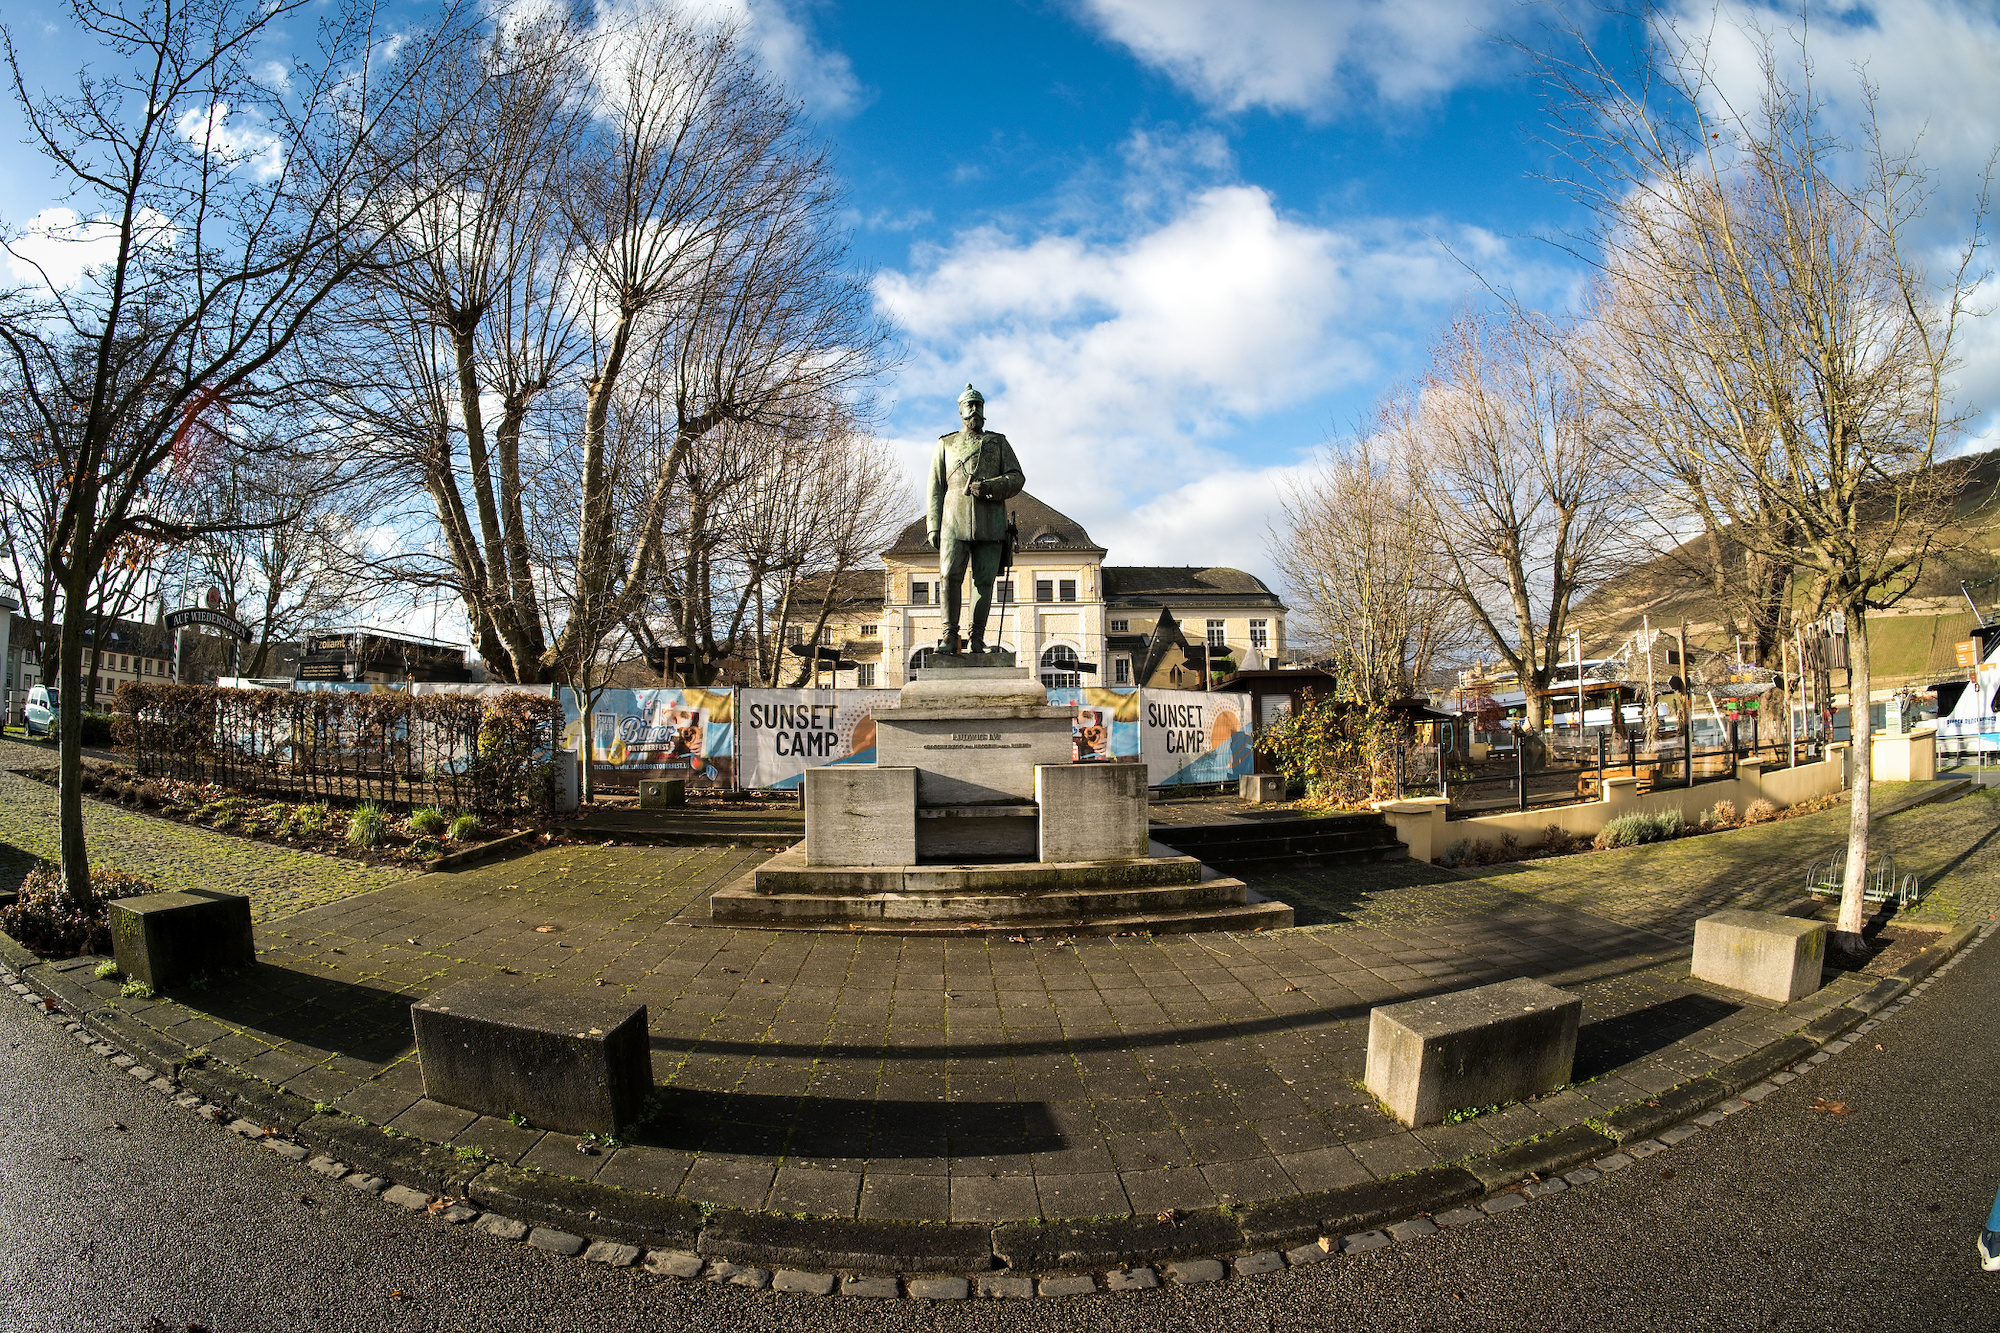
Best setting for 360°x180° Panoramas is at 0.5m(2ft) and f/5.6. This puts everything from near to infinity in focus:
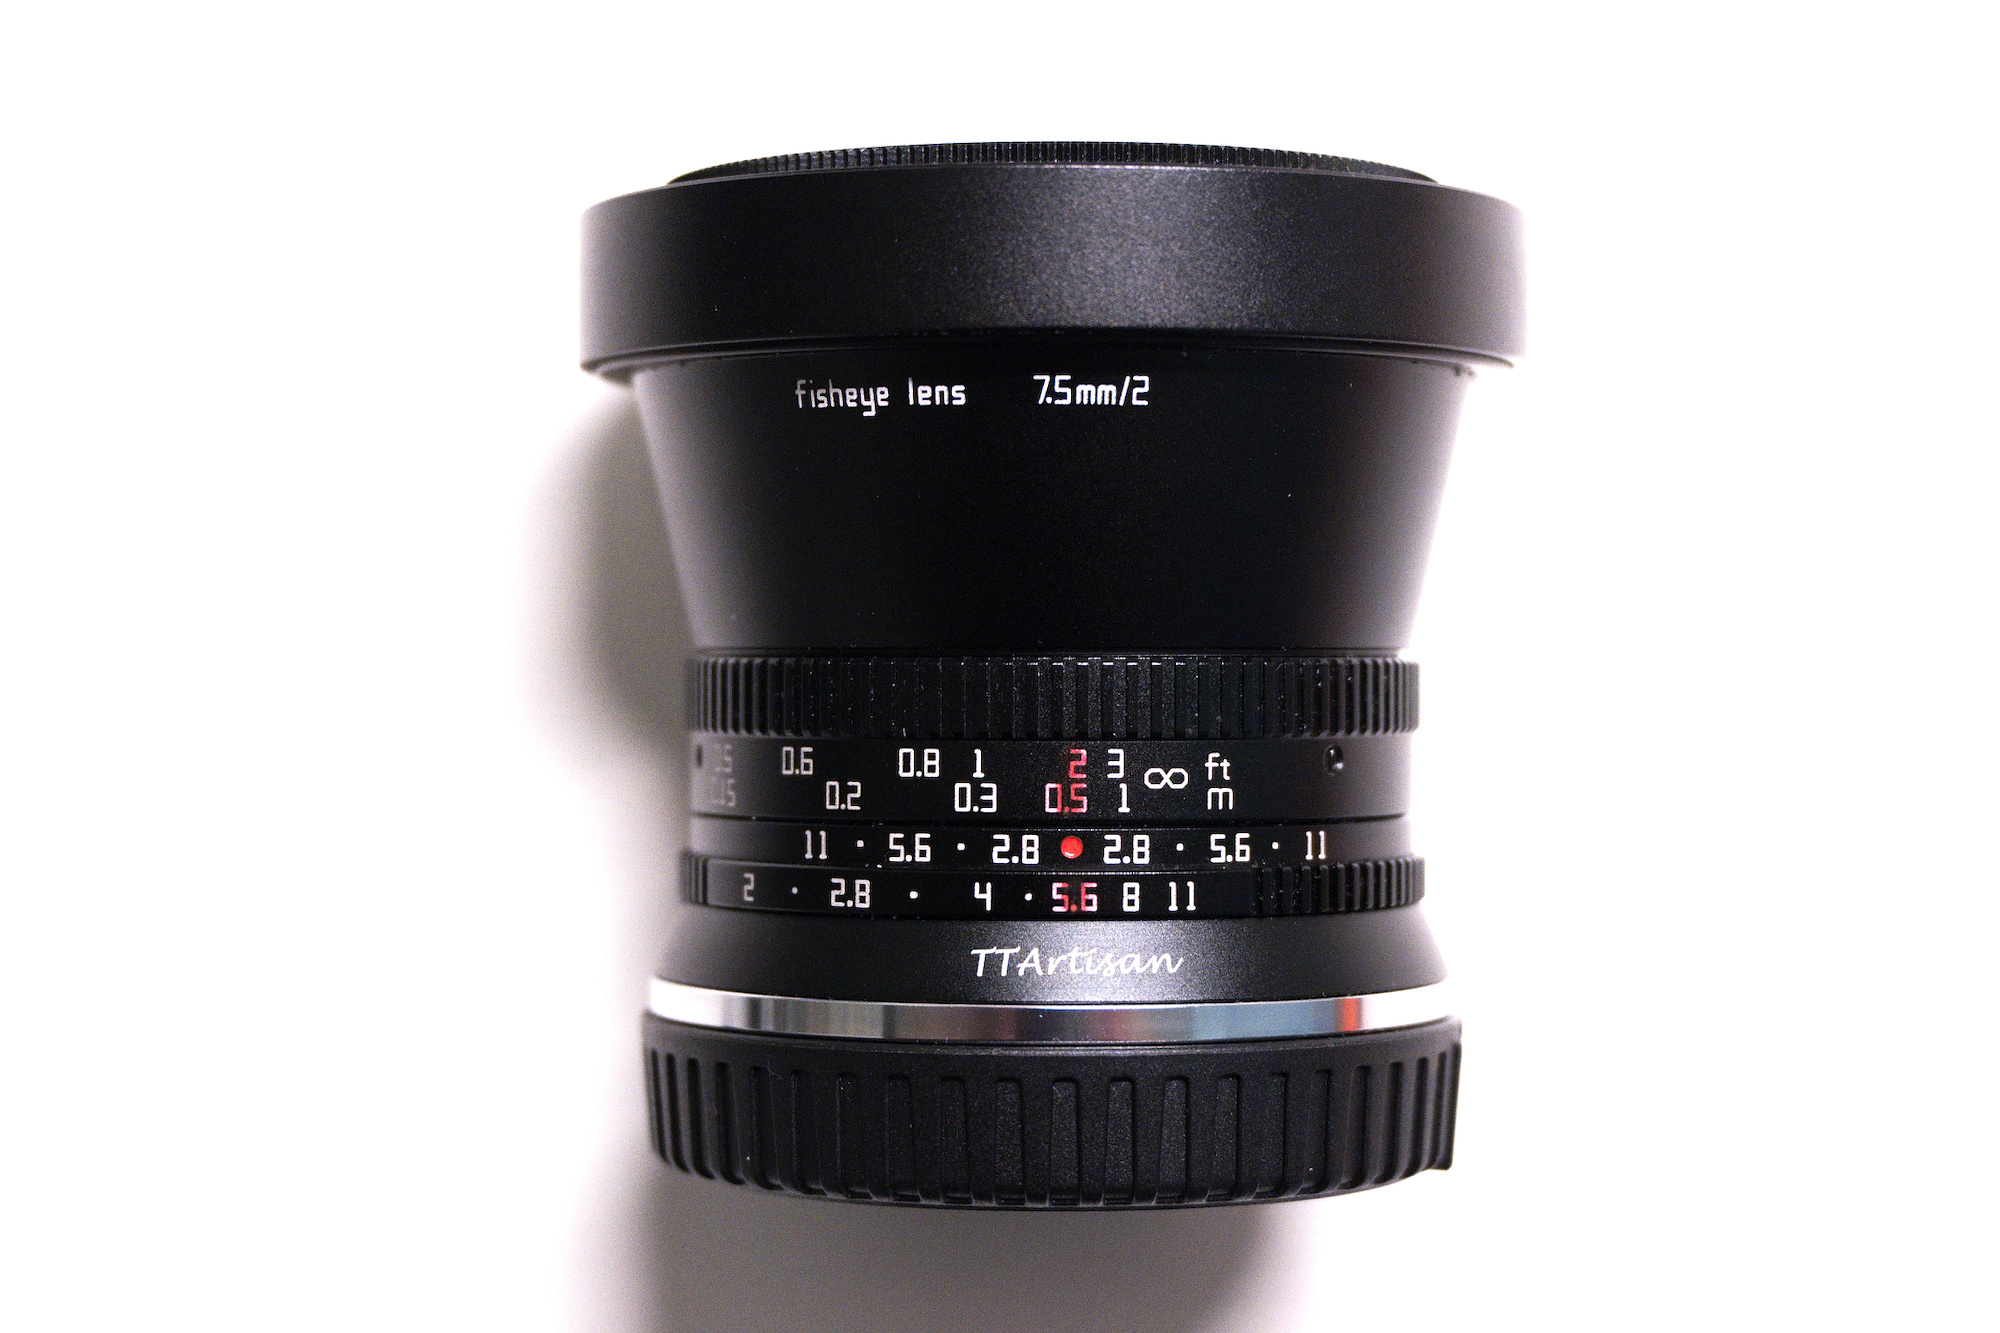
A downside is the lens cap, which holds only by friction using some fabric and can get lost.
1/640s f/5.6 ISO100
See matching Panorama
1:1
(not sharpened)