cPicture Photo Blog

cPicture 3.4.3

cPicture is updated to version 3.4.3

  • improved performance for network drives (NAS)

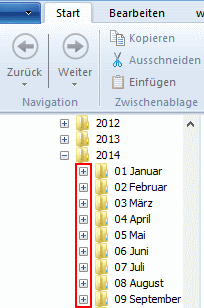
As Network attached drives (NAS) are slower compared to the build-in computer drives, the access to the media folders require more time. This update automatically detects slower network drives and uses a fast network drive access.

Note: All folders for the fast network drive access will have a (+) symbol assigned.

The setting to exclude additional data and check if folders contain sub folders is set by default to on and can be changed in the settings.

cPicture is a portable App, so no installation is required.

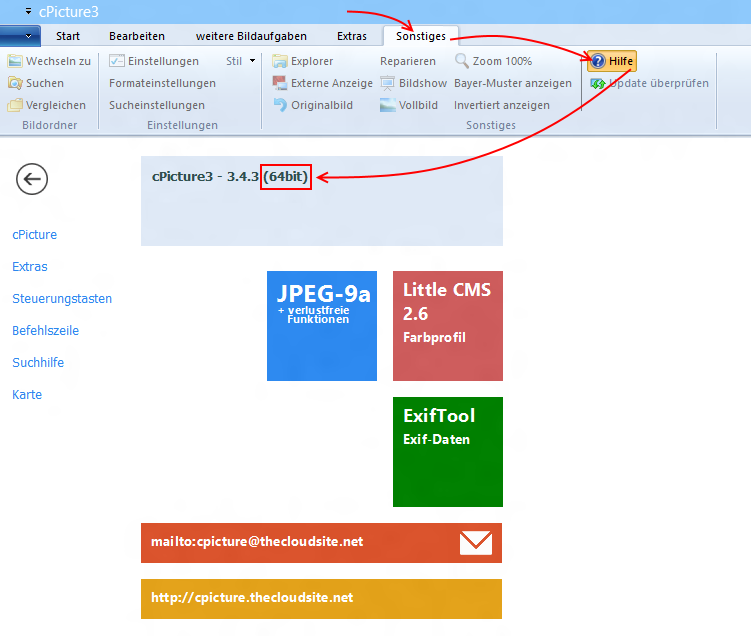
Download the .ZIP file, (click here for the 64bit version) open the ZIP file and copy the cPicture.exe anywhere on your computer to run the app or use the 'Check for updates' button in the 'Other' category.
See the Download Instructions for more details.

For questions, please mail to: cpicture

cPicture 3.4.2

cPicture is updated to version 3.4.2

cPicture is a portable App, so no installation is required.

Download the .ZIP file, (click here for the 64bit version) open the ZIP file and copy the cPicture.exe anywhere on your computer to run the app or use the 'Check for updates' button in the 'Other' category.
See the Download Instructions for more details.

For questions, please mail to: cpicture

Translations of cPicture

Translations for cPicture exist for the following languages:

Thanks to:

  • Microsoft Translator
  • Alberto Dati, Italian
  • Arek Czak, Lukasz Jakubowski, Polish
  • 王燊 (Wang Shen), Chinese Traditional
  • Hu Tenghui, Michael Long, 王泉富 (Chyuan Fu Wang), Chinese Taiwan

for the current translations and their expertise!

If you like to add/update a language, copy the Translation file translation.zip and update the CSV language file. The .zip contains 4 CSV files for each language, one for the main cPicture App and one for the Ribbon menu:

  • <lang>.cpicture.csv
  • <lang>.cpicture.full.csv
  • <lang>.ribbon.csv
  • <lang>.ribbon.full.csv

The .csv is the list of text to translate. The full.csv is the complete set of the translations and allows you to change existing translations.

The CSV files have a simple structure for each translation ("English","Translation") and can be changed with Excel or any text editor. Text Encoding is UTF-8. Please contact me if you have any questions.

    "English";"Translation"
    "OK";"确定"
    "Cancel";"取消"
    "Browse...";"浏览..."
    "Red:";"红:"
    "Green:";"绿:"
    "Blue:";"蓝:"
    "Picture name and target folder";"图片名和目标文件夹"
    "Quality level:";"品质:"
    "File size:";"文件大小:"
    "Enter a name for this picture:";"输入图片名称:"

Workflow example: FTP upload

As part of a workflow, processed pictures often gets transferred to the final web site or publisher via the File Transfer Protocol (FTP).
FTP is an efficient and fast way to transfer large files over the Internet. Every webhoster provides FTP services and with this upload script you can easily transfer your images with cPicture.


Download the ftp-upload.ps1 script, set the password and login name of your FTP server in the script and remove the trailing .txt from the downloaded script file.

Add the script file to the folder where you copied cPicture.exe.
Make sure you have the function plugin for powershell scripts installed.

Run cPicture, select your pictures and start the upload script from the menu:

Workflow example: Open any RAW with Capture NX

To open your Raw file you can simply assign an editor in cPicture to open the file. But if you like to open a RAW file with another editor not supporting your used RAW Format, you can use the universal DNG format to link to your editor.

In this example, we will use external tools and a plugin script to create a simple workflow to open a non-Nikon RAW file with the Nikon RAW software Capture NX.
First the RAW gets converted to a DNG and then to a 16bit TIFF, which can be opened by Capture NX.

You need the ImageMagick Tools and the Adobe DNG converter:

  • Download the ImageMagick Tools ImageMagick and install
    Choose the Q16 Version of ImageMagick to ensure no loss in Quality: ImageMagick-6.8.8-6-Q16-x64-dll.exe

  • Download the Adobe DNG converter Adobe DNG converter and install


Download the convert-Raw-to-TIFF.ps1 script, adjust the file path of the tools in the script

  • C:\Program Files (x86)\Adobe\Adobe DNG Converter.exe
  • C:\Program Files (x86)\ImageMagick-6.8.8-Q16\convert
  • C:\Program Files\Nikon\Capture NX 2\Capture NX 2.exe

and remove the trailing .txt from the downloaded script file.

Add the script file to the folder where you copied cPicture.exe.
Make sure you have the function plugin for powershell scripts installed.

Run cPicture, select your RAW picture and start the conversion script from the menu:


The script will first convert the RAW to a DNG and then using the ImageMagick Tools to convert the DNG to a 16bit TIFF that gets opened by the Nikon software.

Neuere Posts → Home ← Ältere Posts