cPicture Photo Blog

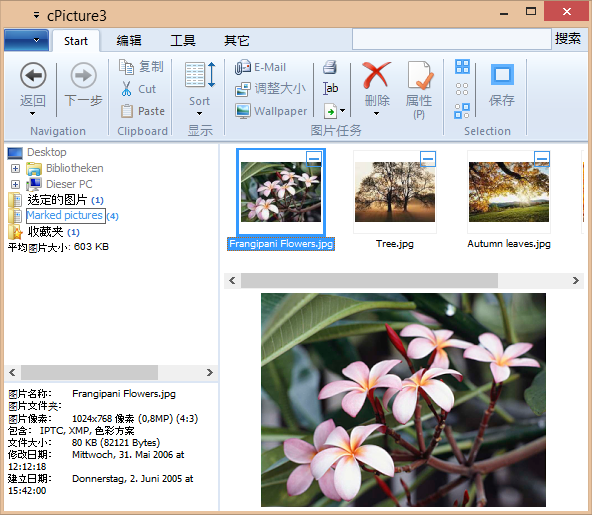
Translations of cPicture

Translations for cPicture exist for the following languages:

Thanks to:

  • Microsoft Translator
  • Alberto Dati, Italian
  • Arek Czak, Lukasz Jakubowski, Polish
  • 王燊 (Wang Shen), Chinese Traditional
  • Hu Tenghui, Michael Long, 王泉富 (Chyuan Fu Wang), Chinese Taiwan

for the current translations and their expertise!

If you like to add/update a language, copy the Translation file translation.zip and update the CSV language file. The .zip contains 4 CSV files for each language, one for the main cPicture App and one for the Ribbon menu:

  • <lang>.cpicture.csv
  • <lang>.cpicture.full.csv
  • <lang>.ribbon.csv
  • <lang>.ribbon.full.csv

The .csv is the list of text to translate. The full.csv is the complete set of the translations and allows you to change existing translations.

The CSV files have a simple structure for each translation ("English","Translation") and can be changed with Excel or any text editor. Text Encoding is UTF-8. Please contact me if you have any questions.

    "English";"Translation"
    "OK";"确定"
    "Cancel";"取消"
    "Browse...";"浏览..."
    "Red:";"红:"
    "Green:";"绿:"
    "Blue:";"蓝:"
    "Picture name and target folder";"图片名和目标文件夹"
    "Quality level:";"品质:"
    "File size:";"文件大小:"
    "Enter a name for this picture:";"输入图片名称:"

Workflow example: FTP upload

As part of a workflow, processed pictures often gets transferred to the final web site or publisher via the File Transfer Protocol (FTP).
FTP is an efficient and fast way to transfer large files over the Internet. Every webhoster provides FTP services and with this upload script you can easily transfer your images with cPicture.


Download the ftp-upload.ps1 script, set the password and login name of your FTP server in the script and remove the trailing .txt from the downloaded script file.

Add the script file to the folder where you copied cPicture.exe.
Make sure you have the function plugin for powershell scripts installed.

Run cPicture, select your pictures and start the upload script from the menu:

Workflow example: Open any RAW with Capture NX

To open your Raw file you can simply assign an editor in cPicture to open the file. But if you like to open a RAW file with another editor not supporting your used RAW Format, you can use the universal DNG format to link to your editor.

In this example, we will use external tools and a plugin script to create a simple workflow to open a non-Nikon RAW file with the Nikon RAW software Capture NX.
First the RAW gets converted to a DNG and then to a 16bit TIFF, which can be opened by Capture NX.

You need the ImageMagick Tools and the Adobe DNG converter:

  • Download the ImageMagick Tools ImageMagick and install
    Choose the Q16 Version of ImageMagick to ensure no loss in Quality: ImageMagick-6.8.8-6-Q16-x64-dll.exe

  • Download the Adobe DNG converter Adobe DNG converter and install


Download the convert-Raw-to-TIFF.ps1 script, adjust the file path of the tools in the script

  • C:\Program Files (x86)\Adobe\Adobe DNG Converter.exe
  • C:\Program Files (x86)\ImageMagick-6.8.8-Q16\convert
  • C:\Program Files\Nikon\Capture NX 2\Capture NX 2.exe

and remove the trailing .txt from the downloaded script file.

Add the script file to the folder where you copied cPicture.exe.
Make sure you have the function plugin for powershell scripts installed.

Run cPicture, select your RAW picture and start the conversion script from the menu:


The script will first convert the RAW to a DNG and then using the ImageMagick Tools to convert the DNG to a 16bit TIFF that gets opened by the Nikon software.

cPicture 3.3

cPicture is updated to version 3.3

  • new syncronization architecture (resolve display lock-up issue)
  • improved tethered shooting

cPicture is a portable App, so no installation is required.

Download the .ZIP file, (click here for the 64bit version) open the ZIP file and copy the cPicture.exe anywhere on your computer to run the app or use the 'Check for updates' button in the 'Other' category.
See the Download Instructions for more details.

For questions, please mail to: cpicture

Encrypt / Decrypt your pictures

These two plugins encrypt and decrypt your pictures to avoid unauthorized access. For example you can store your pictures in an online storage without the fear of anyone scanning and looking at your pictures. The encryption and decryption is done with the Windows .NET Security library via a powershell plugin and uses a 256bit symmetrical chiffre which keeps even the NSA out.

Install

Unzip the encrypt-decrypt plugin to the folder where you copied cPicture.exe
(Make sure you change the password and the secret phrases in both the encrypt and decrypt script!)

Usage

Select your pictures and click the function plug-ins button in the menu ribbon to select the encrypt script:


The pictures cannot be read anymore and will be shown as such. You would add those pictures to your online store or send it to someone. If you send the pictures to someone, you need to pass on your encrypt.ps1 and decrypt.ps1 script passwords in a secure channel. Since you encrypt before any Internet Transfer, there is no chance anyone looking at them.

To decrypt, select the encrypted pictures and click the function plug-ins button in the menu ribbon to select the decrypt script:


The pictures will be now visible again:


Note: The script plugin in this package does not display the Powershell console for each processed picture. If you like to have a console displayed for each processed picture, use the Script plugin for powershell scripts from the Plugins page.
The only difference in the script plugin is in line #204 plugin.cpp. See the source code of the plugin for more detail.

shInfo.nShow = SW_HIDE;
Neuere Posts → Home ← Ältere Posts