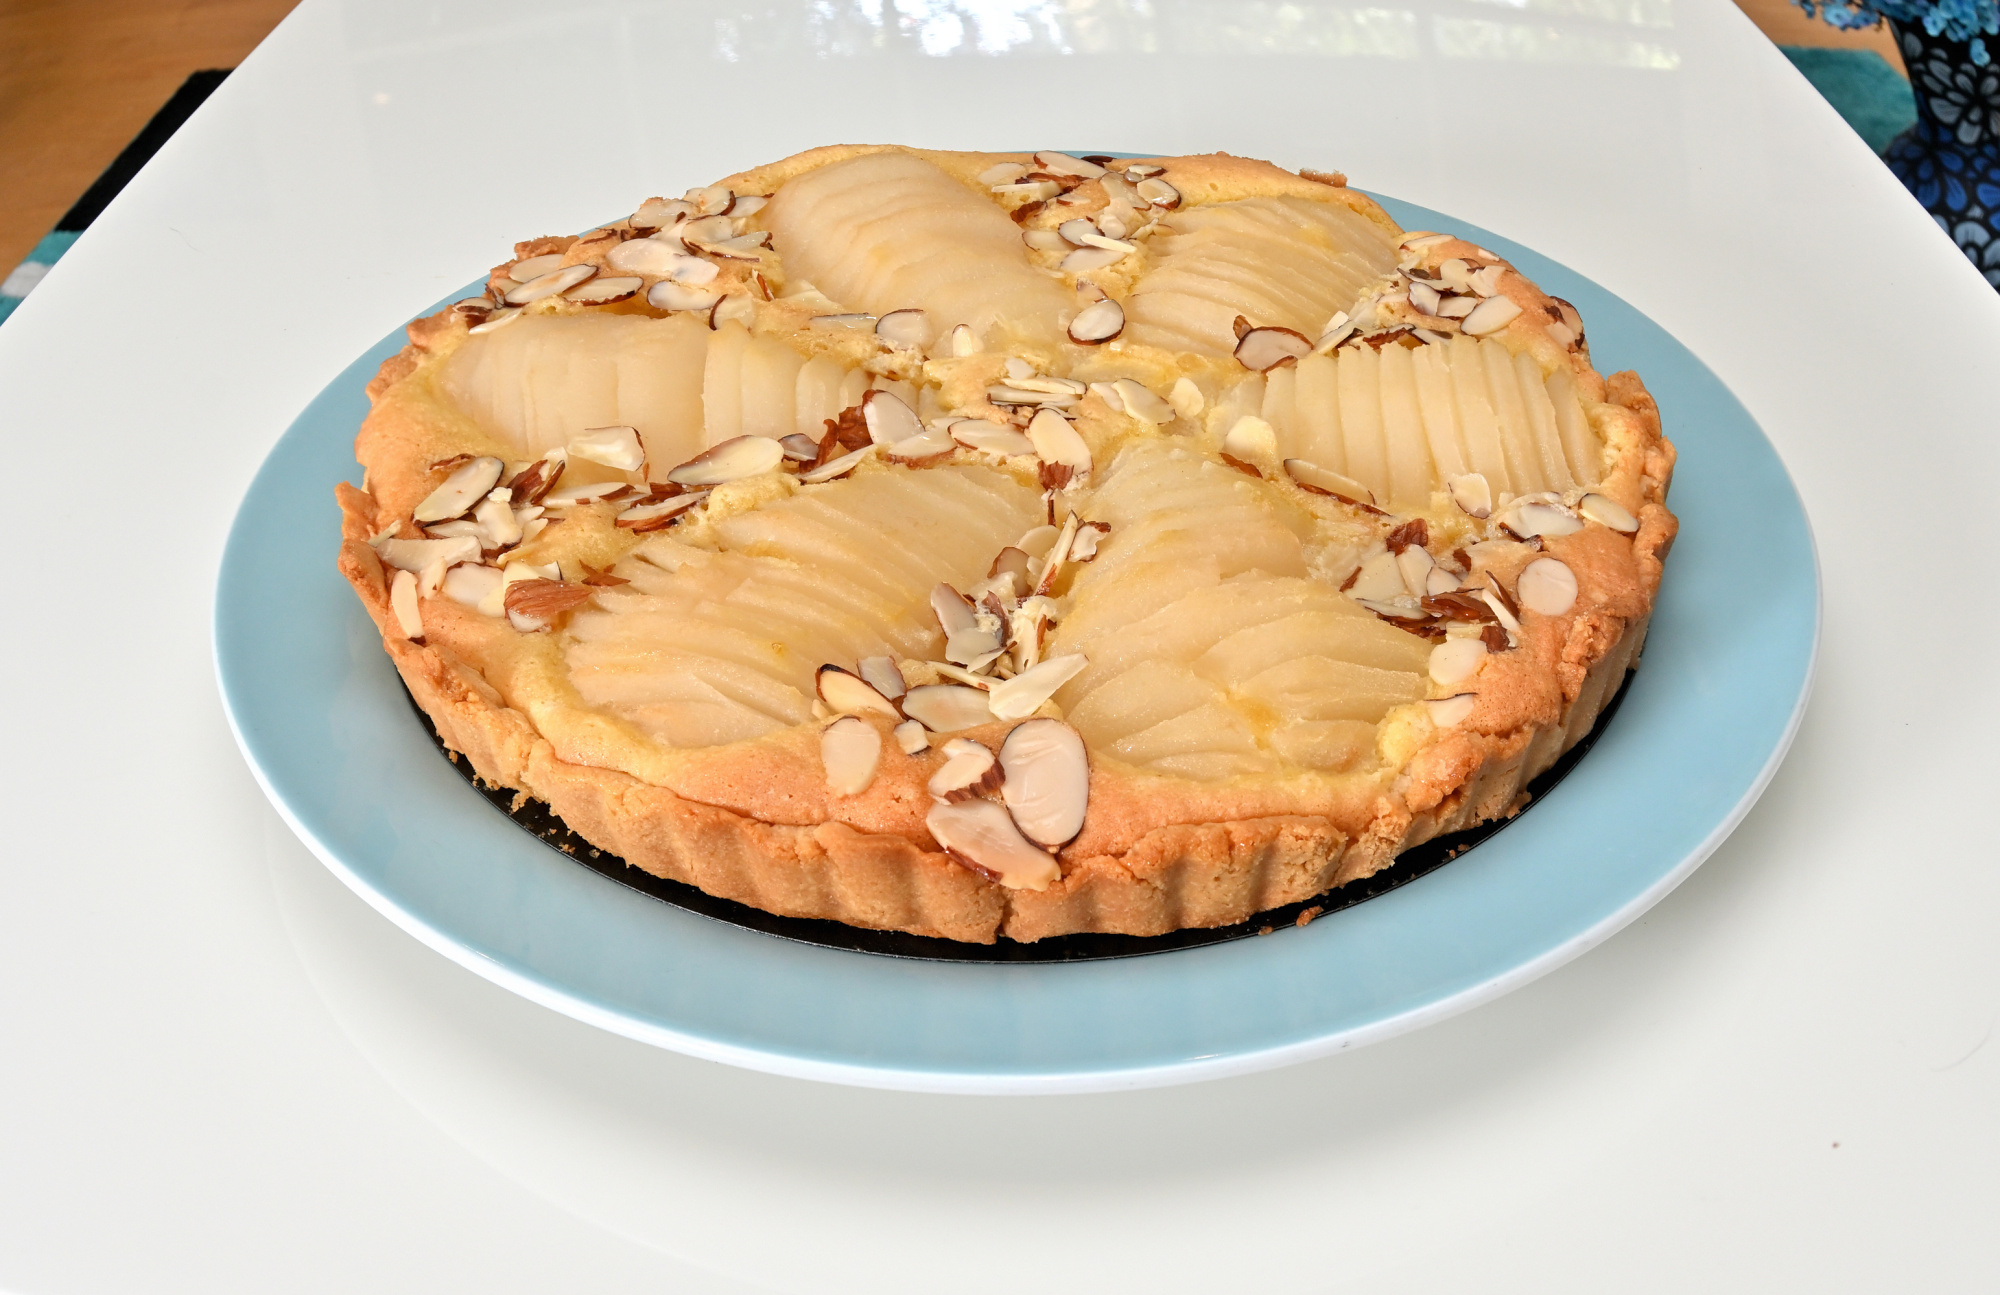
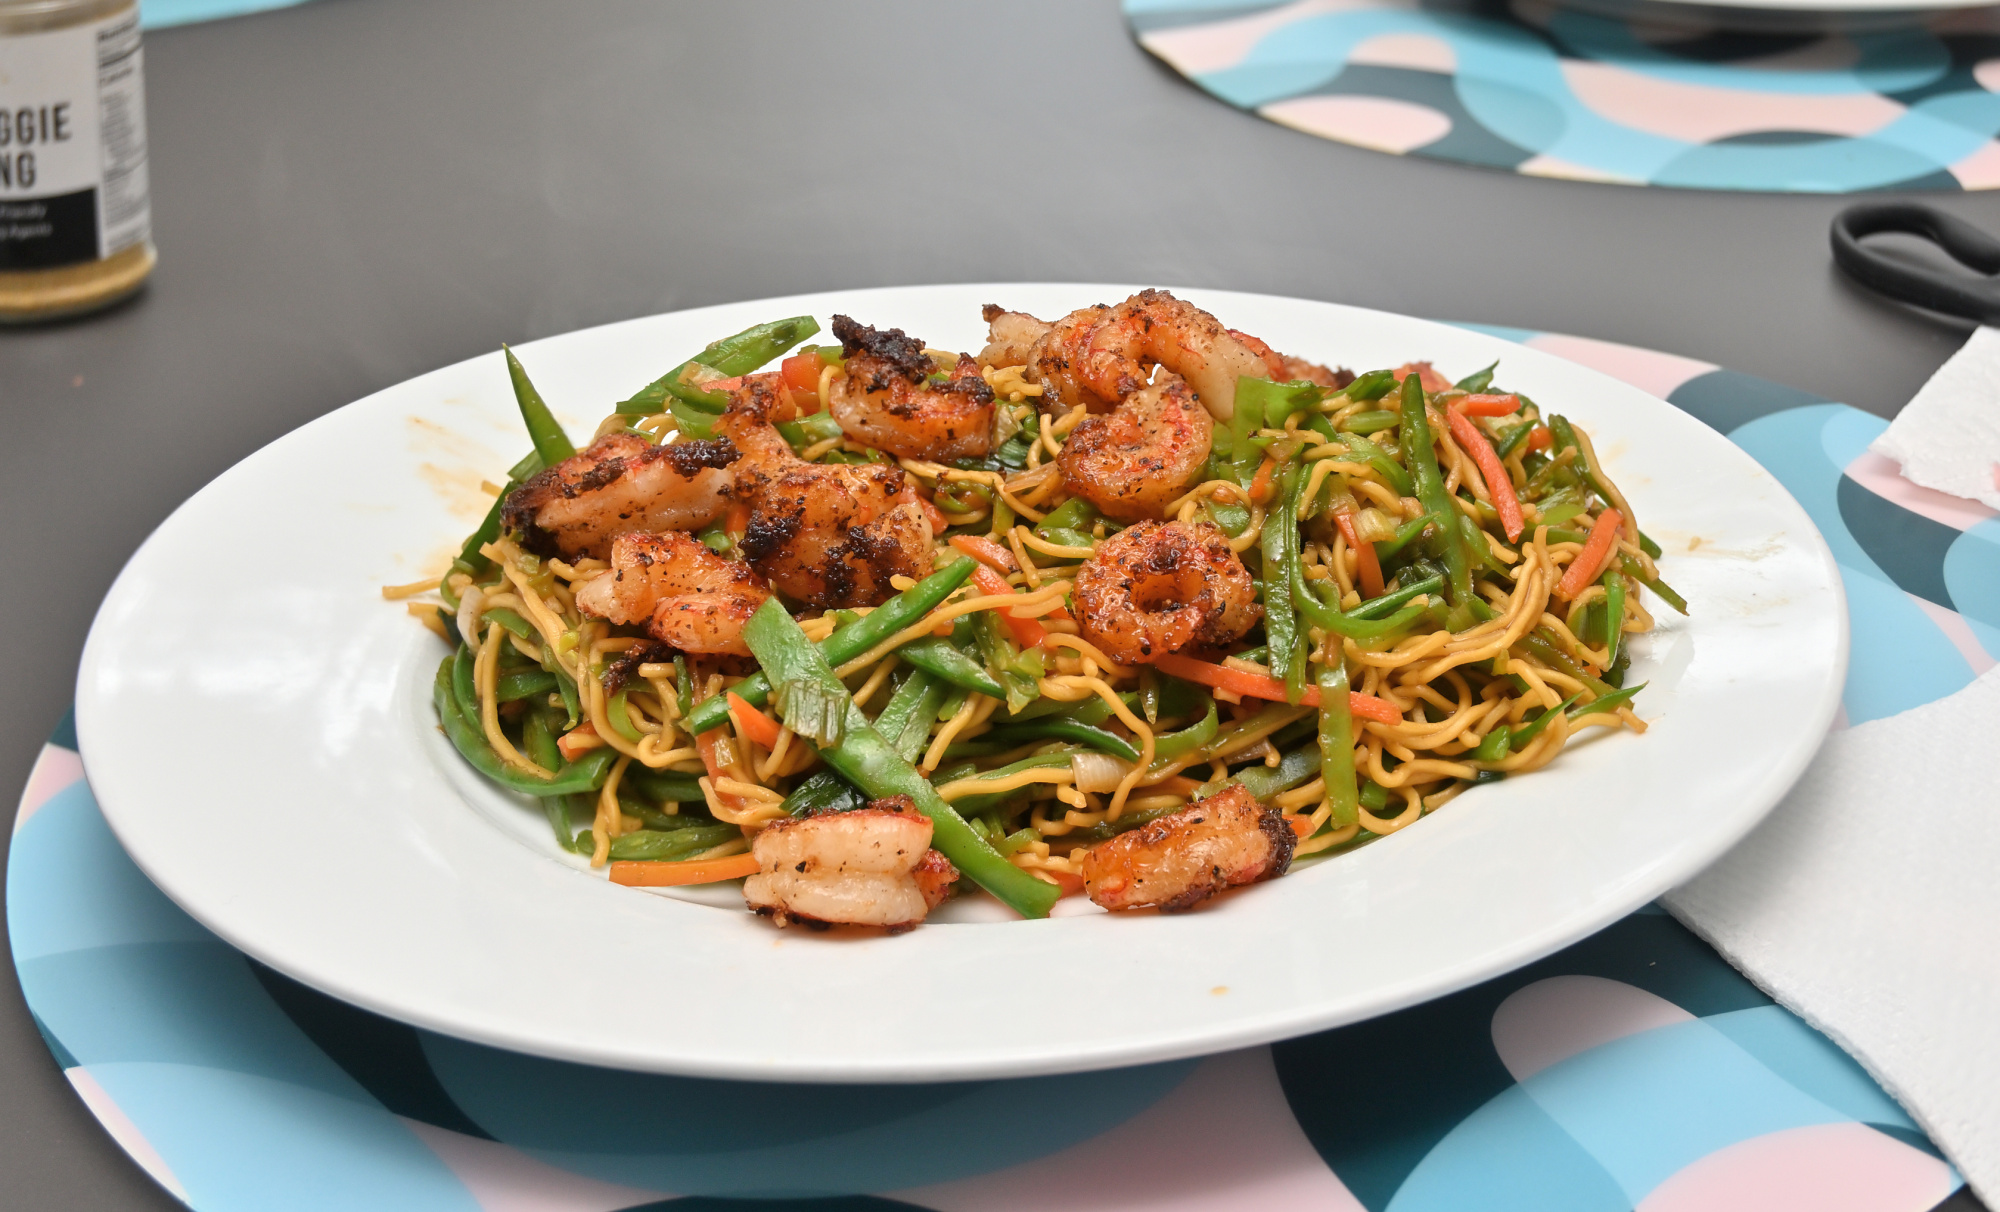
Frisch aus dem Ofen
1/60s f/7,1 ISO 200/24° 16-50mm f/3,5-6,3 VR f=21mm/32mm
Fokus-Stacking, 1/125s f/5,0 ISO 200/24° 16-50mm f/3,5-6,3 VR f=30mm/45mm

In Bearbeitung
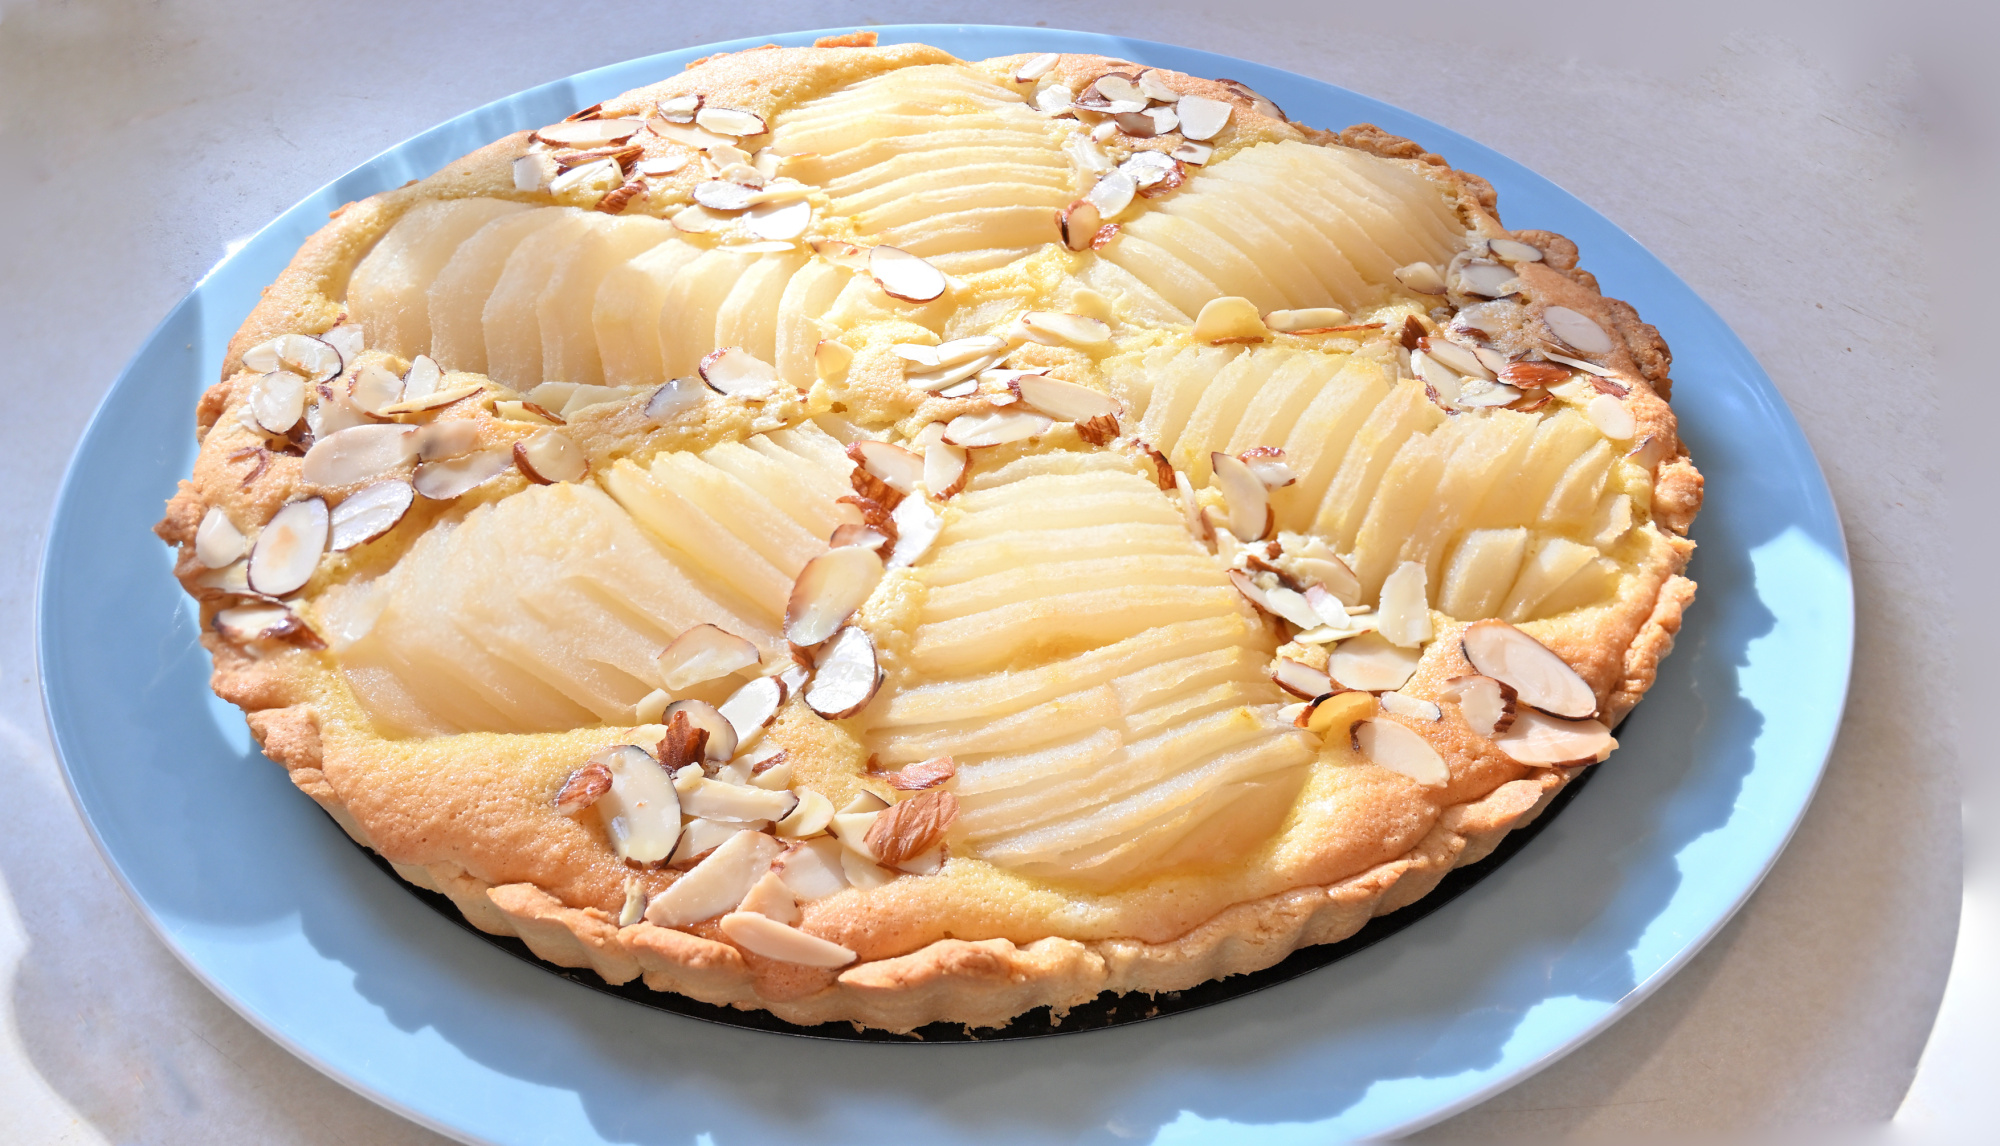
Fokus-Stacking, 1/125s f/5,0 ISO 200/24° 16-50mm f/3,5-6,3 VR f=30mm/45mm
Kaffeezeit
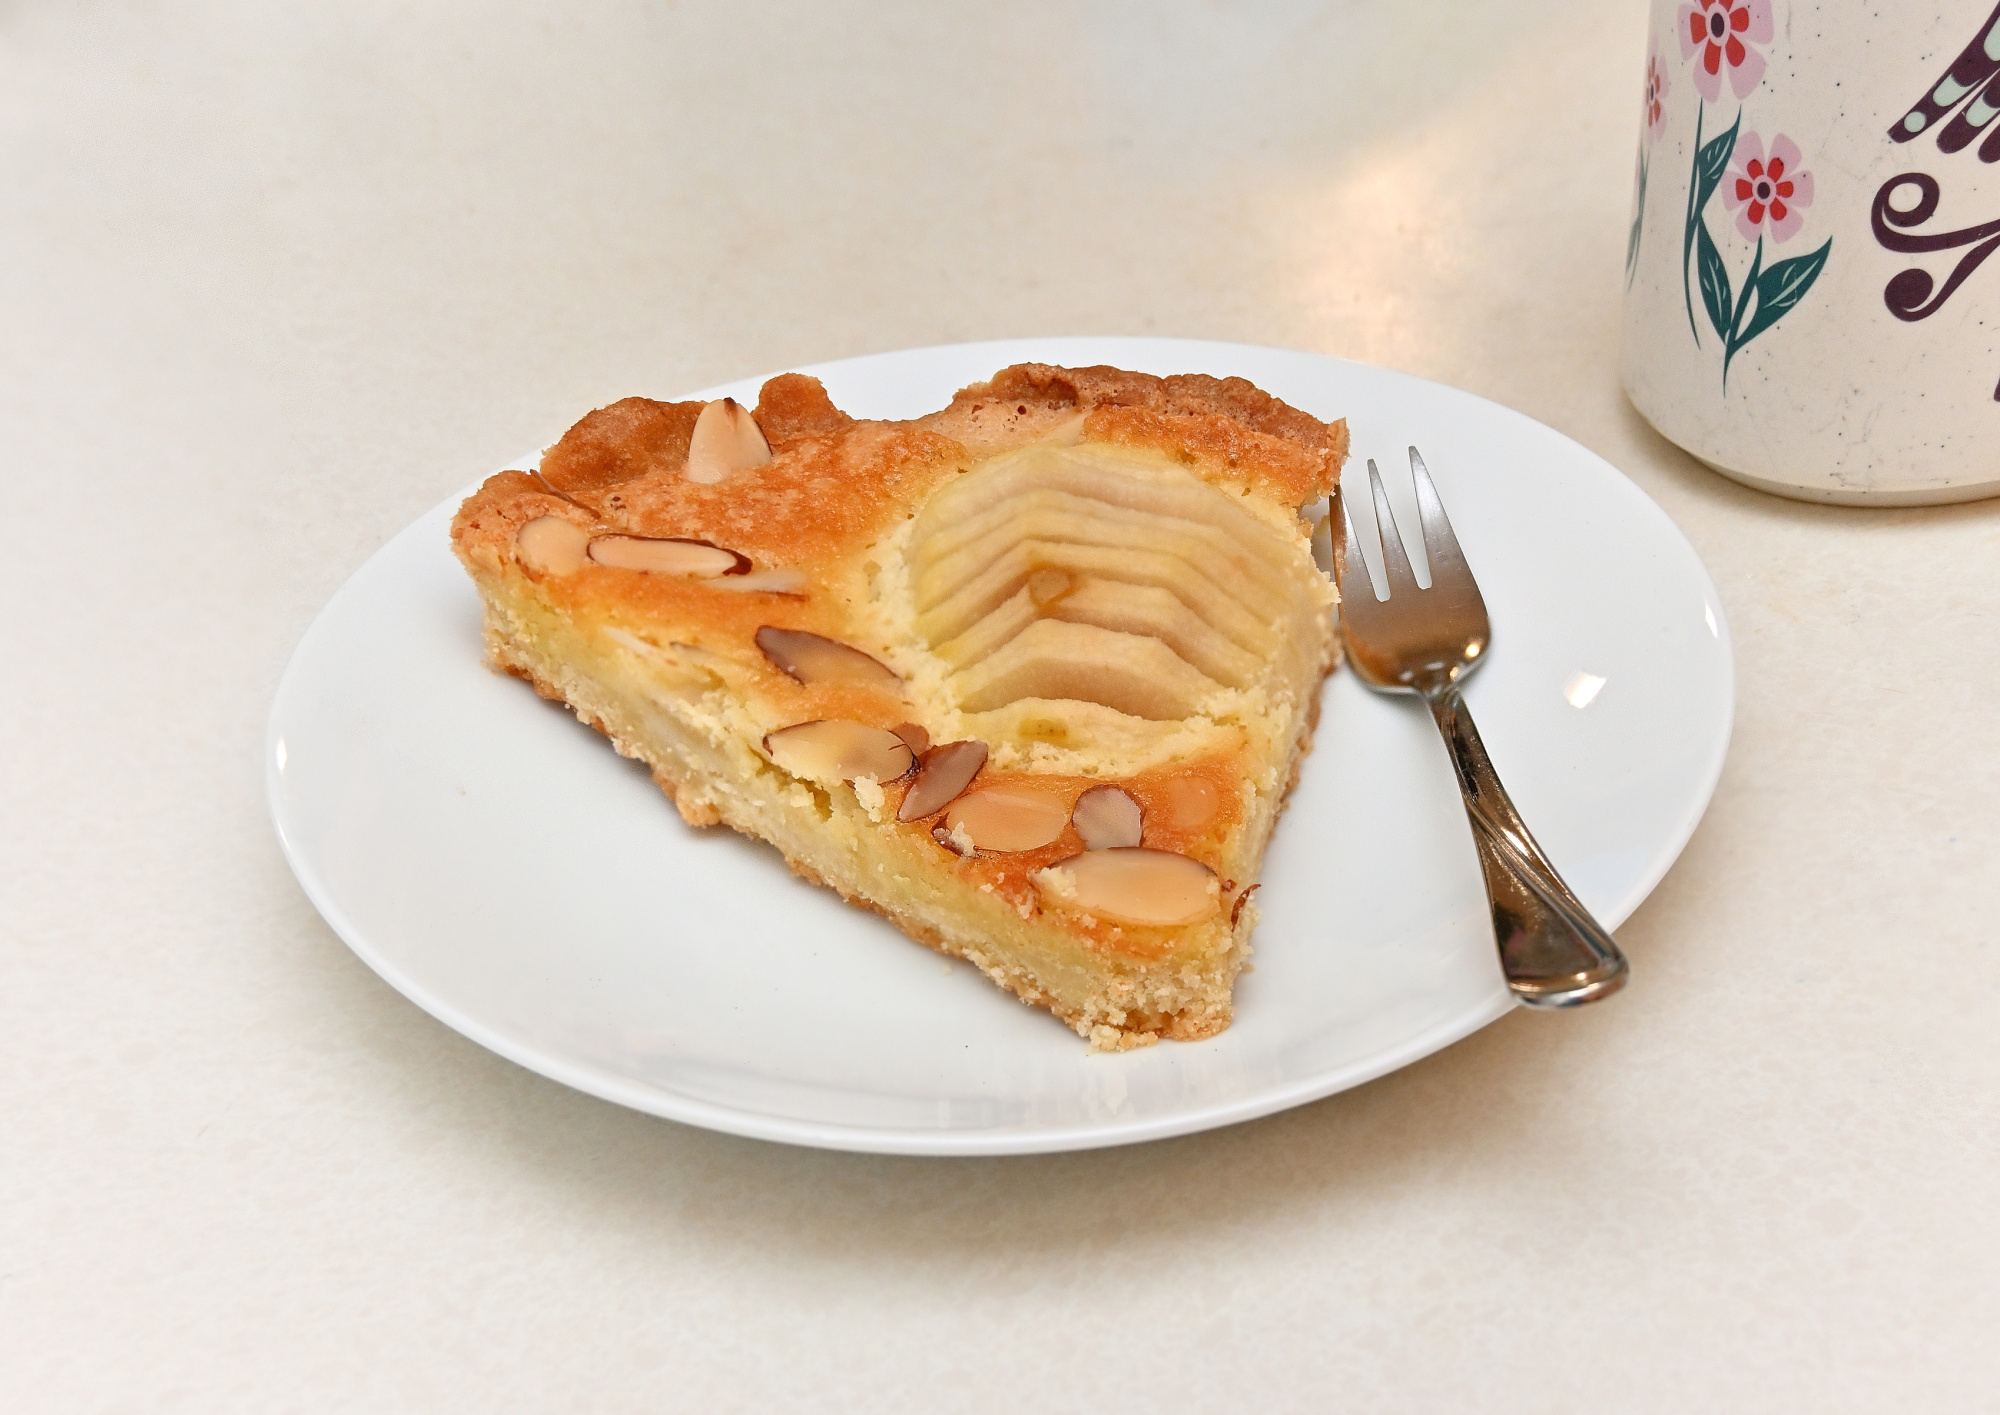
Ohne Fokus-Stacking
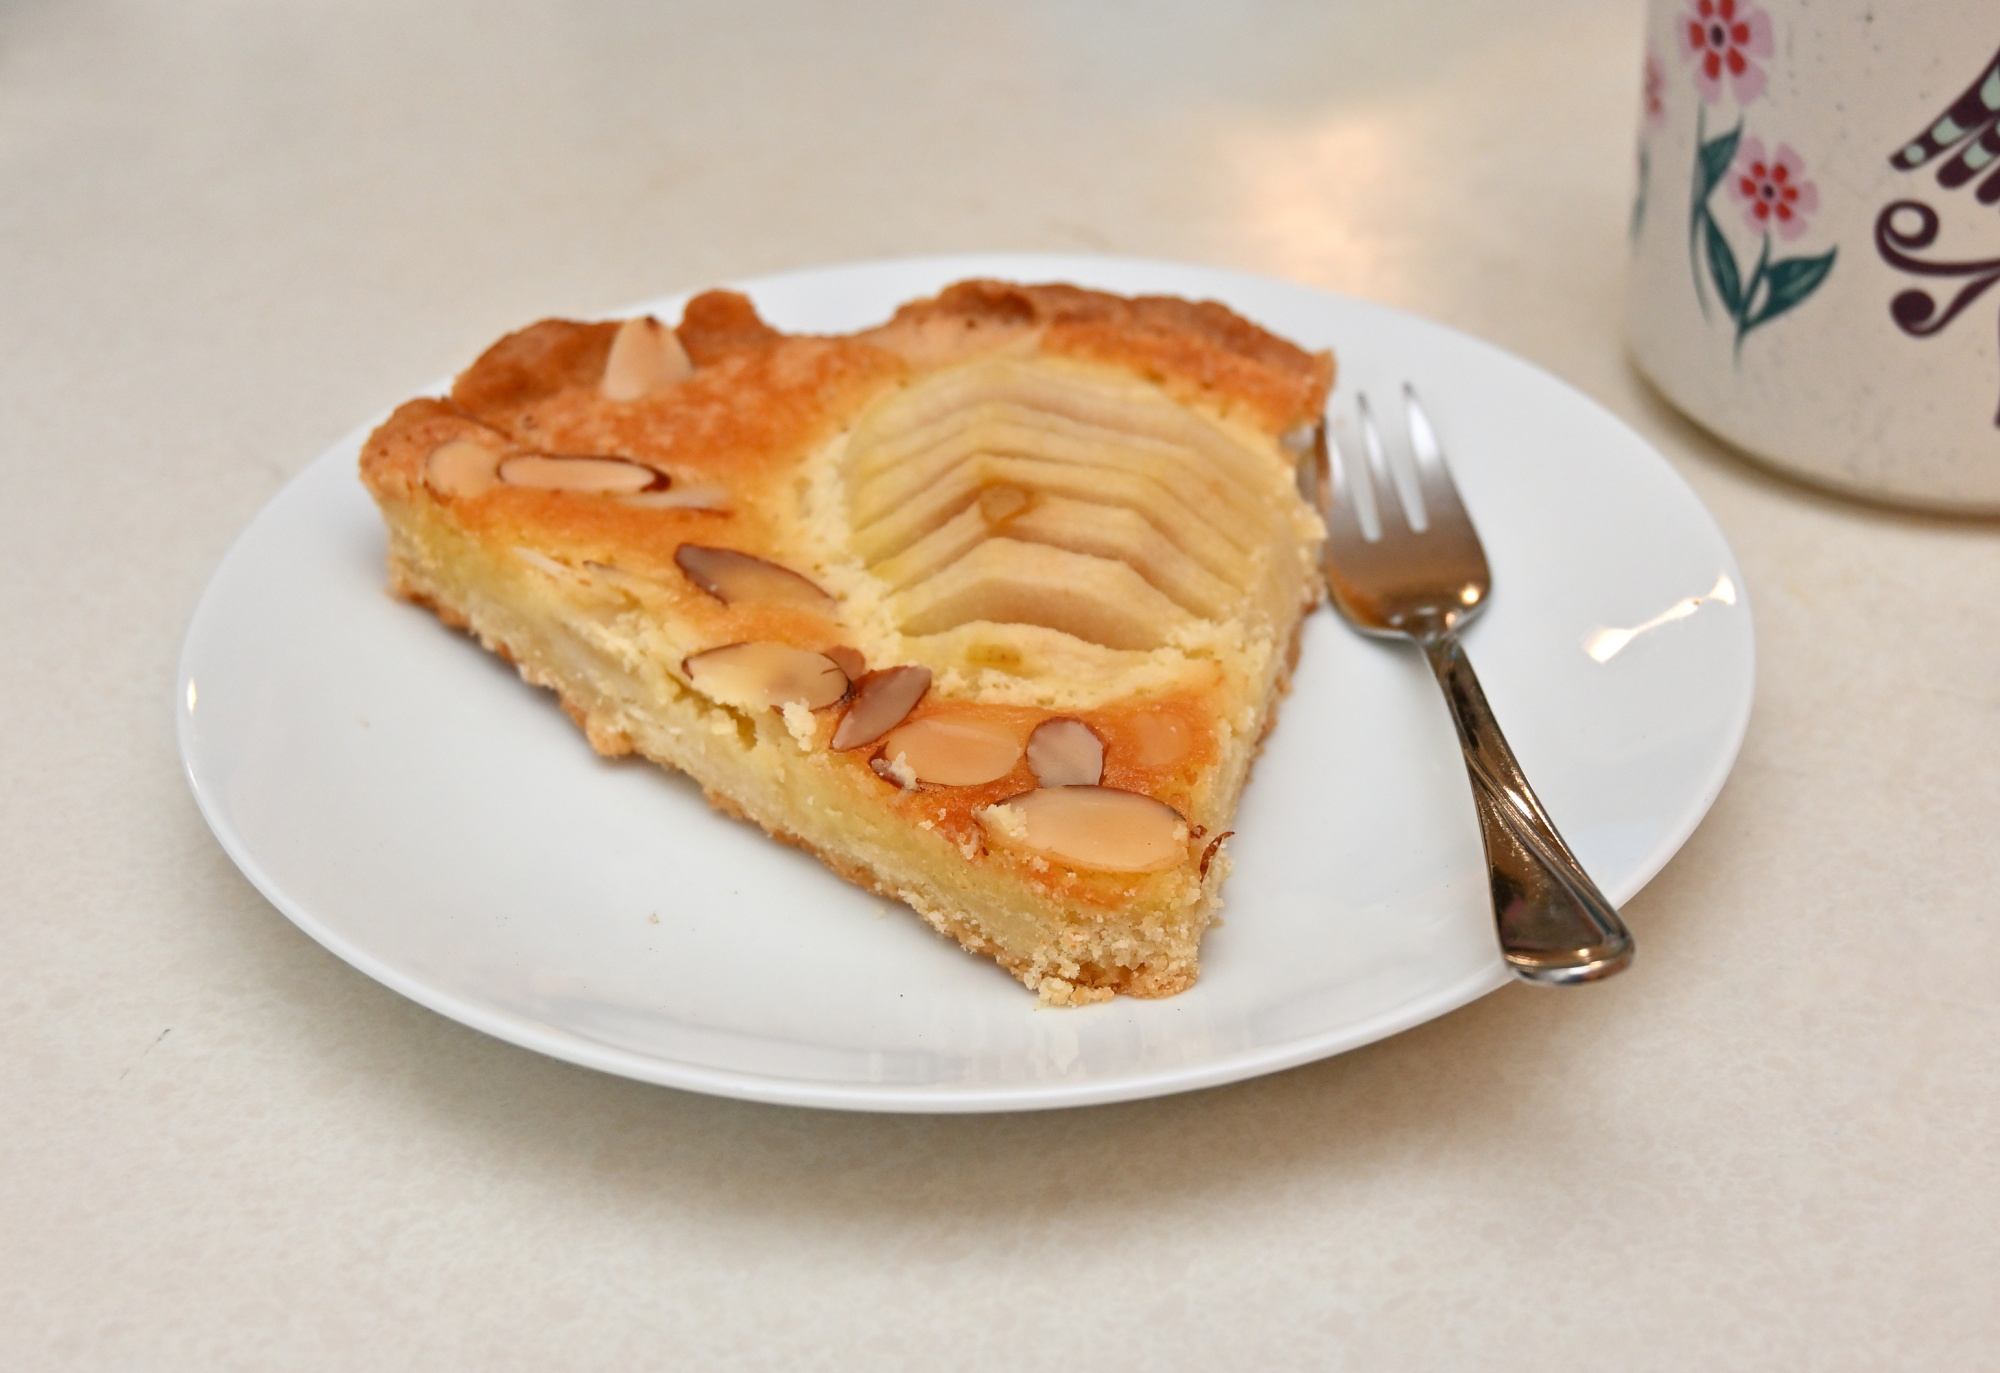
Fokus-Stacking, 1/60s f/5,0 ISO 250 16-50mm f/3,5-6,3 VR f=30mm/45mm

Siehe auch Combine pictures with PTGui, Focus stacking.
Besser geht's nicht. Auch mit dem Fokus-Stacking.
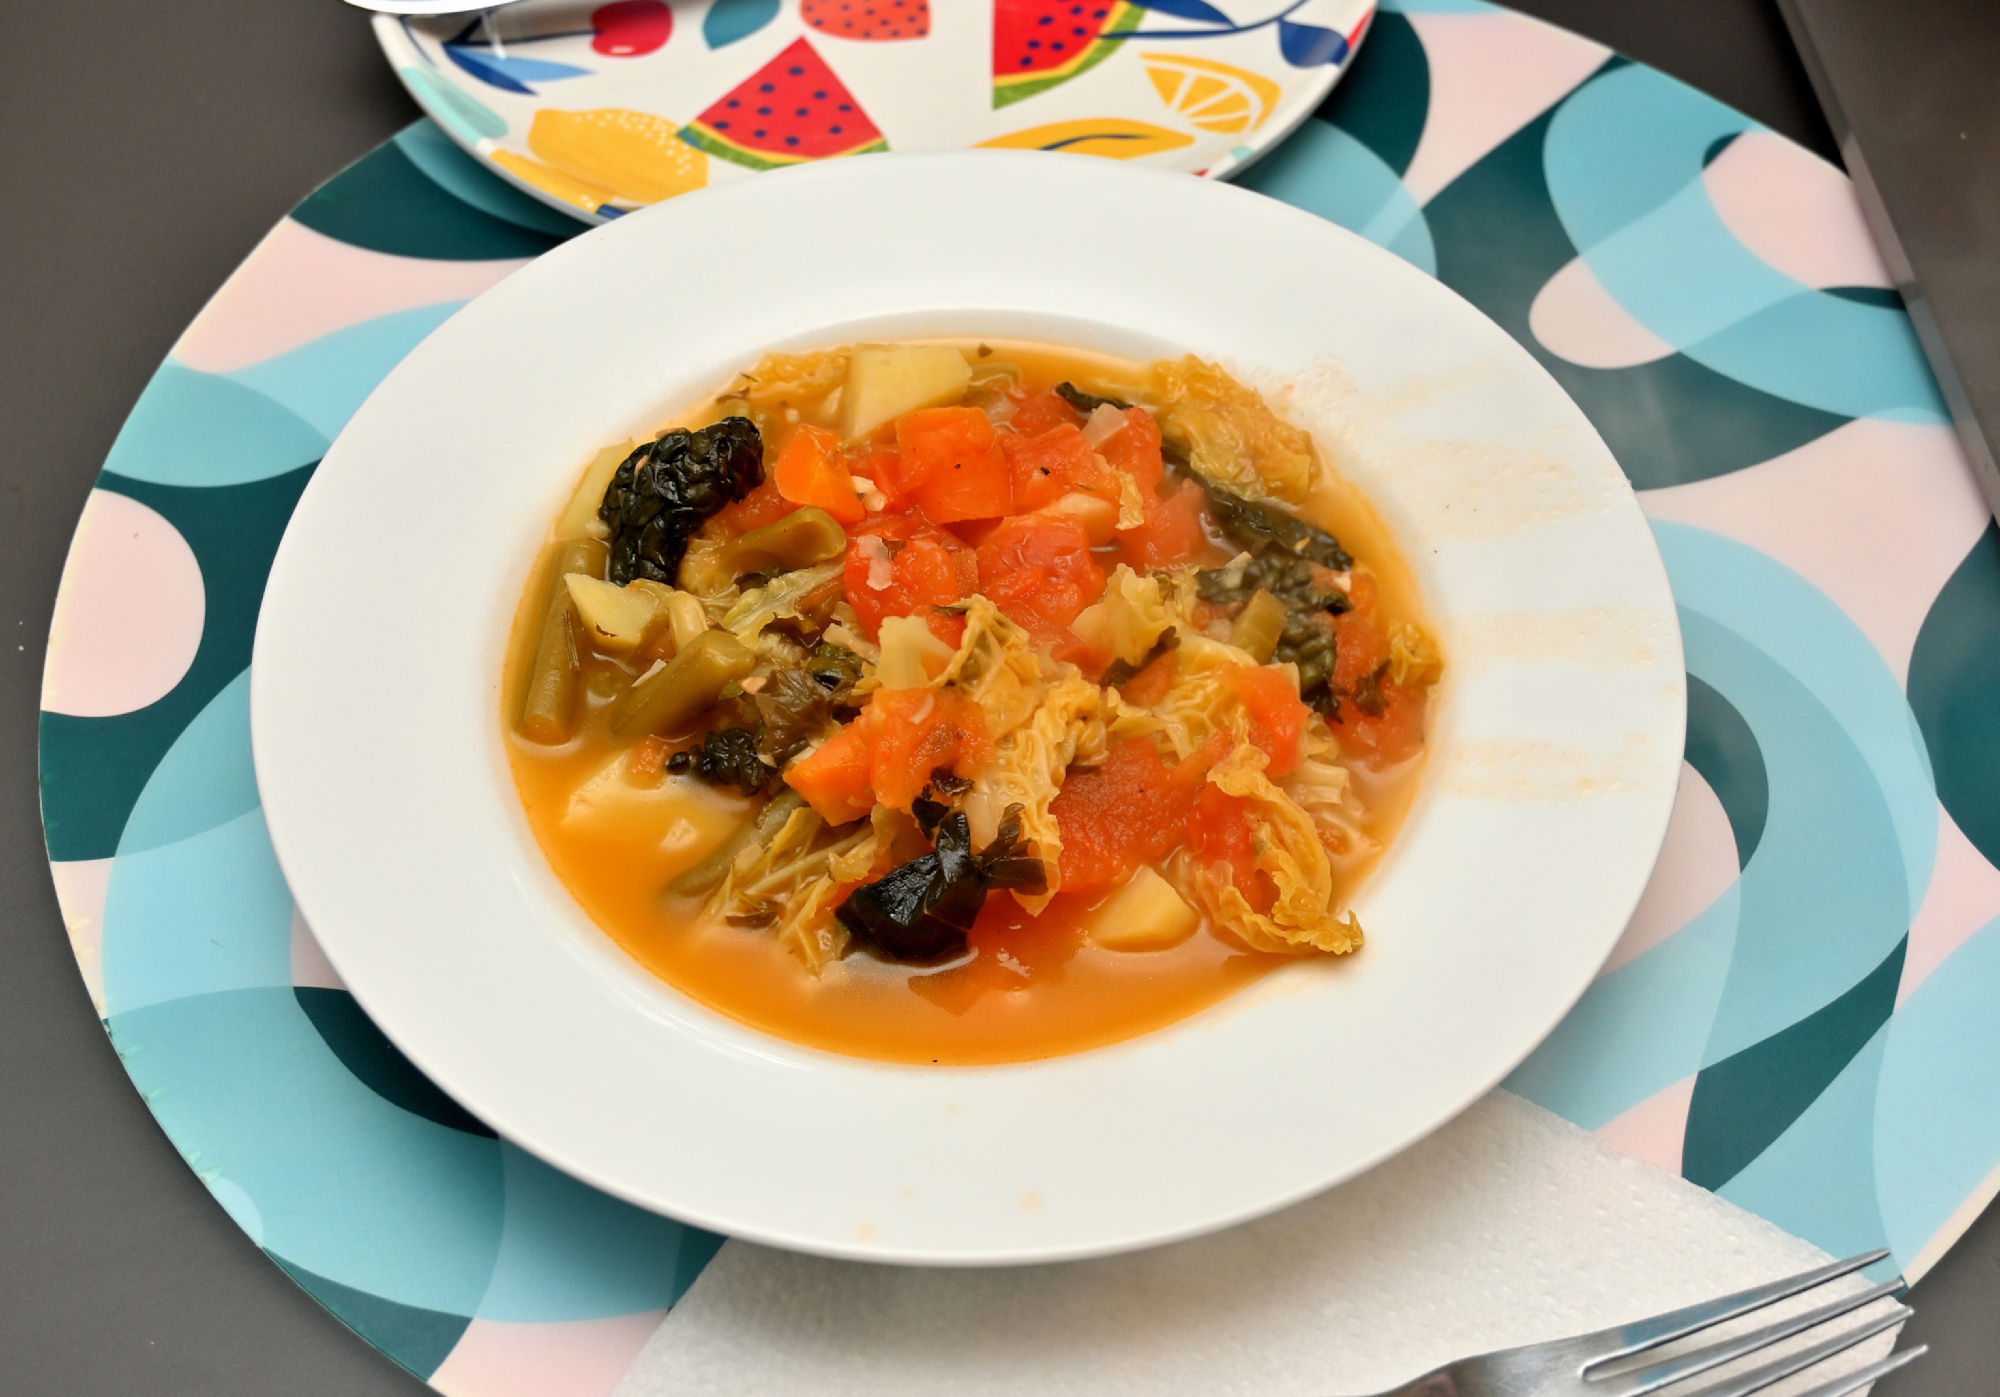
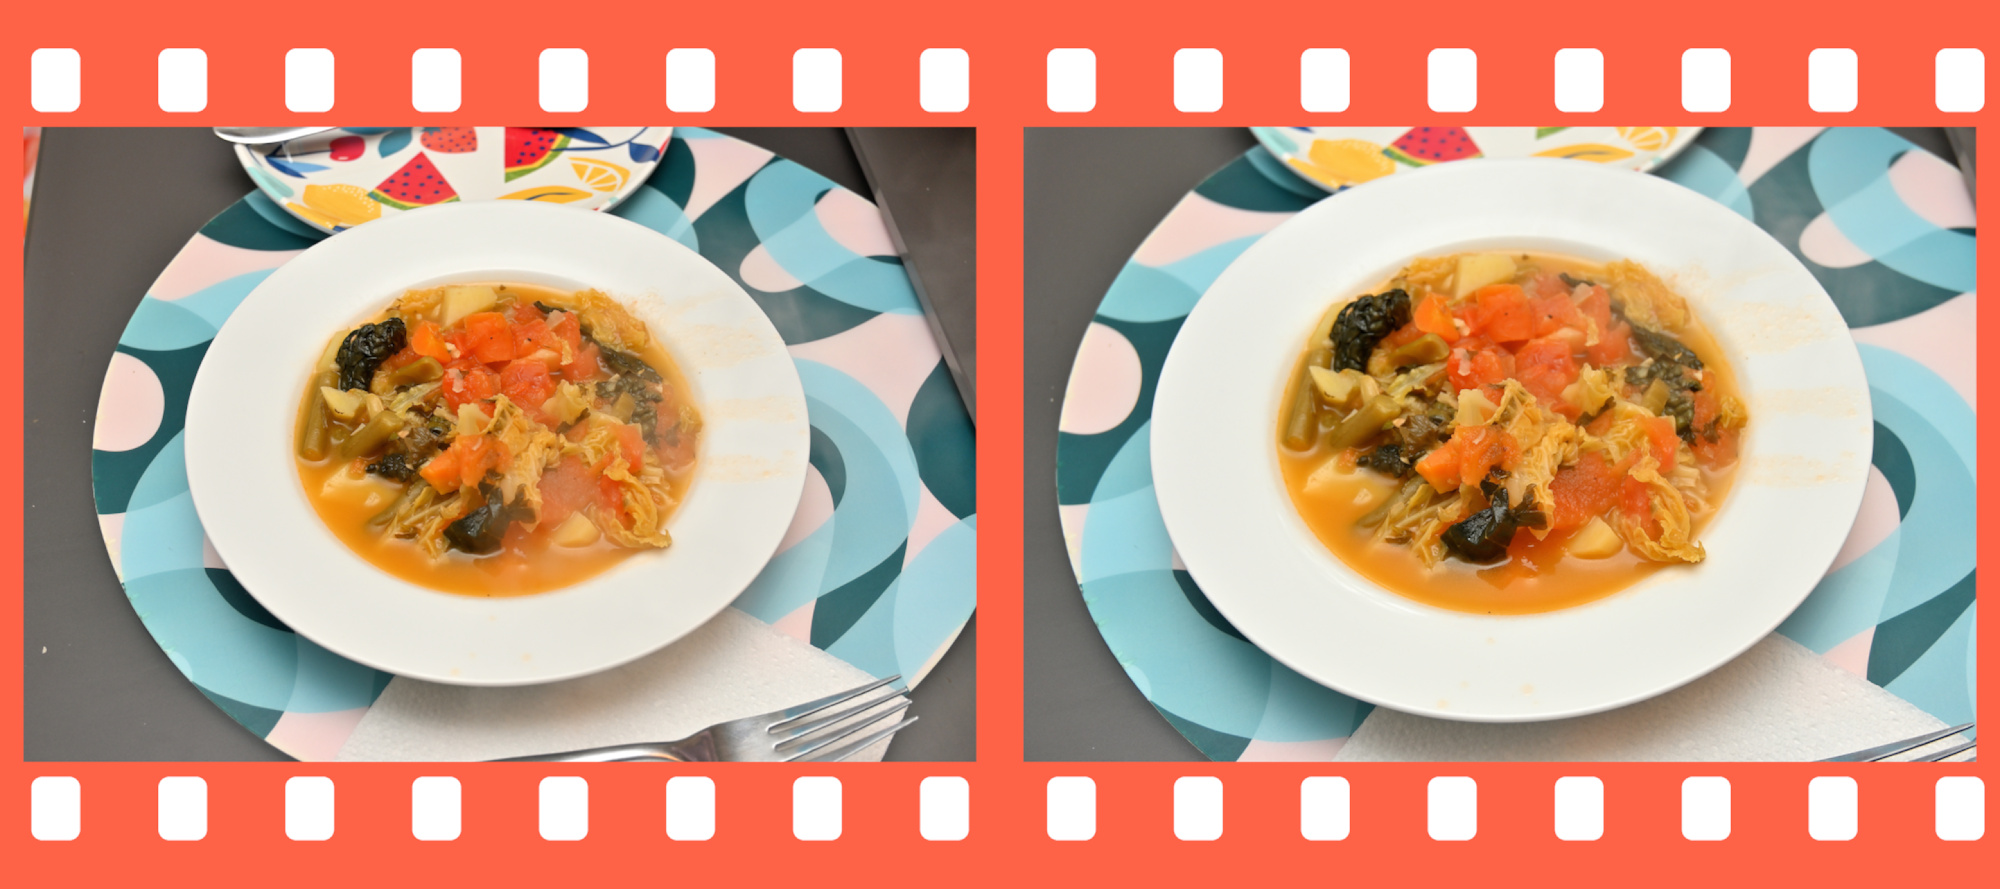
Dieses Bild wurde aus zwei Aufnahmen erstellt, die aus unterschiedlichen Blickwinkeln, Brennweiten und Entfernungen gemacht wurden.
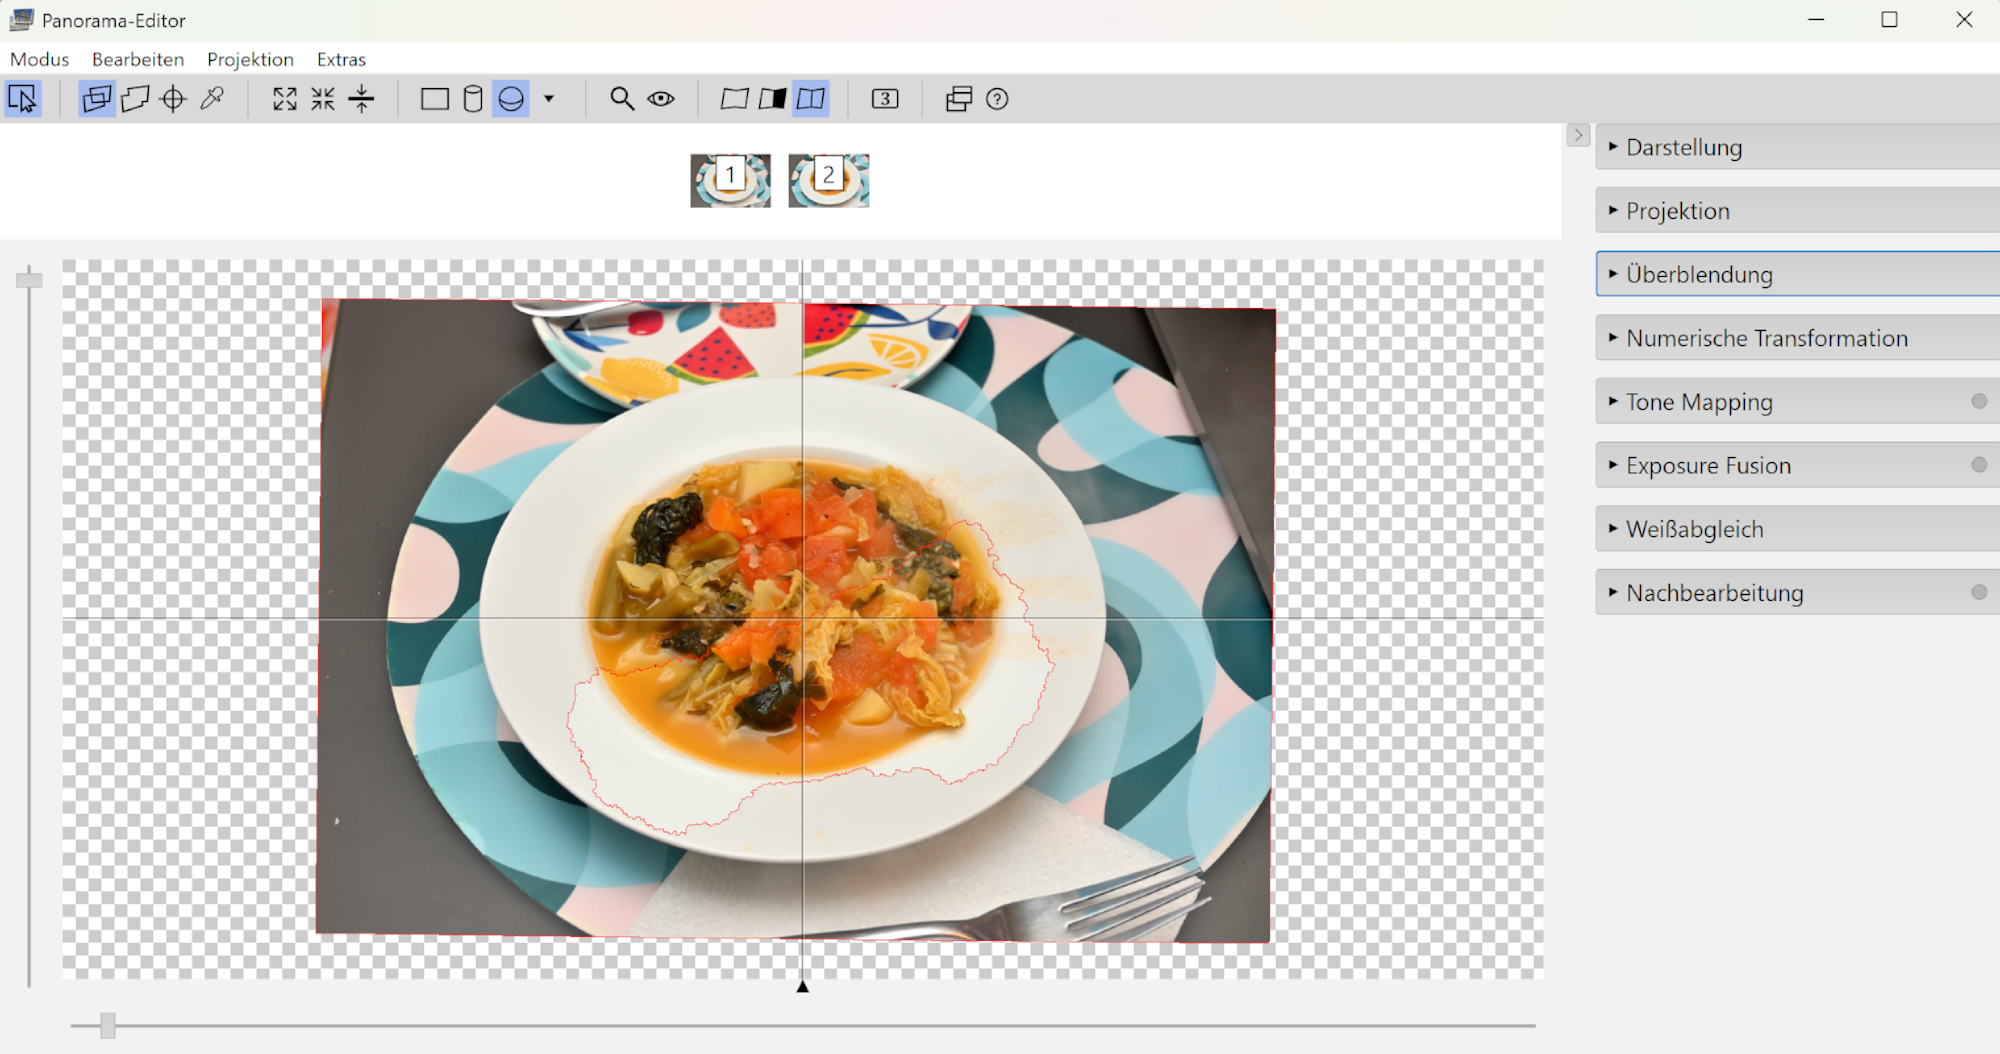
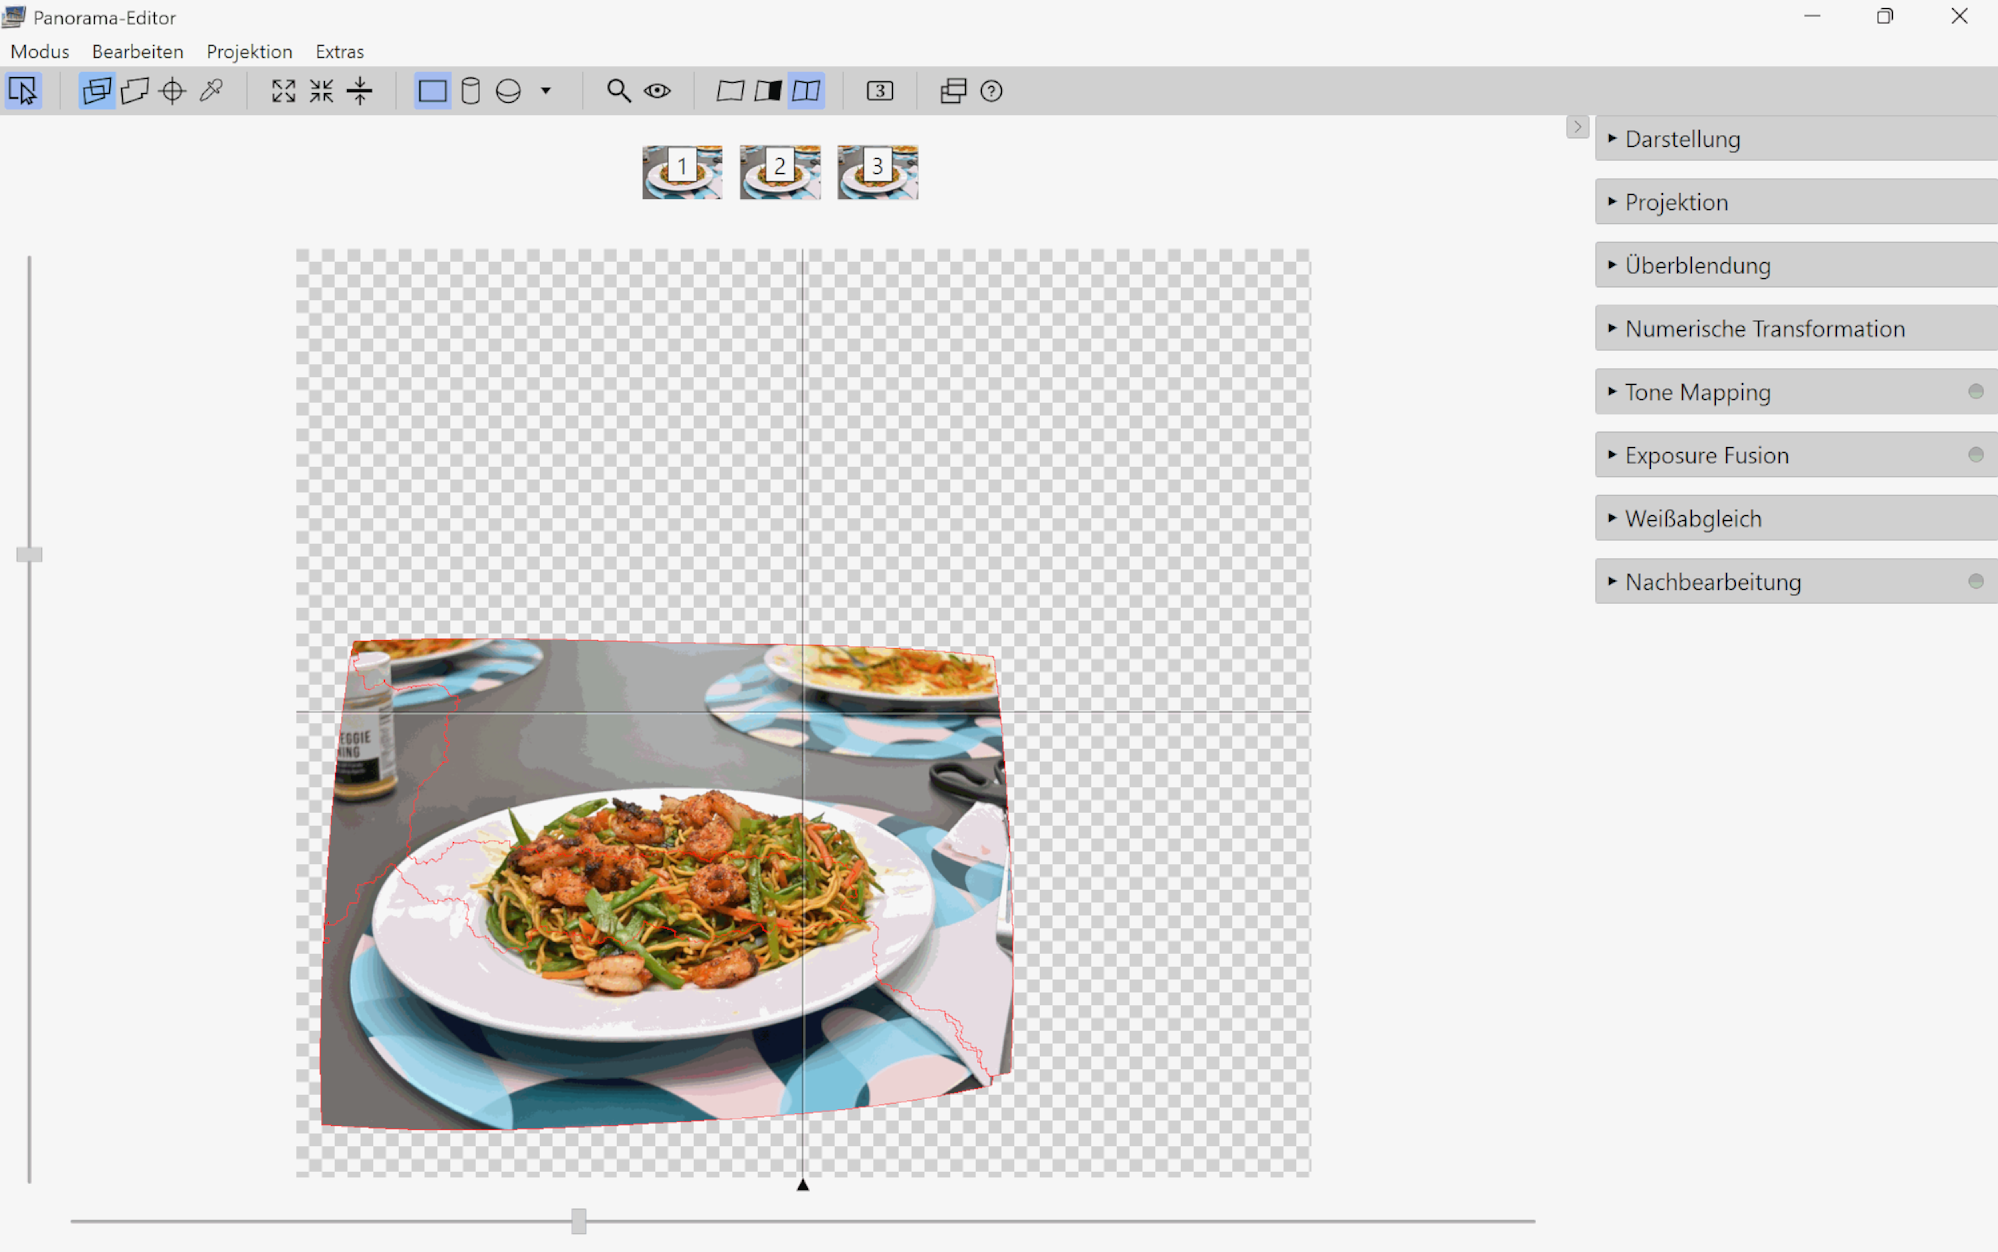
Die Schritte mit PTGui sind einfach:
- automatisch Kontrollpunkte erstellen lassen, und alle Kontrollpunkte außerhalb des interessanten Bereiches (Tellers) entfernen
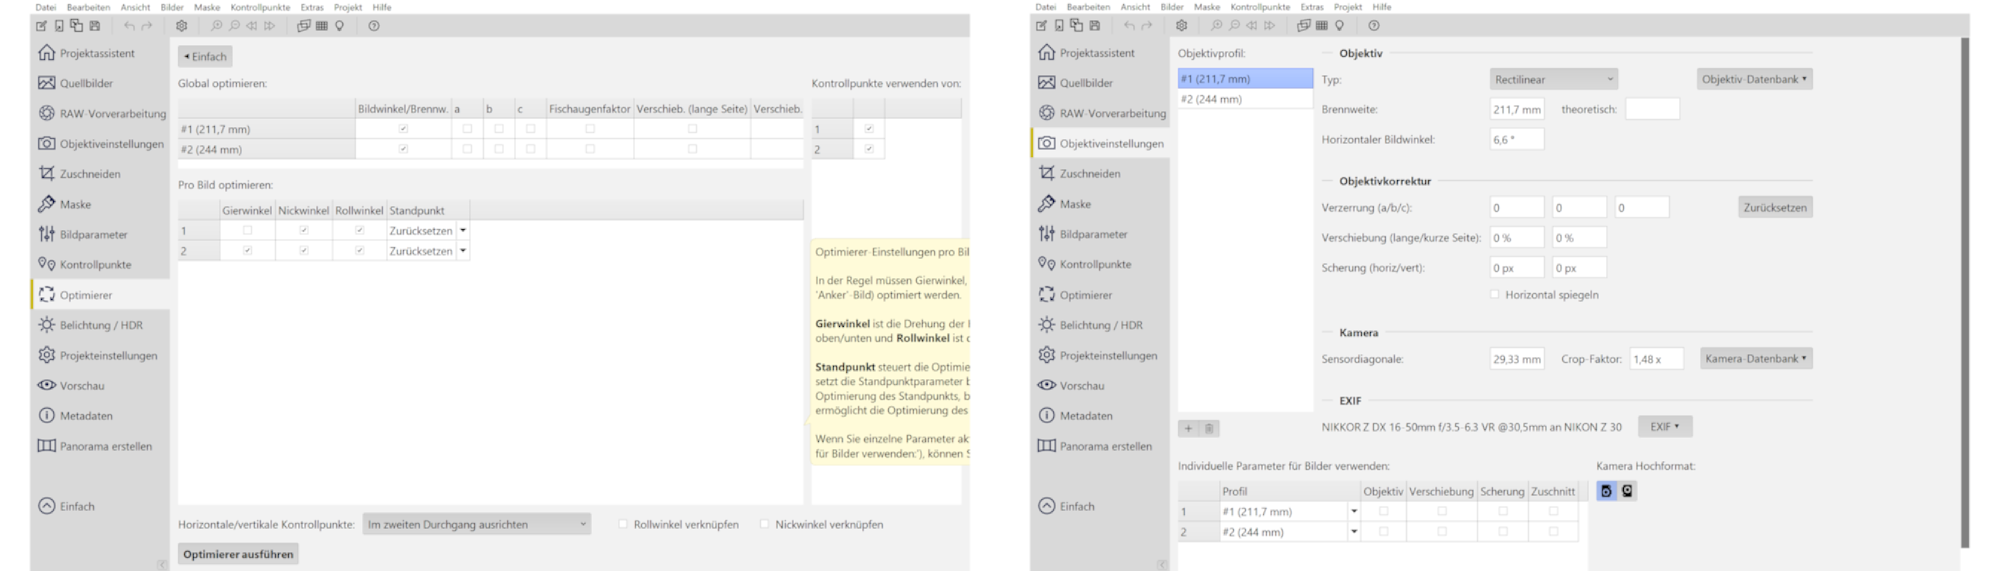
- ohne parameter a, b und c optimieren, also nur Blickwinkel und Gier-, Nick- und Rollwinkel, damit werden die verschiedenen Brennweiten automatisch erkannt und korrekt zusammengefügt
Die Bereiche in Fokus zur Verwendung grün malen (rote Bereiche dagegen werden ausgeschlossen):
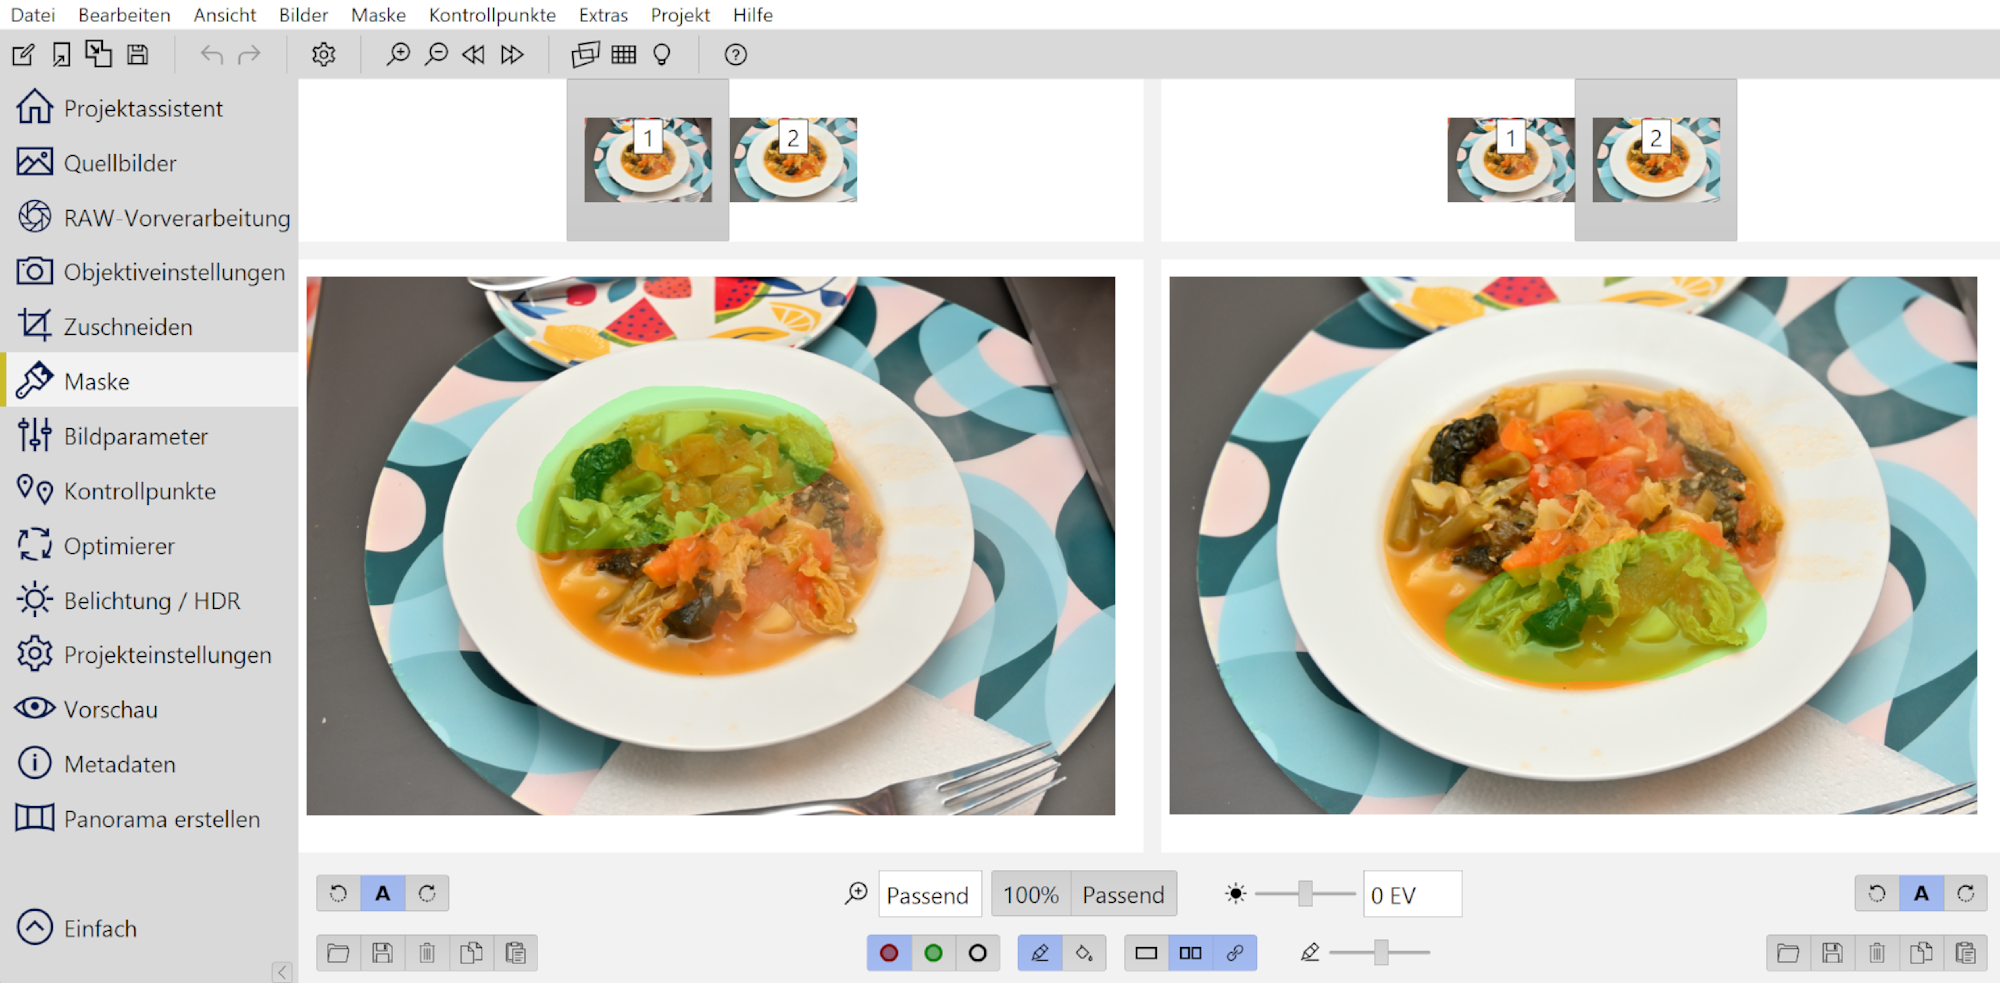
Dadurch werden nur die jeweils scharf abgebildeten Bereiche verwendet:
Siehe Combine pictures with PTGui, Focus stacking
[1/60s f/4,8 ISO 100/21° 16-50mm f/3,5-6,3 VR f=30mm/45mm] [1/60s f/5,0 ISO 100/21° 16-50mm f/3,5-6,3 VR f=31mm/47mm]
#FF6347 RGB(255,99,71)
[1/60s f/5,3 ISO 250 16-50mm f/3,5-6,3 VR f=36mm/54mm] [1/60s f/5,6 ISO 250 16-50mm f/3,5-6,3 VR f=38mm/57mm]

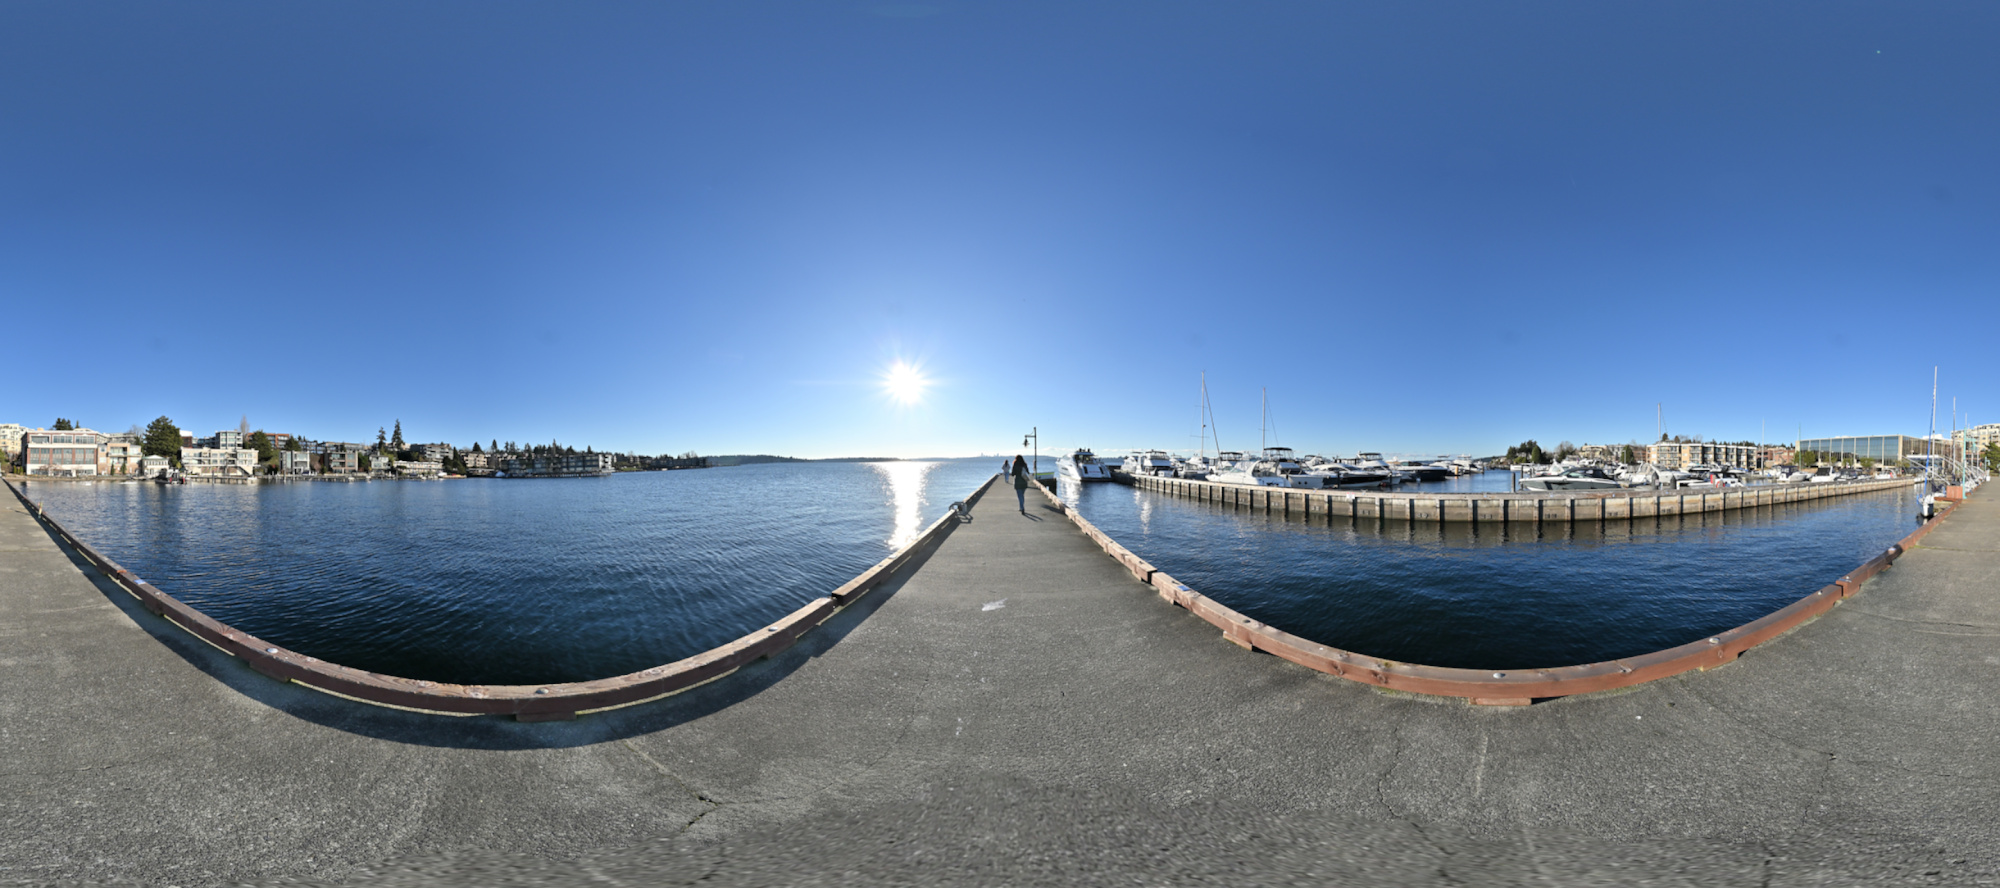
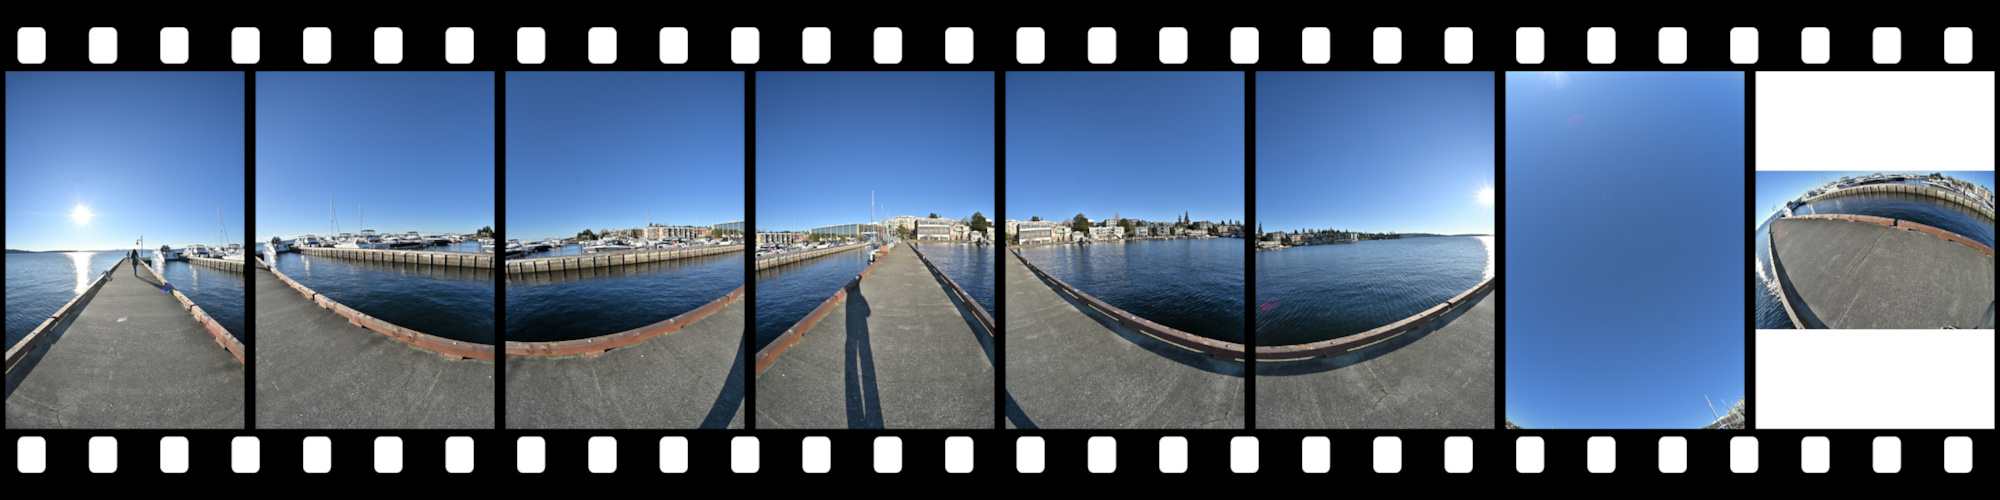
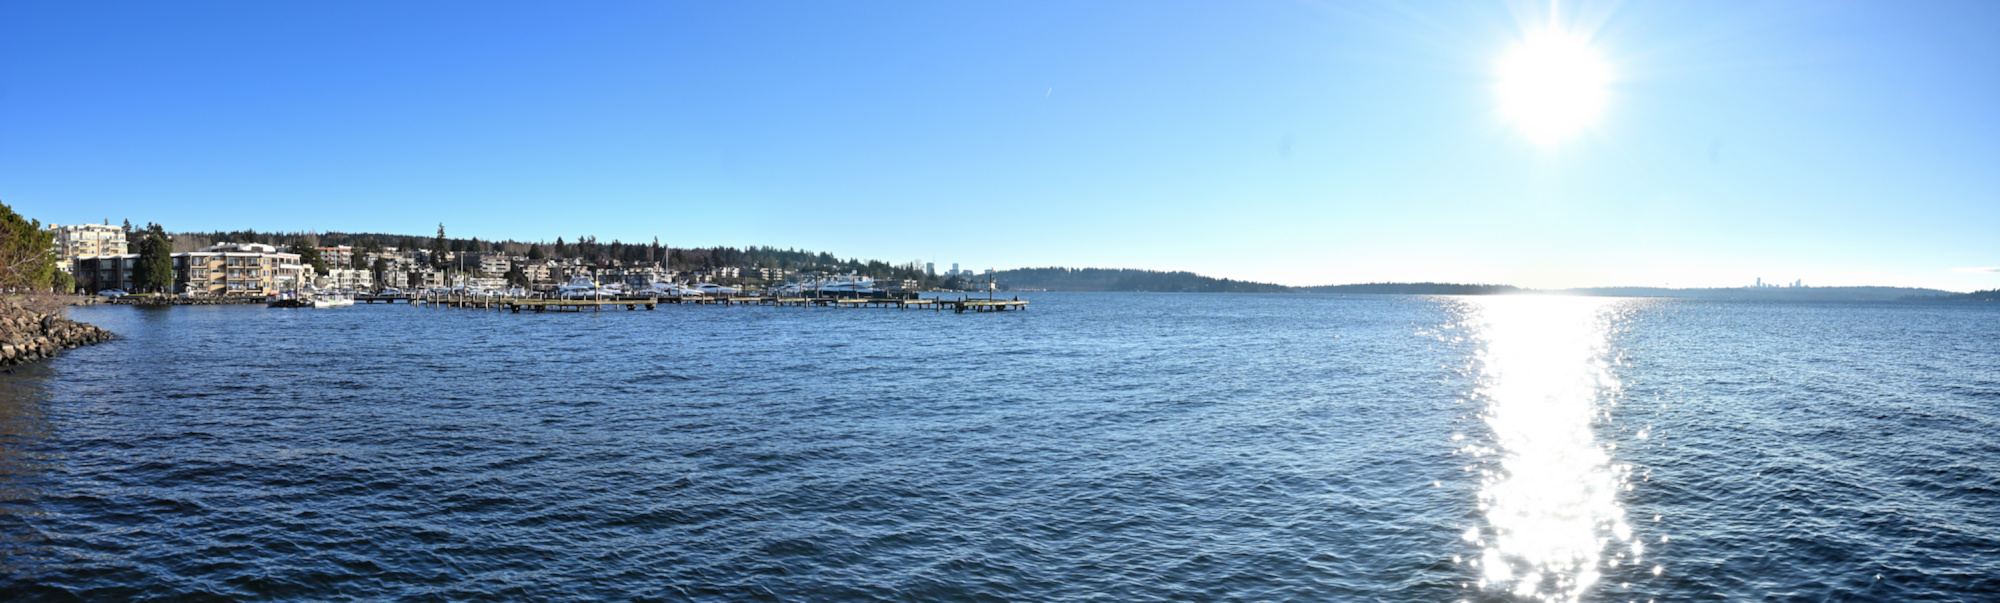
Sunny Sunday afternoon at the Kirkland Piers.
Interactive Panorama Kirkland Pier 1

1/800s f/5,6 ISO 100/21° f=7,5mm
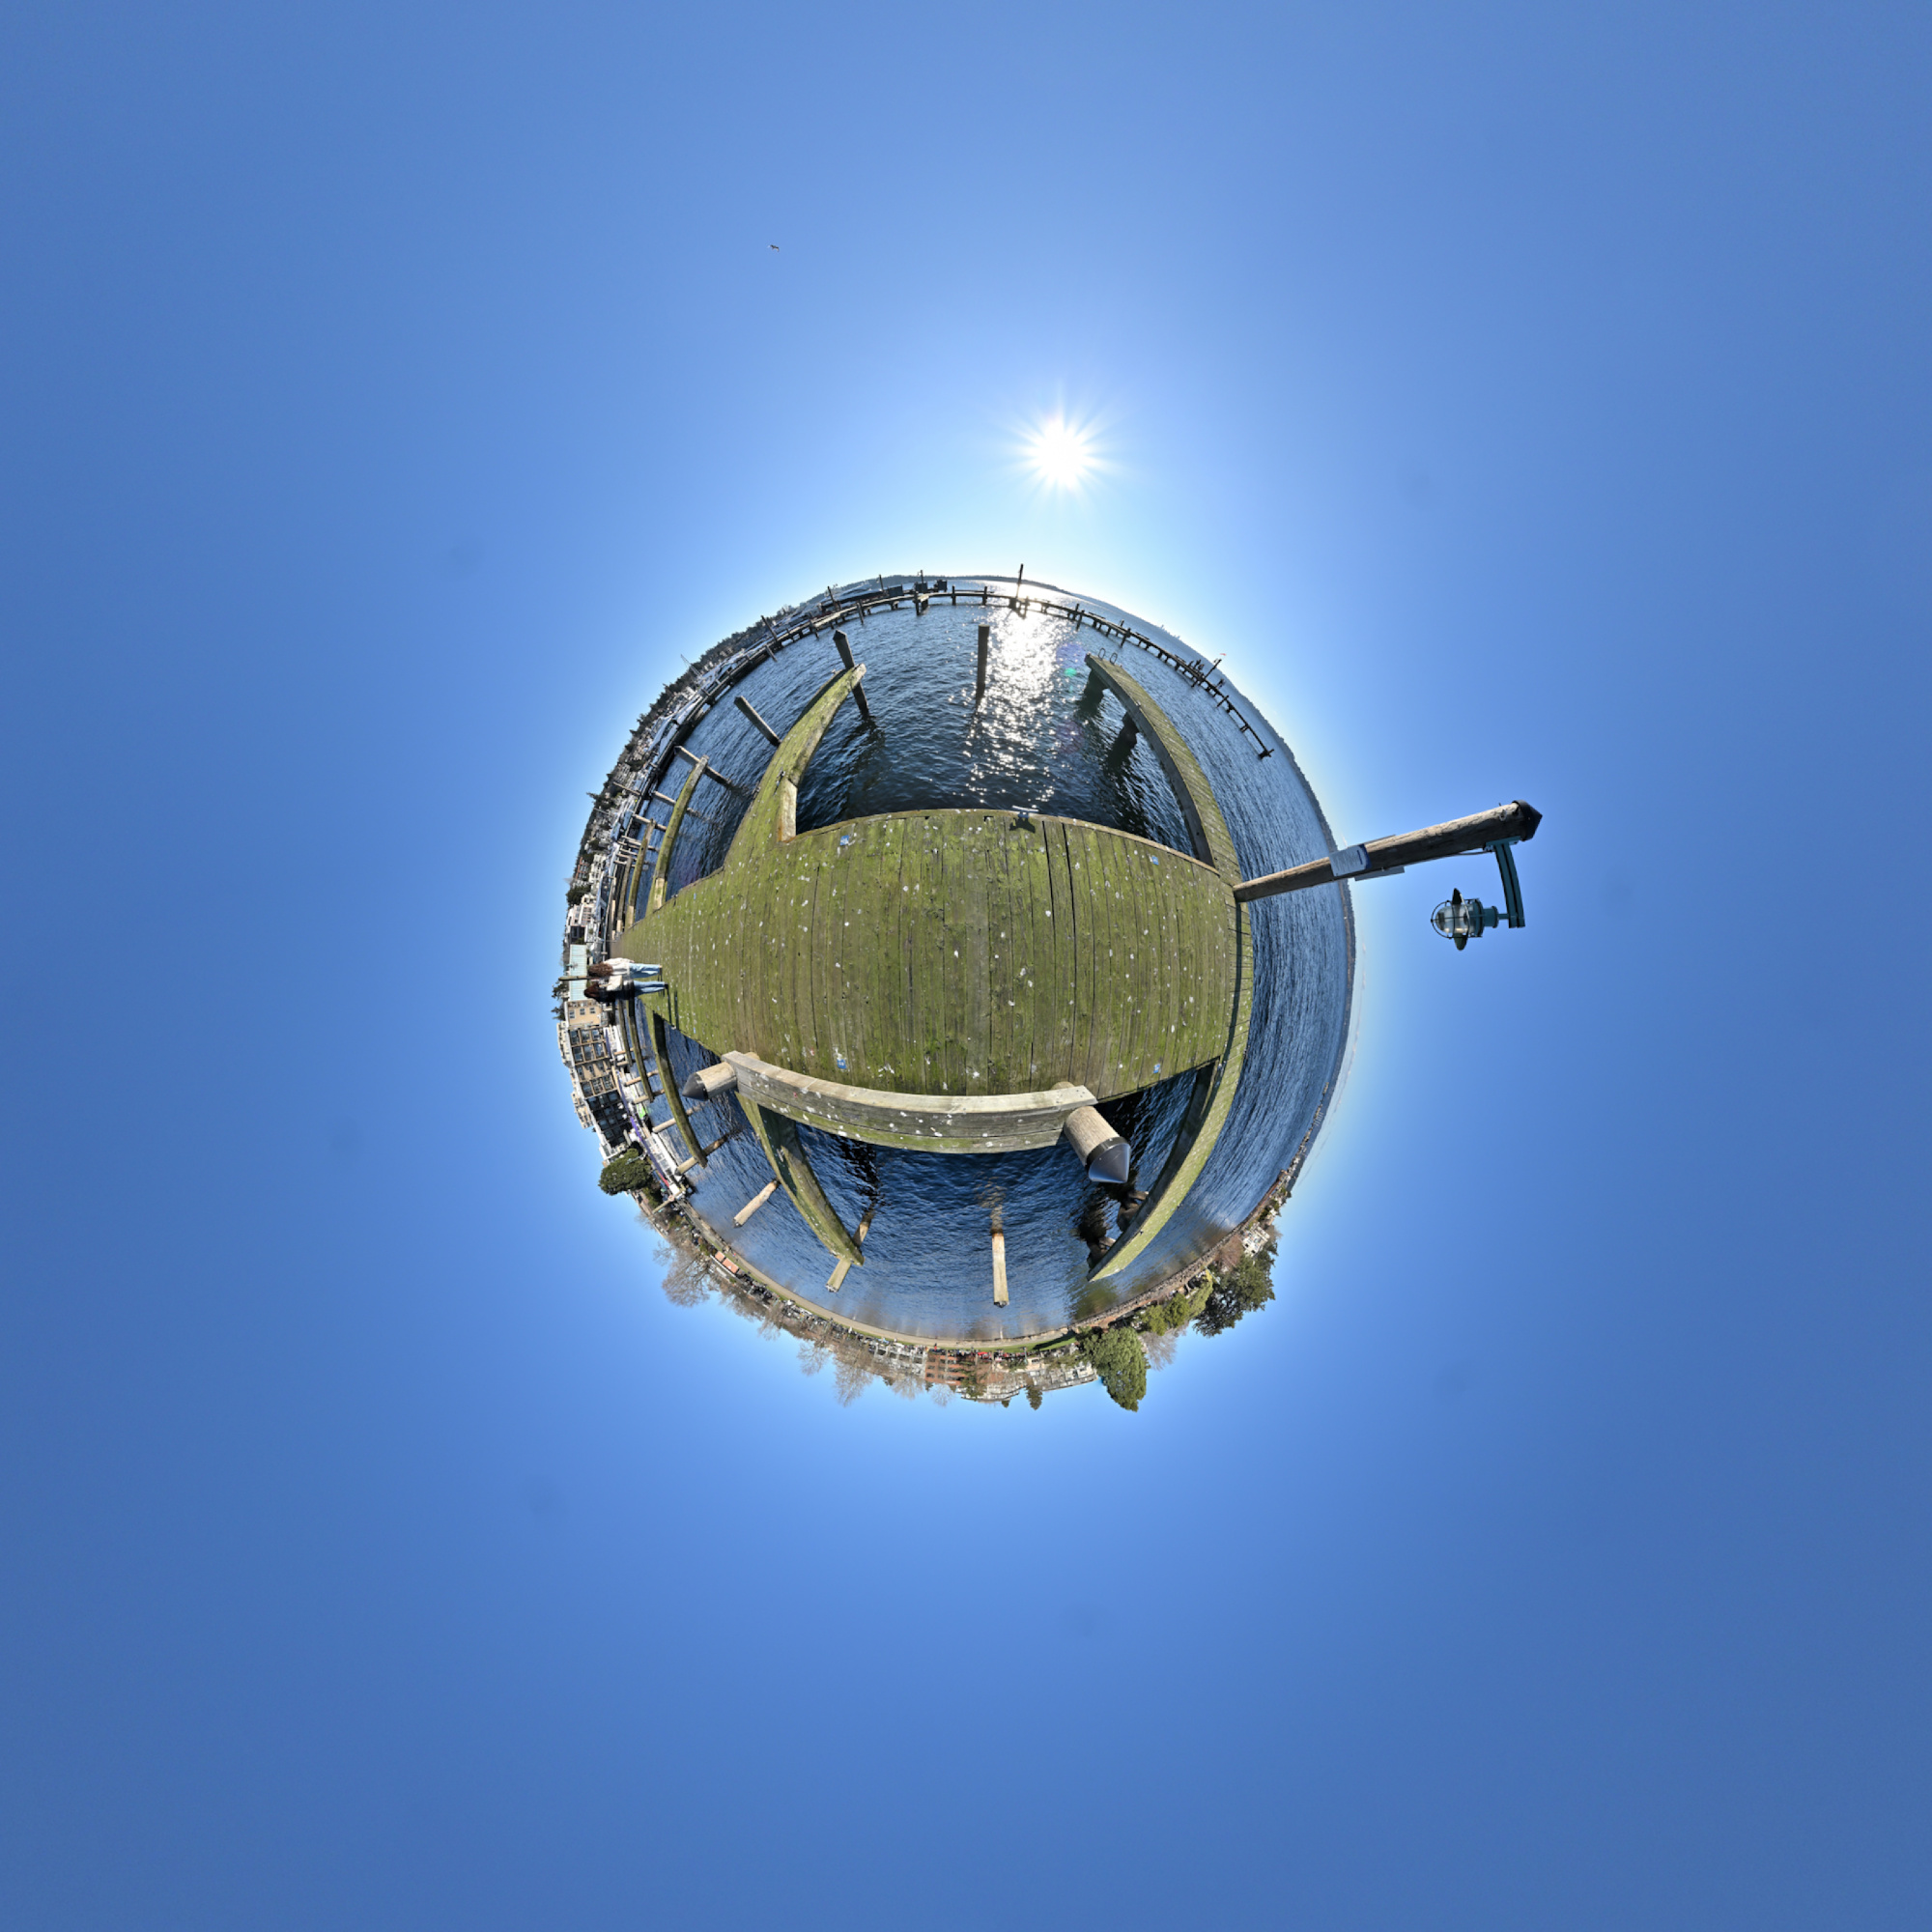
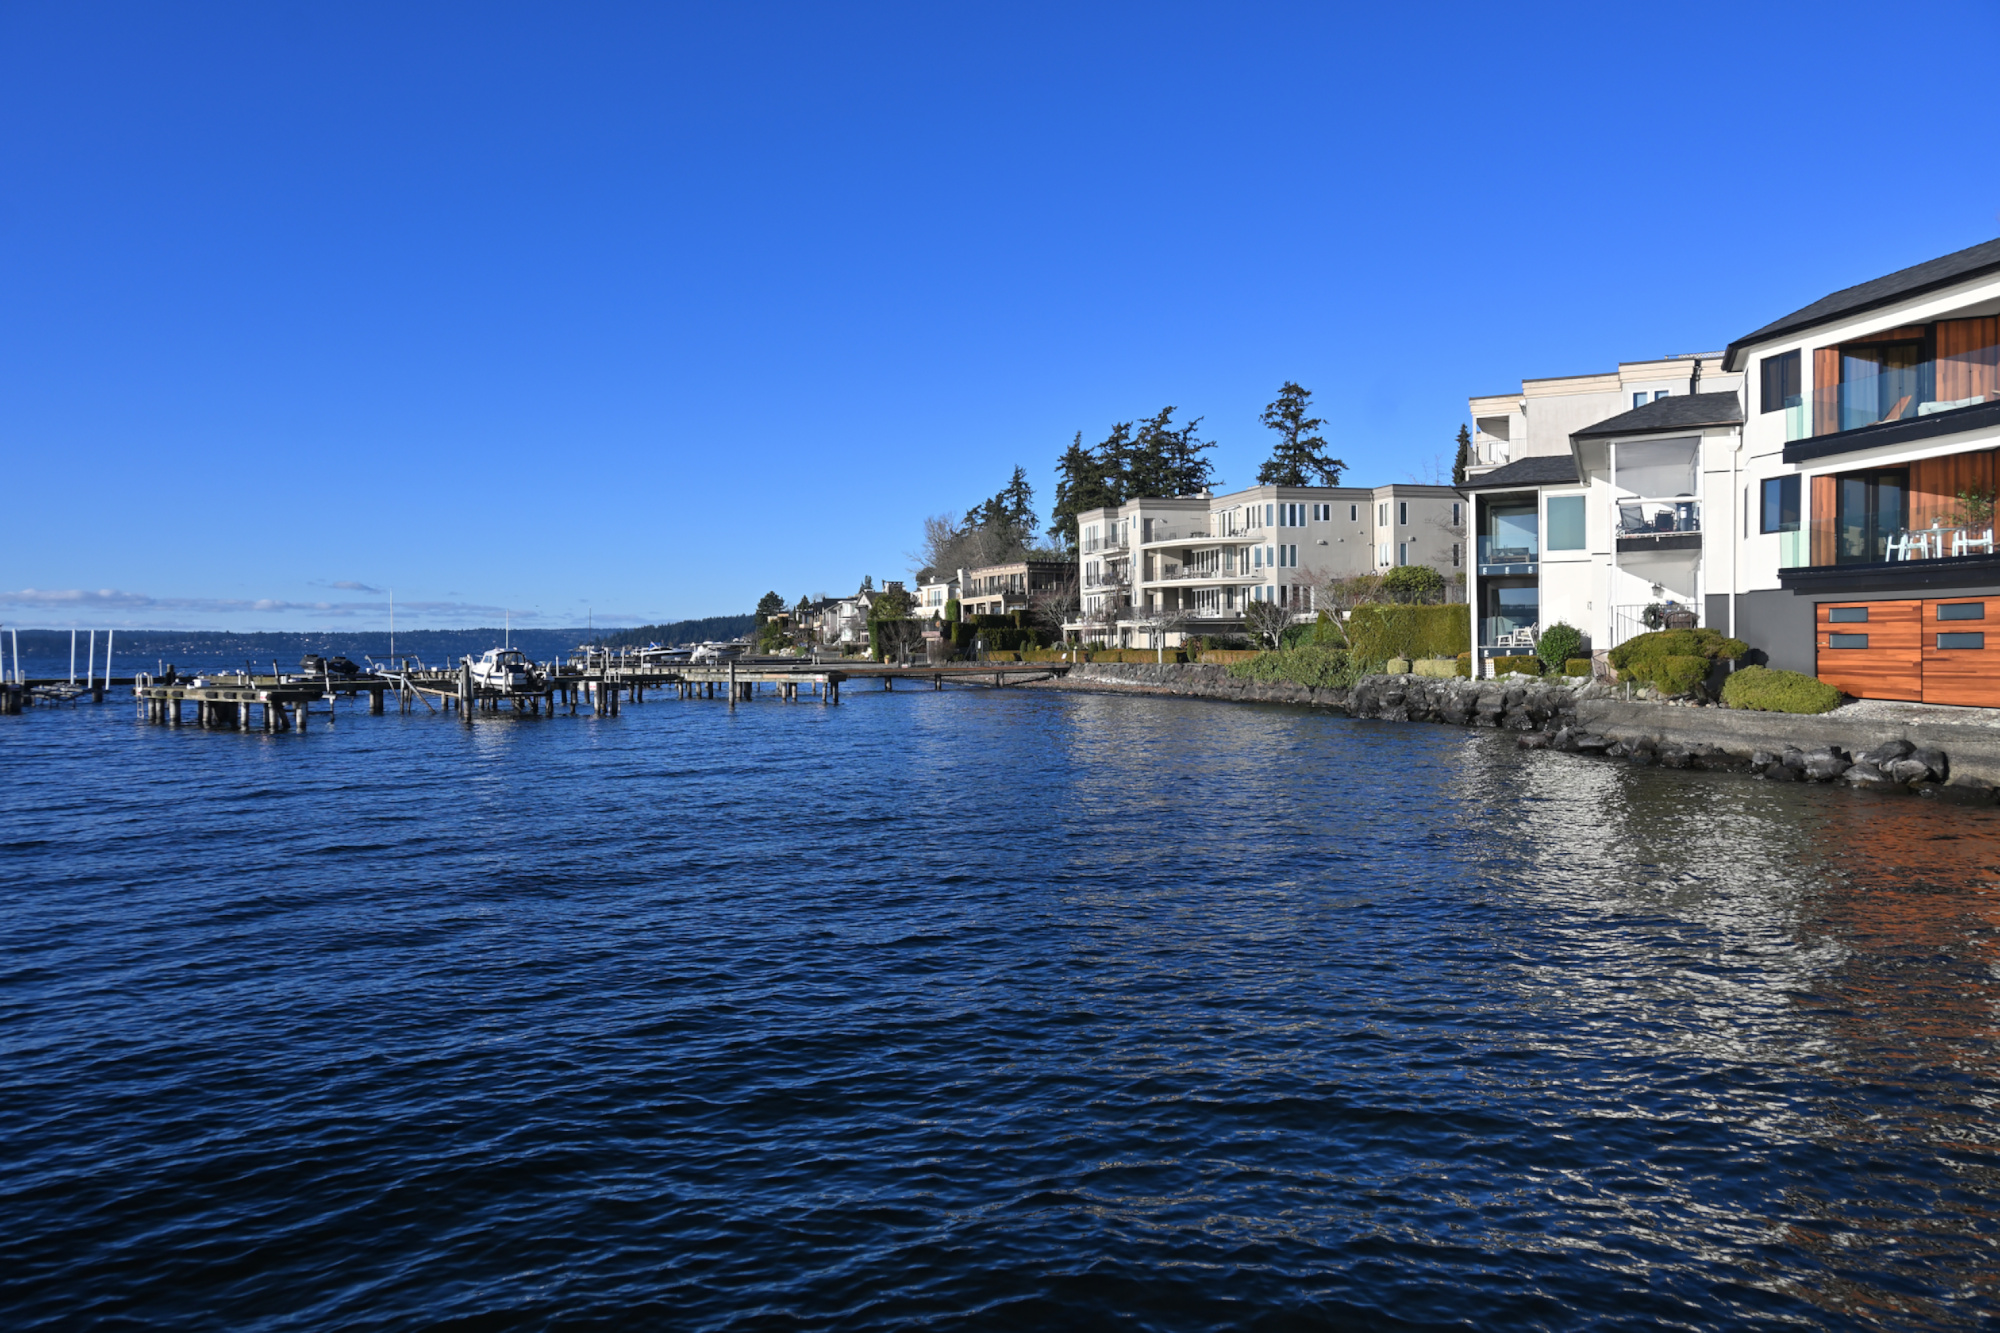
Hidden, but in plain sight. This pier is next to the popular Marina park, but since the entrance is hidden behind the street, it was empty.
The long shadow (picture #4 in the index) was covered by taking a nadir picture (picture #8 in the index) off center. Almost. One piece of the shadow is still visible at the siding of the pier.
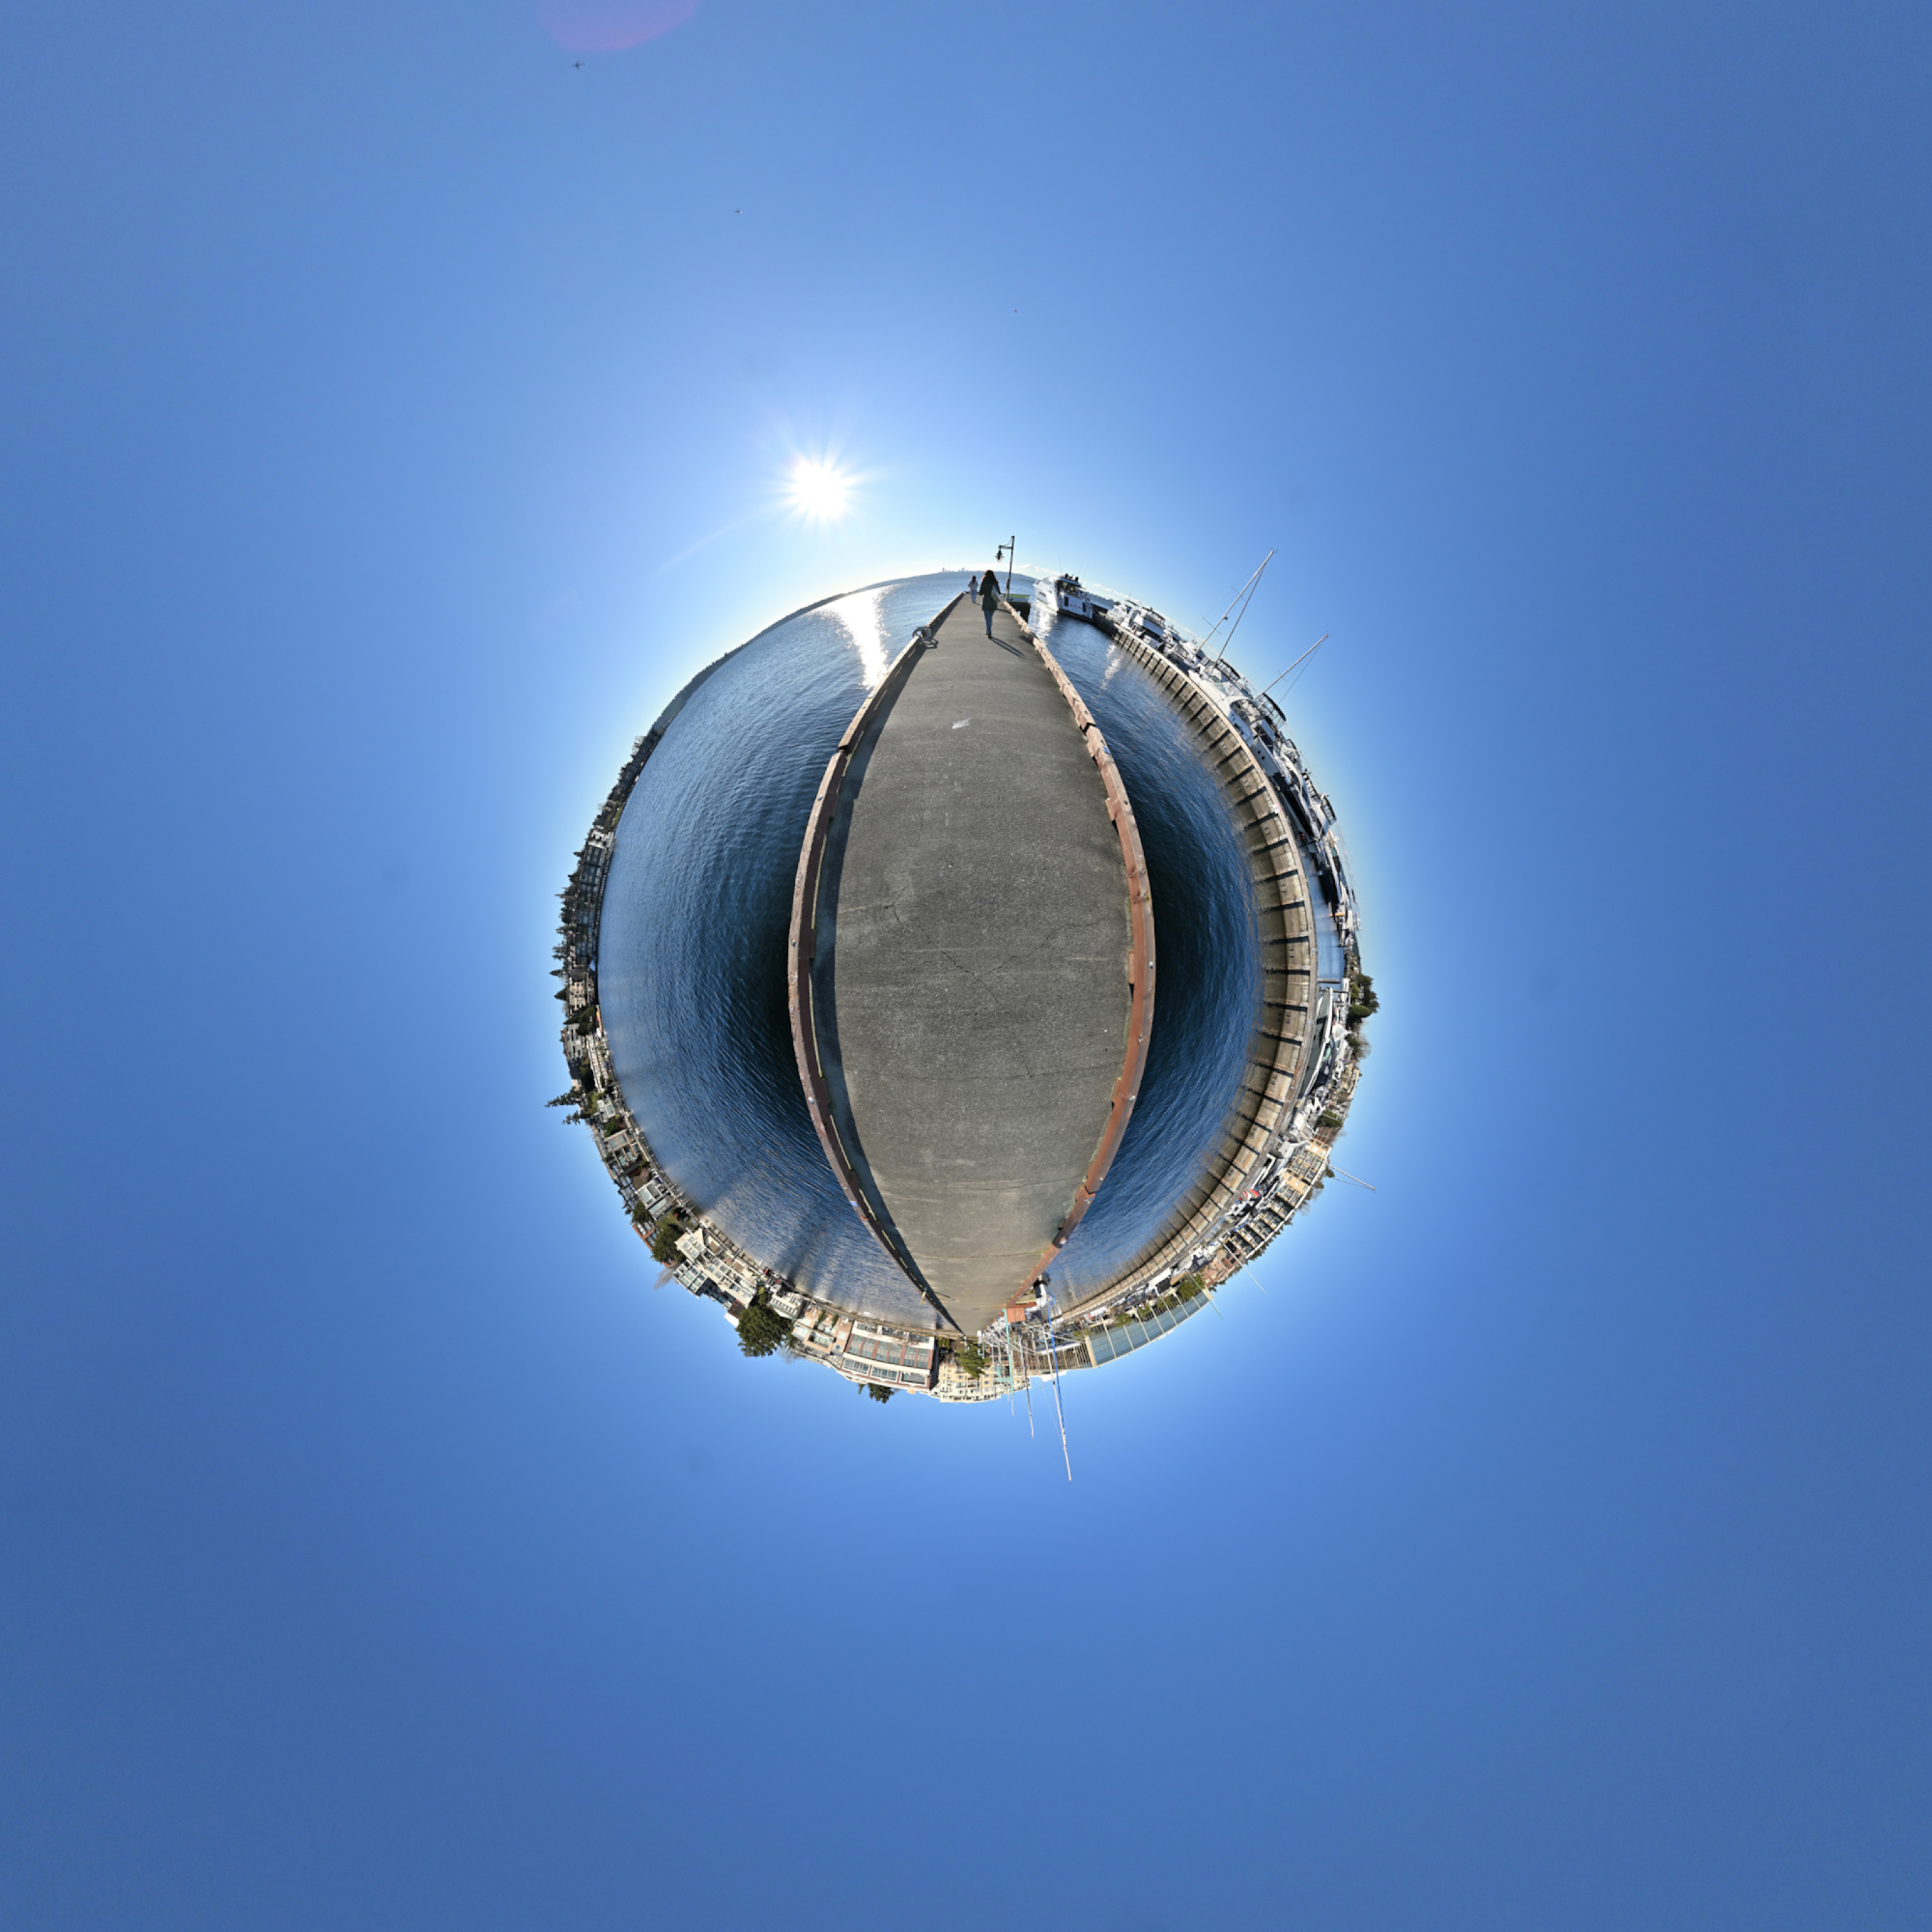
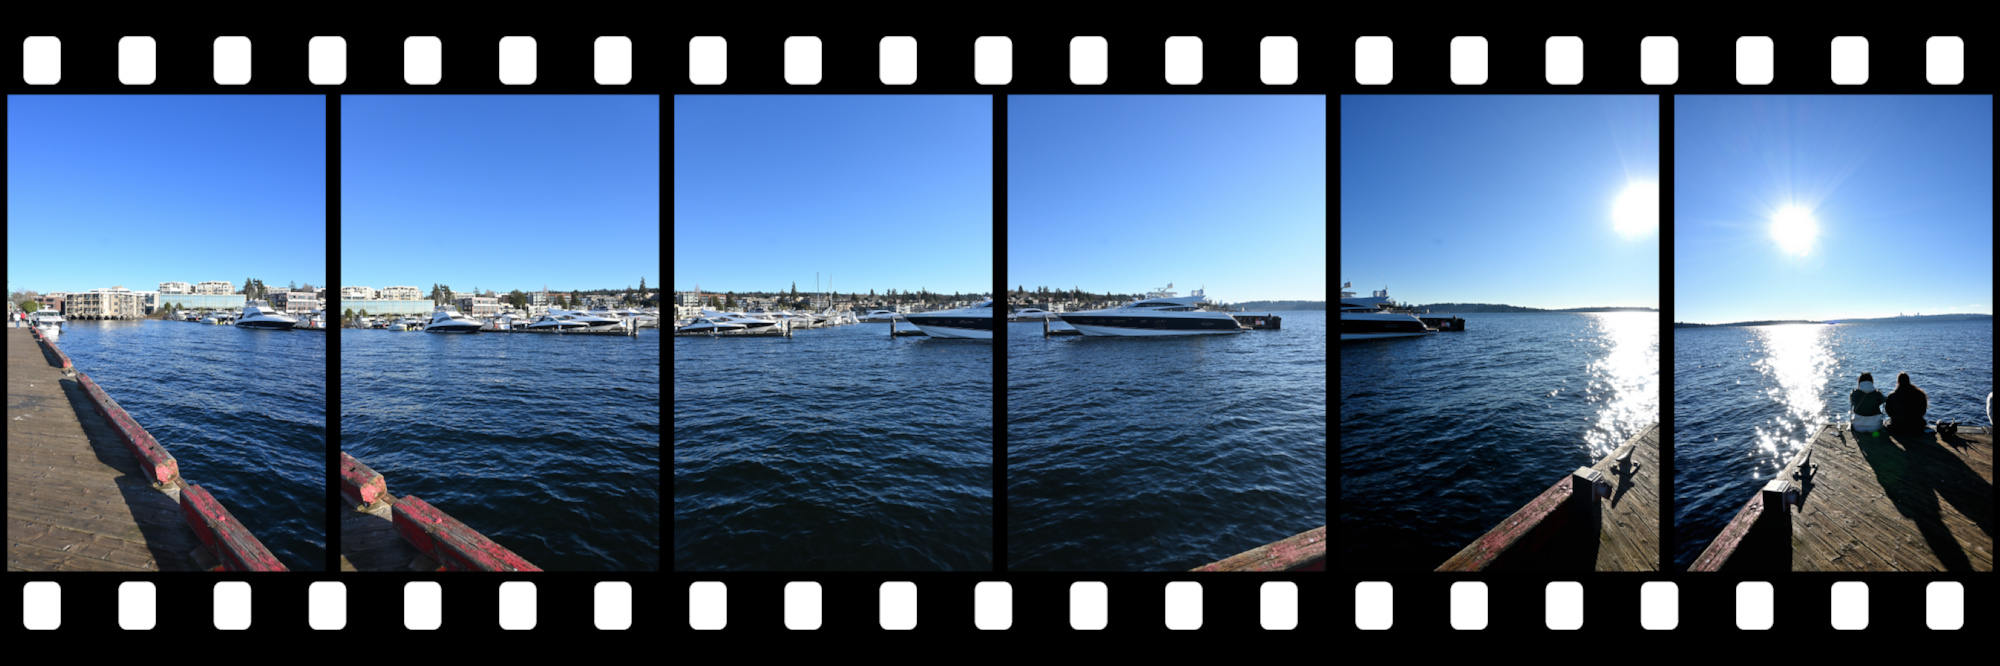
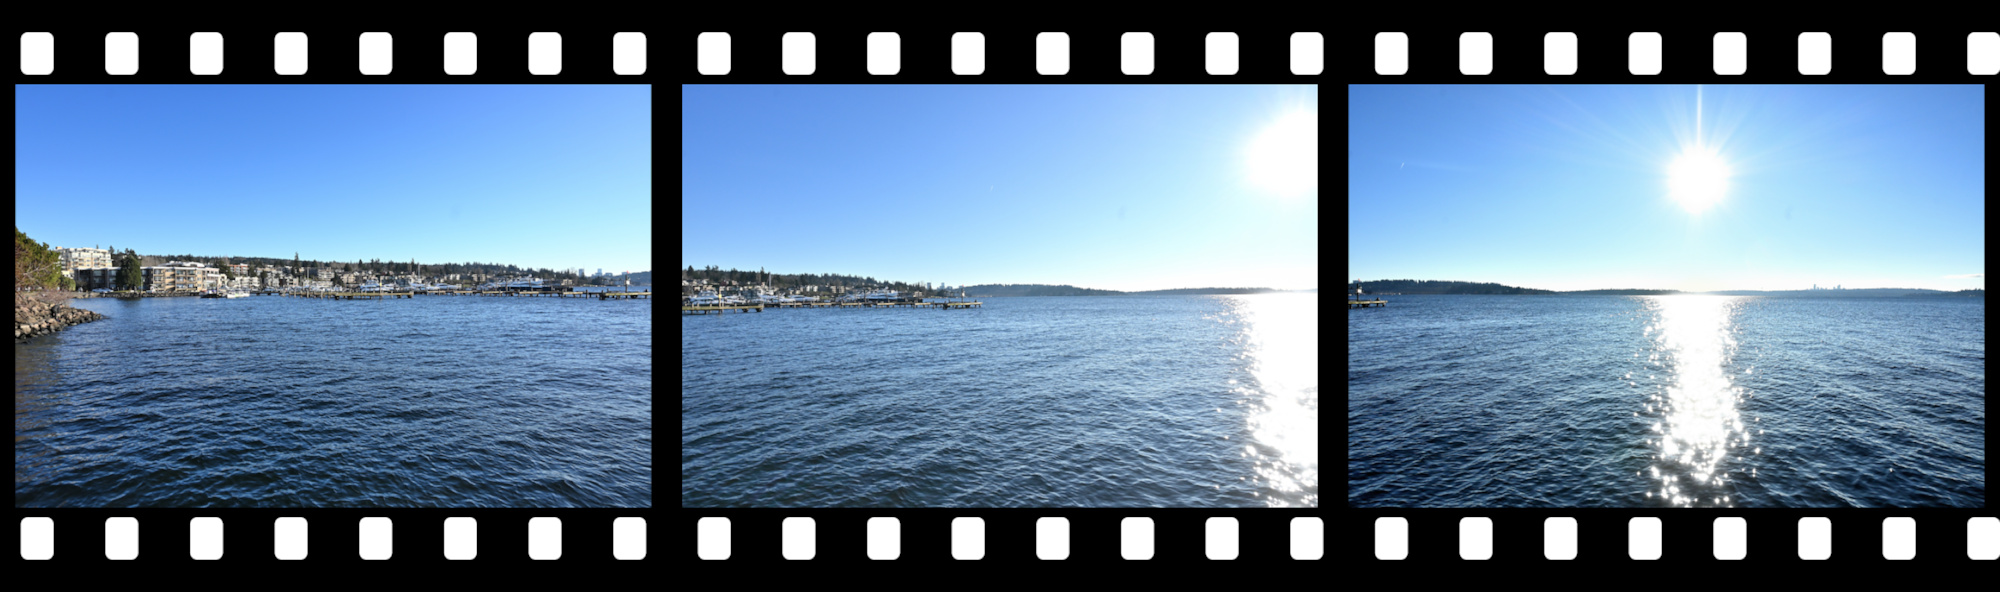
Interactive Panorama Kirkland Pier 2
1/1000s f/5,6 ISO 100/21° f=7,5mm
Sauron is watching you.
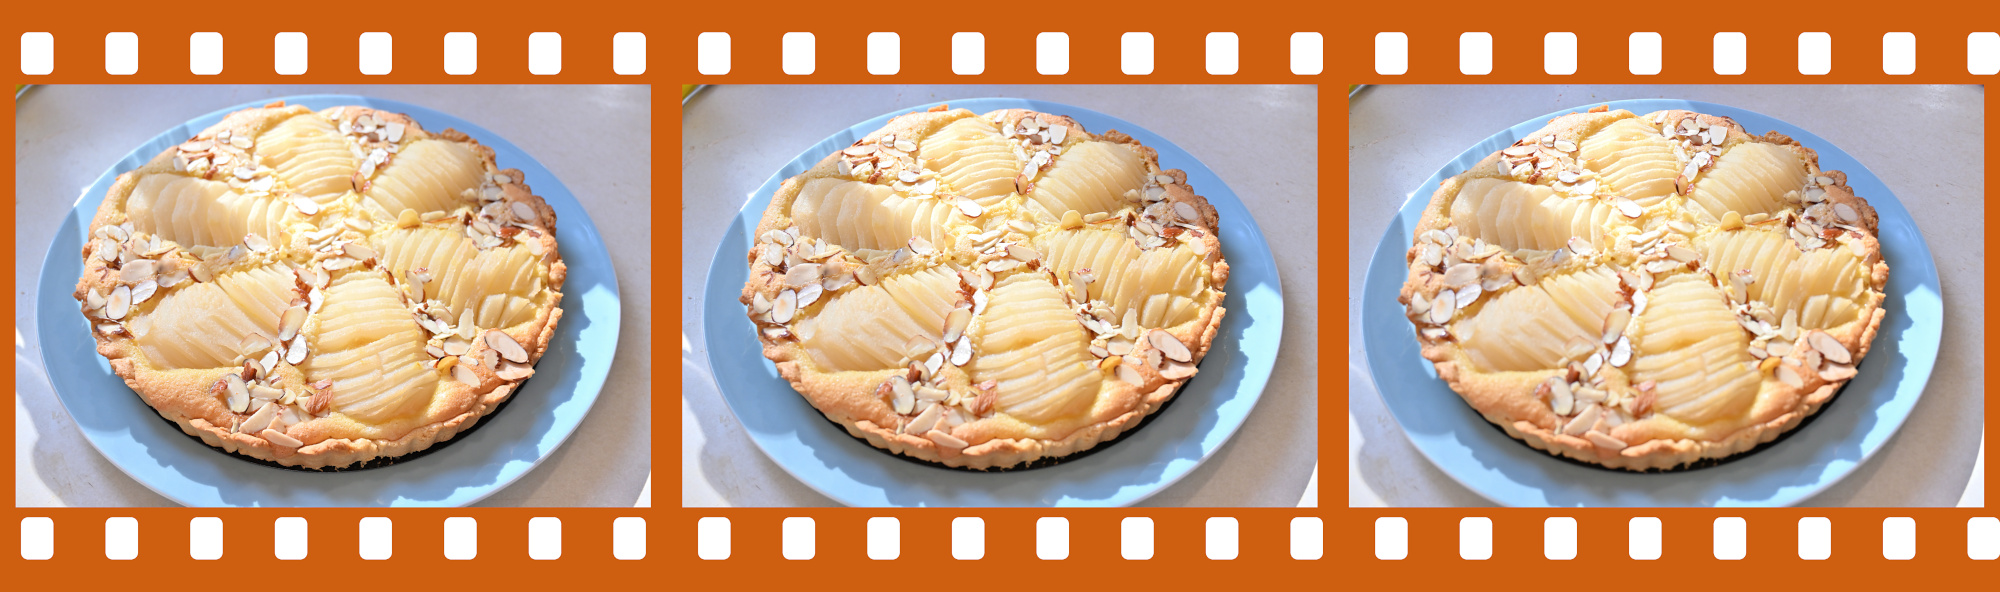
1/320s f/6,3 ISO 100/21° 16-50mm f/3,5-6,3 VR f=16mm/24mm

1/320s f/6,3 ISO 100/21° 16-50mm f/3,5-6,3 VR f=16mm/24mm
1/320s f/6,3 ISO 100/21° 16-50mm f/3,5-6,3 VR f=16mm/24mm
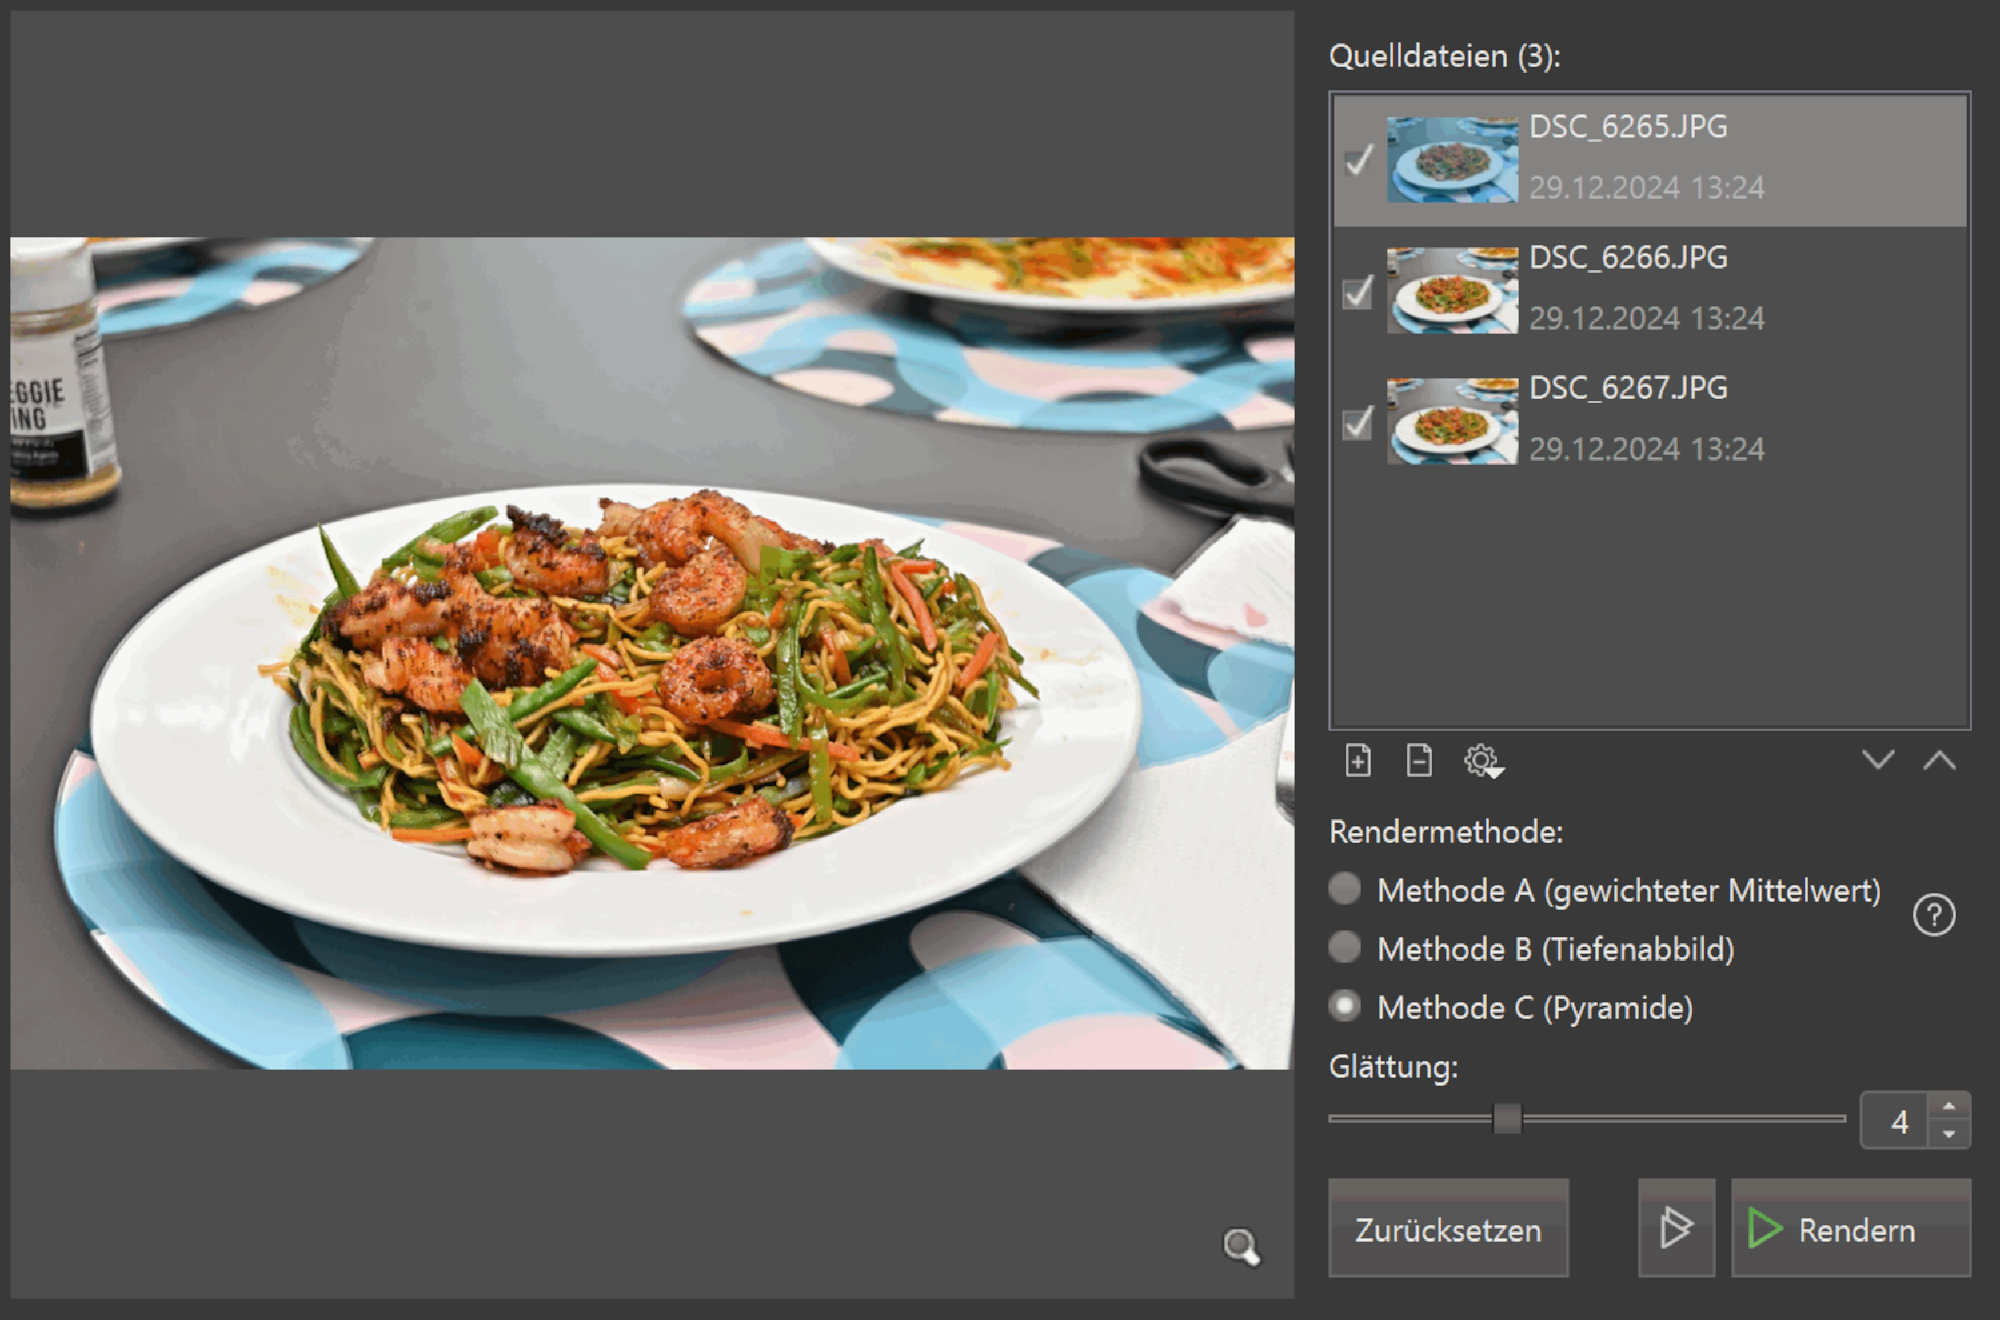
Focus stacking involves taking multiple photos at different focus points and merging them into a single image that contains only the sharpest areas.
See also Combine pictures with PTGui, Focus stacking.
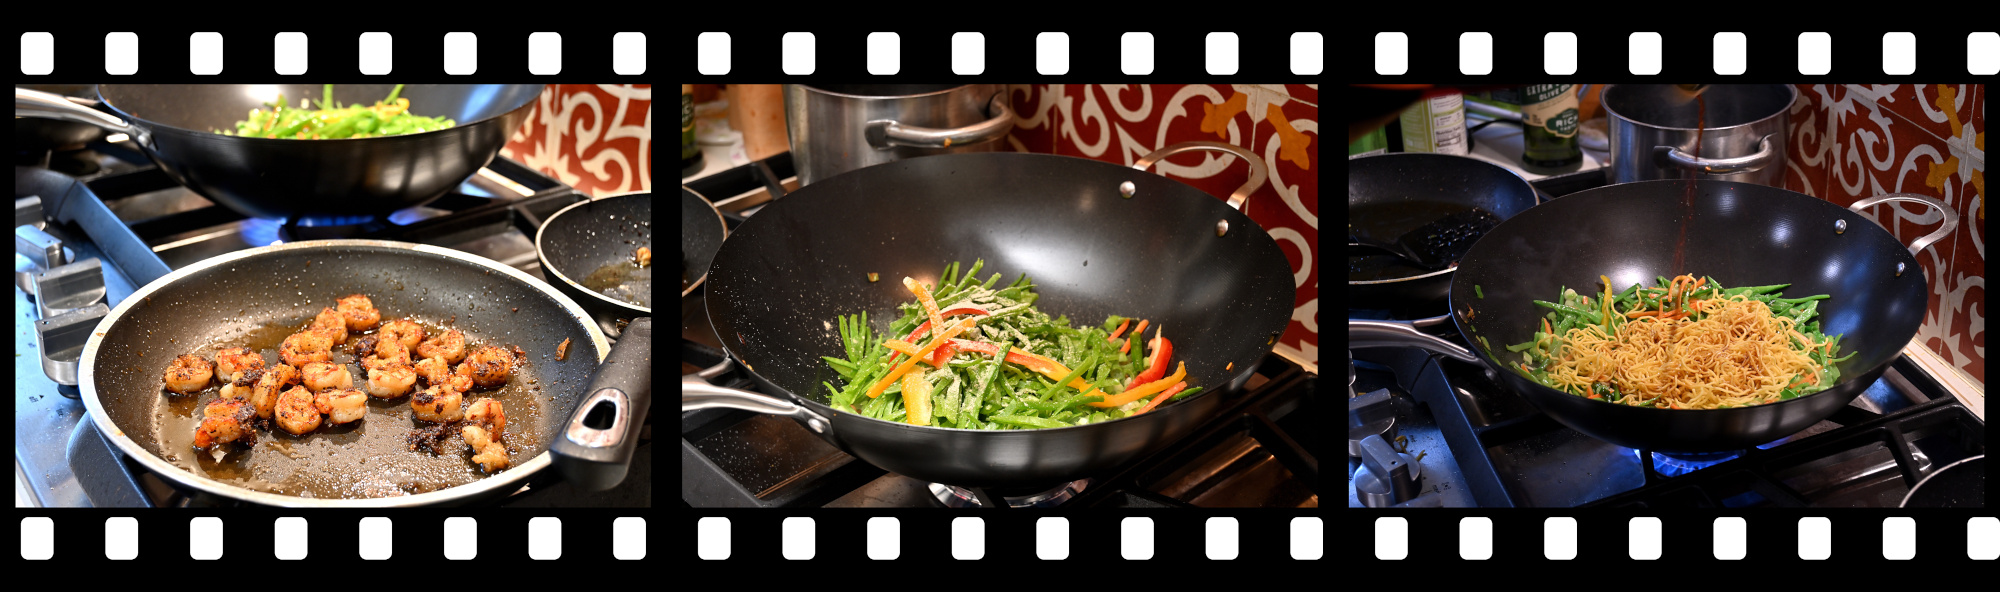
Three images, each focused on different points -foreground, middle ground, and background- were taken and subsequently merged using PTGui and HeliconFocus.

PTGui
PTGui automatically established control points and precisely aligned all the images, performing as expected for a panoramic image application. Using a simple mask, the three in-focus areas were seamlessly integrated.
HeliconFocus
Since all the images were taken handheld, there are slight variations in perspective. This is evident in the results from HeliconFocus. It is likely that a dedicated focus stacking application expects images to be captured using a tripod for optimal results.
.jpg)
Isn't it surprising how good a panorama stitching app performs compared to a dedicated focus stacking app?
The Making of the test picture
See Combine pictures with PTGui, Focus stacking
Taken at the 2024 Winter Solstice ♑︎, the shortest day of the year.
This panorama is the 2024 Winter Solstice contribution for the 'December Wrinkle' event of WorldWidePanorama.
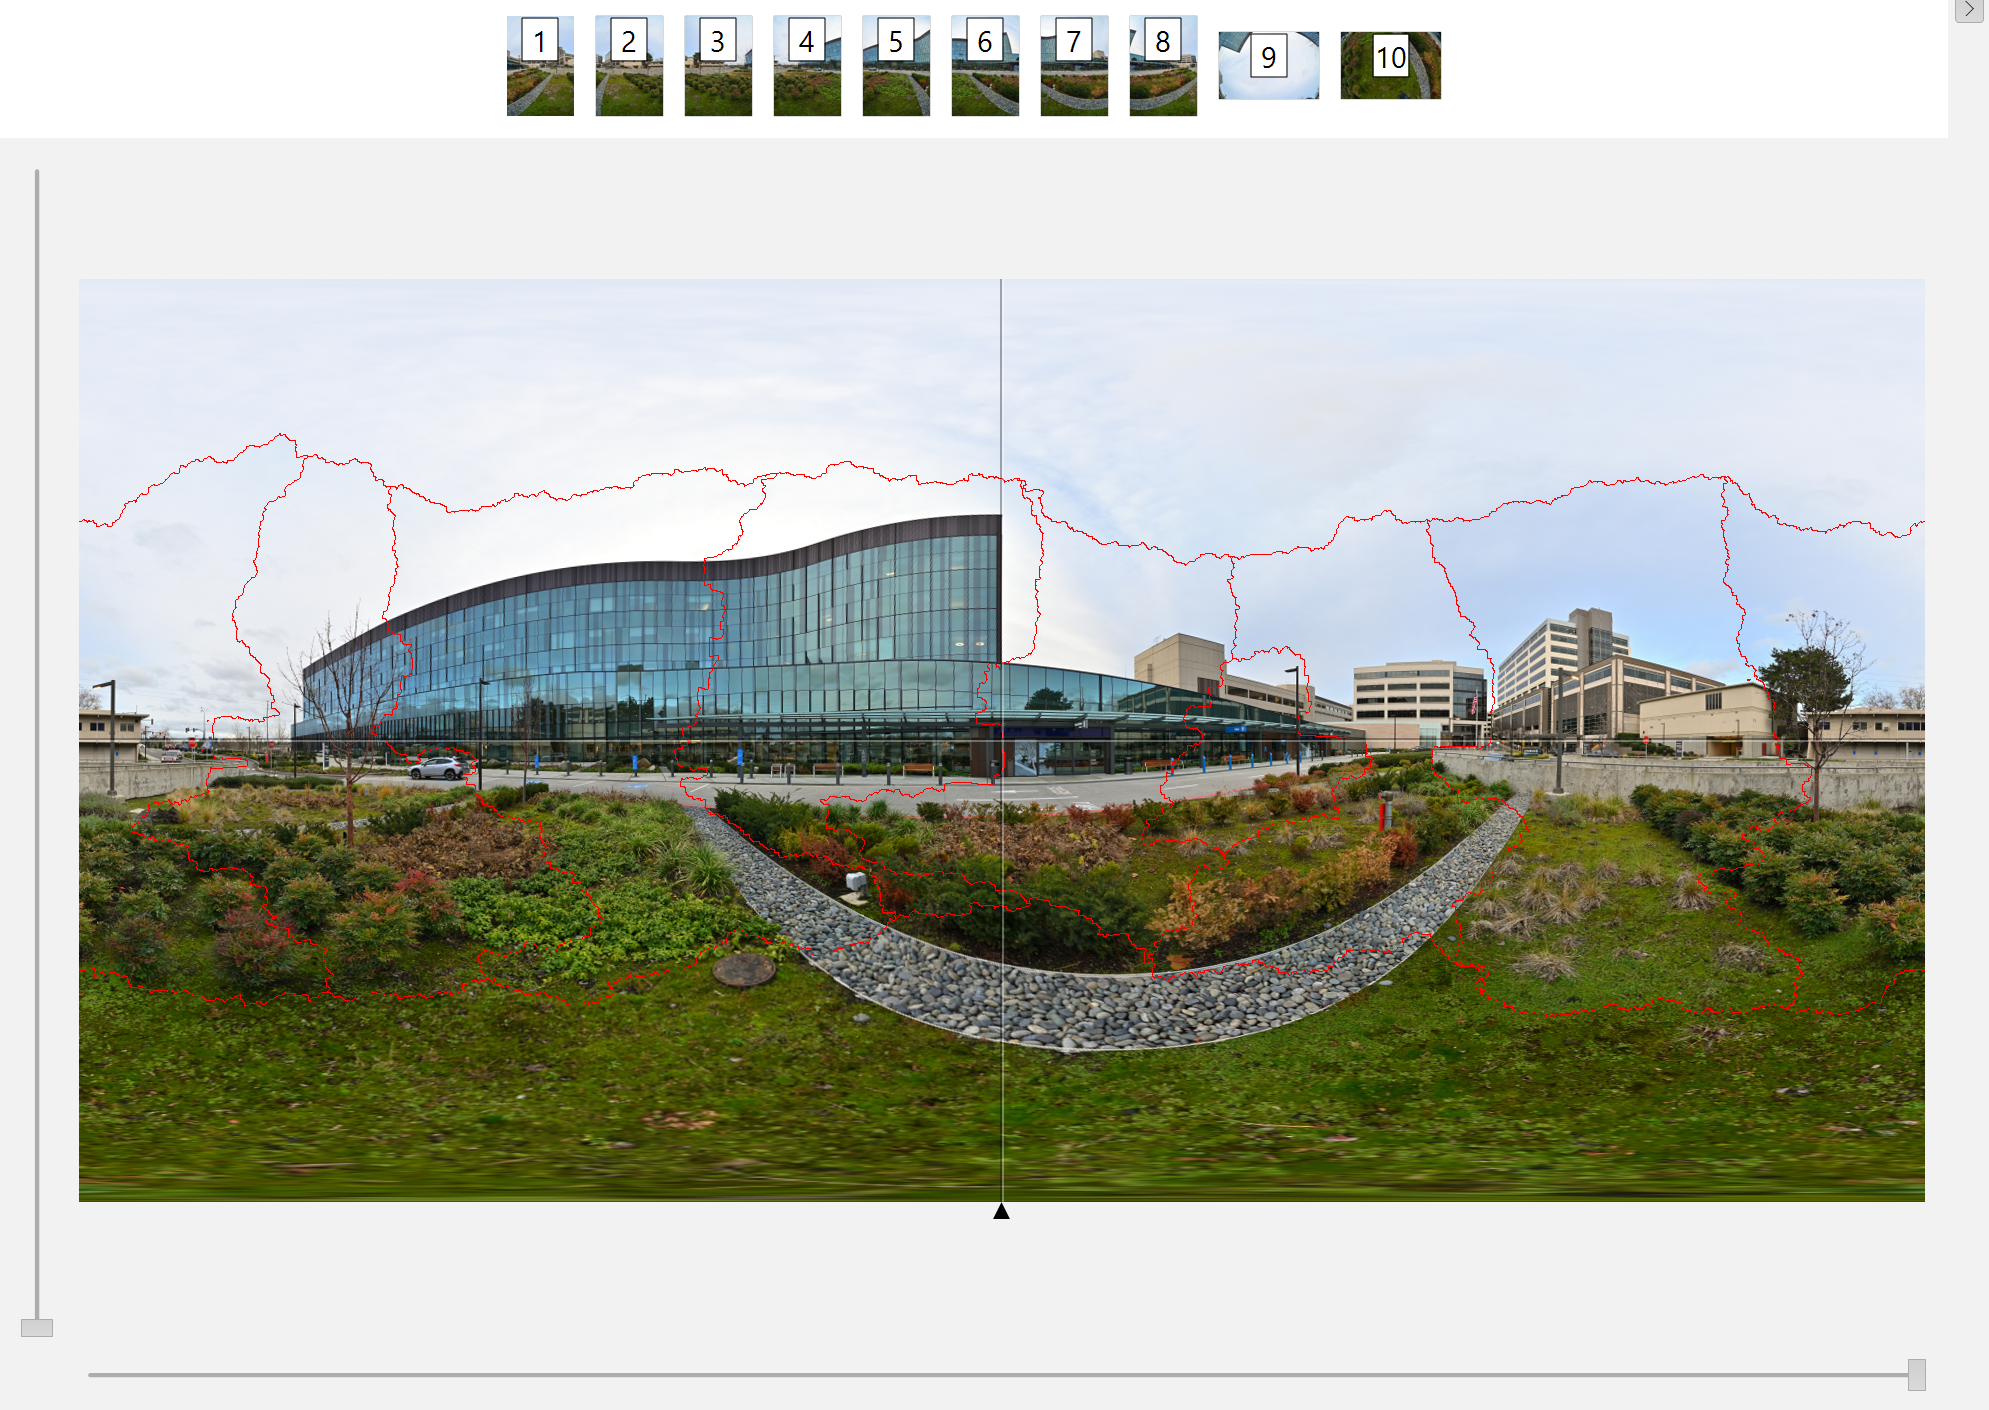
Interactive Panorama Overlake Hospital
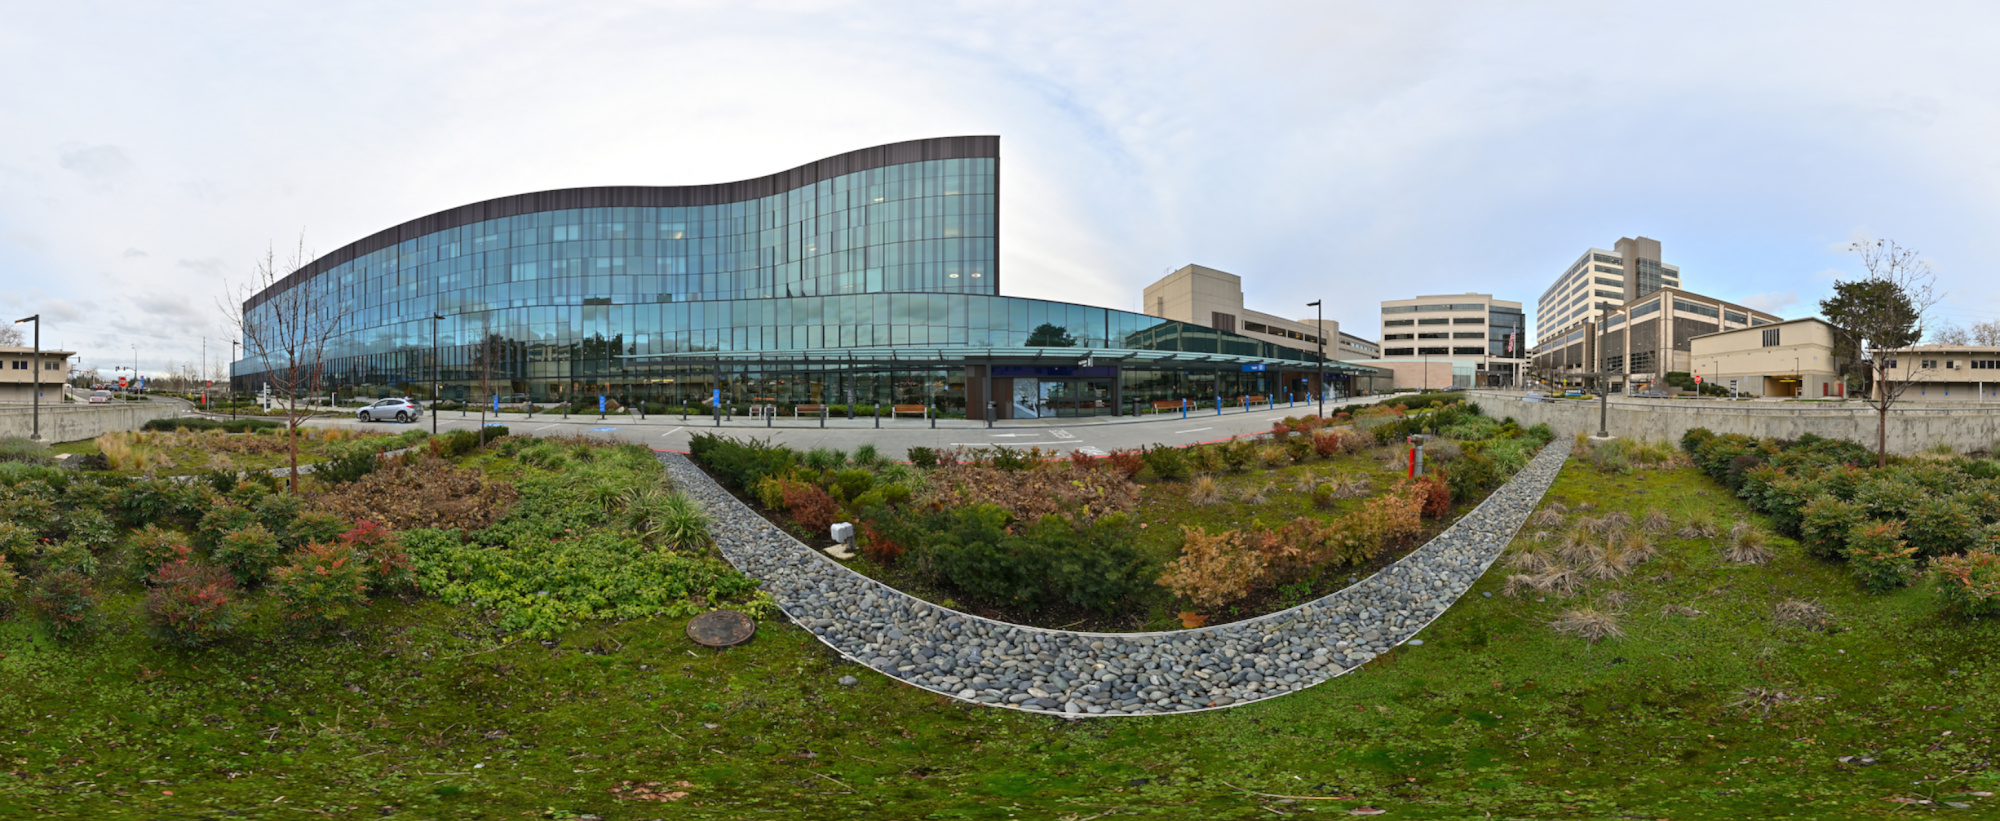
I took this panorama about an hour before sunset without a tripod while waiting at the main exit. The main challenge was aligning the pathway with the building's geometric facade.
Taking more pictures than necessary helps with panoramas because it allows for better adjustments and alignment.
Using the mask feature in PTGui is another significant advantage. It allows you to force the seamlines into less prominent areas, thereby minimizing visible overlaps and reducing poor alignment.
1/60s f/5,6 ISO 100/21° 7,5mm
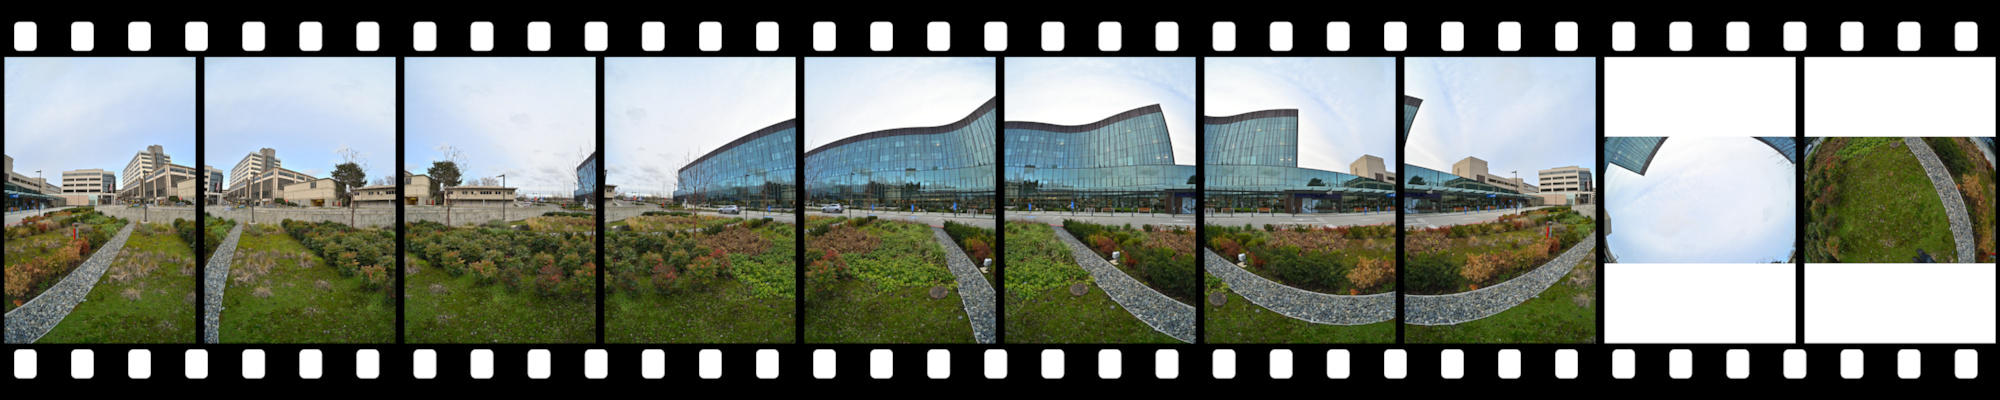
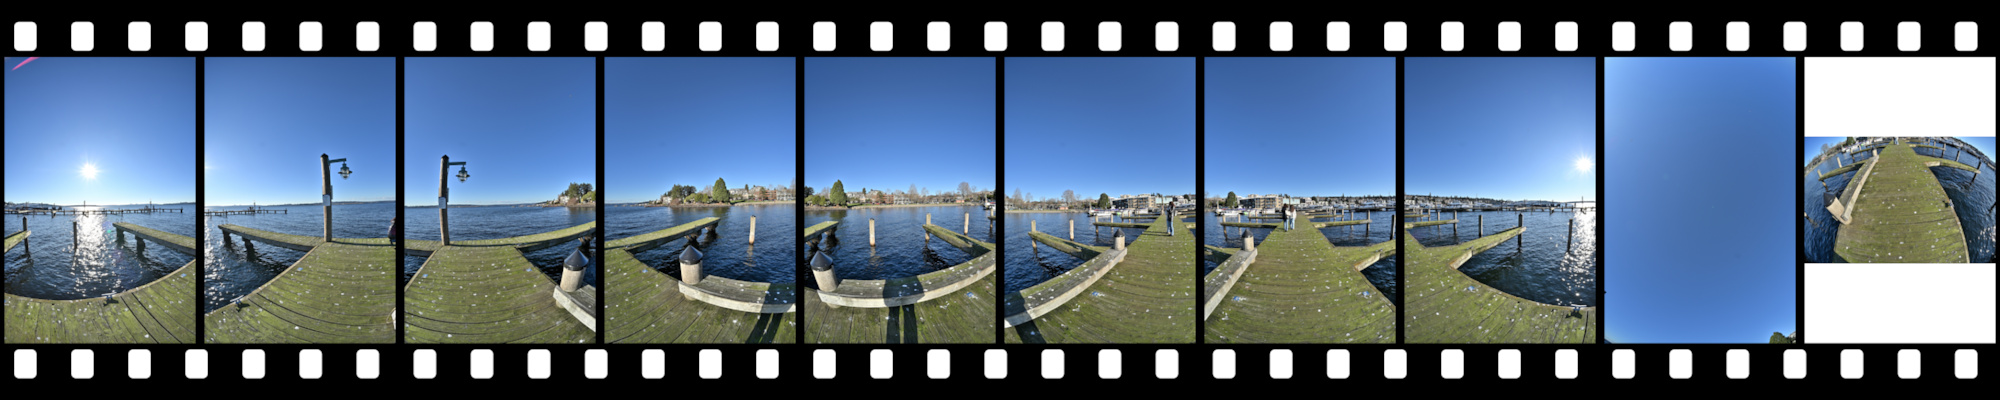
Only the central parts of the images were used, which minimized errors. Note the nearly uniform size of the horizontal image parts, with the exception of the pair on the left side of the large building.
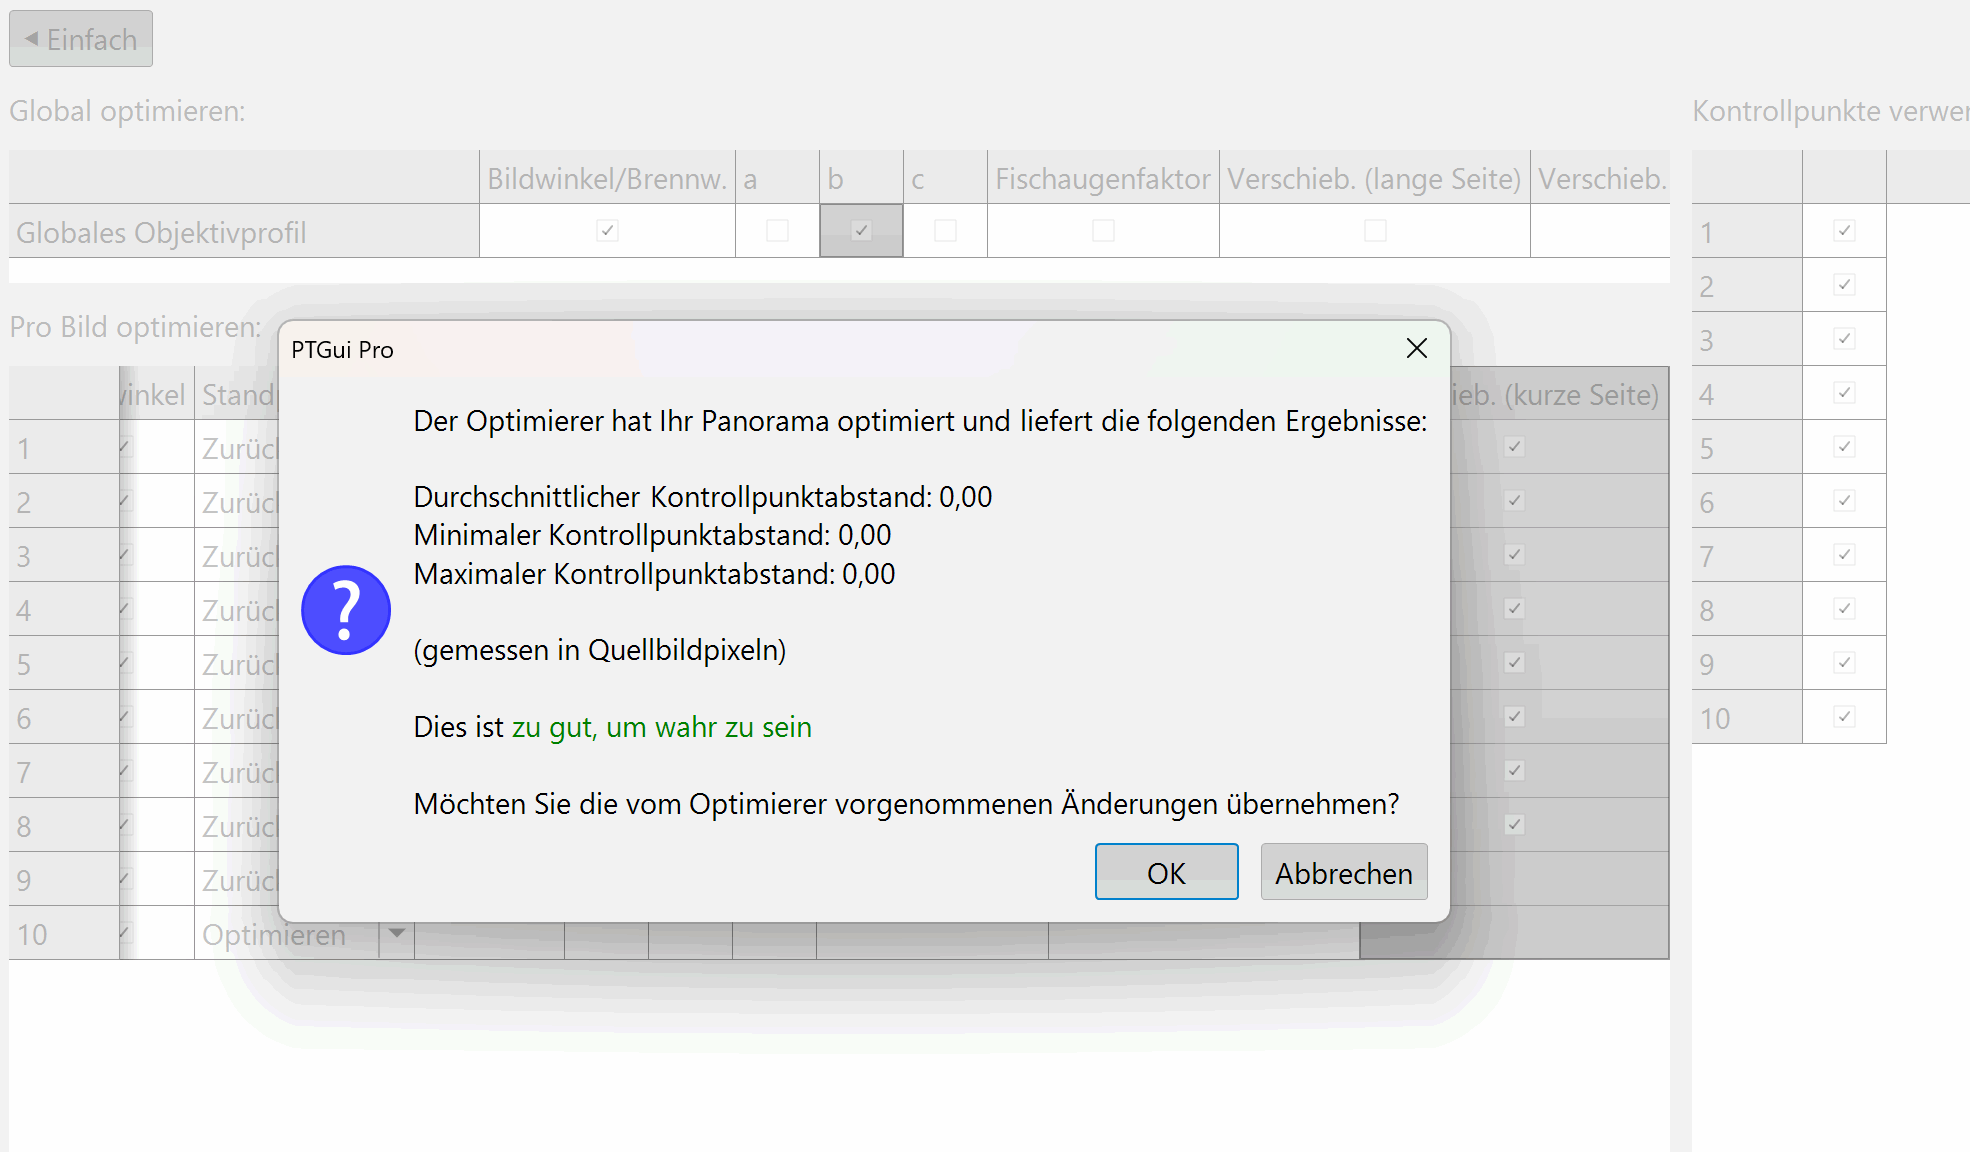
At one point, I had this rare PTGui result:
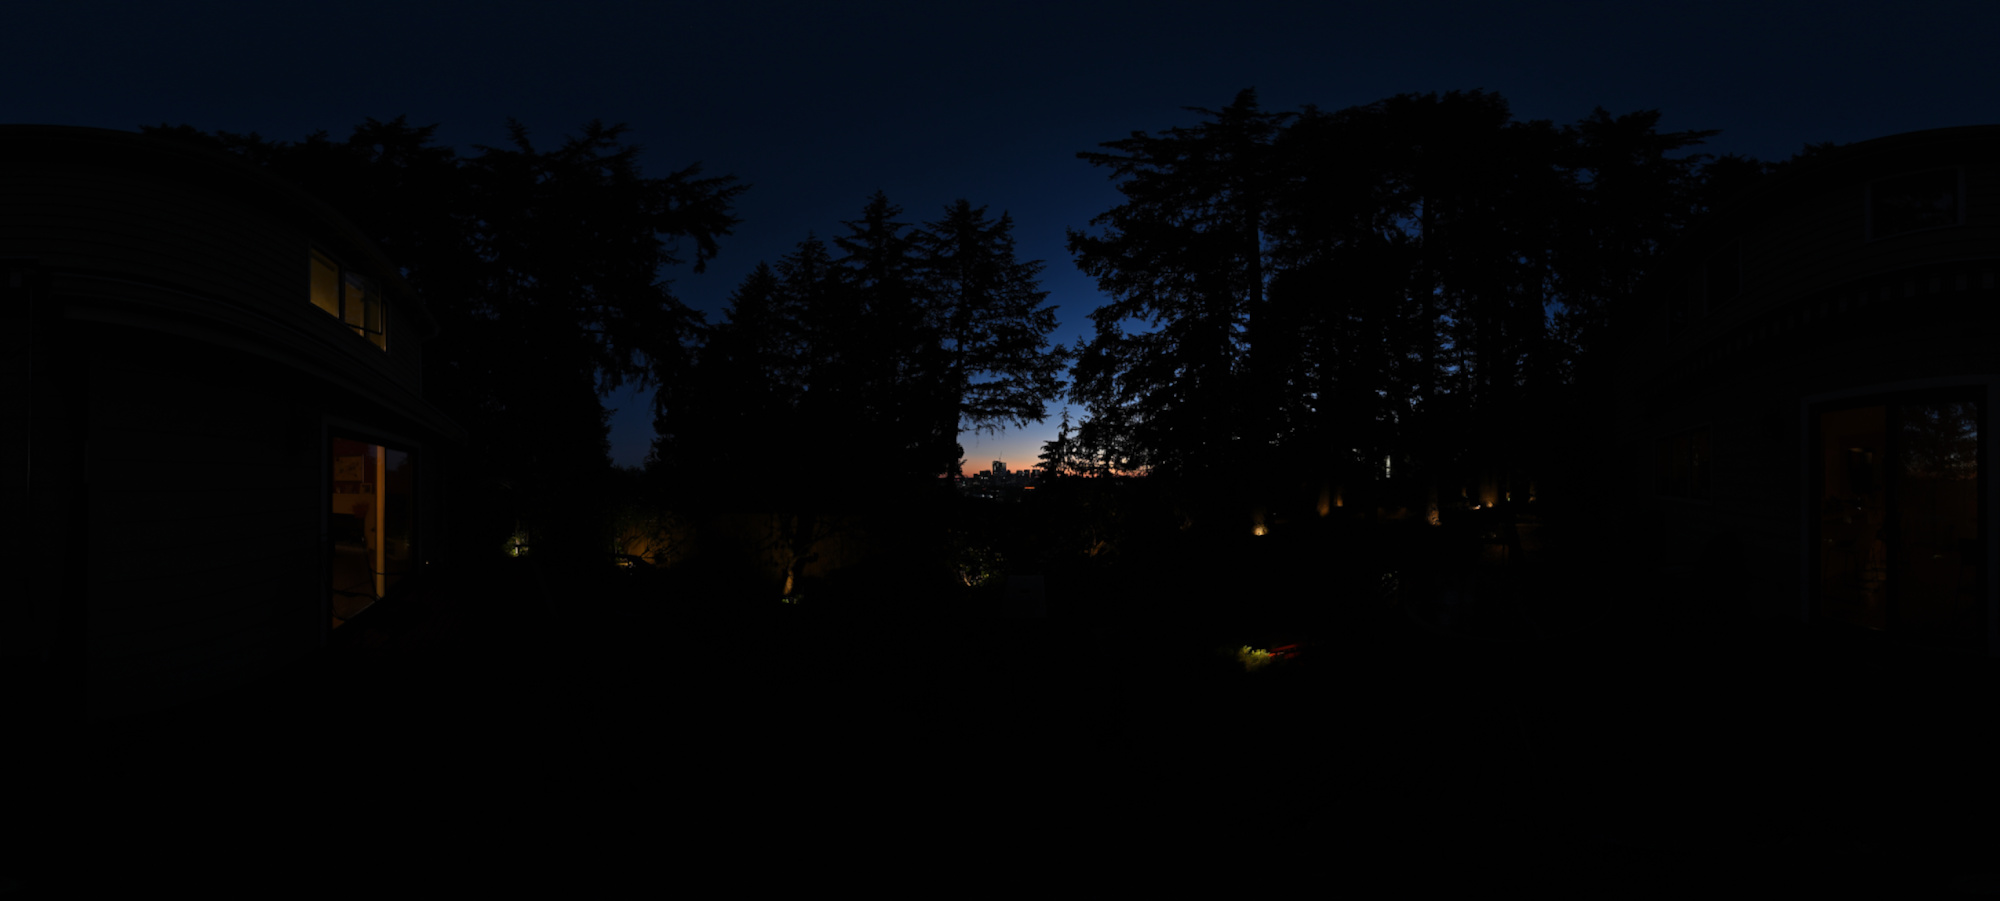
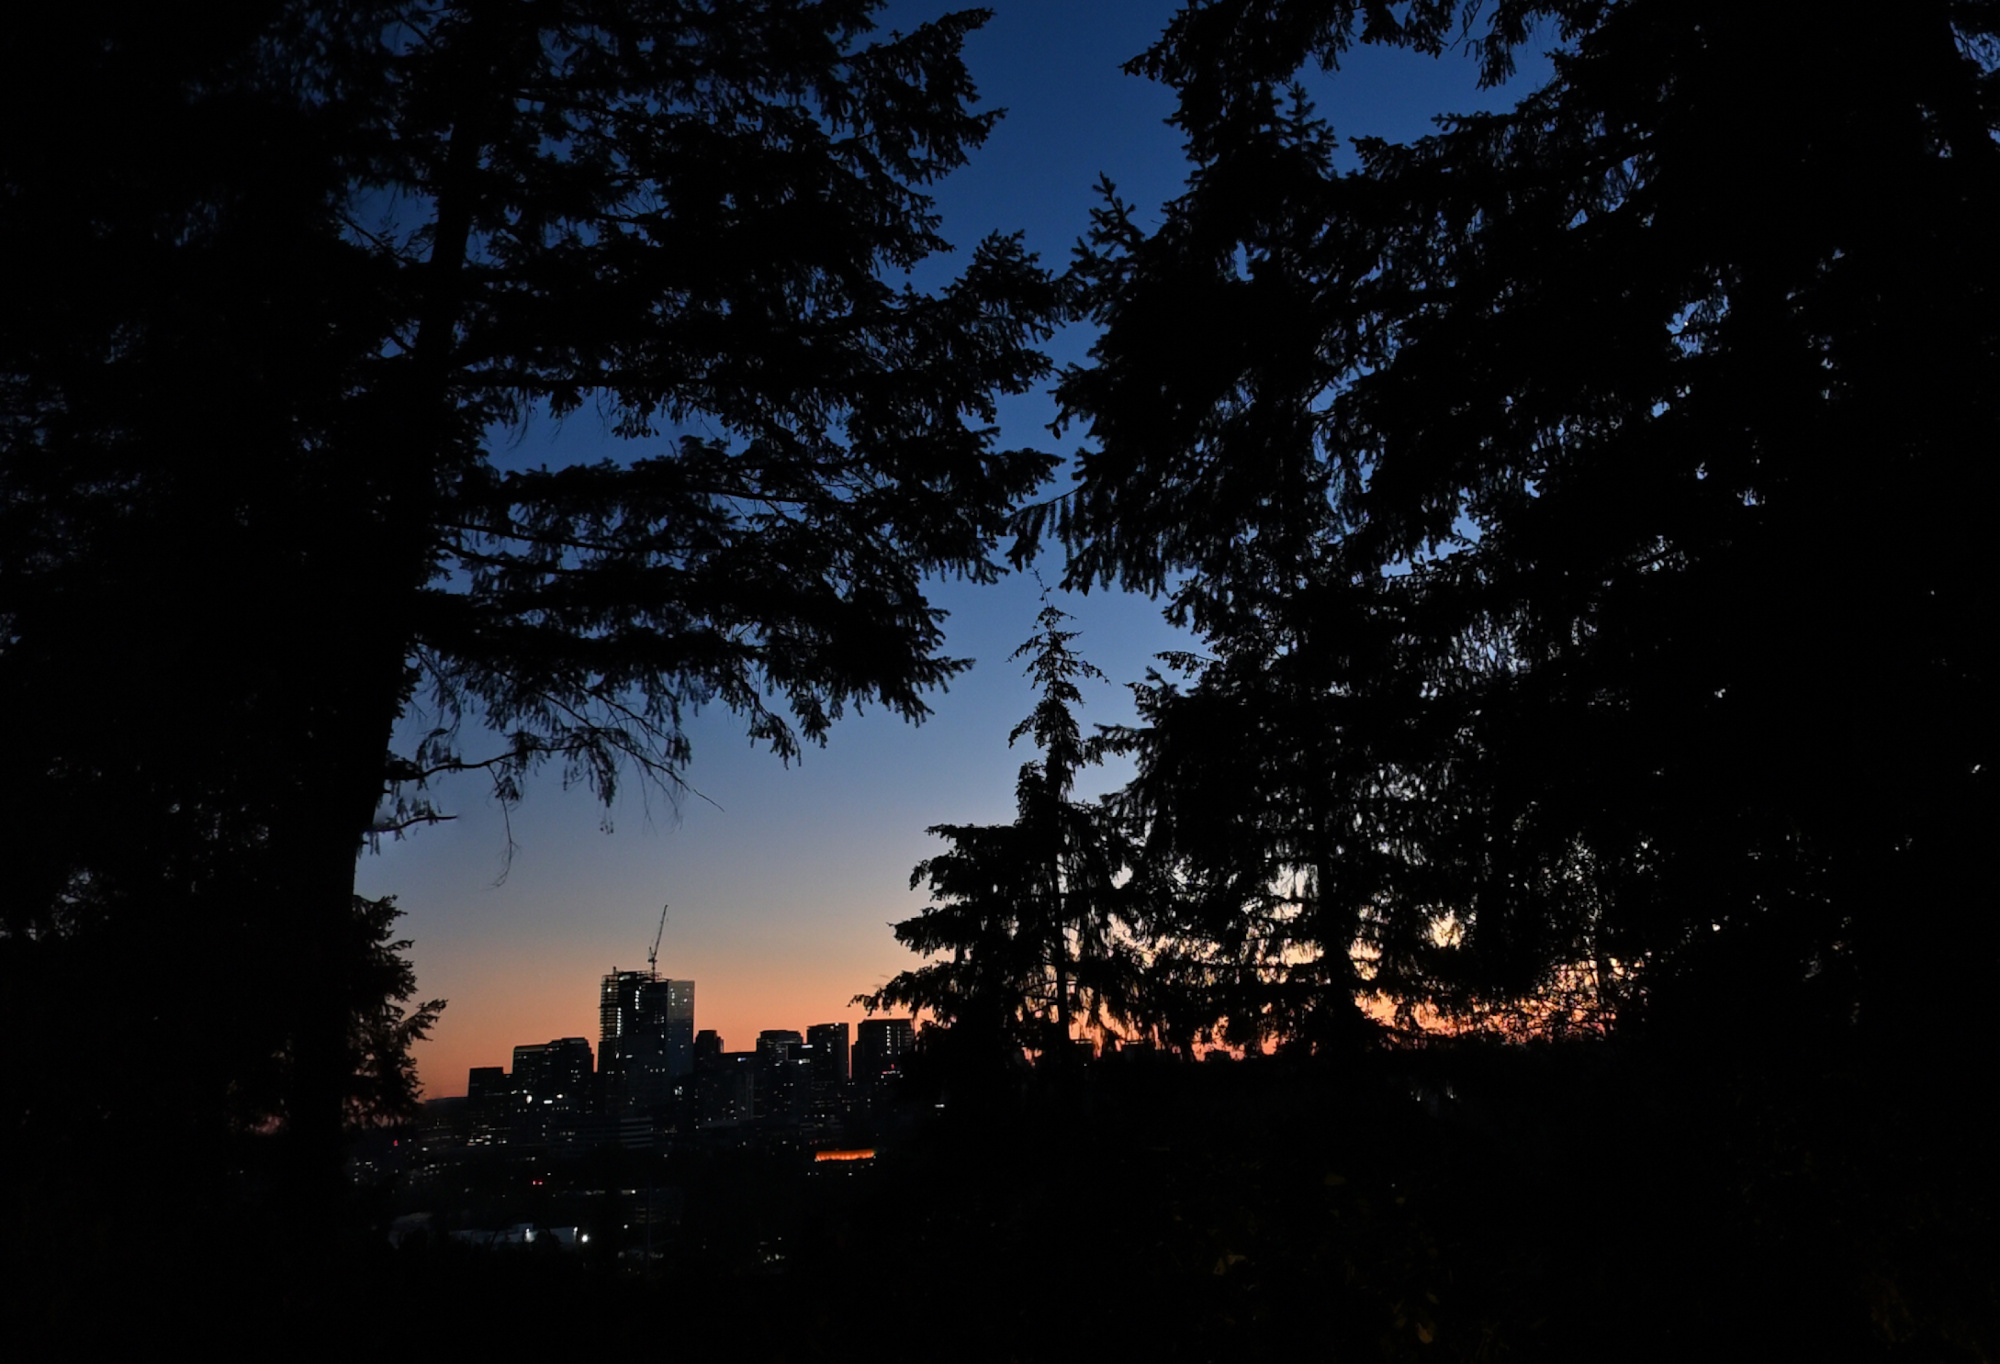
This is the sunset that occurs closest to the Autumn equinox, which is the point in the year when the sun crosses the celestial equator heading southward, marking the transition from summer to fall. This event results in equal lengths of day and night, creating a unique and balanced twilight experience.
But with so many trees around, the experience is limited to a narrow field of view towards the sunset. Nevertheless, the experience remains wonderful.
This panorama is the September 2024 Equinox contribution for the 'September Wrinkle' event of WorldWidePanorama.
Interactive Panorama Equinox-Sunset
The Making
Automated control points aren’t an option here because the individual images are predominantly black:
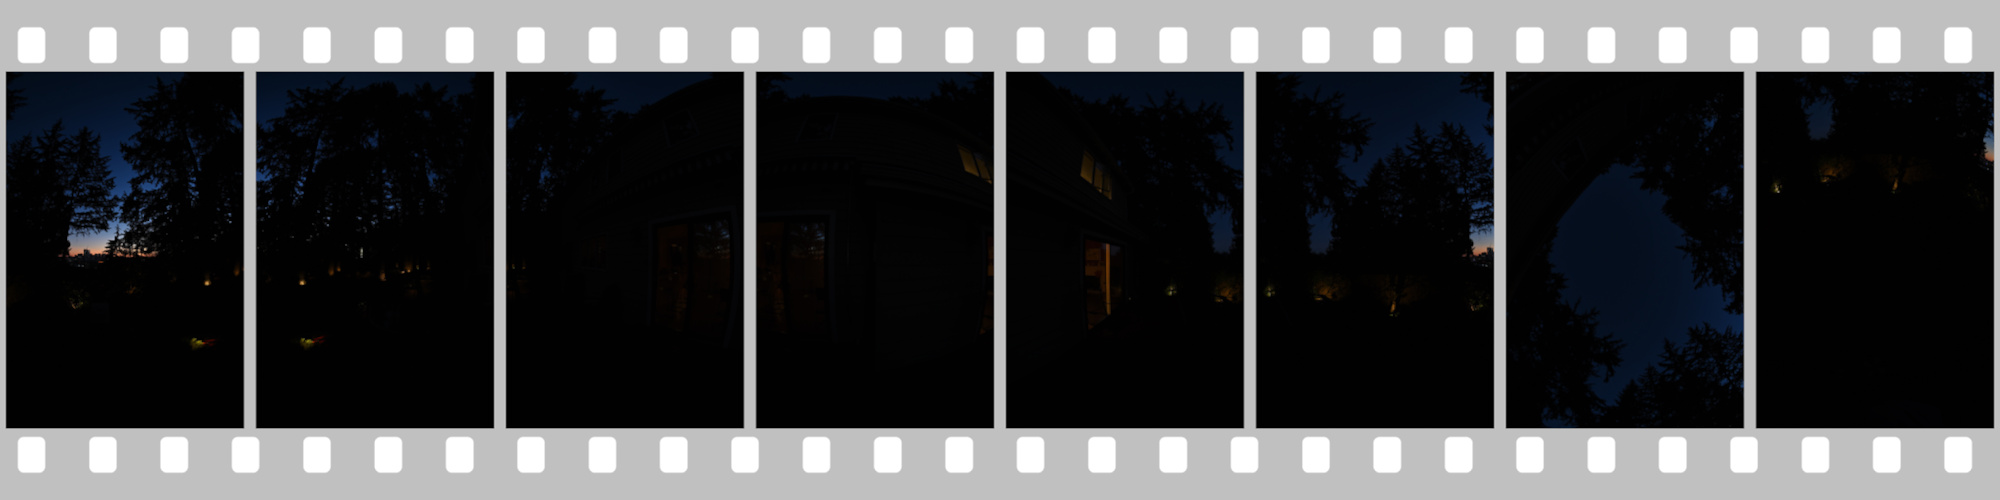
There are 6 pictures taken every 60°, including Zenit and Nadir (6+Z+N). To establish the control points, the brightness in PTGui was increased by +5EV.
Without precise control points, a 360°x180° panorama can become warped and distorted. It might seem that creating panoramas with large areas of uniform dark color would be easier, but unfortunately, there are no shortcuts in this process. Accurate control points are essential for maintaining the integrity of the image.