Backup your pictures 💾
12 April, 2025
NAS (Network Attached Storage) is a convenient solution for storing pictures, videos, and all your other files. The NAS device is typically configured as RAID-1, utilizing two disks to ensure data is mirrored in case one disk fails thereby improving resilience. It connects to your local network, providing reliable and accessible storage, but it is not a backup.
Backing up files from a NAS device is very important to ensure data integrity and availability.
Many NAS systems, such as my Synology NAS, come equipped with backup software like Hyper-Backup. Unfortunately those software is getting slower over time during a backup run for some reason.
And do not copy your files over the network to a drive attached to your computer. This process is slow and there's a risk of the connection dropping.
Using PuTTY, a popular SSH client, and simple Linux commands, you can efficiently perform backups and verify them running on the NAS. Here’s a step-by-step guide.
Prerequisite
NAS devices typically feature USB ports, allowing you to connect an external hard drive of the required size directly to the NAS via USB. External drives are available in two main types: SSD (Solid State Drives) and HDD (Hard Disk Drives with spinning disks). I'm using HDD because of their long-term data retention capabilities, but SSDs are faster and maybe perfect for frequent short term backups. The drive connects to the system with a path like /volumeUSB1/usbshare1-2. Simply check with the cd and dir command.
Step 1: Connect to your NAS using PuTTY
Download and Install PuTTY.
Open PuTTY and enter the IP address of your NAS in the "Host Name (or IP address)" field. Default Port is 22.
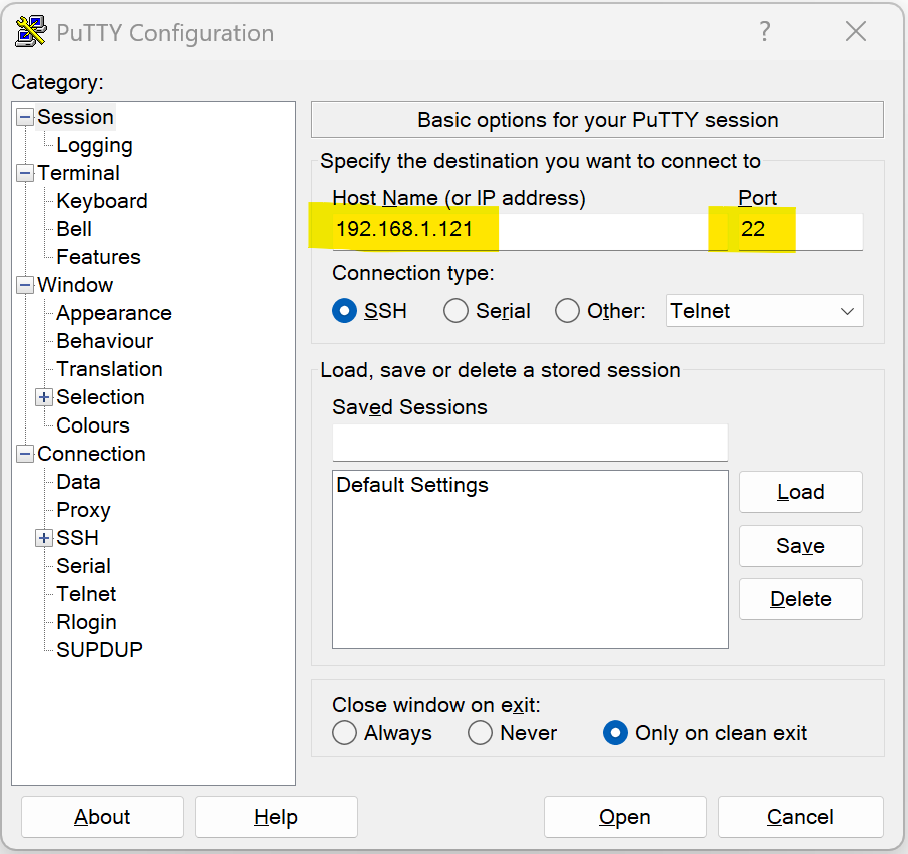
Login: Click "Open" and log in using your NAS credentials. You should now have access to the NAS embedded Linux console.
Step 2: Backup Files using the cp command
The cp command of the embedded Linux system of the NAS is used to copy files and directories.
To backup files from your NAS to another drive, follow these steps:
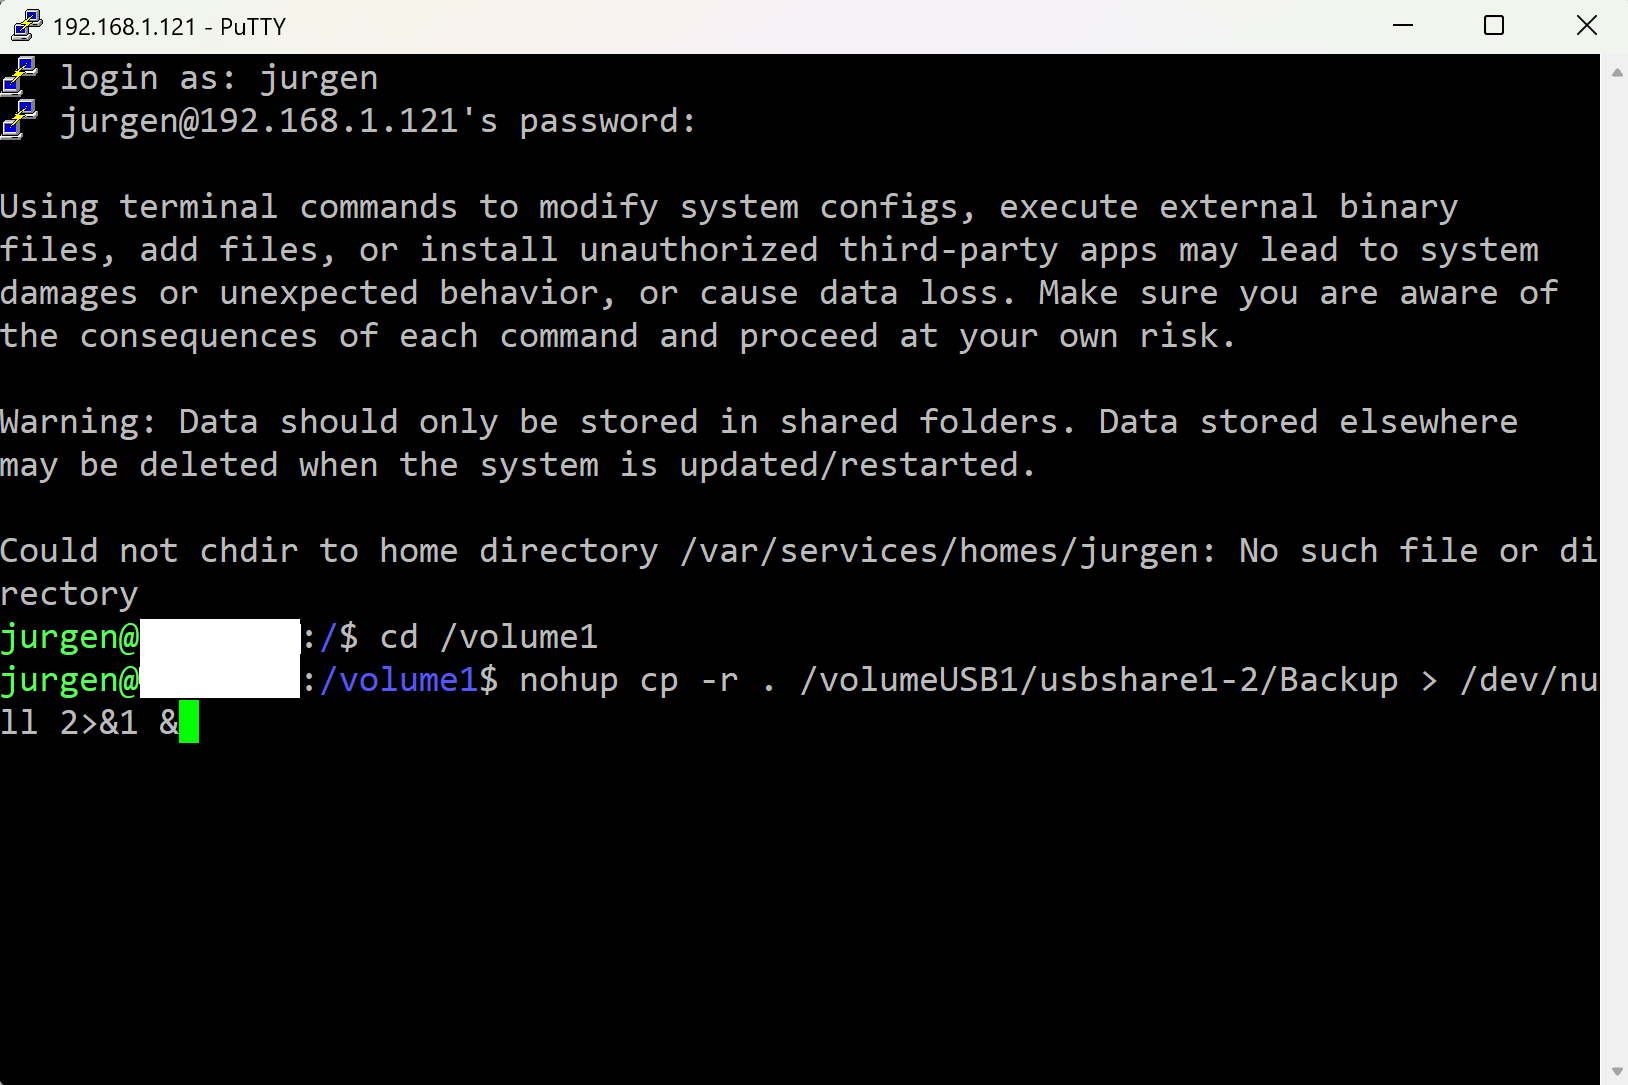
Navigate to the Source Directory:
cd /volume1For large data sets, the copy process can take several days, and the PuTTY terminal may disconnect, closing the command. To prevent this, use the nohup command to keep the process running even if the terminal disconnects.
While commands like screen or tmux can be used to detach from the current terminal session, they are not always available on every system. At least, it is not available on the Synology NAS.
Copy Files to the Backup Location using cp command with nohup:
nohup cp -r . /volumeUSB1/usbshare1-2/backup > /dev/null 2>&1 &If you only want to back up specific folders, list those folders in the cp command instead of using the dot (.), which copies everything. Enclose folder names that contain spaces in quotes.
nohup cp -r pictures1 pictures2 "some foldername with space" /volumeUSB1/usbshare1-2/backup > /dev/null 2>&1 &The nohup command immediately returns and provides a process ID (PID). You can use the ps or htop command to check for this PID if it is still running in later sessions. Use the kill command with this PID to stop the backup.
Step 3: Verify the Backup using the diff command
To ensure that the backup is identical to the original files, you can use the diff command to compare the contents of the source and backup directories.
diff -qr /volume1 /volumeUSB1/usbshare1-2/backupIf the directories are identical, diff will not produce any output. If there are differences, it will list the differing files.
For large file sets, use the nohup command to not rely on the active terminal session. Any output will be written to the redirected file (for example /var/services/tmp/diff.txt) and can be checked later.
nohup diff -qr /volume1 /volumeUSB1/usbshare1-2/backup > /var/services/tmp/diff.txt 2>&1 &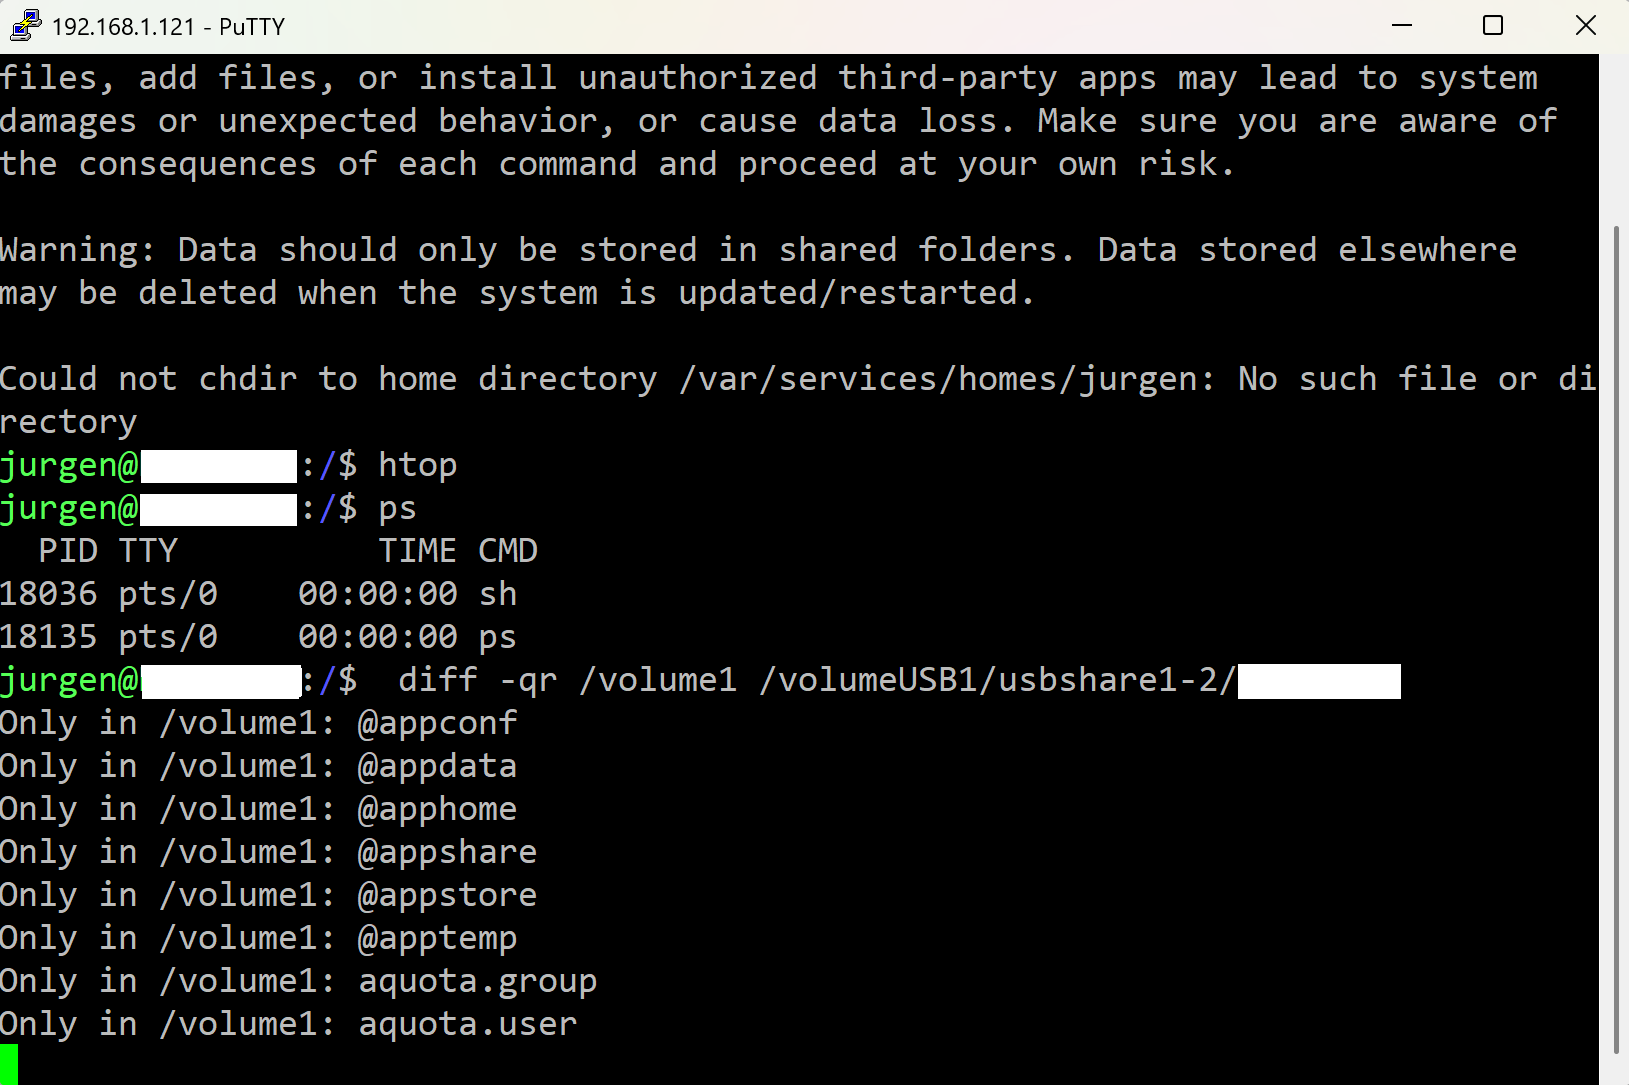
My first digital camera was a Kodak DC-260, and I used 3.5" 💾 for backup.