Die Kontaktflächen eines Kugellagers bestehen aus gehärtetem Stahl oder Keramik. Mit einer Ausnahme, wenn sie aus China kommen.
Gesehen an meinem Fahrrad, das auch aus China kommt. Während der Fahrt hat das Vorderrad Geräusche gemacht und hier ist warum:
Bei Fahrrädern ist es üblich, dass die Lagerschalen und Käfig (der die Kugeln hält) getrennt sind. Also ein einfaches Konuslager. In diesem Fall noch nicht mal mit Käfig, sondern einzelne Kugeln, die nicht mit dem Käfig auf Abstand gehalten werden:
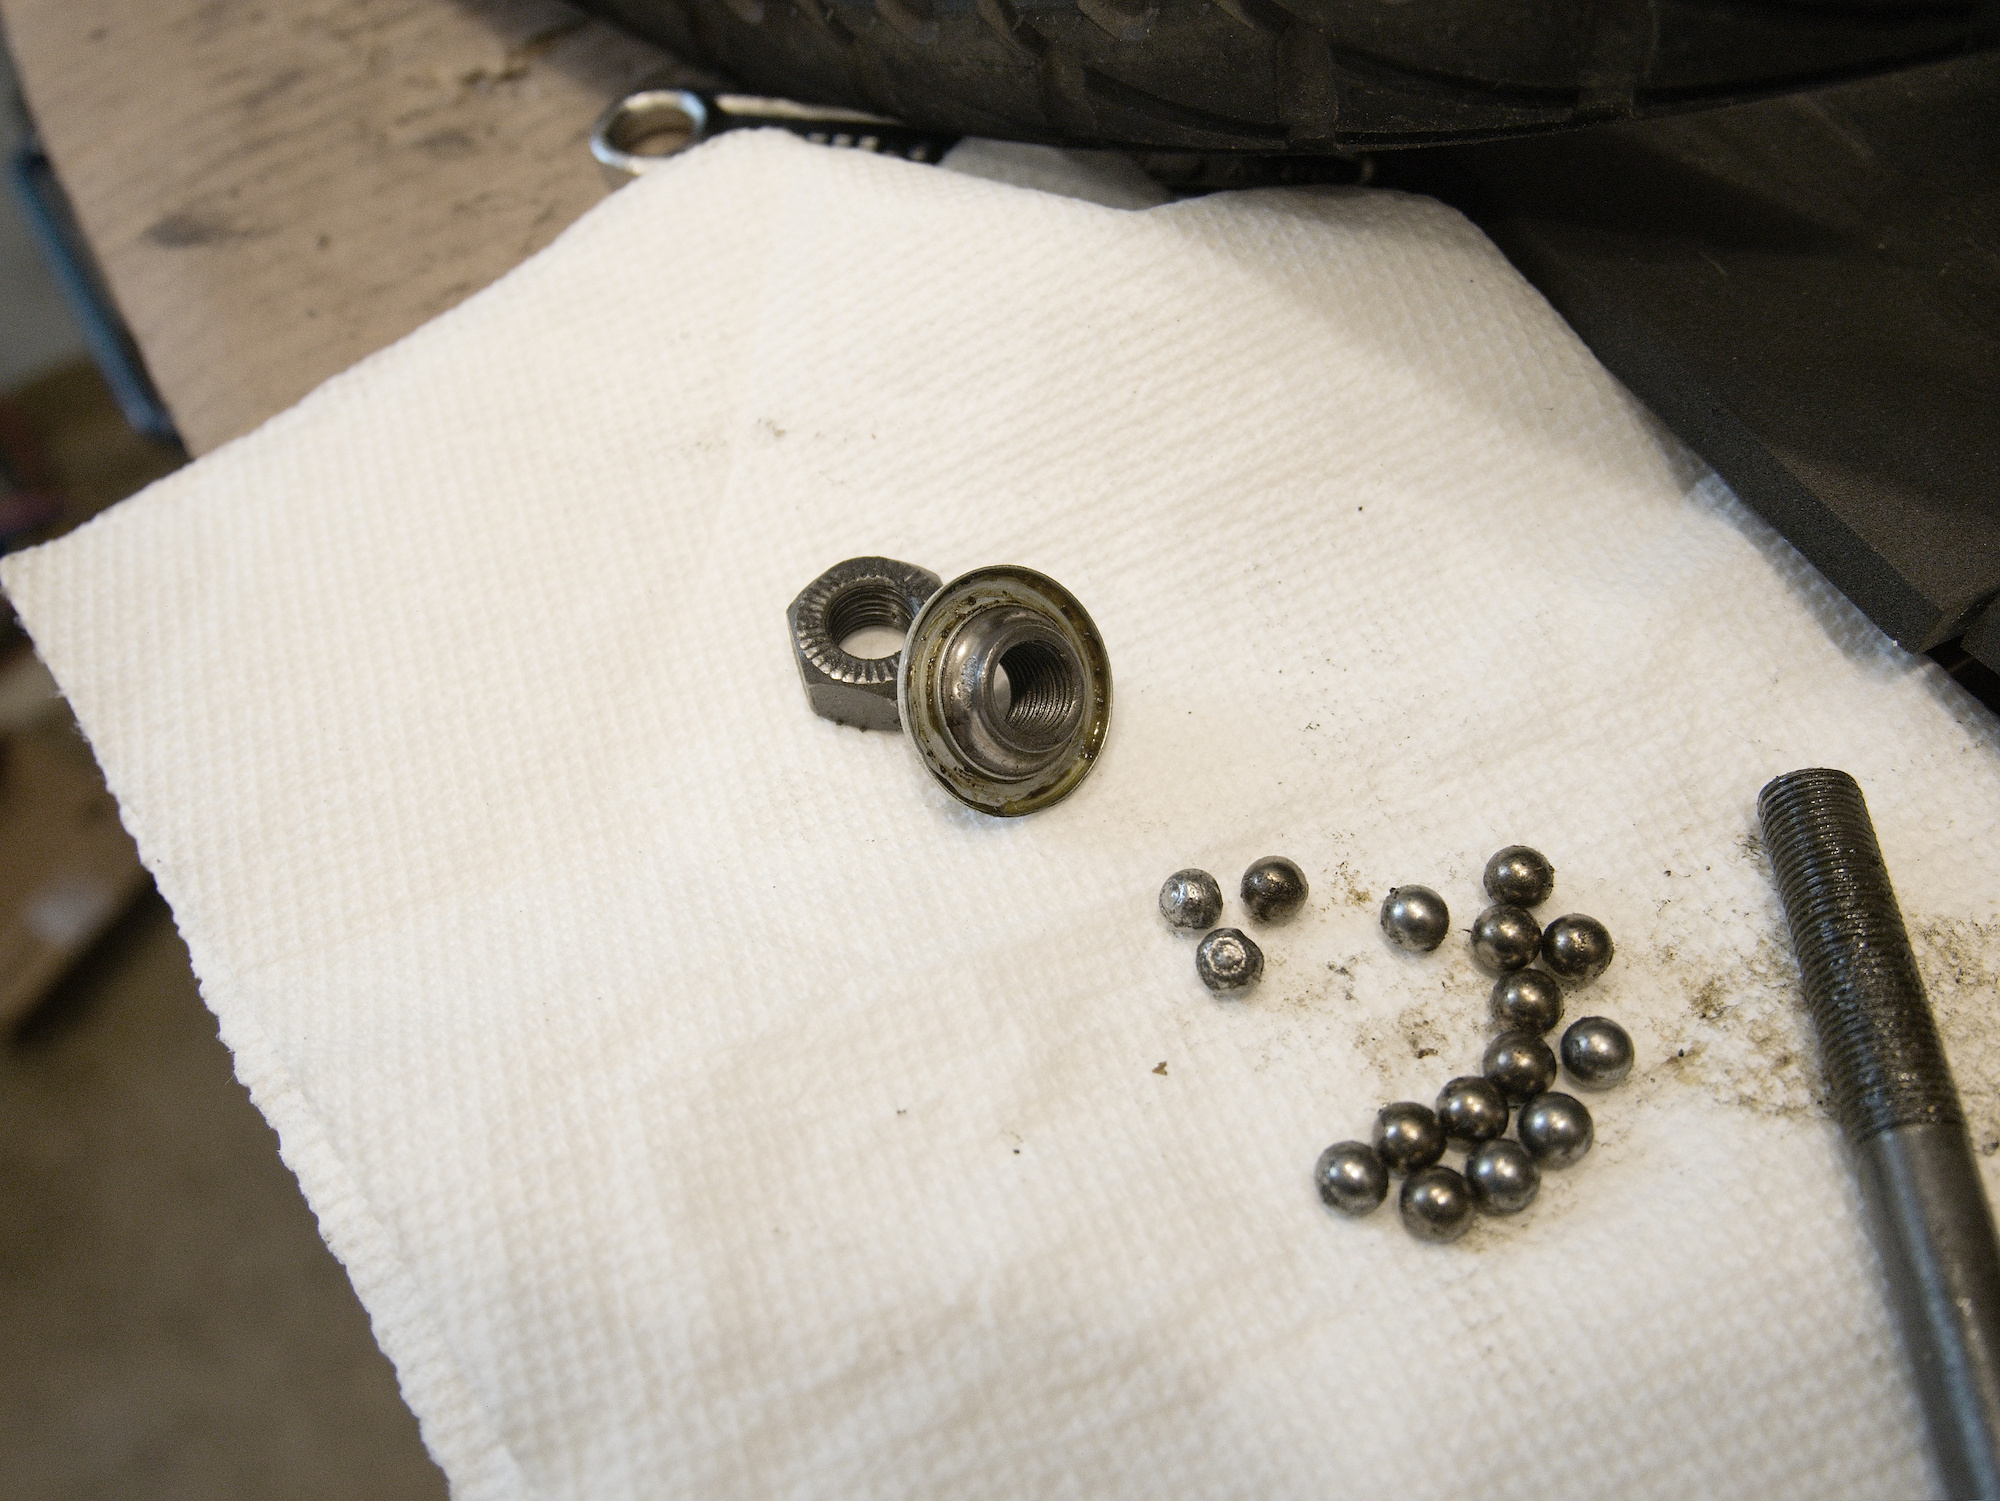
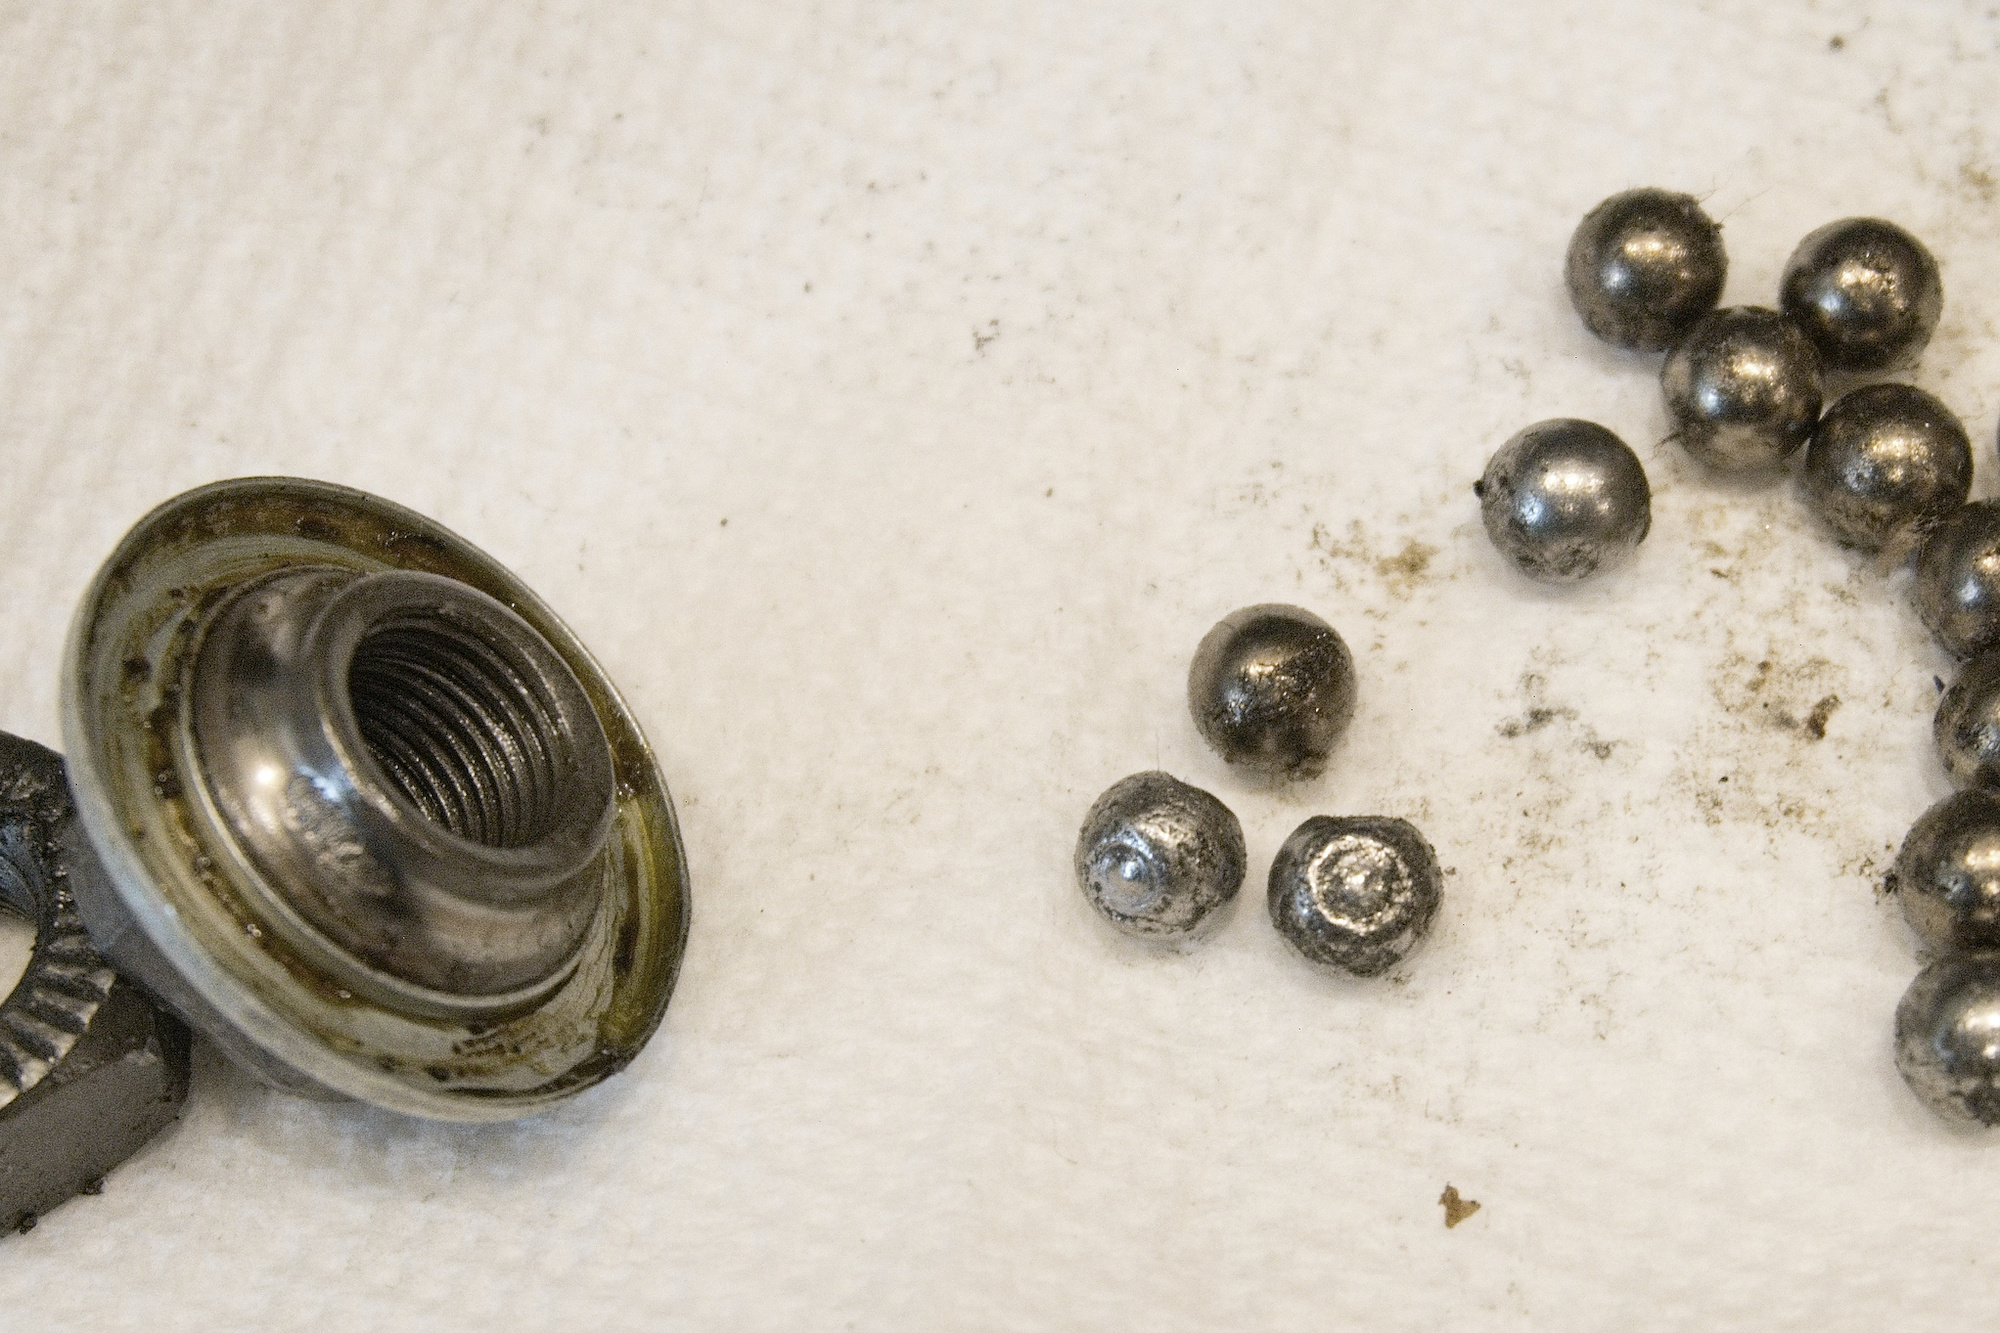
Die Kugeln waren verformt (!) und die Ursache der Fahrgeräusche. Die Lagerschale in der Mutter war teilweise beschädigt. Das ist alles, aber kein gehärteter Stahl.
Ein einfacher Reparatursatz mit Kugelkäfig:
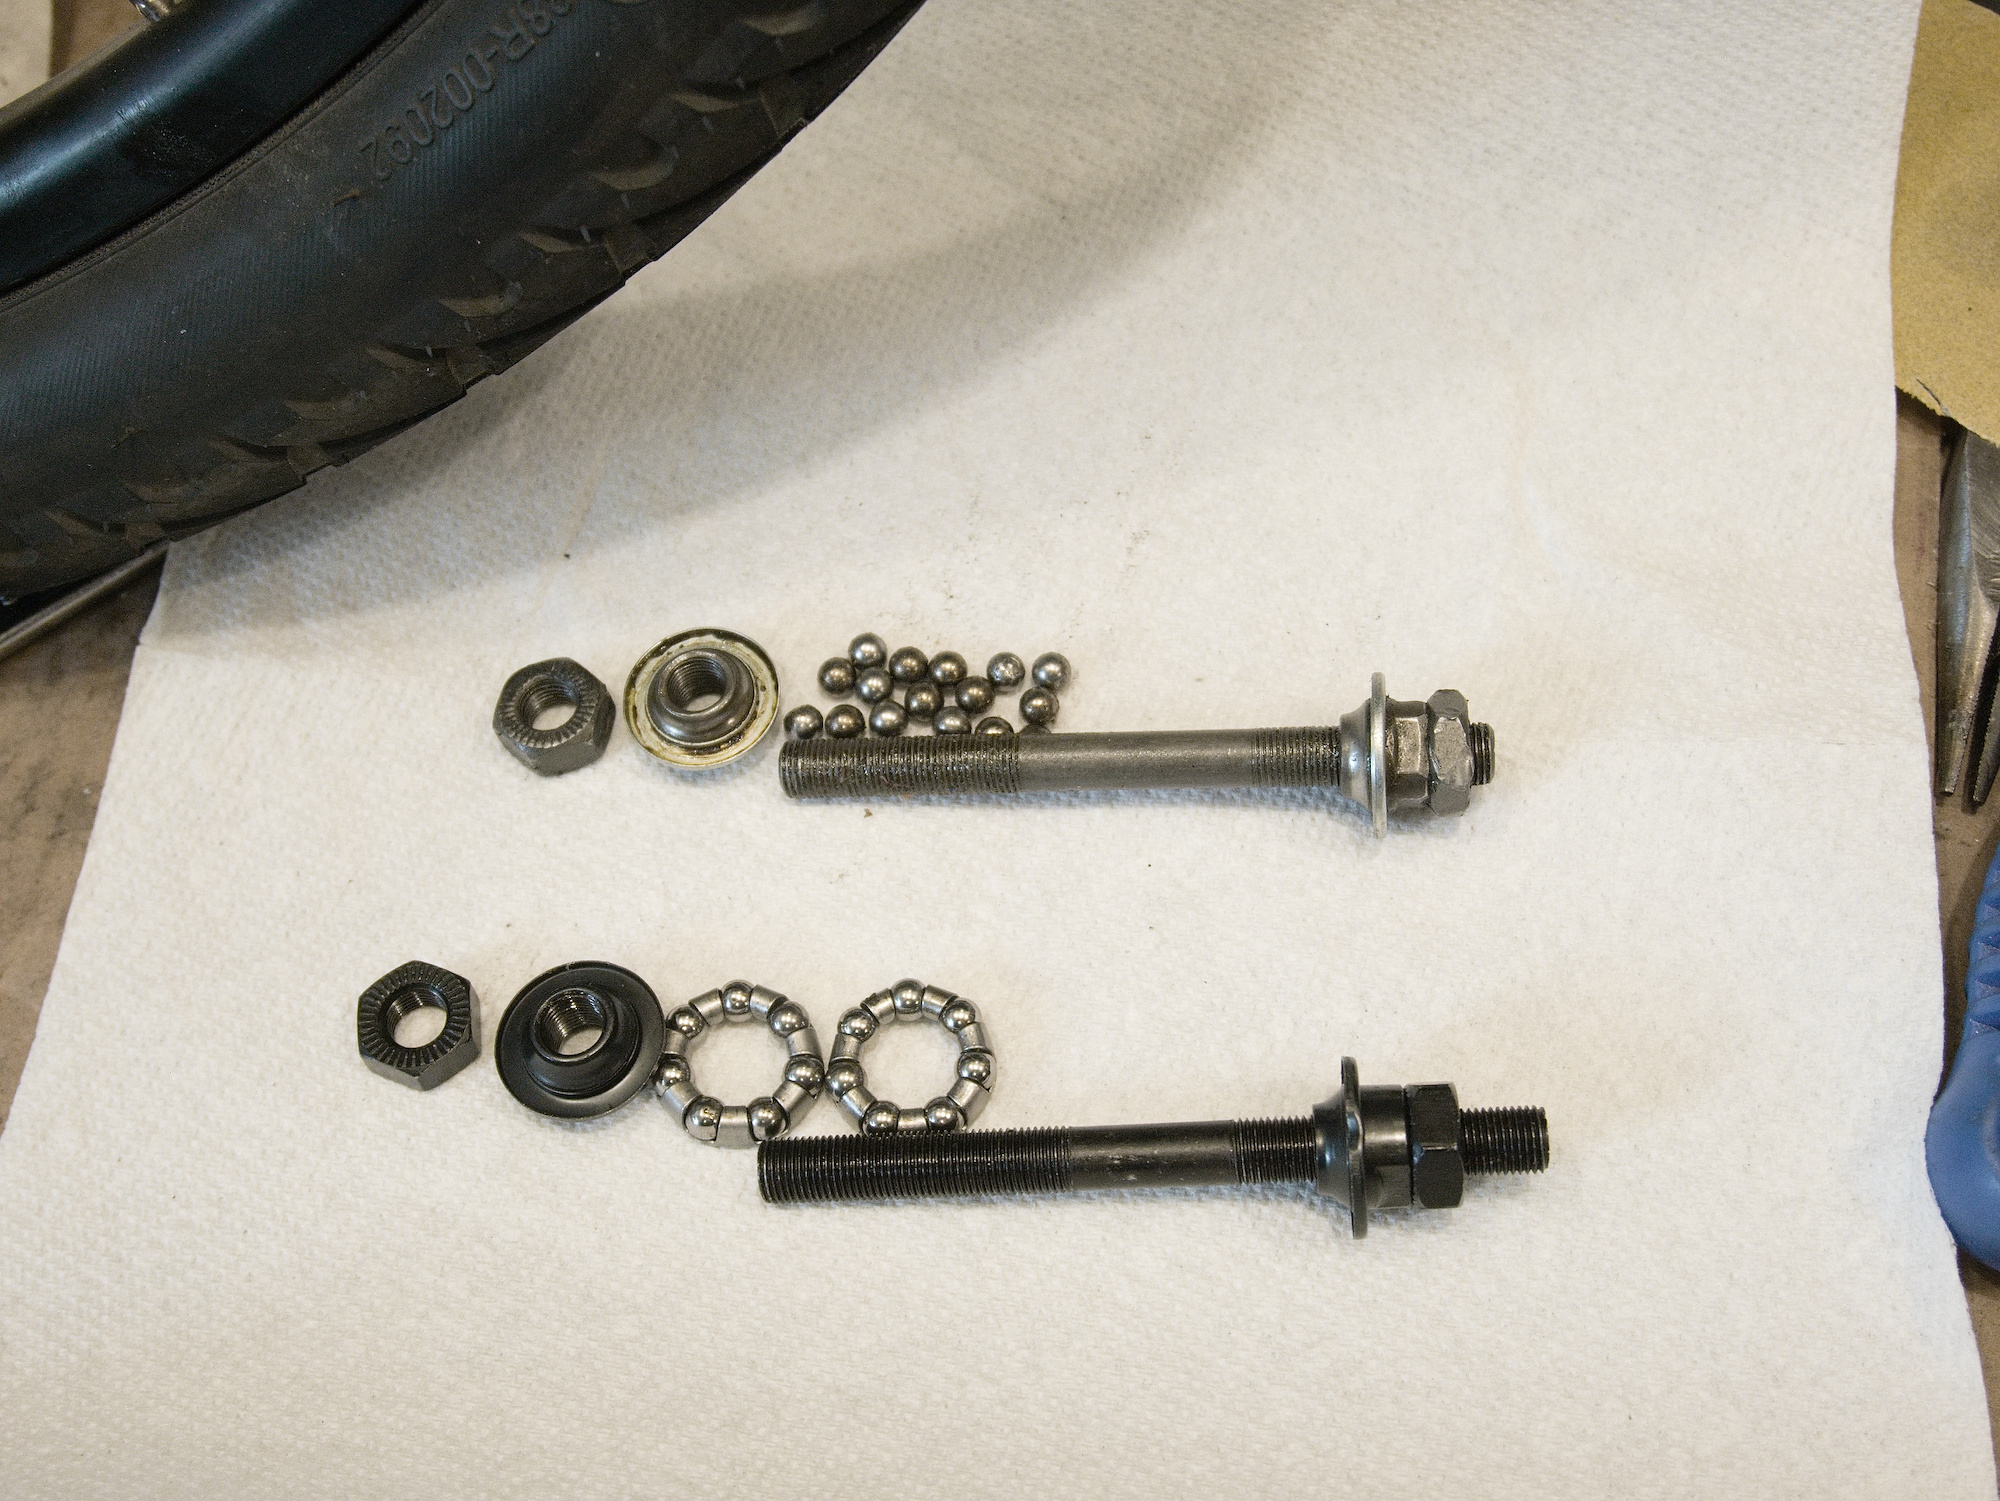
Die Nabenseite, die den Außenring des Lagers hält, war nicht beschädigt. Ansonsten hätte das Rad auch noch ersetzt werden müssen.
Dann wären der Rahmen, der Motor und der Lenker das einzige, was noch nicht ersetzt wurde.
Aber billig war das Fahrrad nicht. Und ein Haufen 5-Sterne-Beurteilungen hat es auch gehabt.

Und um die Tiefenschärfe zu reduzieren, wird das Focus-Stacking angewendet, siehe Combine pictures with PTGui, Focus stacking
Mehrere Bilder werden mit verschiedenen Fokussierungspunkten aufgenommen und kombiniert.
In PTGui werden die Masken mit den fokussierten Bereichen gemalt und dann kombiniert.
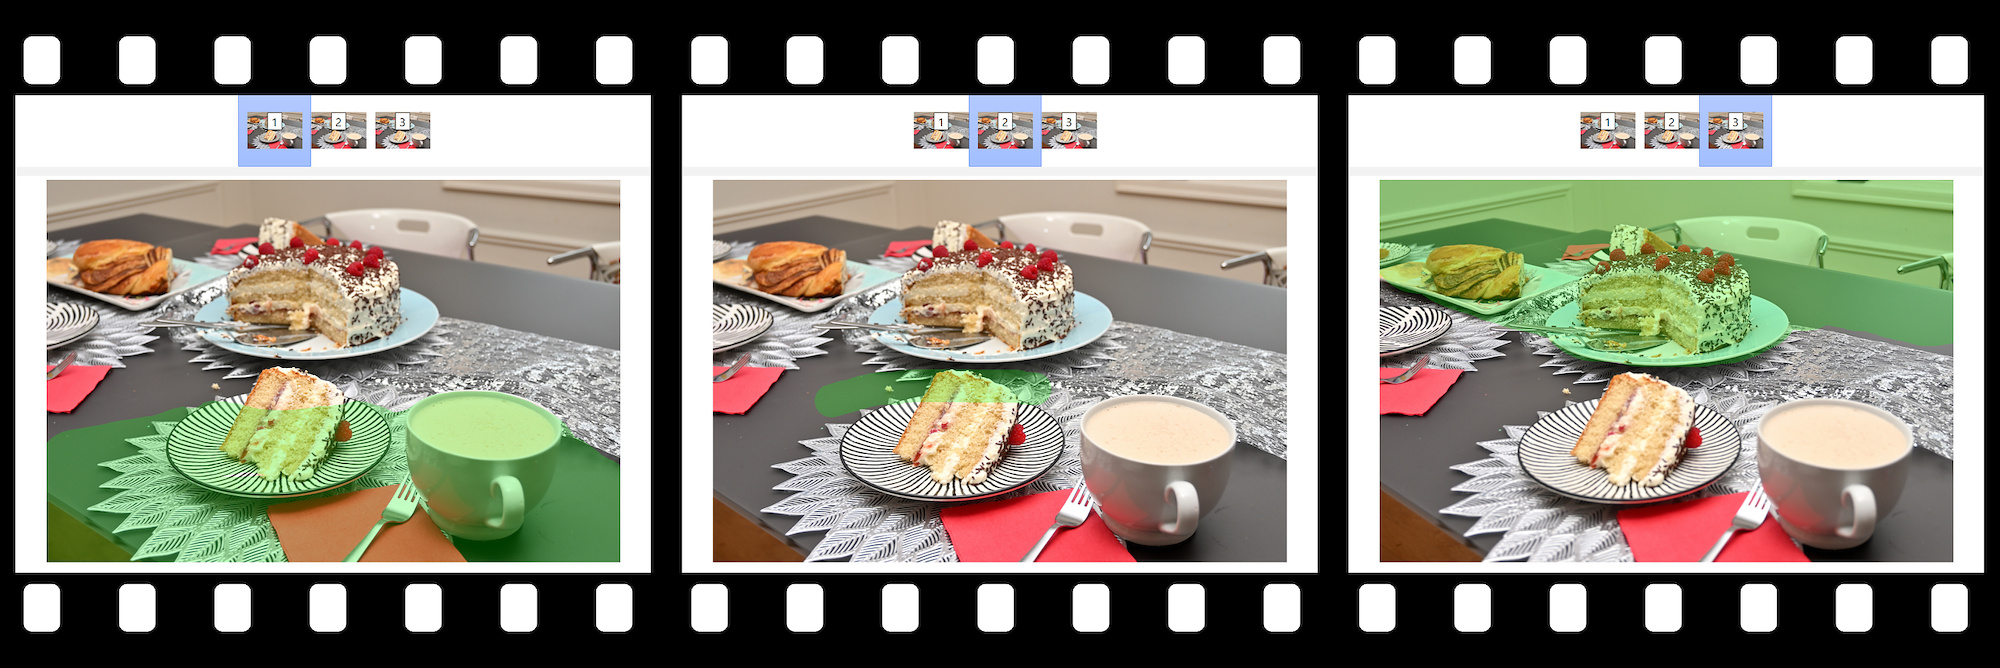
The mask feature in PTGui simplifies the process of selecting areas from different images. This is not just for overlapping regions in panoramic photos, but it can also be applied to basic focus stacking.
Focus stacking involves taking multiple pictures with different focus areas.
To achieve focus across all objects, a small aperture is needed, but this may not be ideal or sufficient under certain lighting conditions to achieve the required depth of field. Thus, when not all objects are in focus, focus stacking becomes a practical solution.
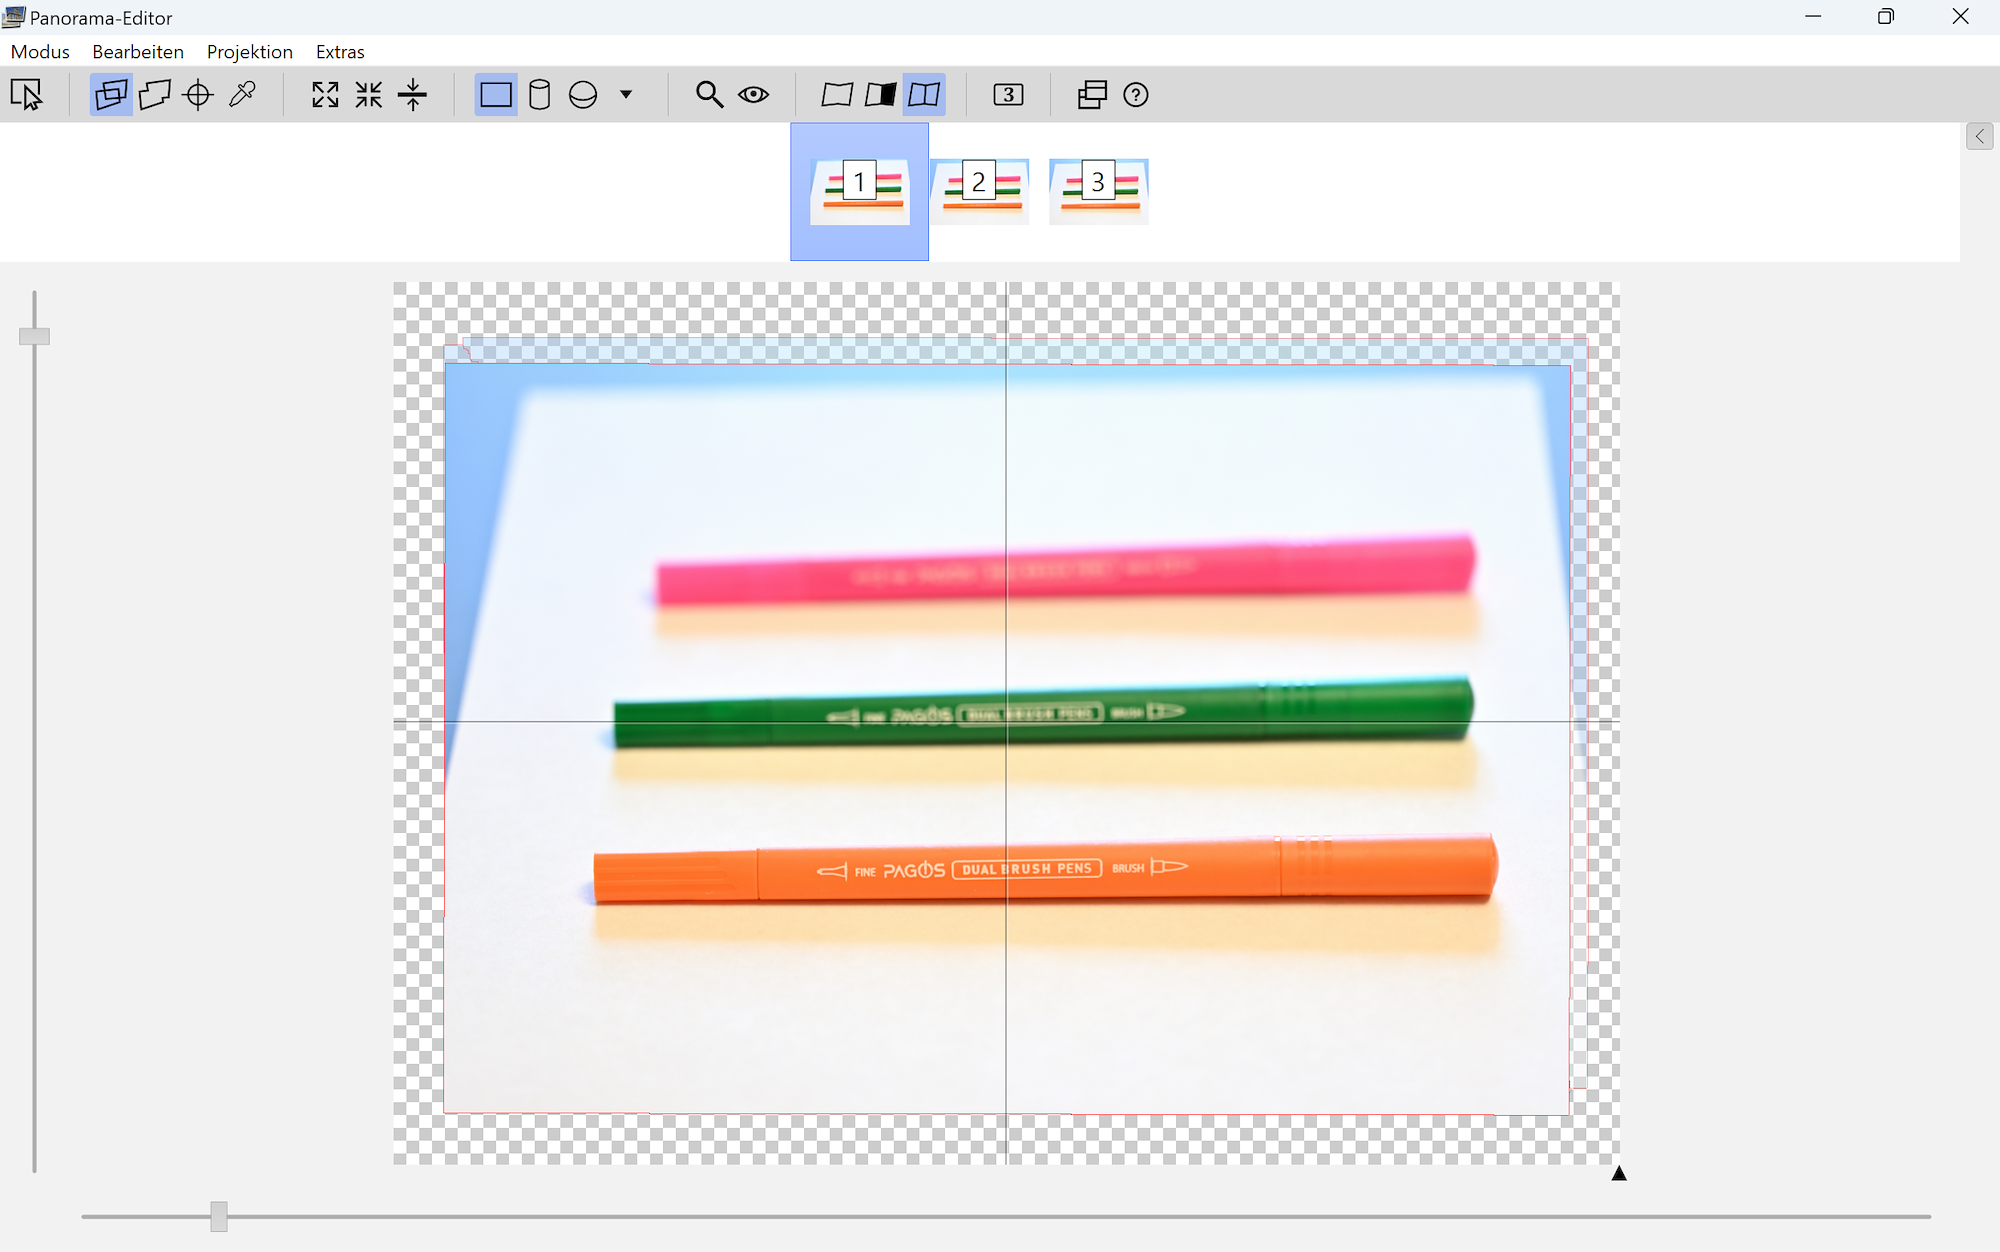
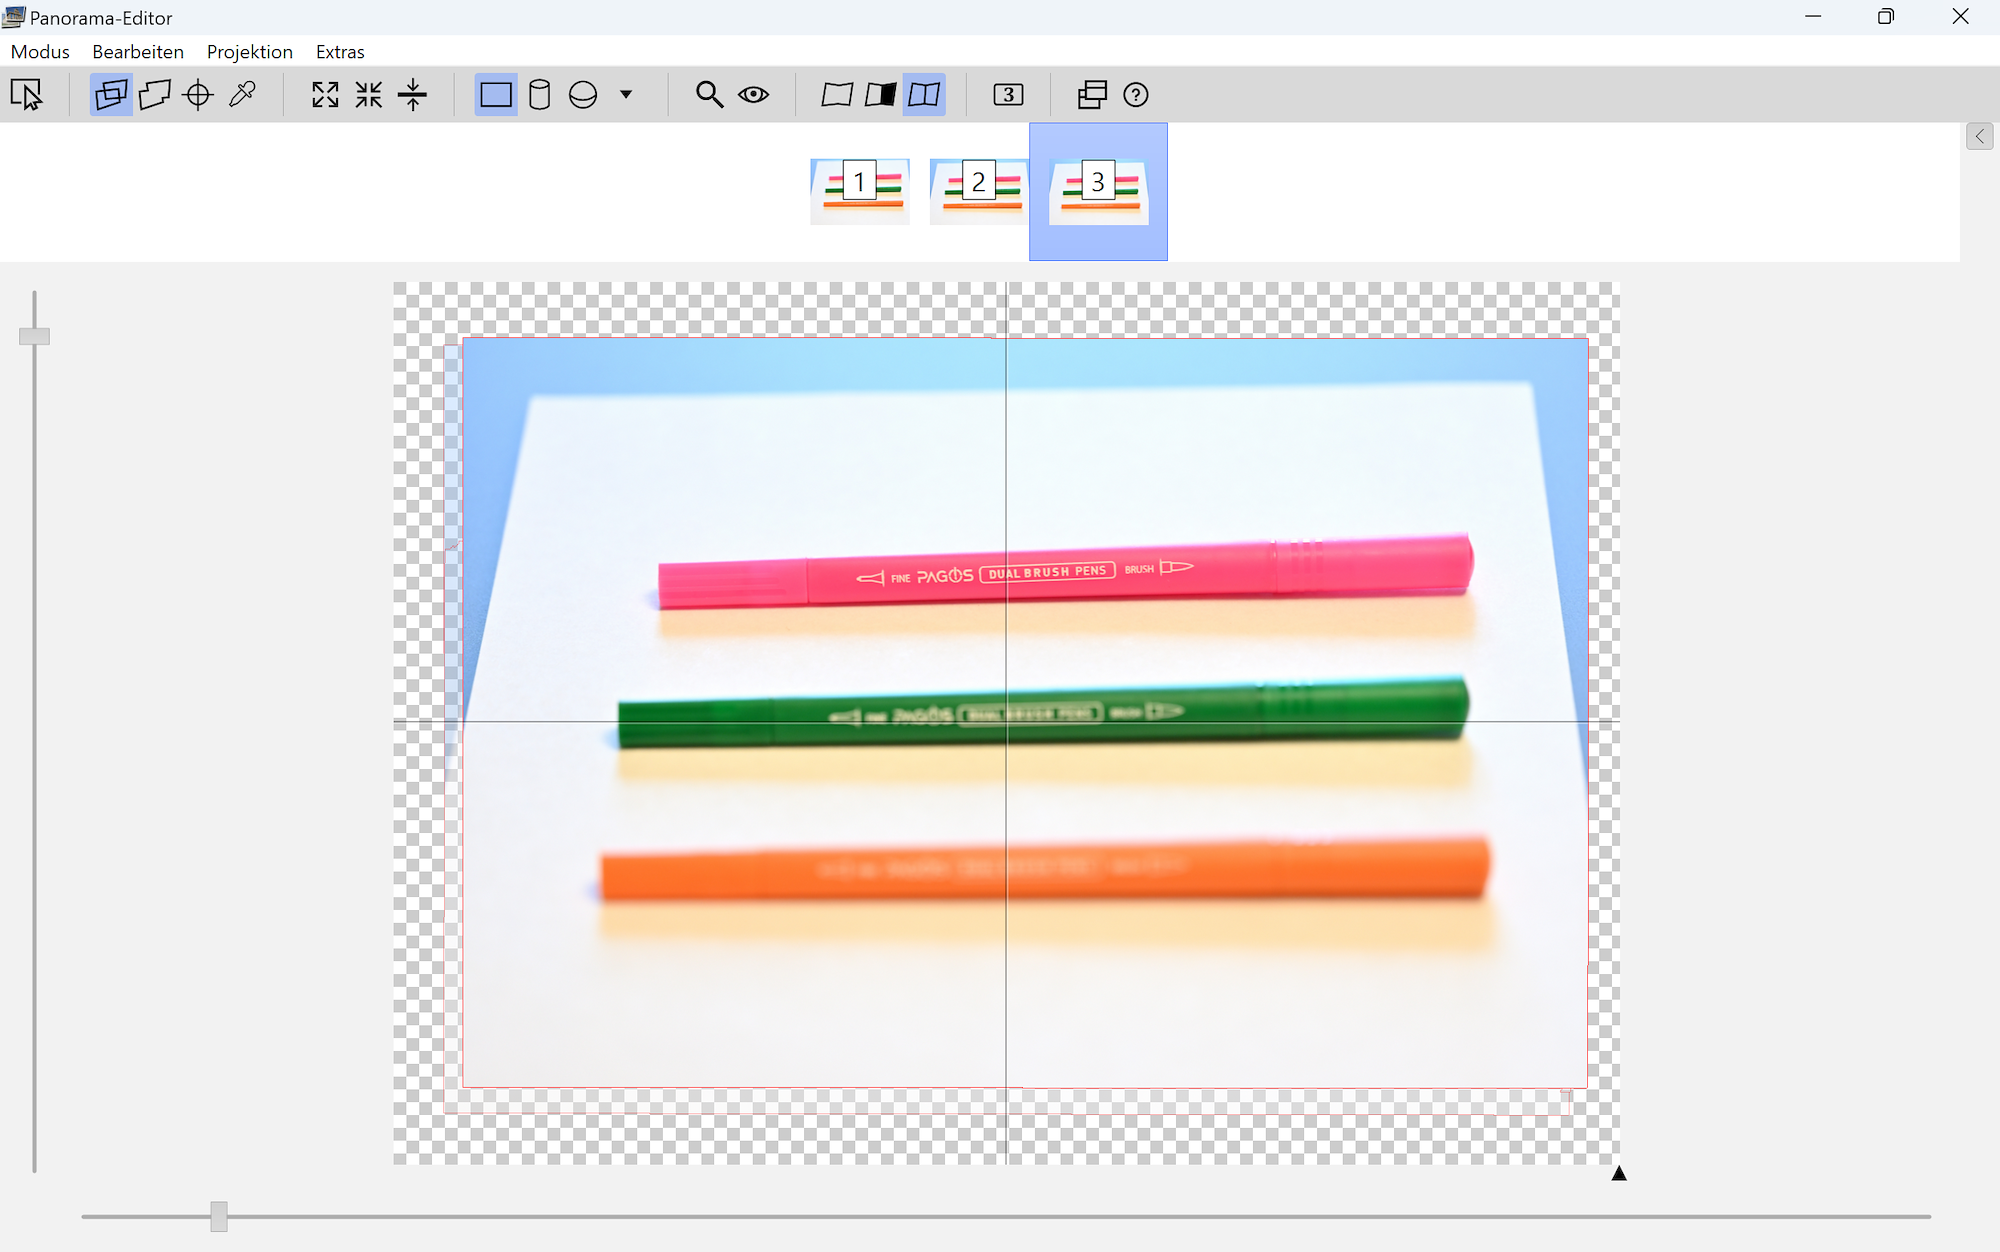
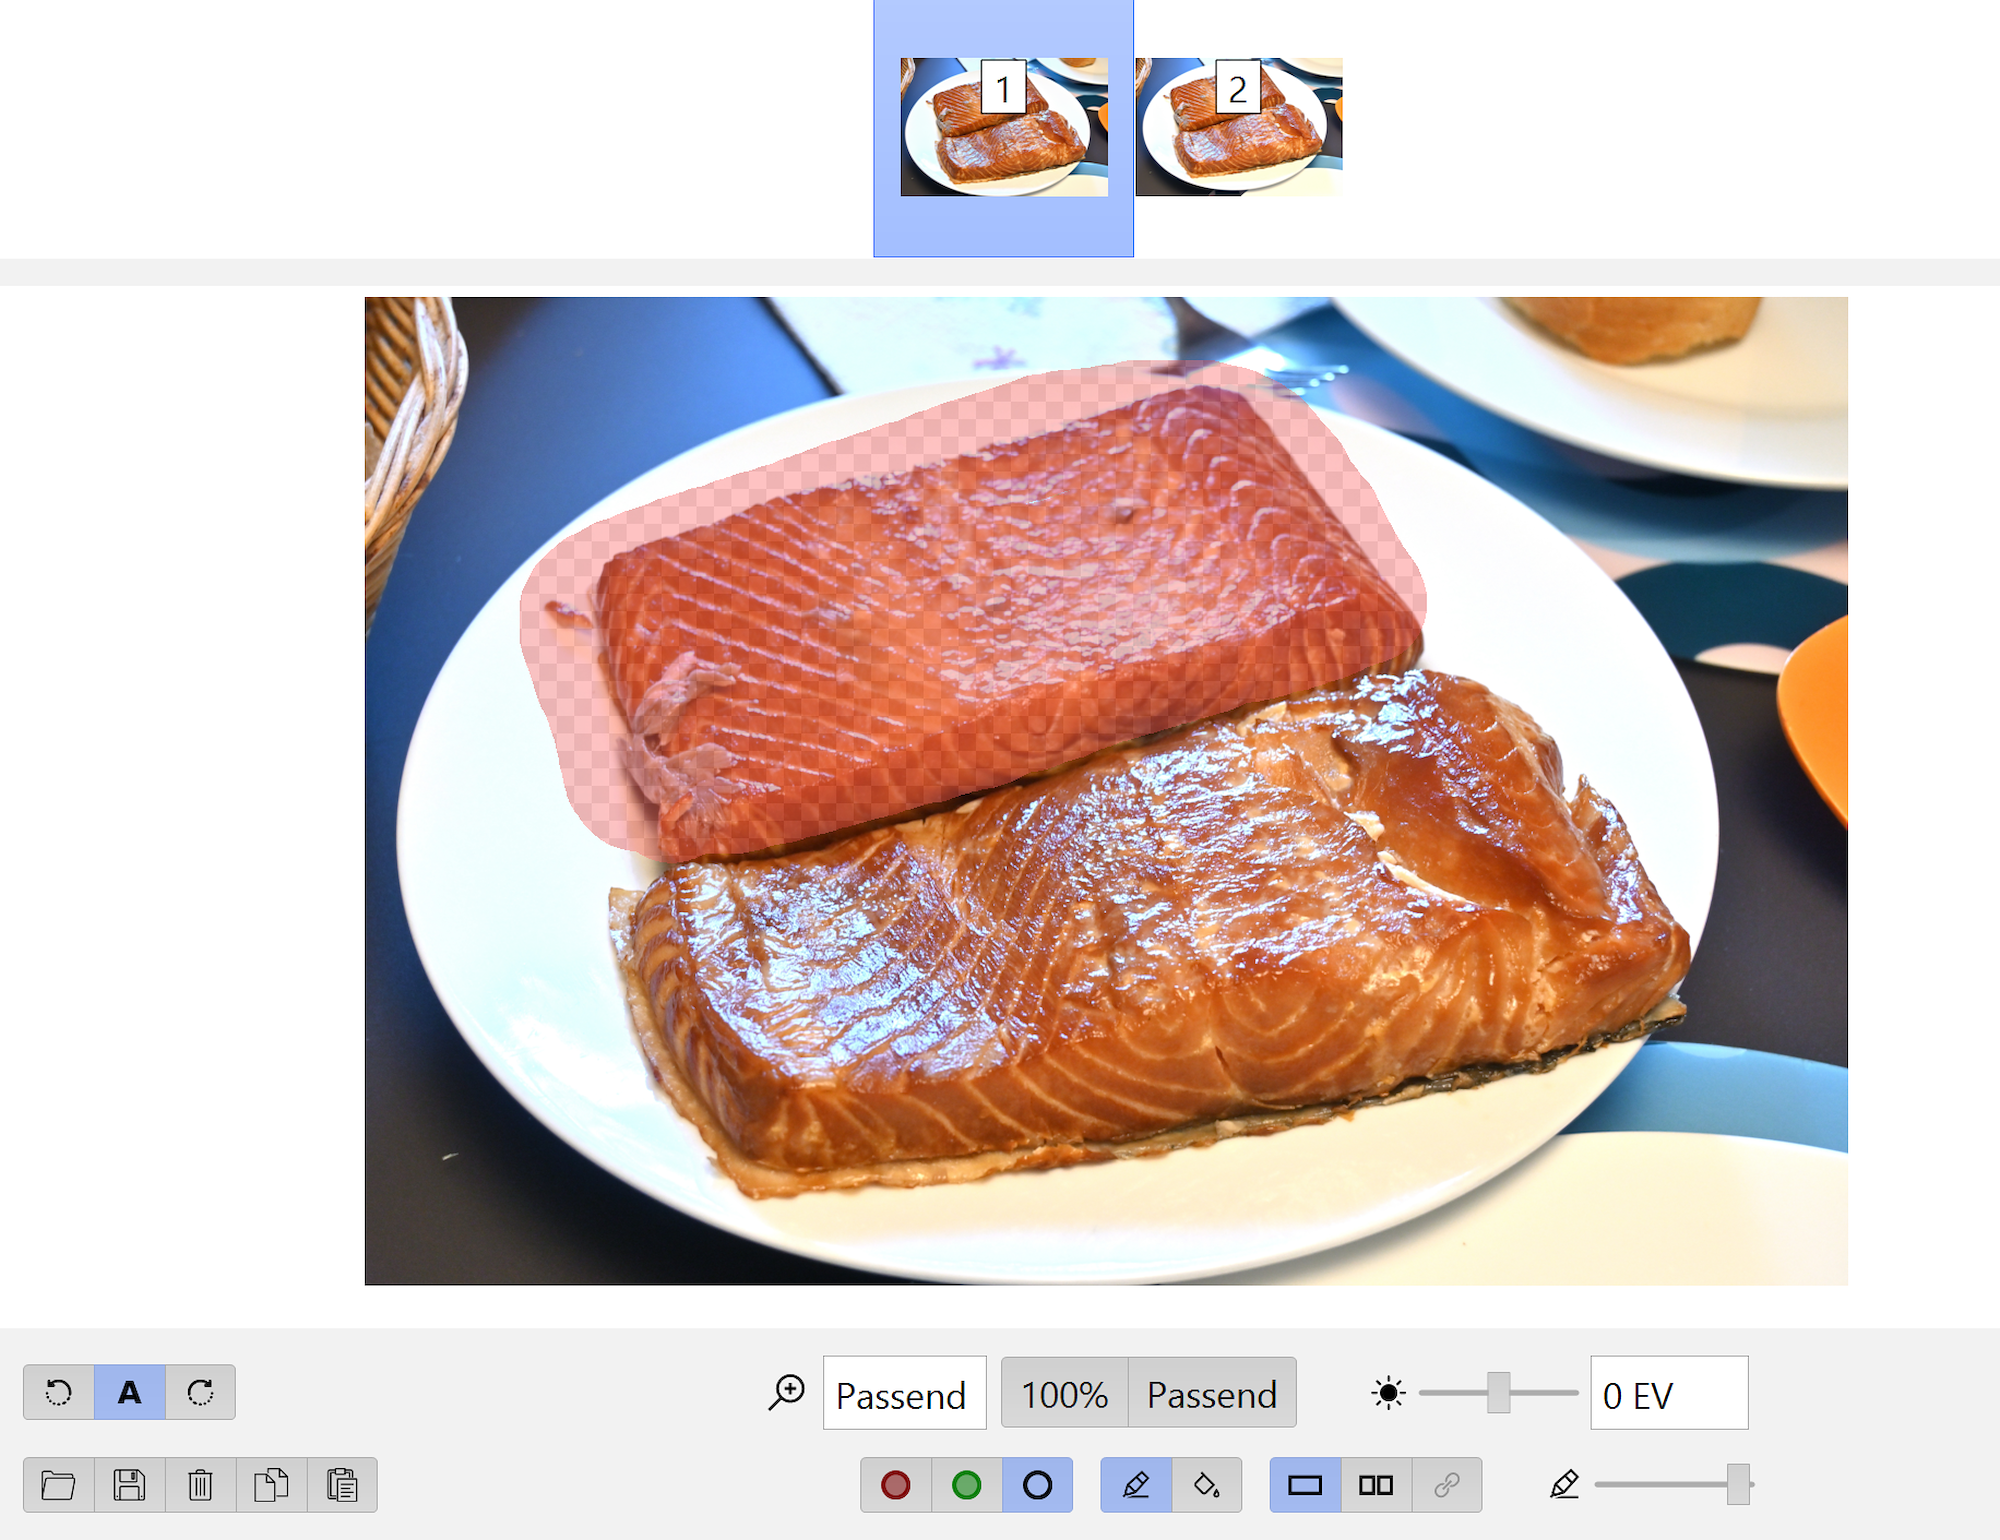
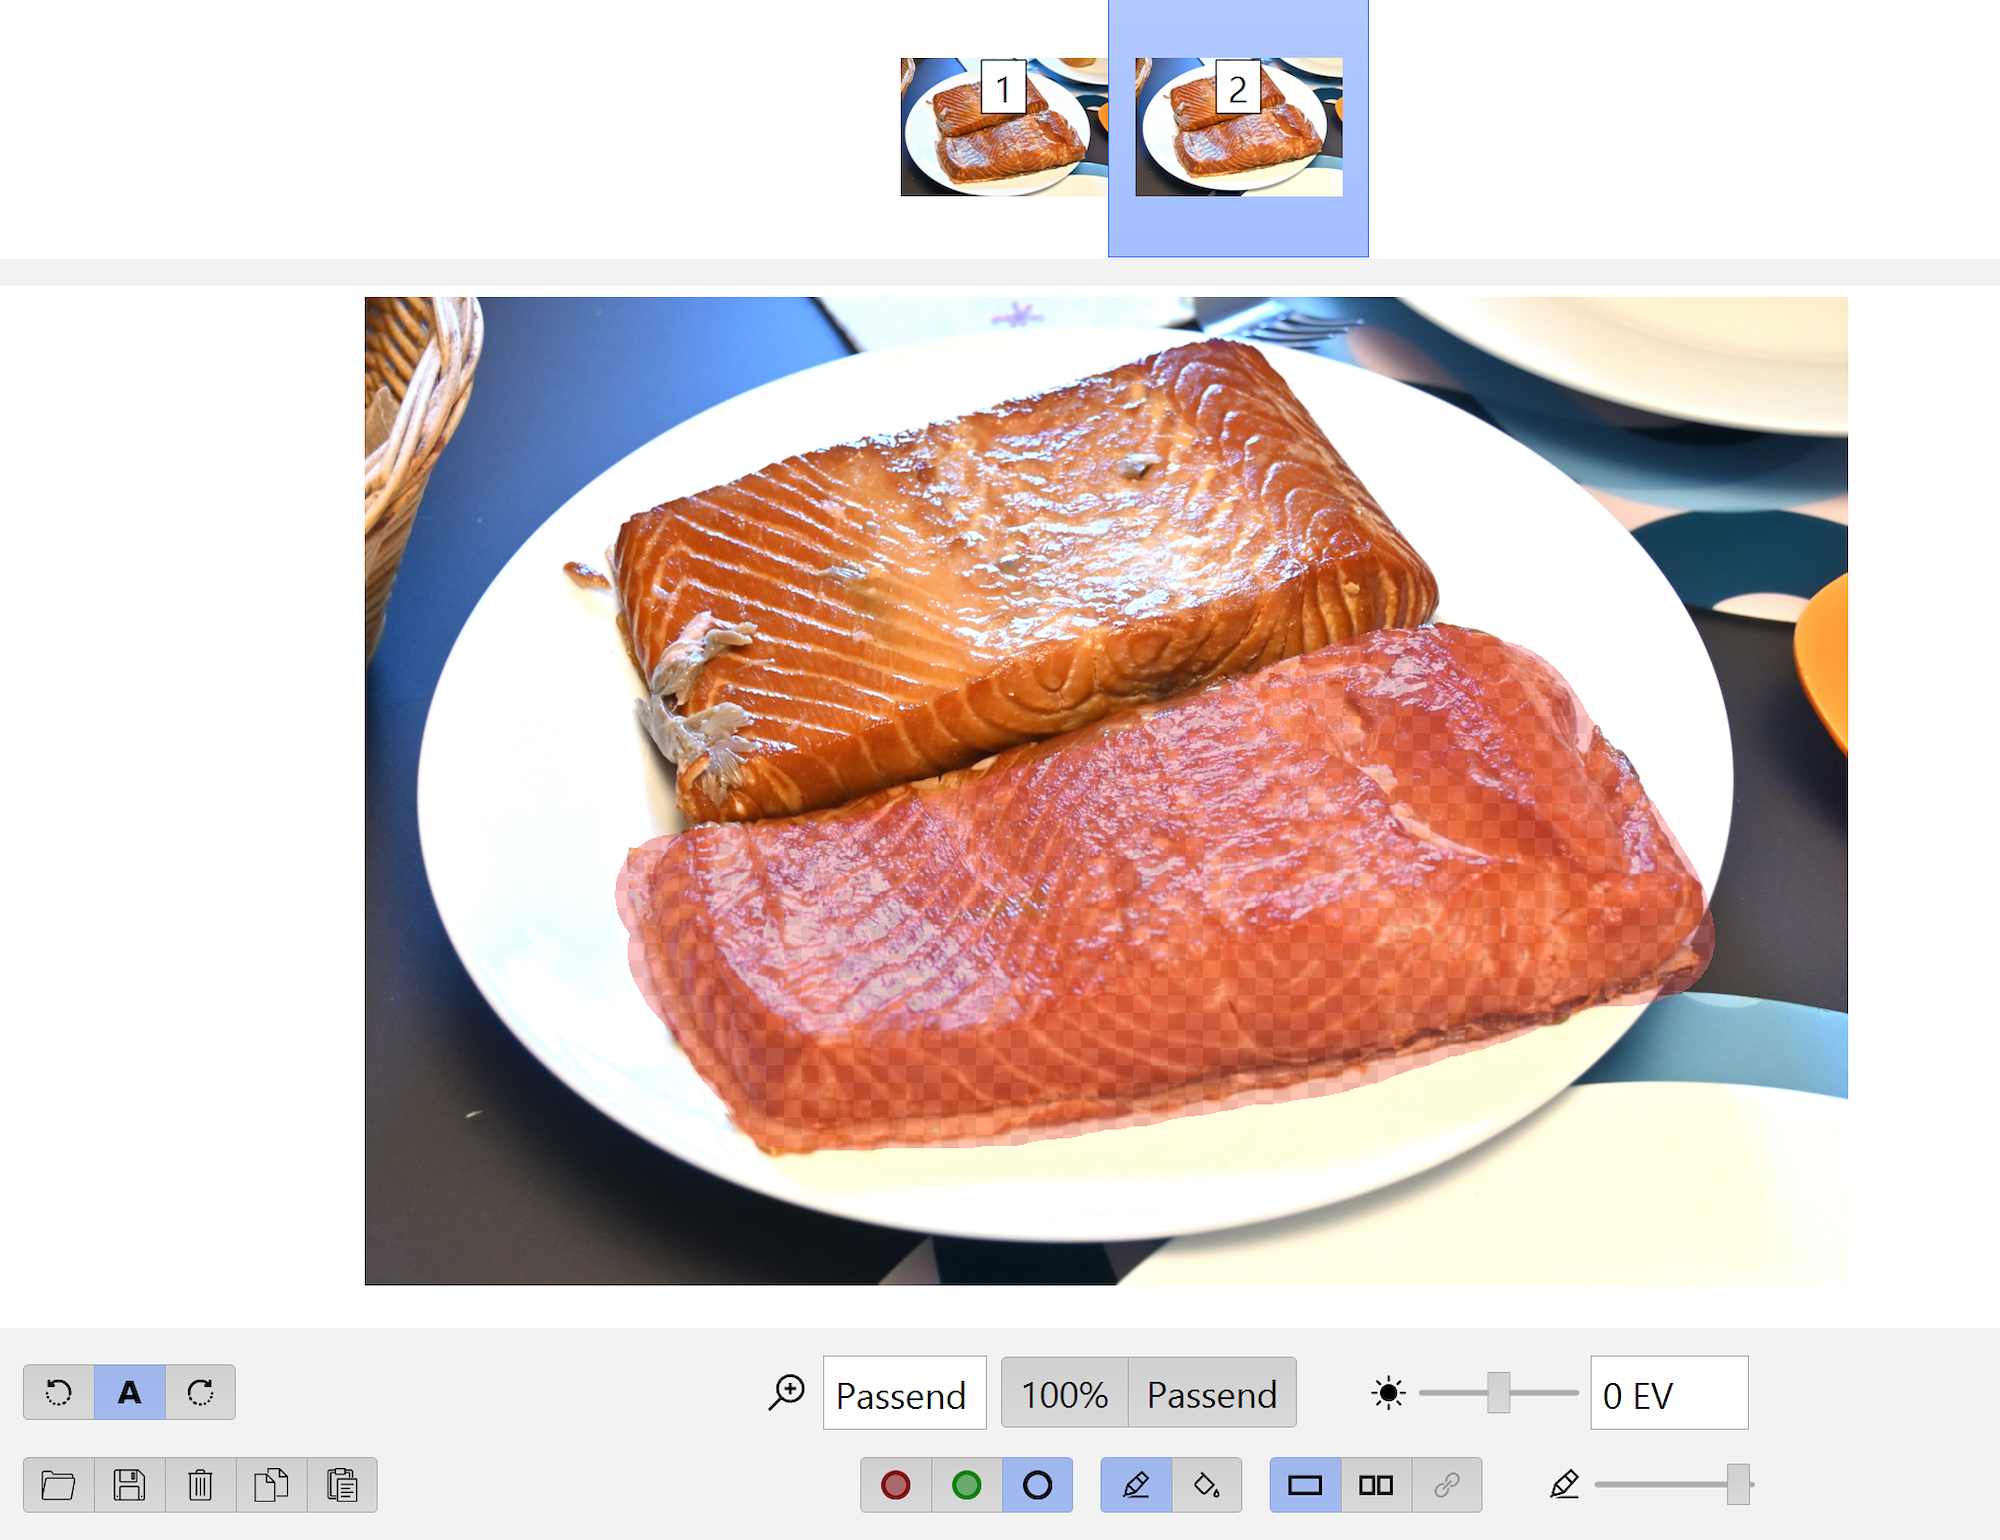
For instance, consider these pictures each with a different focus point:
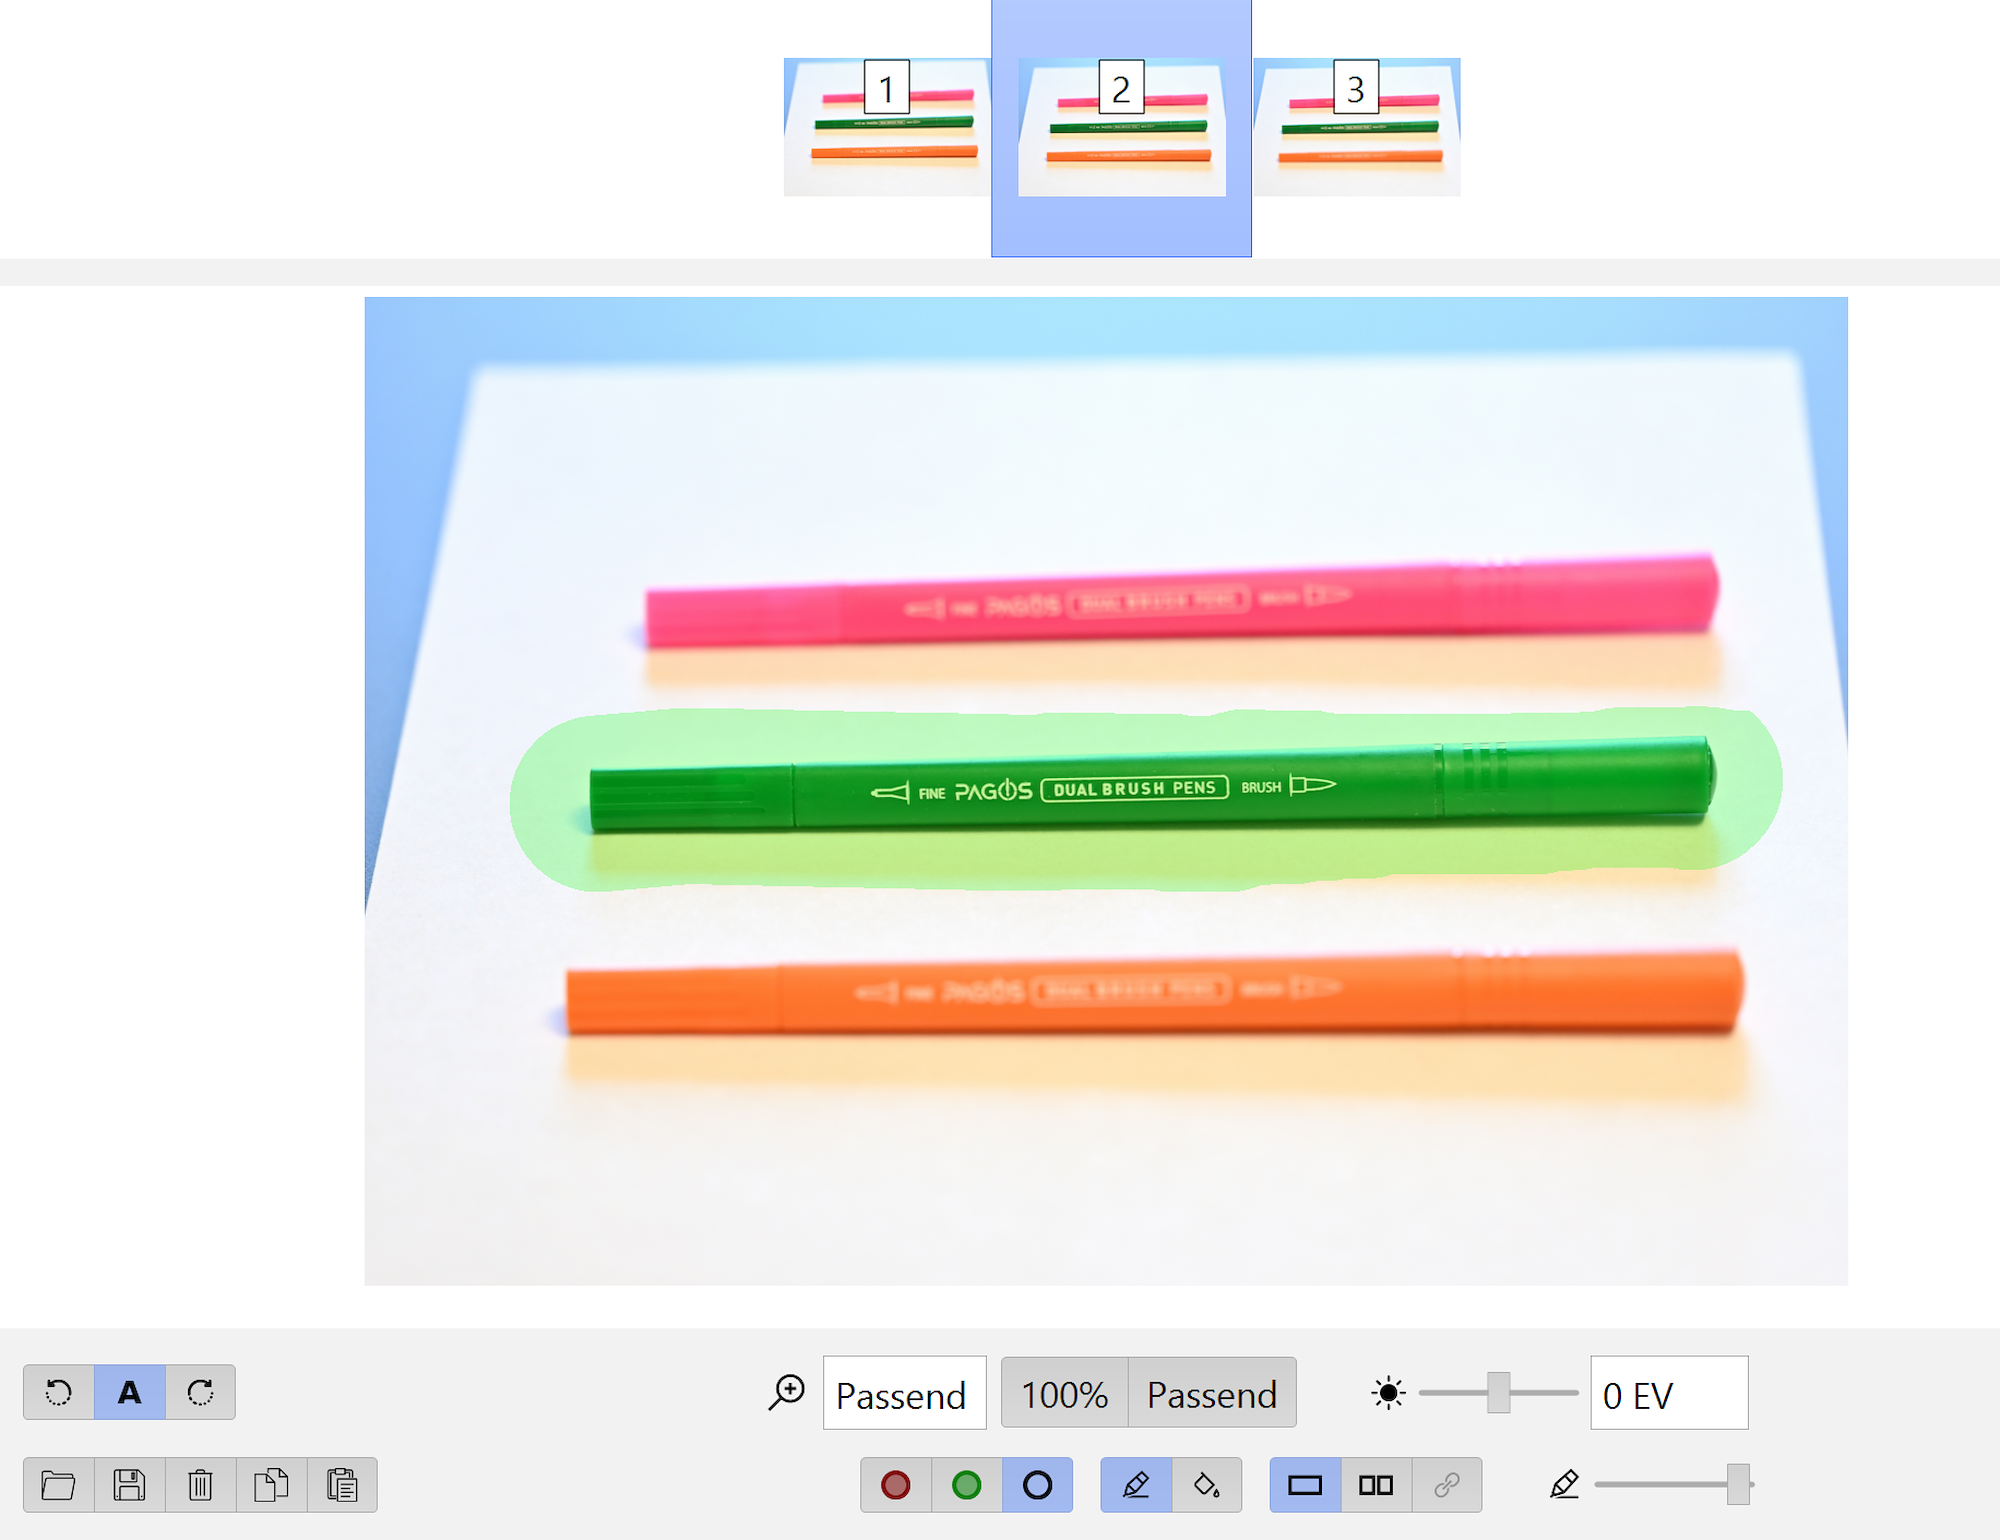
Orange in focus:
Green in focus:

Pink in focus:
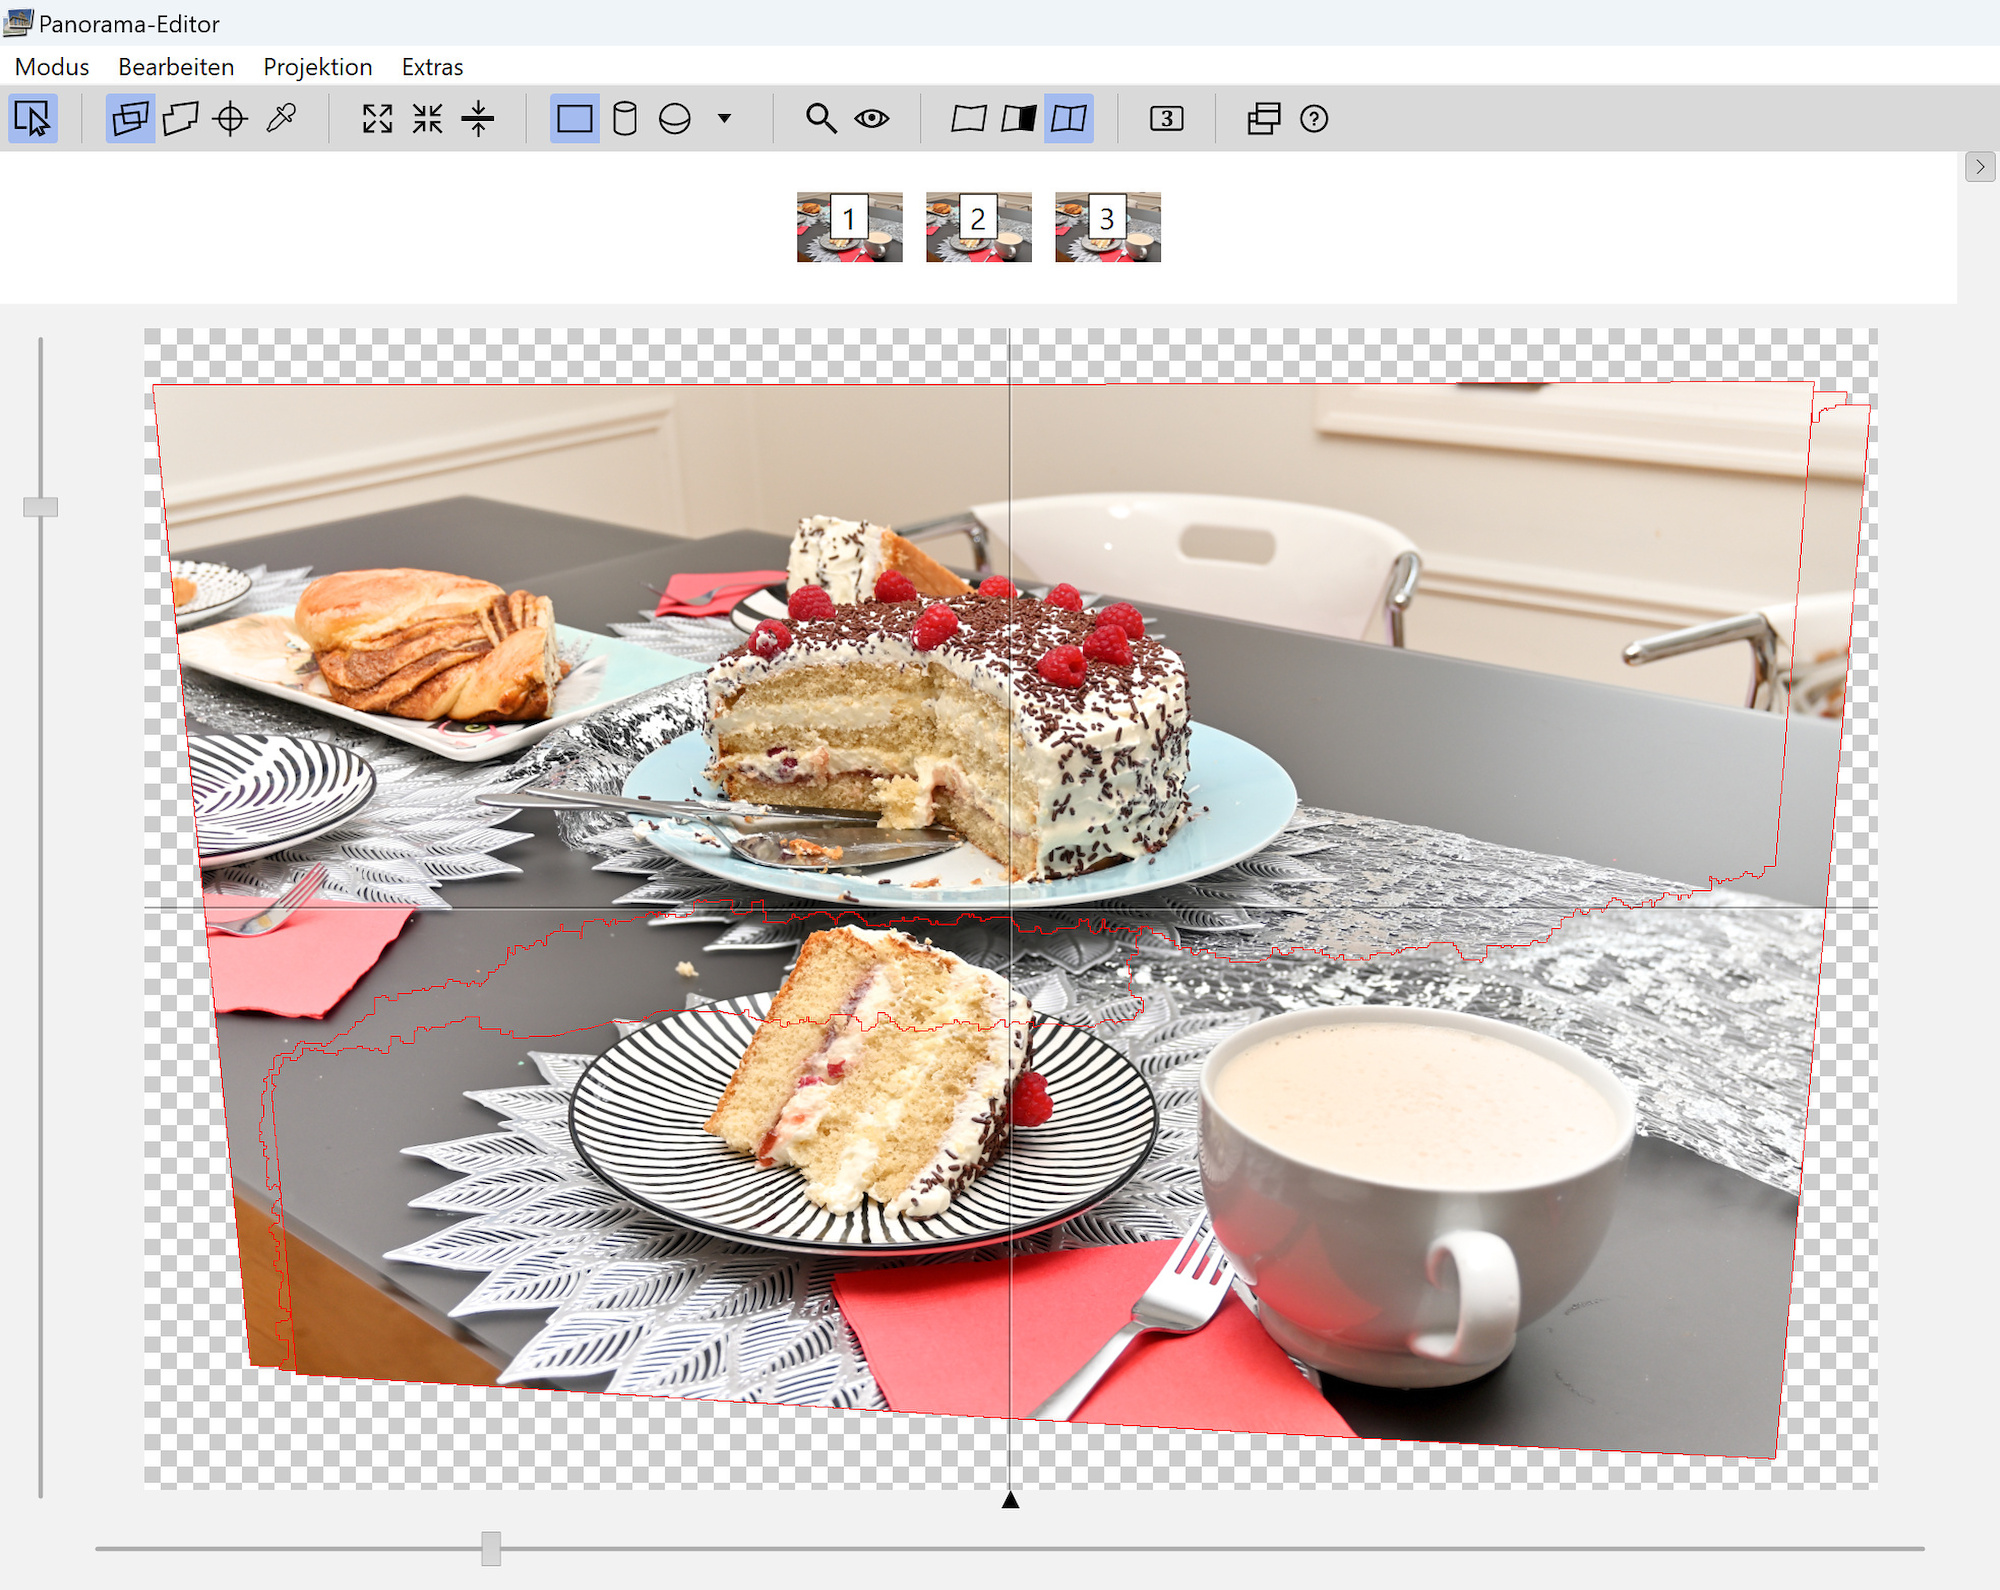
For each image, apply a mask to the object that is in focus:


Run optimize with only the basic optimization for rol, pitch and yaw, but not for the parameters a, b or c.
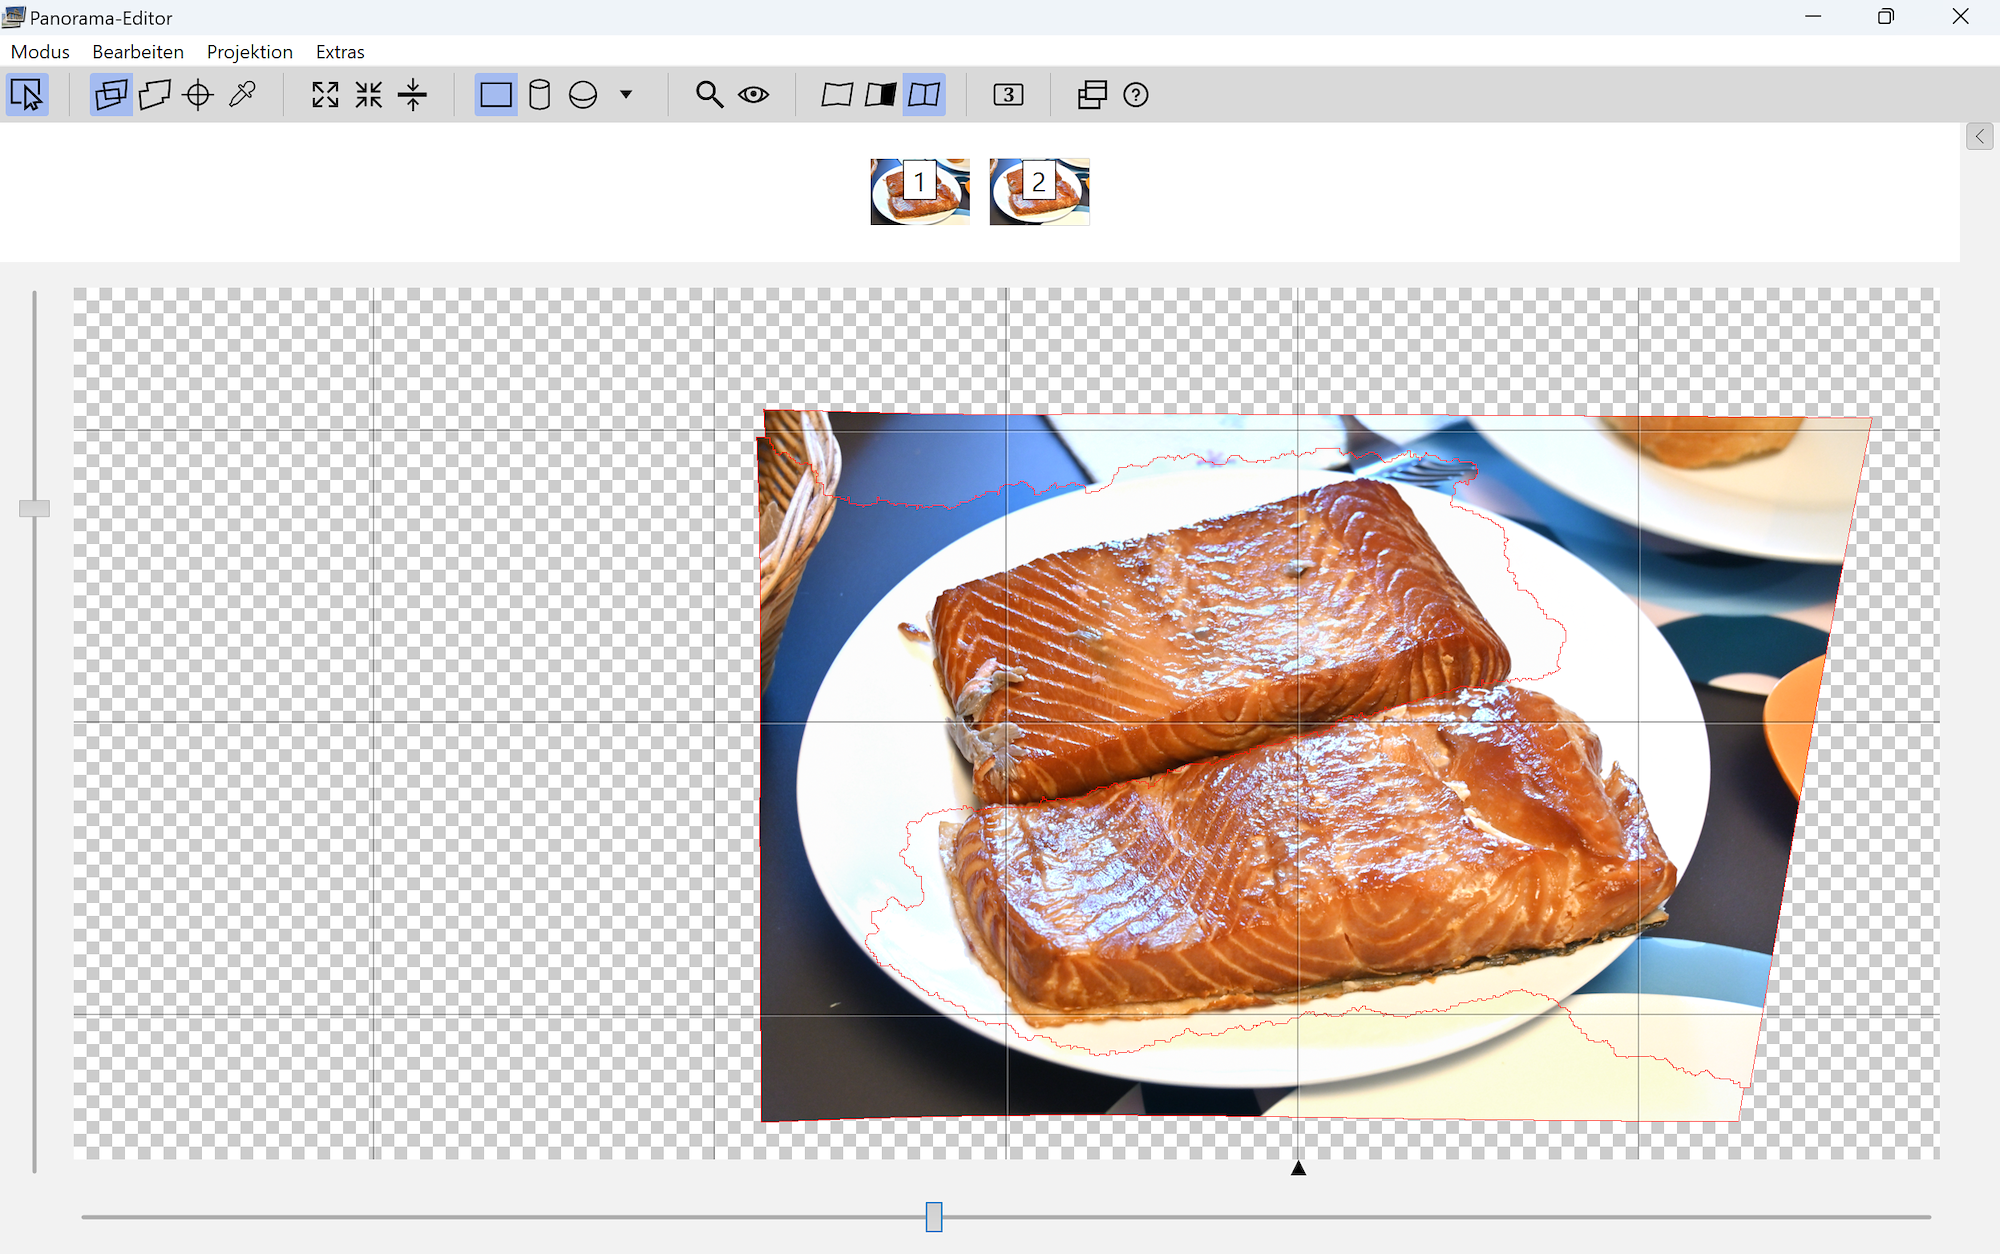
The seam line will be perfectly set:

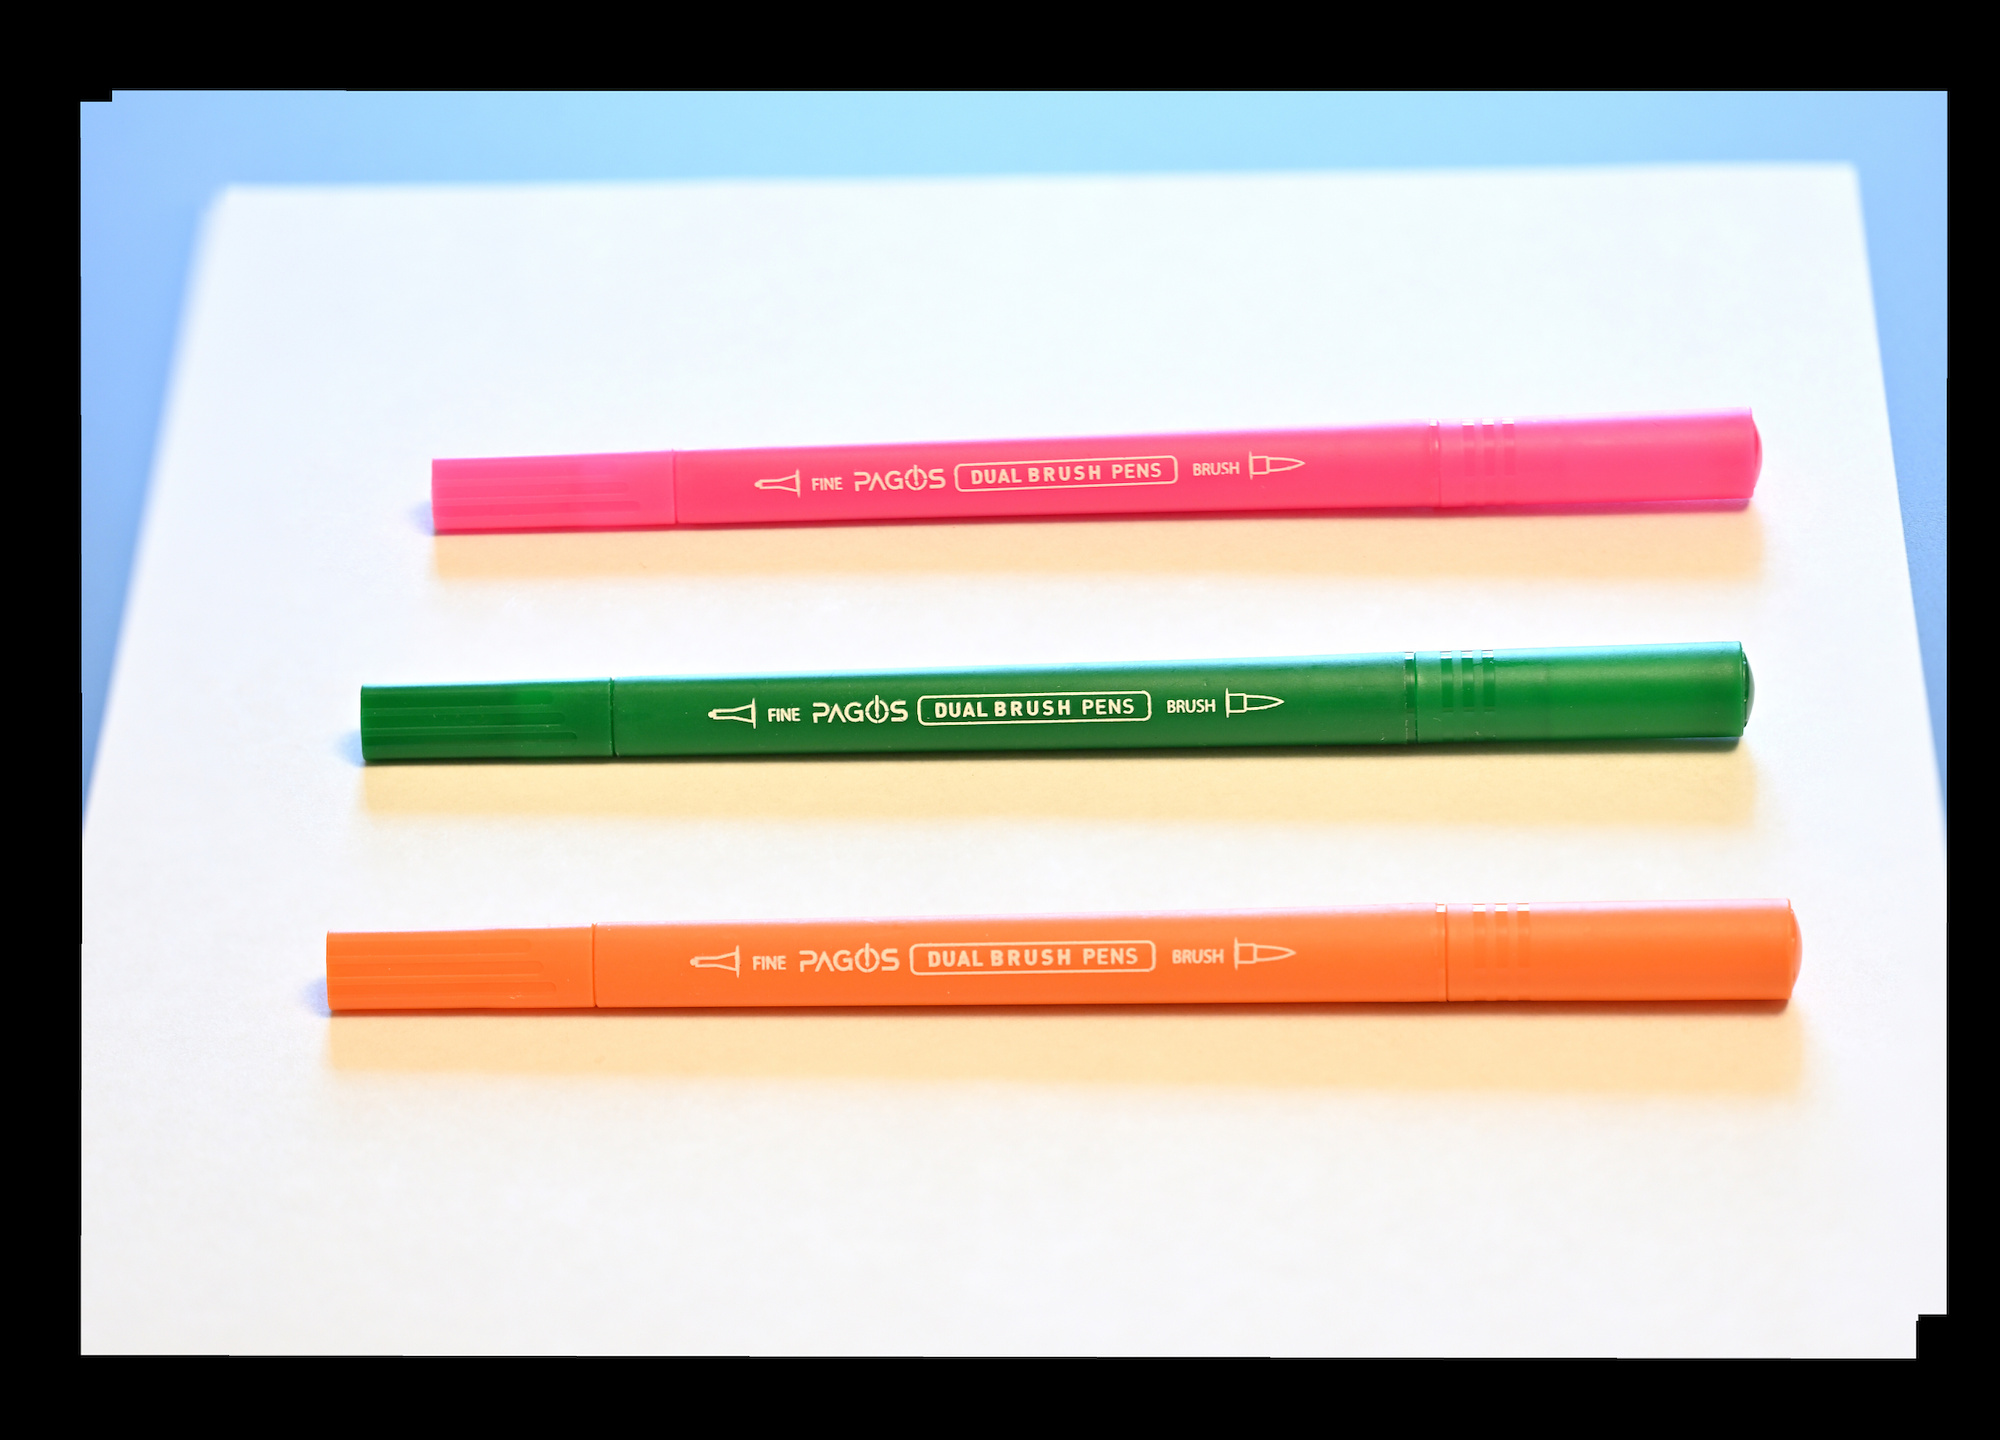
The focus stacked picture:
Another example:
Even a small aperture was not enough to bring everything into focus.
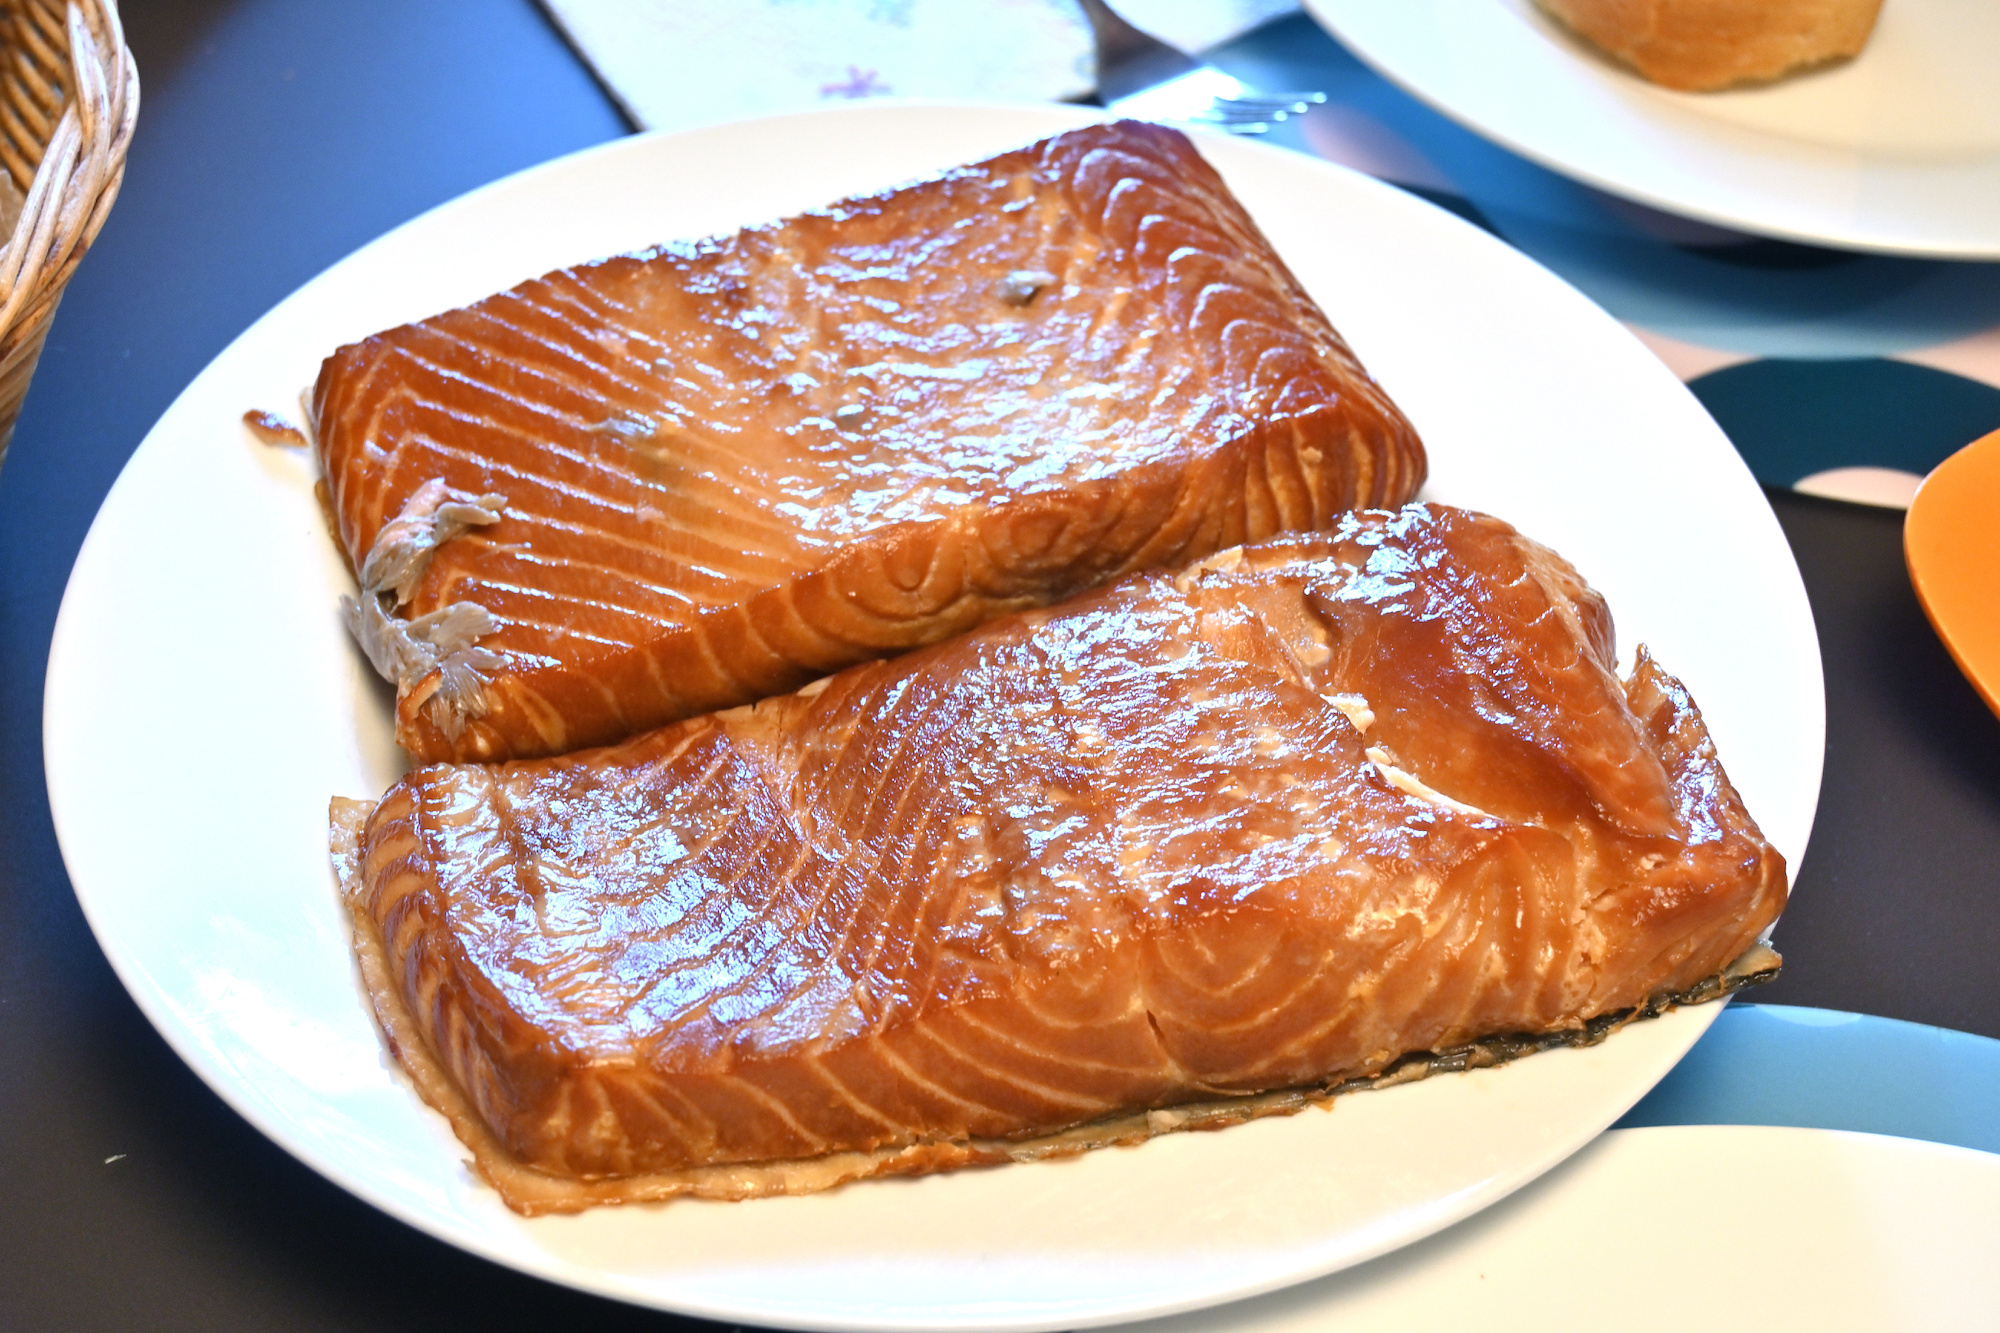
Only the lower part is in focus:
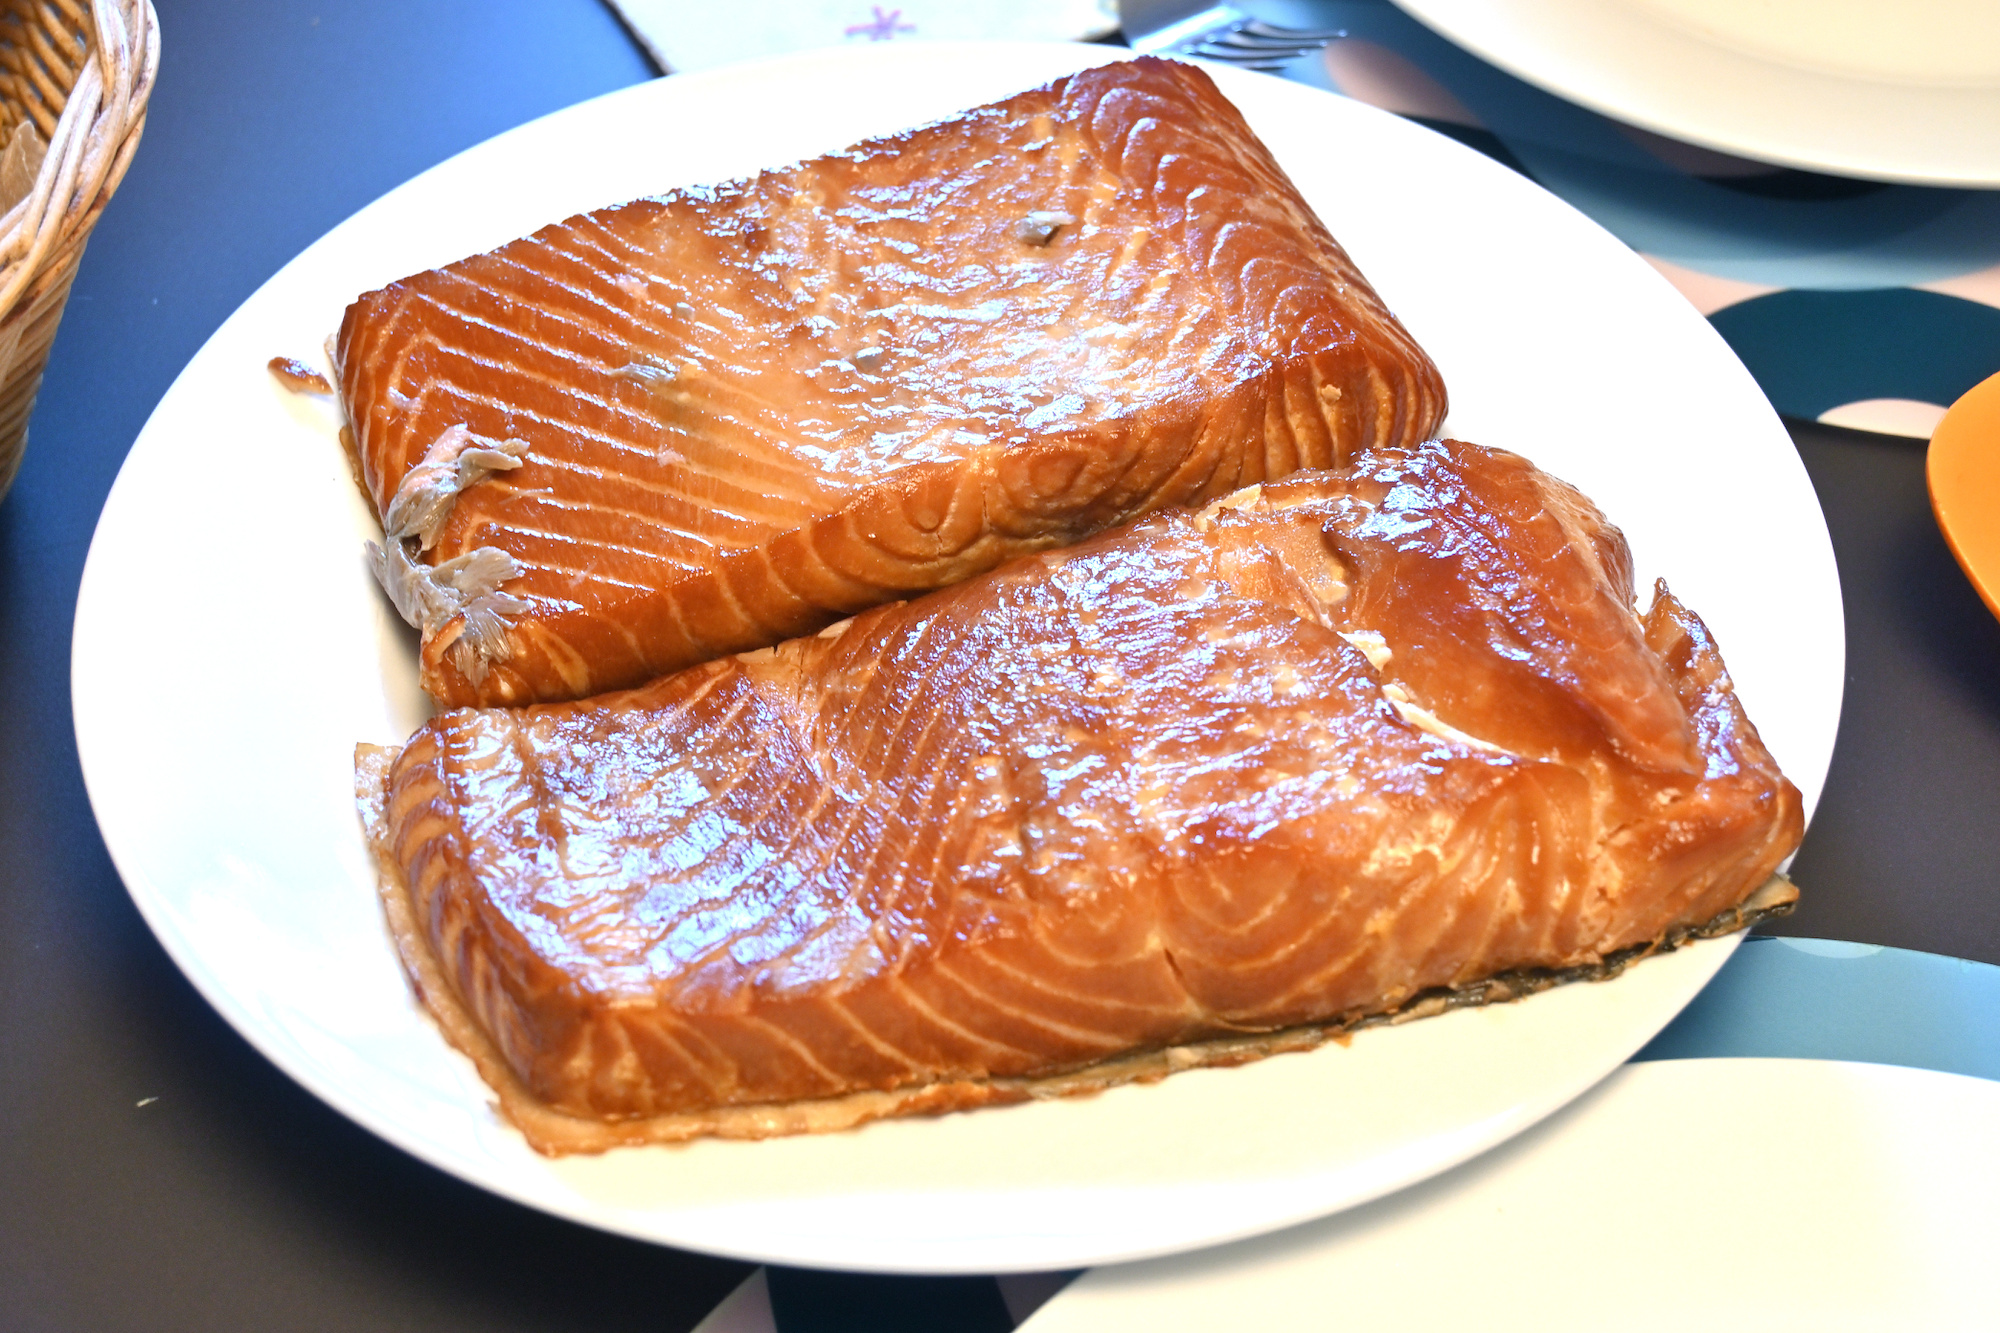
Only the upper part is in focus:
Rather than selecting the object in focus as in the previous example (using the green mask), you can deselect the object that is not in focus (using the red mask):
The seam line runs directly between the objects:
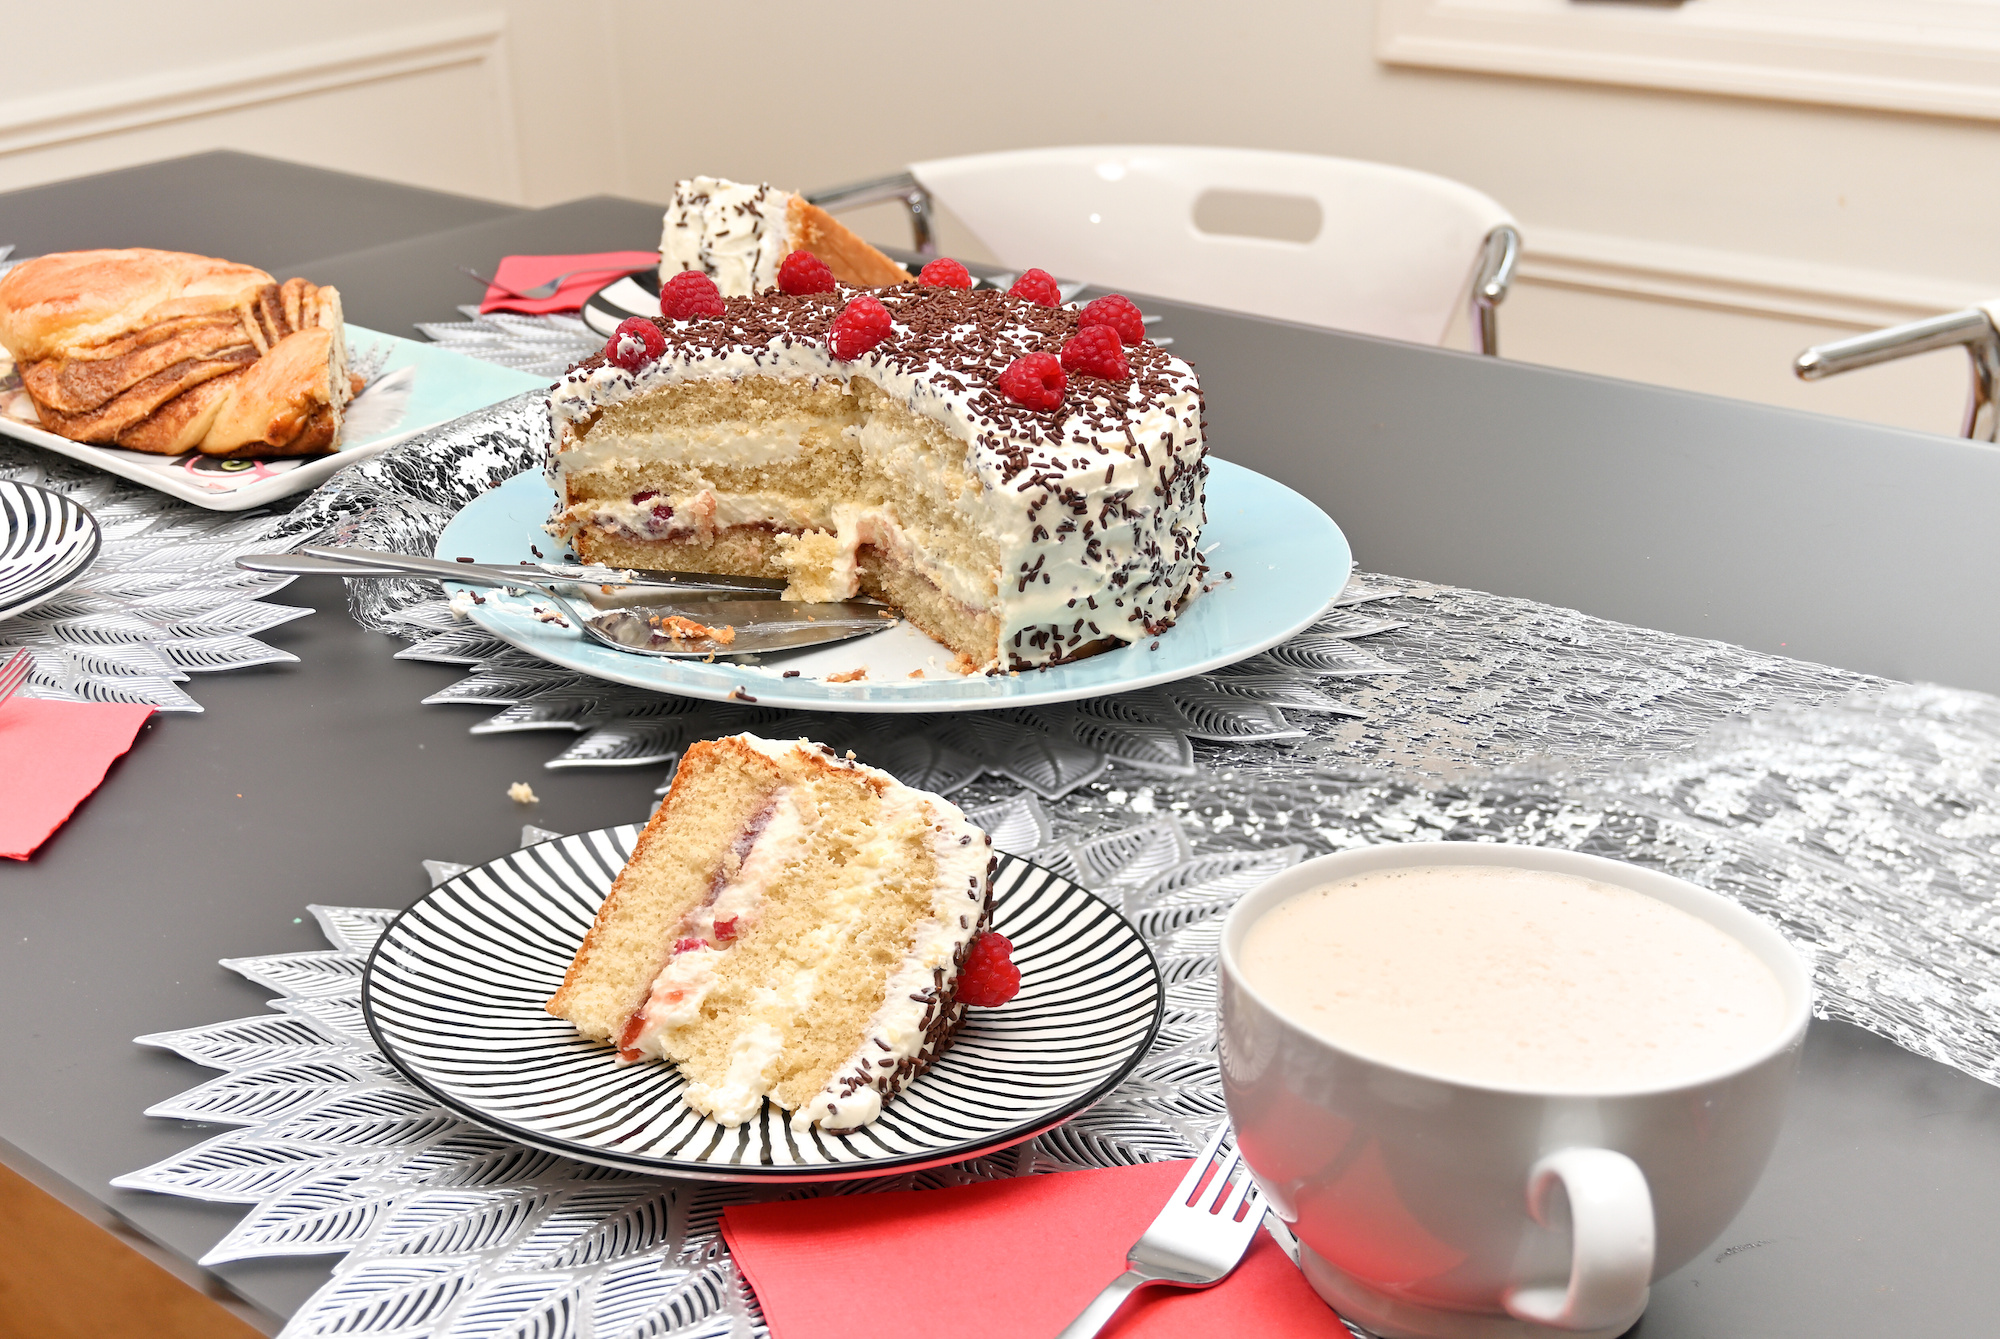
The final focus stacked result:
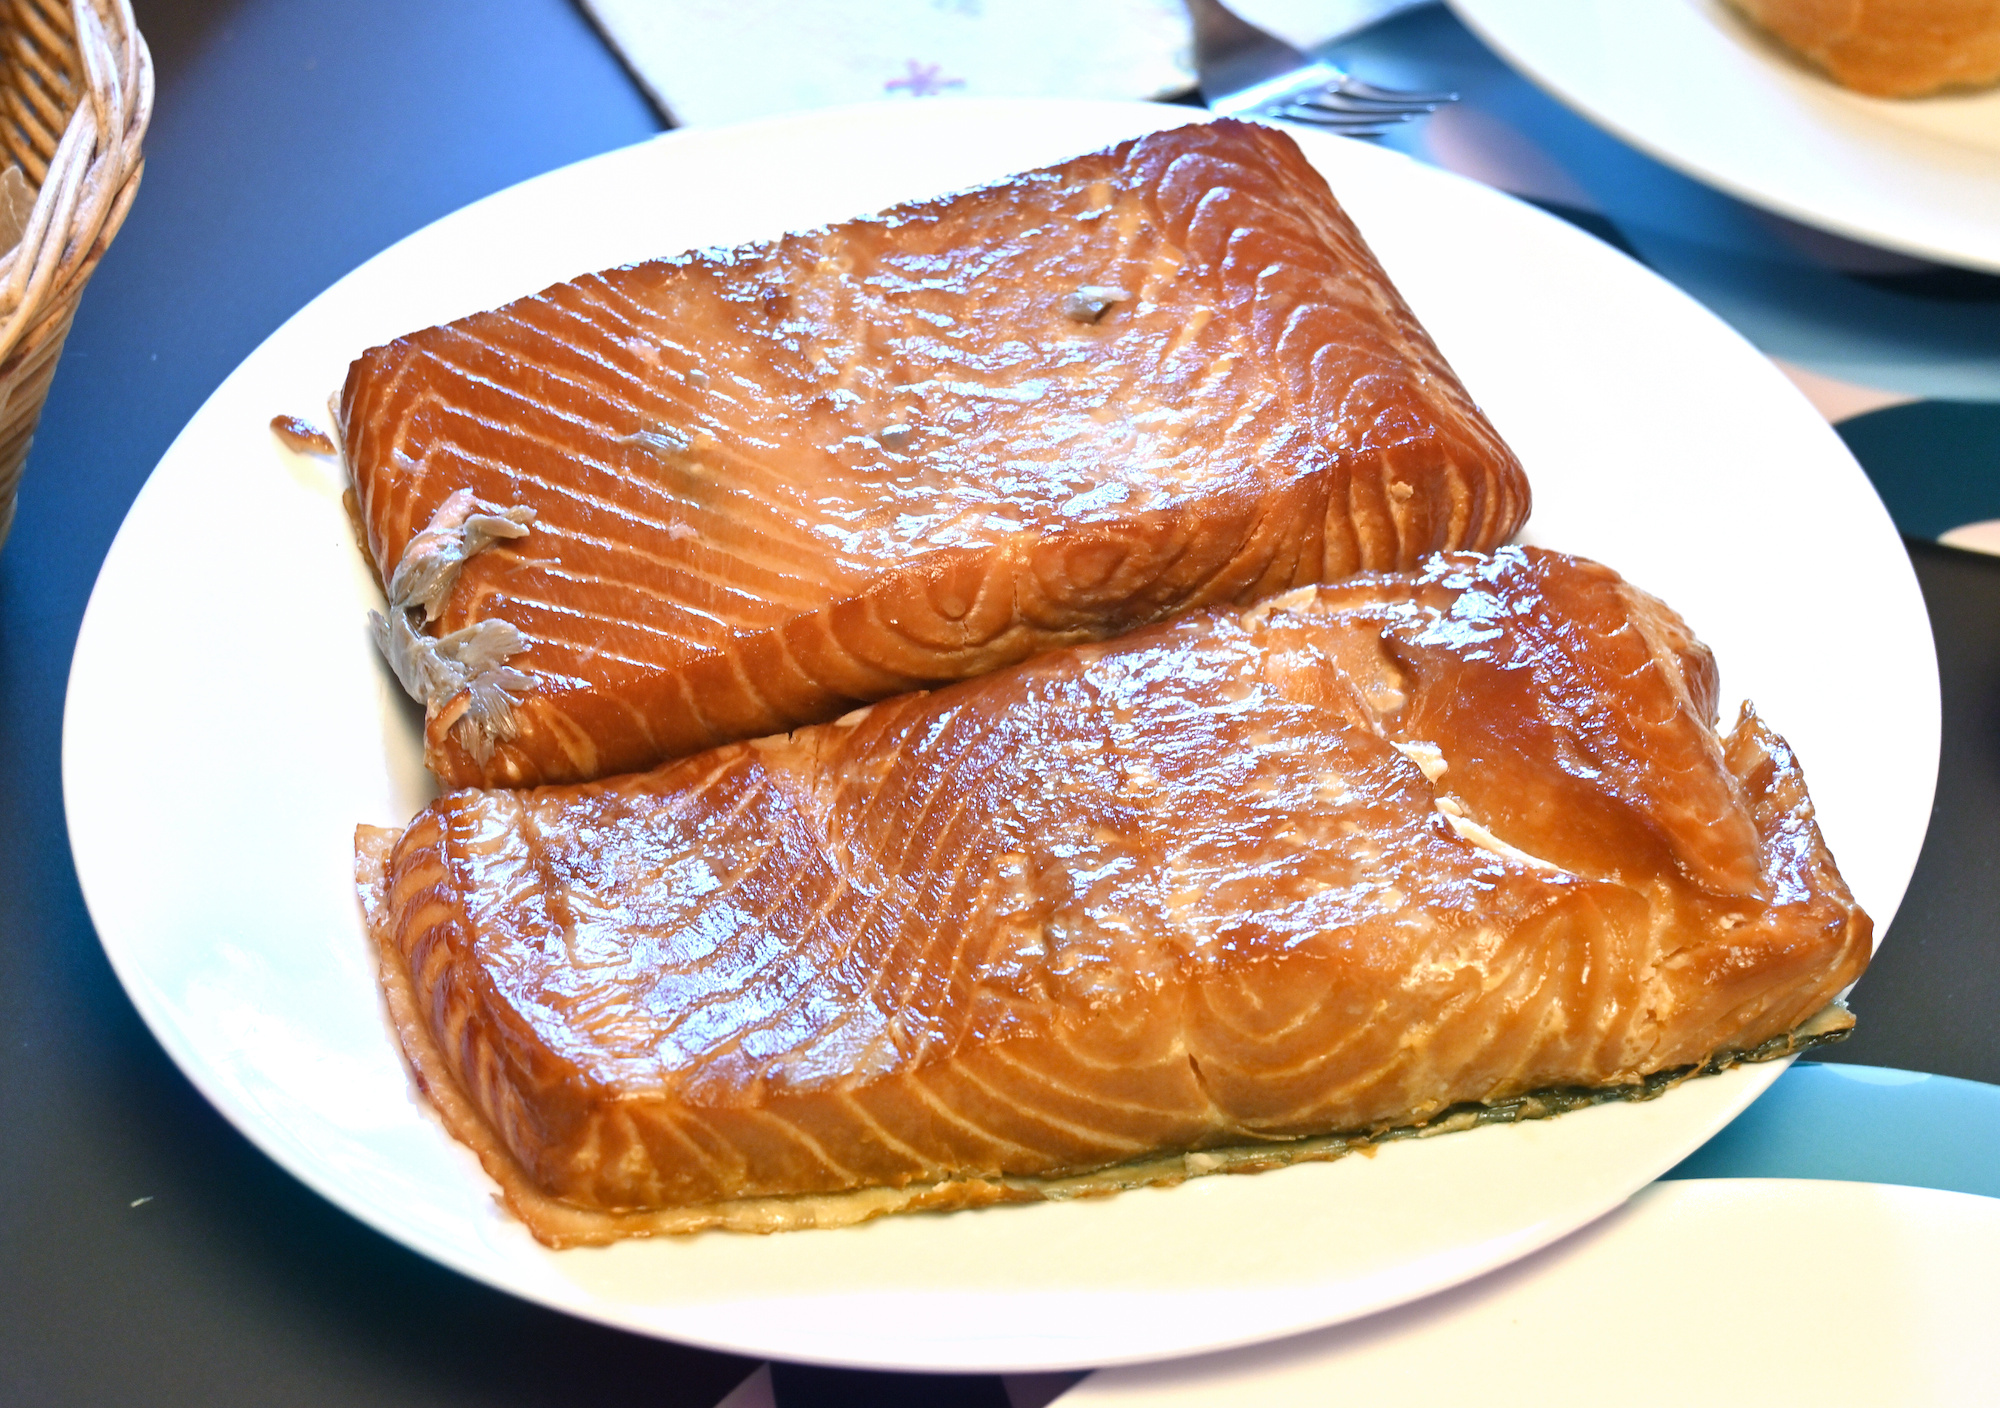
The source of the focus stacked result:
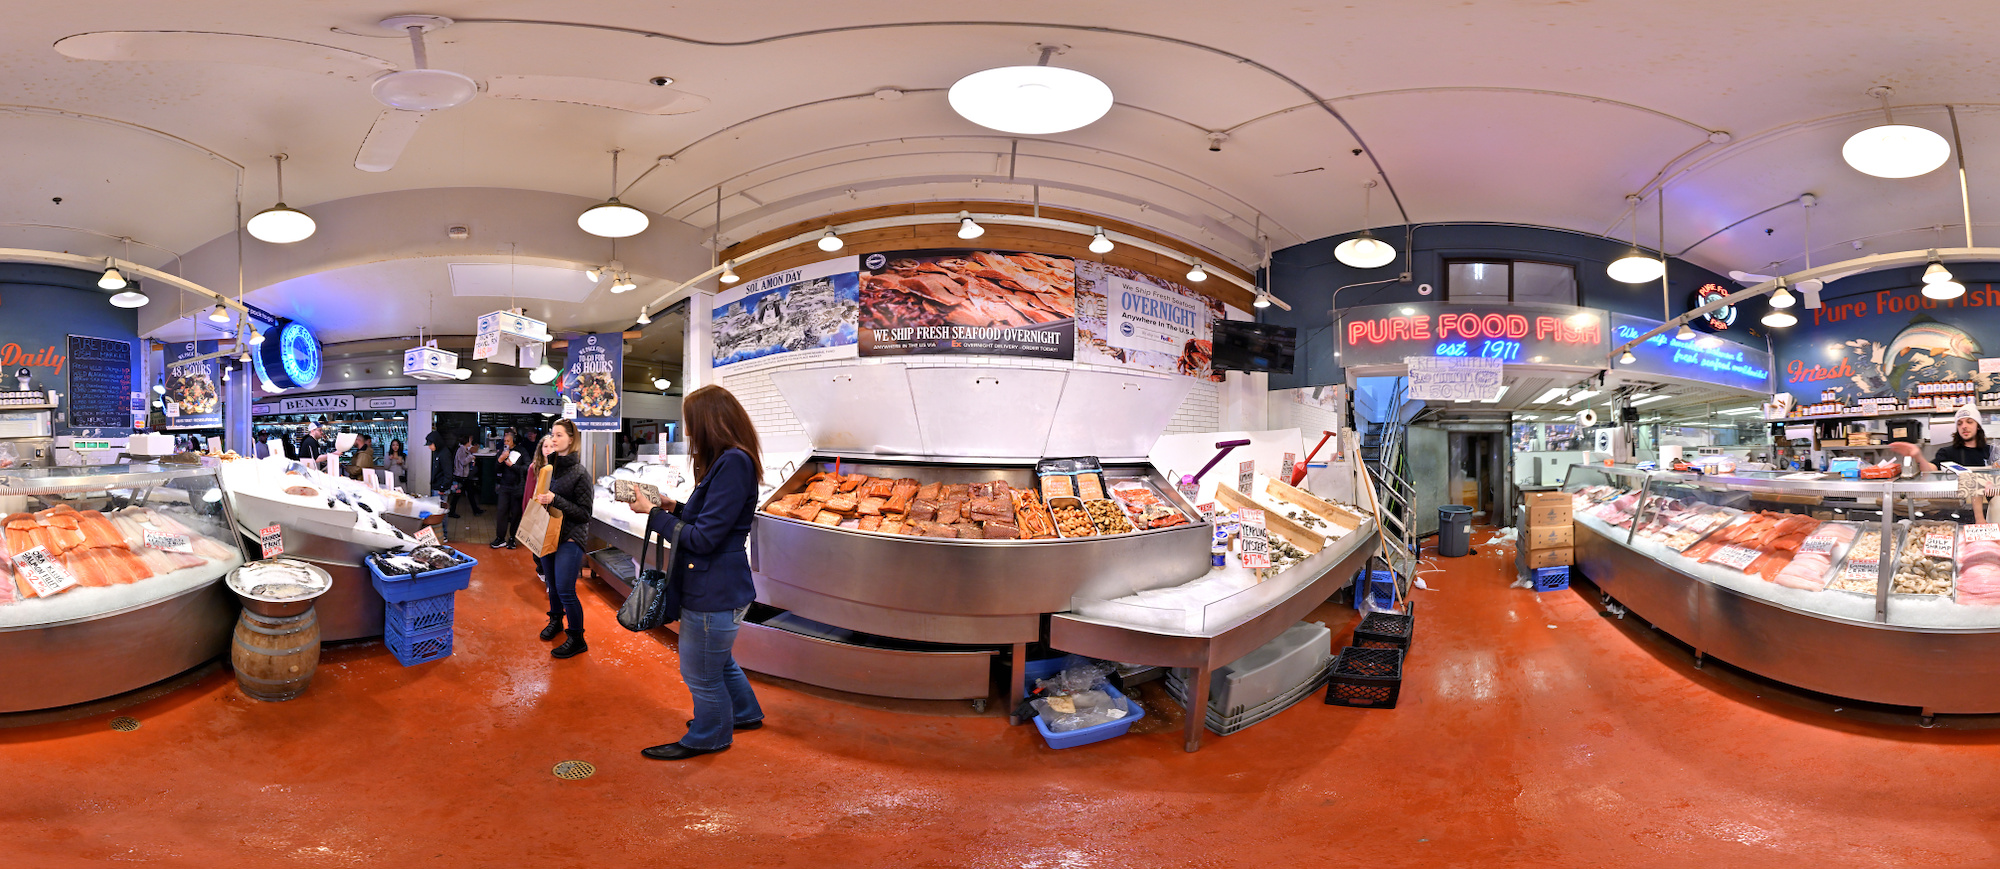
Interactive Panorama Pike Place Market Fischladen
Another example:
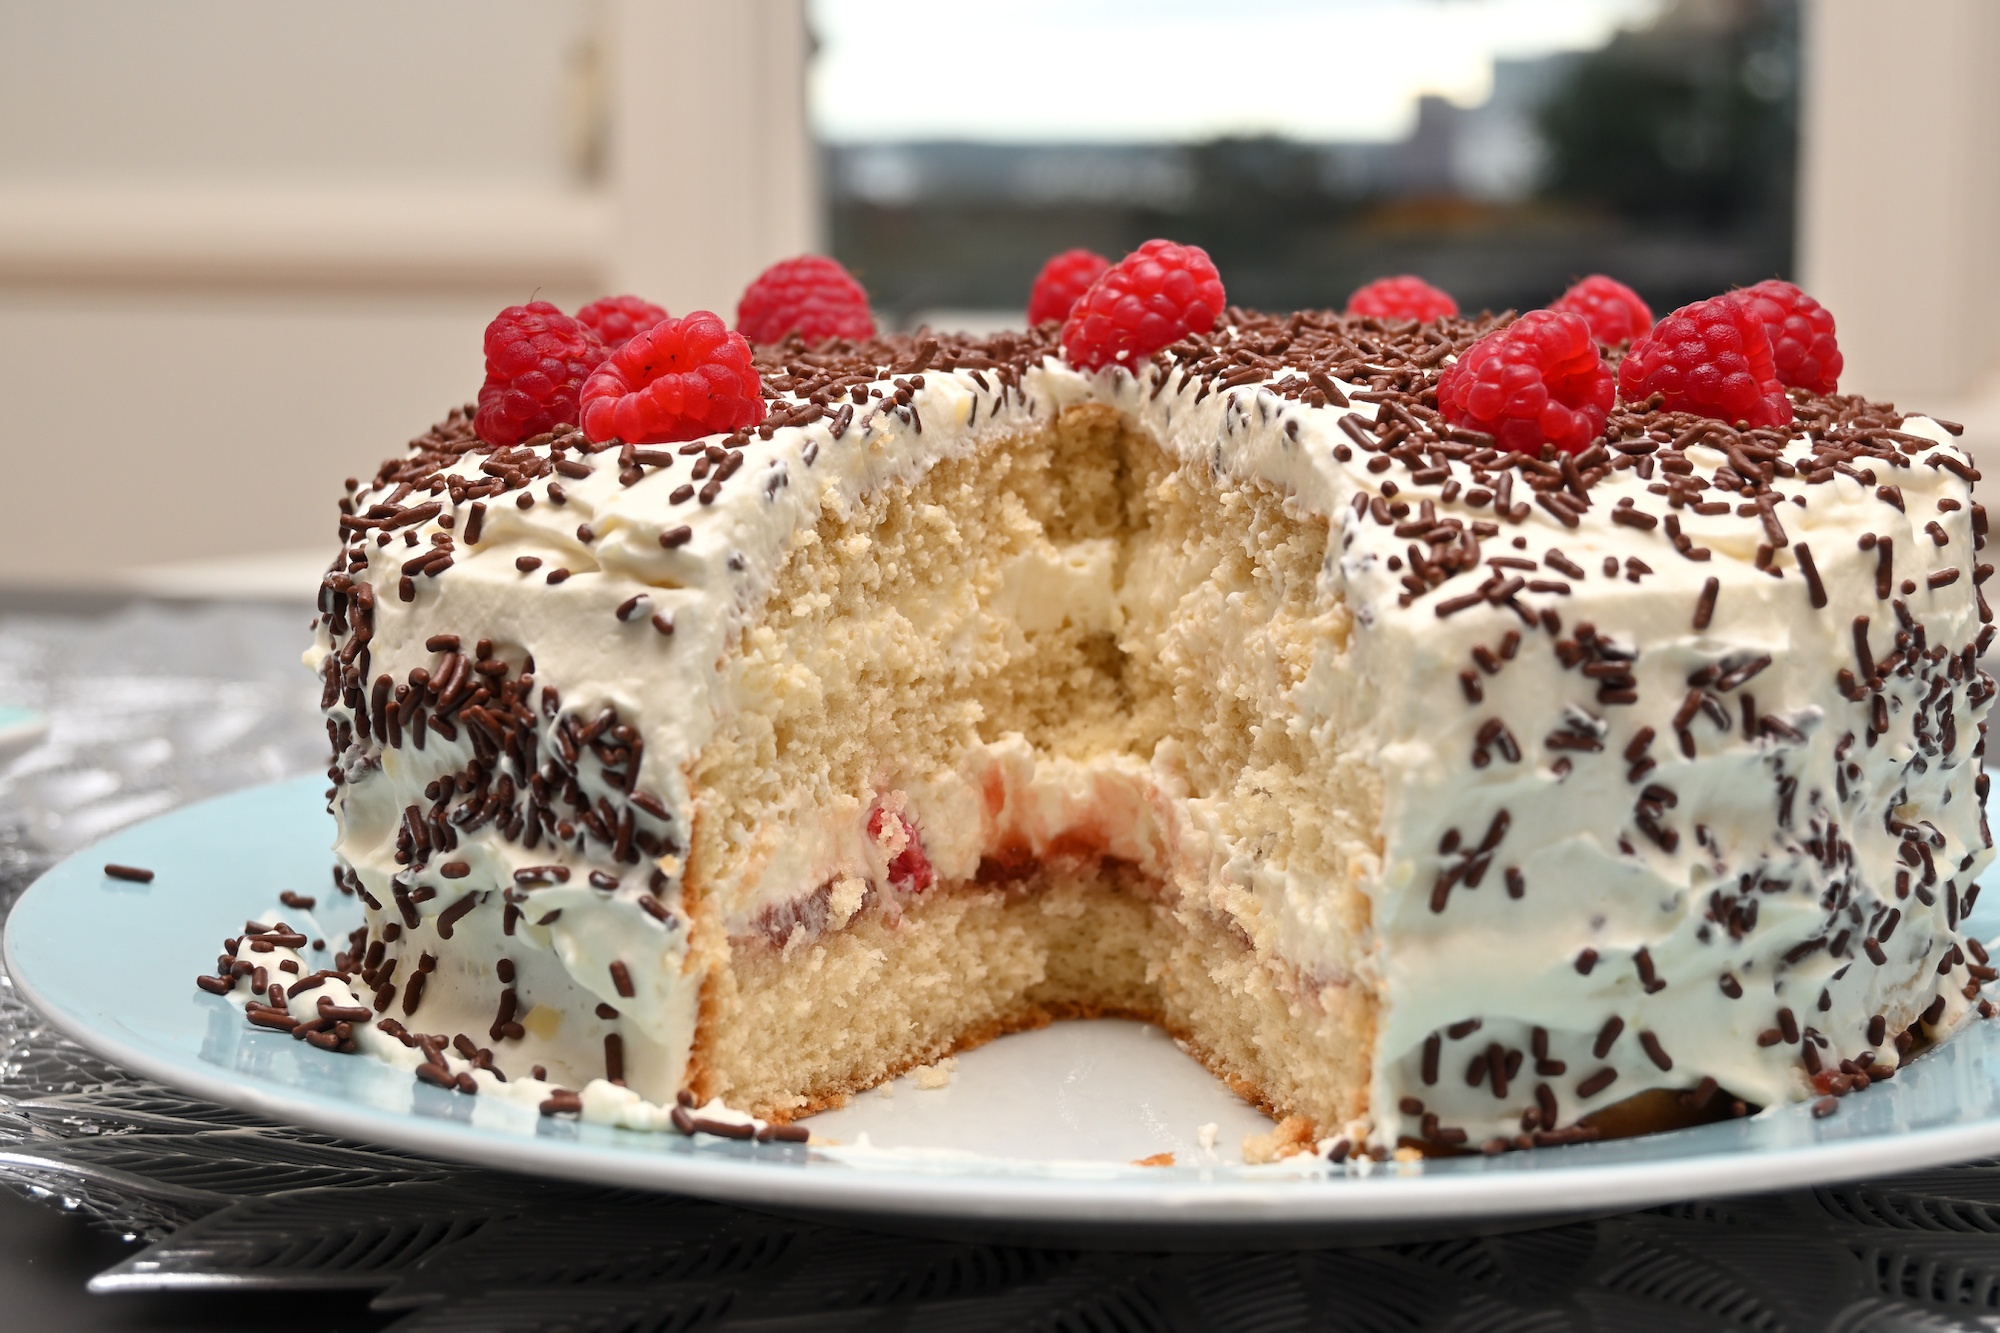
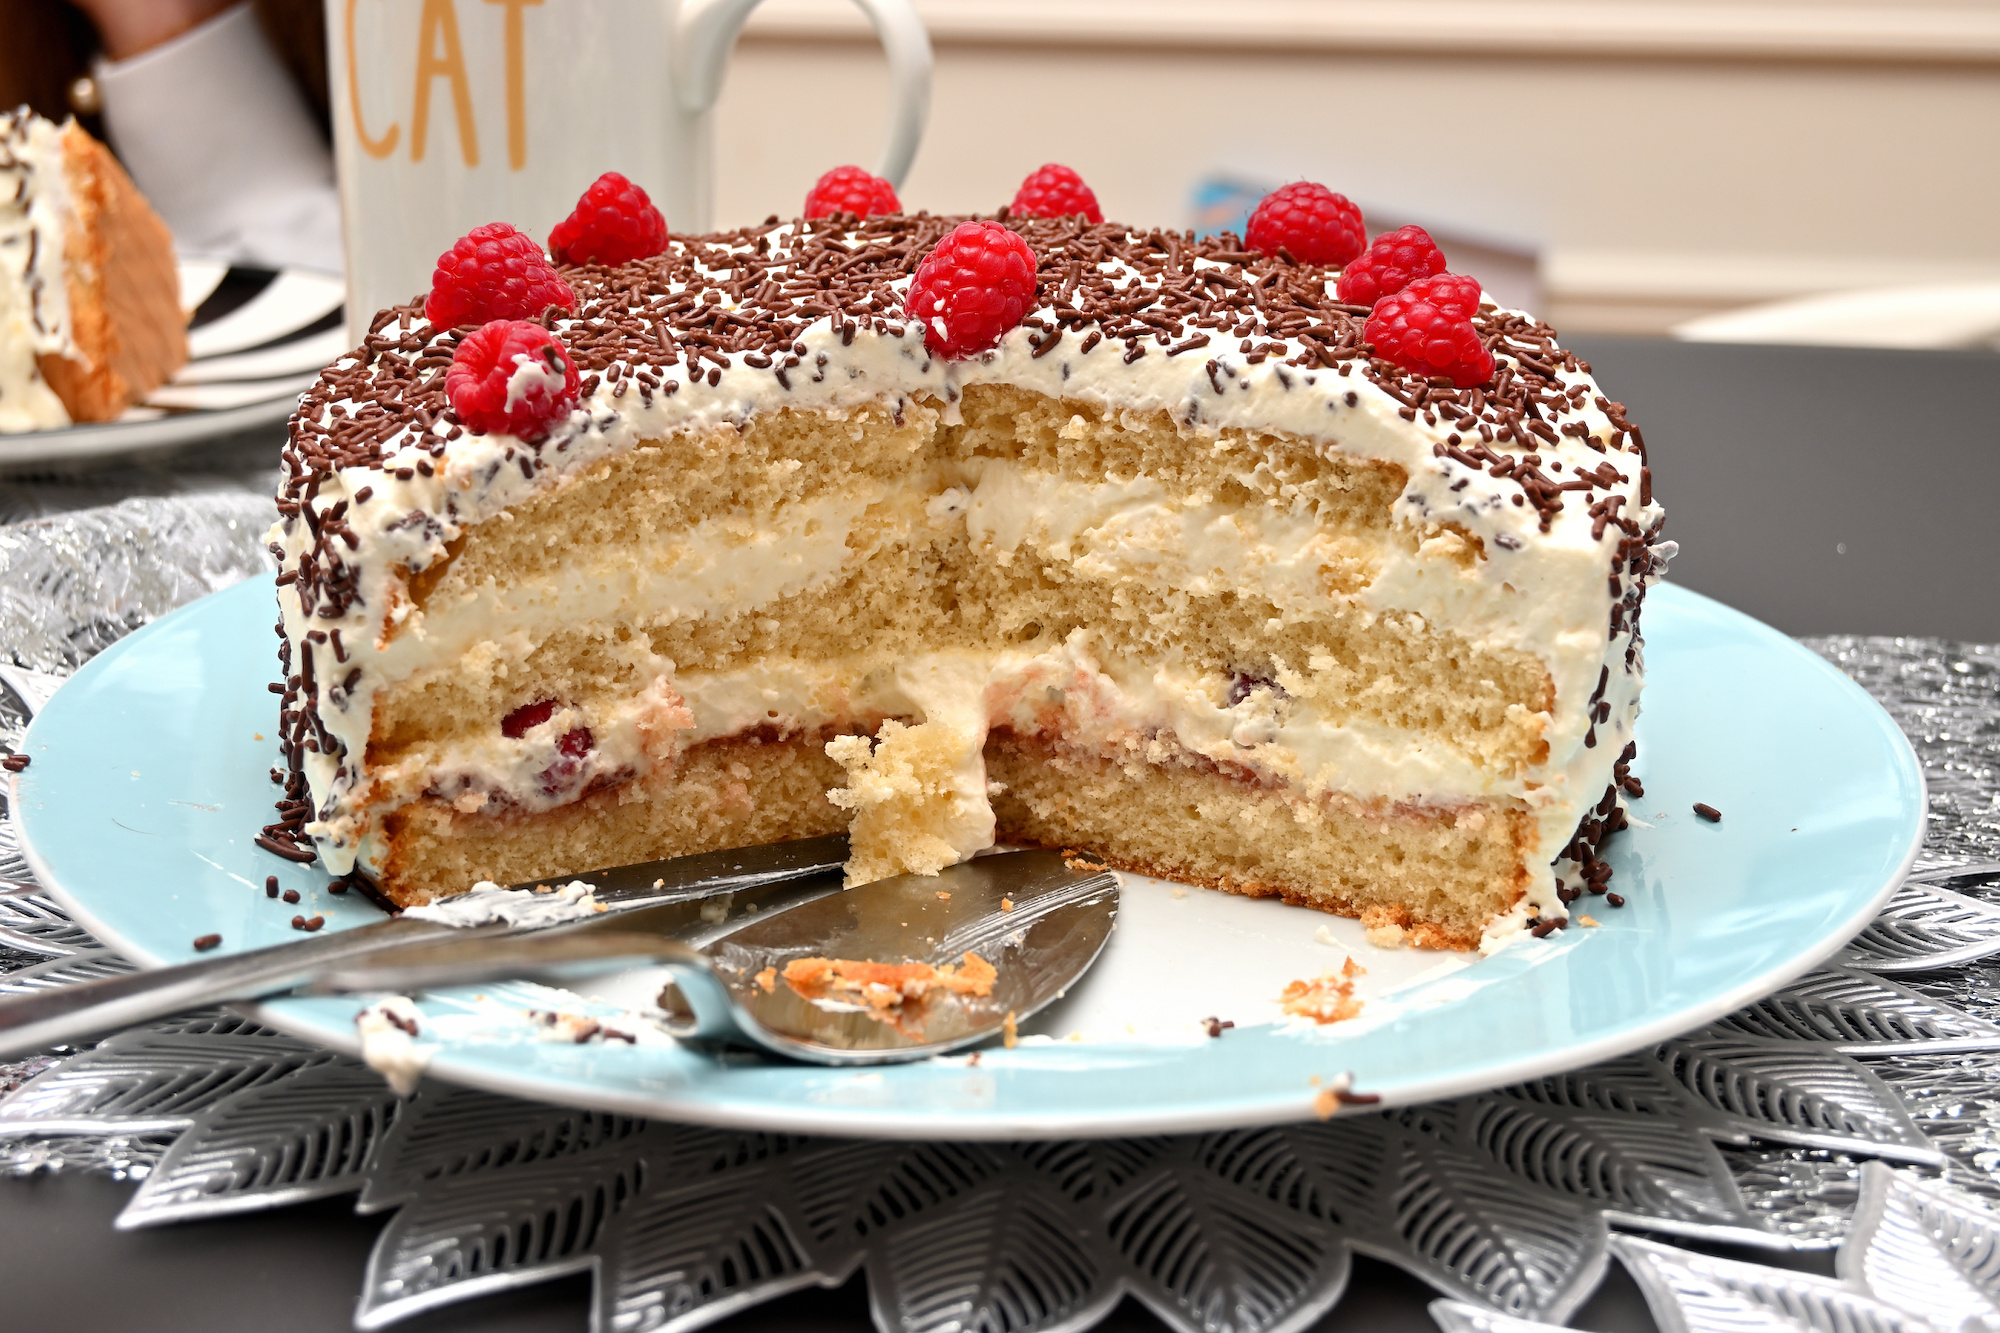
Torte - 2x24 🥳🎉🎂
Ein Blumenstrauß zum Muttertag 💐🌹
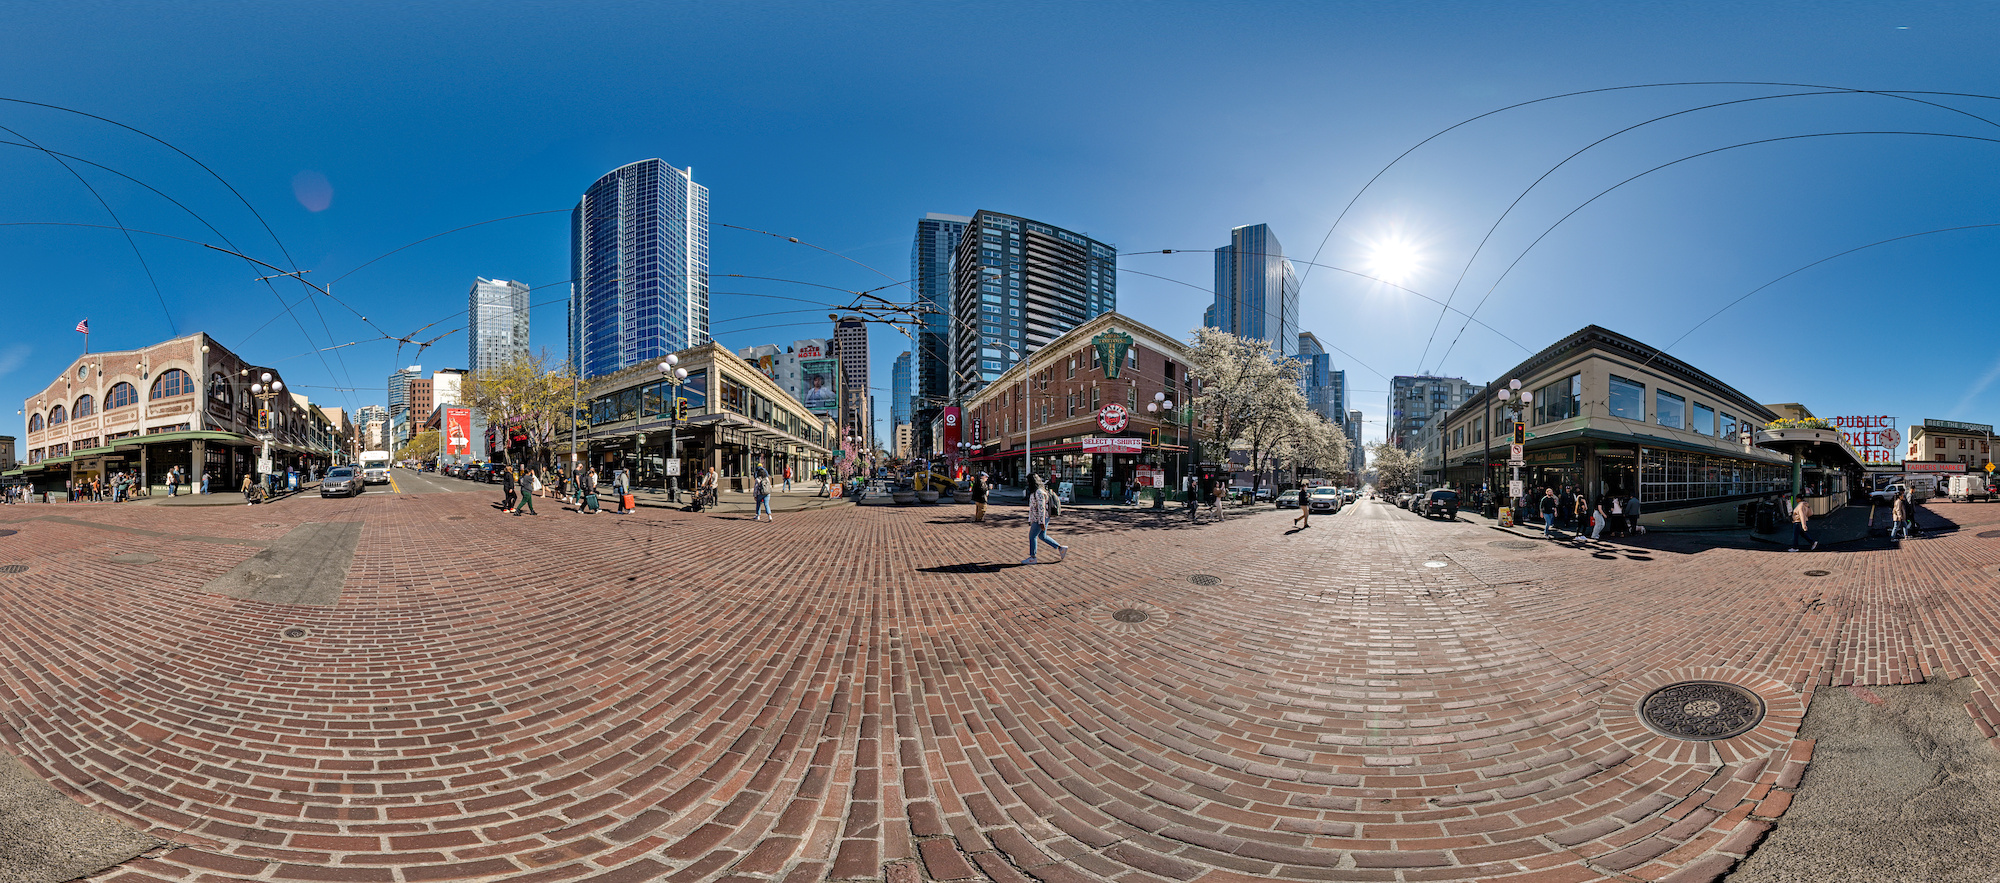
2024 Equinox, the first spring sun appeared over the large intersection of 1st Avenue and Pike Street in the otherwise cloudy and rainy Pacific Northwest.
This panorama is the March 2024 equinox contribution for the 'Wrinkle March' event of WorldWidePanorama.
Interactive Panorama Pike Place Market
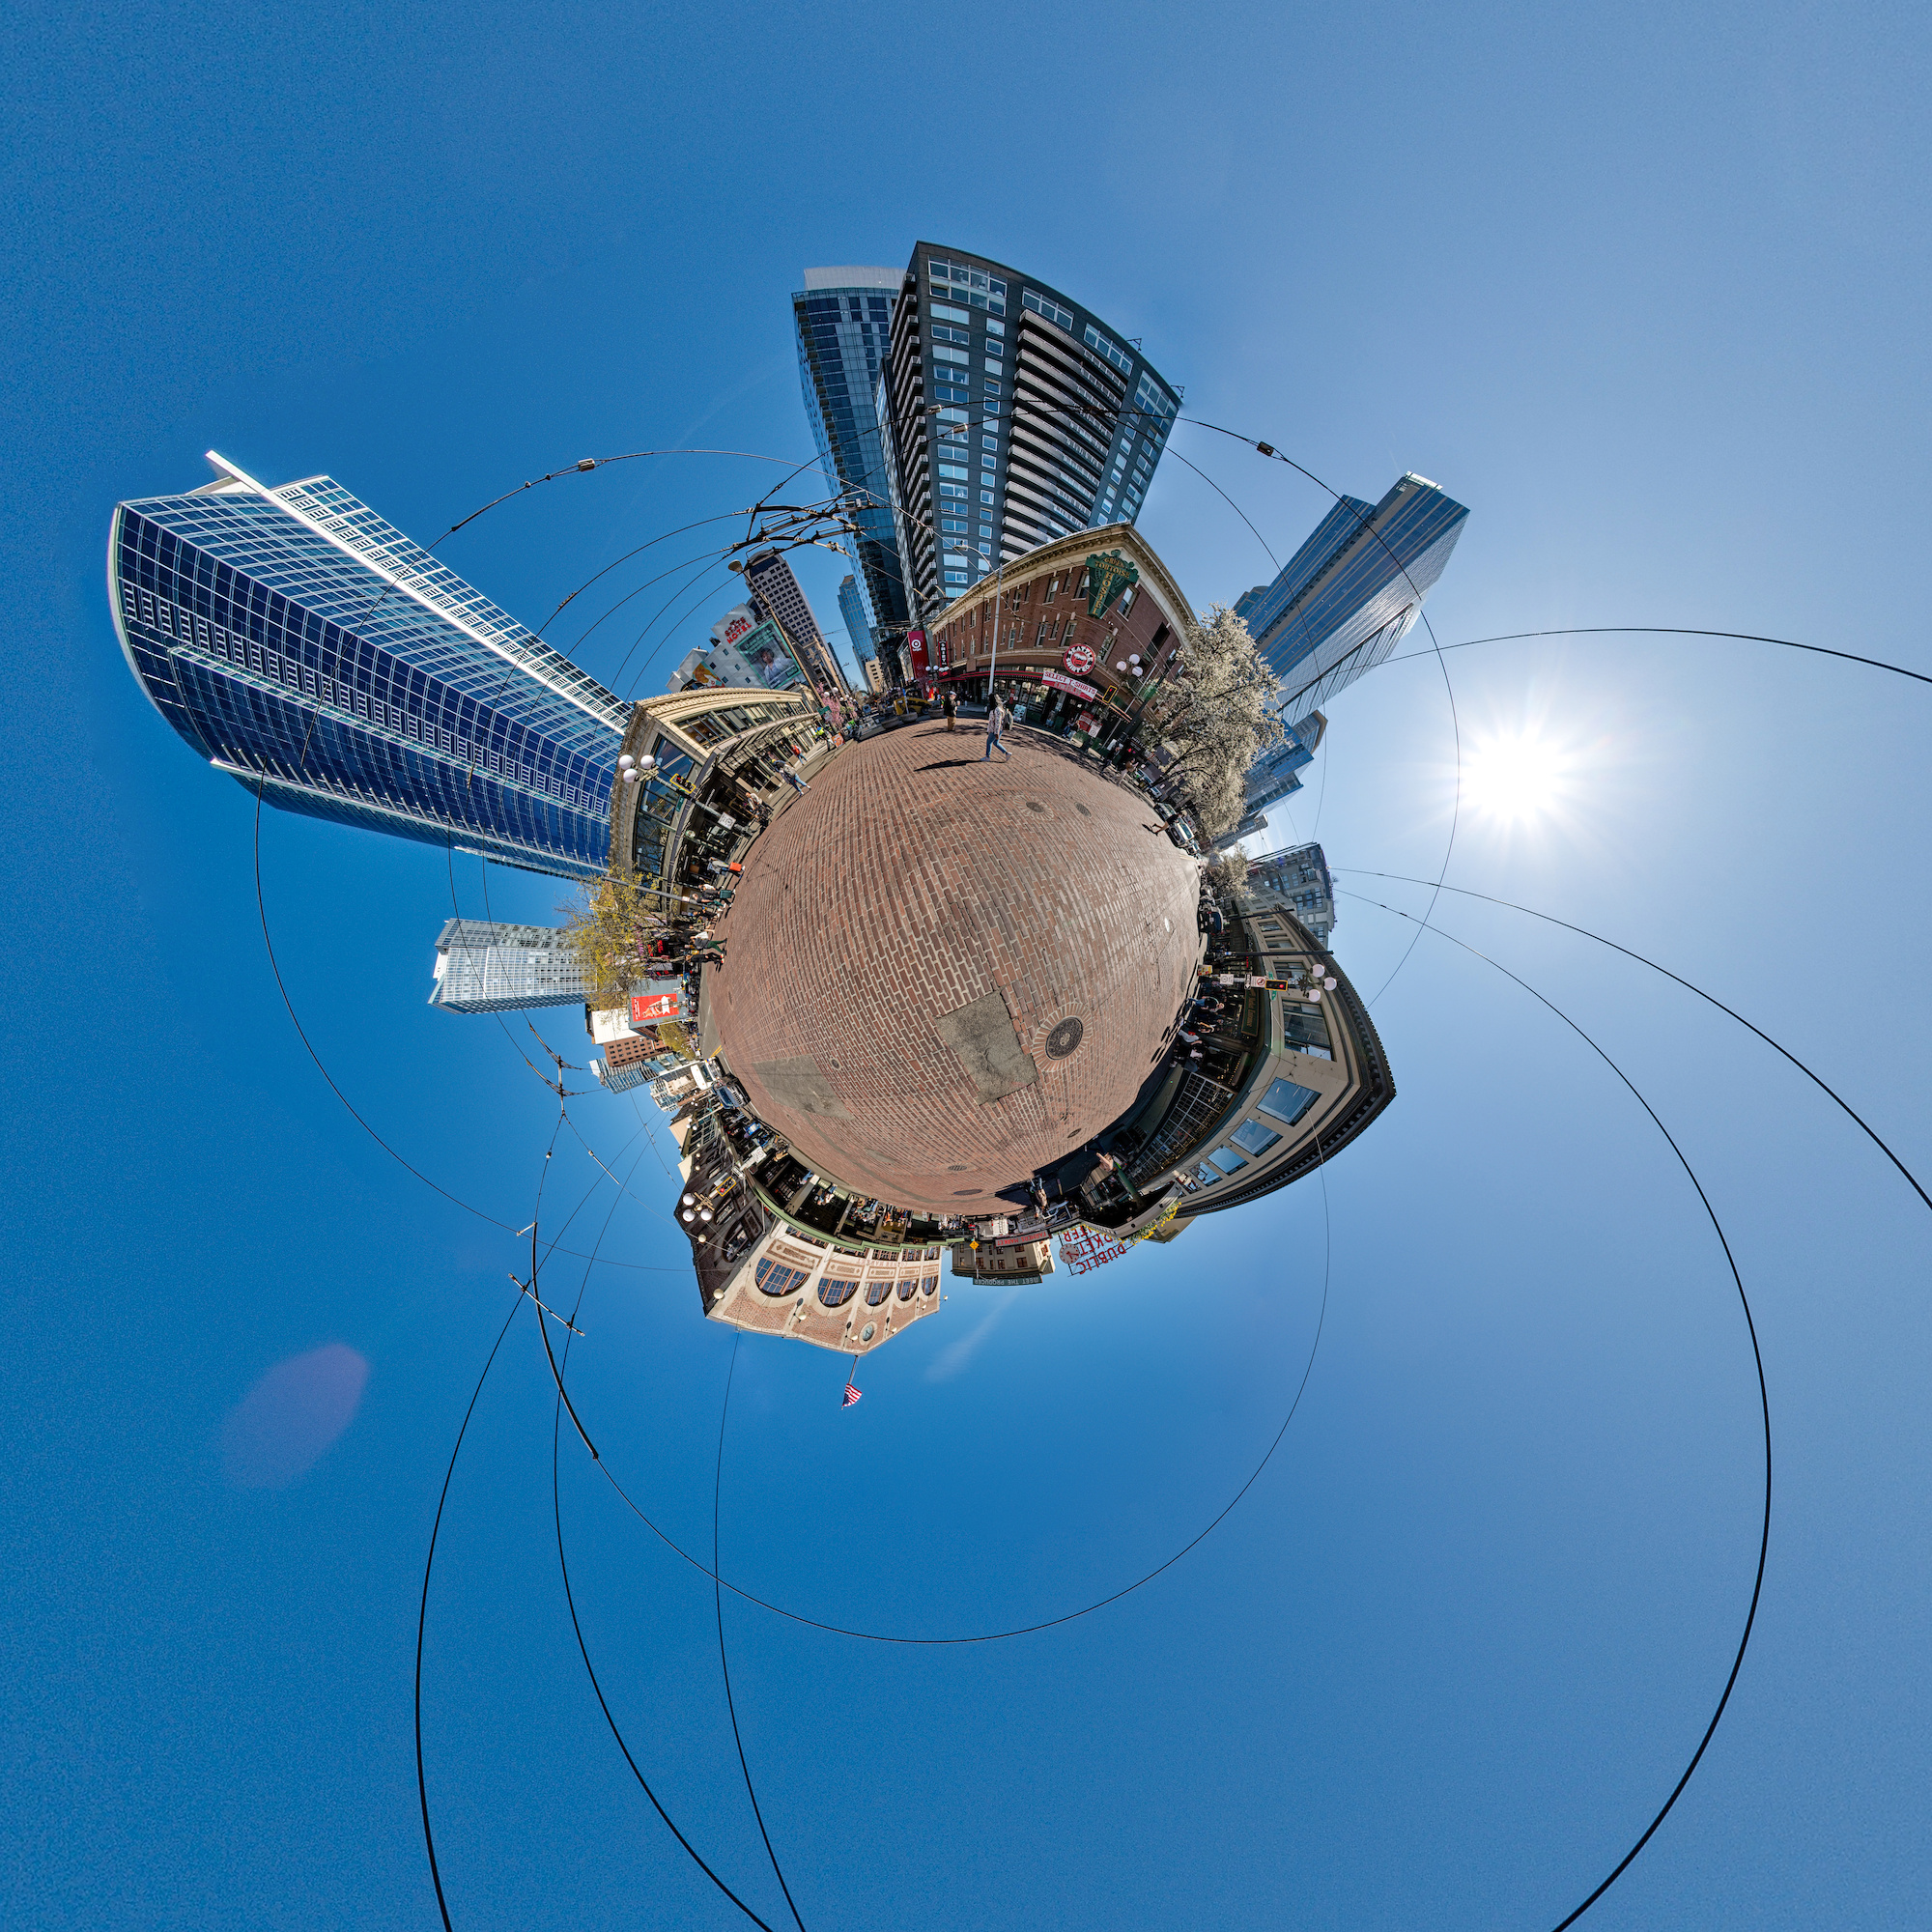
This panorama is a contribution for the '20 Years' event of WorldWidePanorama and taken at the same place as the original panorama from 2009.
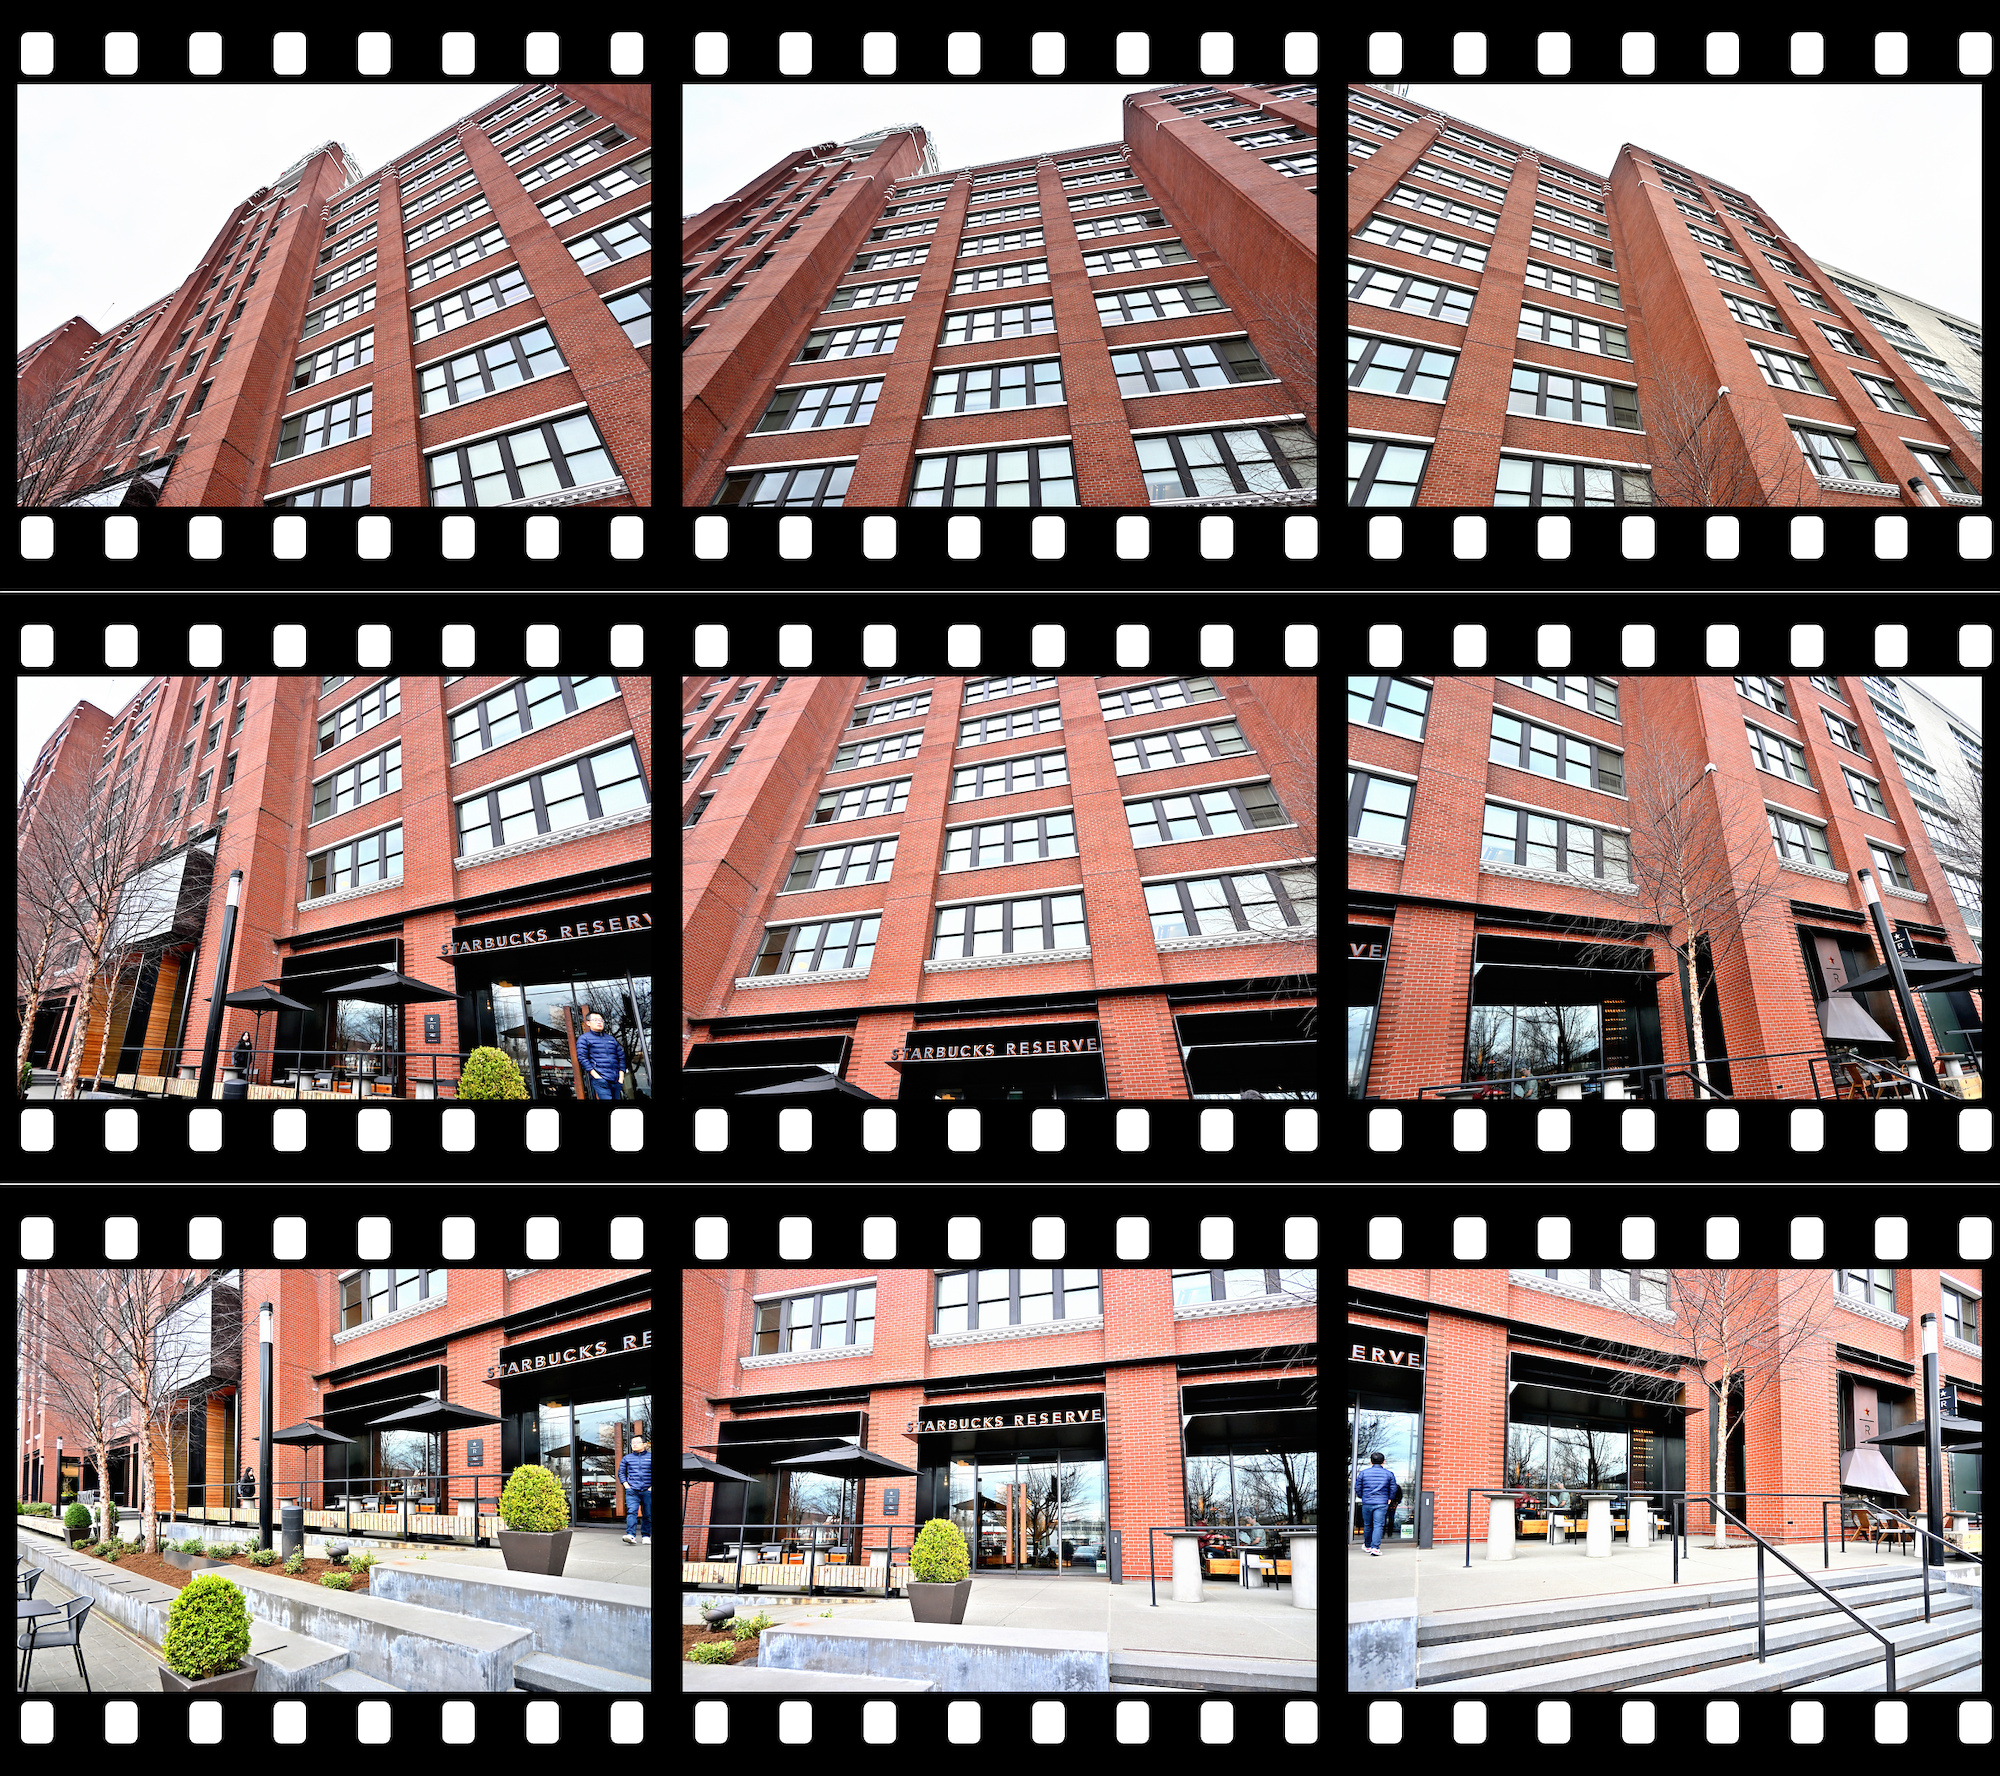
Interactive Panorama Starbucks at Pike Place Market
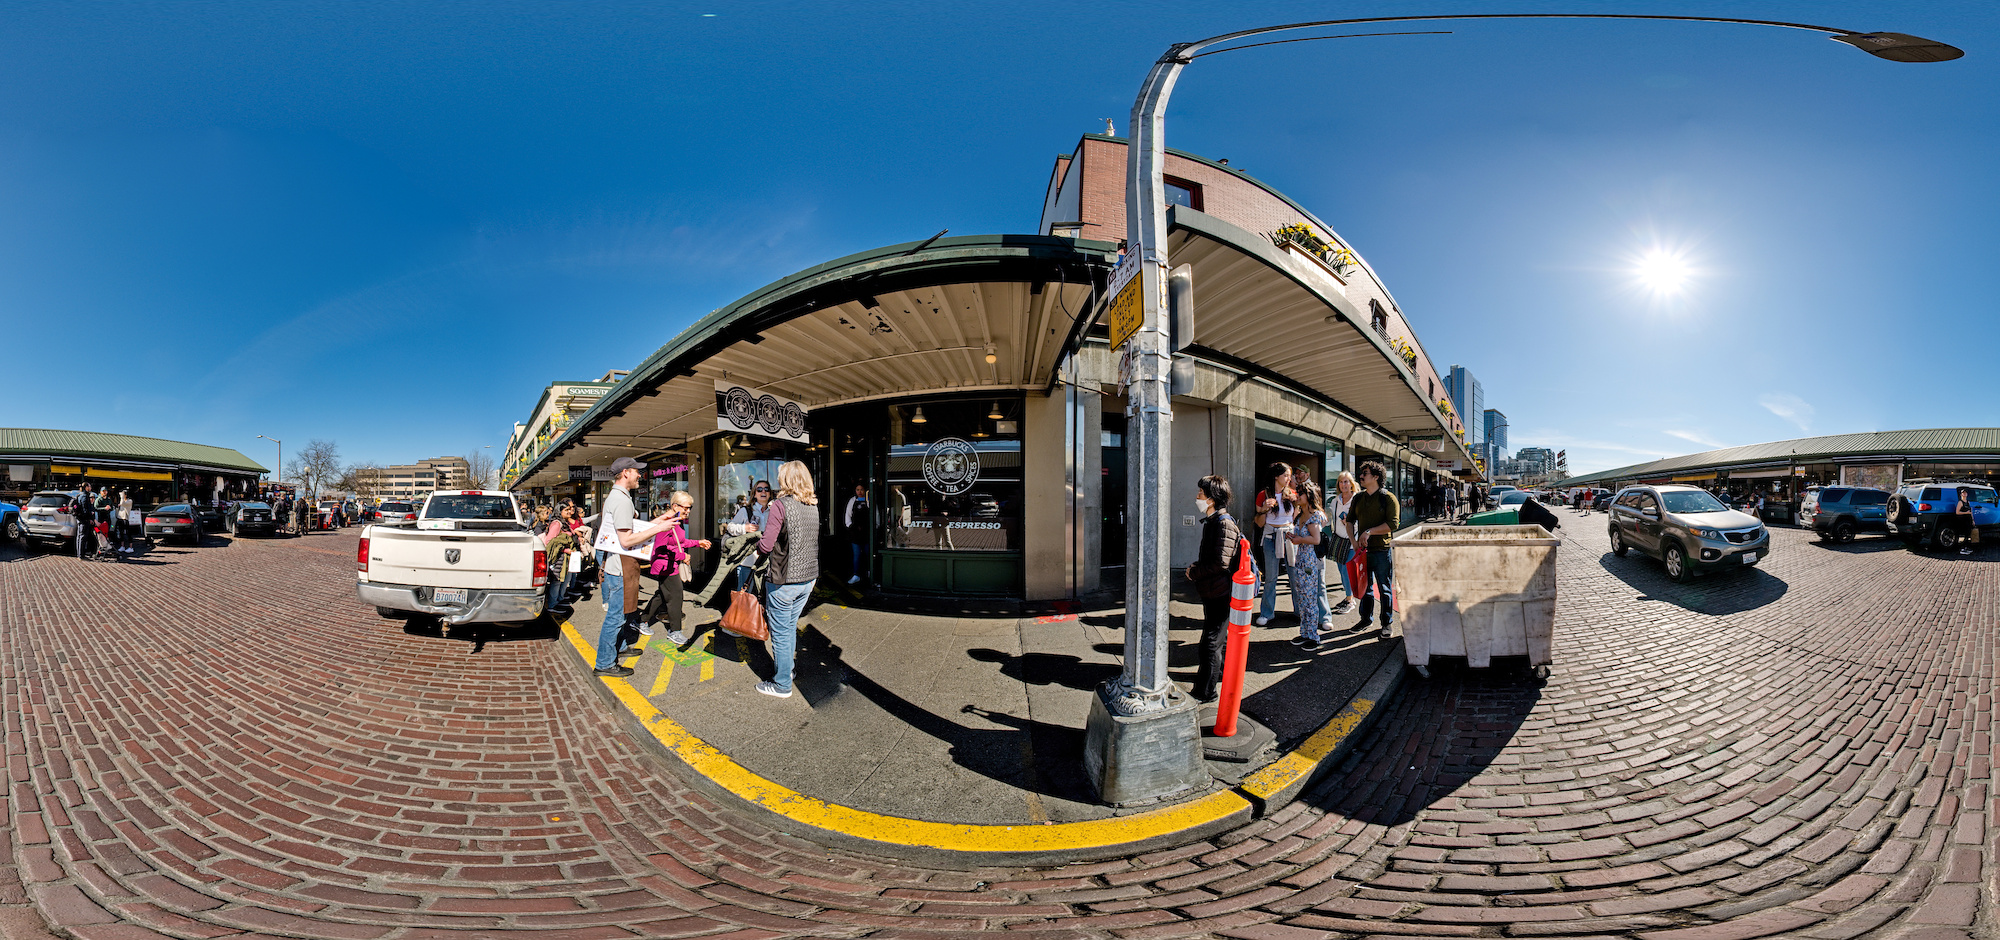
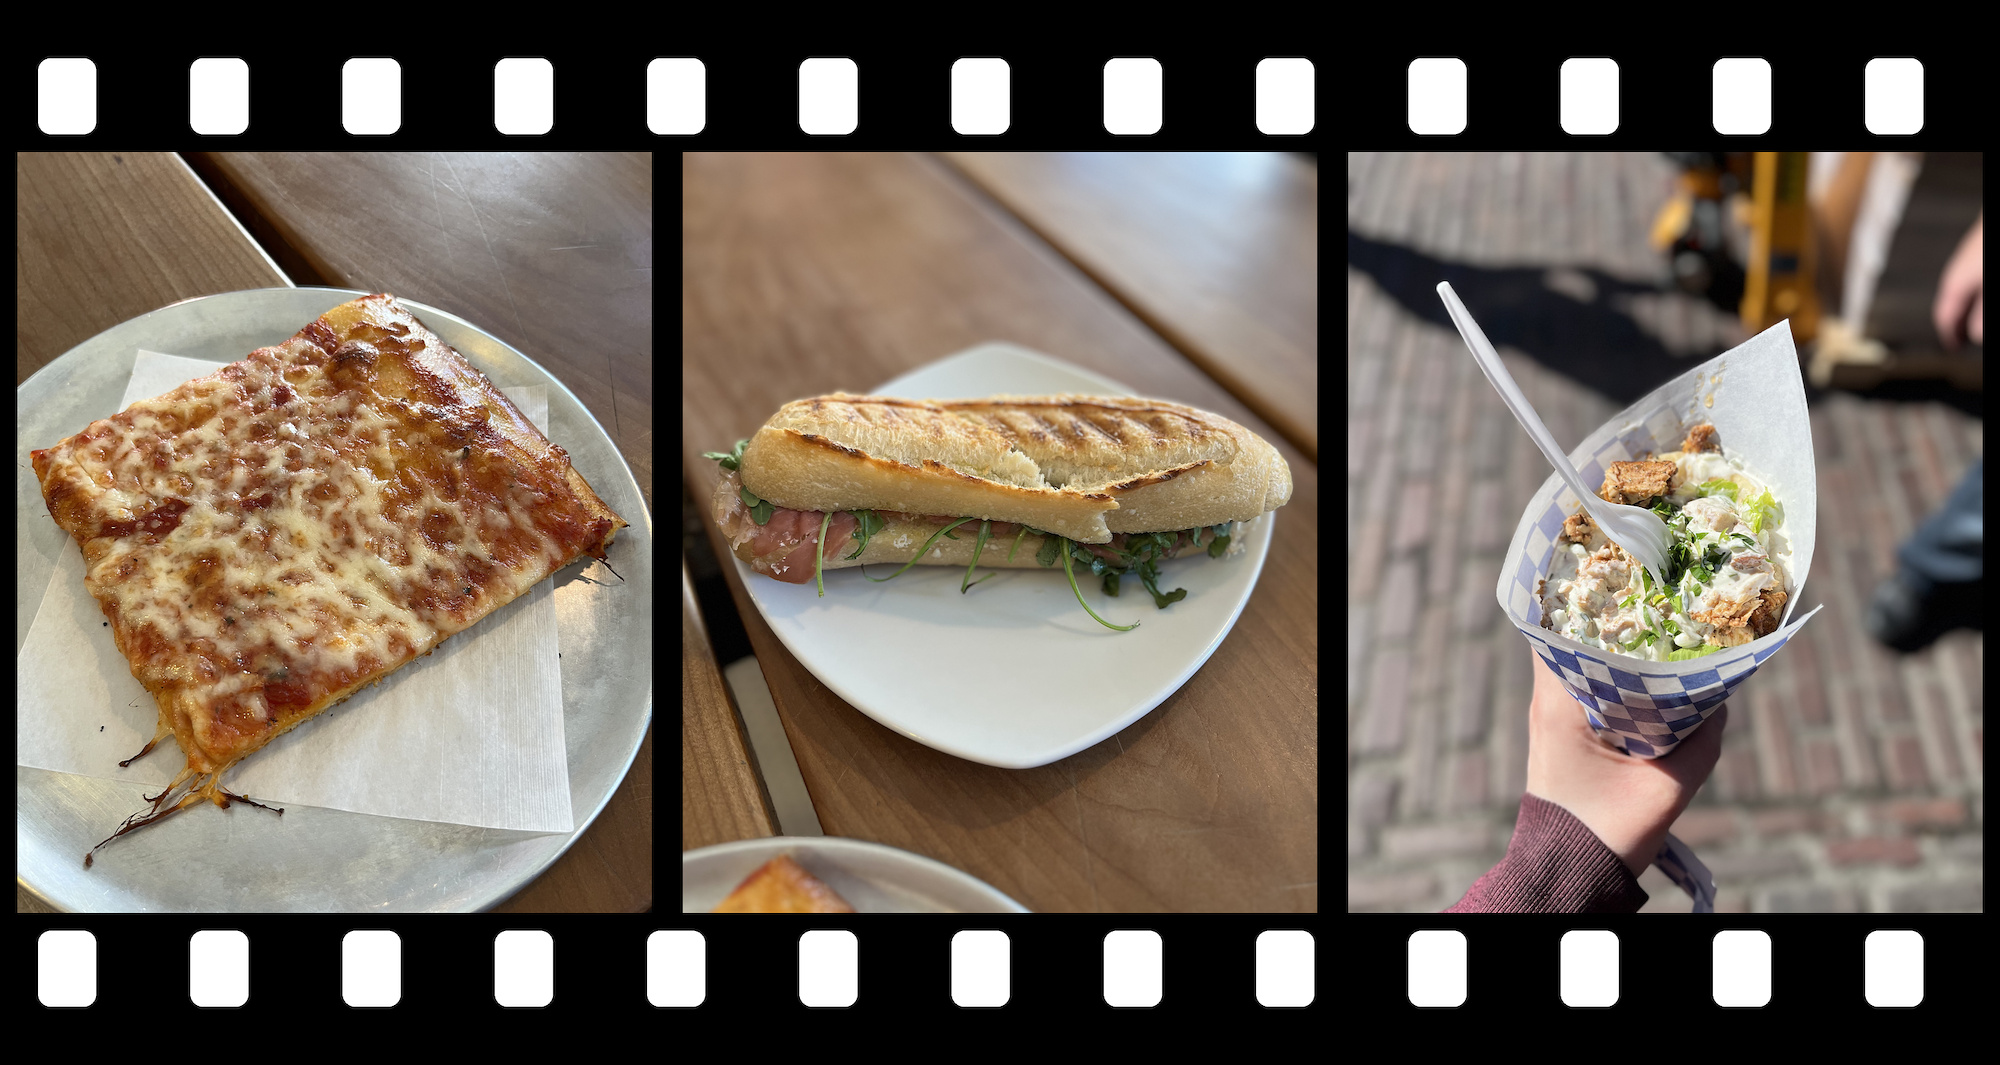
And the Market Food, one of the best of its class.
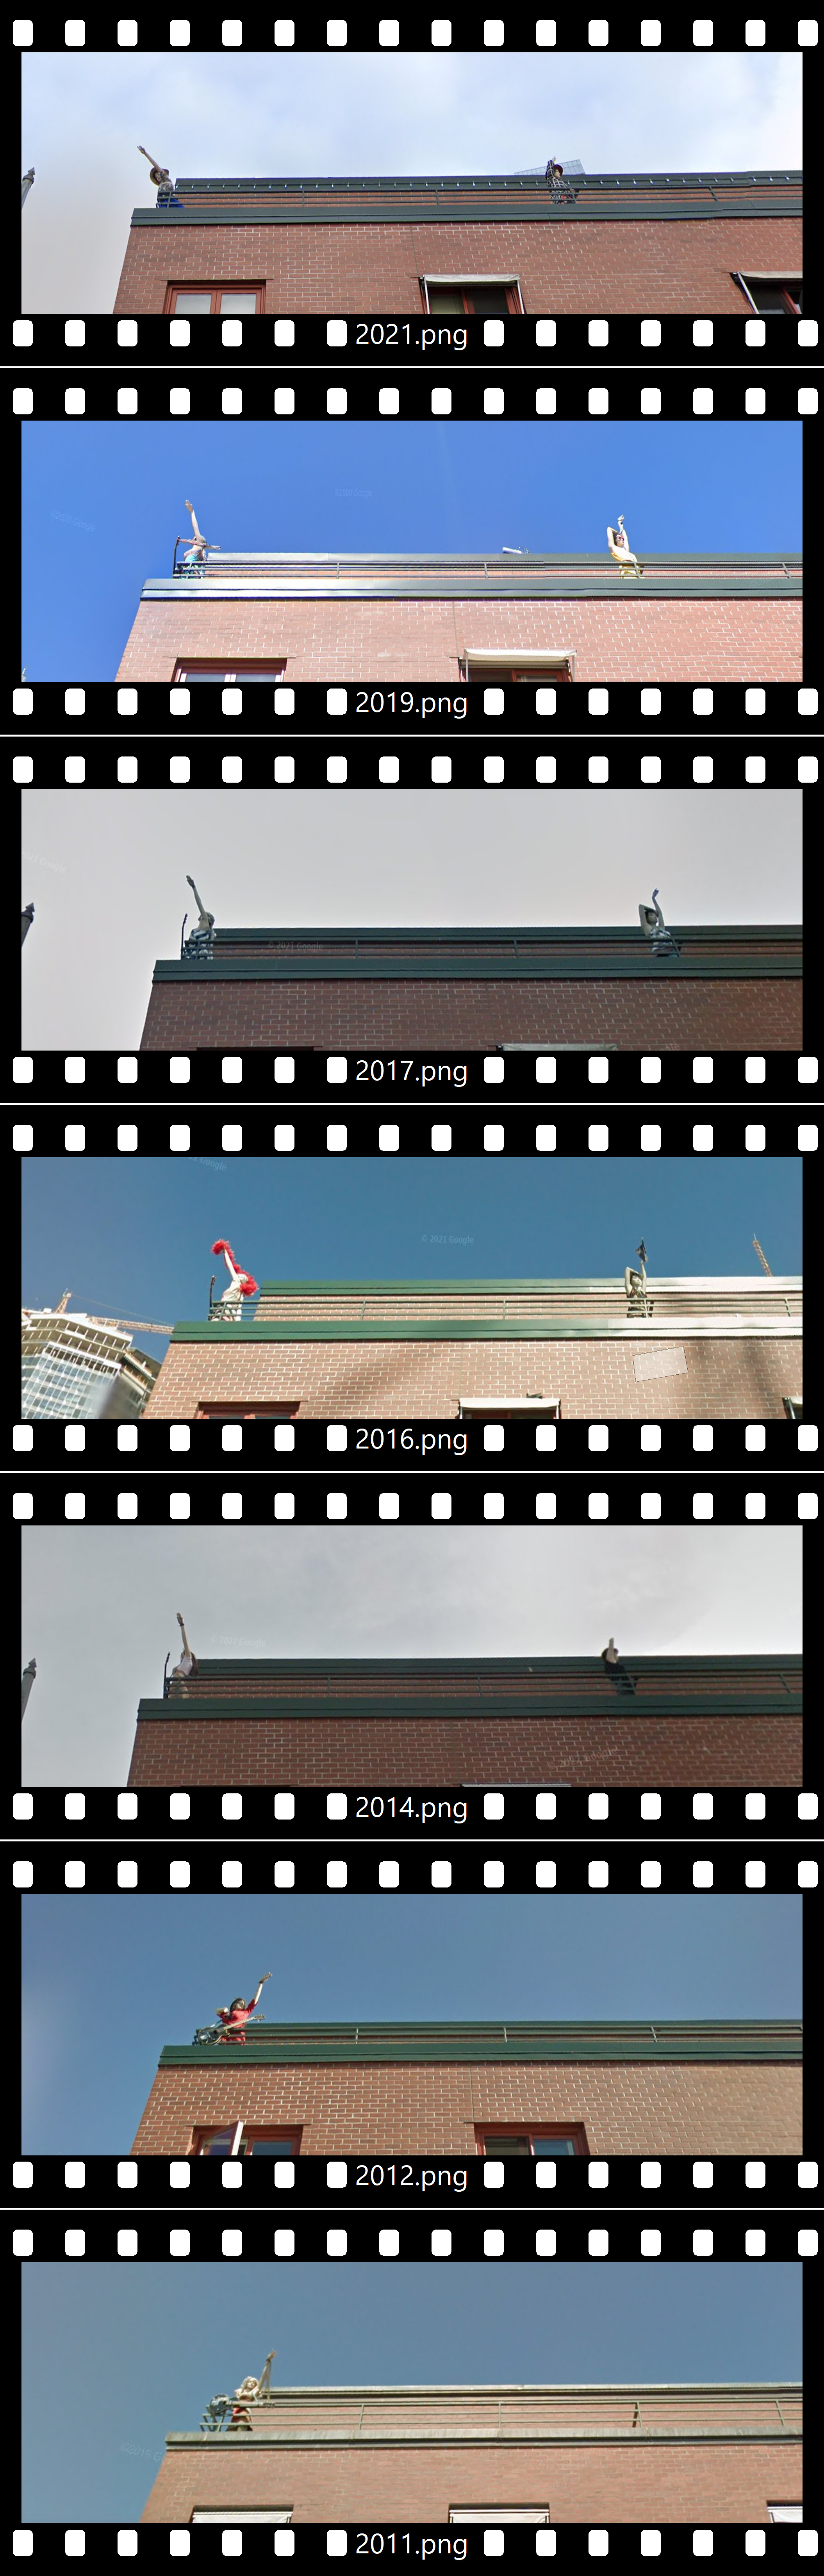
Notice the observers on the roof balcony:

They have been watching the scene for quite some time, from the street view:
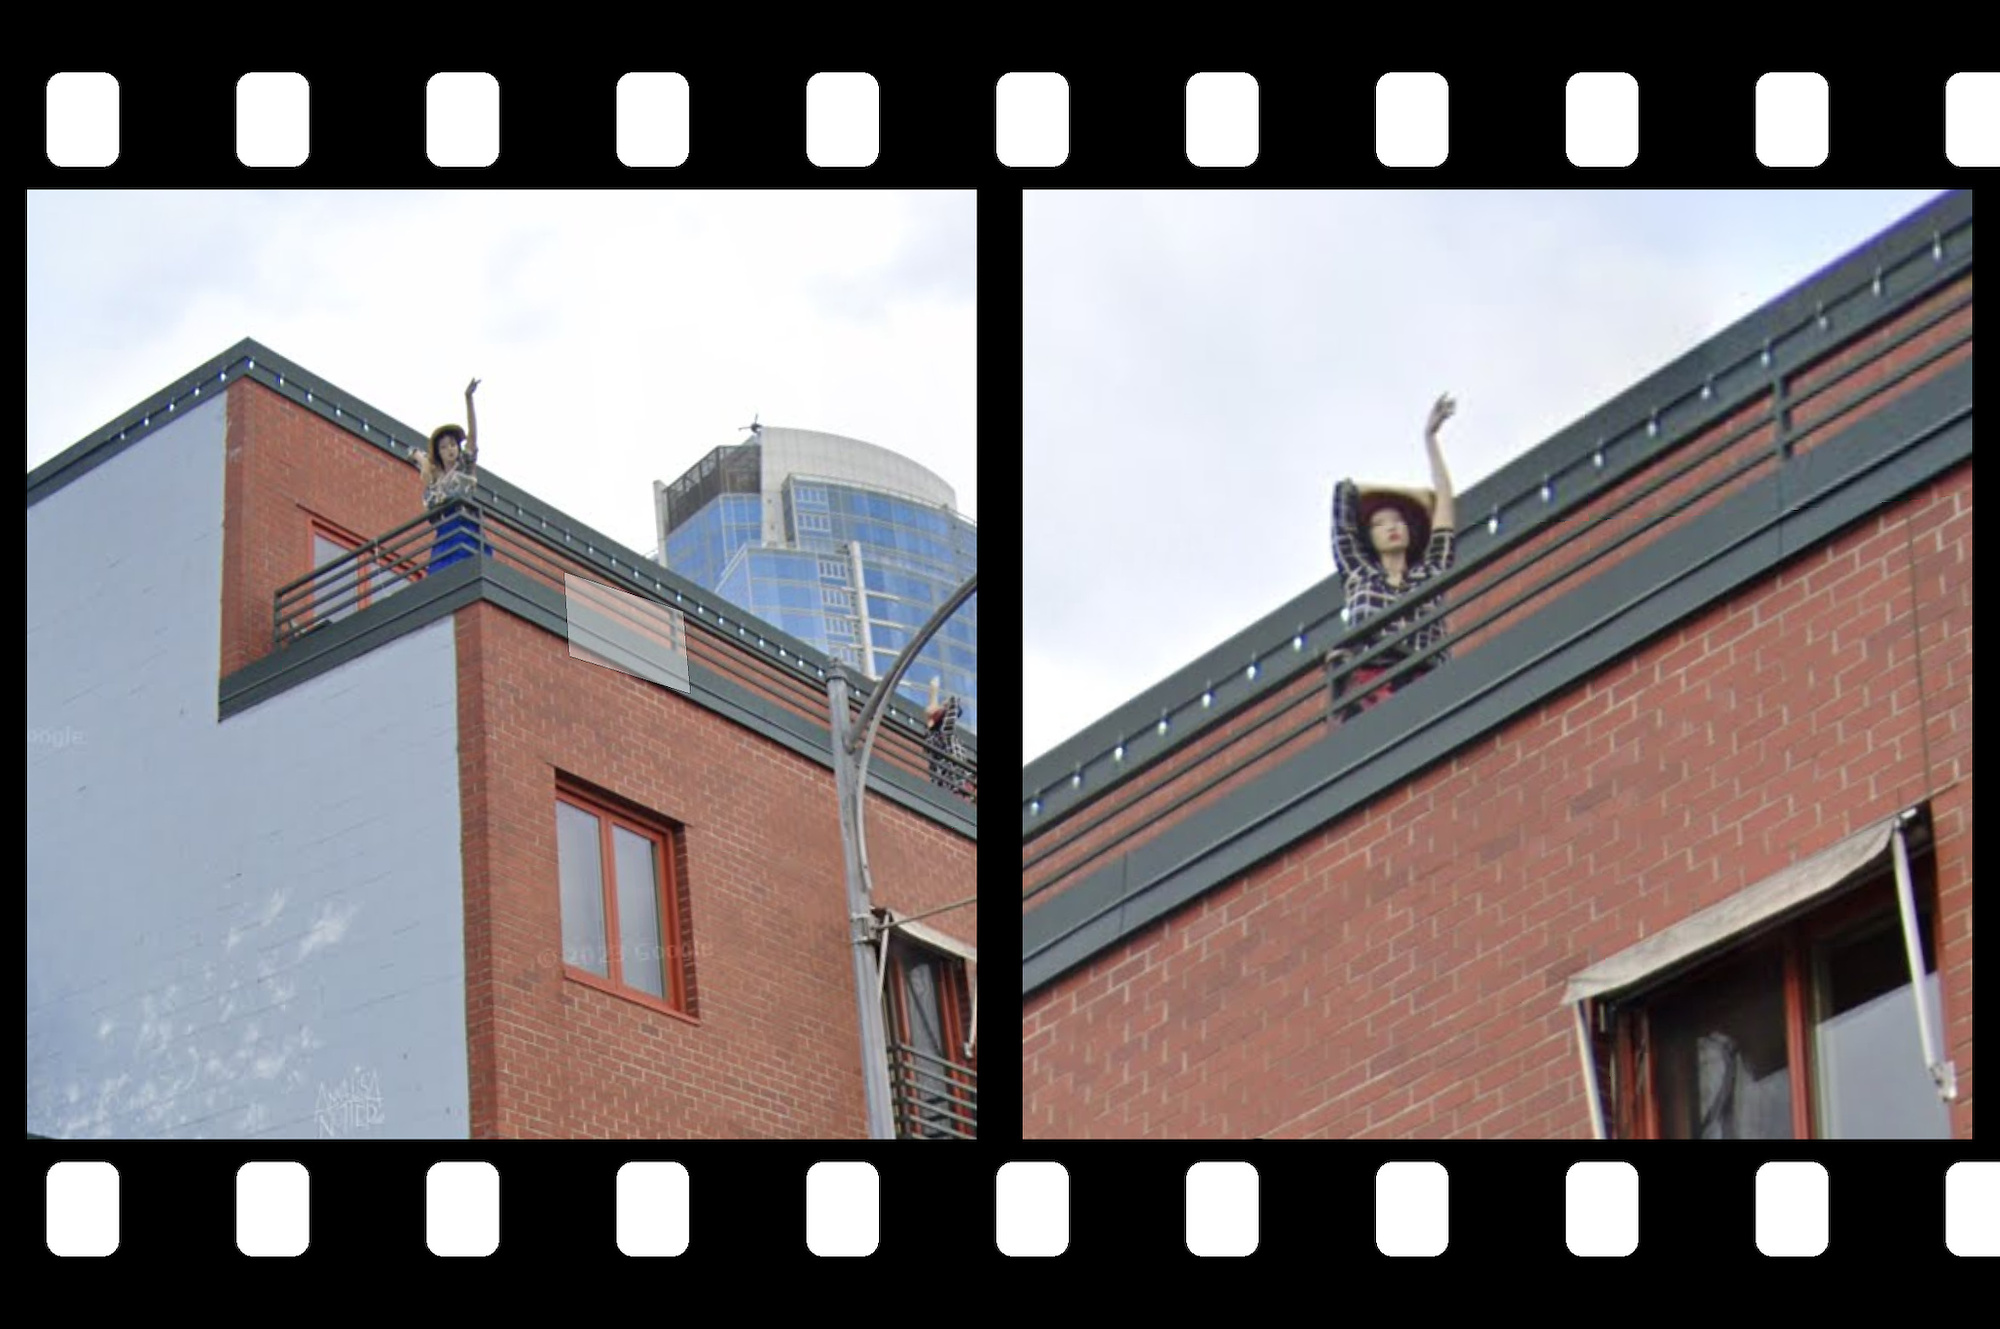
The girls go with the fashion:
Pictures taken for panoramic images should always have the same exposure by using the manual exposure setting on the camera, but sometimes this is not always the case as in Uneven Exposures.
In this example of a classical building panorama, the pictures were all automatically exposed by the camera and are different.
16-50mm f/3,5-6,3 VR lens on the NIKON Z30 at f=16mm/24mm
Actual exposure values using the Index print feature in cPicture.
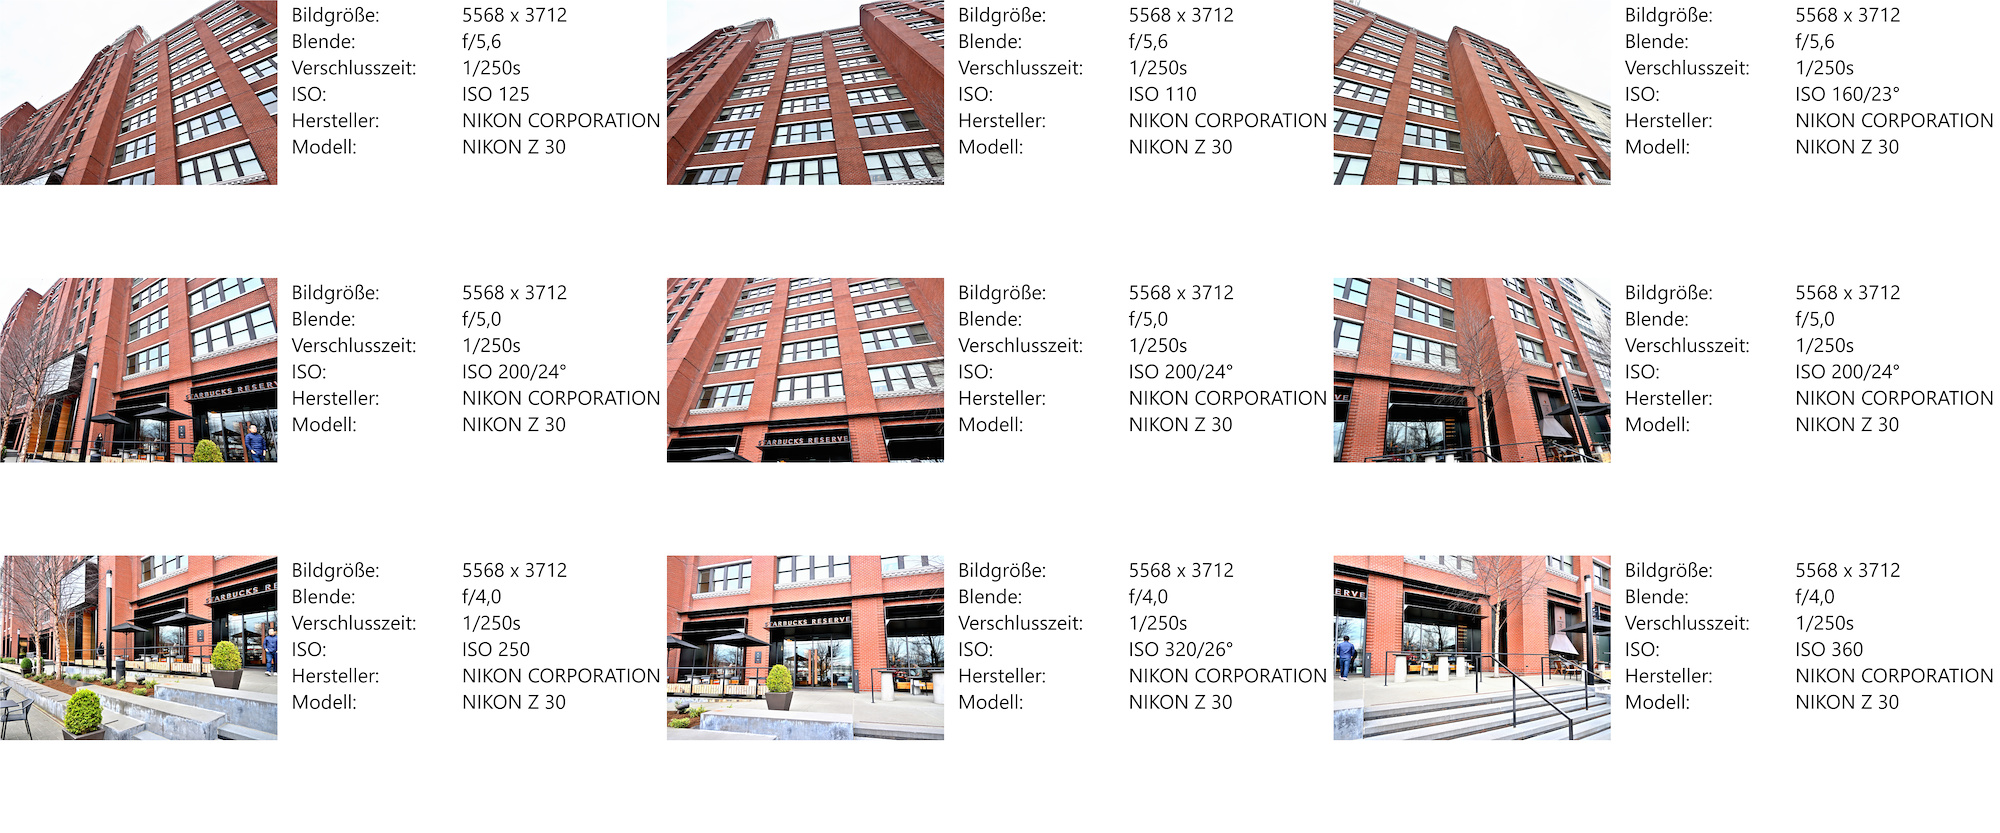
Required exposure correction values:
| |
|
|
f/5,6 ISO125
0EV
|
f/5,6 ISO110
+0,18EV
|
f/5,6 ISO160
-0,36EV
|
f/5,0 ISO200
-1EV
|
f/5,0 ISO200
-1EV
|
f/5,0 ISO200
-1EV
|
f/4,0 ISO250
-2EV
|
f/4,0 ISO320
-2,3EV
|
f/4,0 ISO360
-2,5EV
|
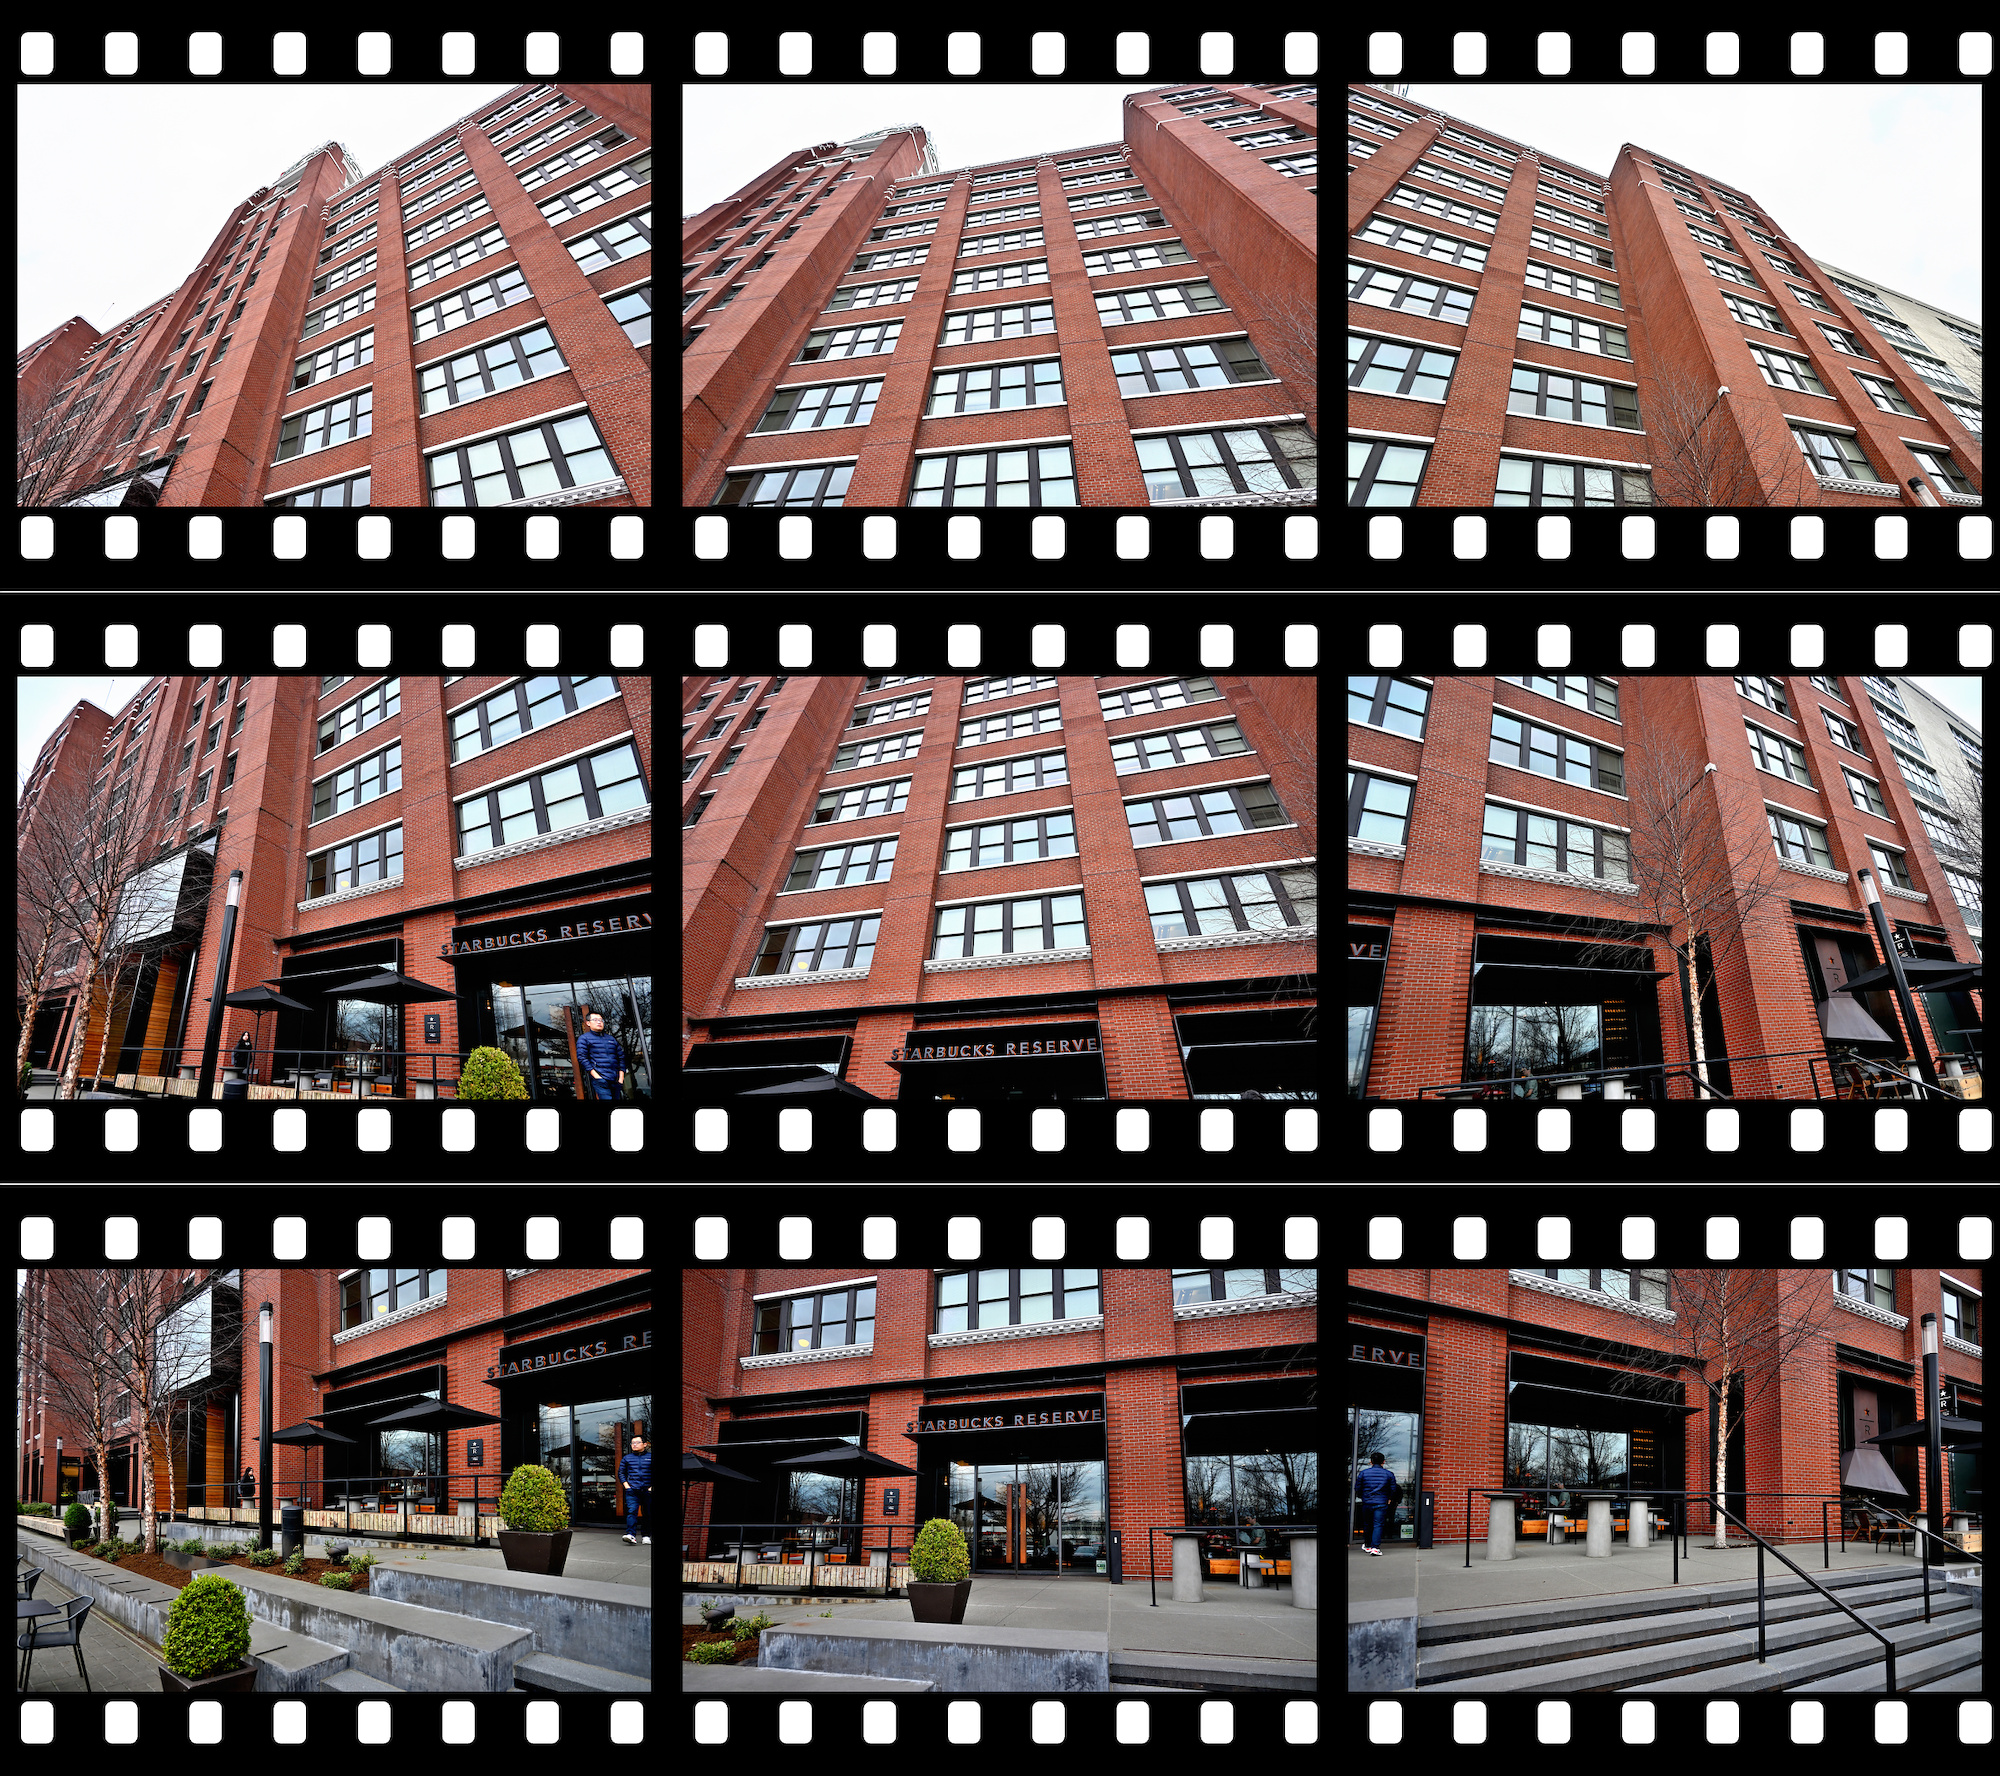
The corrected set of pictures:
To calculate the exposure correction values, you can use the Exposure calculator, but for a larger picture set it is easier to use a script to calculate all the exposure correction that need to be applied to match the exposure of the reference picture.
Script to calculate the exposure adjustments:
# Set up the list of pictures with the exposure settings.
$picturesEV = @(
    # Name, Speed, Aperture, ISO
    @("DSC_4121.NEF", 250, 4.0, 320),
    @("DSC_4122.NEF", 250, 5.0, 200),
    @("DSC_4123.NEF", 250, 5.6, 110),
    @("DSC_4124.NEF", 250, 4.0, 360),
    @("DSC_4125.NEF", 250, 5.0, 200),
    @("DSC_4126.NEF", 250, 5.6, 180),
    @("DSC_4127.NEF", 250, 5.6, 160),
    @("DSC_4128.NEF", 250, 4.0, 250),
    @("DSC_4129.NEF", 250, 5.0, 200),
    @("DSC_4130.NEF", 250, 5.6, 140),
    @("DSC_4131.NEF", 250, 5.6, 125)
)

# Set the reference picture to which all other pictures will be aligned to.
$refPictureName = "DSC_4131.NEF"

# Get the data for the reference picture.
foreach ($pictureEV in $picturesEV) {
    if ($refPictureName -eq $pictureEV[0]) {
        $refPictureEV = $pictureEV
        break
    }
}

function log2([double]$x) {
    [Math]::Log($x) / [Math]::Log(2.0)
}

function Get-ExposureText($EV) {
    "1/$($EV[1])s f/$($EV[2]) ISO$($EV[3])"
}

[string]$expRef = Get-ExposureText $refPictureEV

"Adjust exposure to match $refPictureName [$expRef]:"

# Calulate the exposure correction for each picture.
foreach ($pictureEV in $picturesEV) {

    [string]$name = $pictureEV[0]

    # Example a to b:
    # 1/(250) to 1/(500) = -1EV , (log2 250) - (log2 500)
    # f5.6 to f4 = +1EV , 2*((log2 5.6) - (log2 4))
    # ISO200 to ISO100 = -1EV , (log2 100) - (log2 200)

    # Calulate correction values from speed, f-stop and iso.
    [double]$speedEV = (log2 $pictureEV[1]) - (log2 $refPictureEV[1])
    [double]$fEV = 2 * ((log2 $pictureEV[2]) - (log2 $refPictureEV[2]))
    [double]$isoEV = (log2 $refPictureEV[3]) - (log2 $pictureEV[3])

    [double]$EV = [math]::Round($speedEV + $fEV + $isoEV, 2)
    [string]$sign = if ($eV -gt 0.0) { "+" } else { "" }
    [string]$exp = Get-ExposureText $pictureEV

    # Output result.
    "$name [$exp] = $sign{0:g2}EV" -f $EV
}
The results:
Adjust exposure to match DSC_4131.NEF [1/250s f/5.6 ISO125]:
DSC_4121.NEF [1/250s f/4 ISO320] = -2,3EV
DSC_4122.NEF [1/250s f/5 ISO200] = -1EV
DSC_4123.NEF [1/250s f/5.6 ISO110] = +0,18EV
DSC_4124.NEF [1/250s f/4 ISO360] = -2,5EV
DSC_4125.NEF [1/250s f/5 ISO200] = -1EV
DSC_4126.NEF [1/250s f/5.6 ISO180] = -0,53EV
DSC_4127.NEF [1/250s f/5.6 ISO160] = -0,36EV
DSC_4128.NEF [1/250s f/4 ISO250] = -2EV
DSC_4129.NEF [1/250s f/5 ISO200] = -1EV
DSC_4130.NEF [1/250s f/5.6 ISO140] = -0,16EV
DSC_4131.NEF [1/250s f/5.6 ISO125] = 0EV
An easy way to get the exposure data for all pictures is to use cPicture to export the data as a XML file:
<?xml version="1.0" encoding="utf-8" ?>
<List>
    <Picture File="DSC_4121.JPG" Aperture="f/4,0" Shutterspeed="1/250s" Iso="ISO 320/26°" />
    <Picture File="DSC_4122.JPG" Aperture="f/5,0" Shutterspeed="1/250s" Iso="ISO 200/24°" />
    <Picture File="DSC_4123.JPG" Aperture="f/5,6" Shutterspeed="1/250s" Iso="ISO 110" />
    <Picture File="DSC_4124.JPG" Aperture="f/4,0" Shutterspeed="1/250s" Iso="ISO 360" />
    <Picture File="DSC_4125.JPG" Aperture="f/5,0" Shutterspeed="1/250s" Iso="ISO 200/24°" />
    <Picture File="DSC_4127.JPG" Aperture="f/5,6" Shutterspeed="1/250s" Iso="ISO 160/23°" />
    <Picture File="DSC_4128.JPG" Aperture="f/4,0" Shutterspeed="1/250s" Iso="ISO 250" />
    <Picture File="DSC_4129.JPG" Aperture="f/5,0" Shutterspeed="1/250s" Iso="ISO 200/24°" />
    <Picture File="DSC_4131.JPG" Aperture="f/5,6" Shutterspeed="1/250s" Iso="ISO 125" />
</List>
To use the exposure data from the cPicture list, you can use this conversion script and use this instead of the static data list. The full script is here.
# Load the exported picture list from cPicture bilder.xml
[xml]$pictureXML = New-Object xml
$pictureXML.Load("$PSScriptRoot\blog\bilder.xml")

$picturesEVxml = @()

# Get the picture exposure data from the xml file.
$pictureXML.List.Picture | ForEach-Object {
    # File="DSC_4121.JPG" Aperture="f/4,0" Shutterspeed="1/250s" Iso="ISO 320/26°"
    if ($_.Aperture -match "f/(\d(?:,\d+)?)") {
        $Aperture = [double]($matches[1].Replace(",", "."))

        if ($_.Shutterspeed -match "1/(\d+)s") {
            $Shutterspeed = [double]($matches[1])

            if ($_.Iso -match "ISO (\d+)(?:/d+°)?") {
                $Iso = [double]($matches[1])

                $picturesEVxml += ,@($($_.File), $Shutterspeed, $Aperture, $Iso)
            }
        }
    }
}
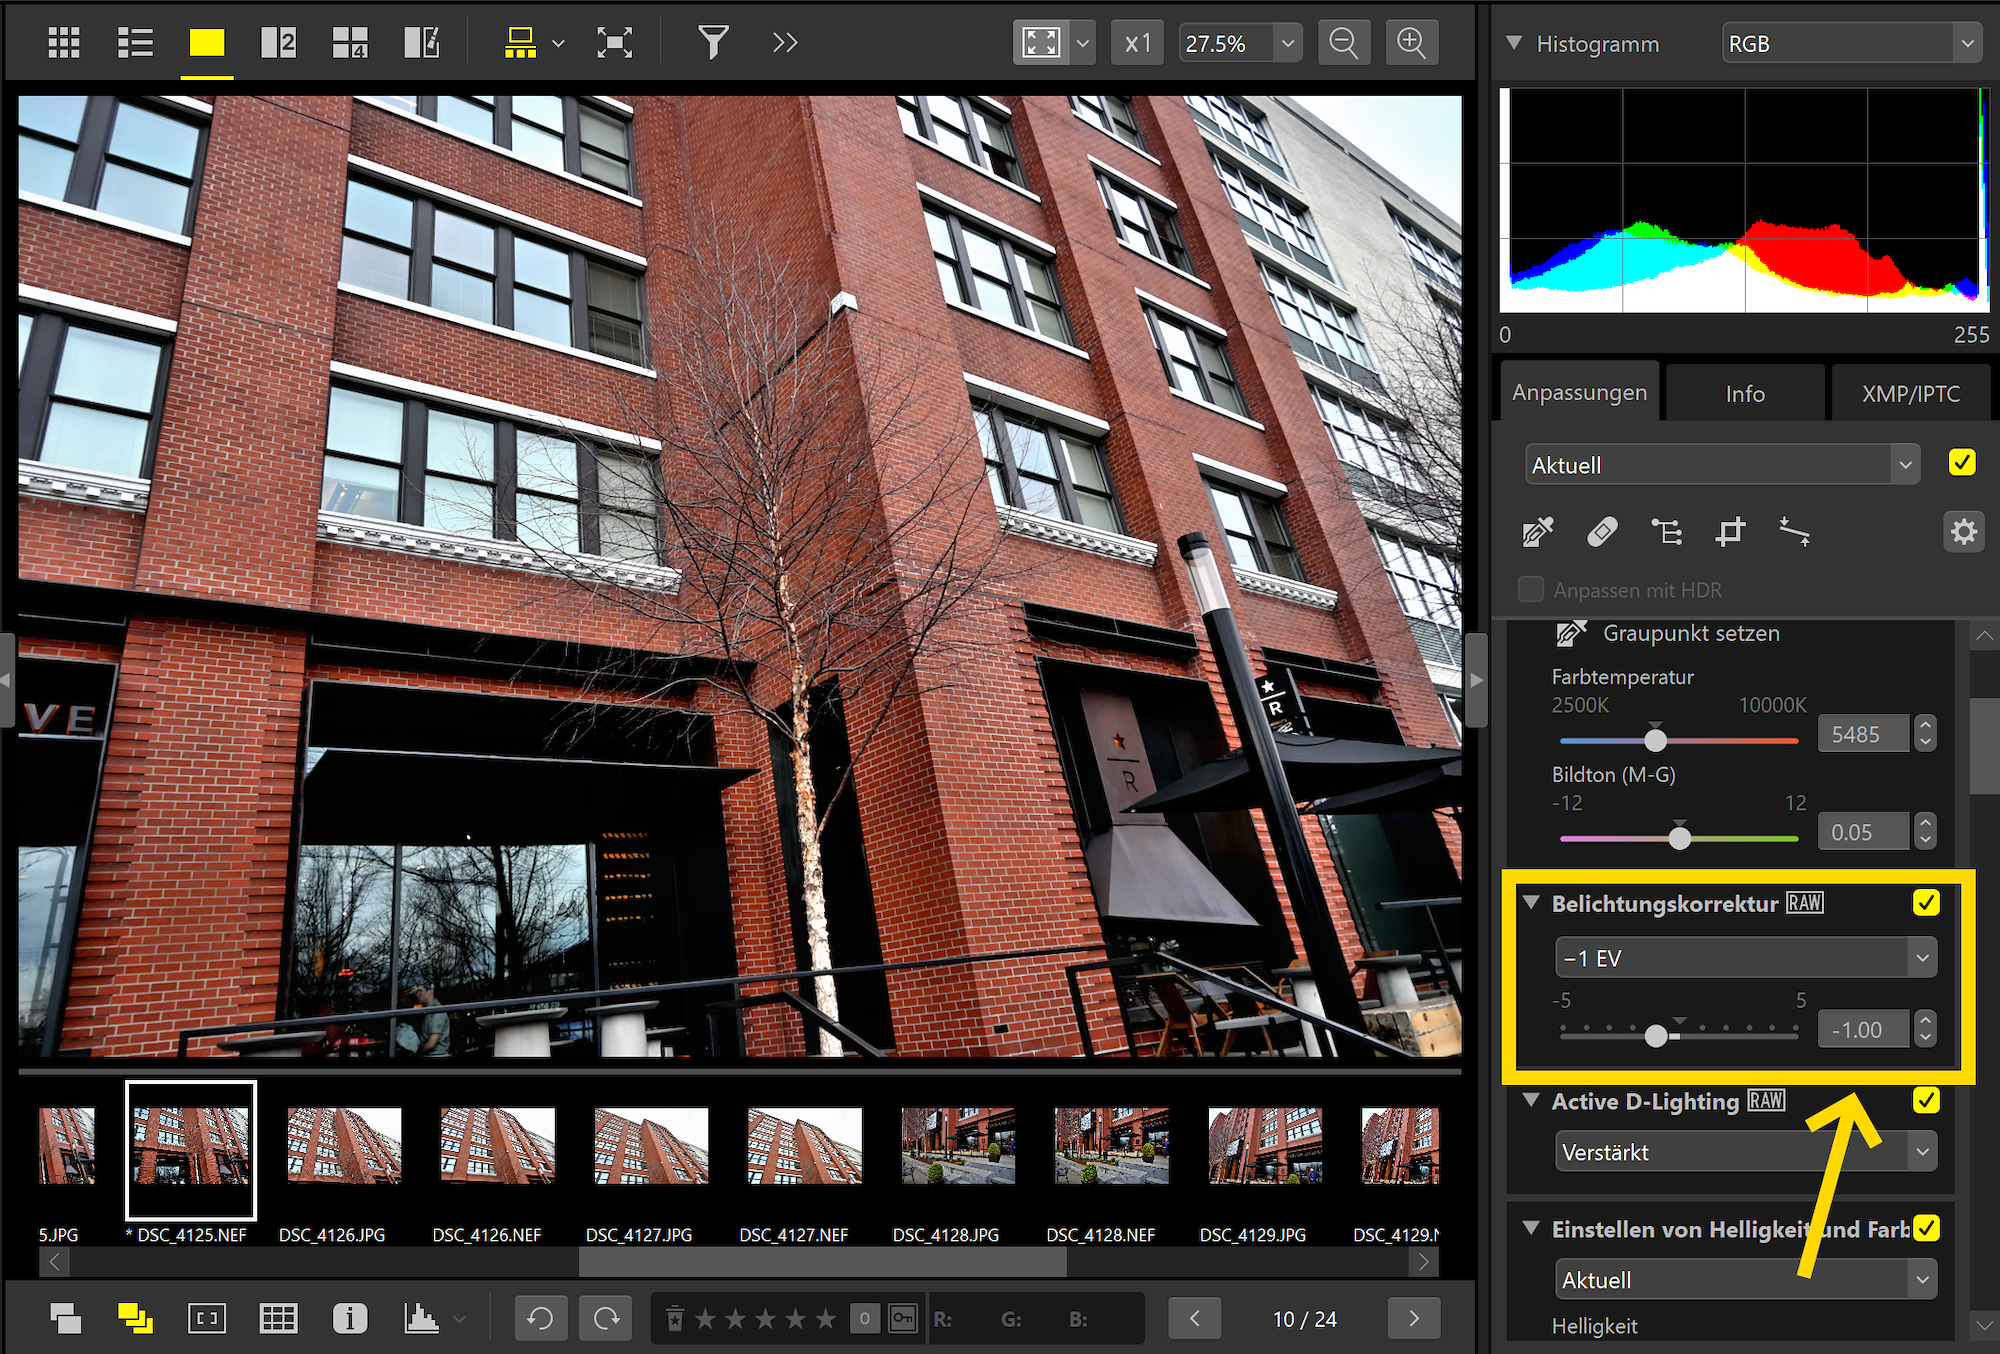
The correction can be automated using a command line tool or done in the editor, for example NX Studio in my case:
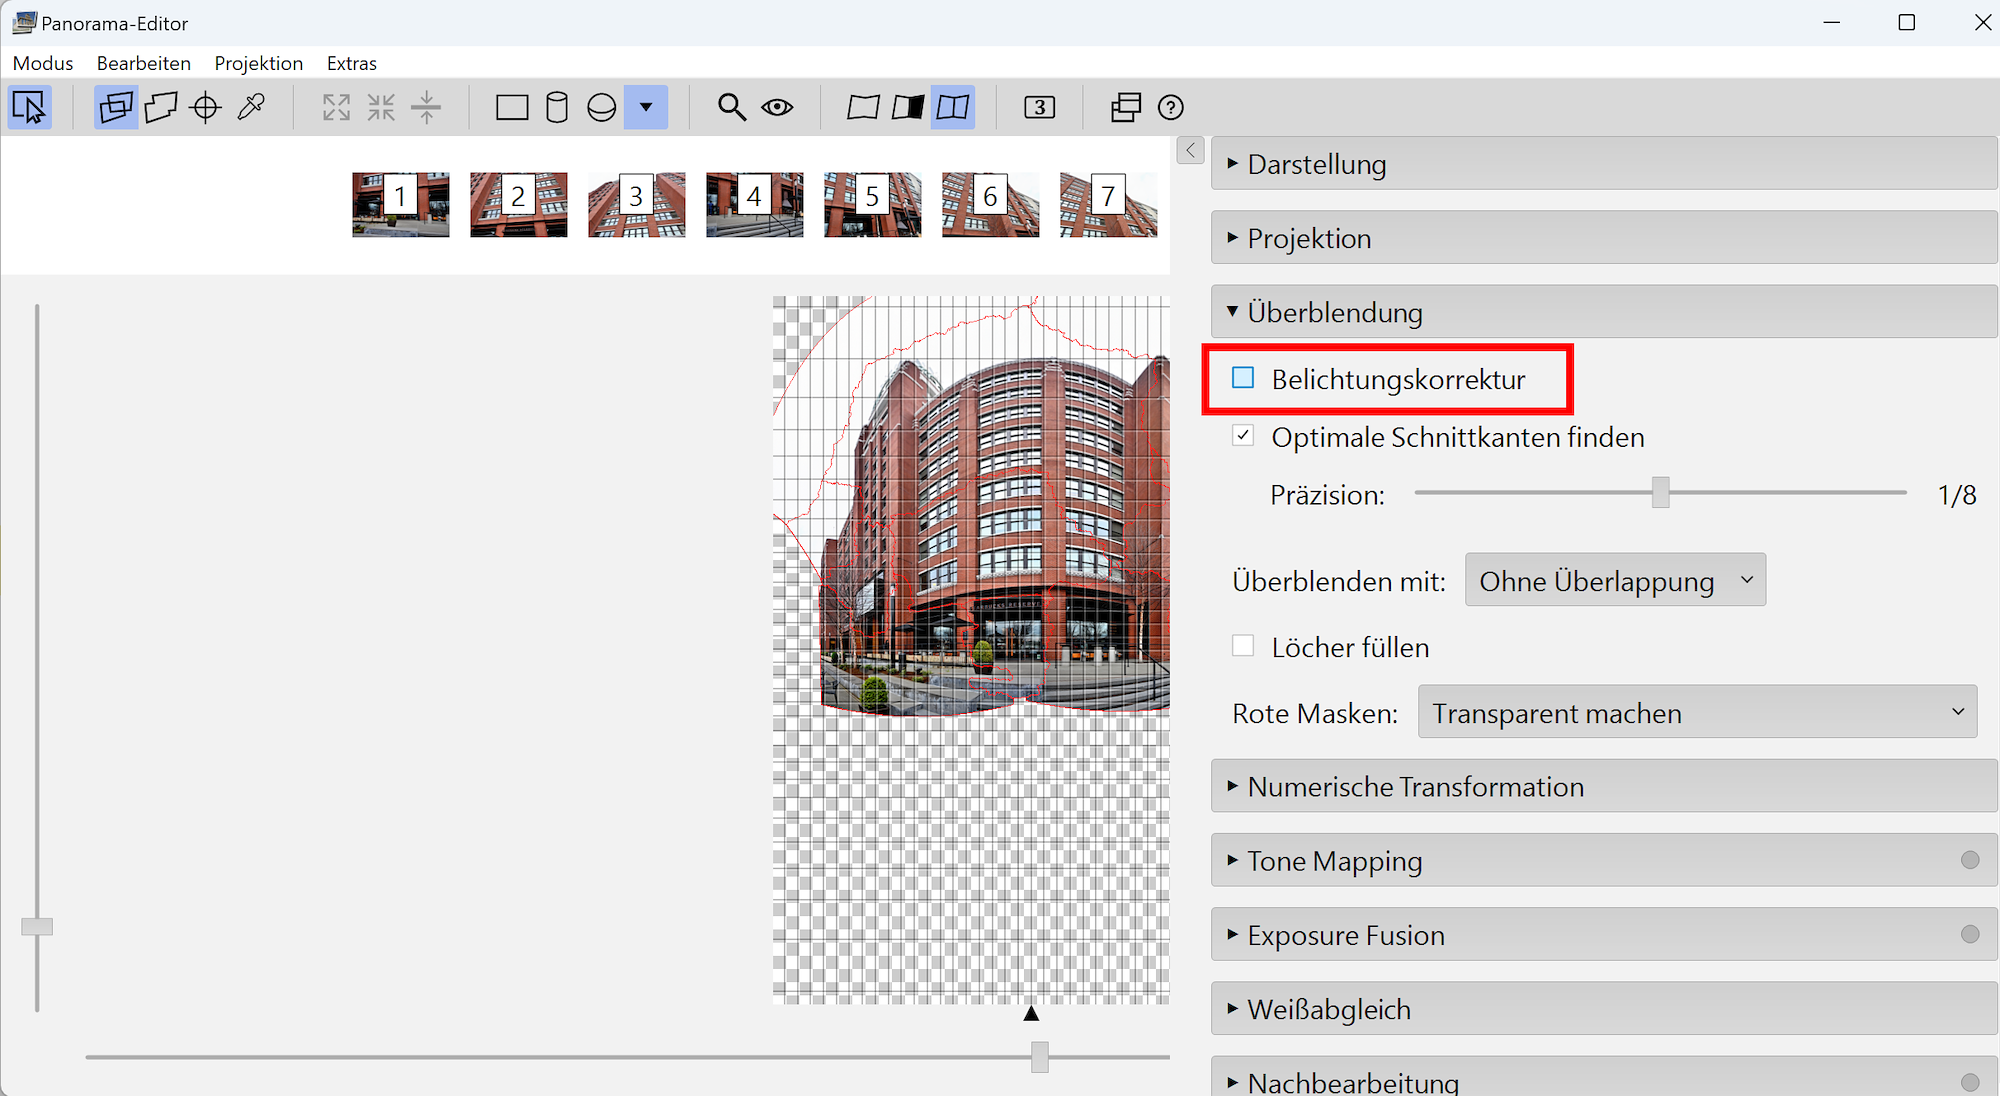
Once all correction are applied, the option to correct exposure in the Blending option in PTGui needs to be changed from enabled
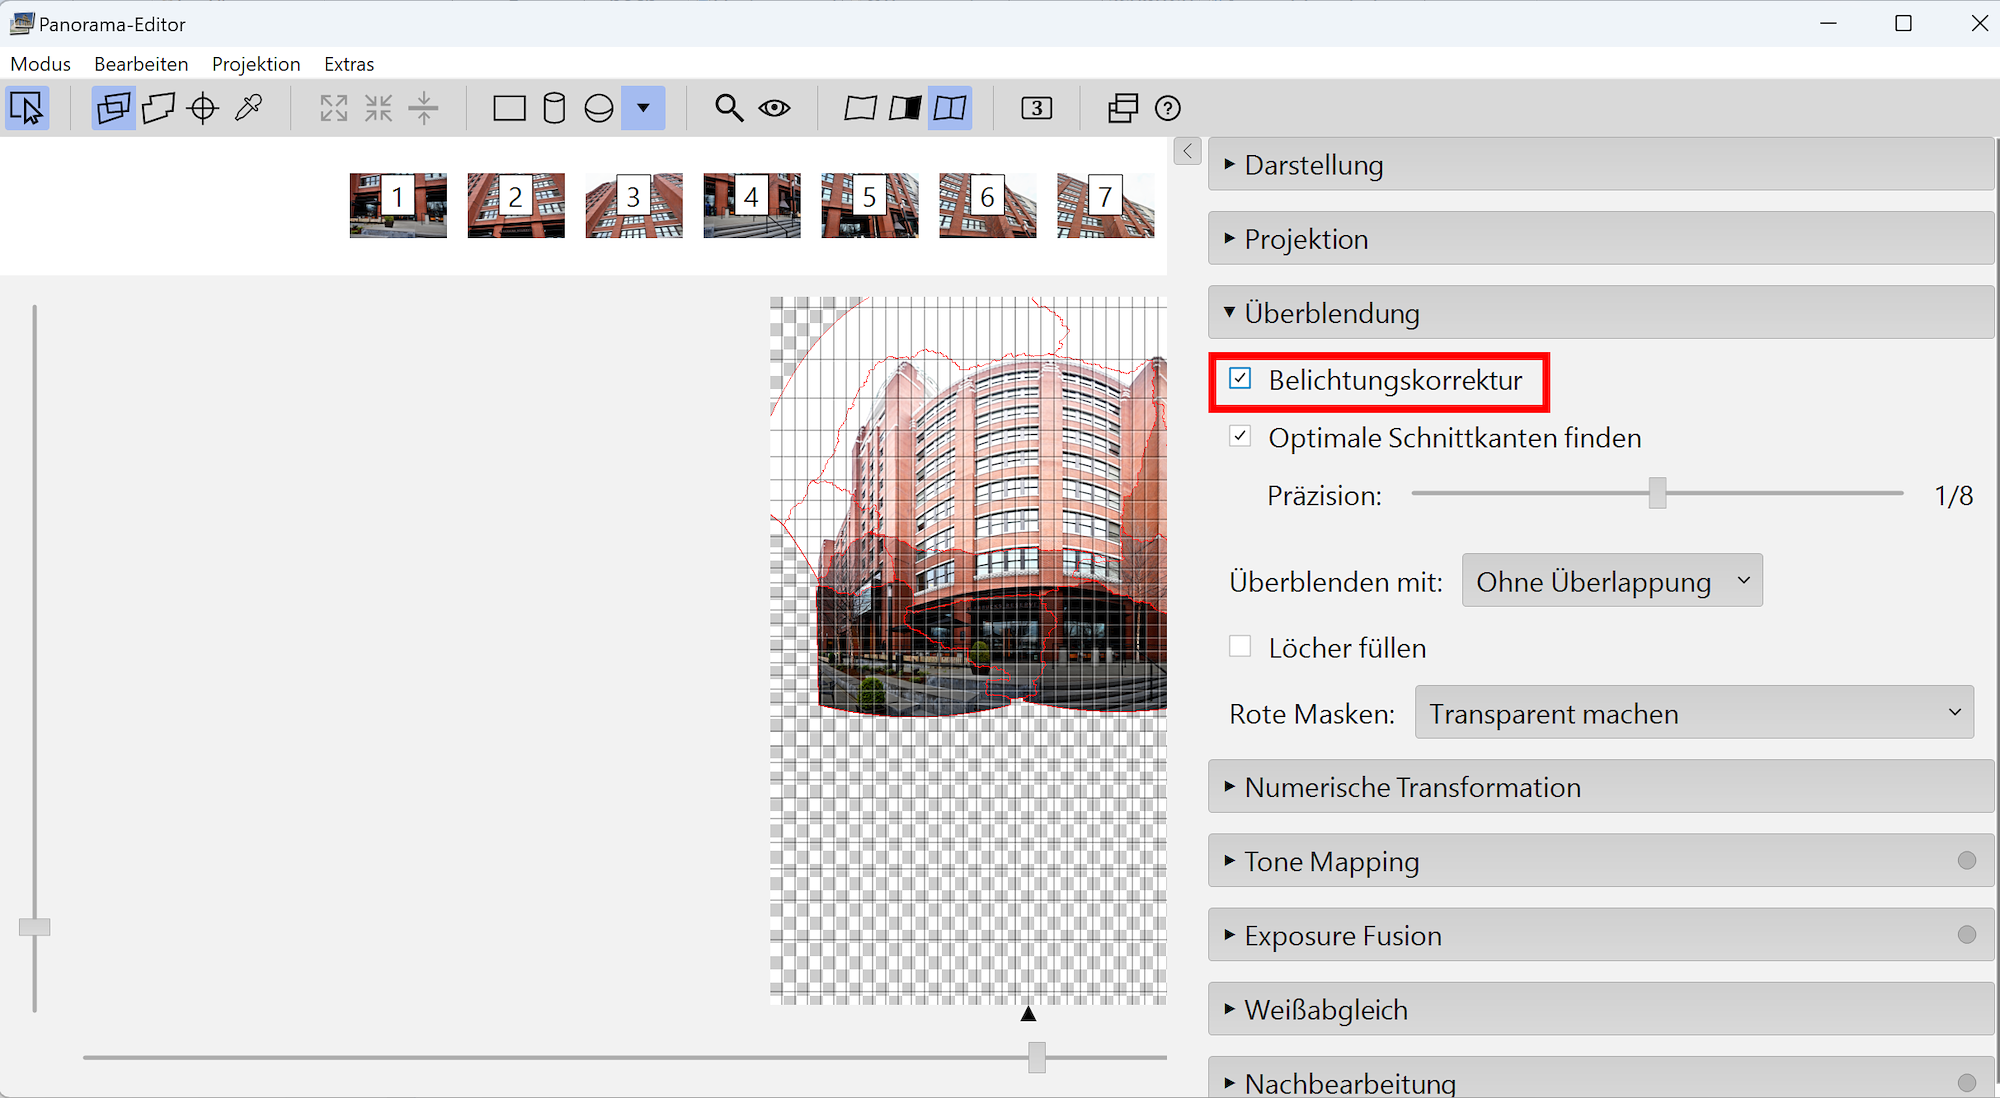
to disabled:
The pictures were aligned using the auto control point feature in PTGui. Only a few vertical control points were added.
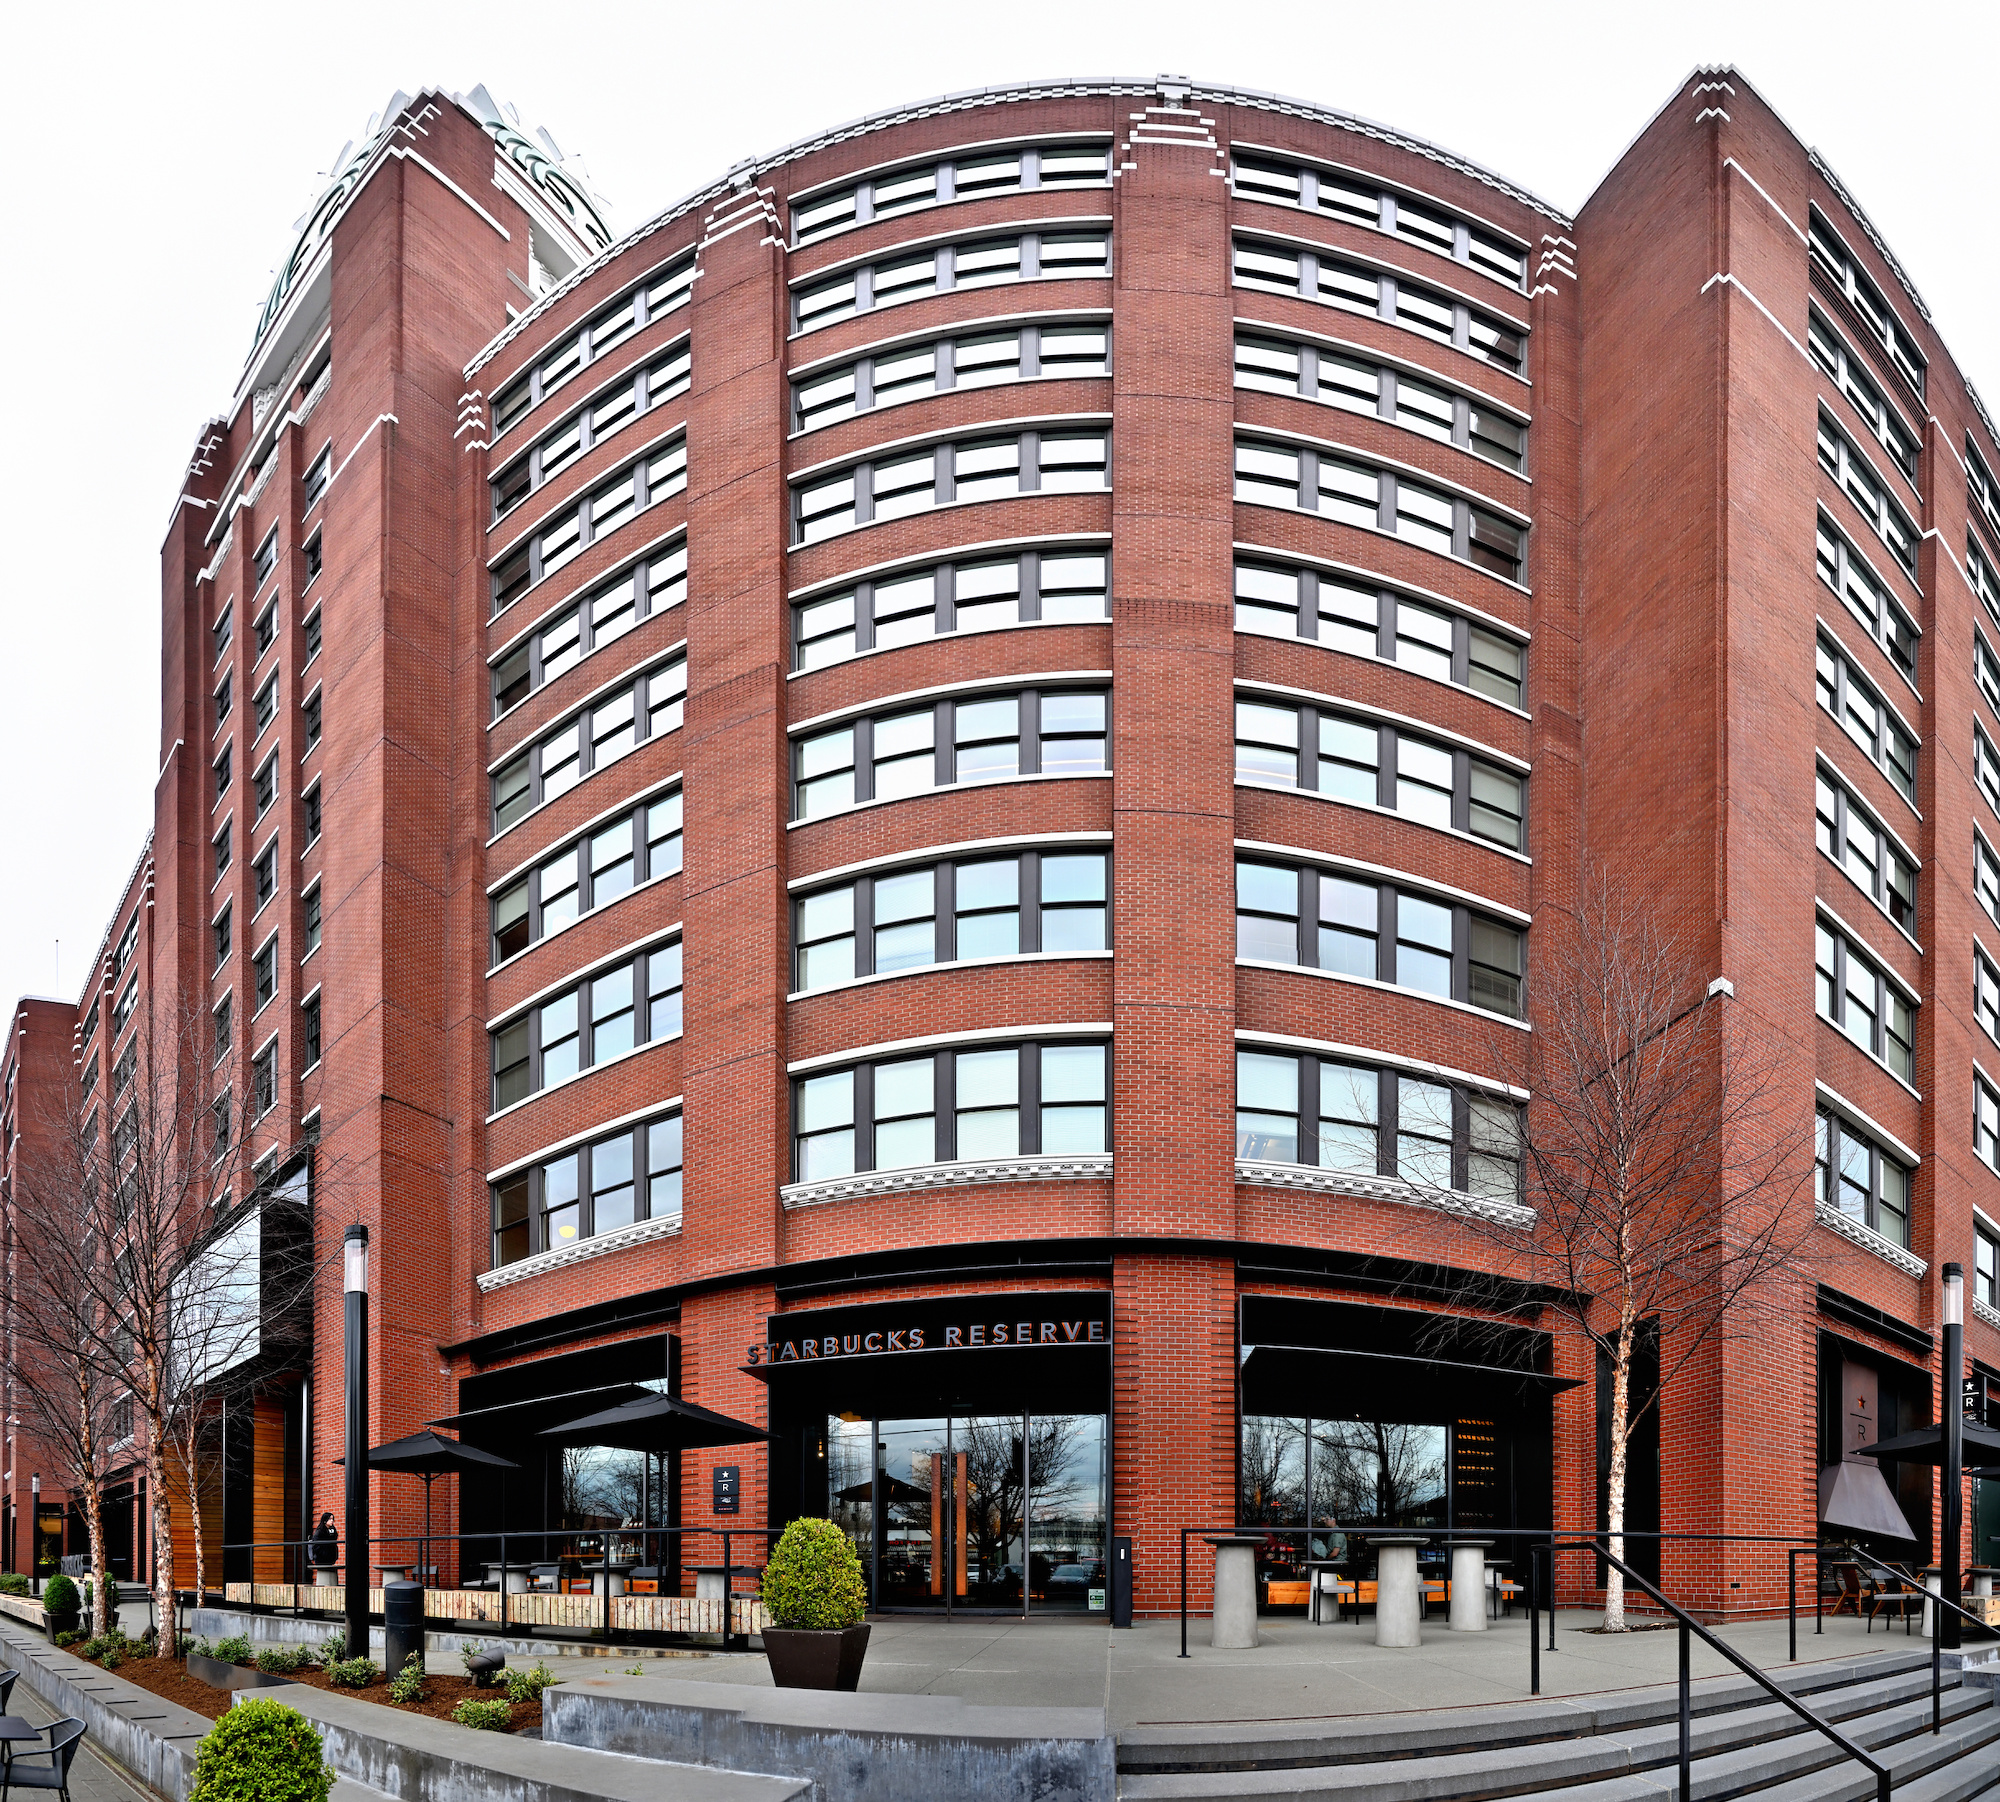
Using the Equirectangular projection:
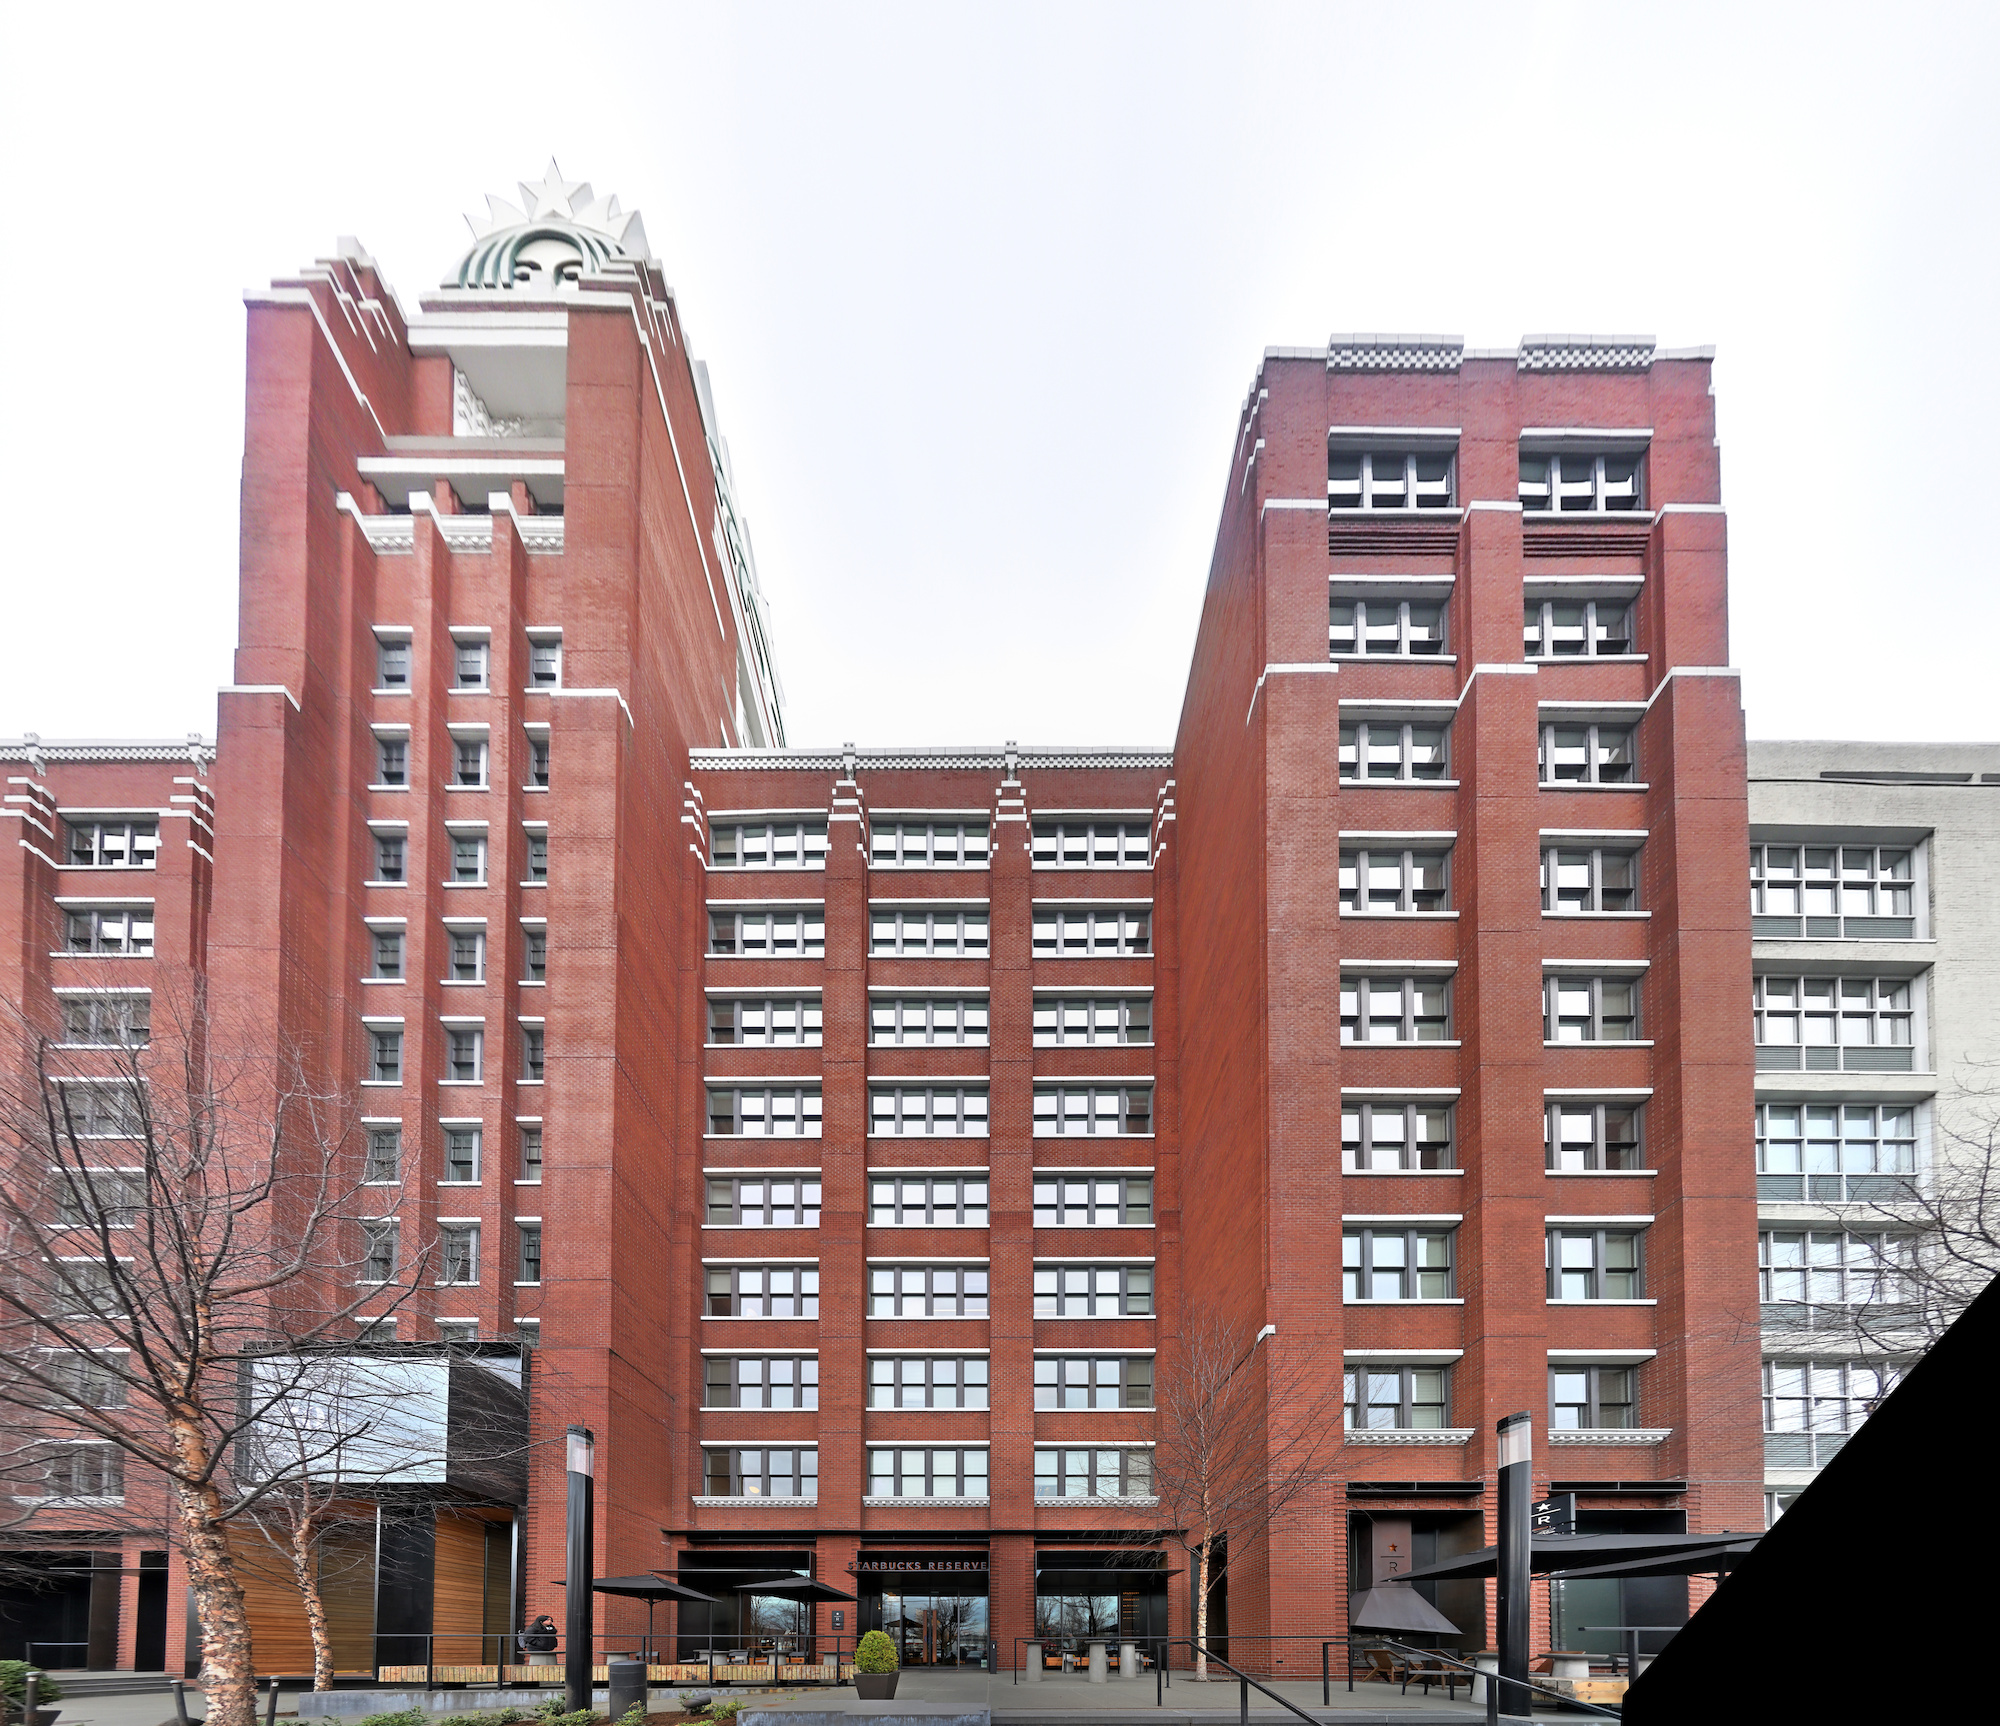
Using the Rectilinear projection.
Note the Company logo on top of the left tower:
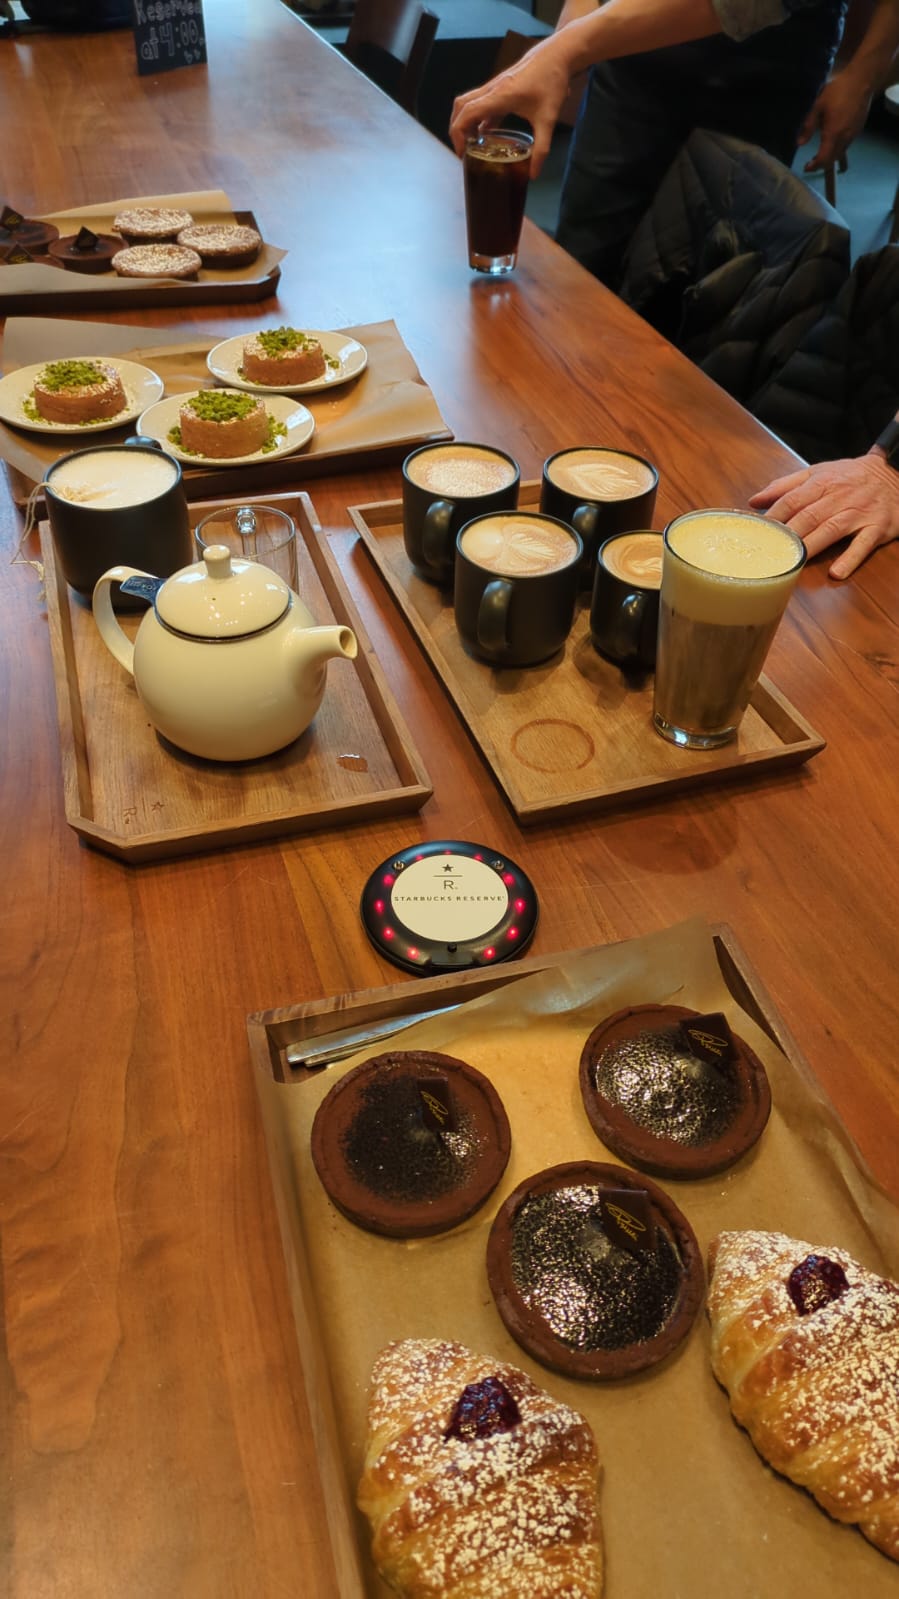
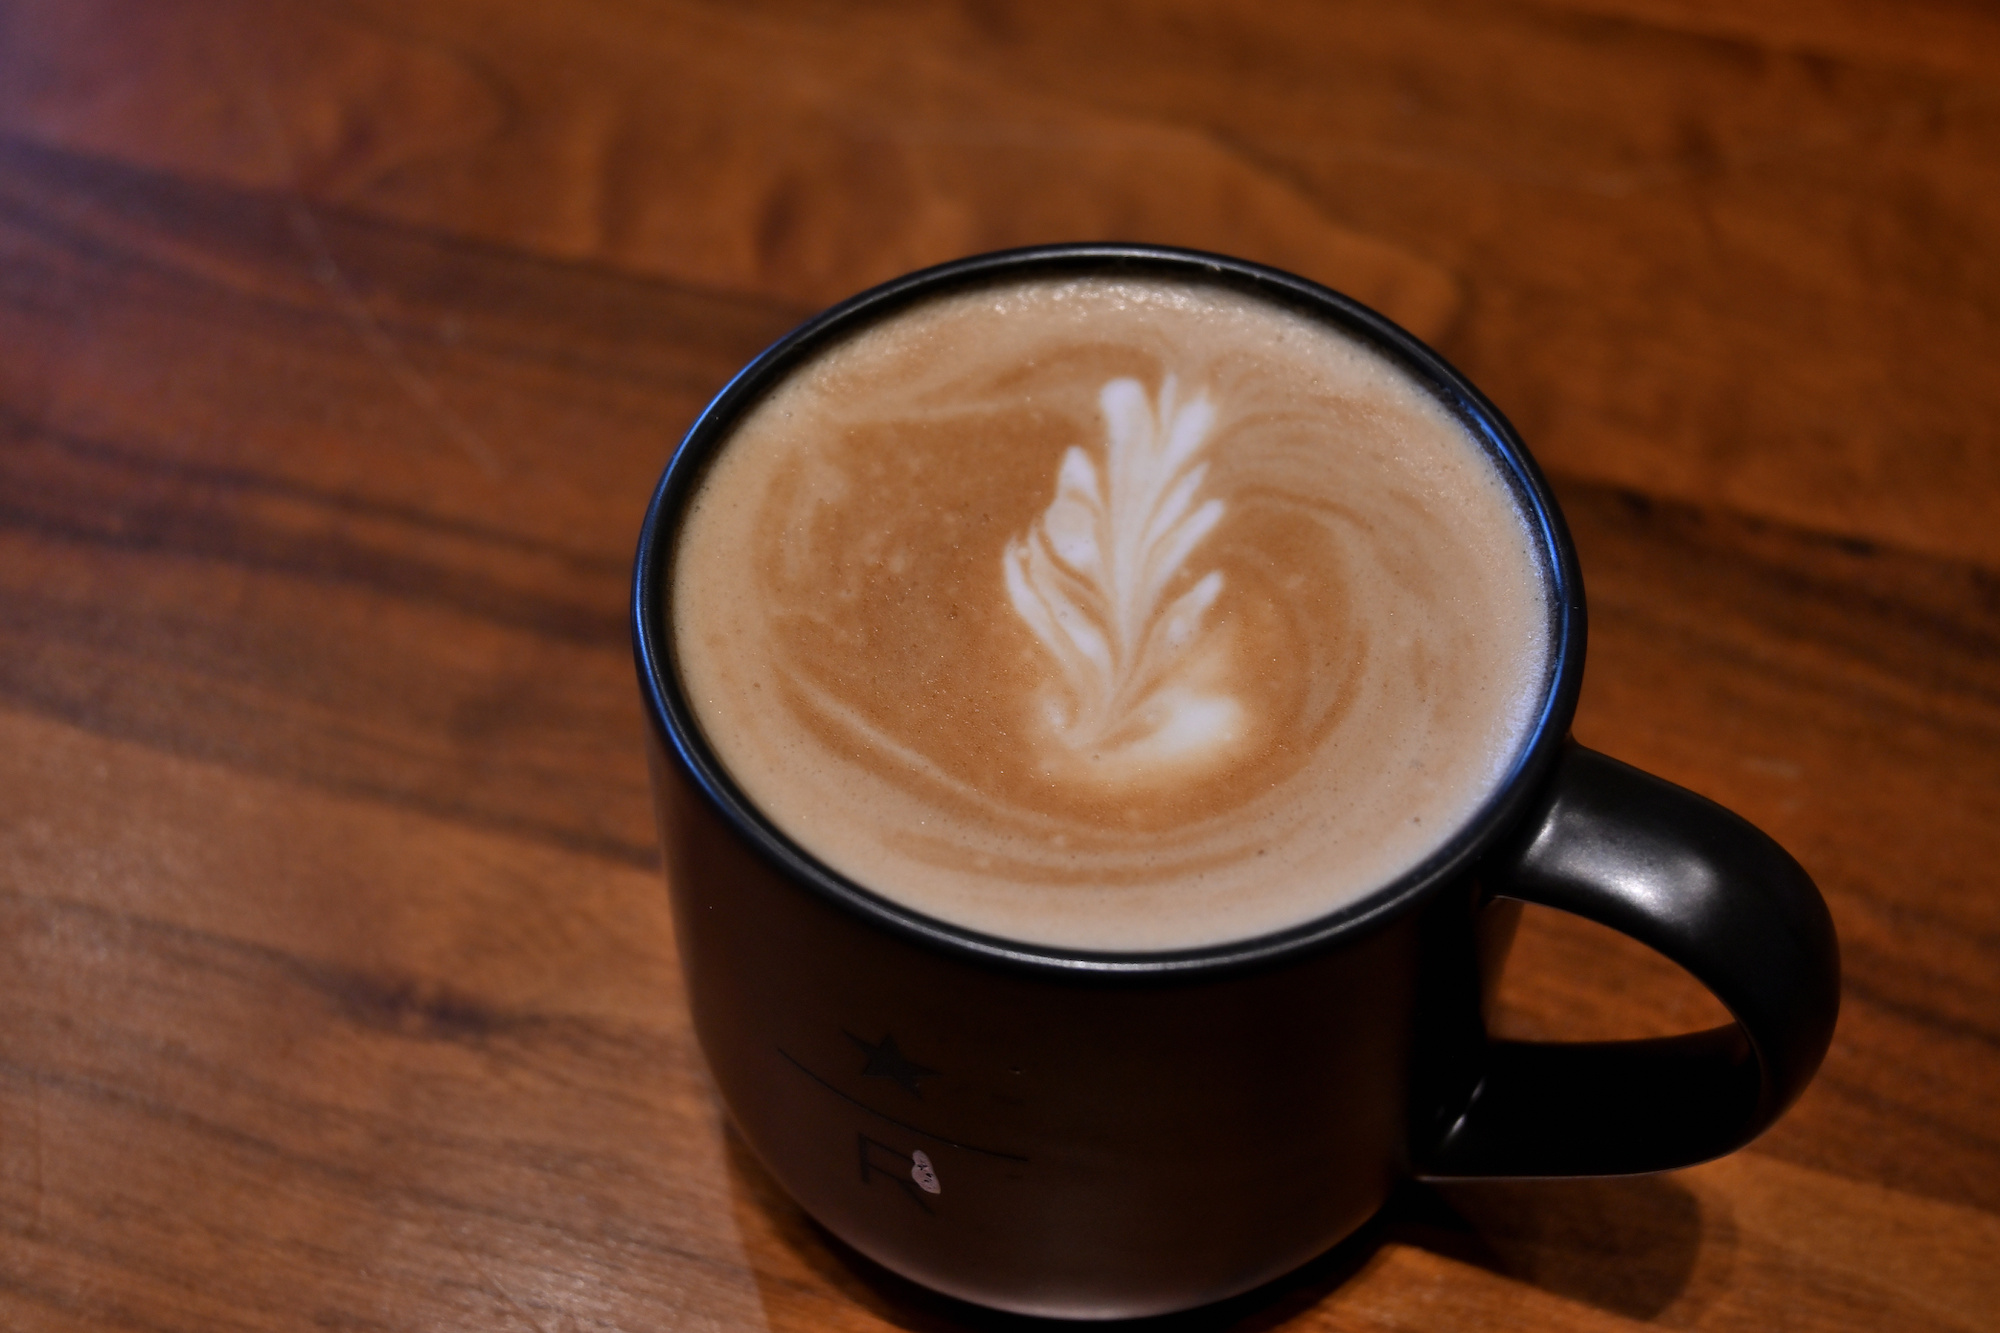
Panorama outside, ☕🥧🥐 inside