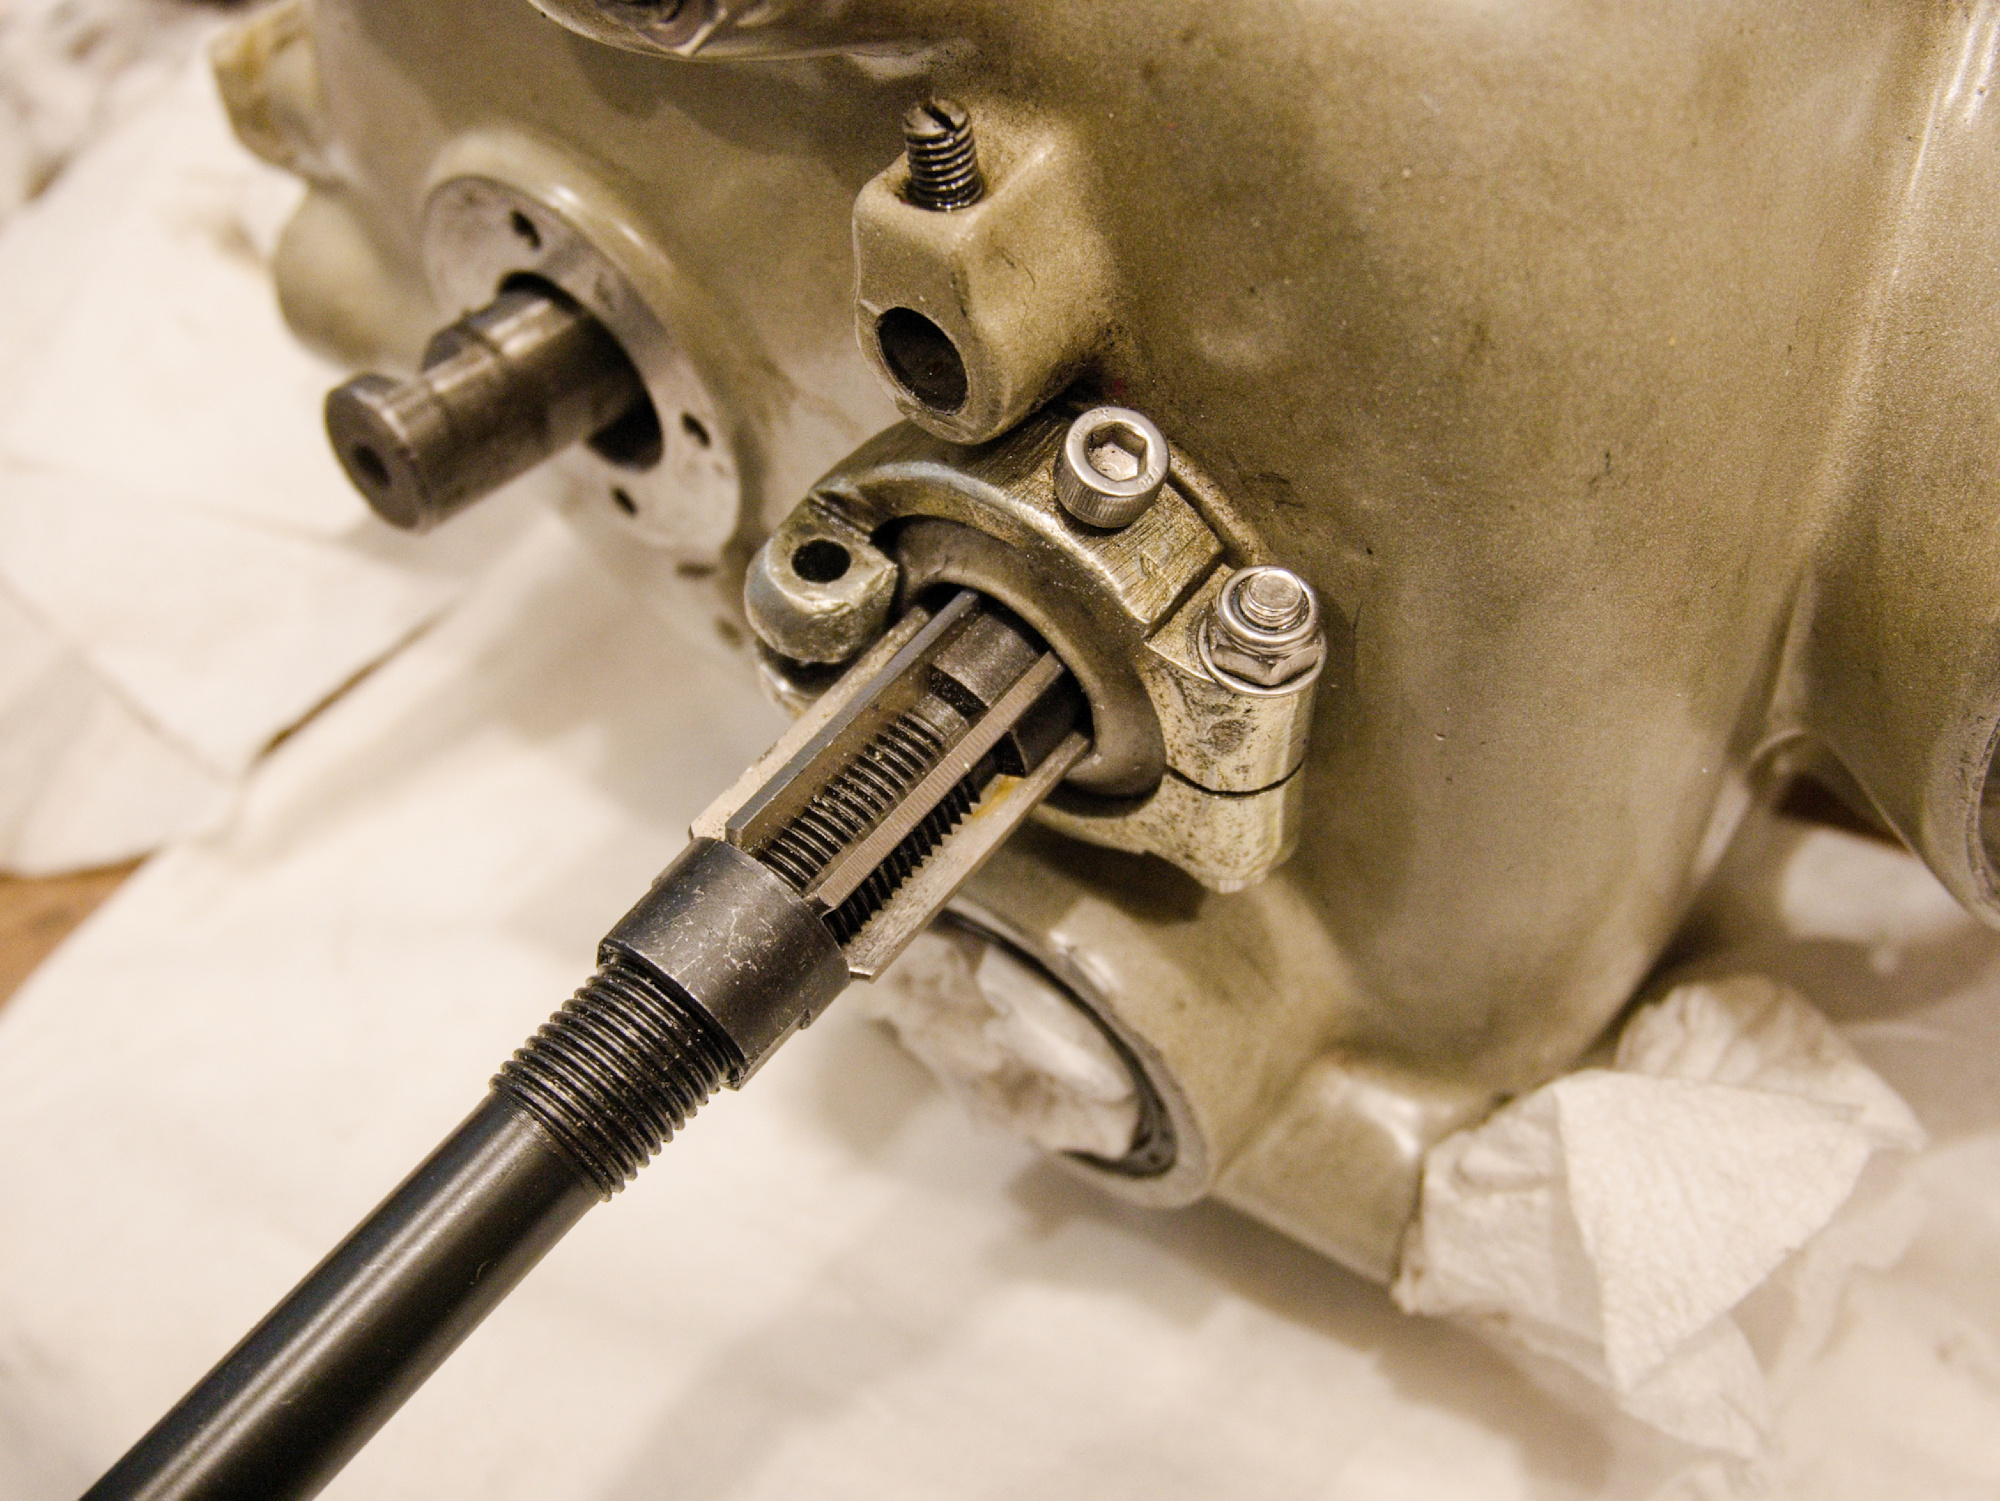
Before the gear shaft gets installed, use a reamer to slightly remove the uneven wear caused by the clutch push rod. This is a common place for oil leaks.
Put in the transmission rod half way for the reverse gear shifter.
Slide in the reverse gear shifter.
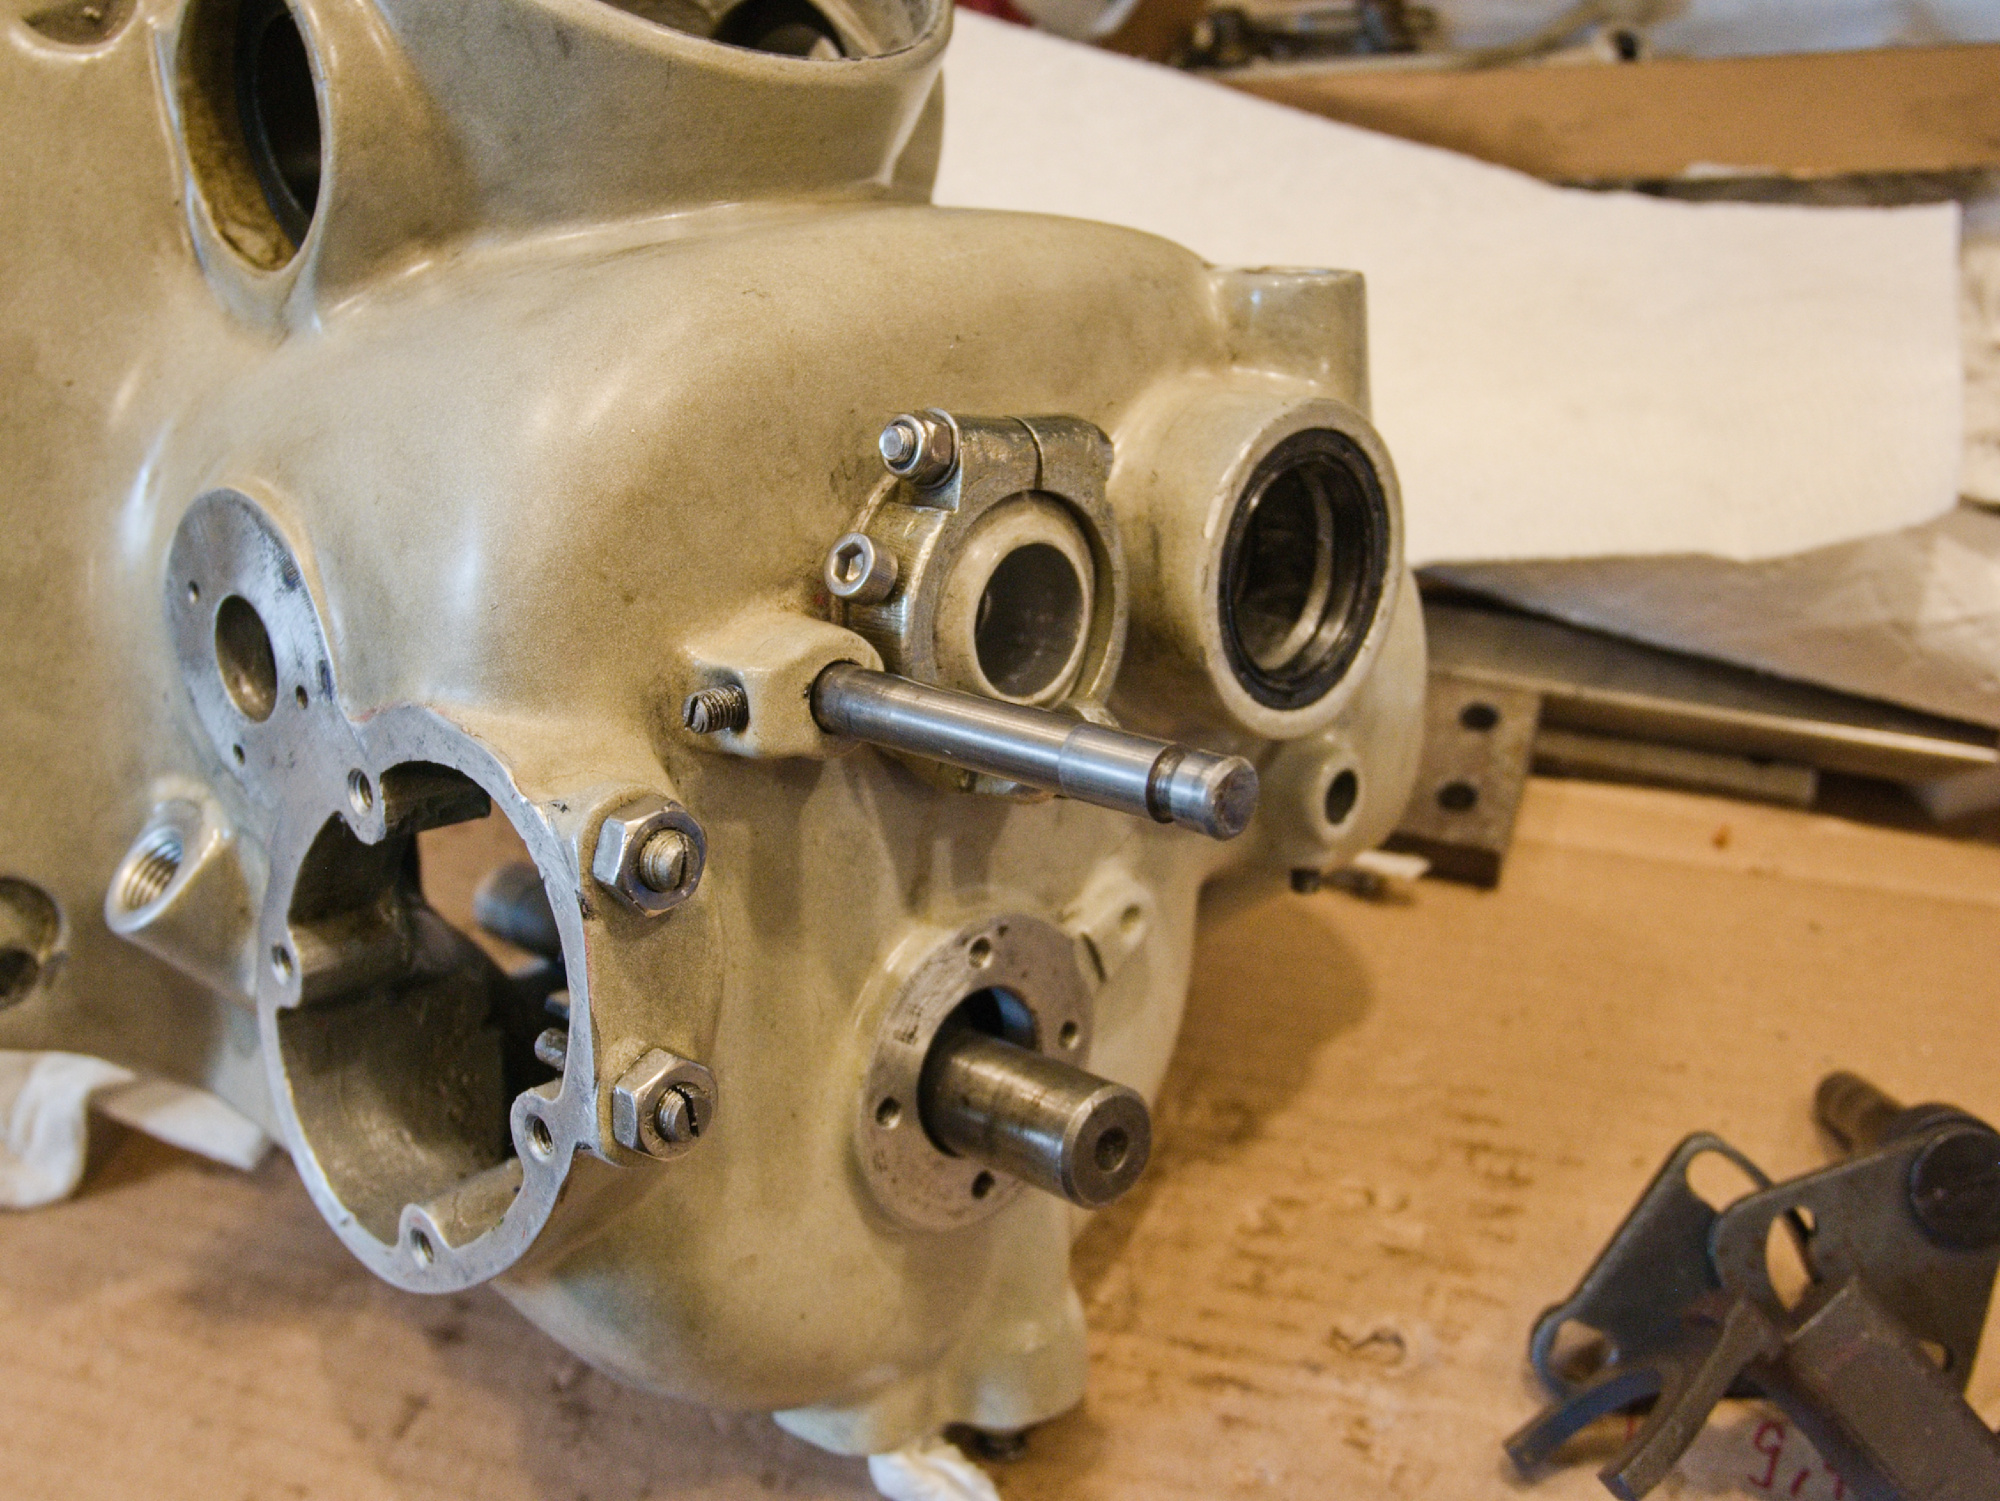
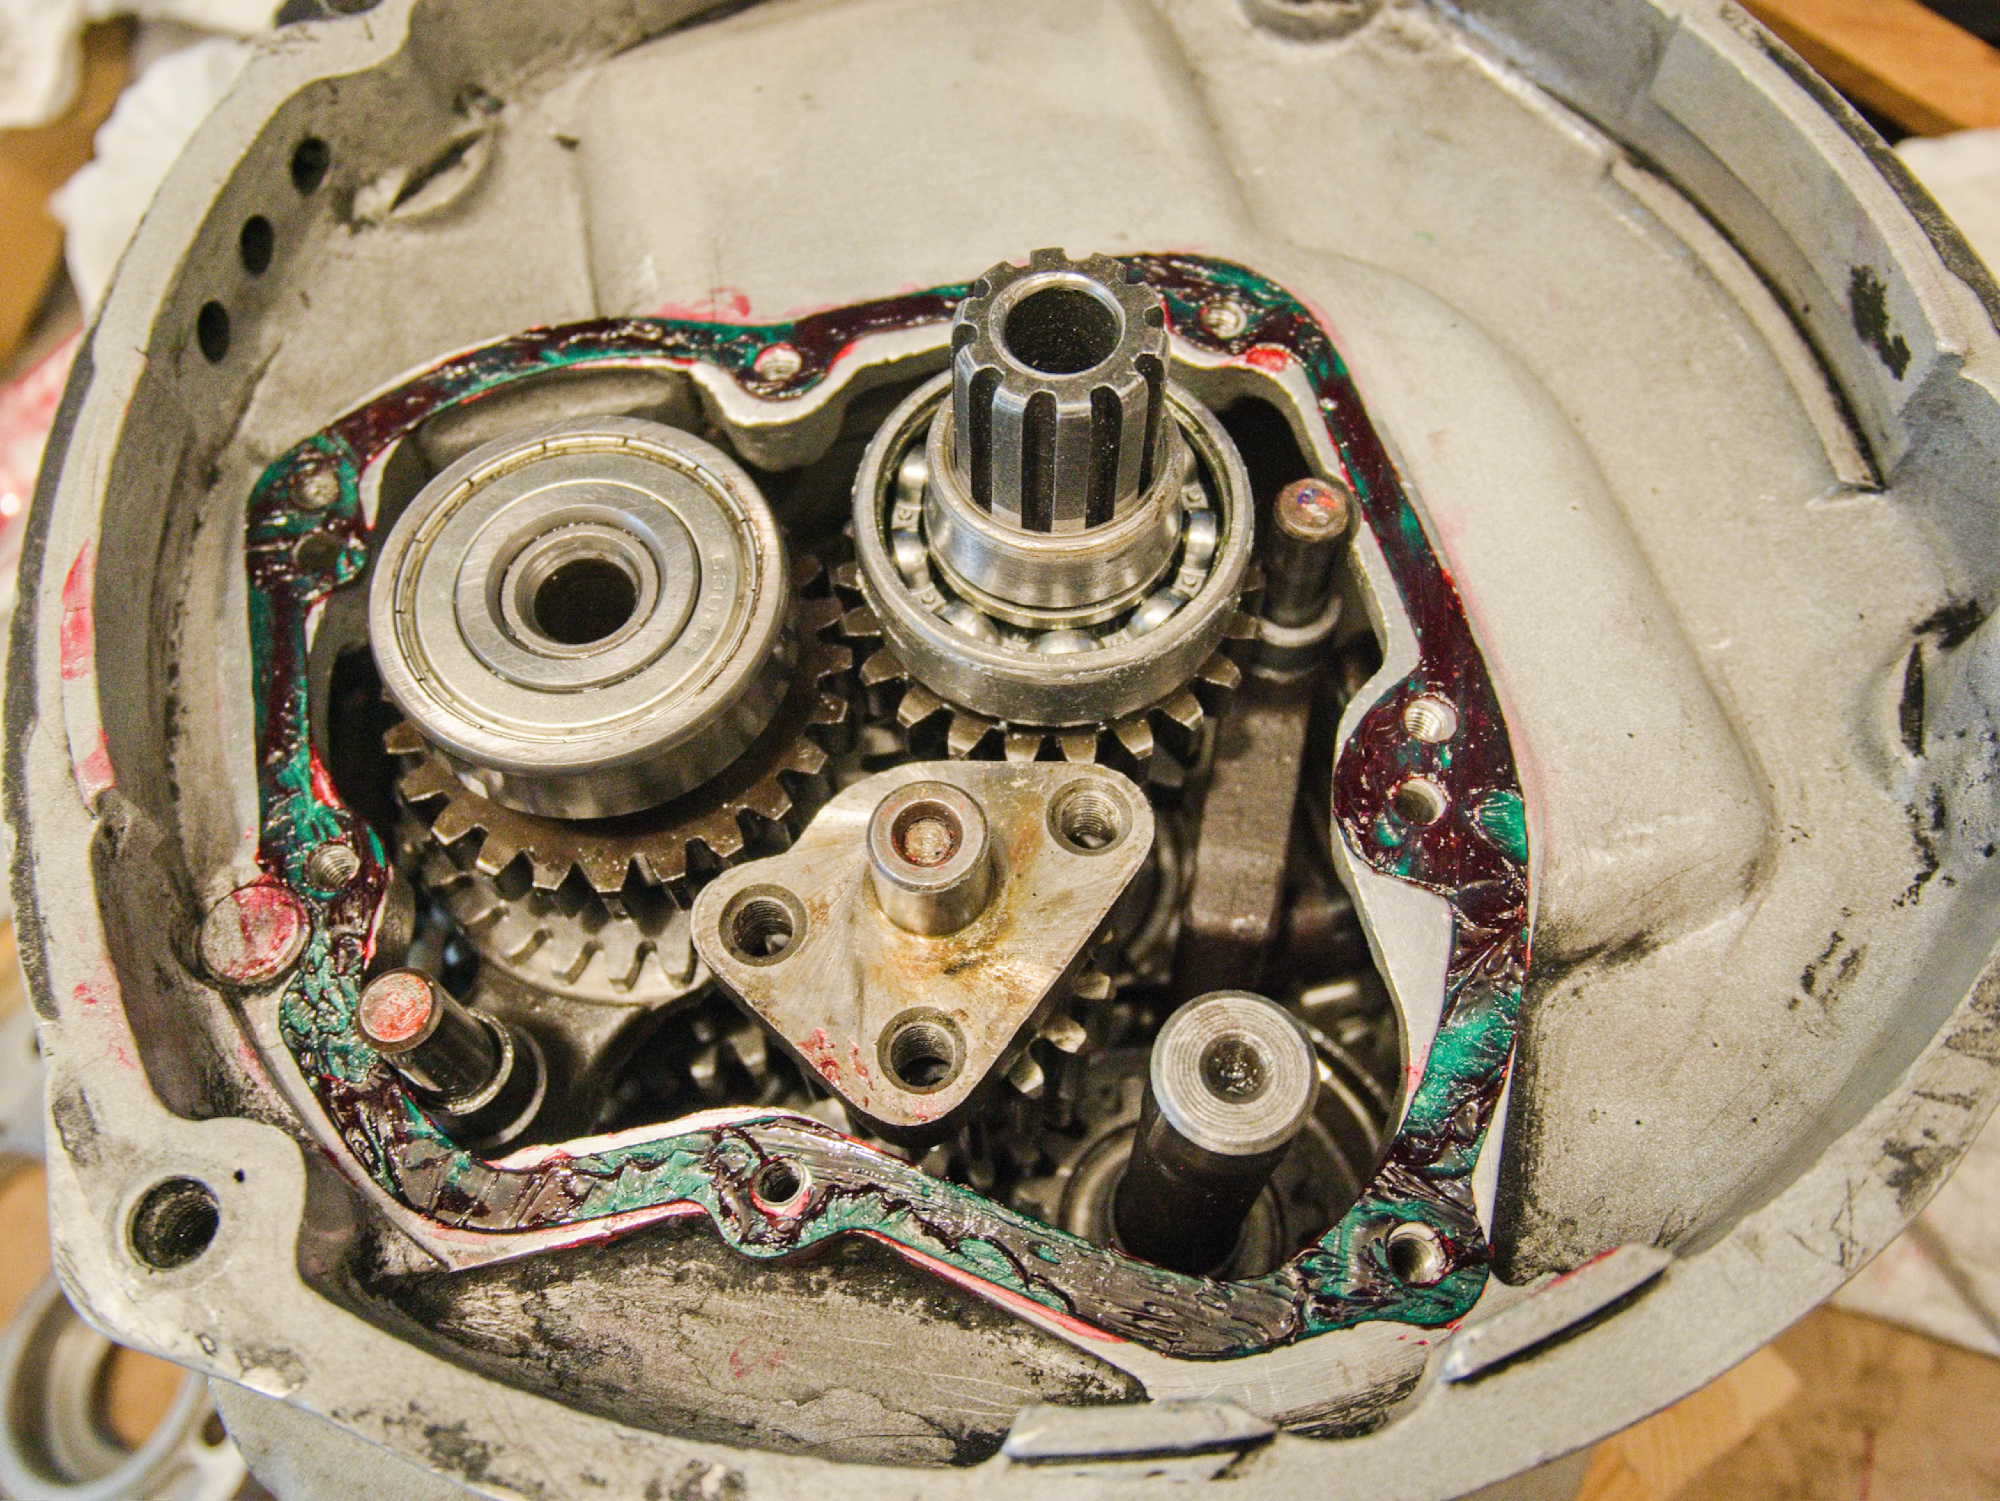
Insert the input shaft and make sure it spins freely.
The bearing has pieces of aluminium foil glued on for a perfect fit.
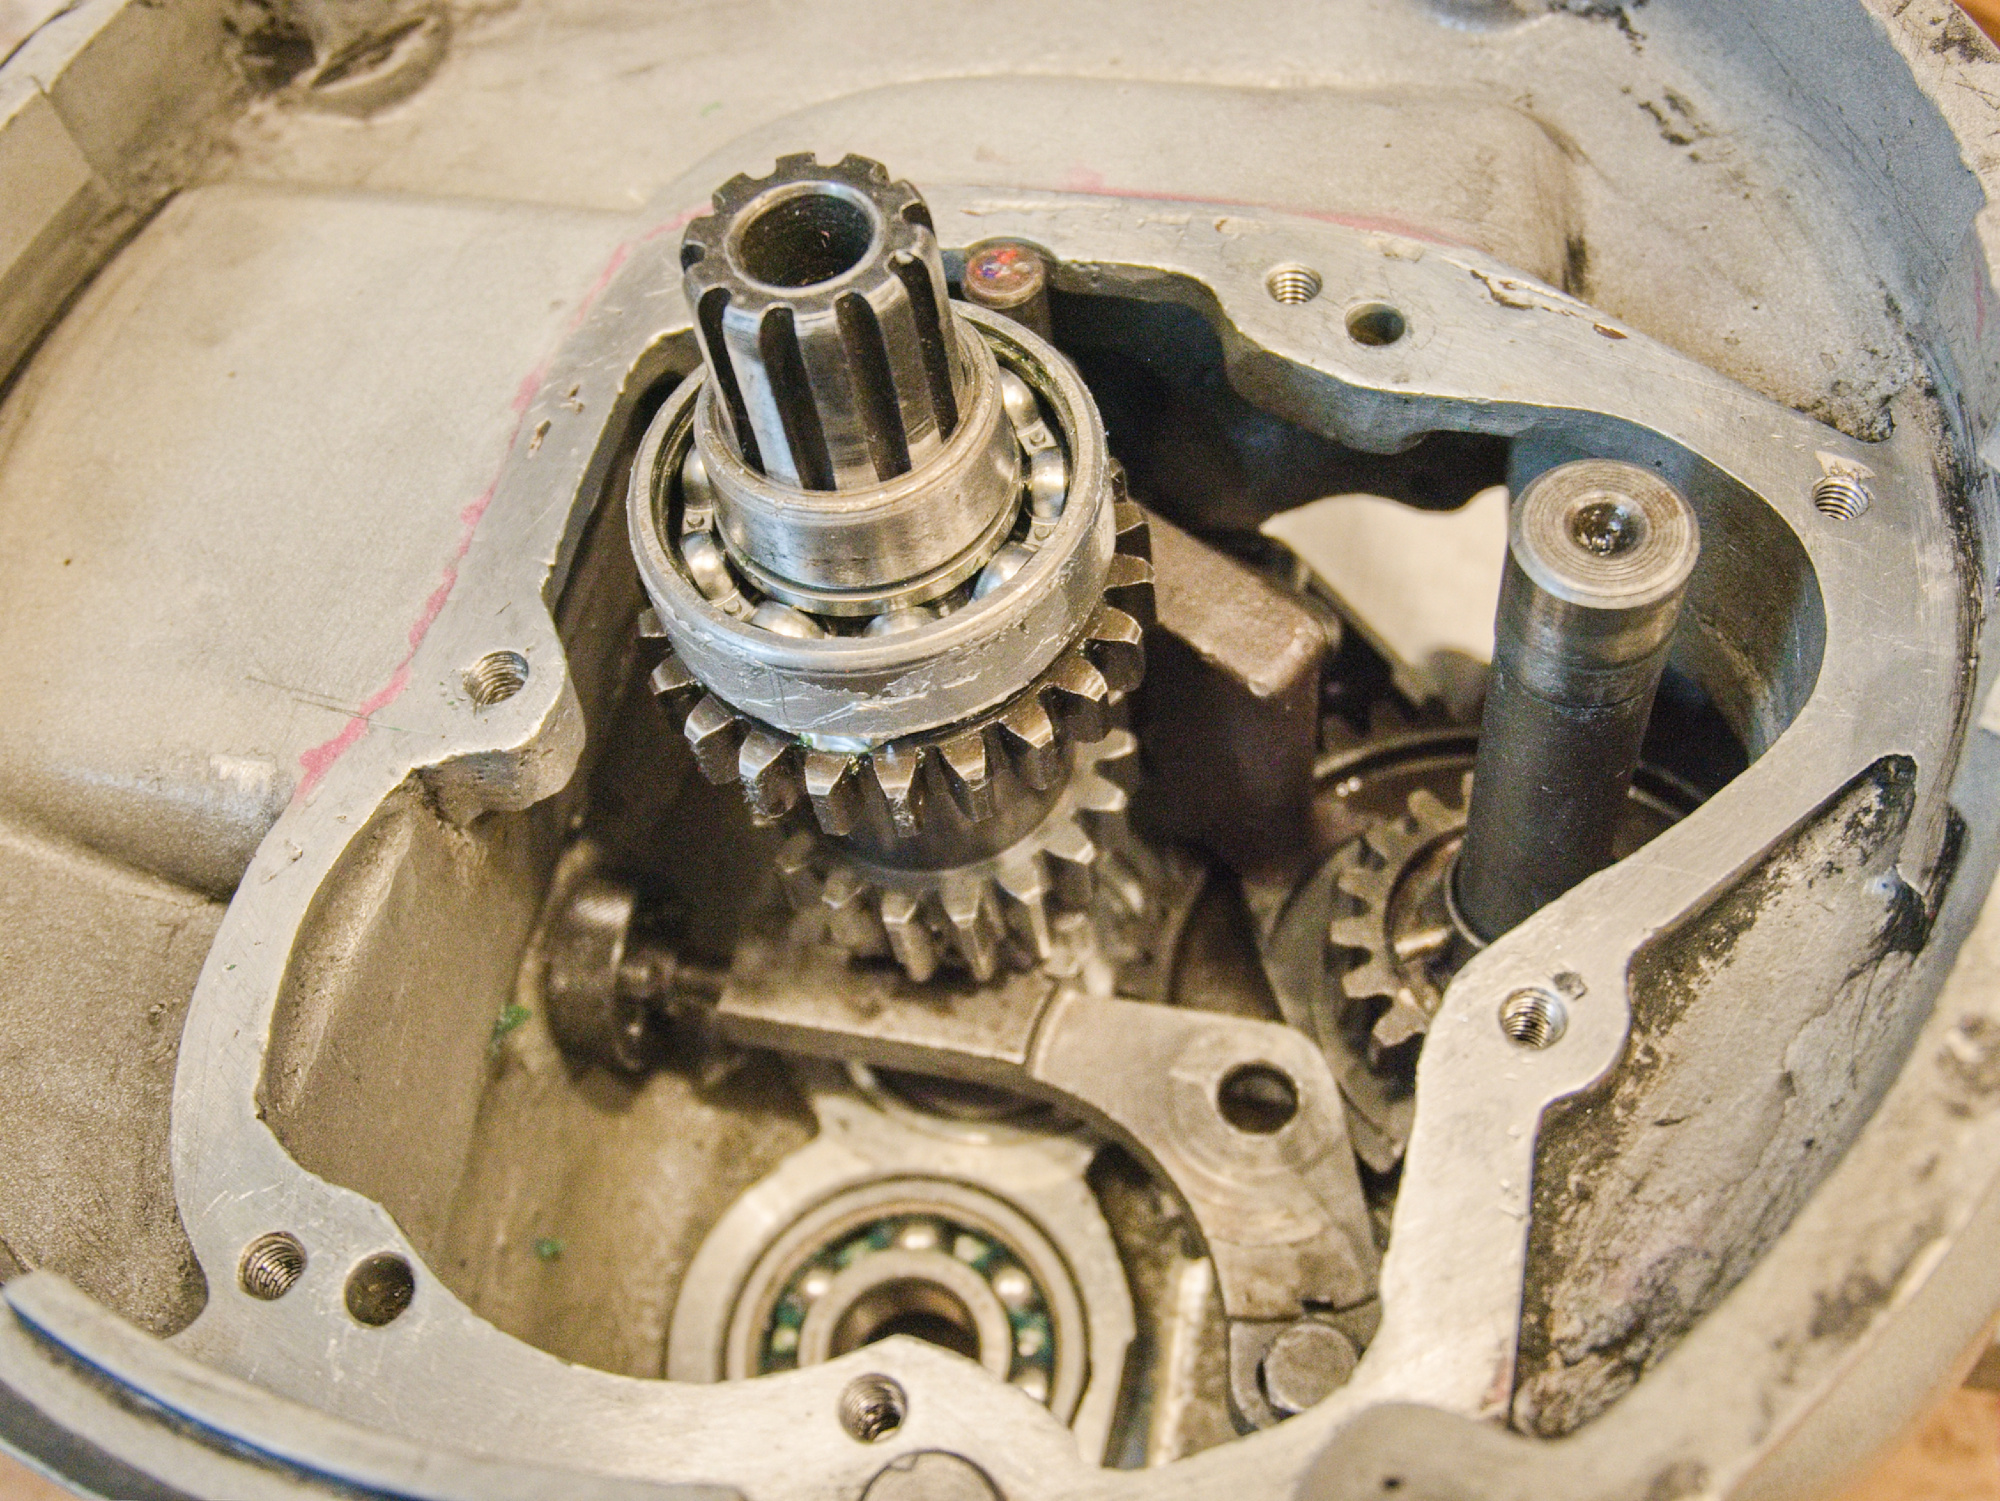
Insert the reverse gear shaft.
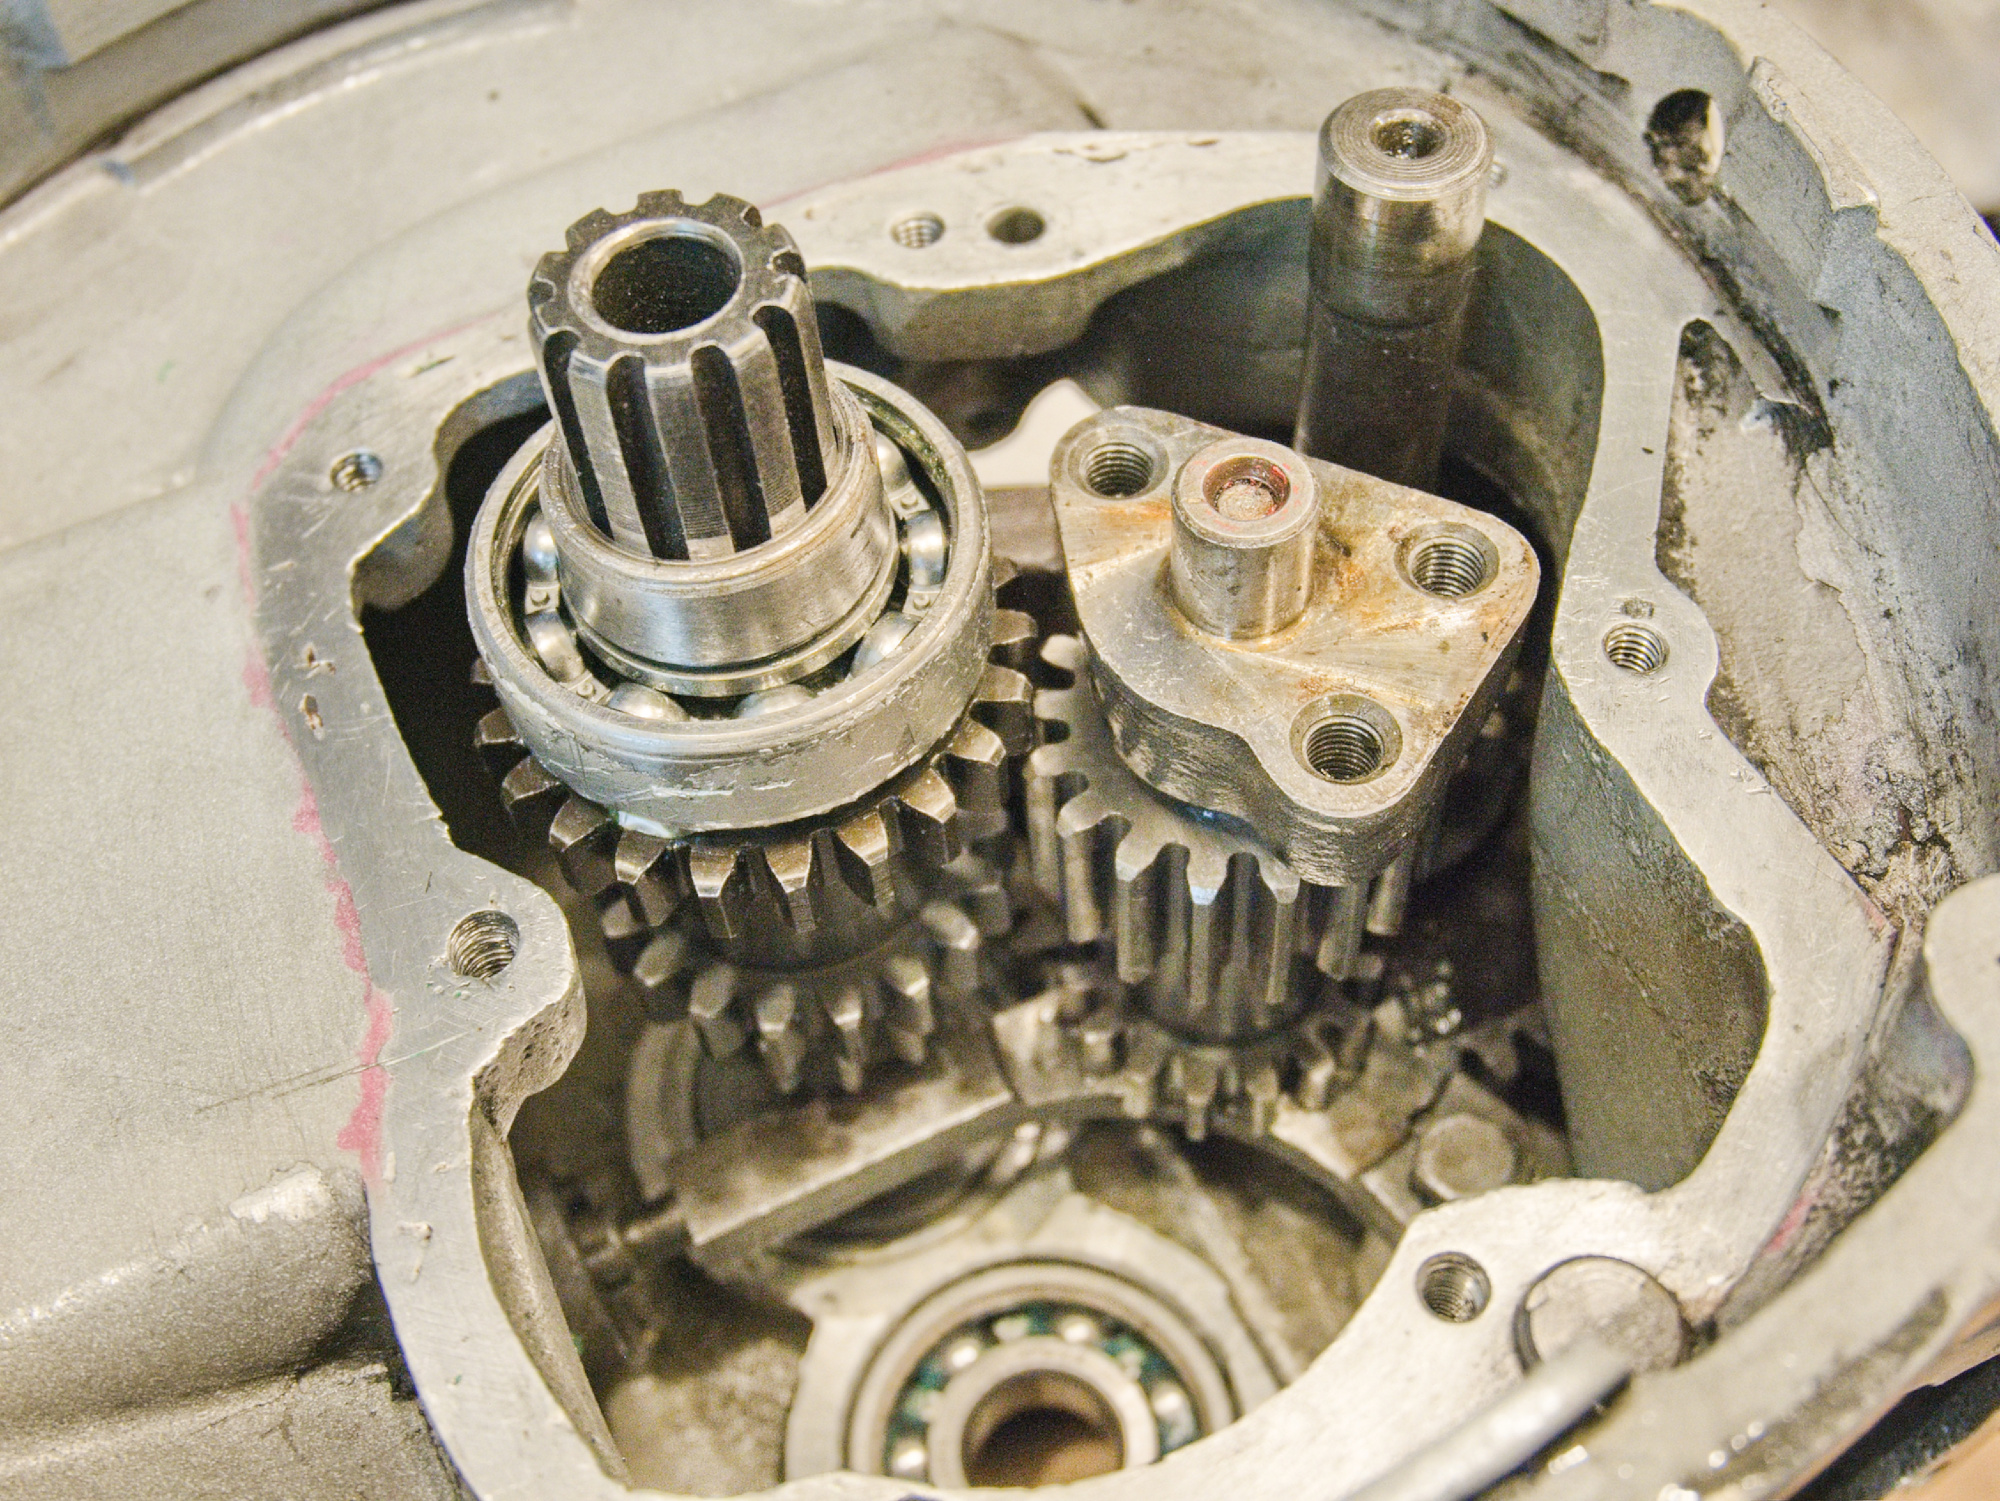
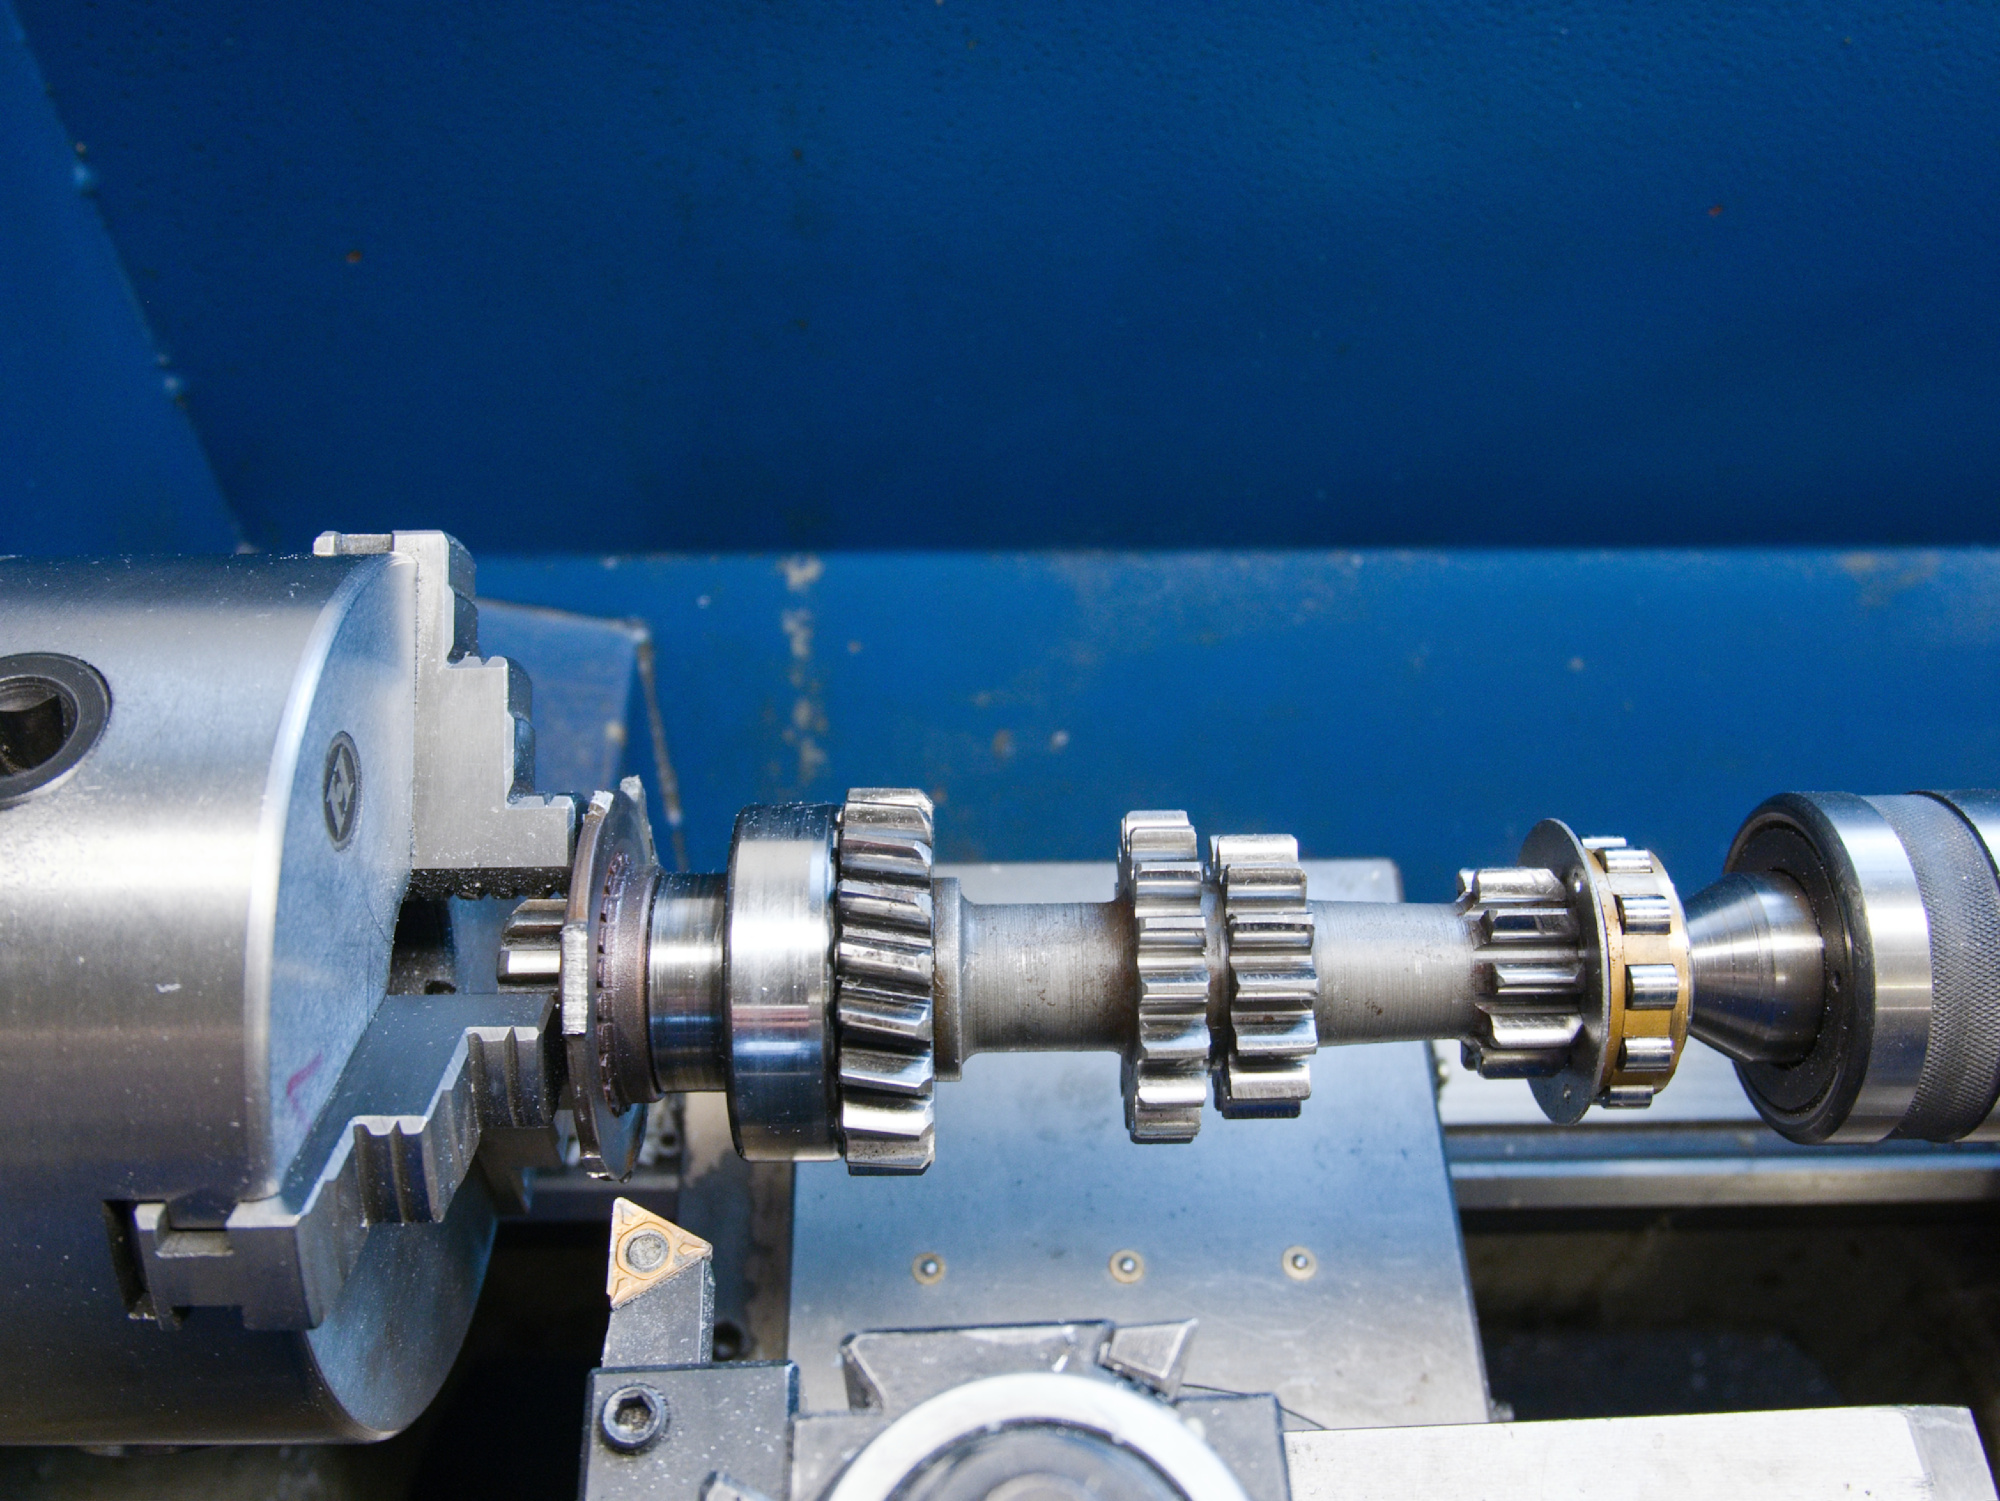
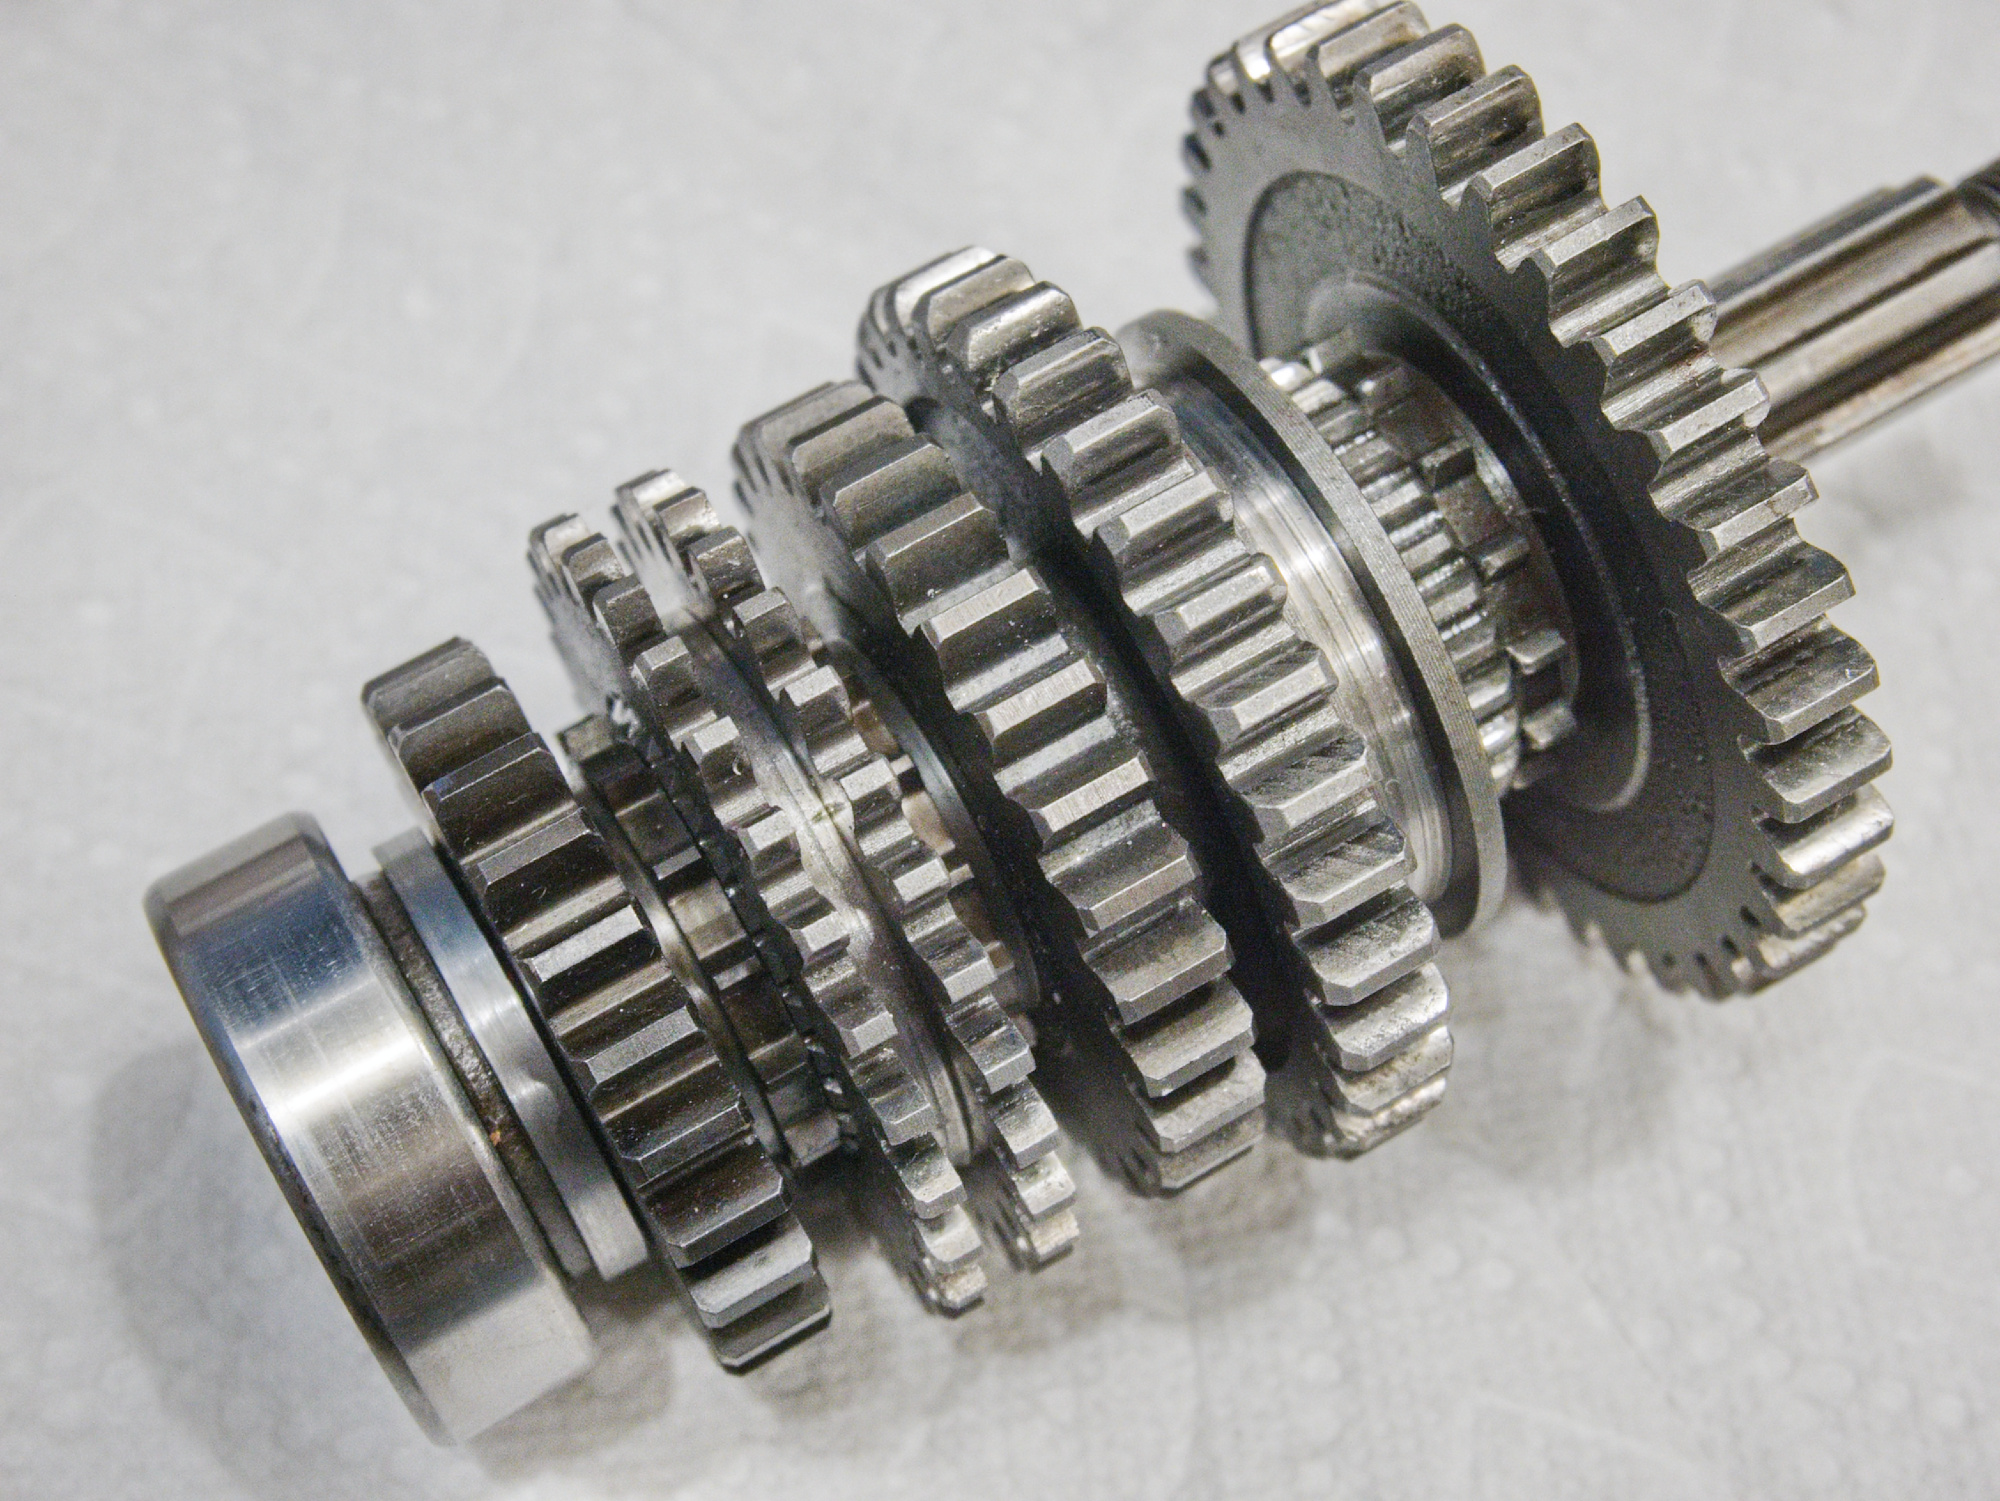
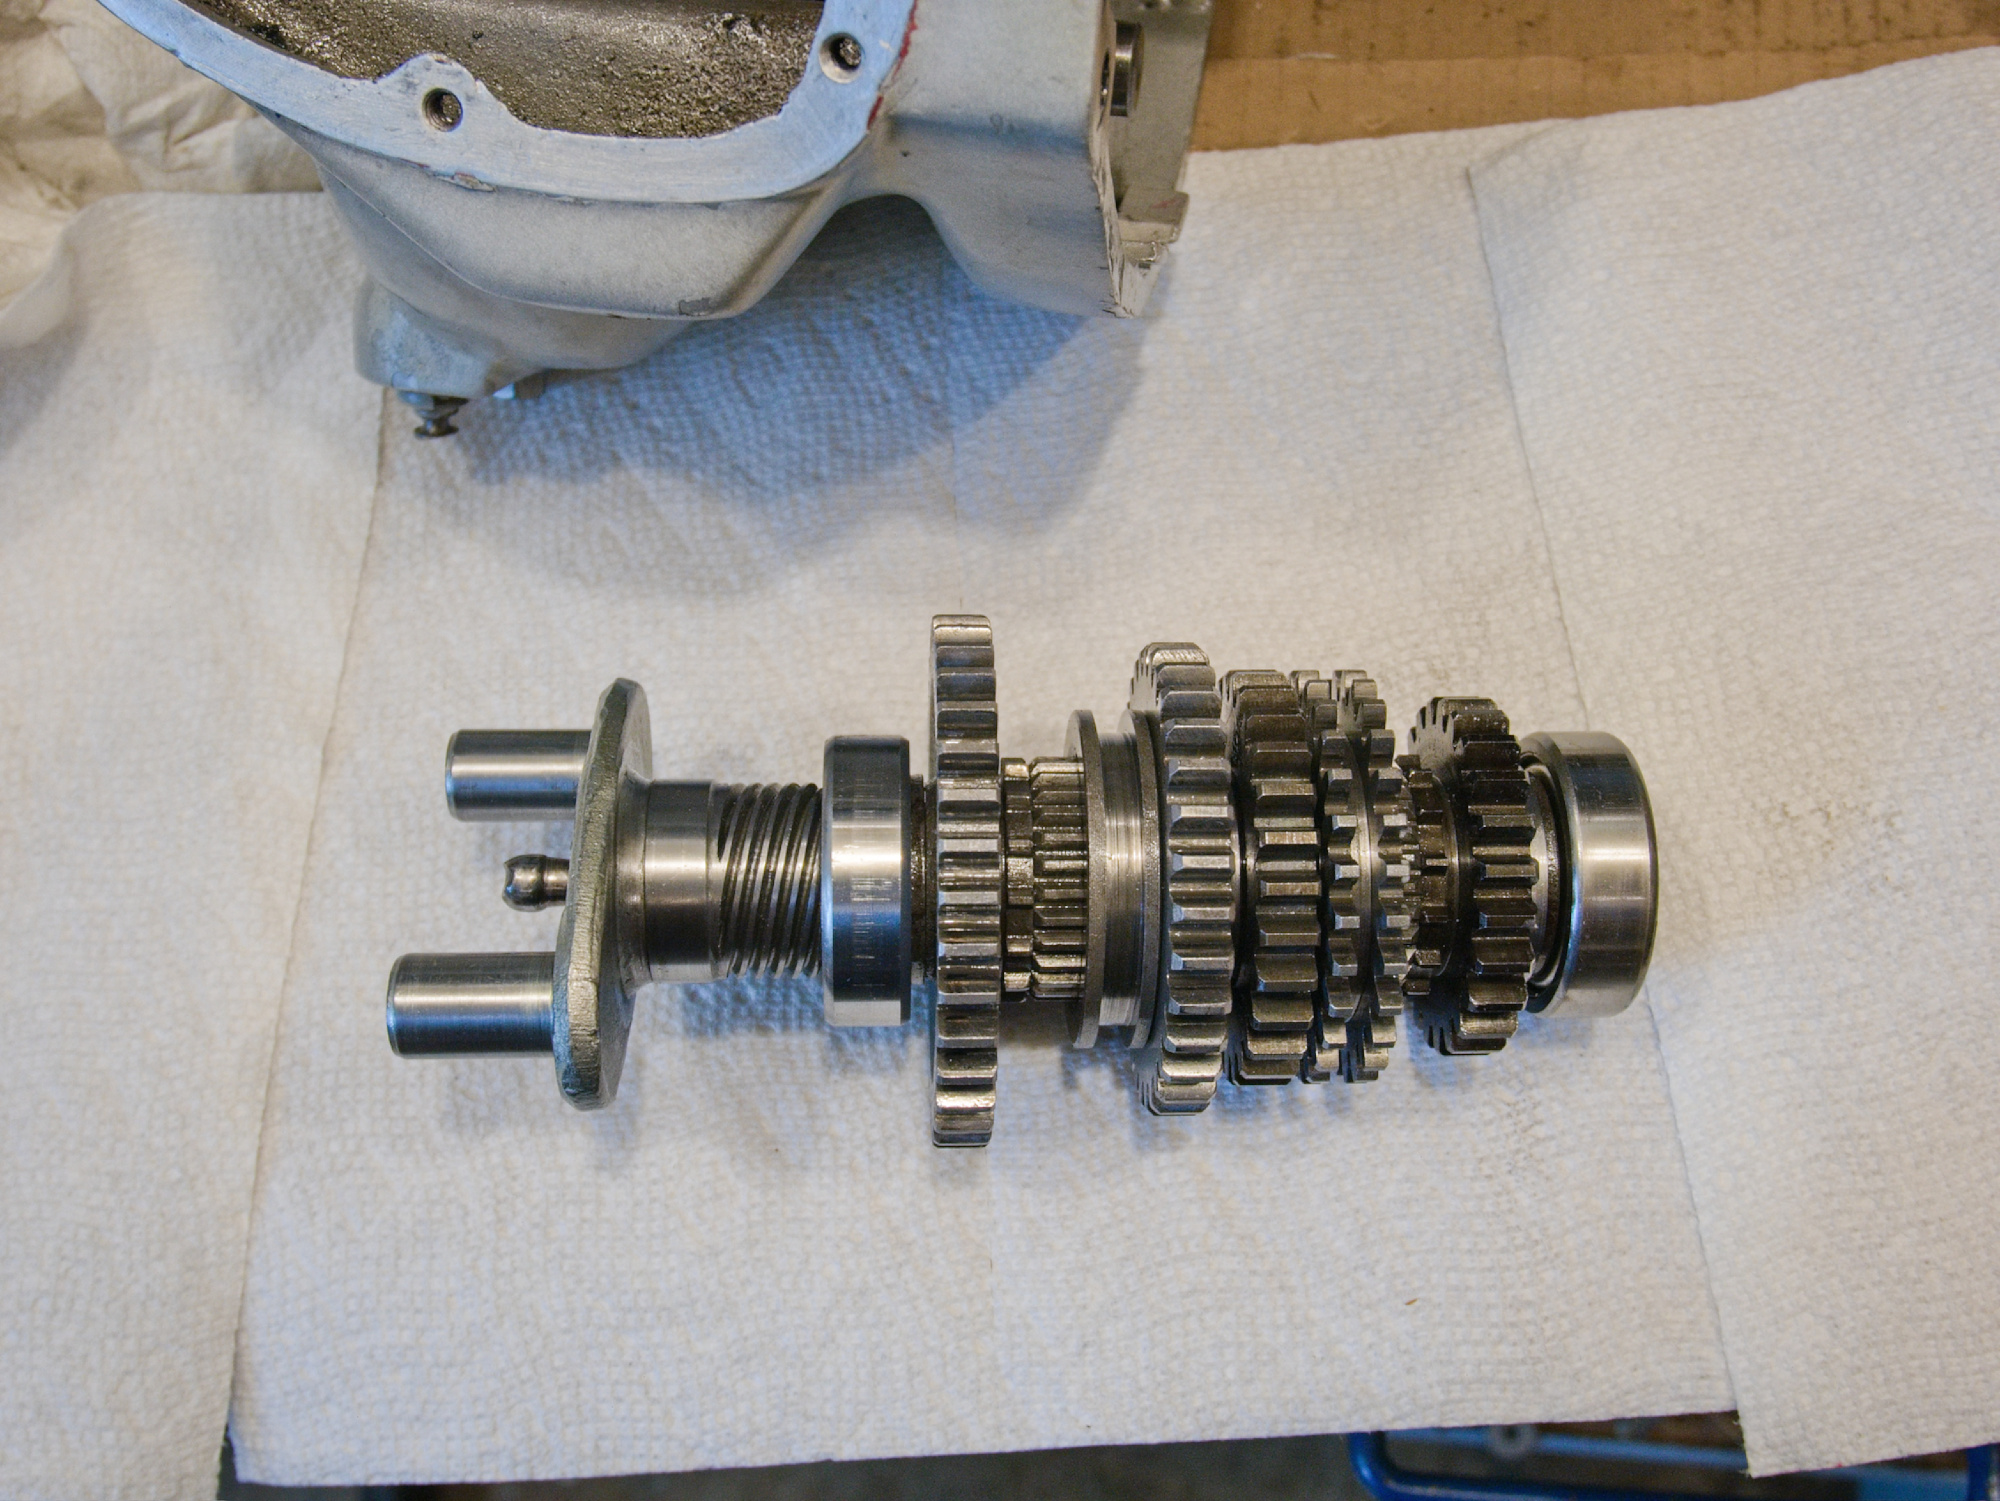
Insert the output shaft. What works best is to put in the individual gears first on a small rod. Then push the axle through once all gears are in place.
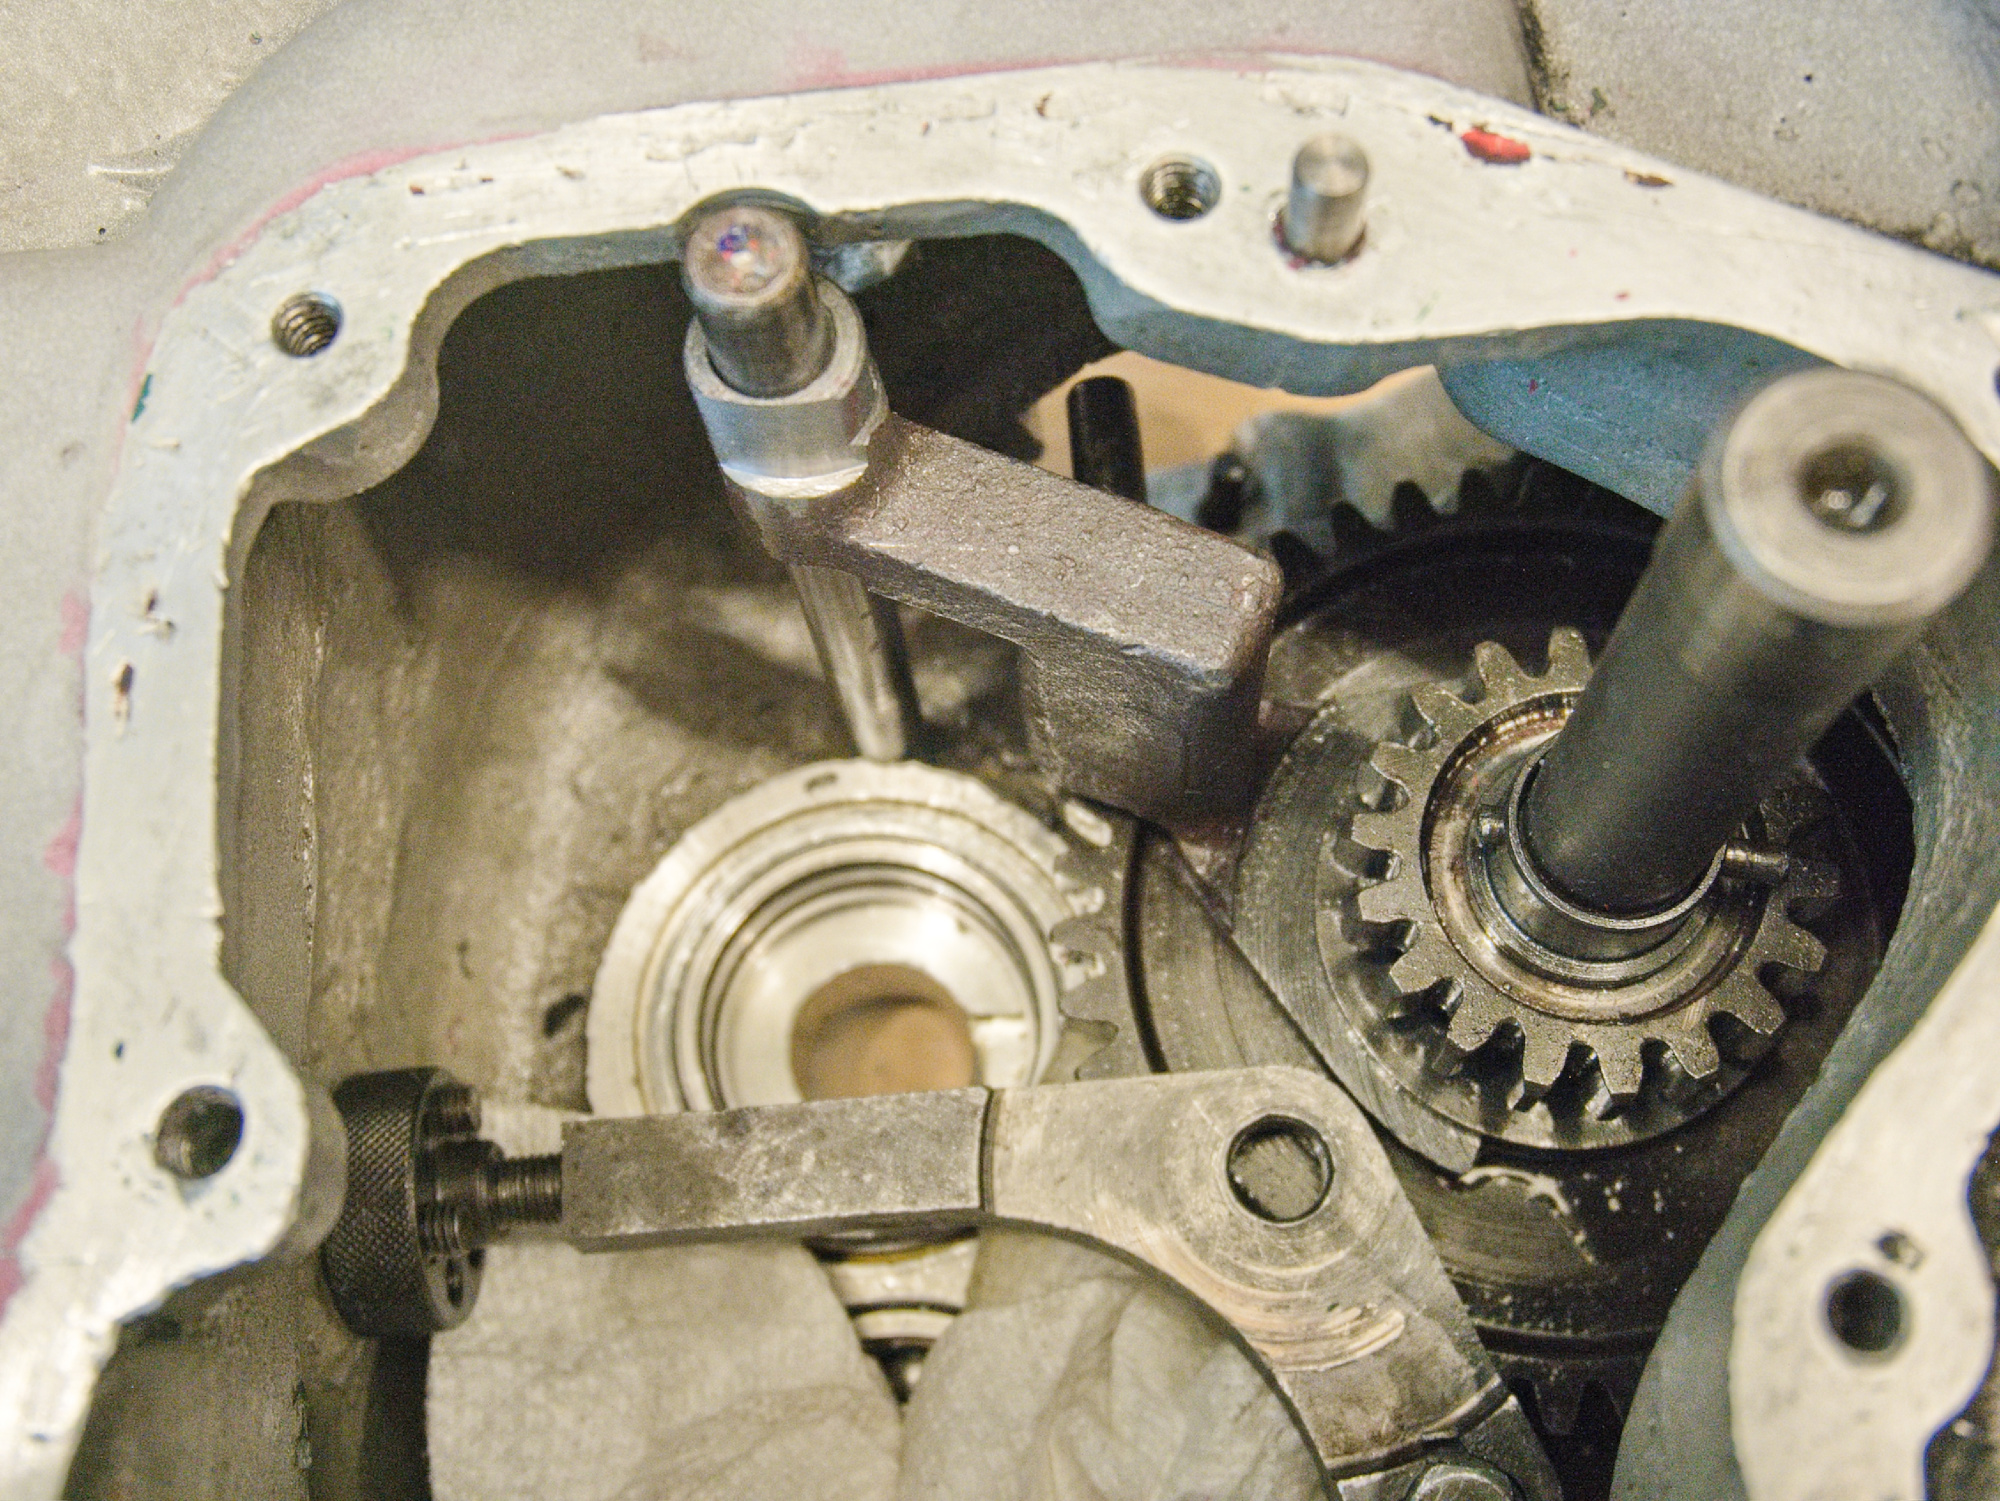
All gears should perfectly match.

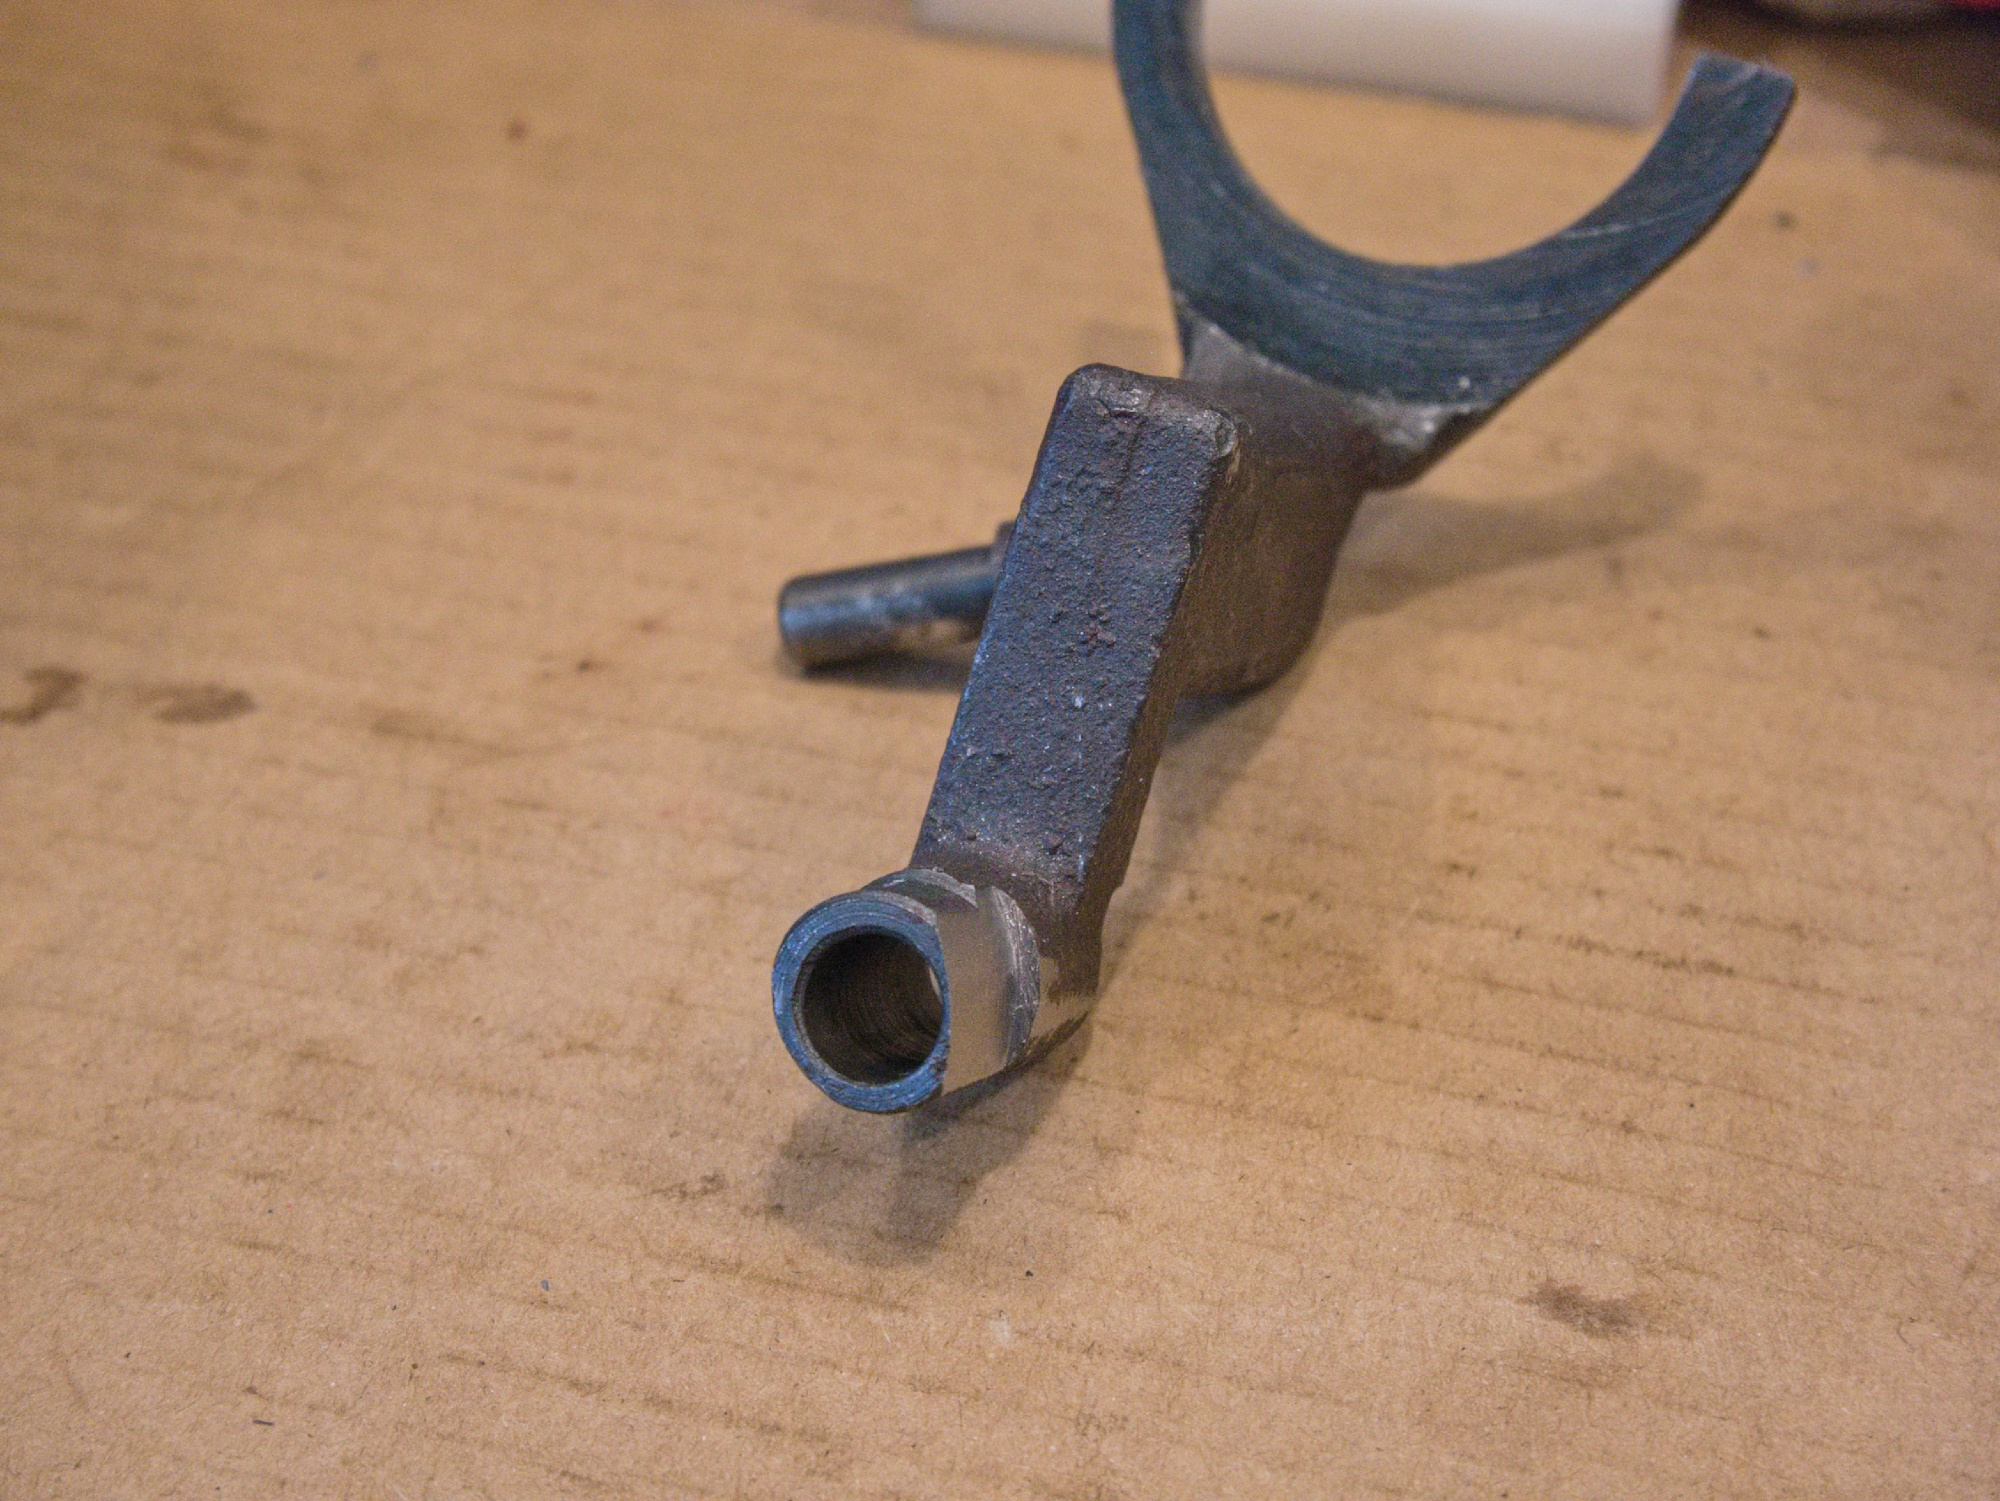
Put in the gear change transmission rod along with the gear forks.
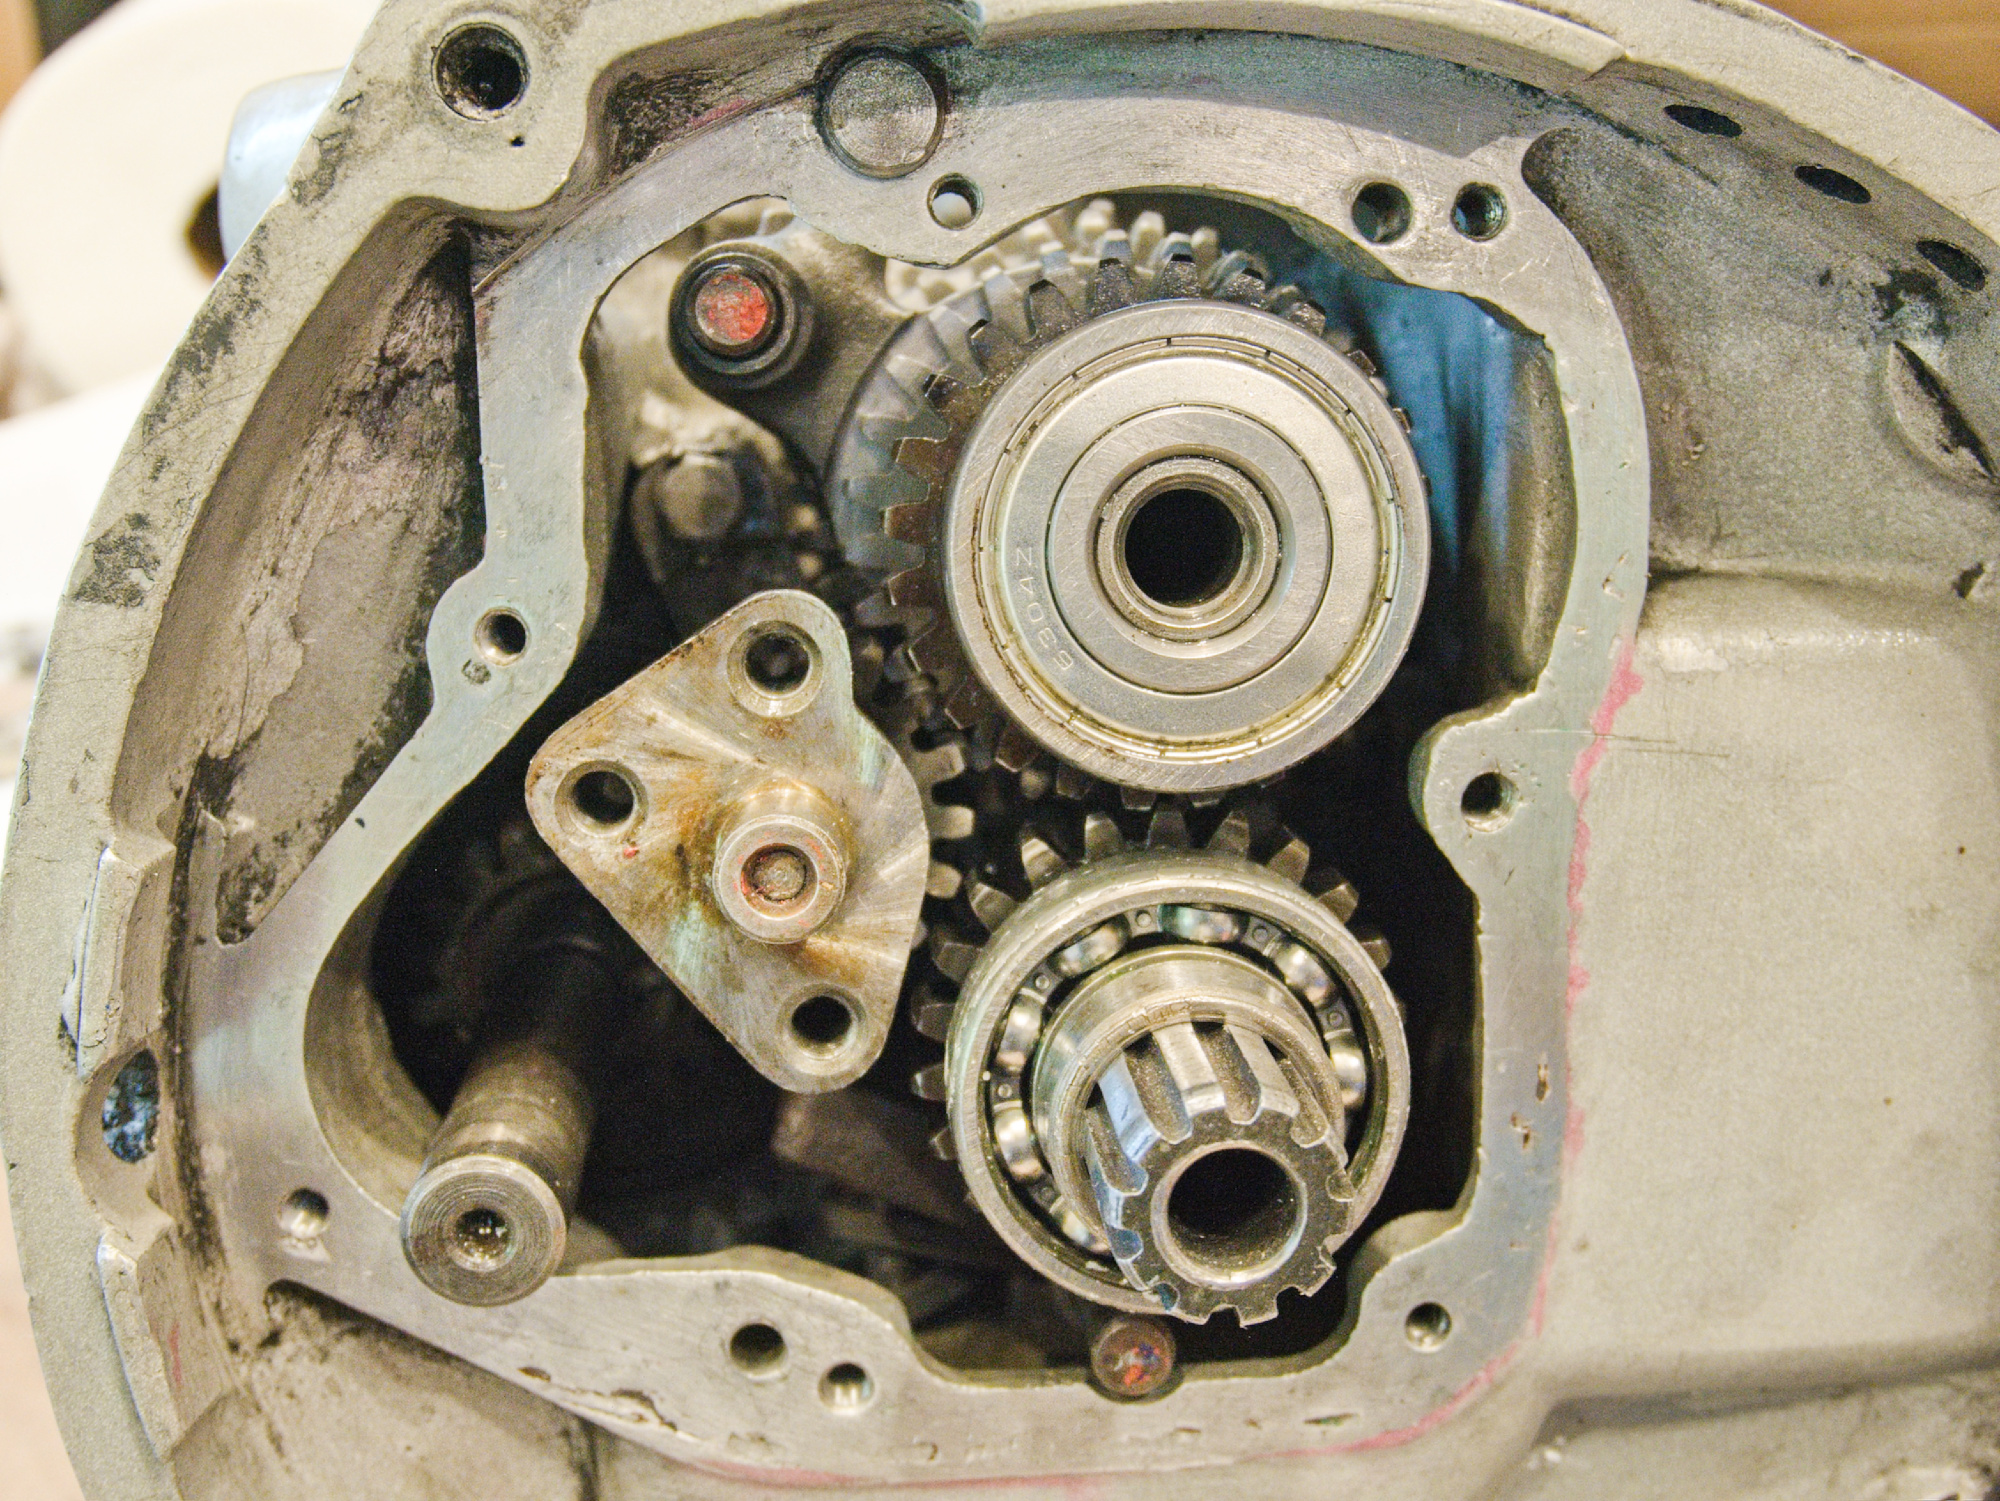
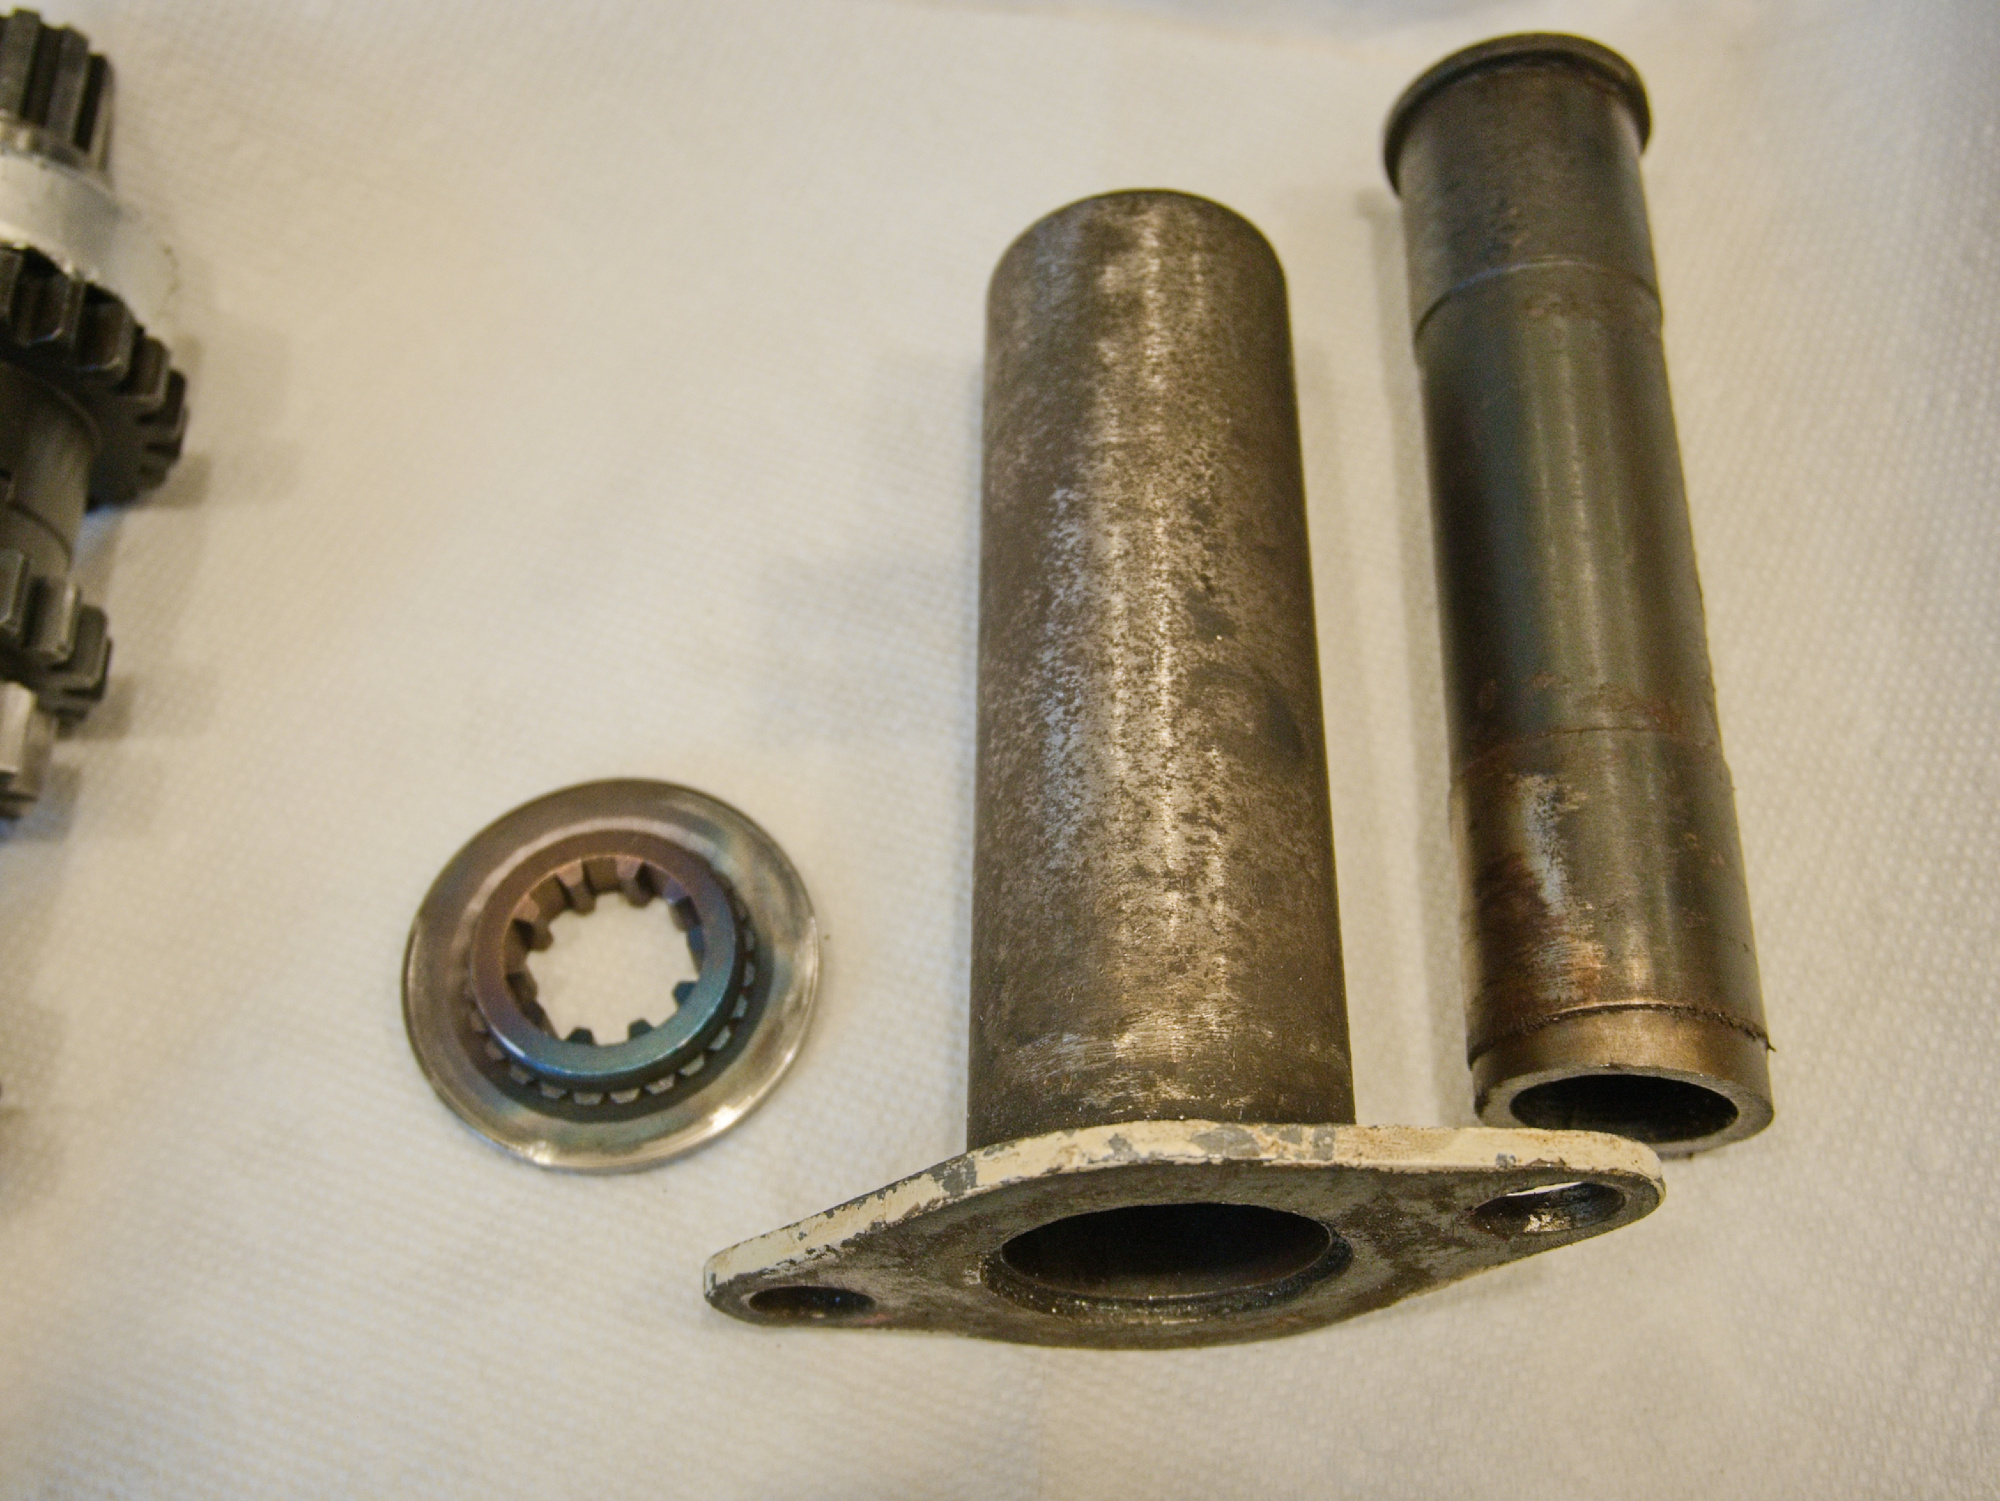
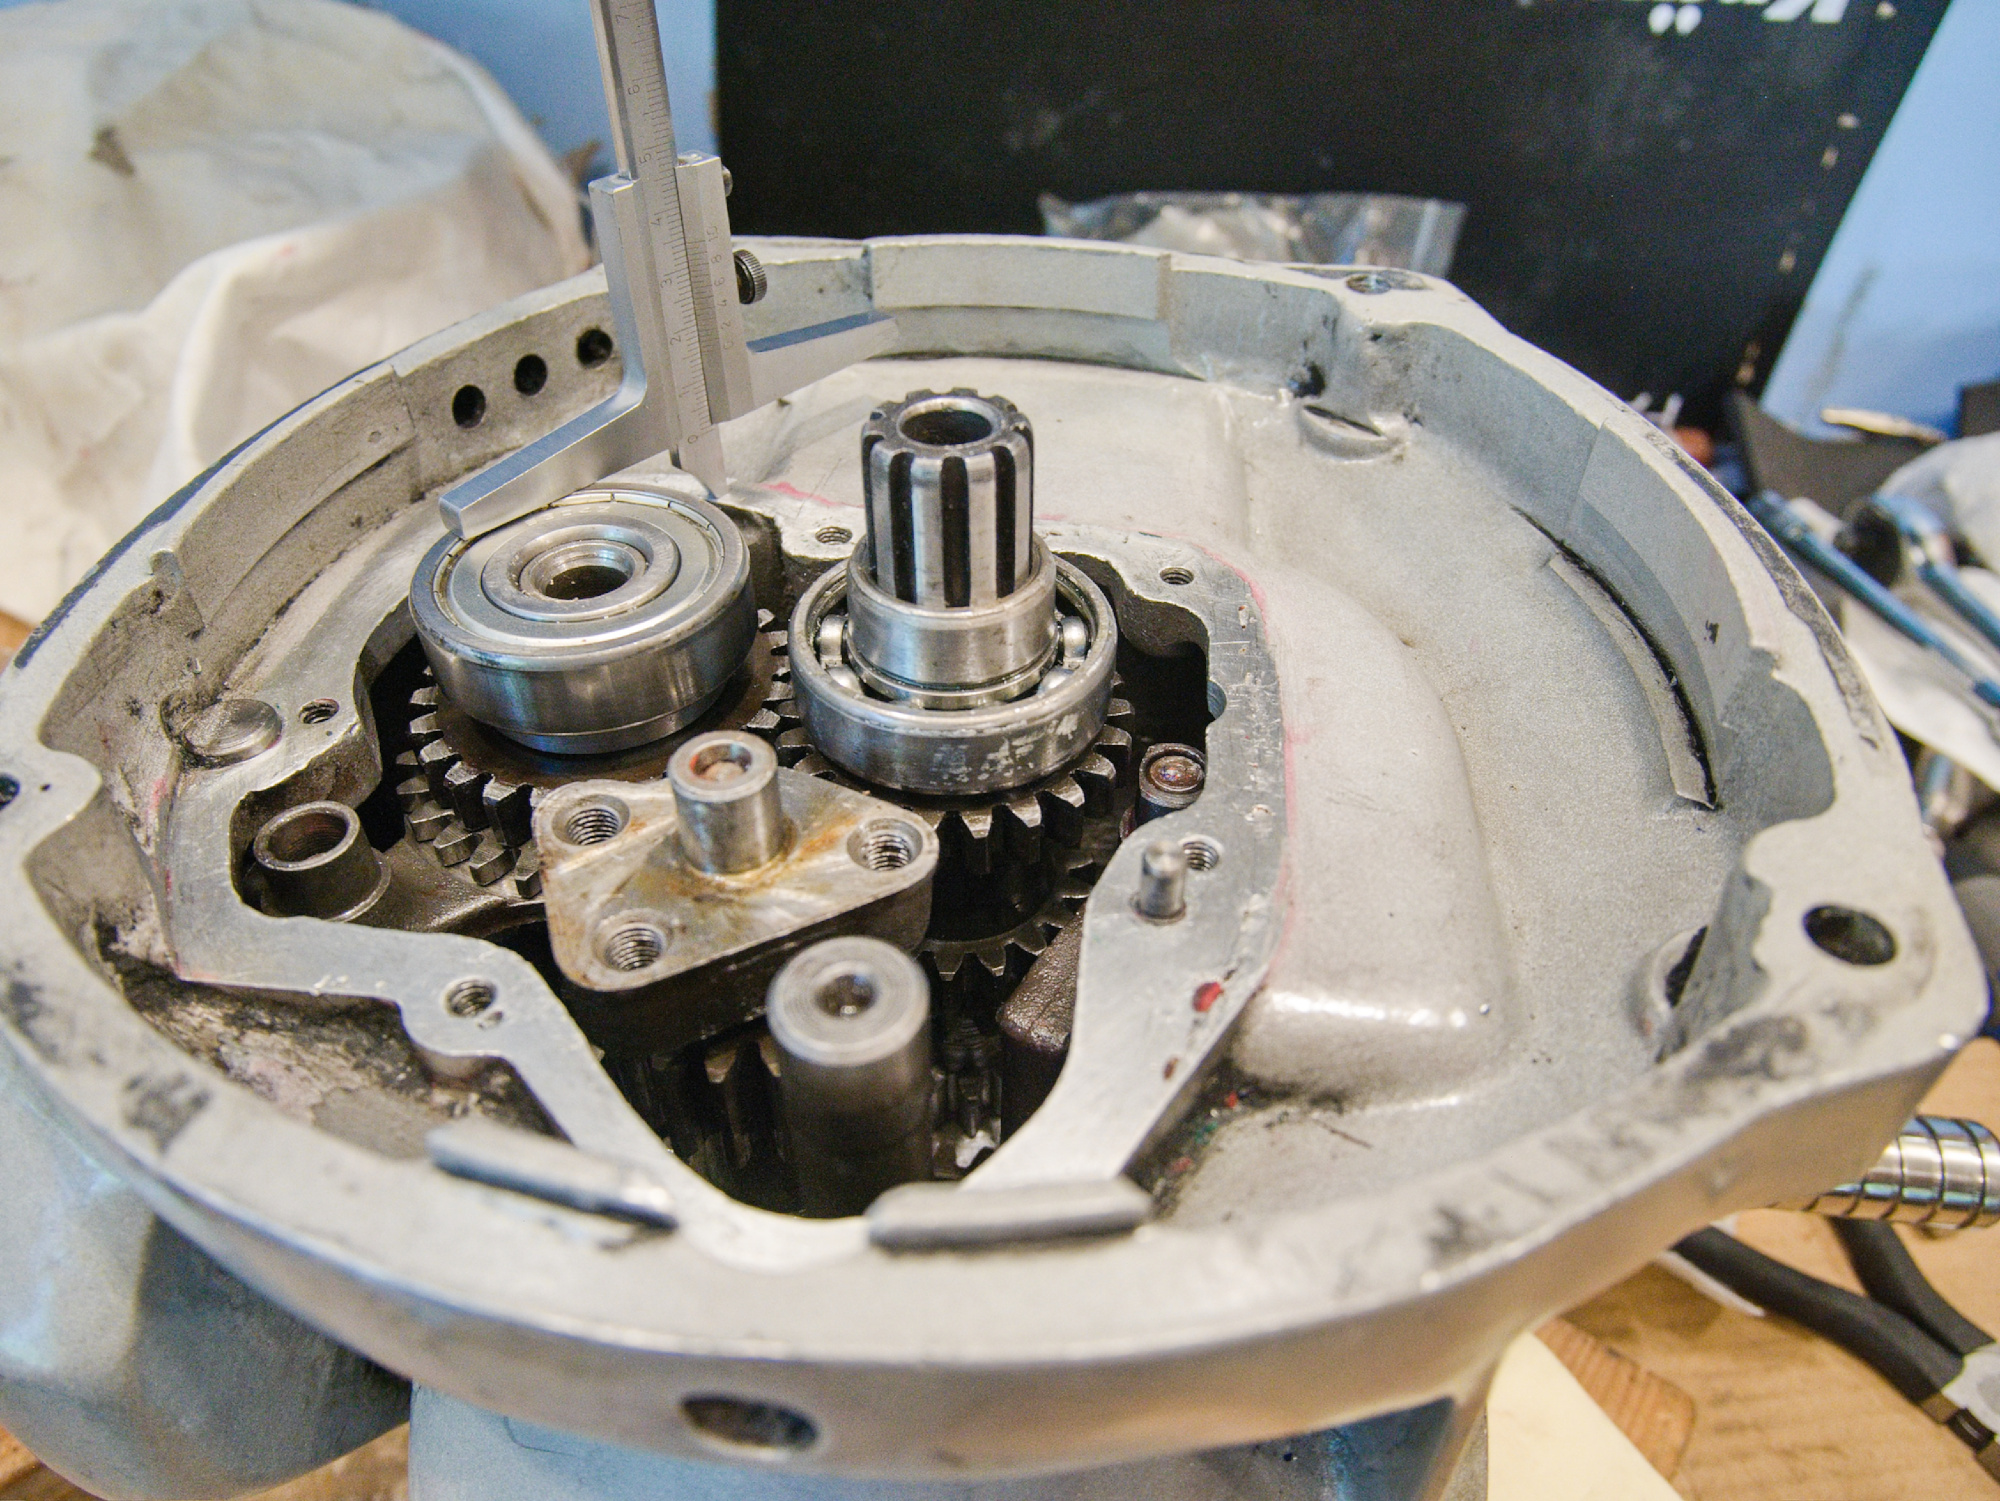
Put in the plate and shaft assembly.
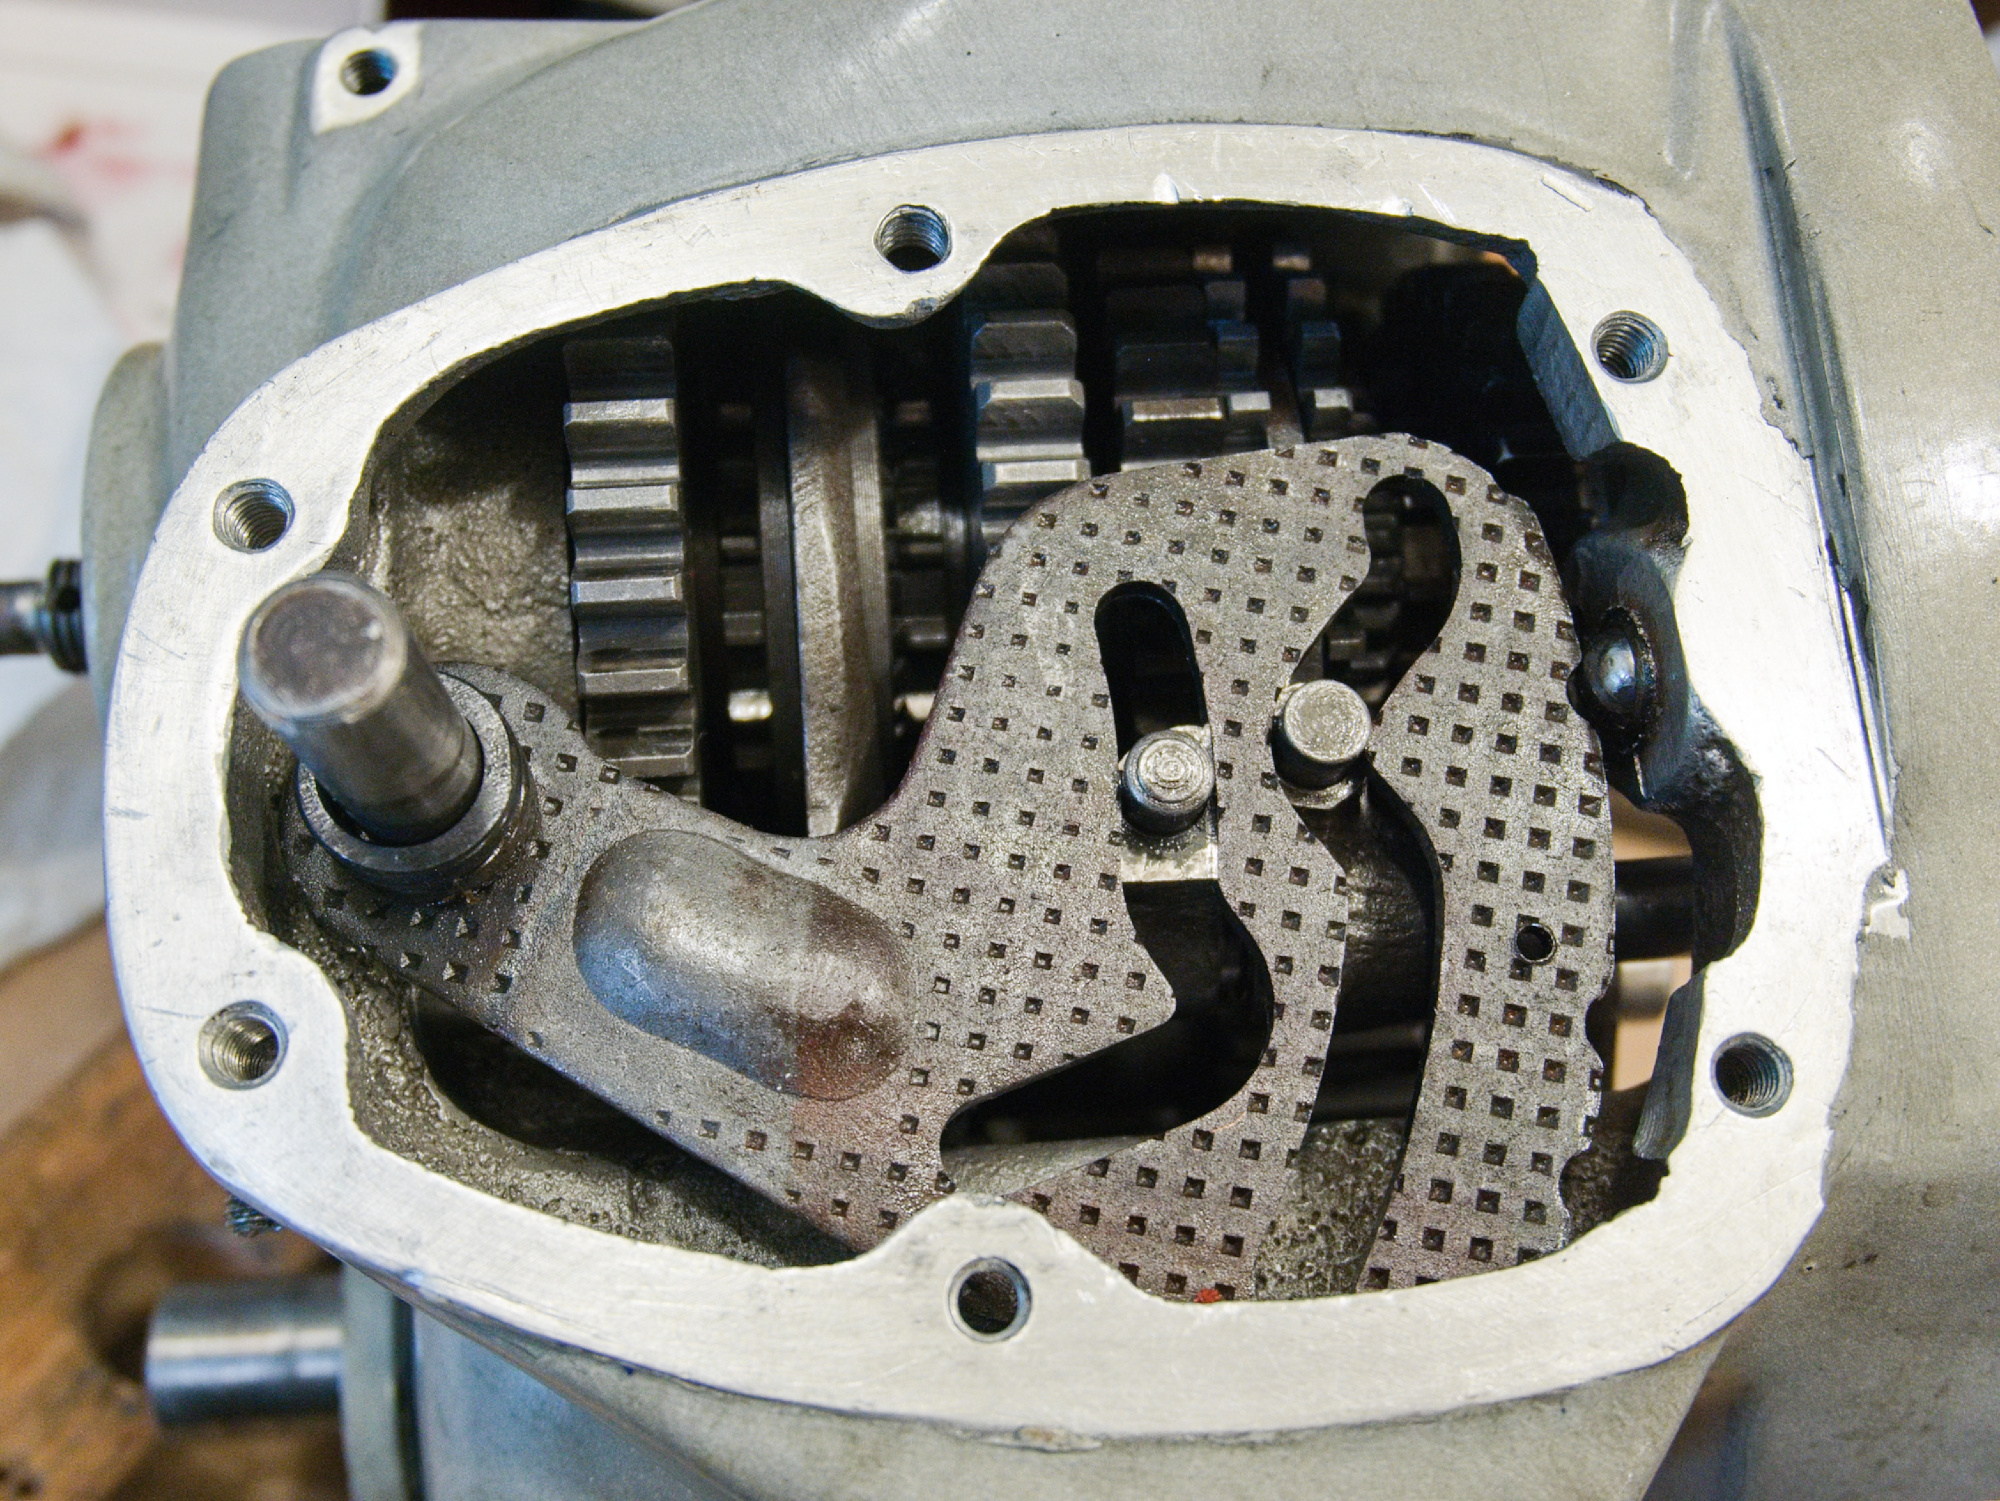
The other end of the plate and shaft assembly needs to go to the reverse shifter plate.
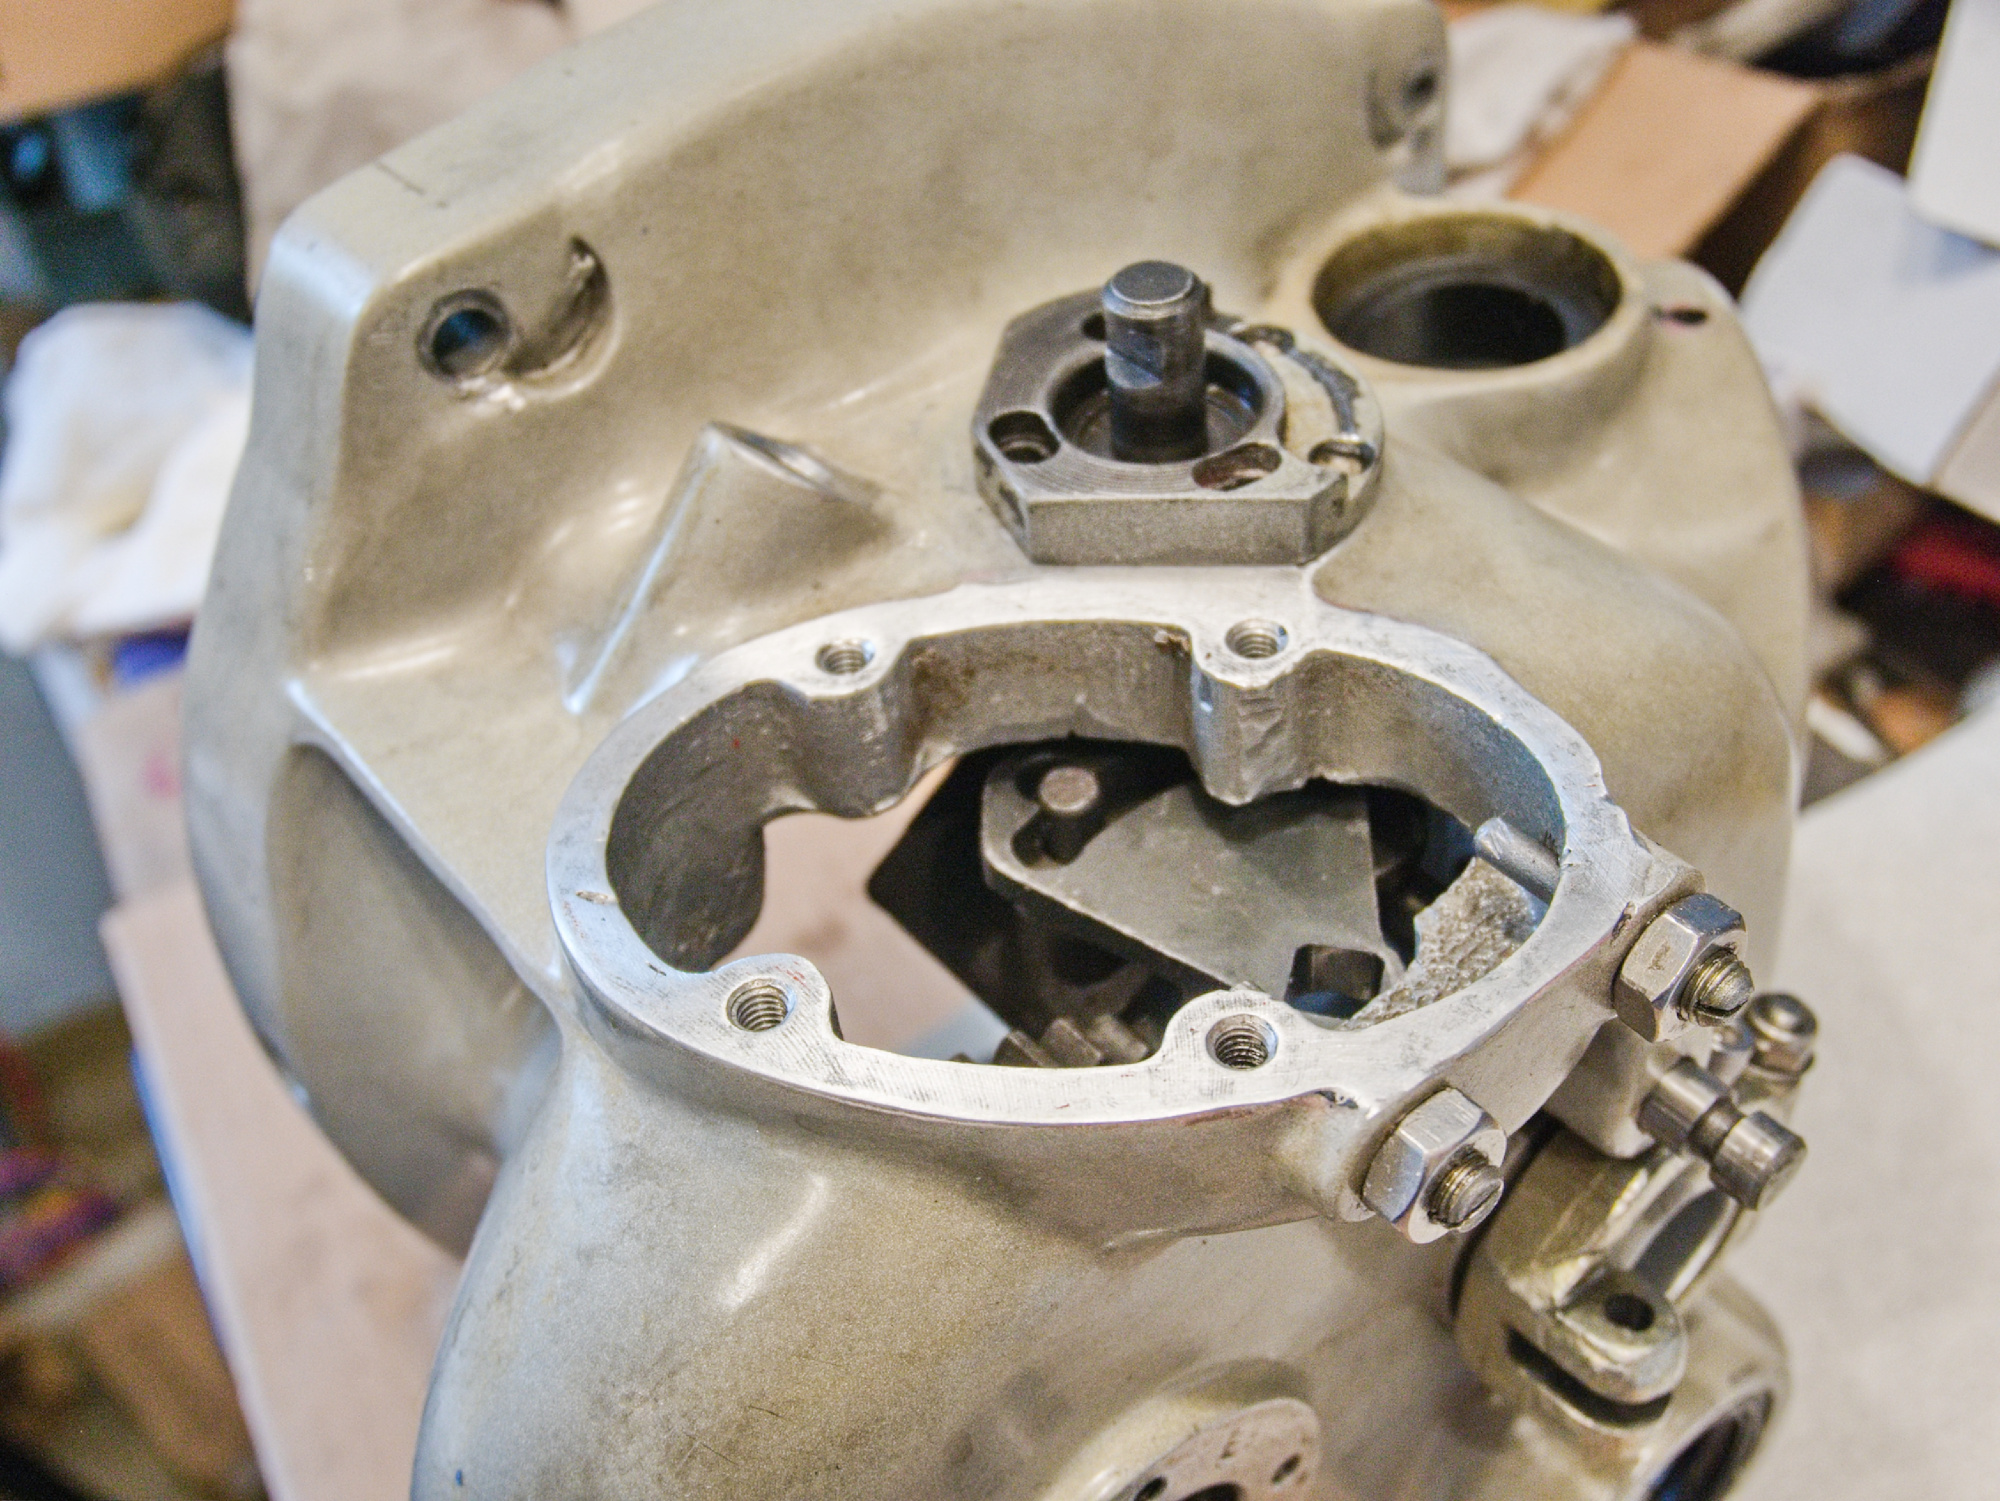
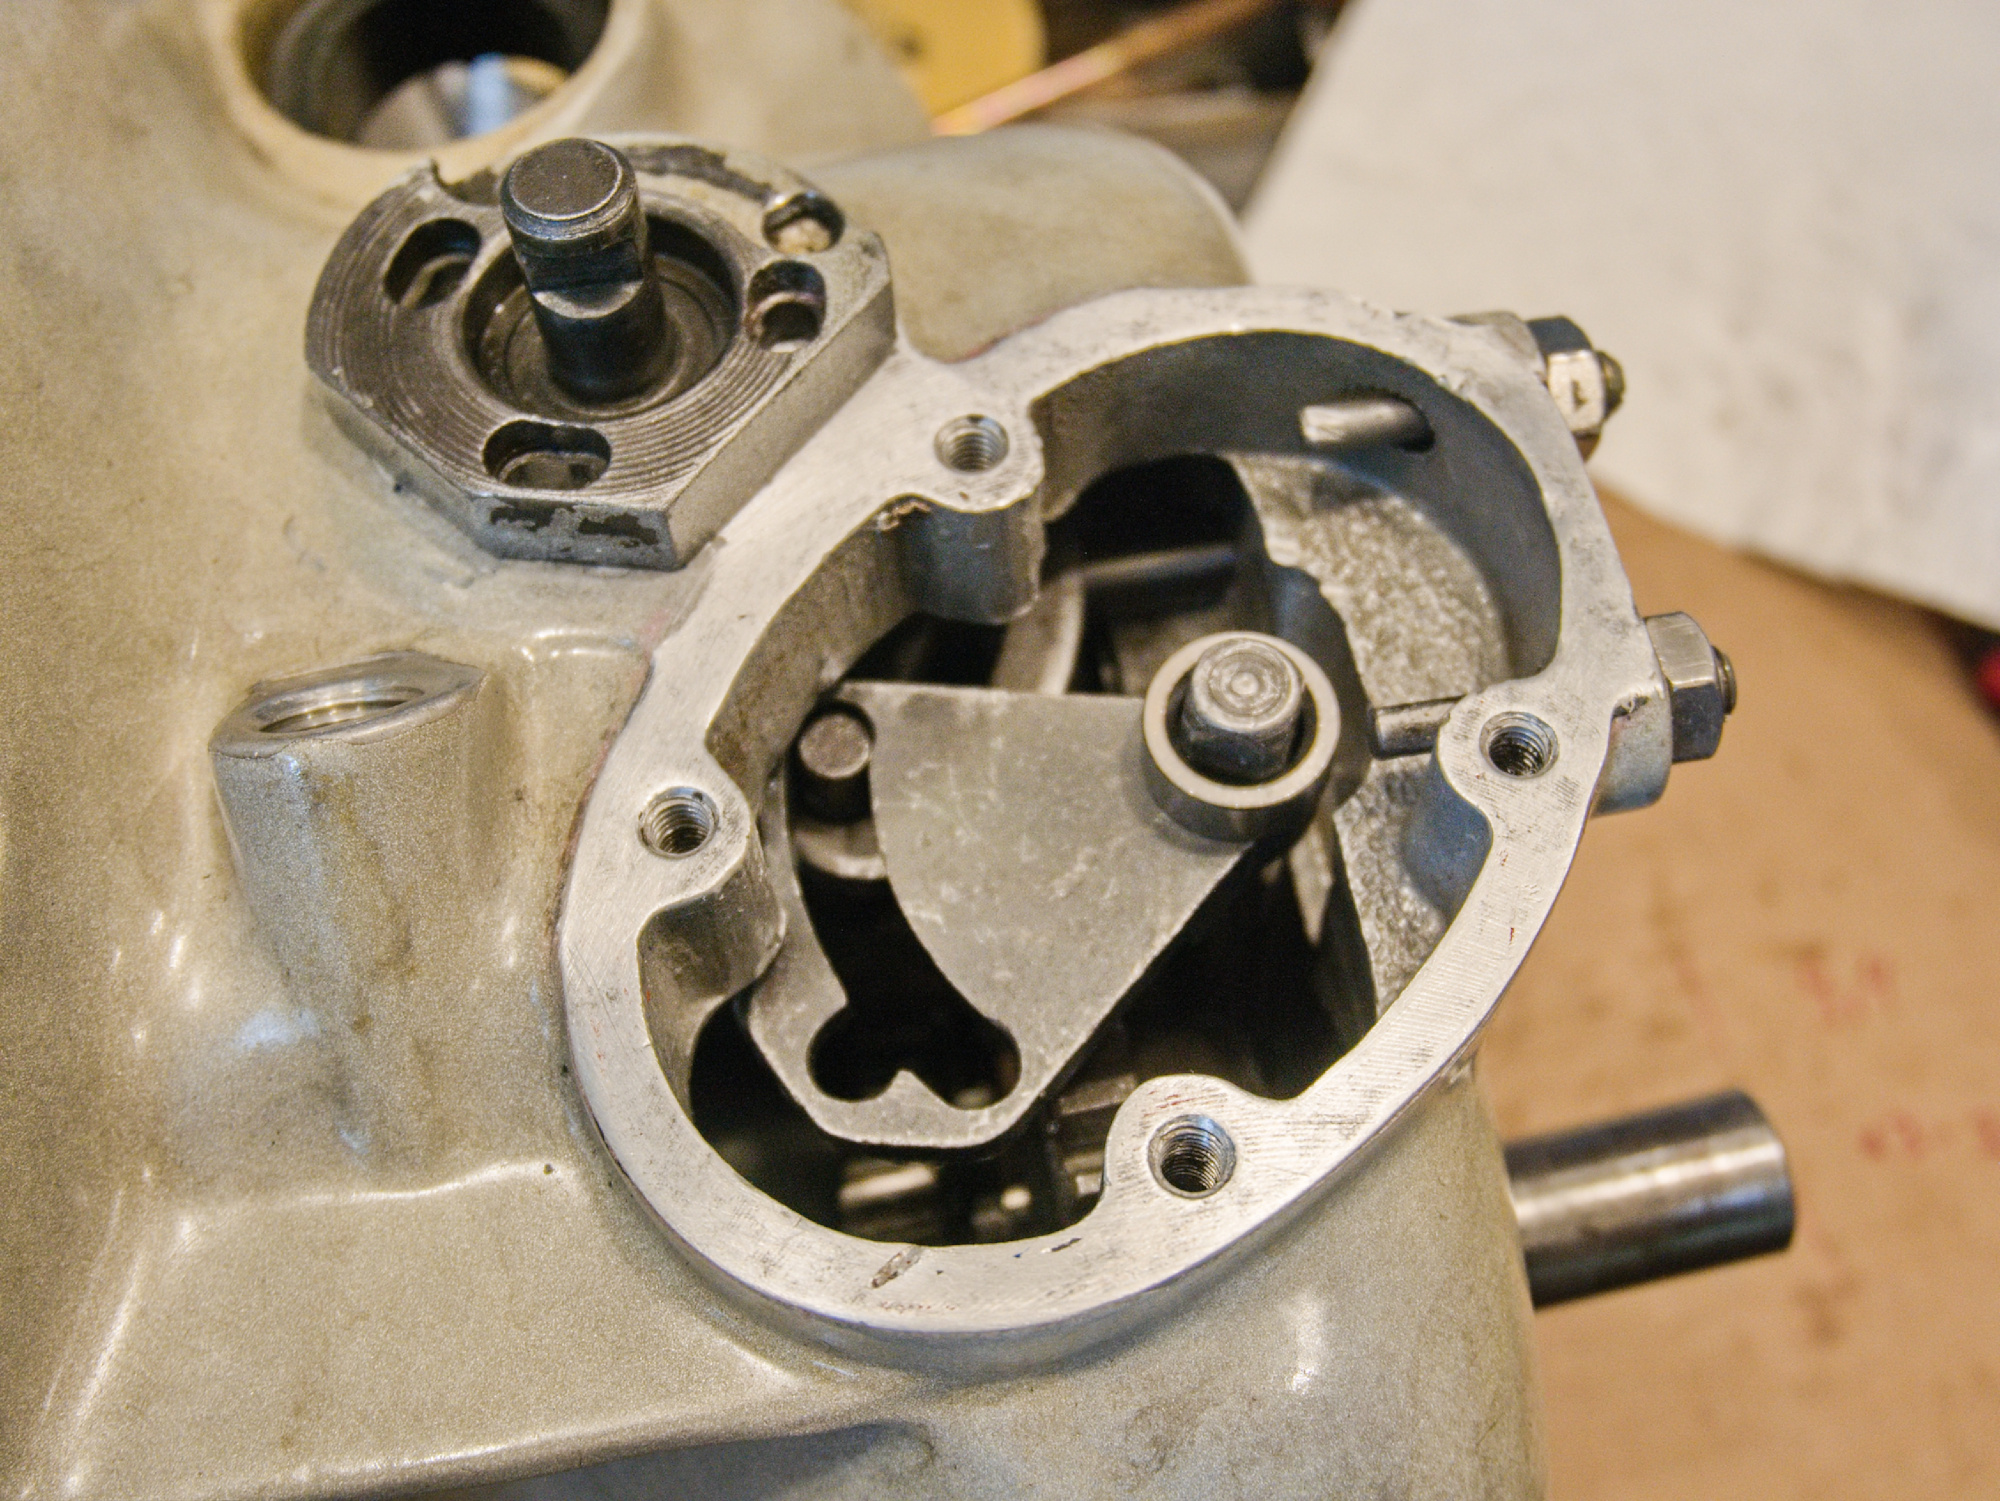
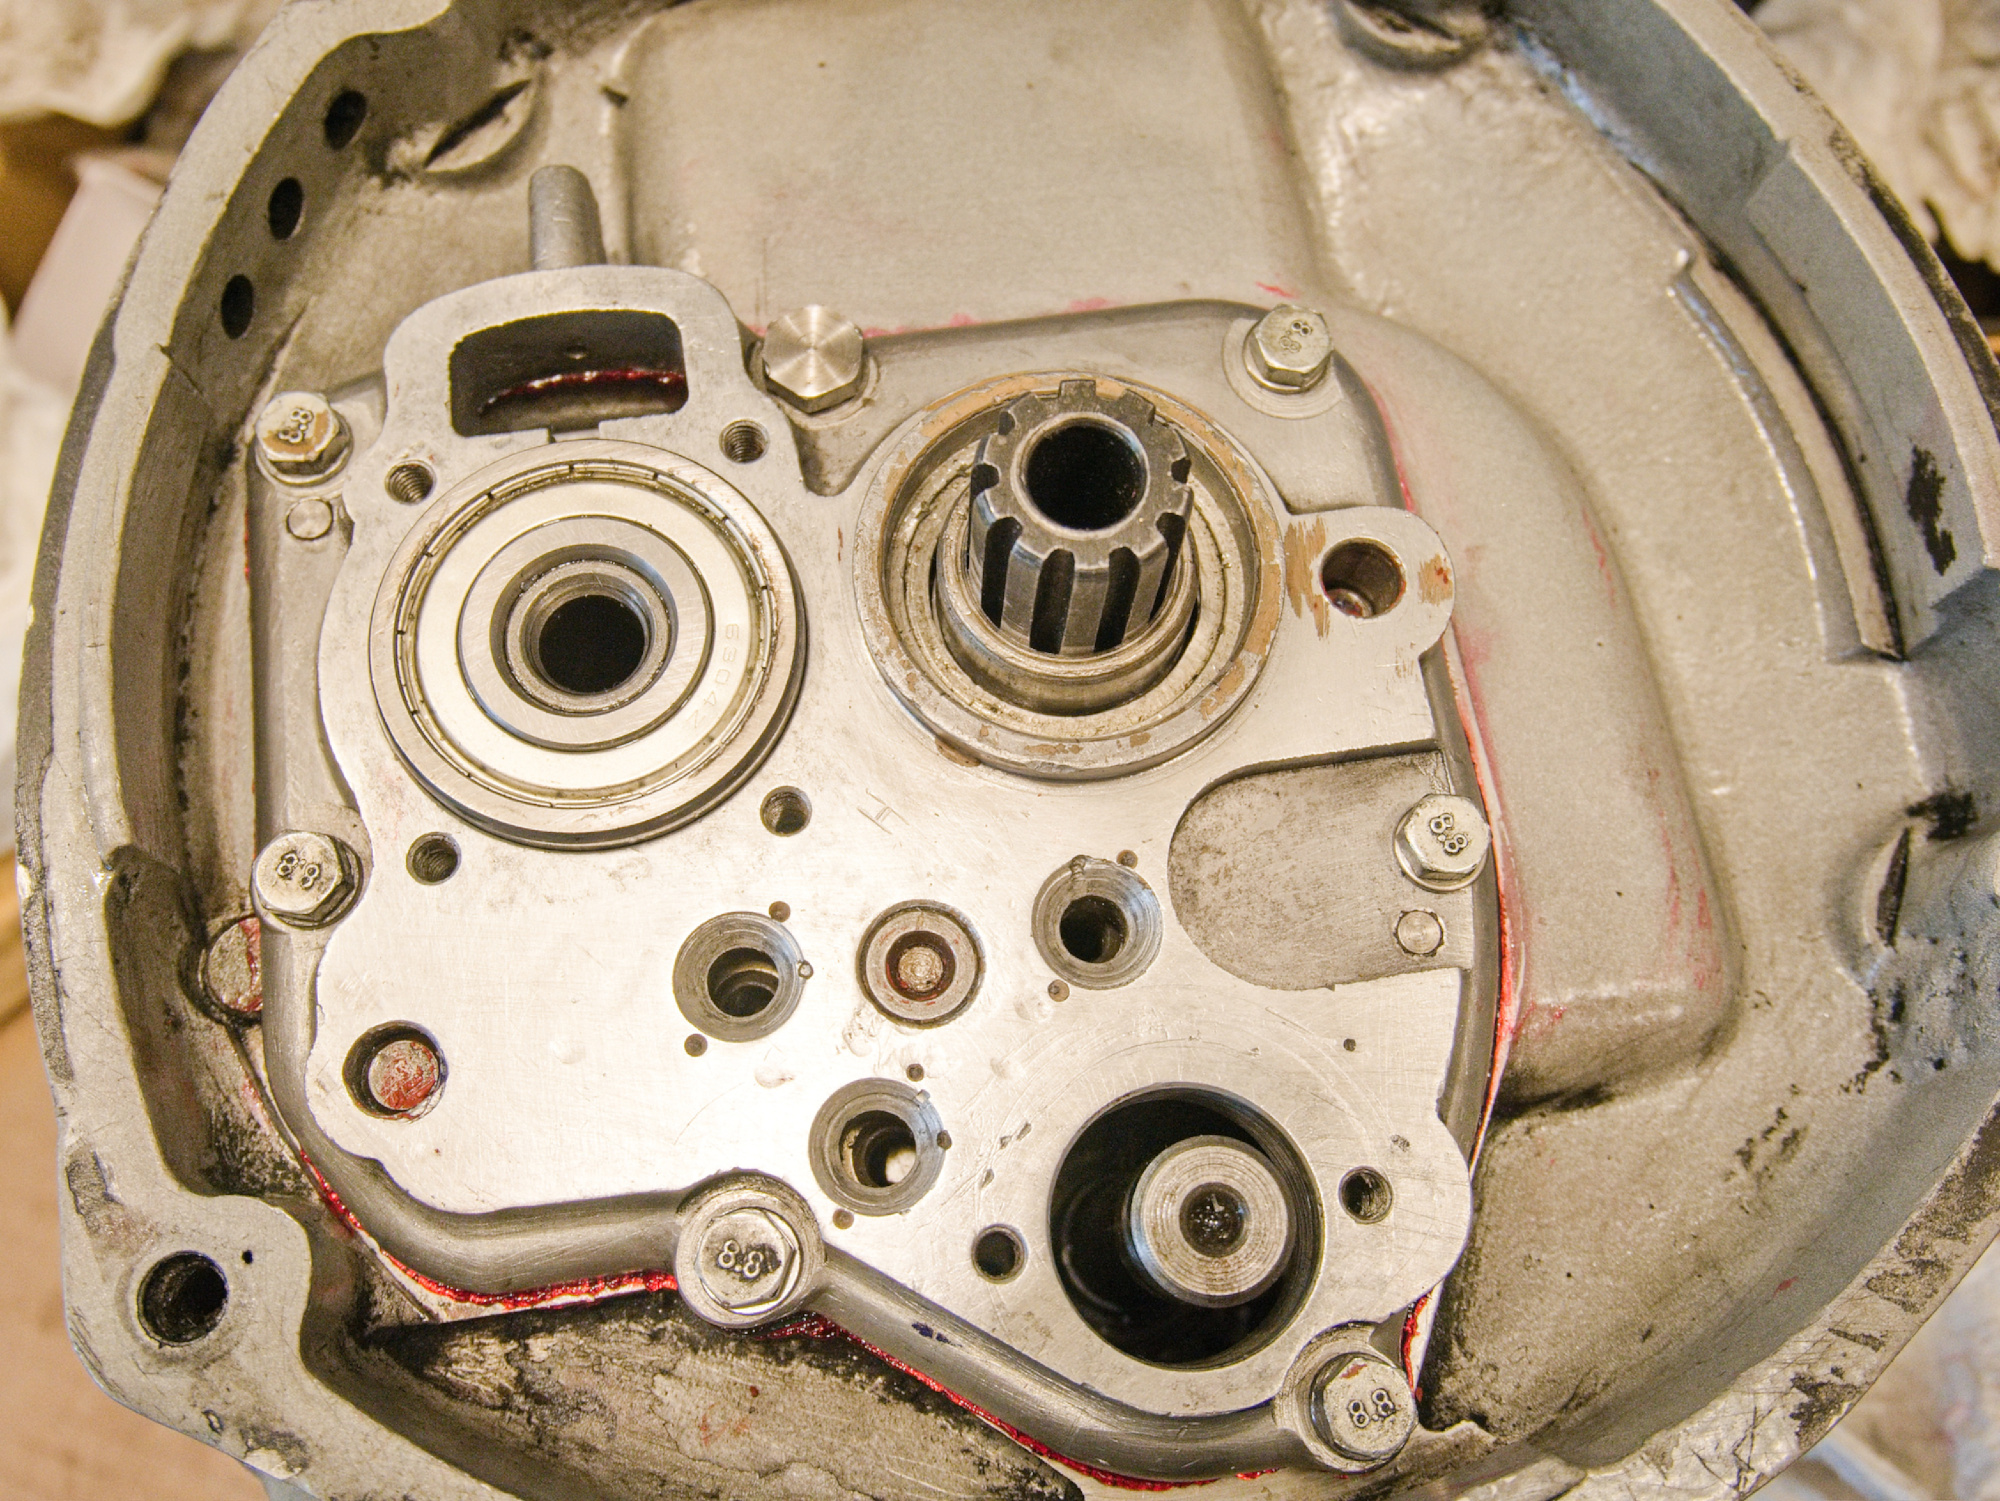
Add the distance bushing.
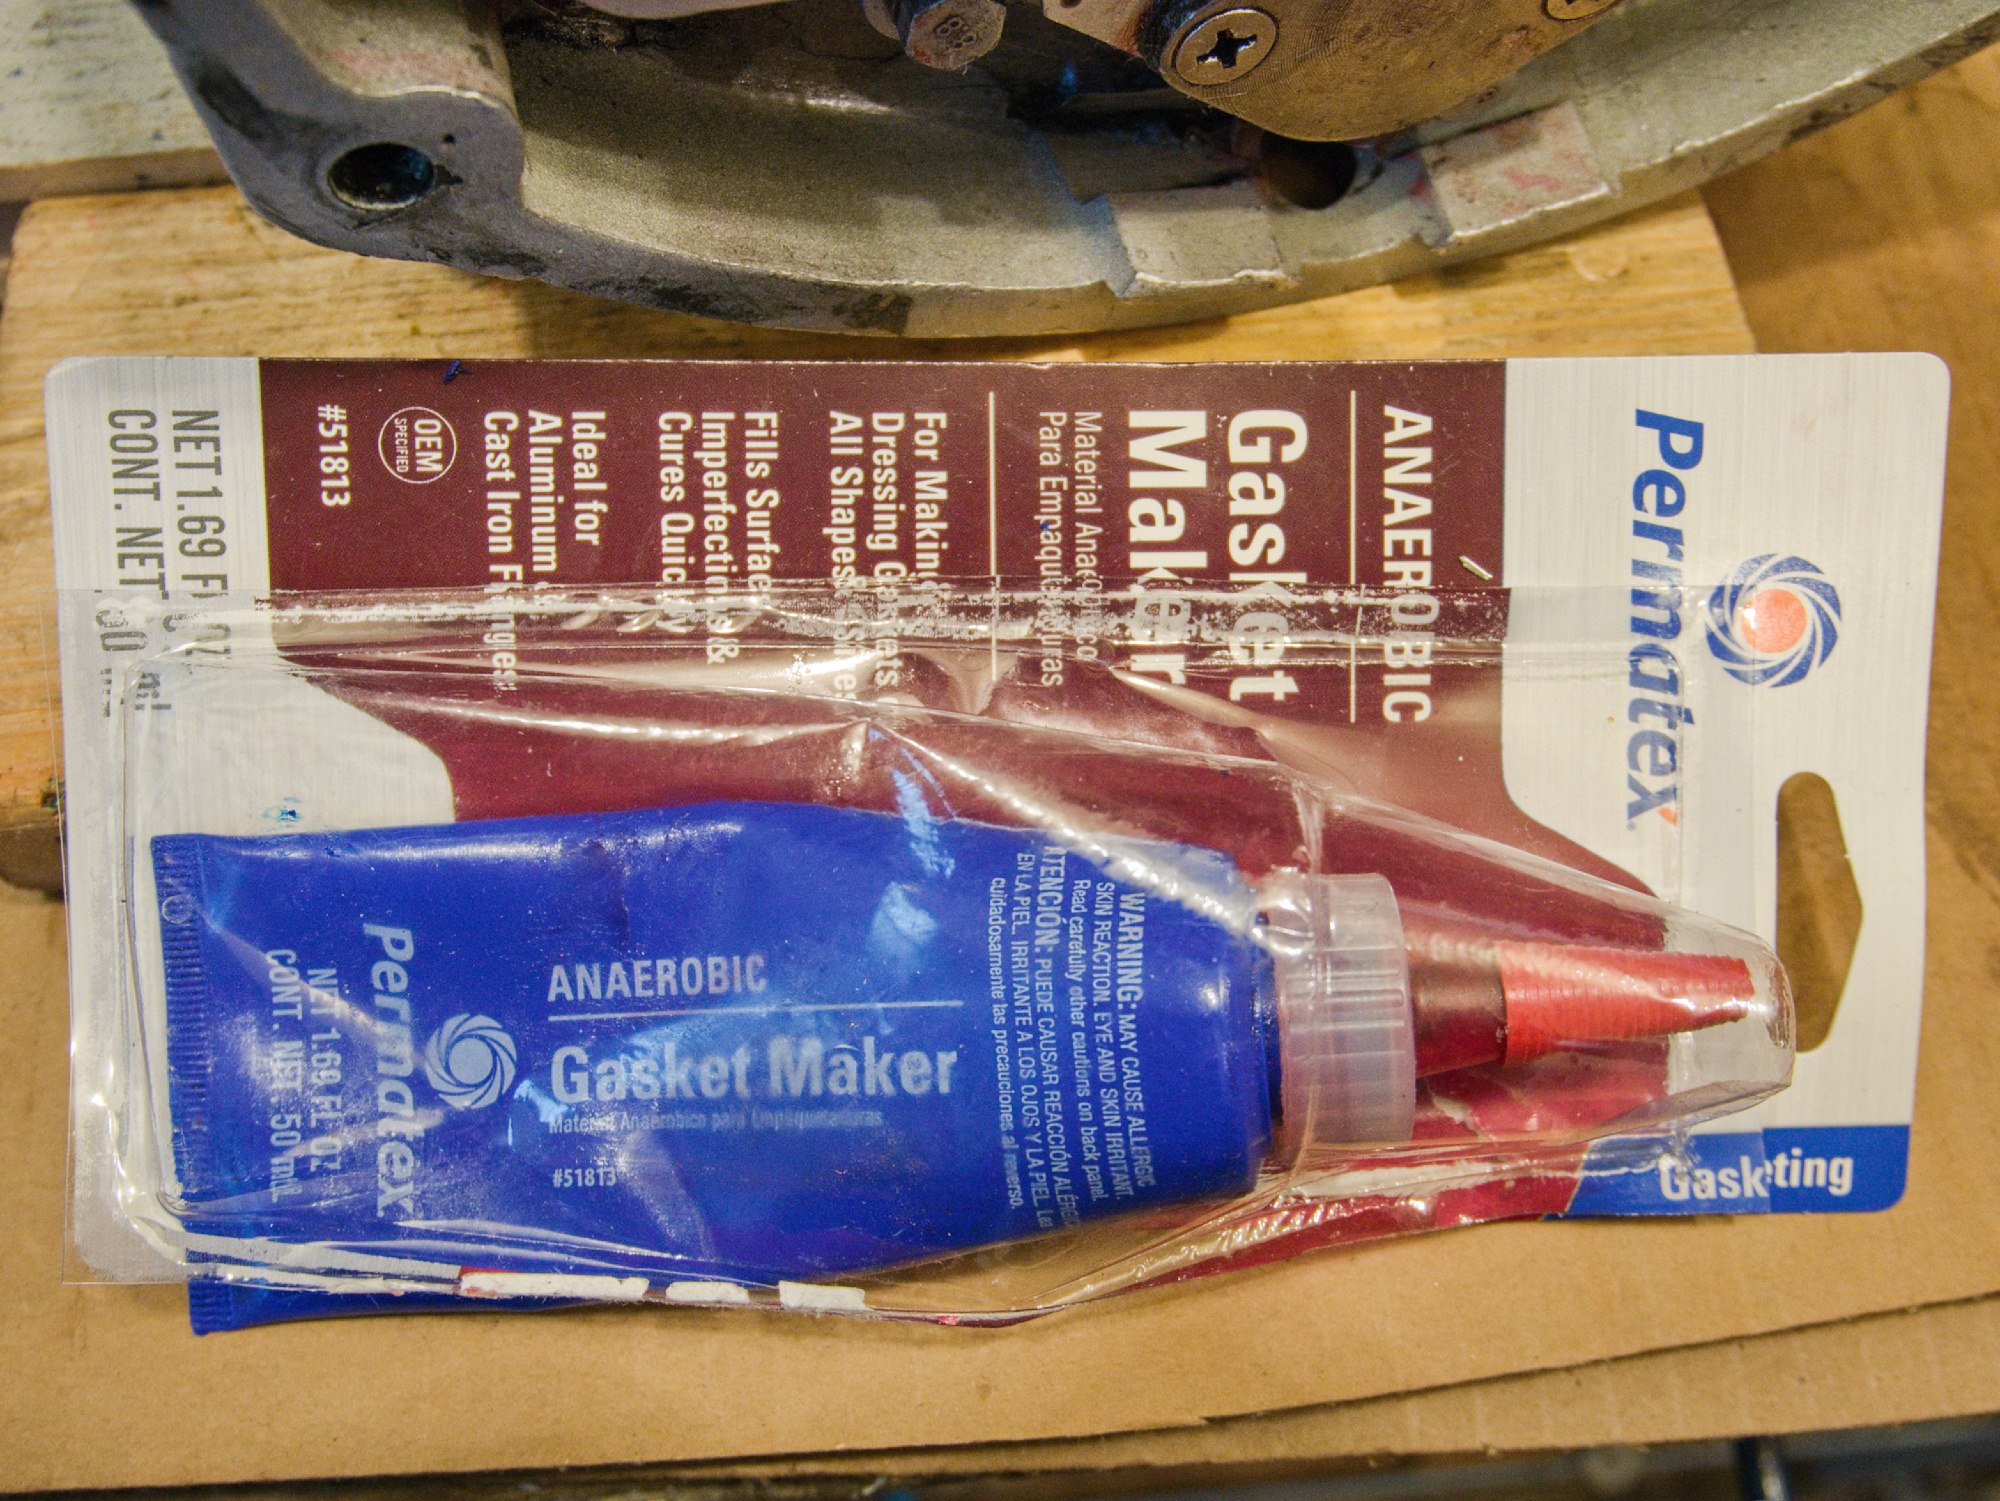
Add gasket maker to the gasket on both sides. This fills in minor gaps for an oil tight seal.
And carefully tighten the cover.
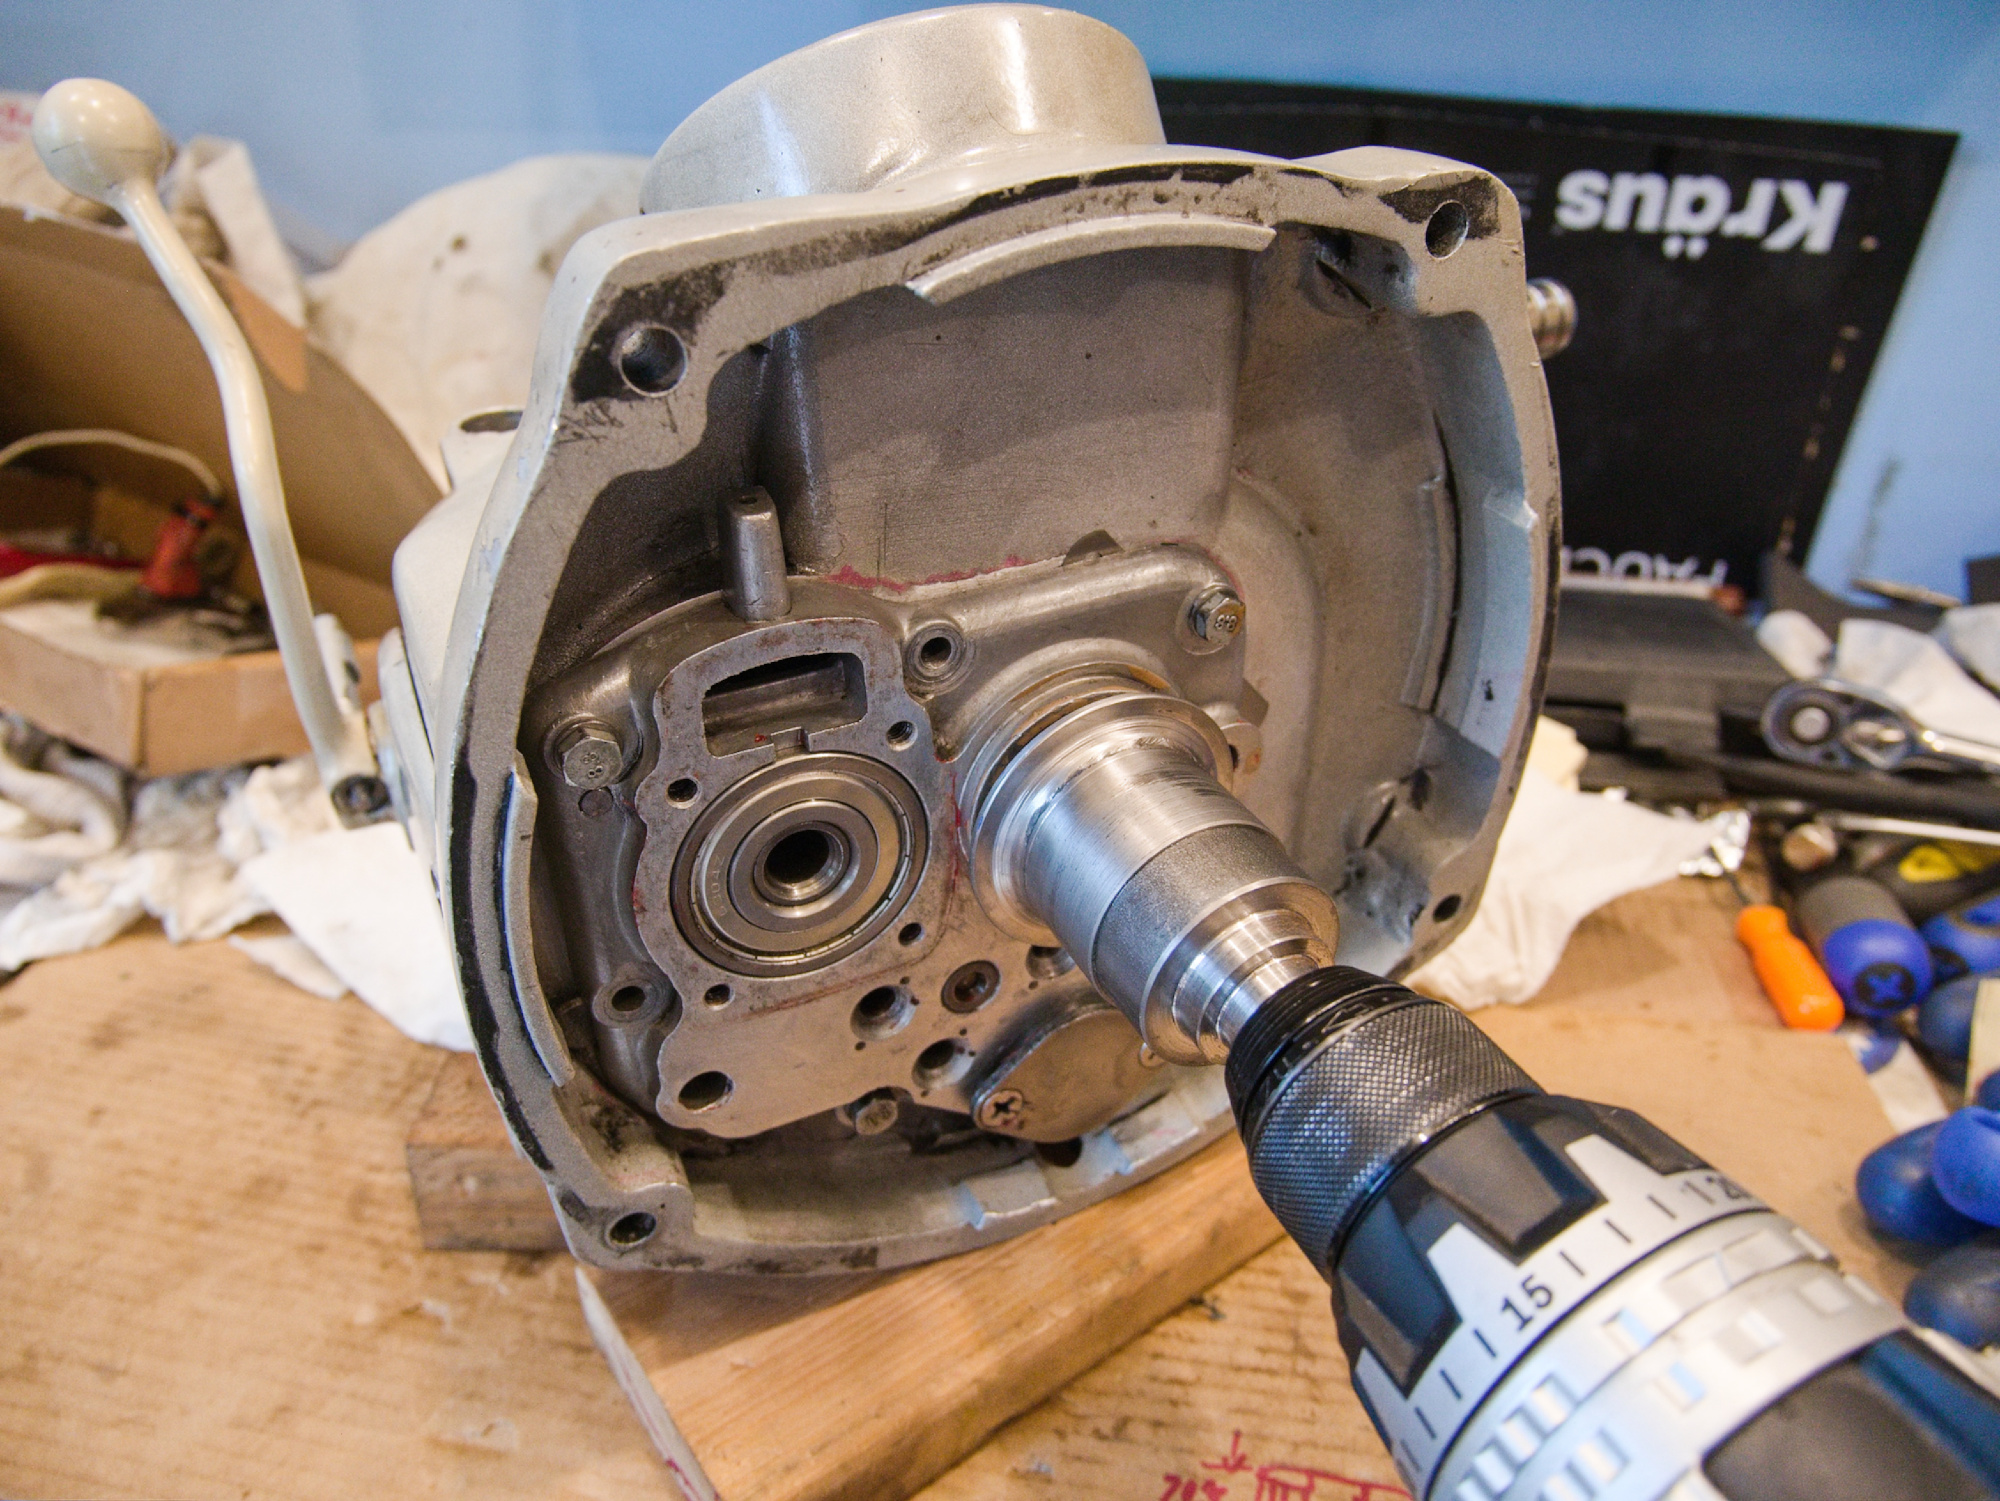
To test the gearbox, the input shaft needs to be rotated. To connect the input shaft to a drill for example, an adapter is needed for the input spline.
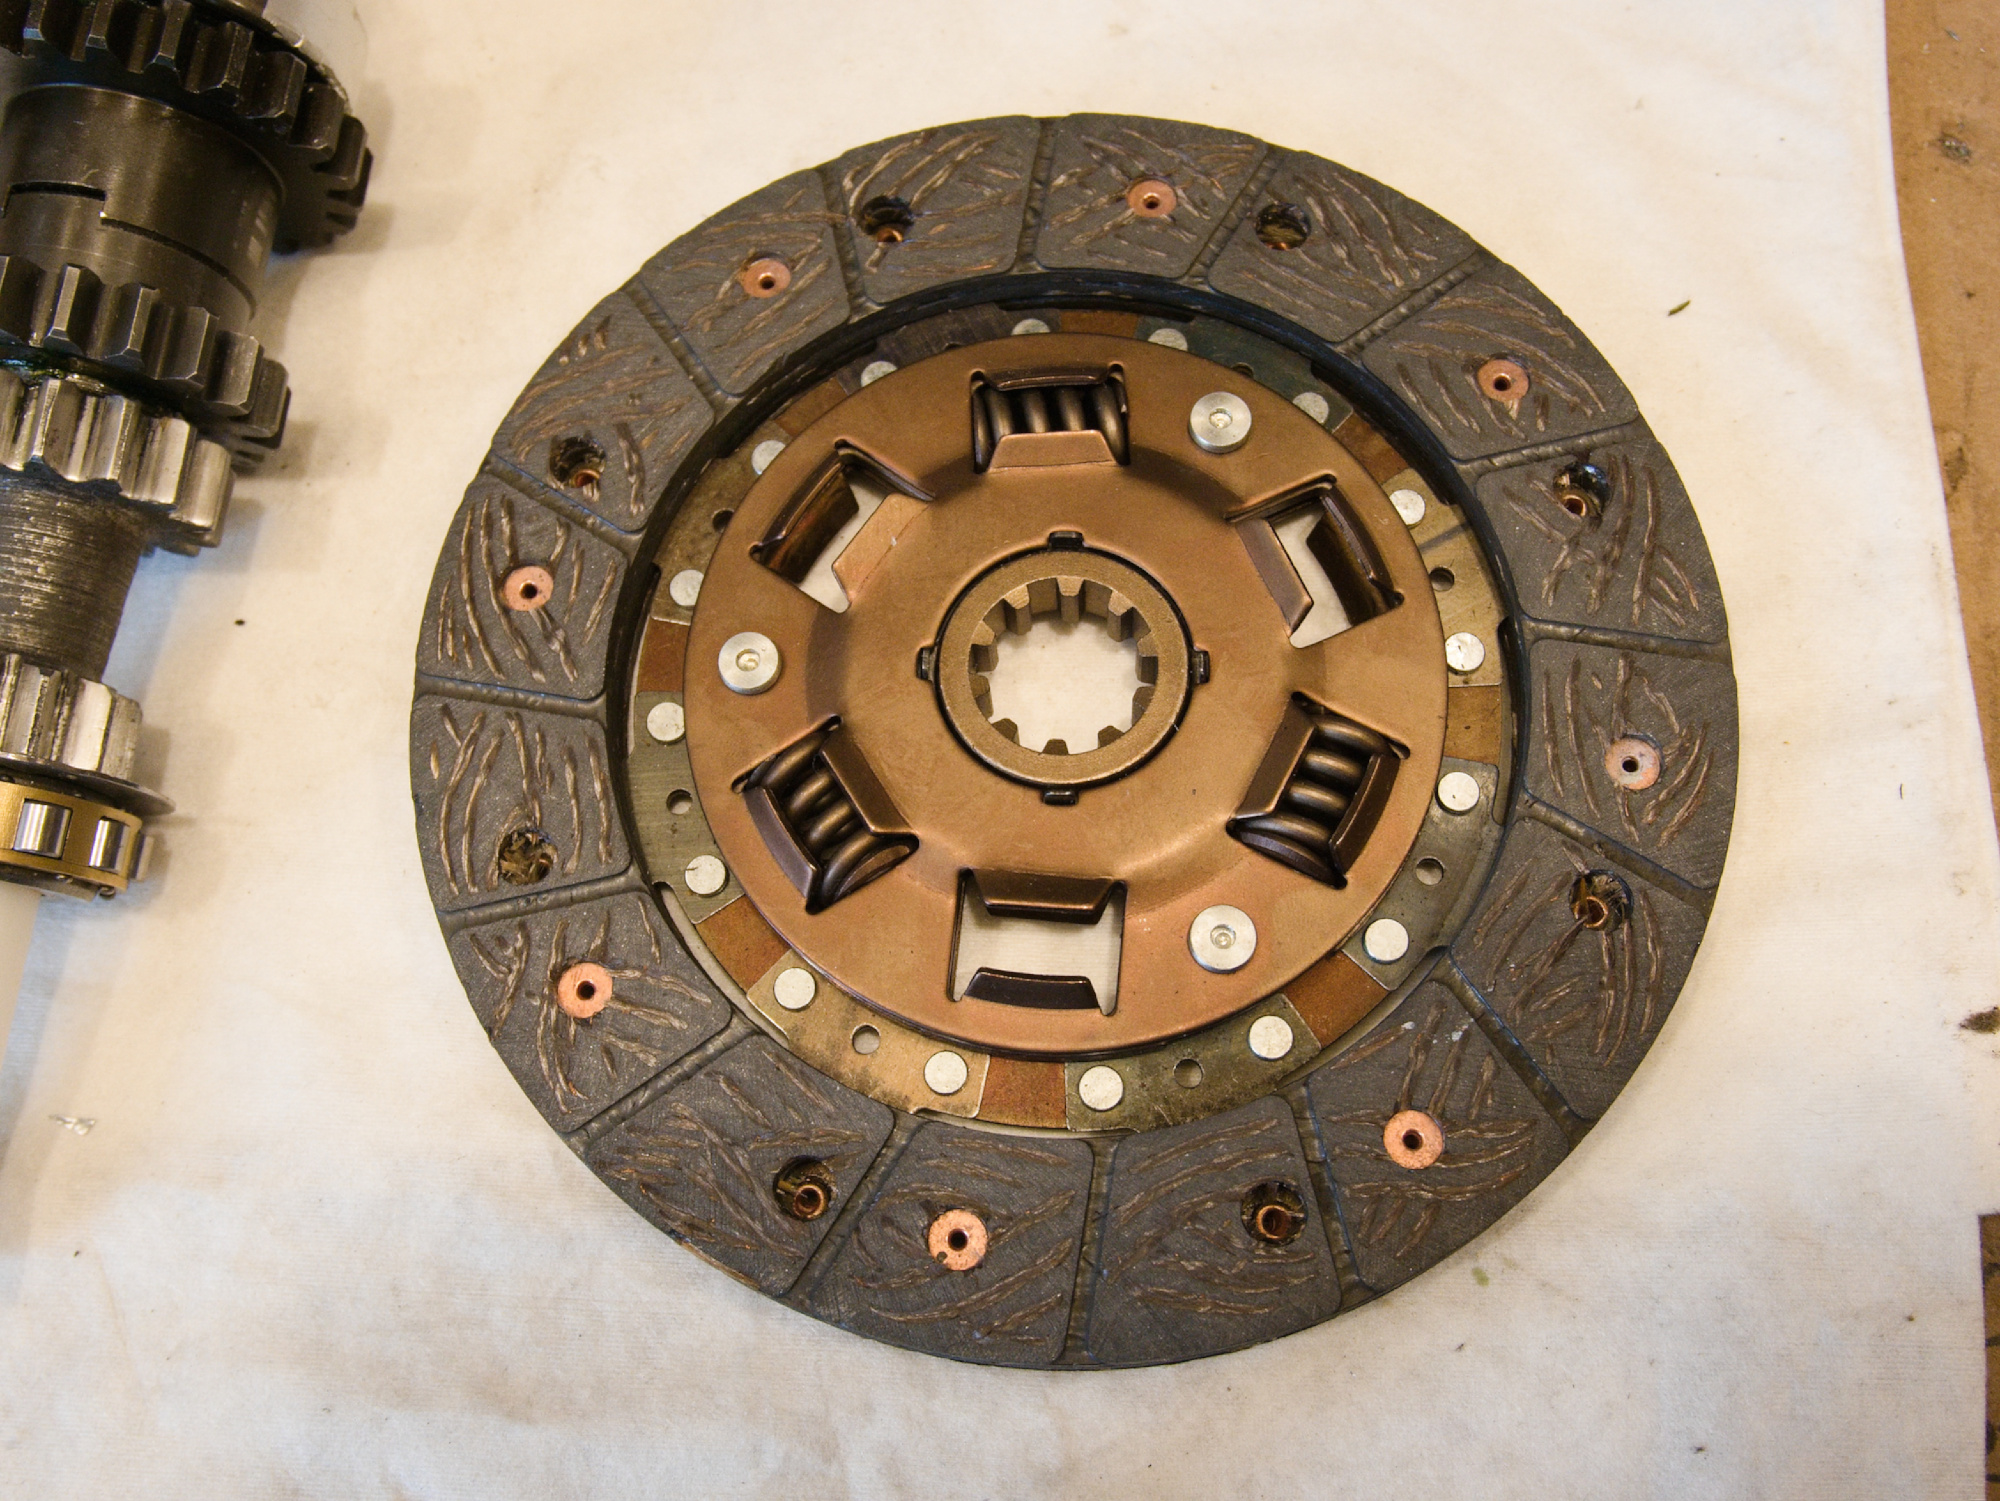
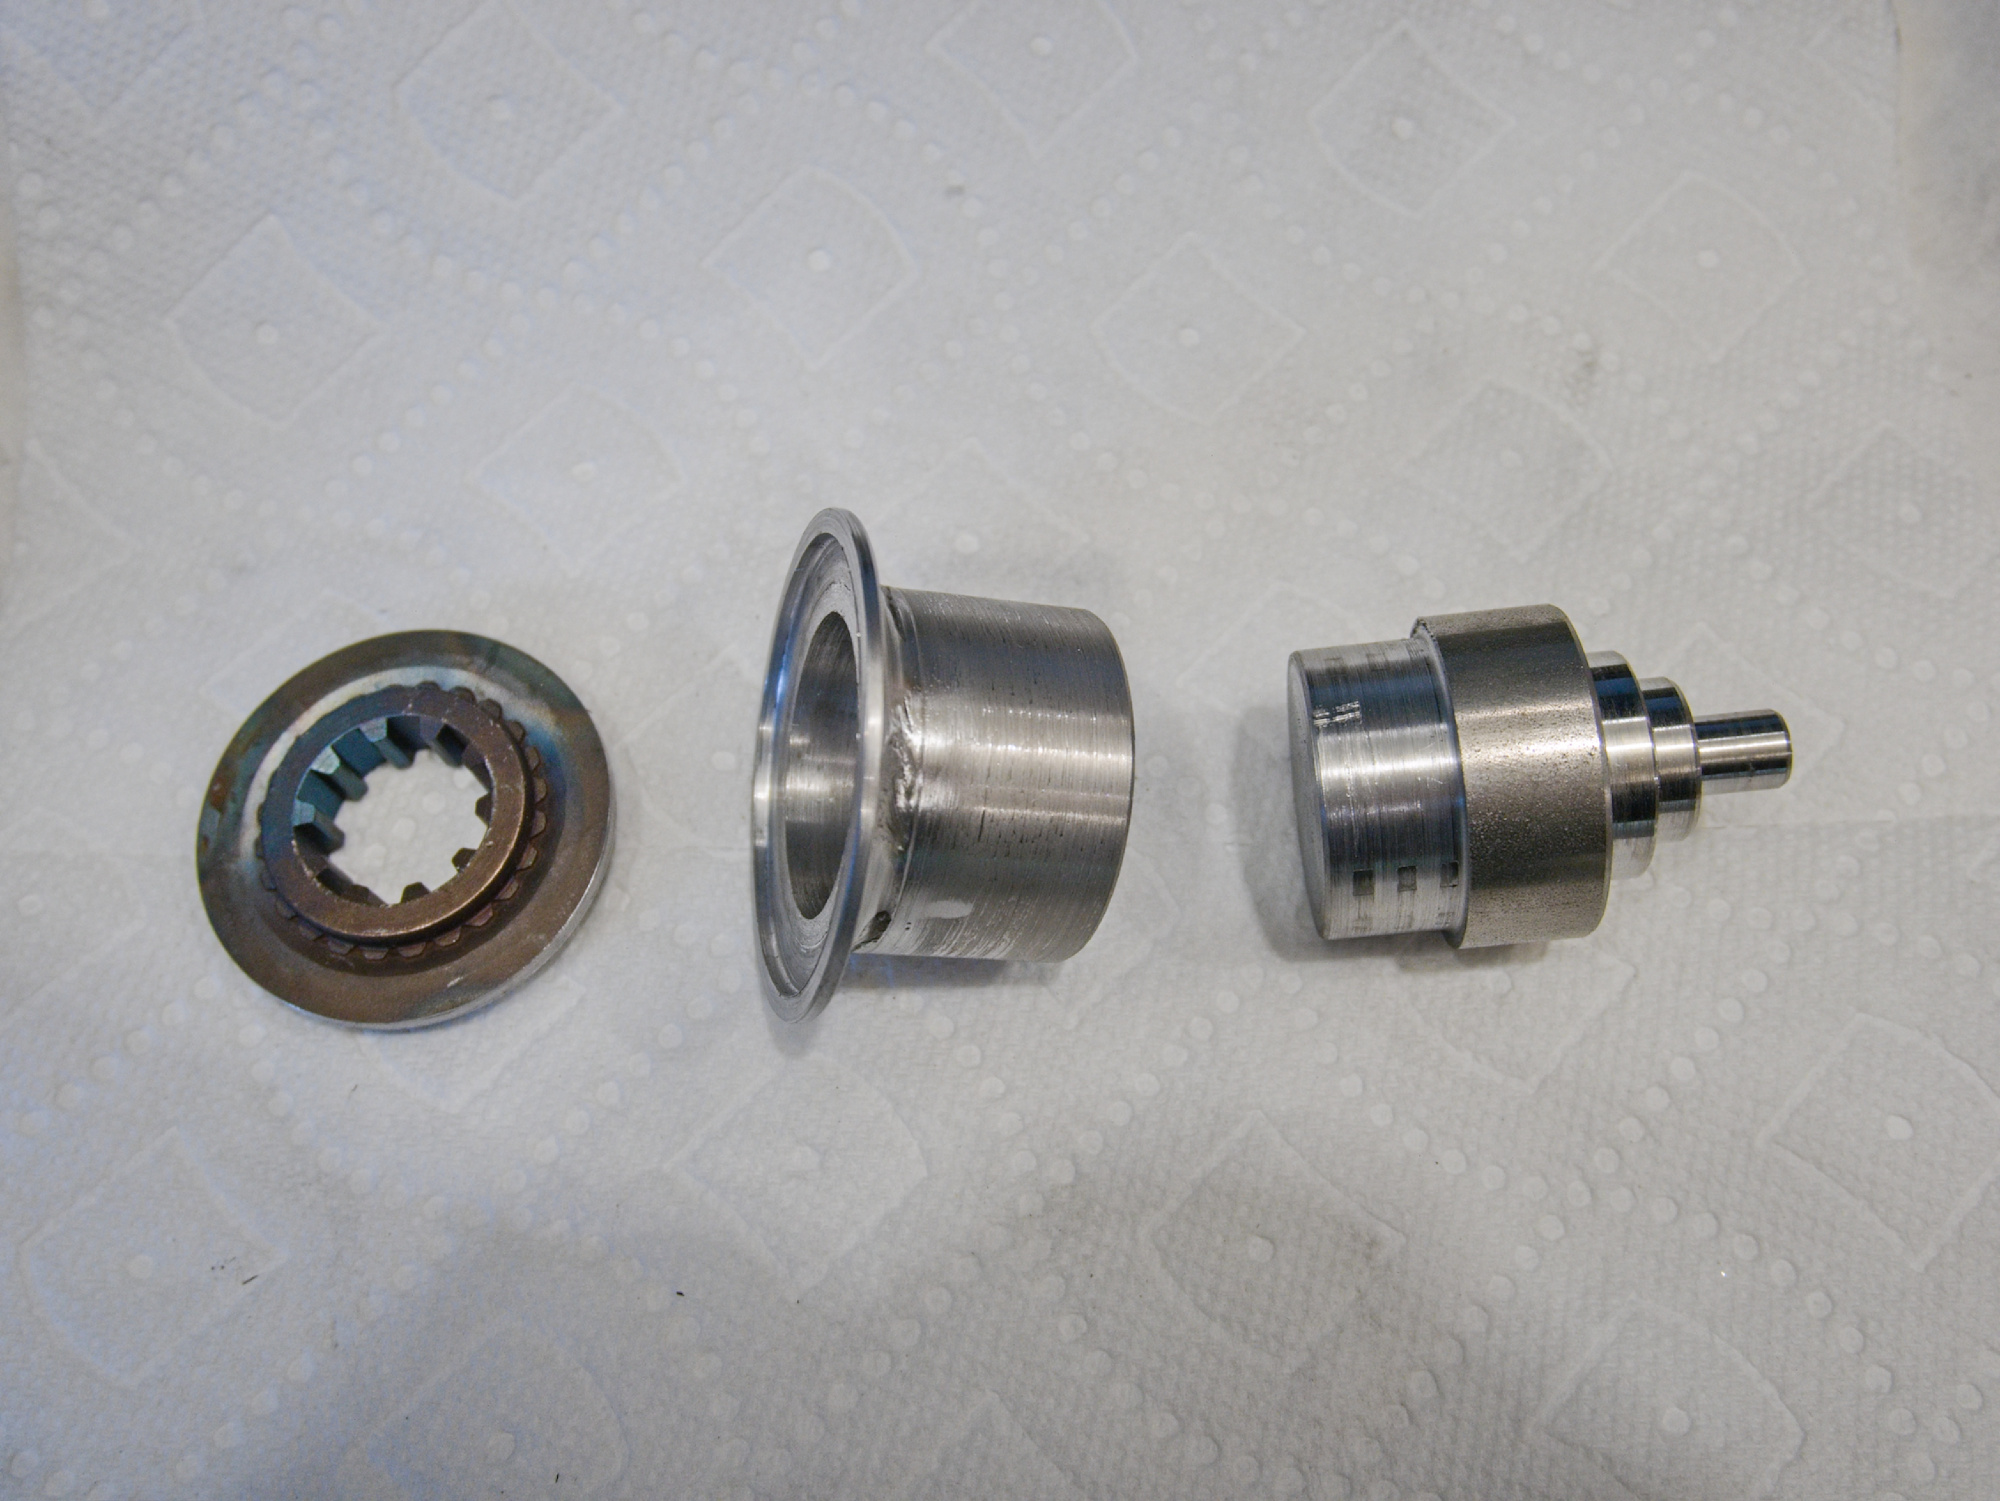
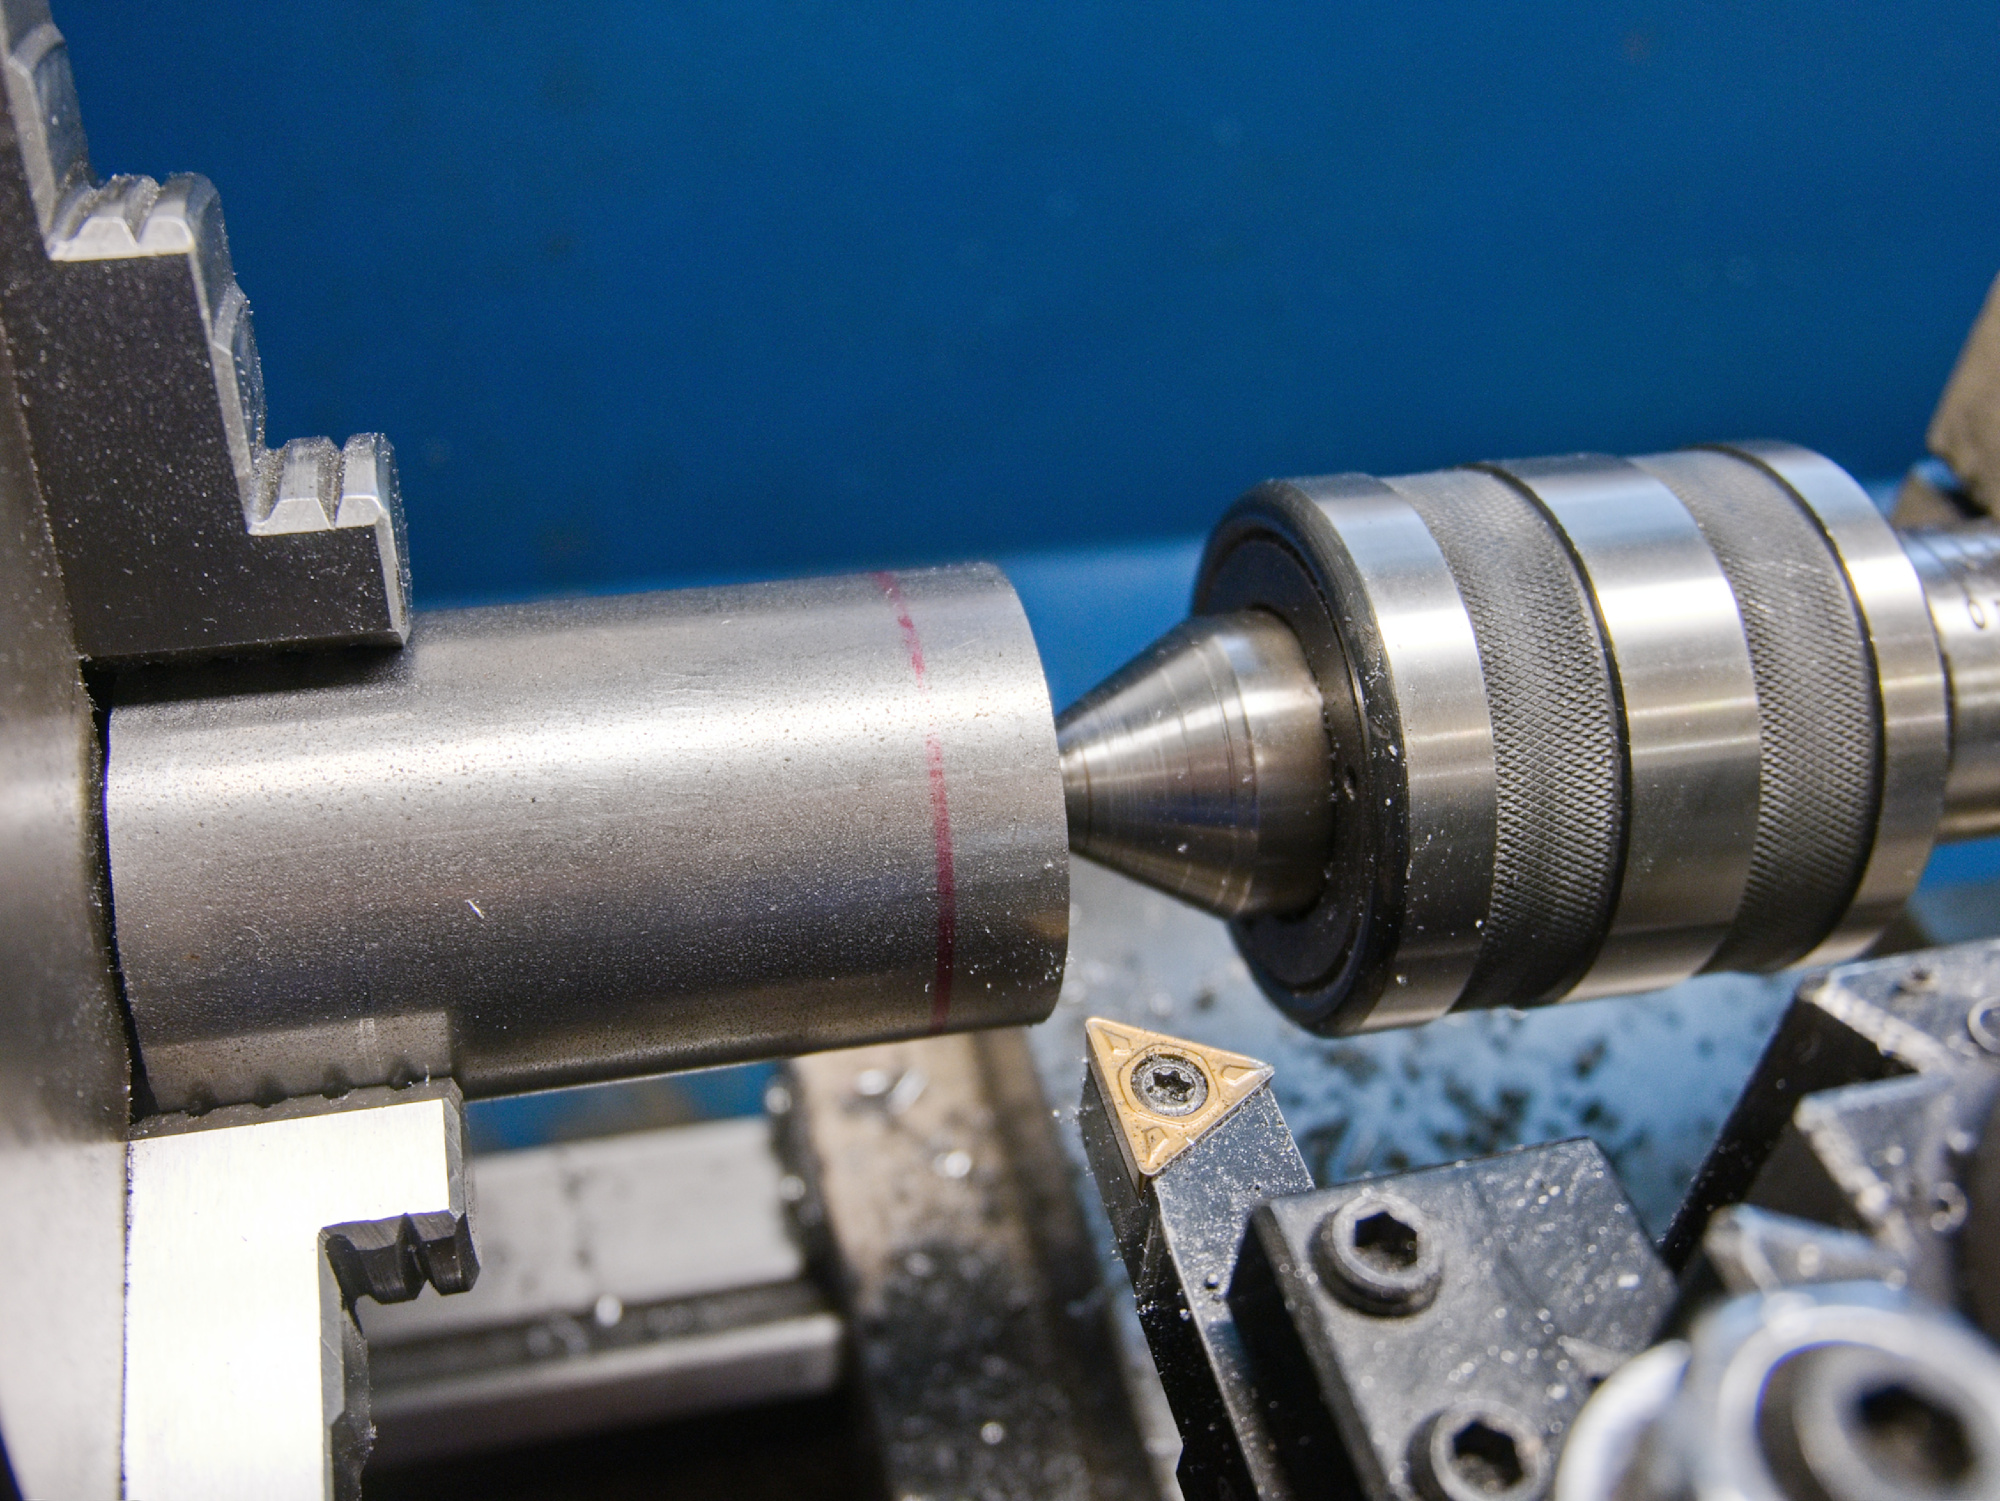
I'm using an unused clutch for this.
Cut with a plasma cutter since some parts are hardened.
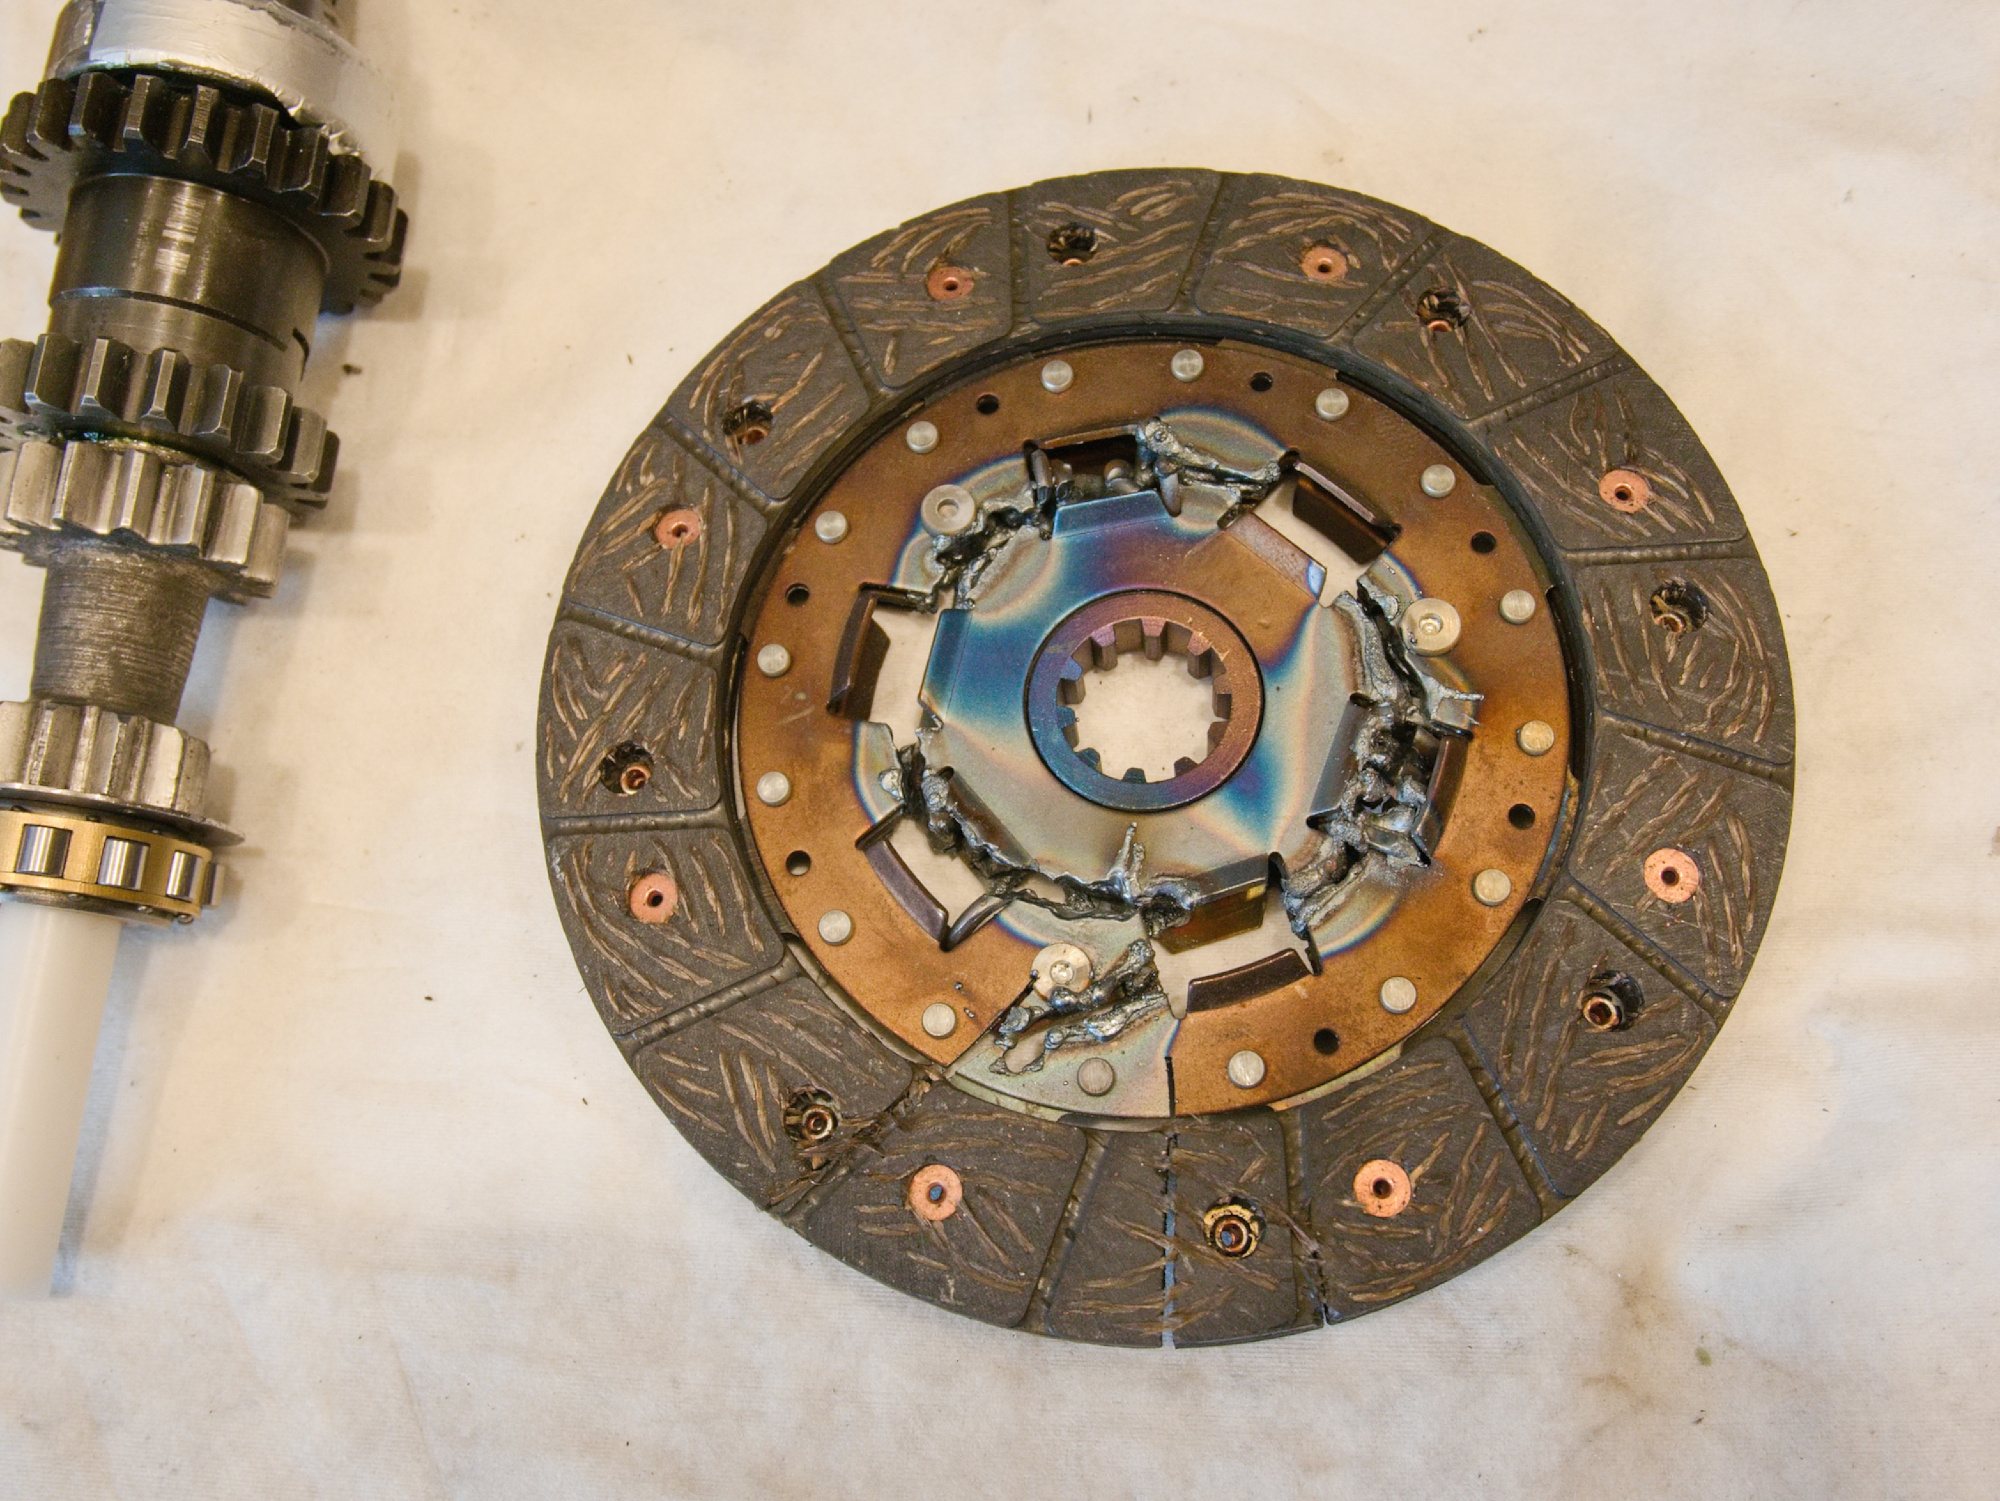
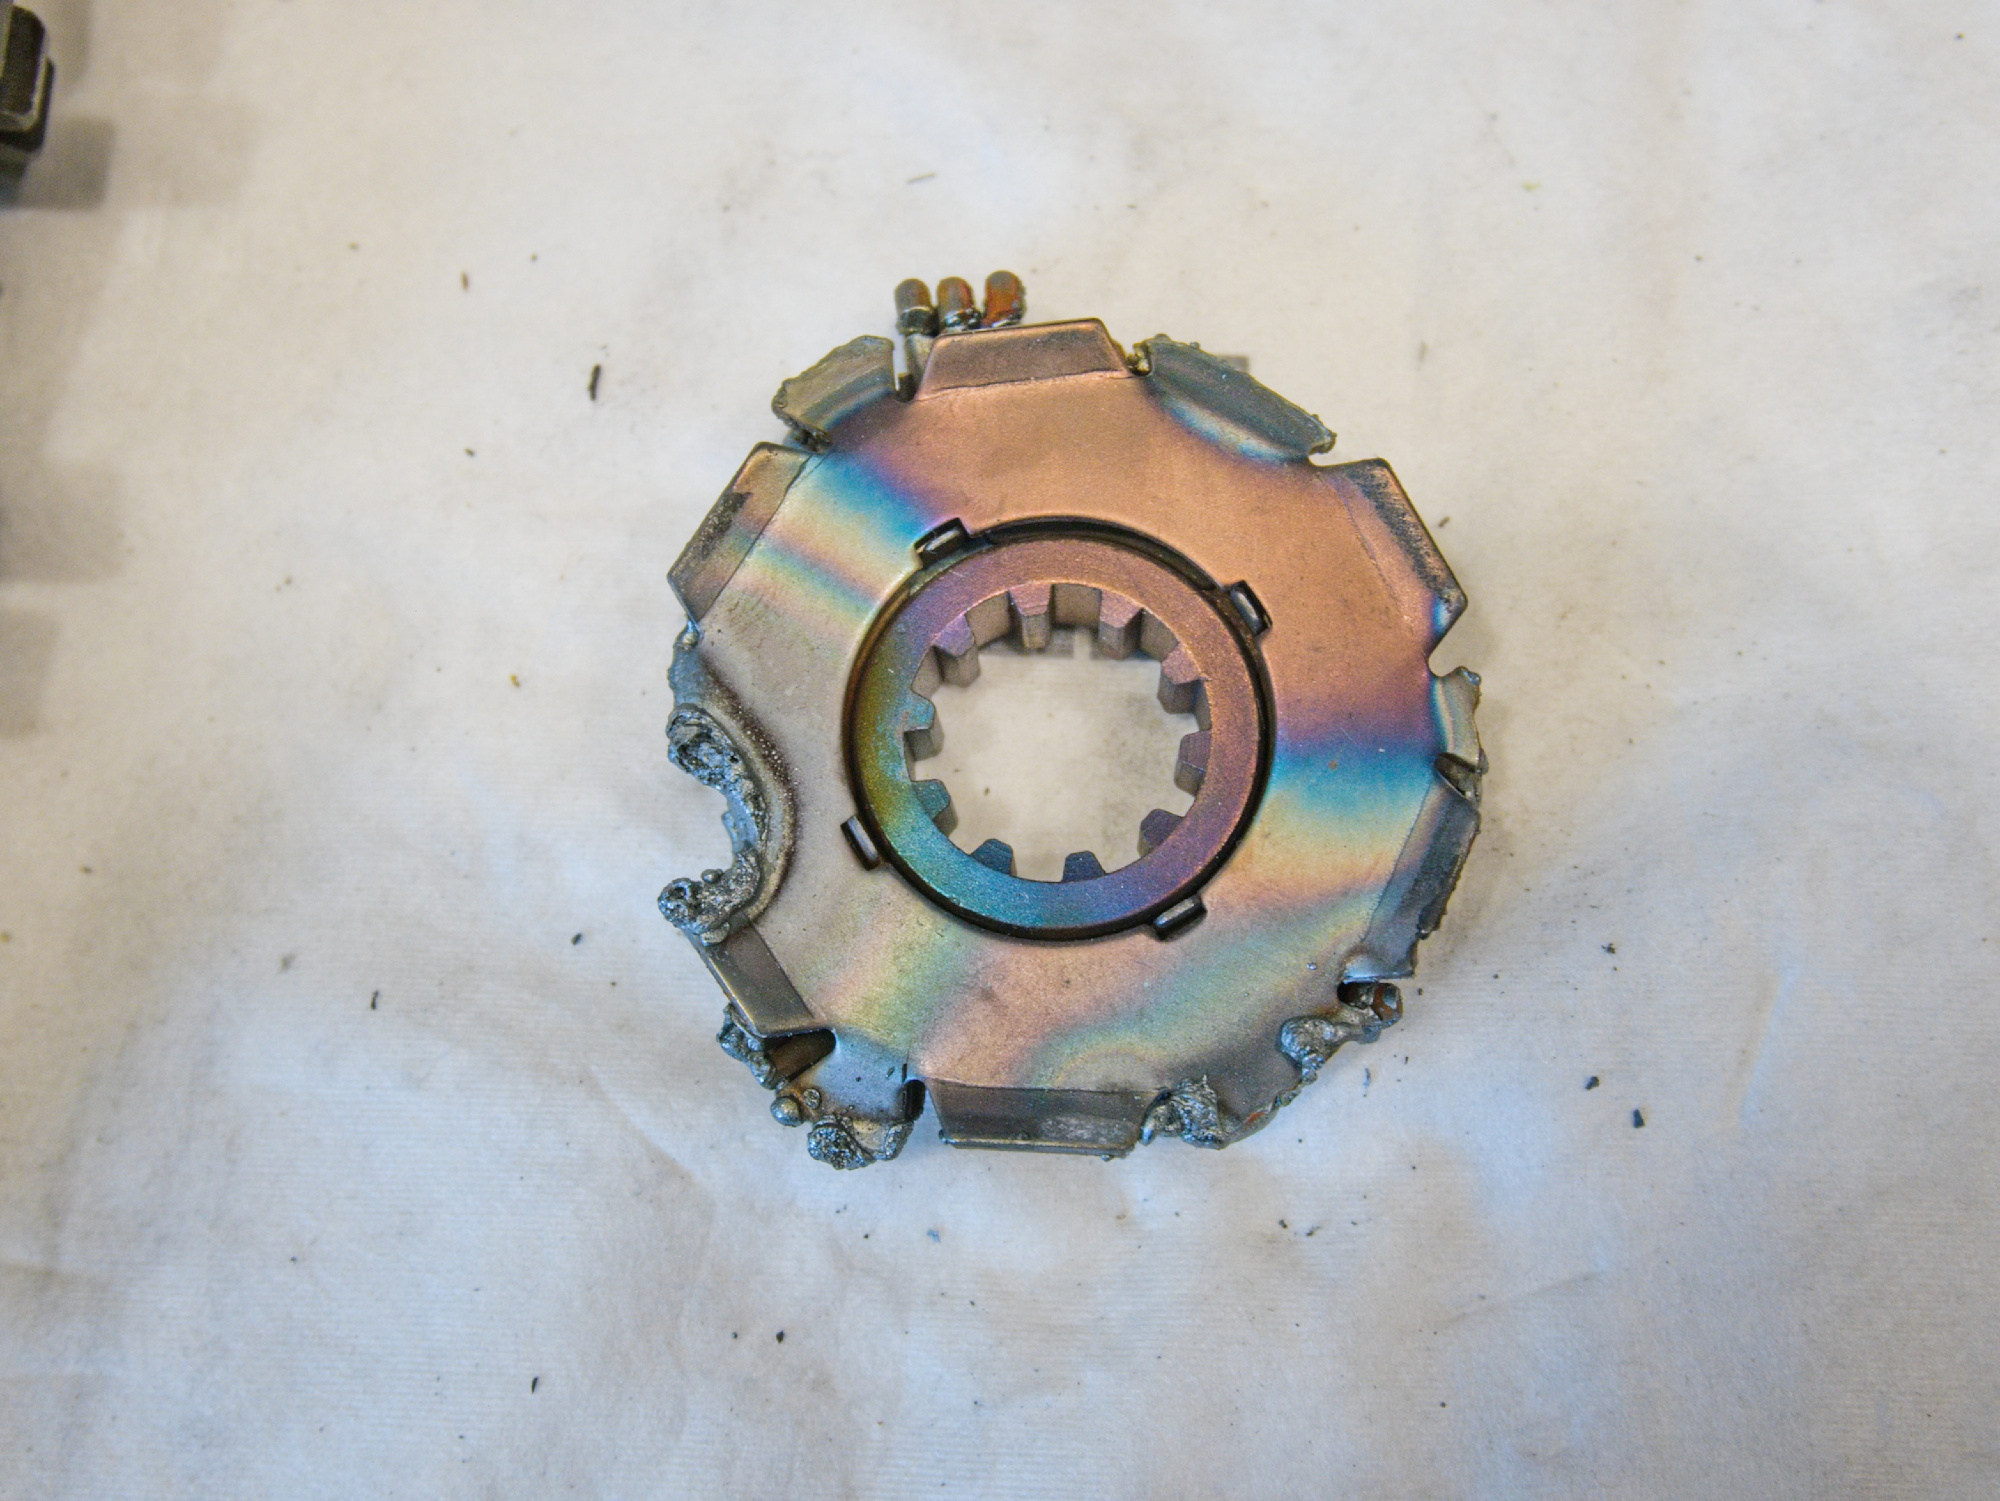

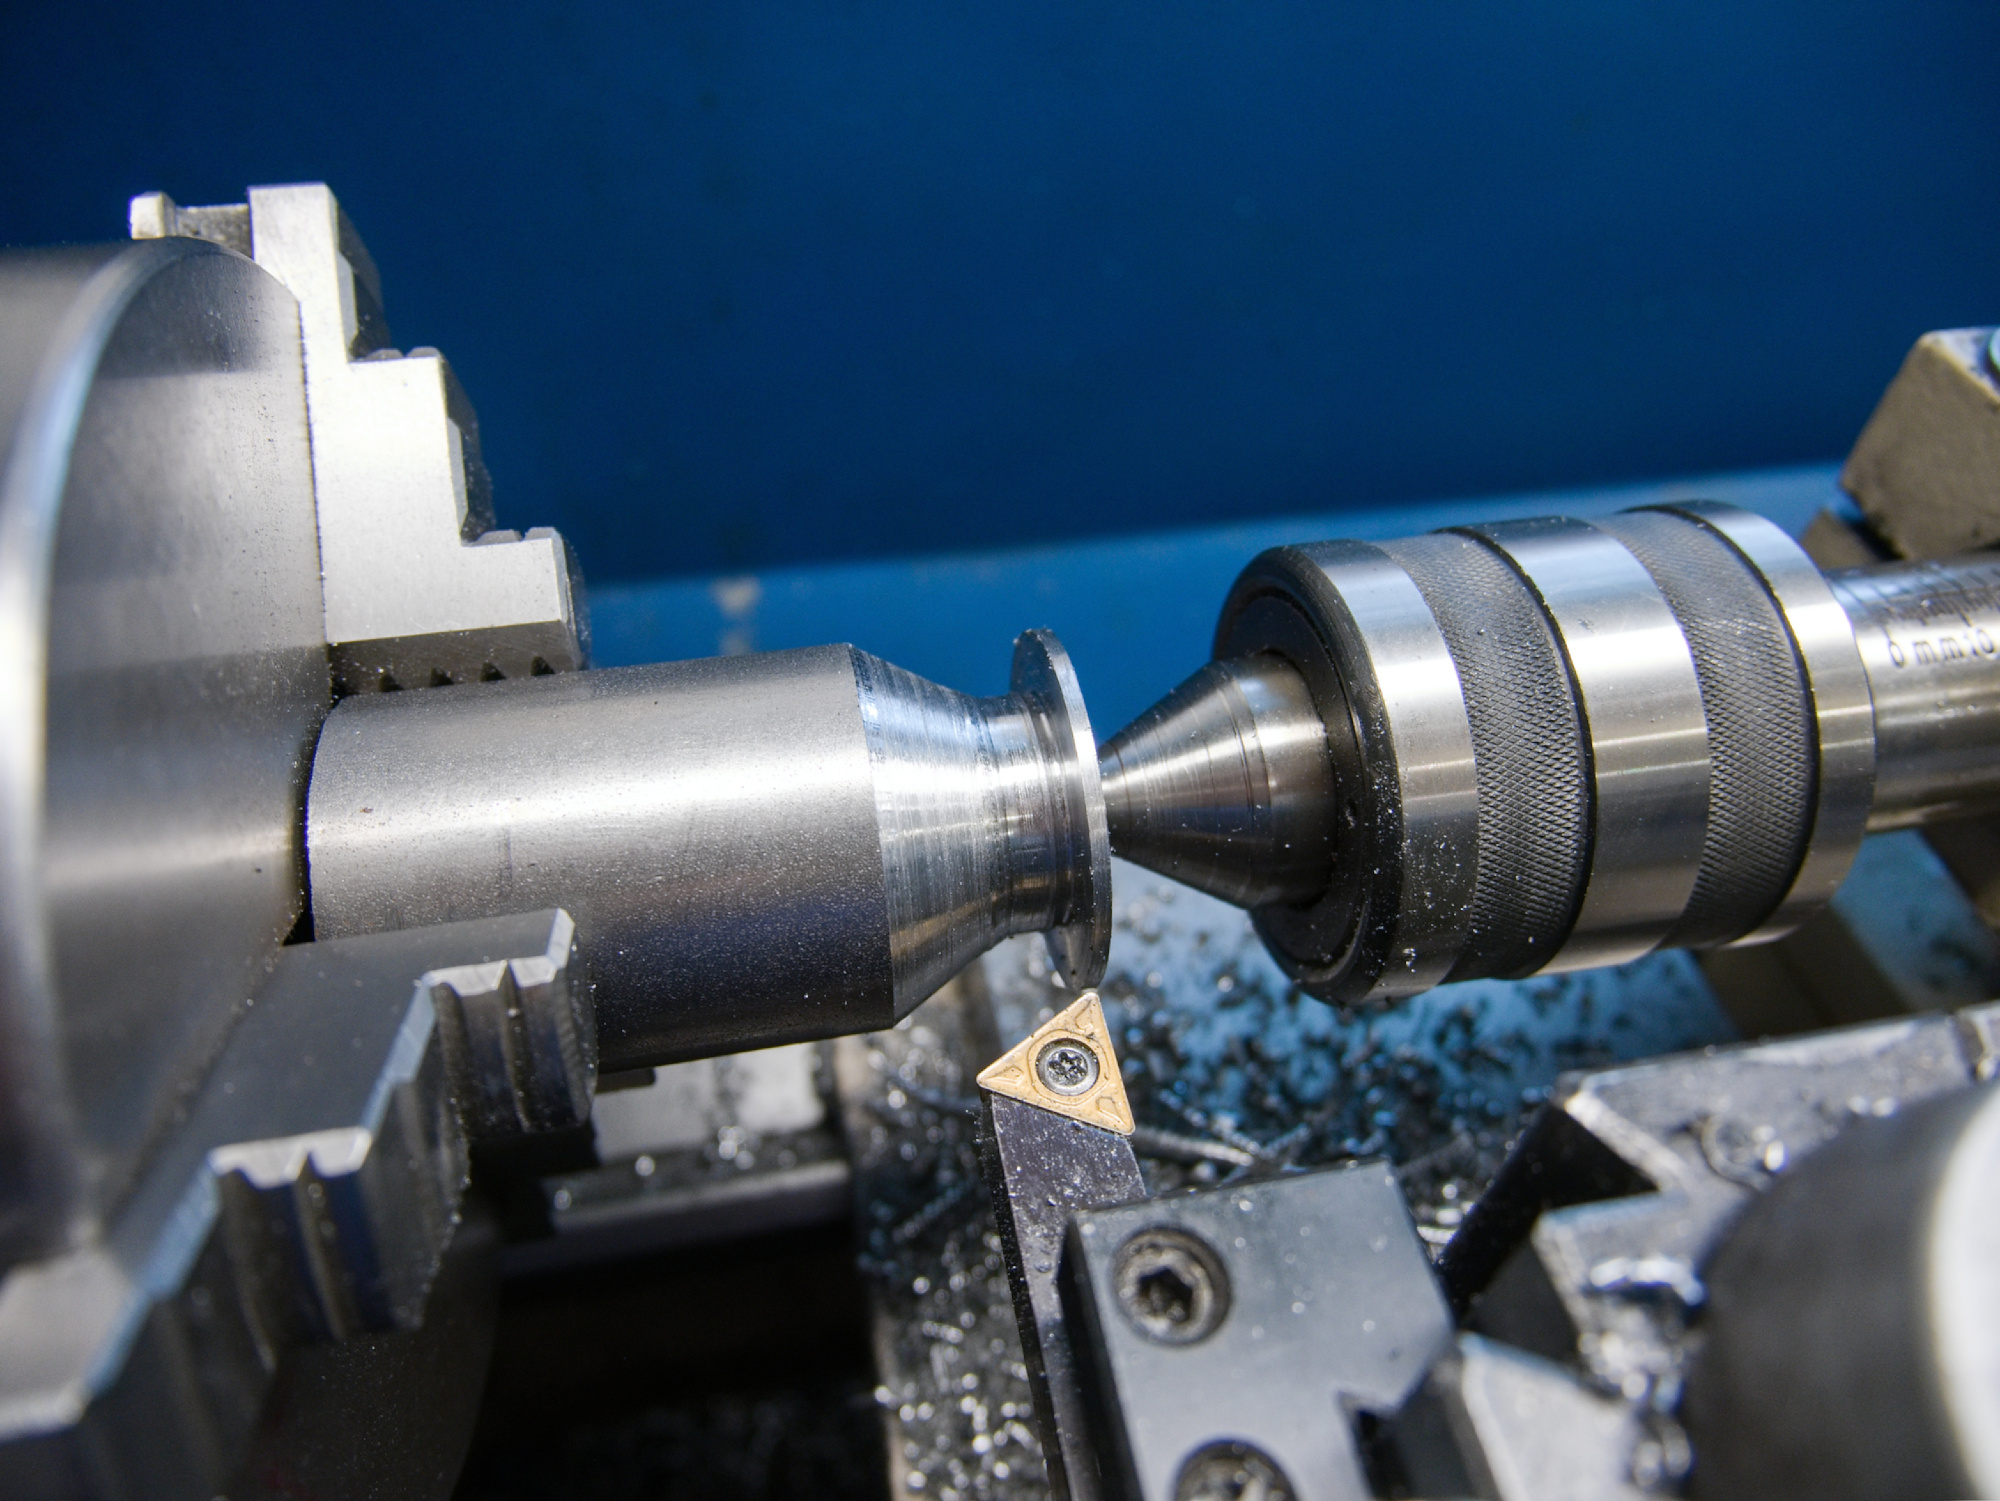
The cut out flange is machined using the input shaft.
To hold the flange with the spline in place, I'm using an old sidecar suspension holder.
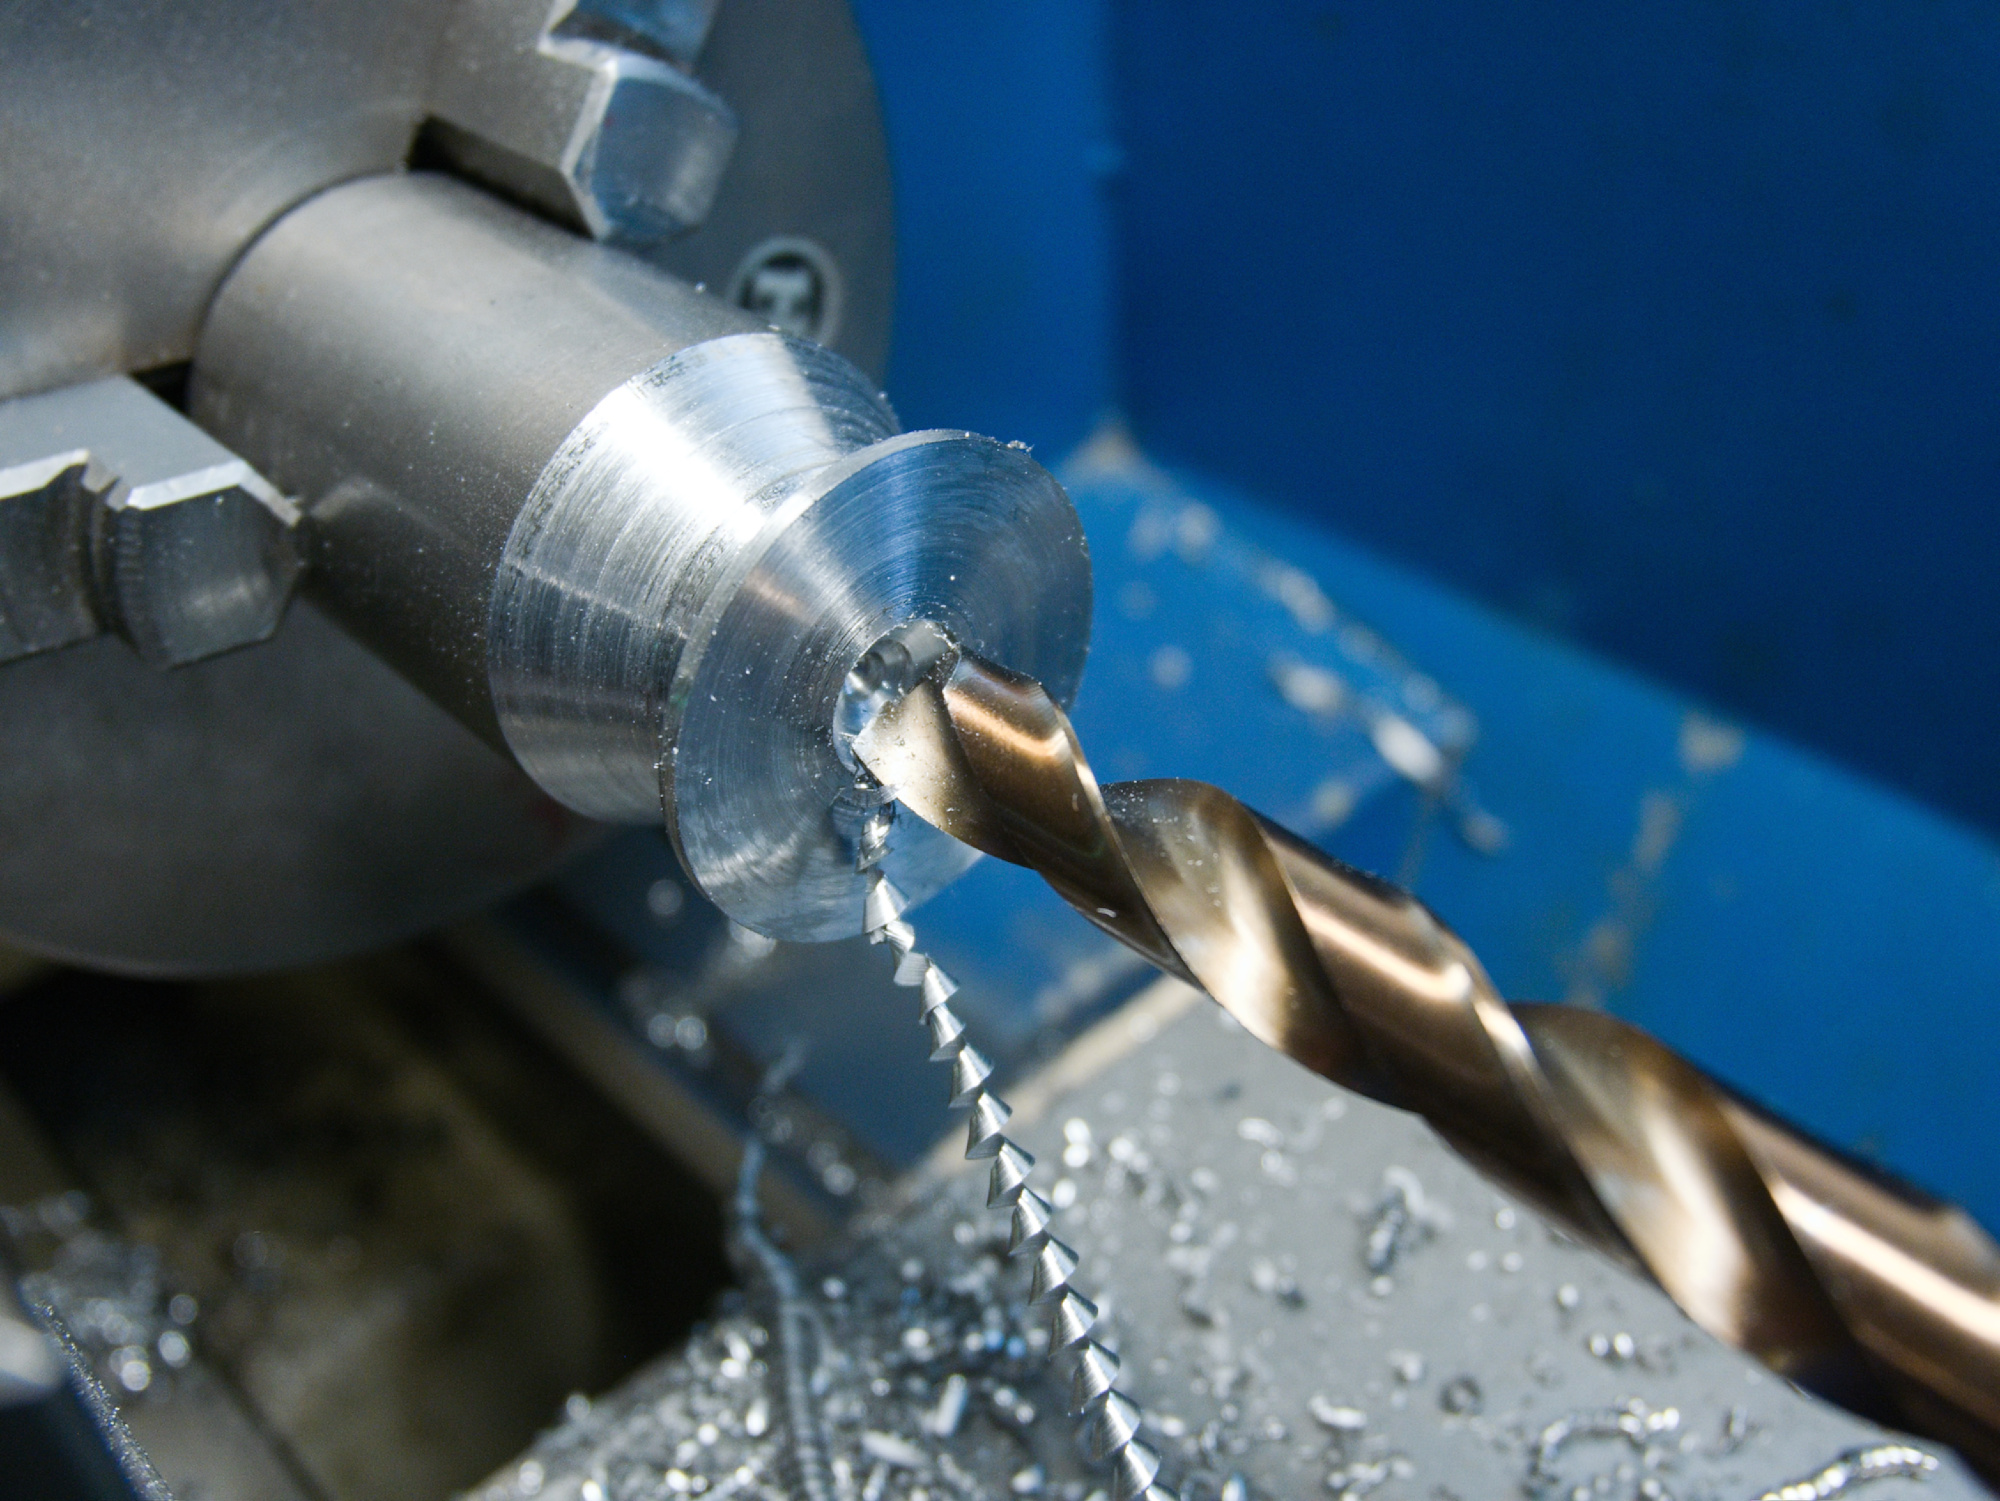
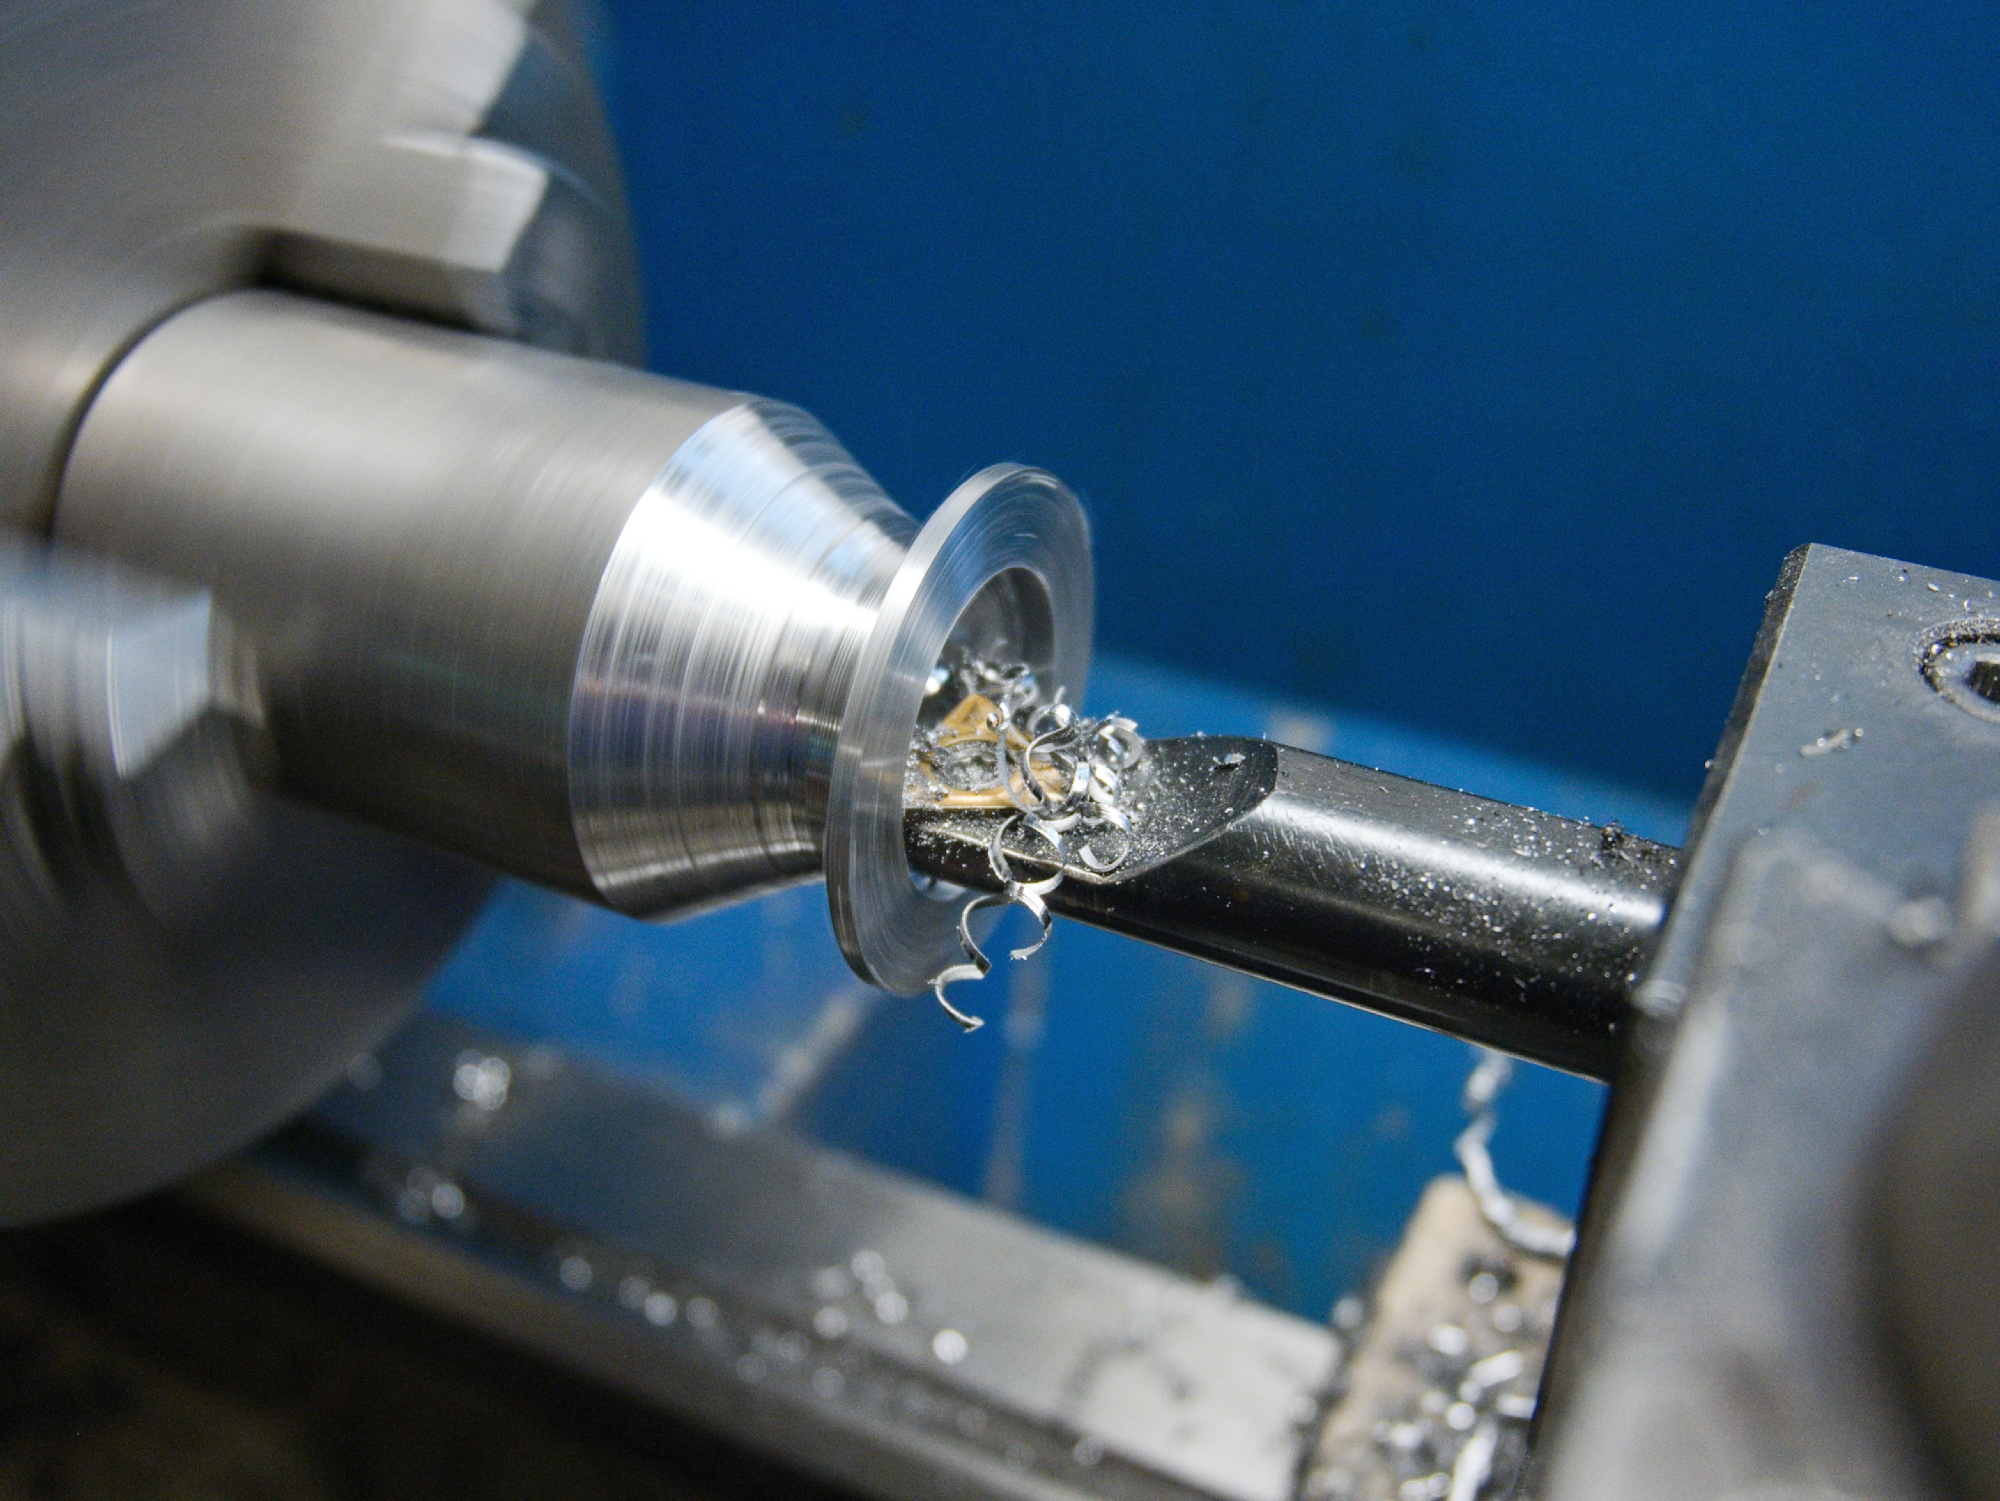
The machined parts are secured with Loctite 638.
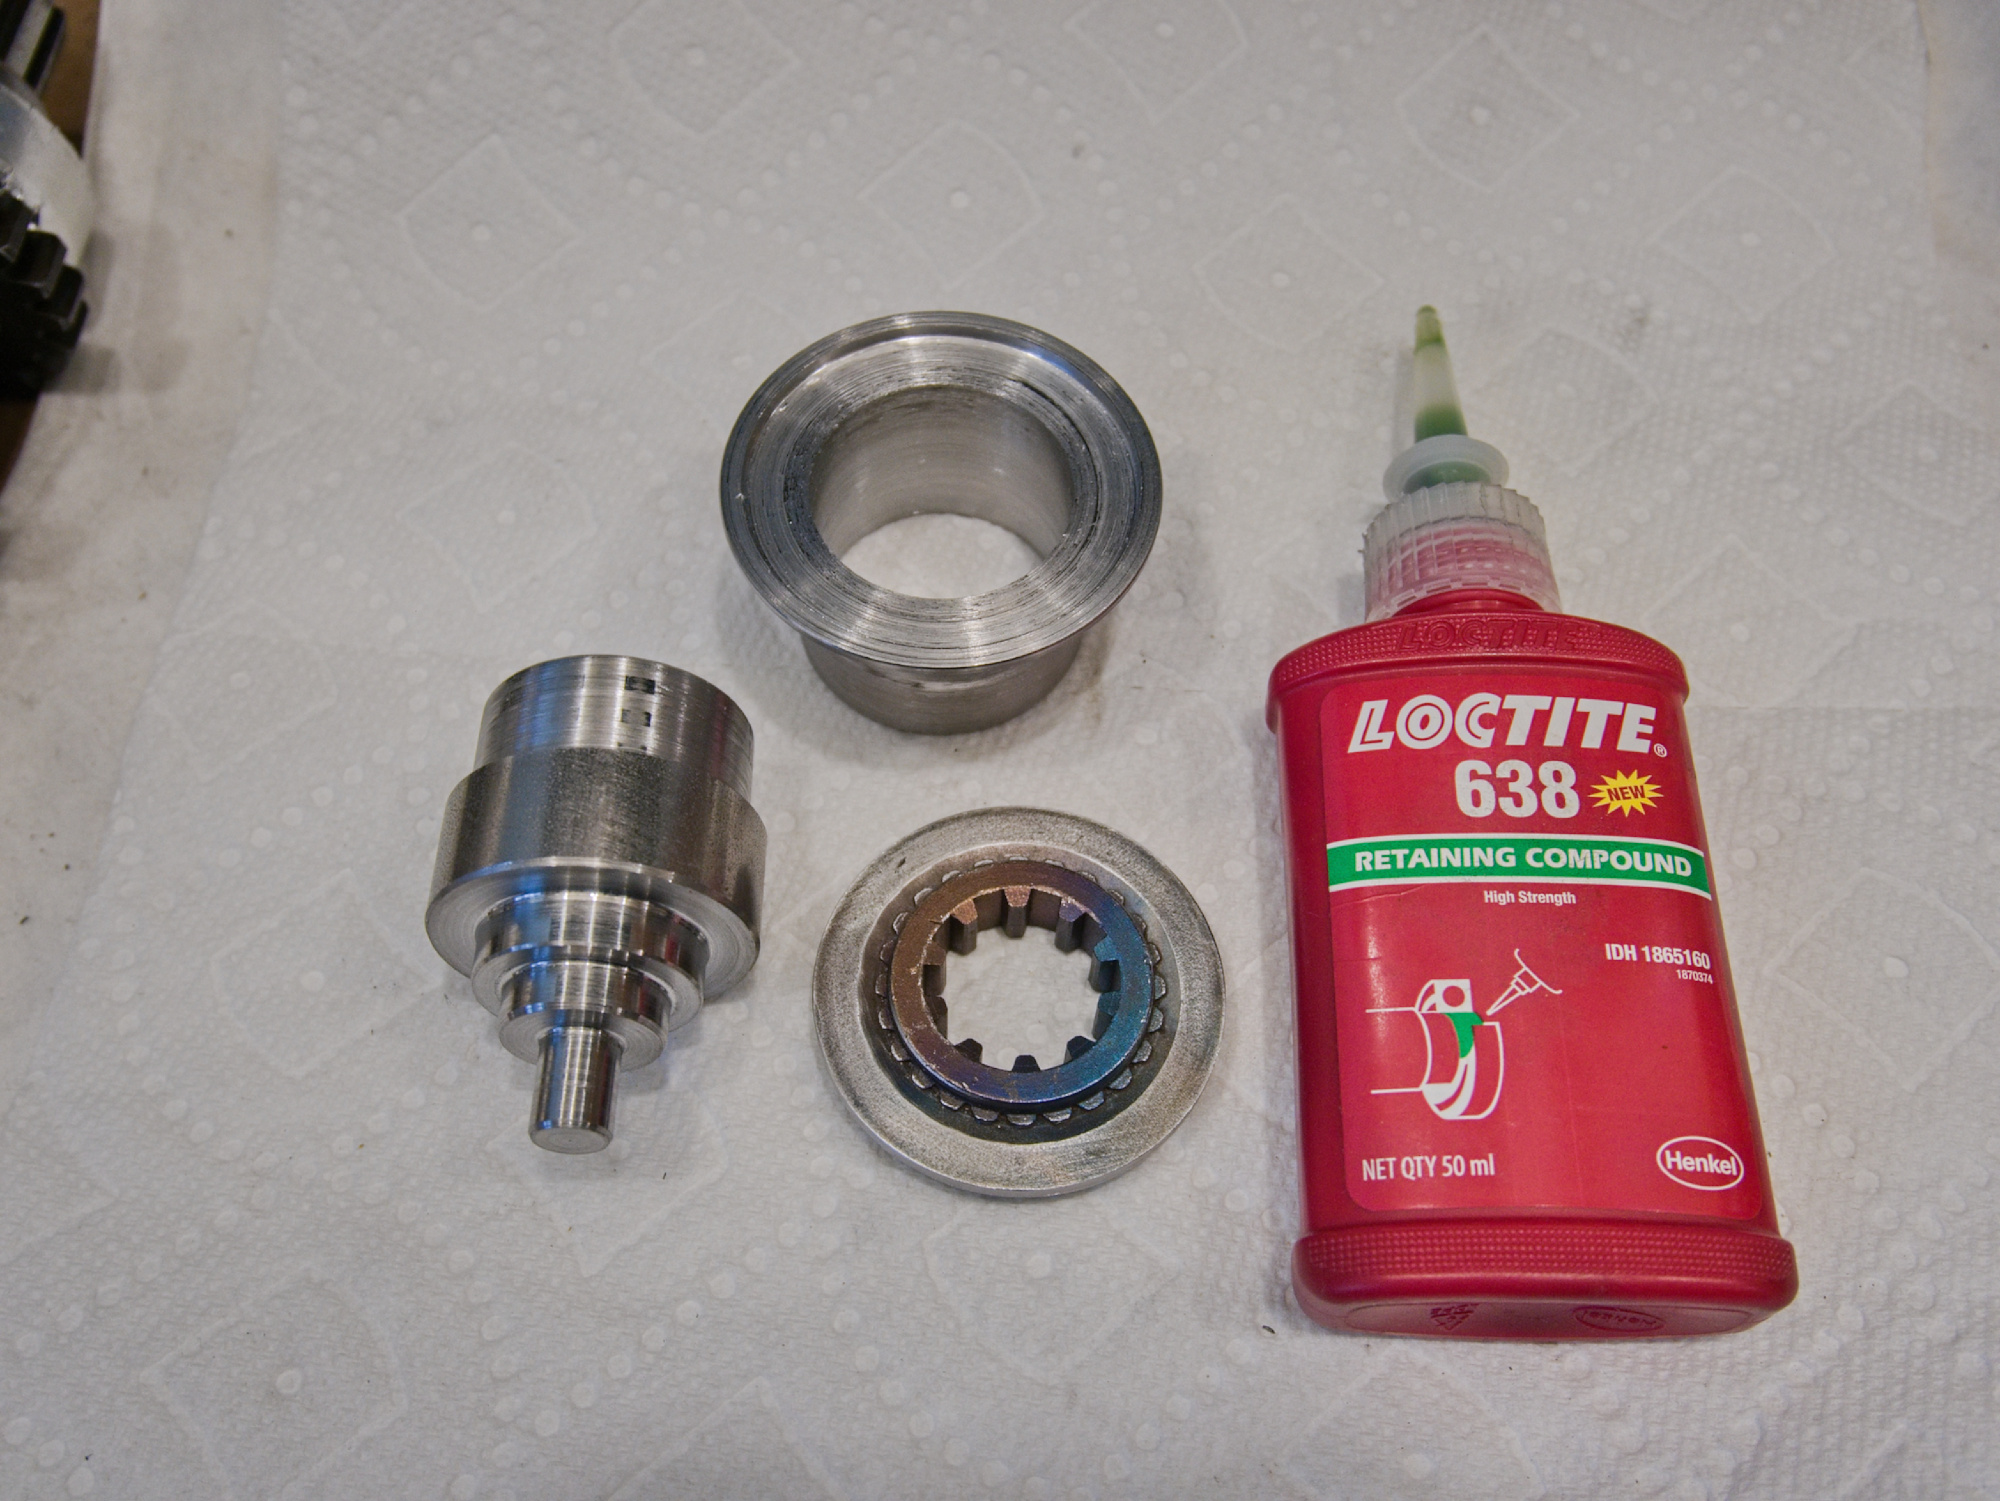
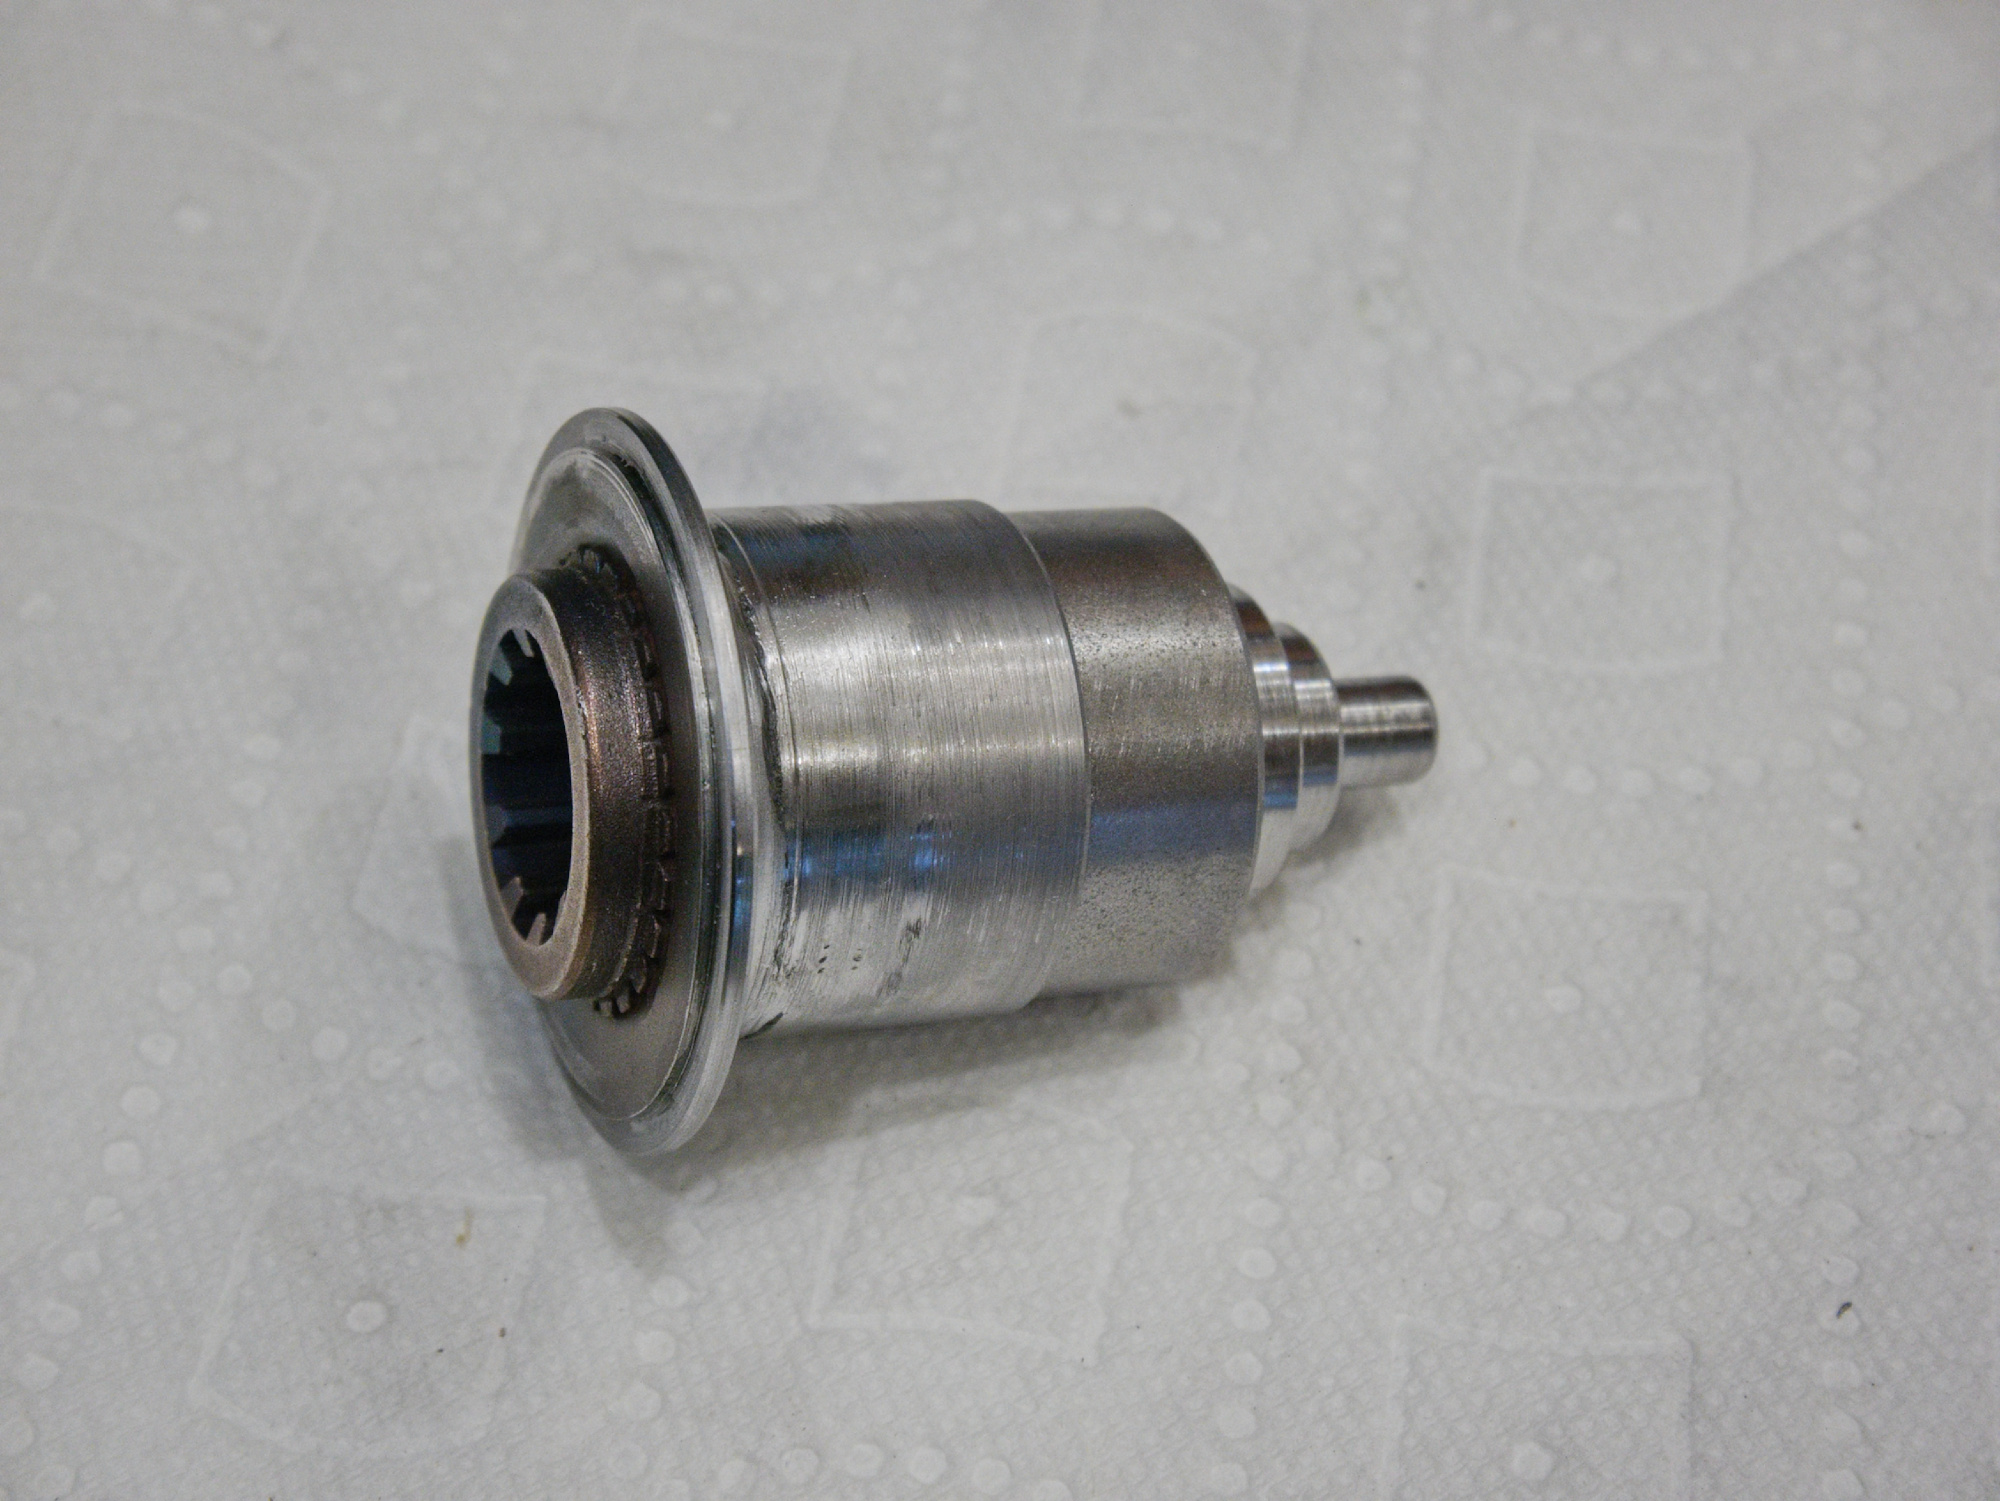
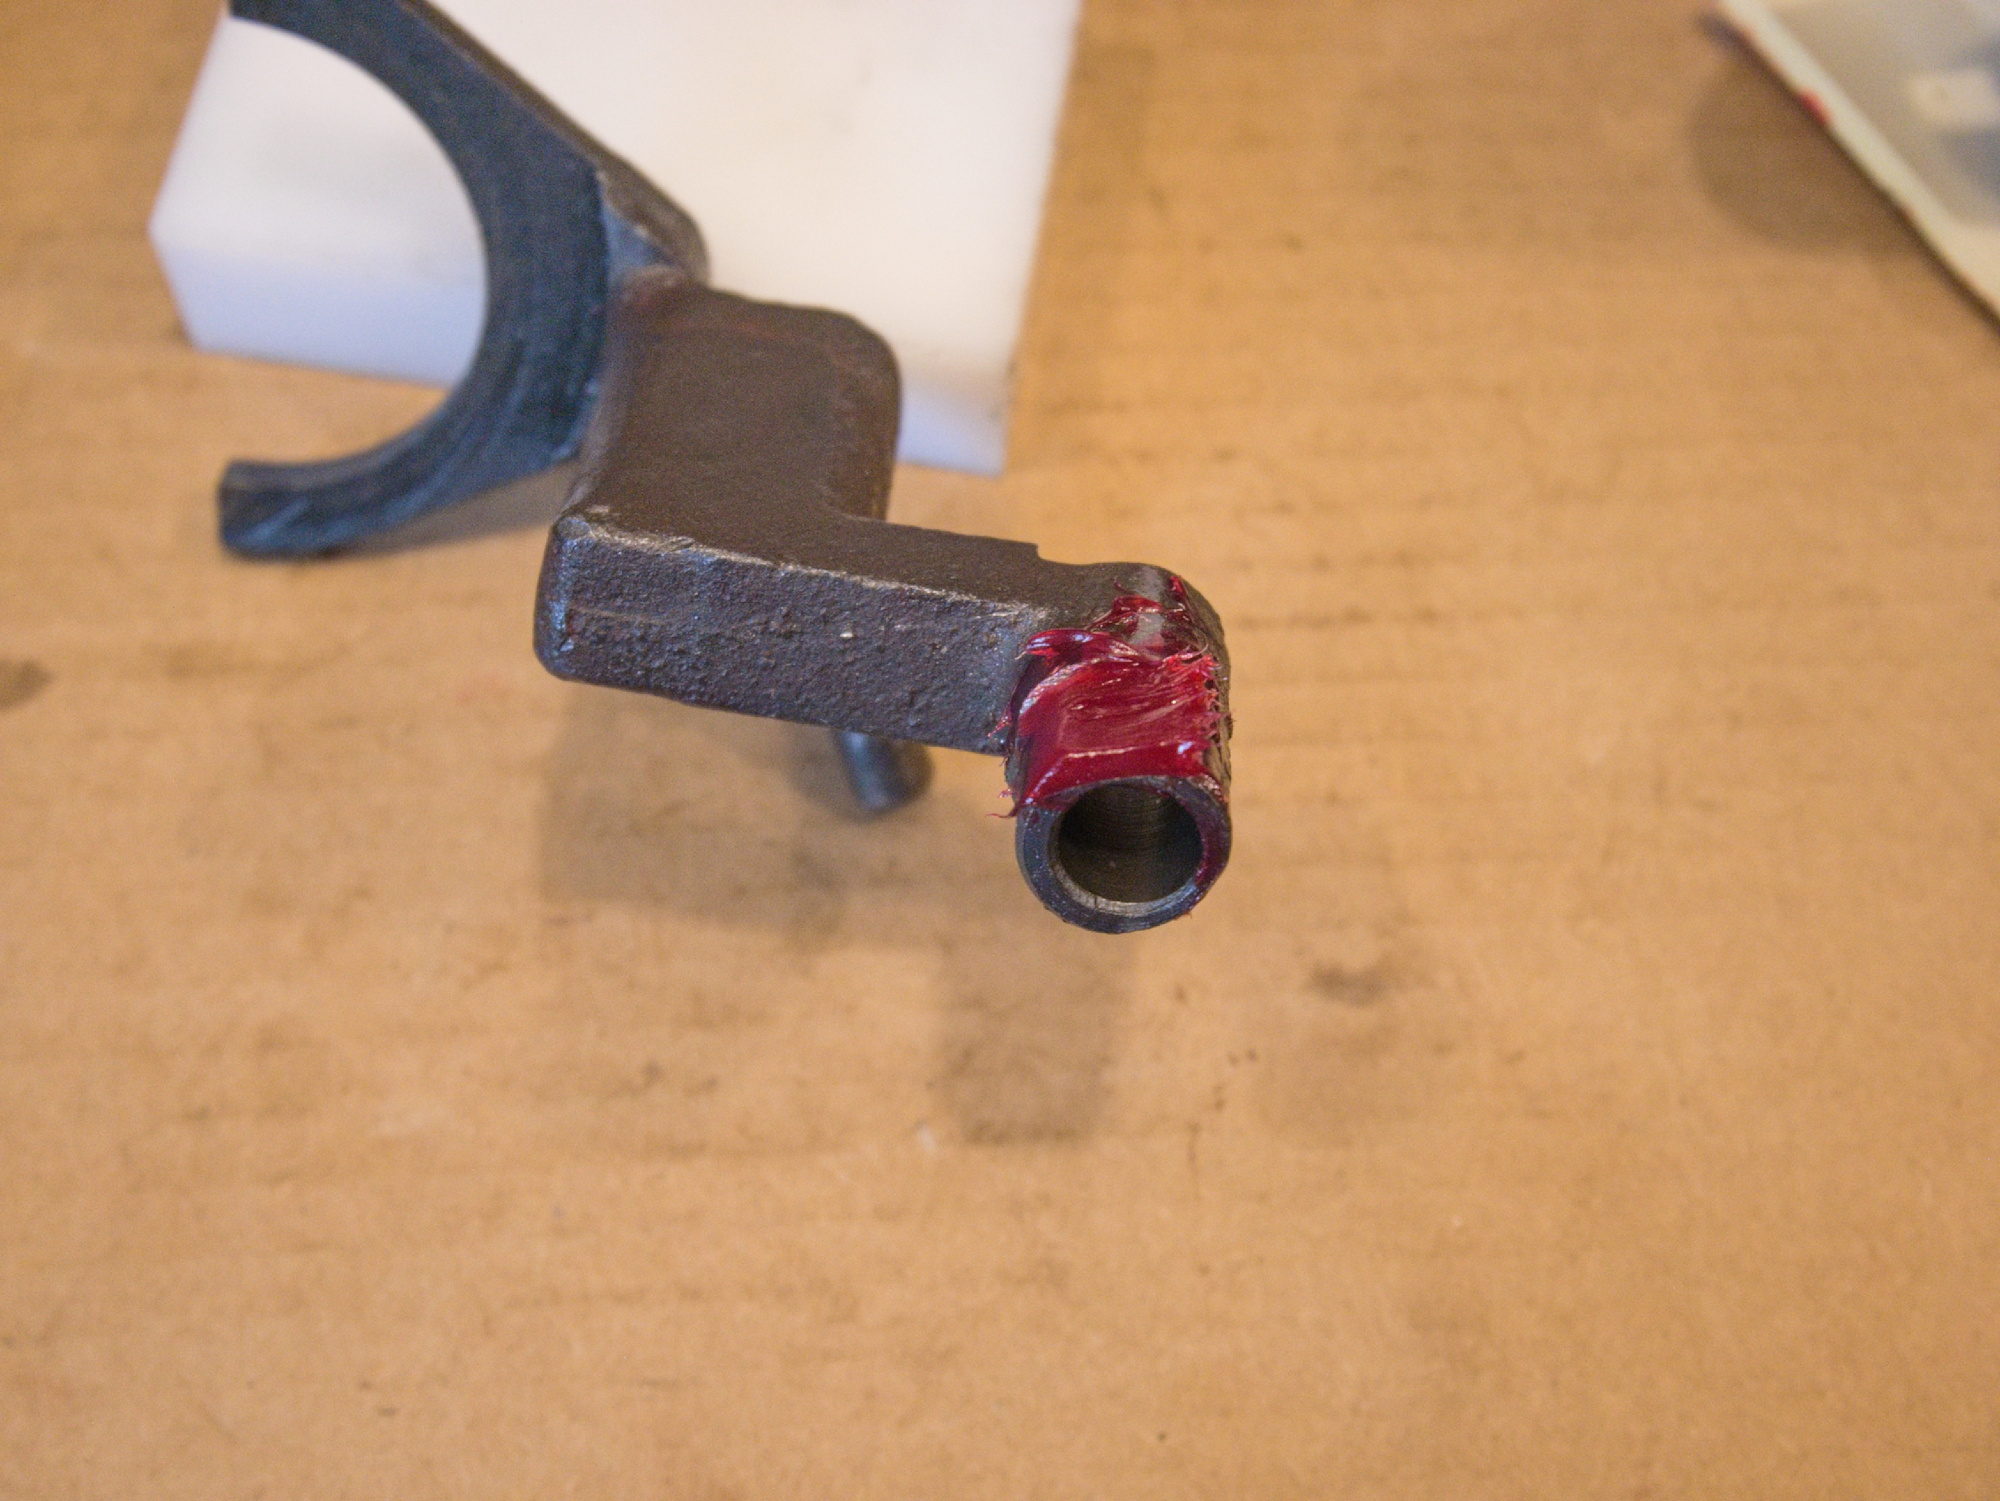
Finished spline adapter.
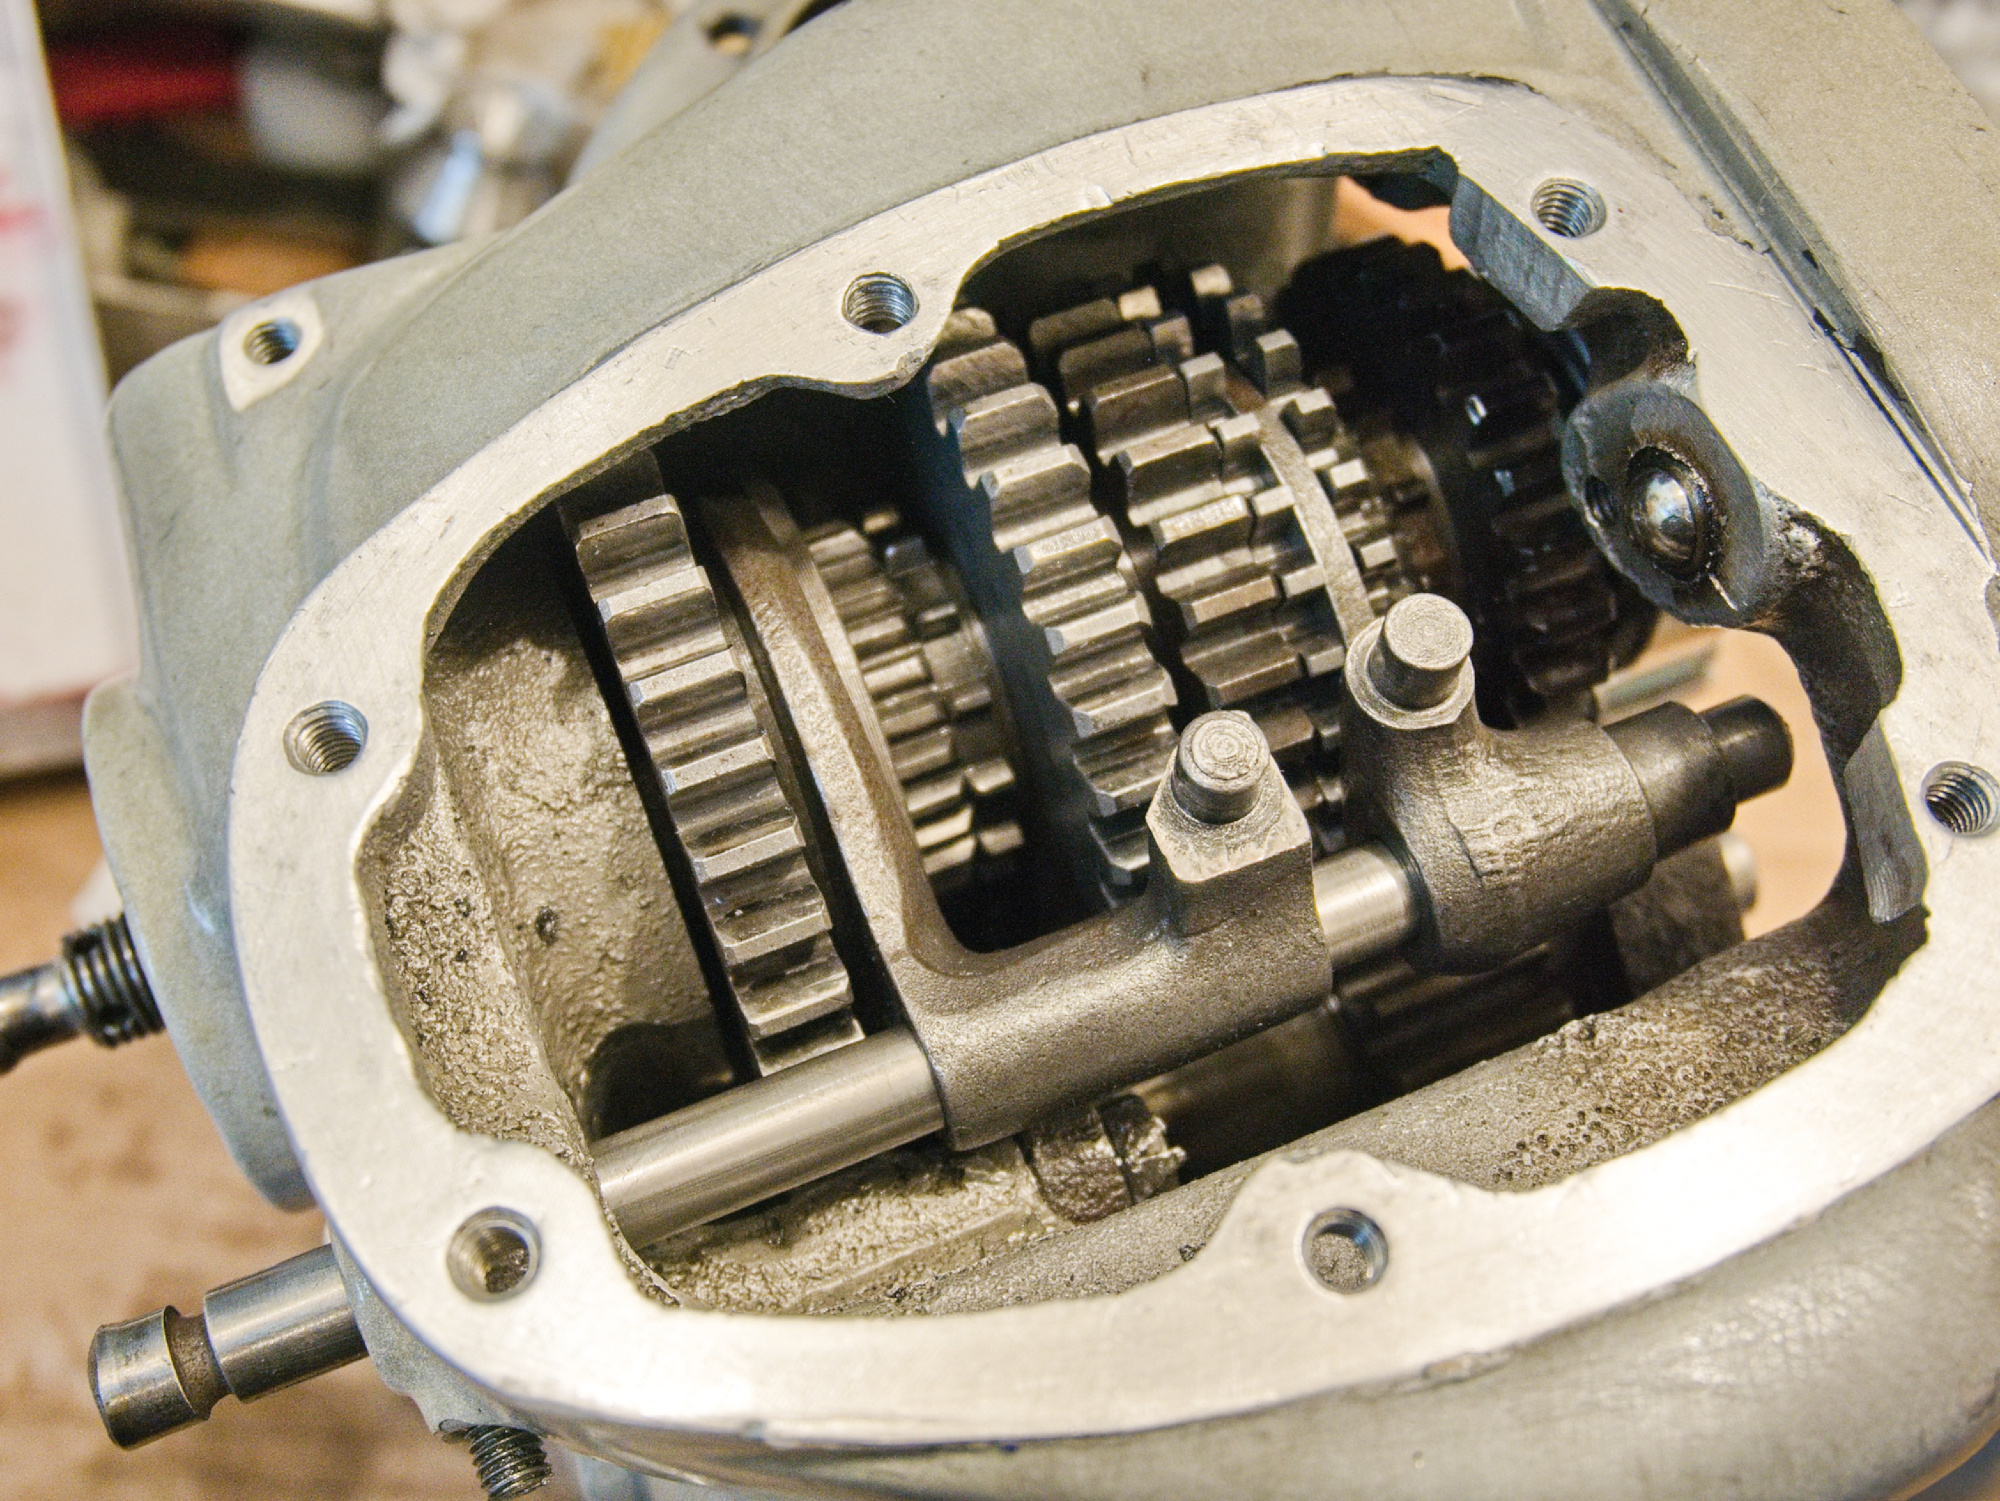
The gears gets installed with the dry gaskets only and checked if all gears can be selected and that they run without any grinding noise.
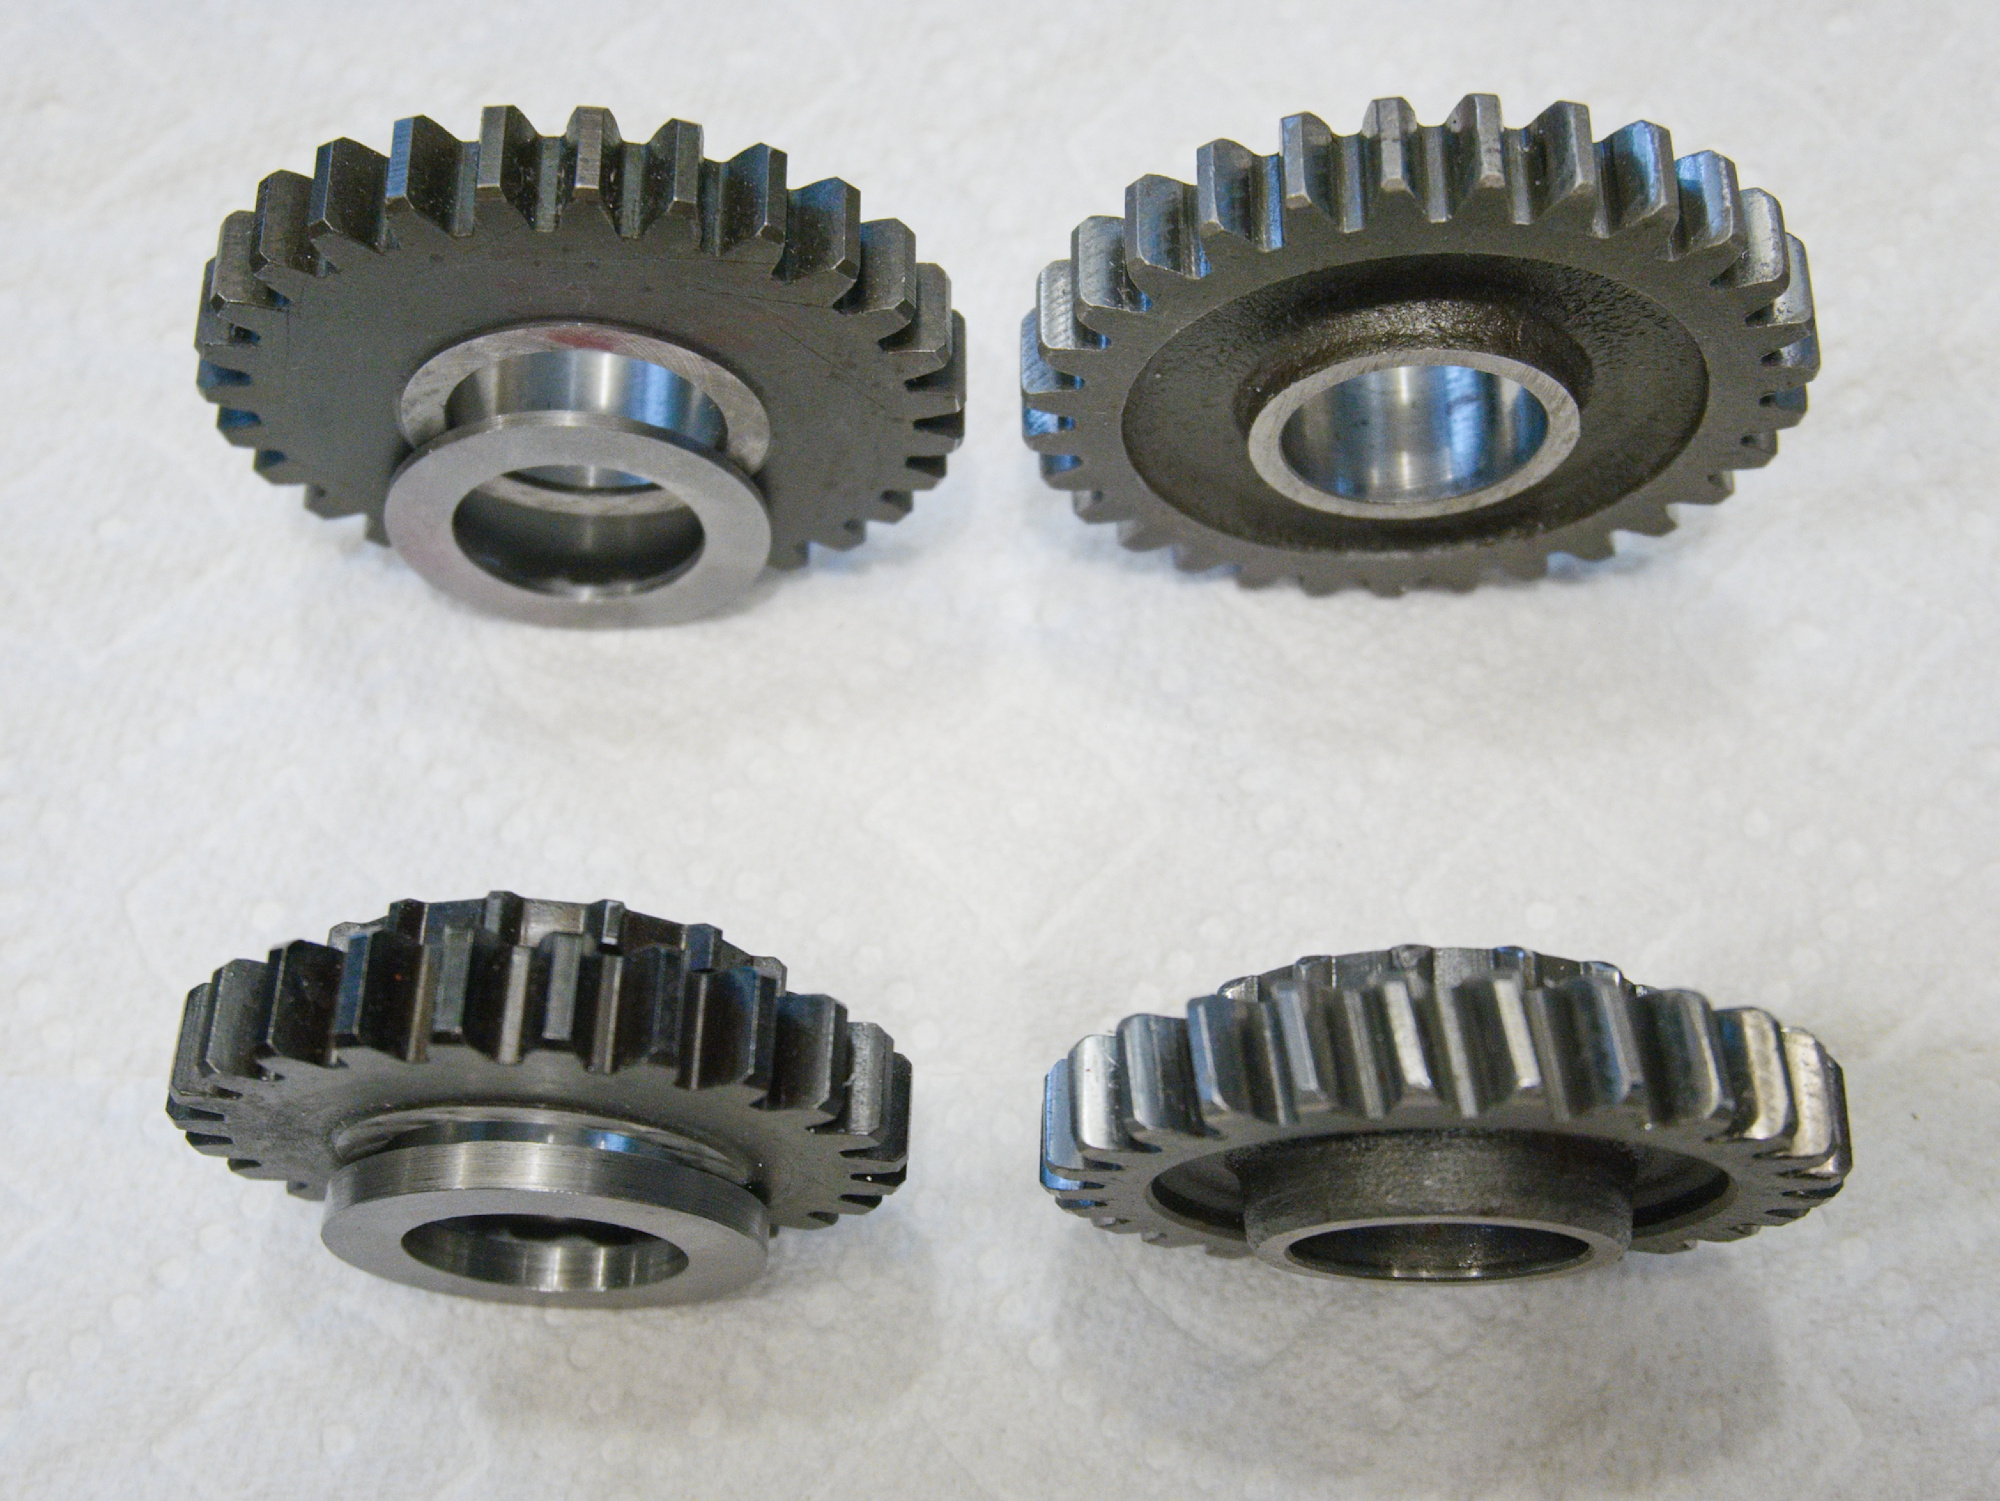
The new 3rd and 4th gear for the output shaft are slightly thinner as the original gears.
To compensate for this, spacers need to be added to have the new gears aligned.
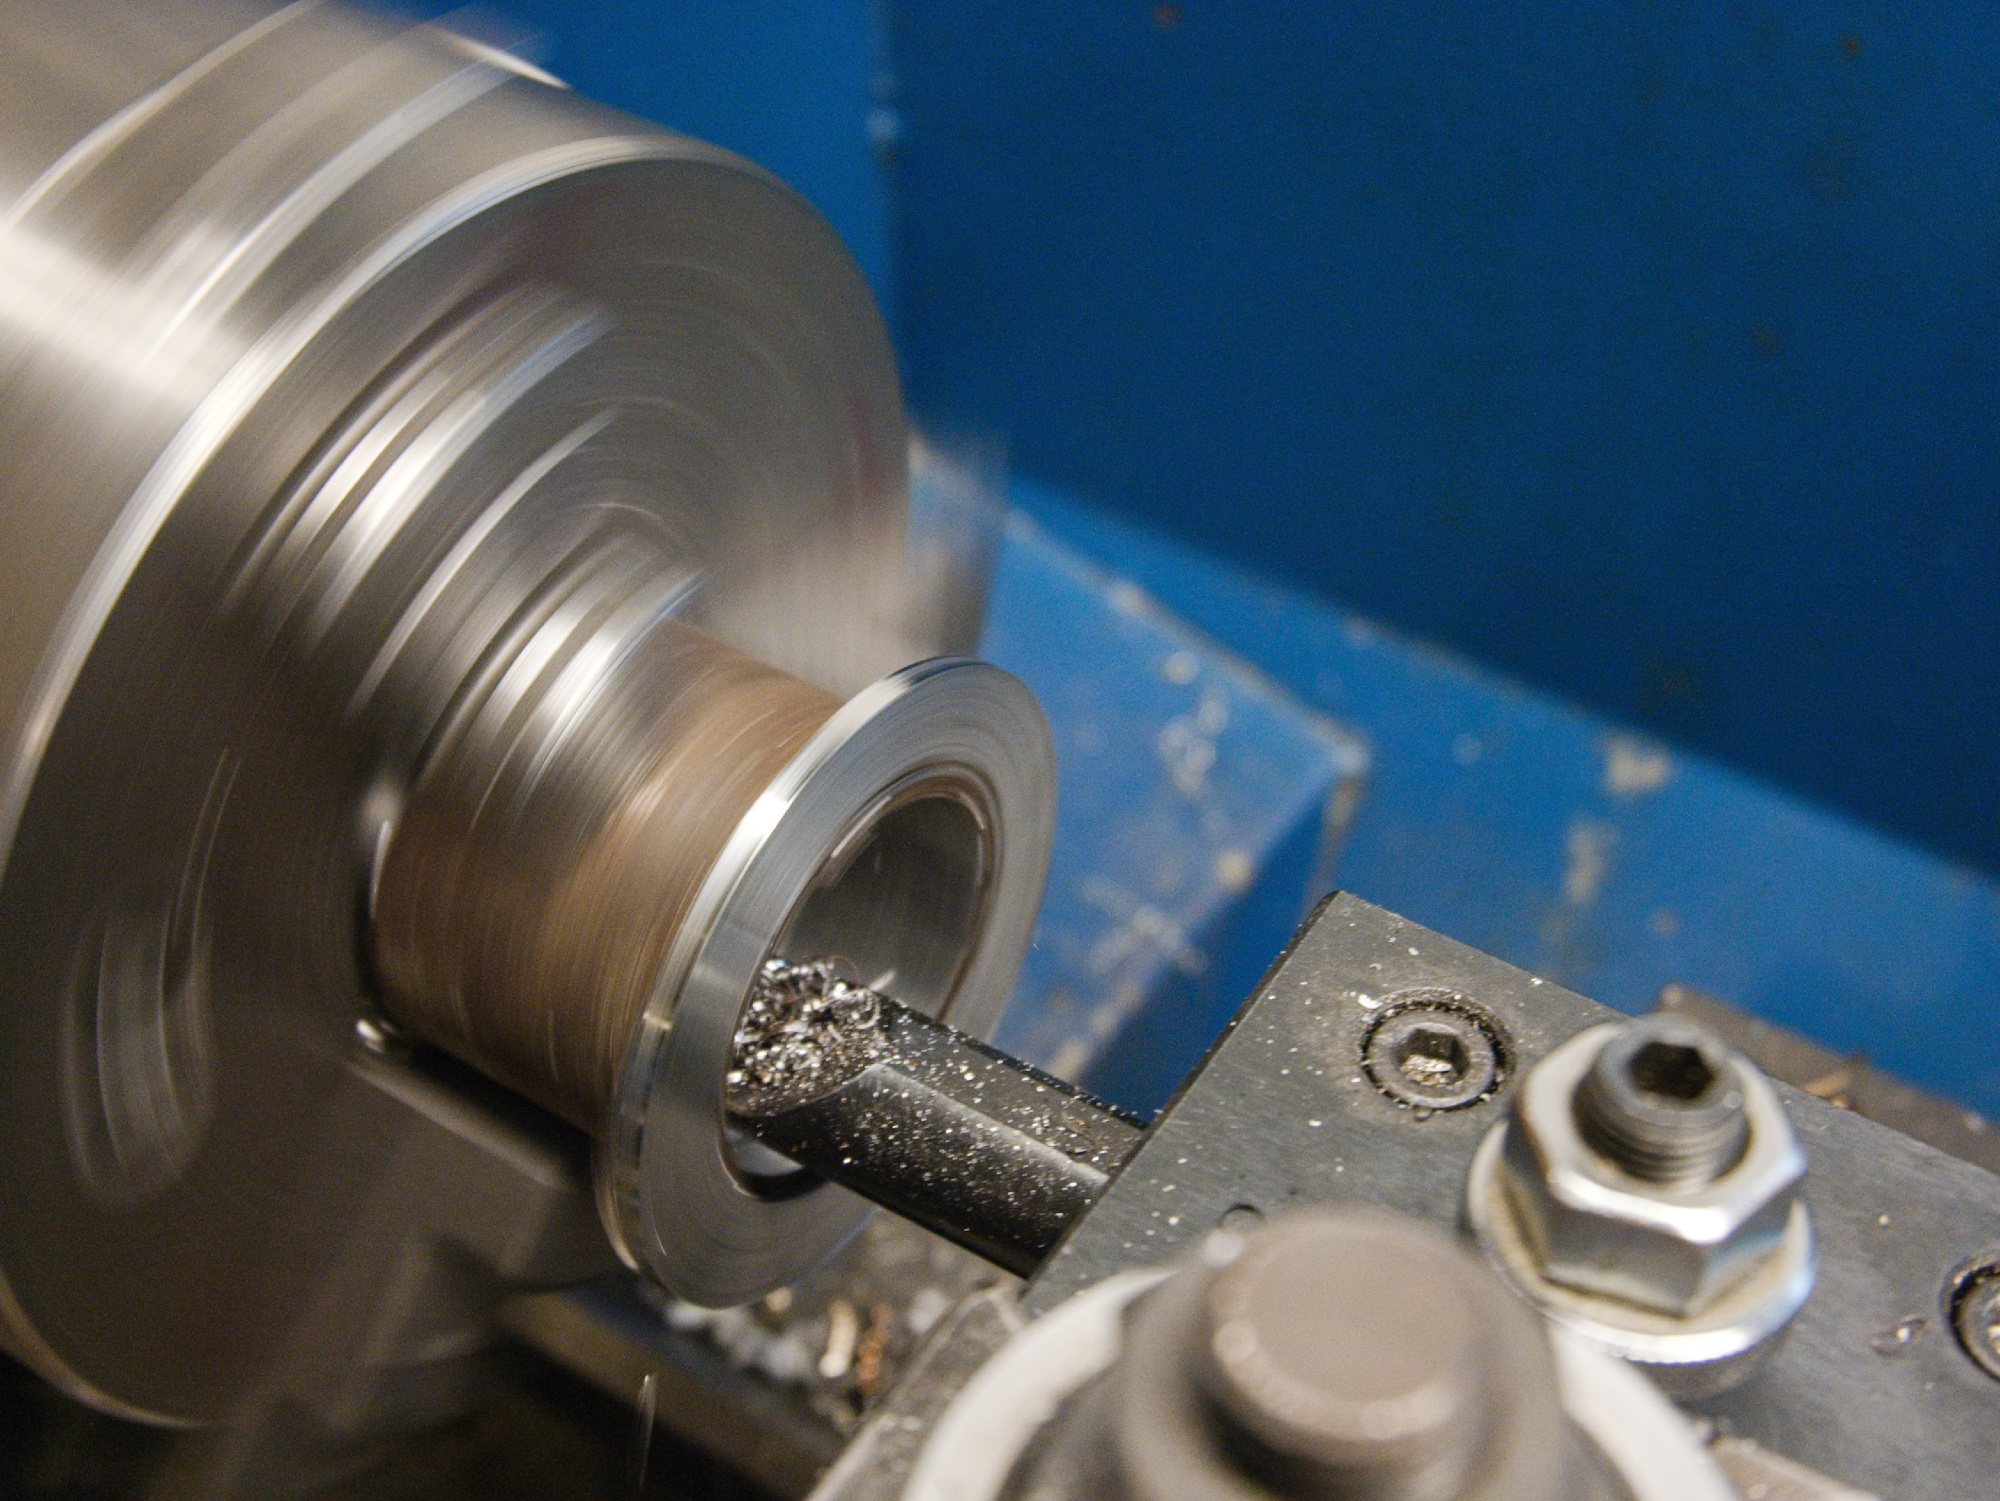
Fabricating spacers with an exact thickness and inner diameter can be difficult. For my new gear set, I cut them from 12L14 round stock.
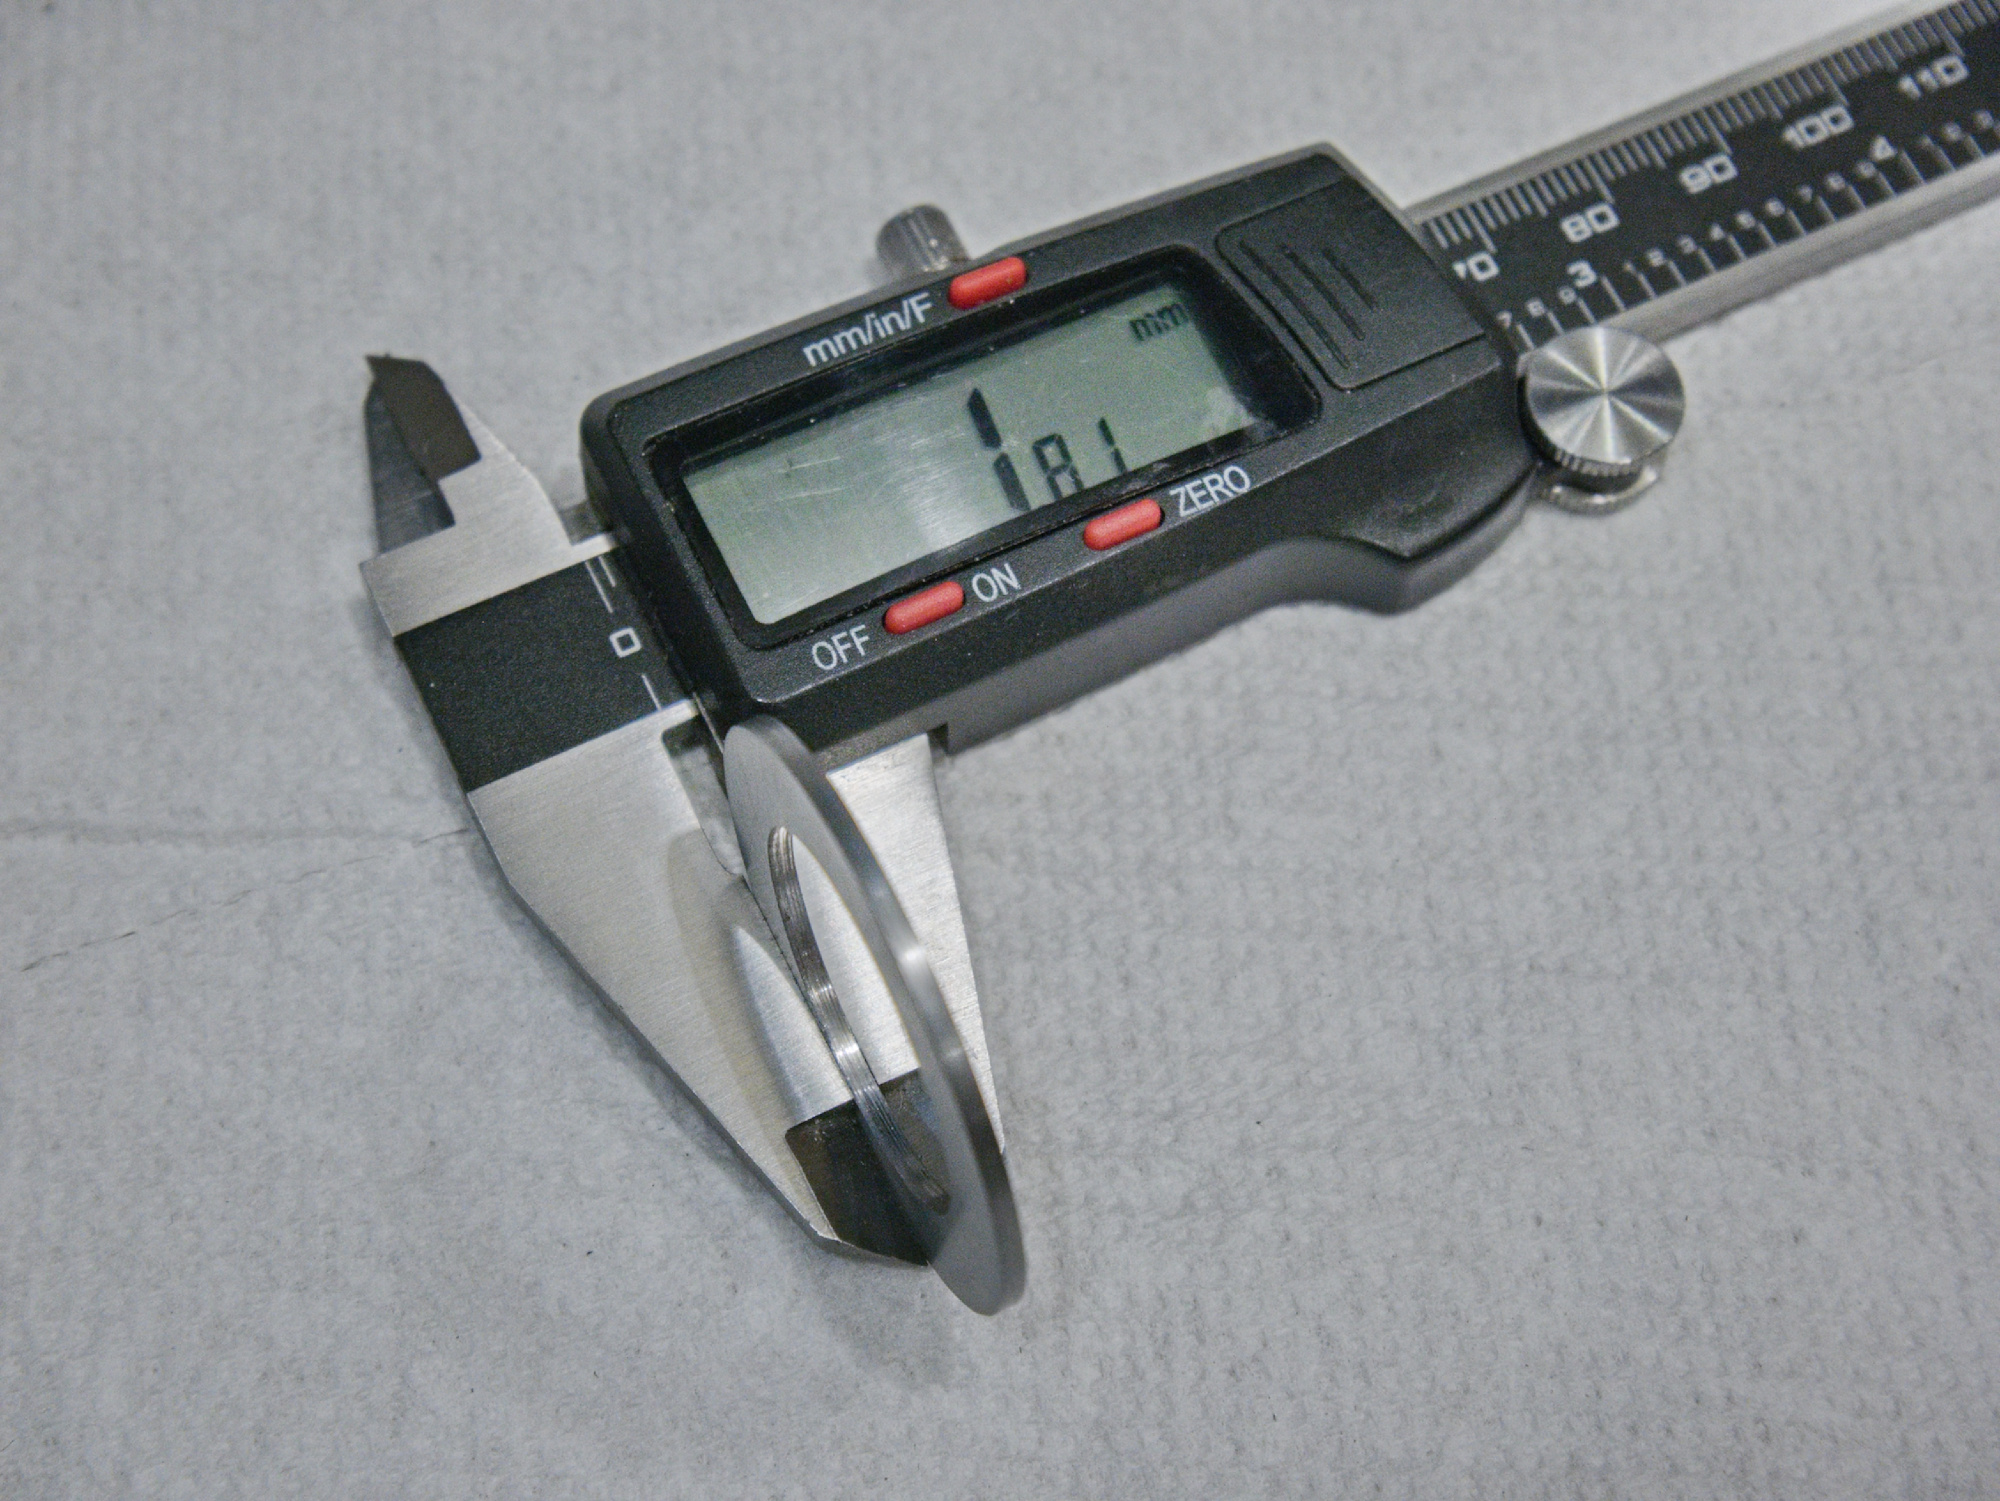
The exact thickness is machined while keeping a small ridge to hold the part.
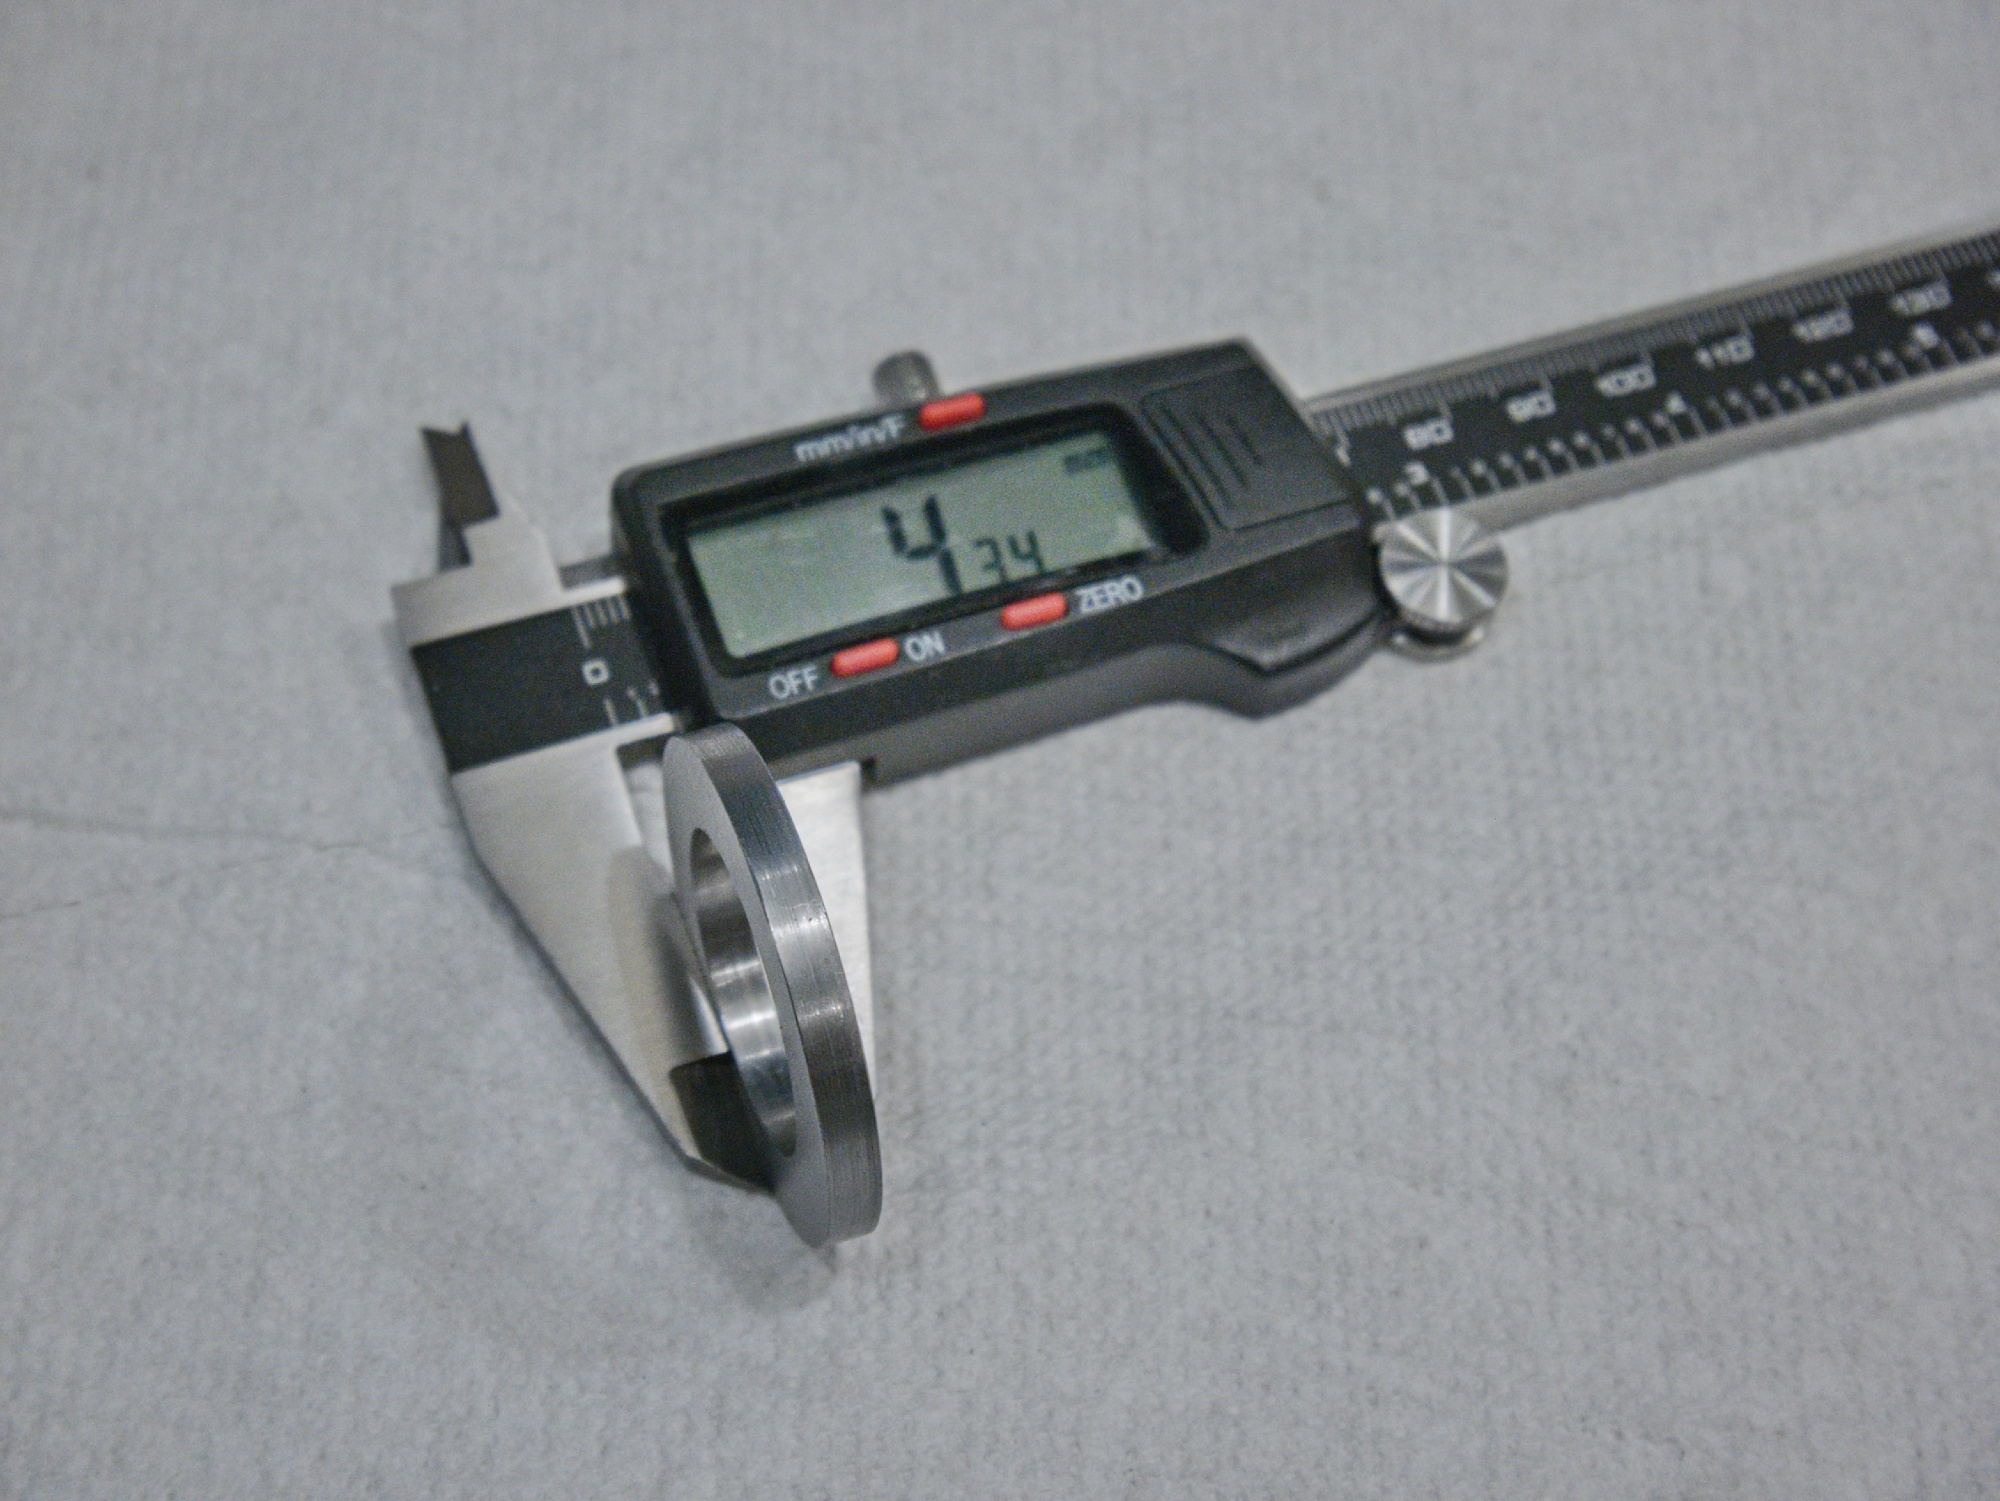
The final inner diameter is set and cut. This separates the part.
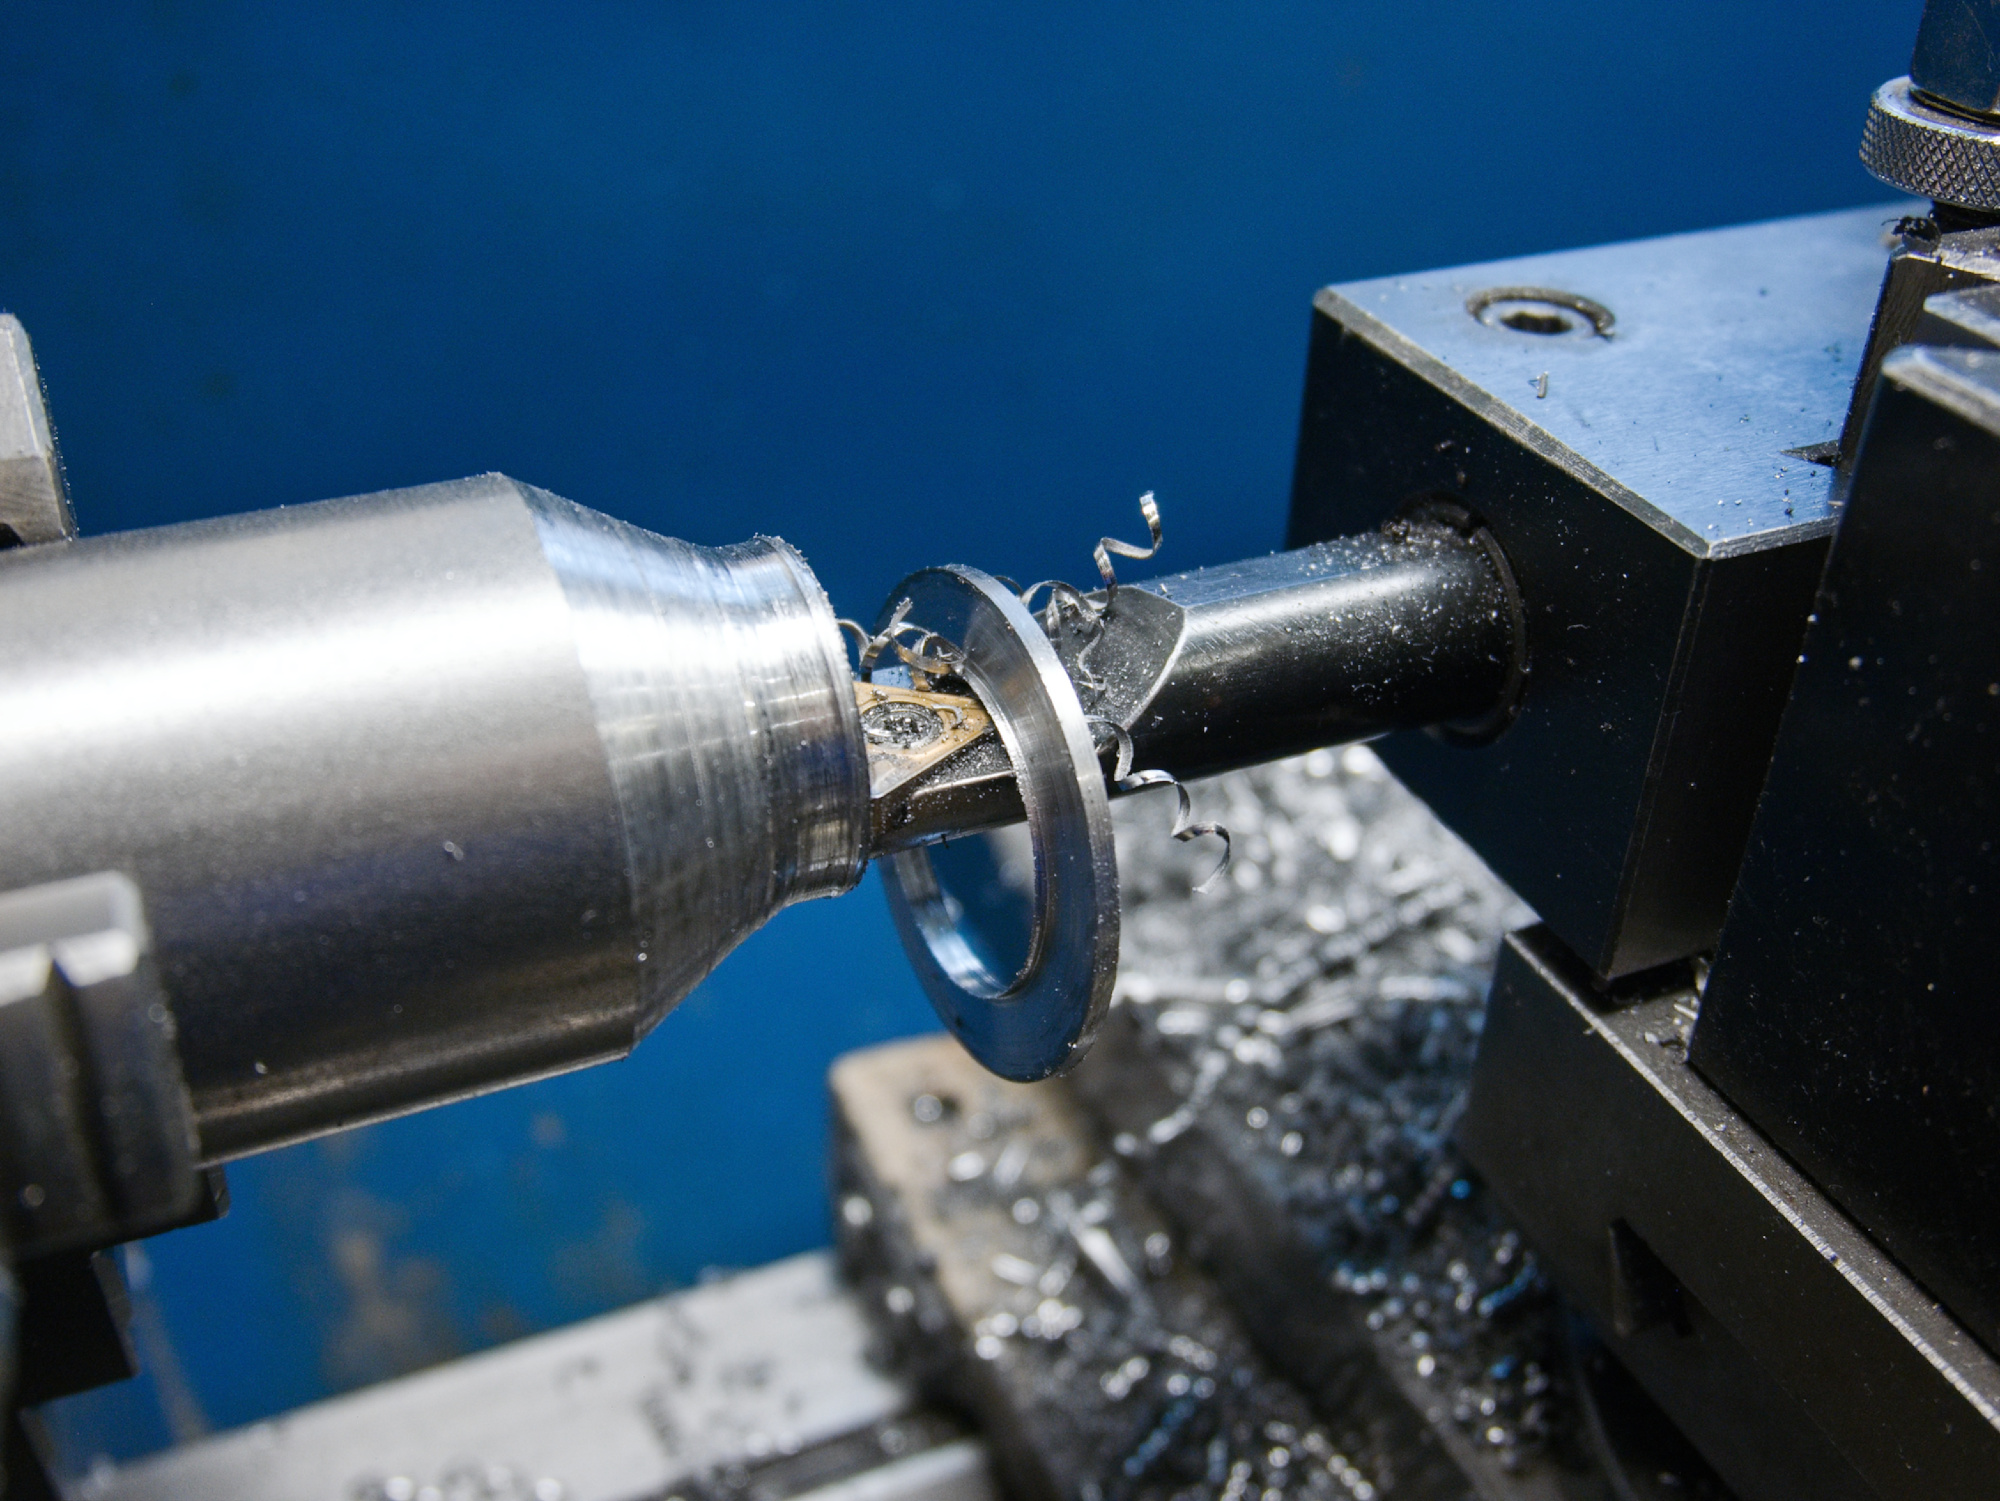
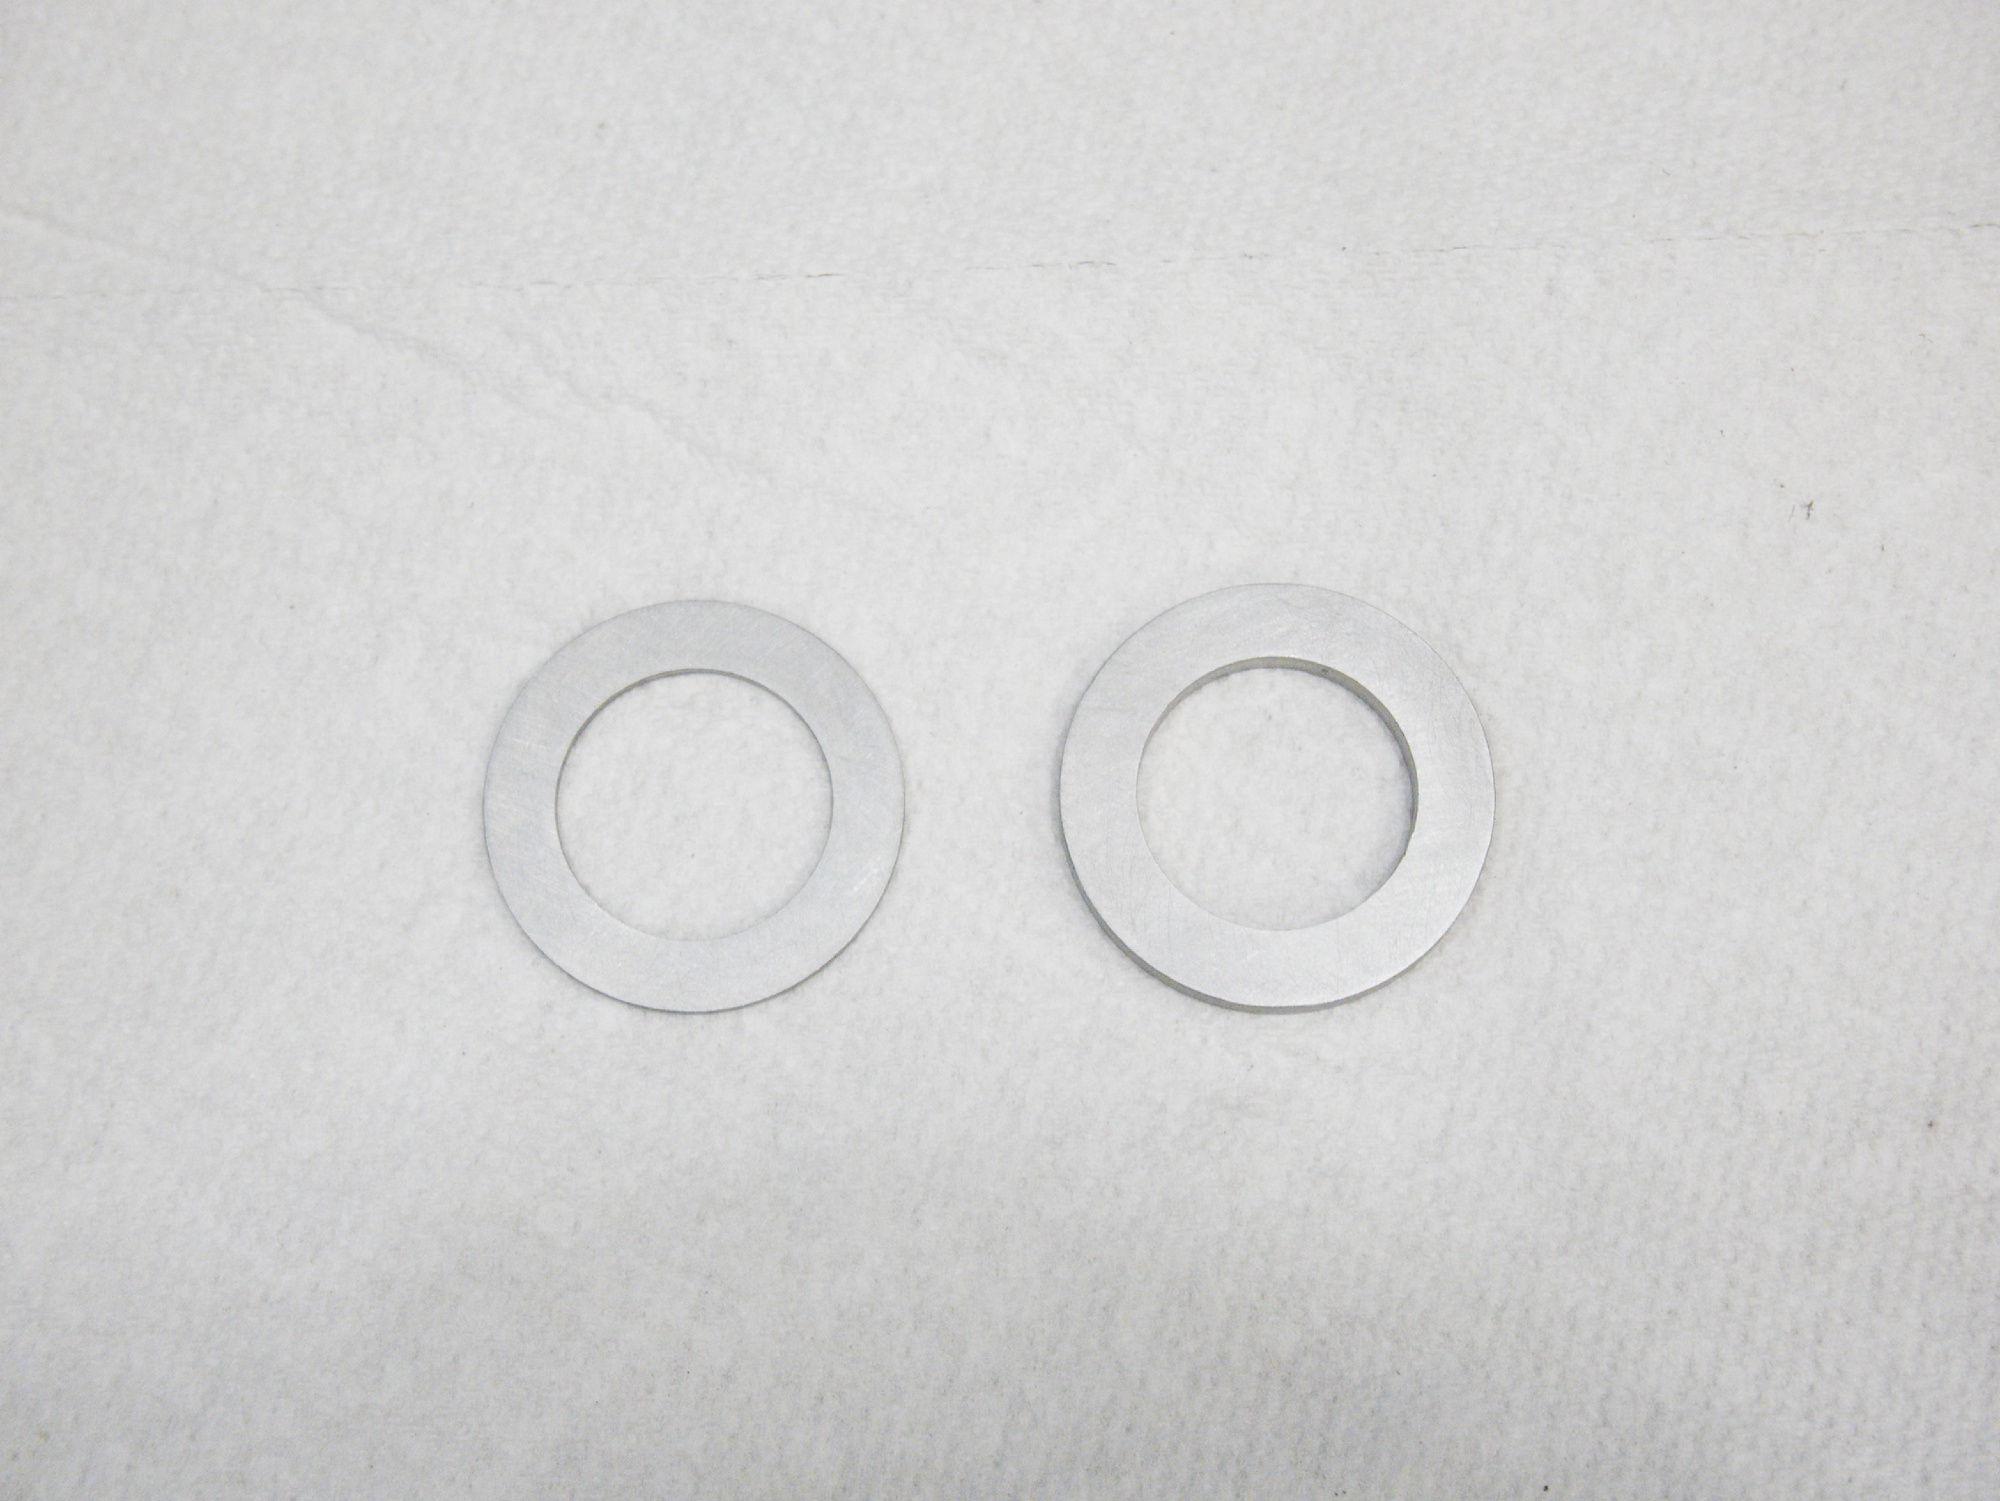
The new spacers are cut.
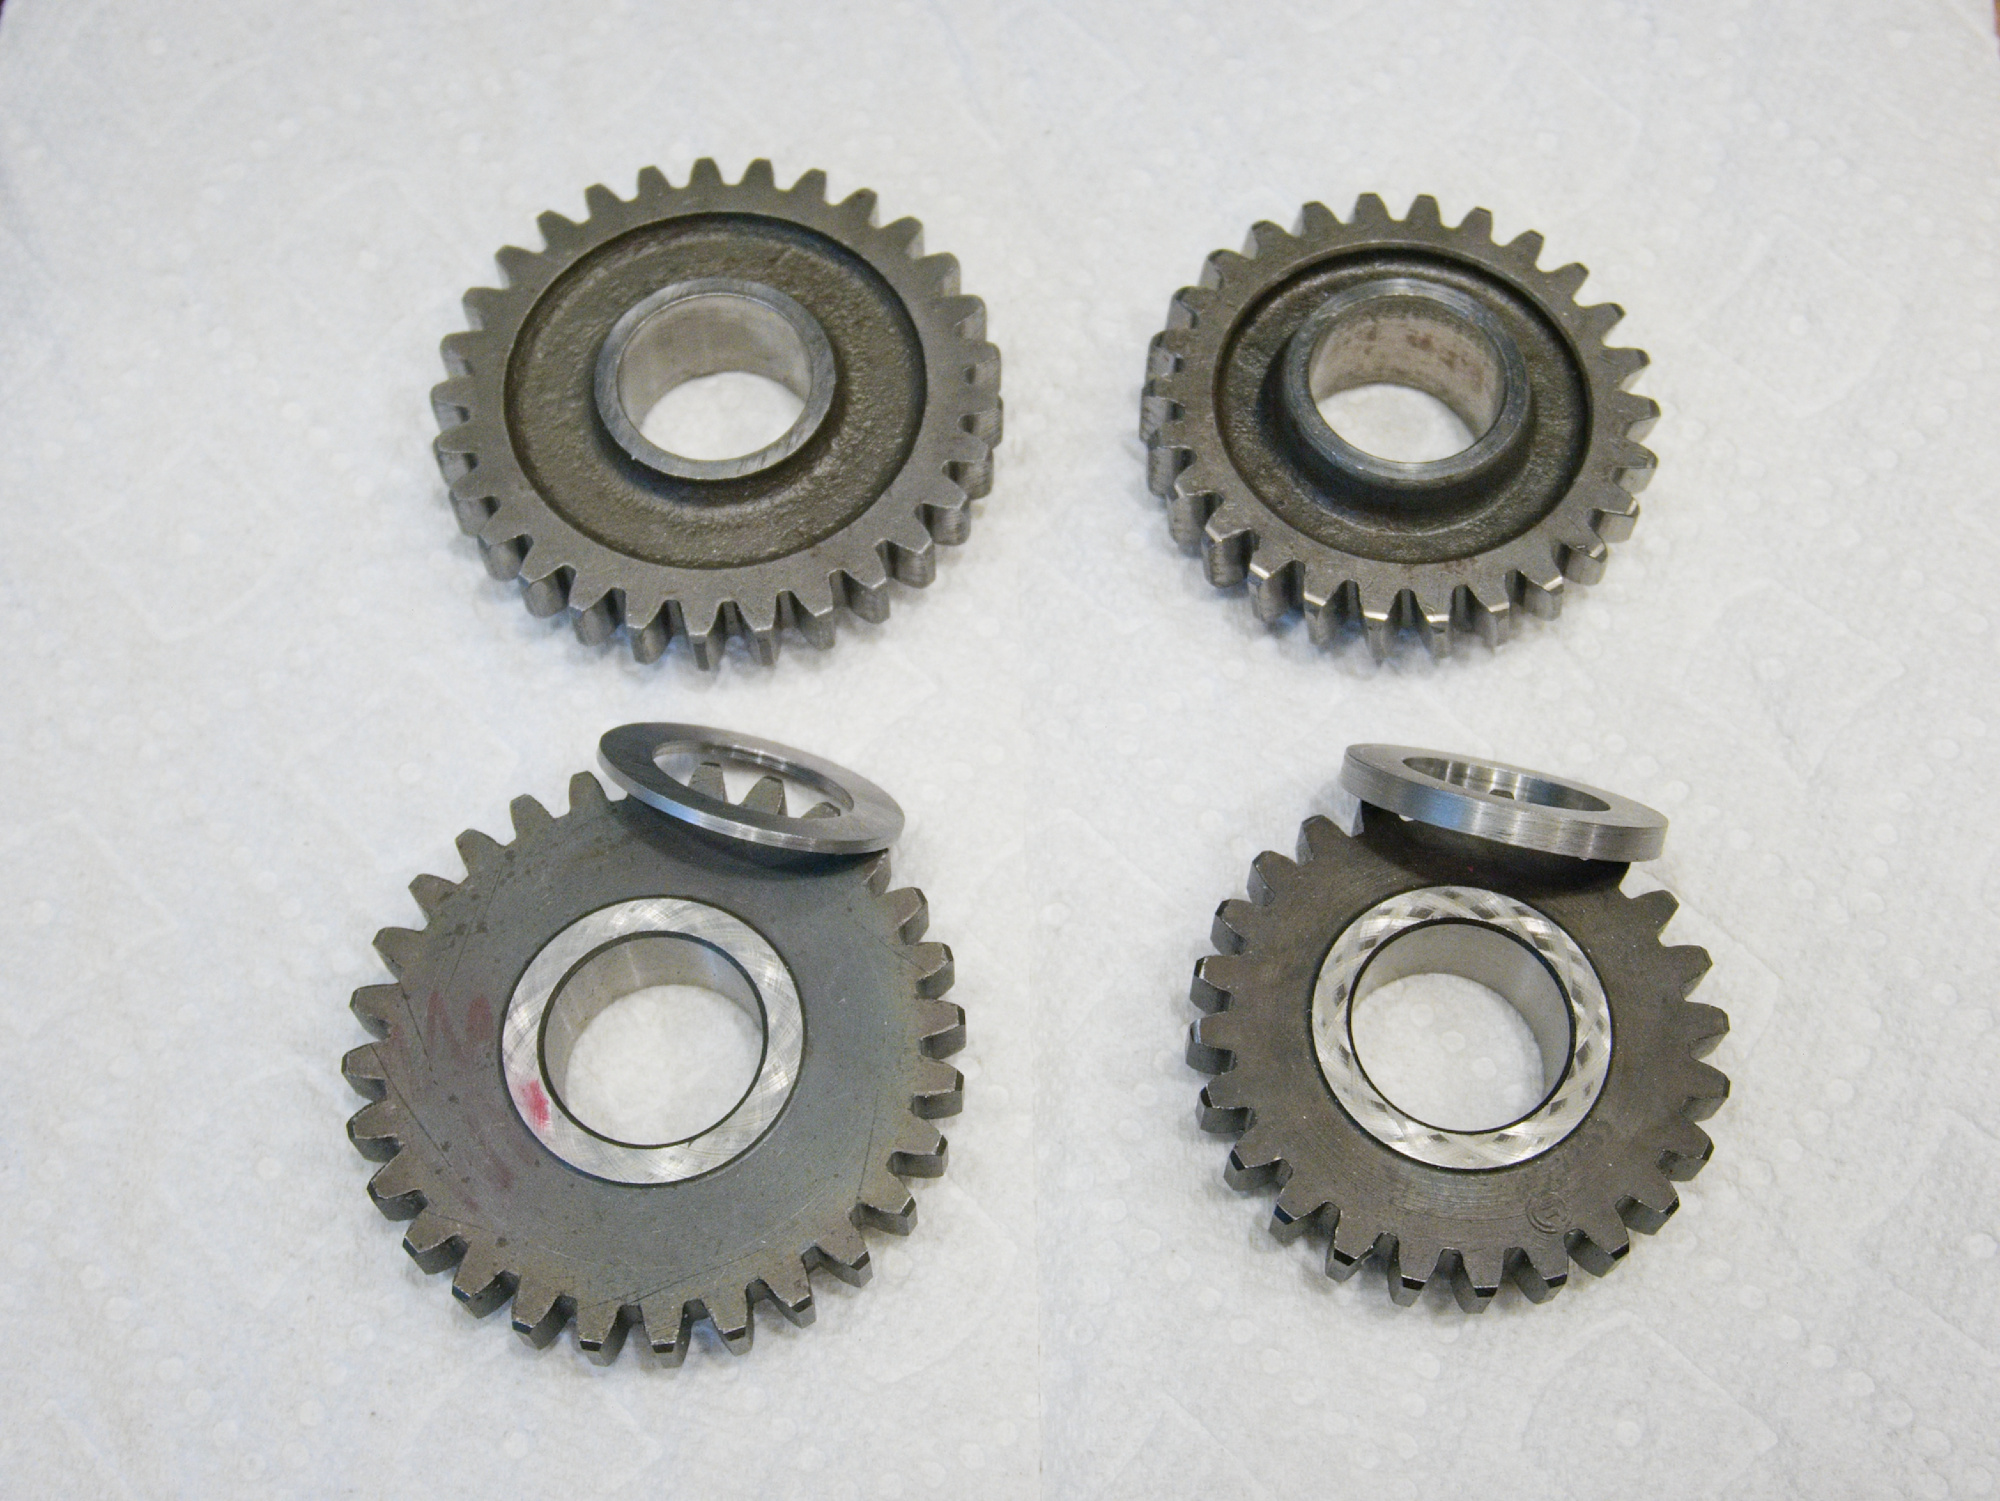

The original 4th gear is 26/20, while the new one is 24/22. The input shaft side of the 4th is 2 teeth more, and collides with the reverse shifter.
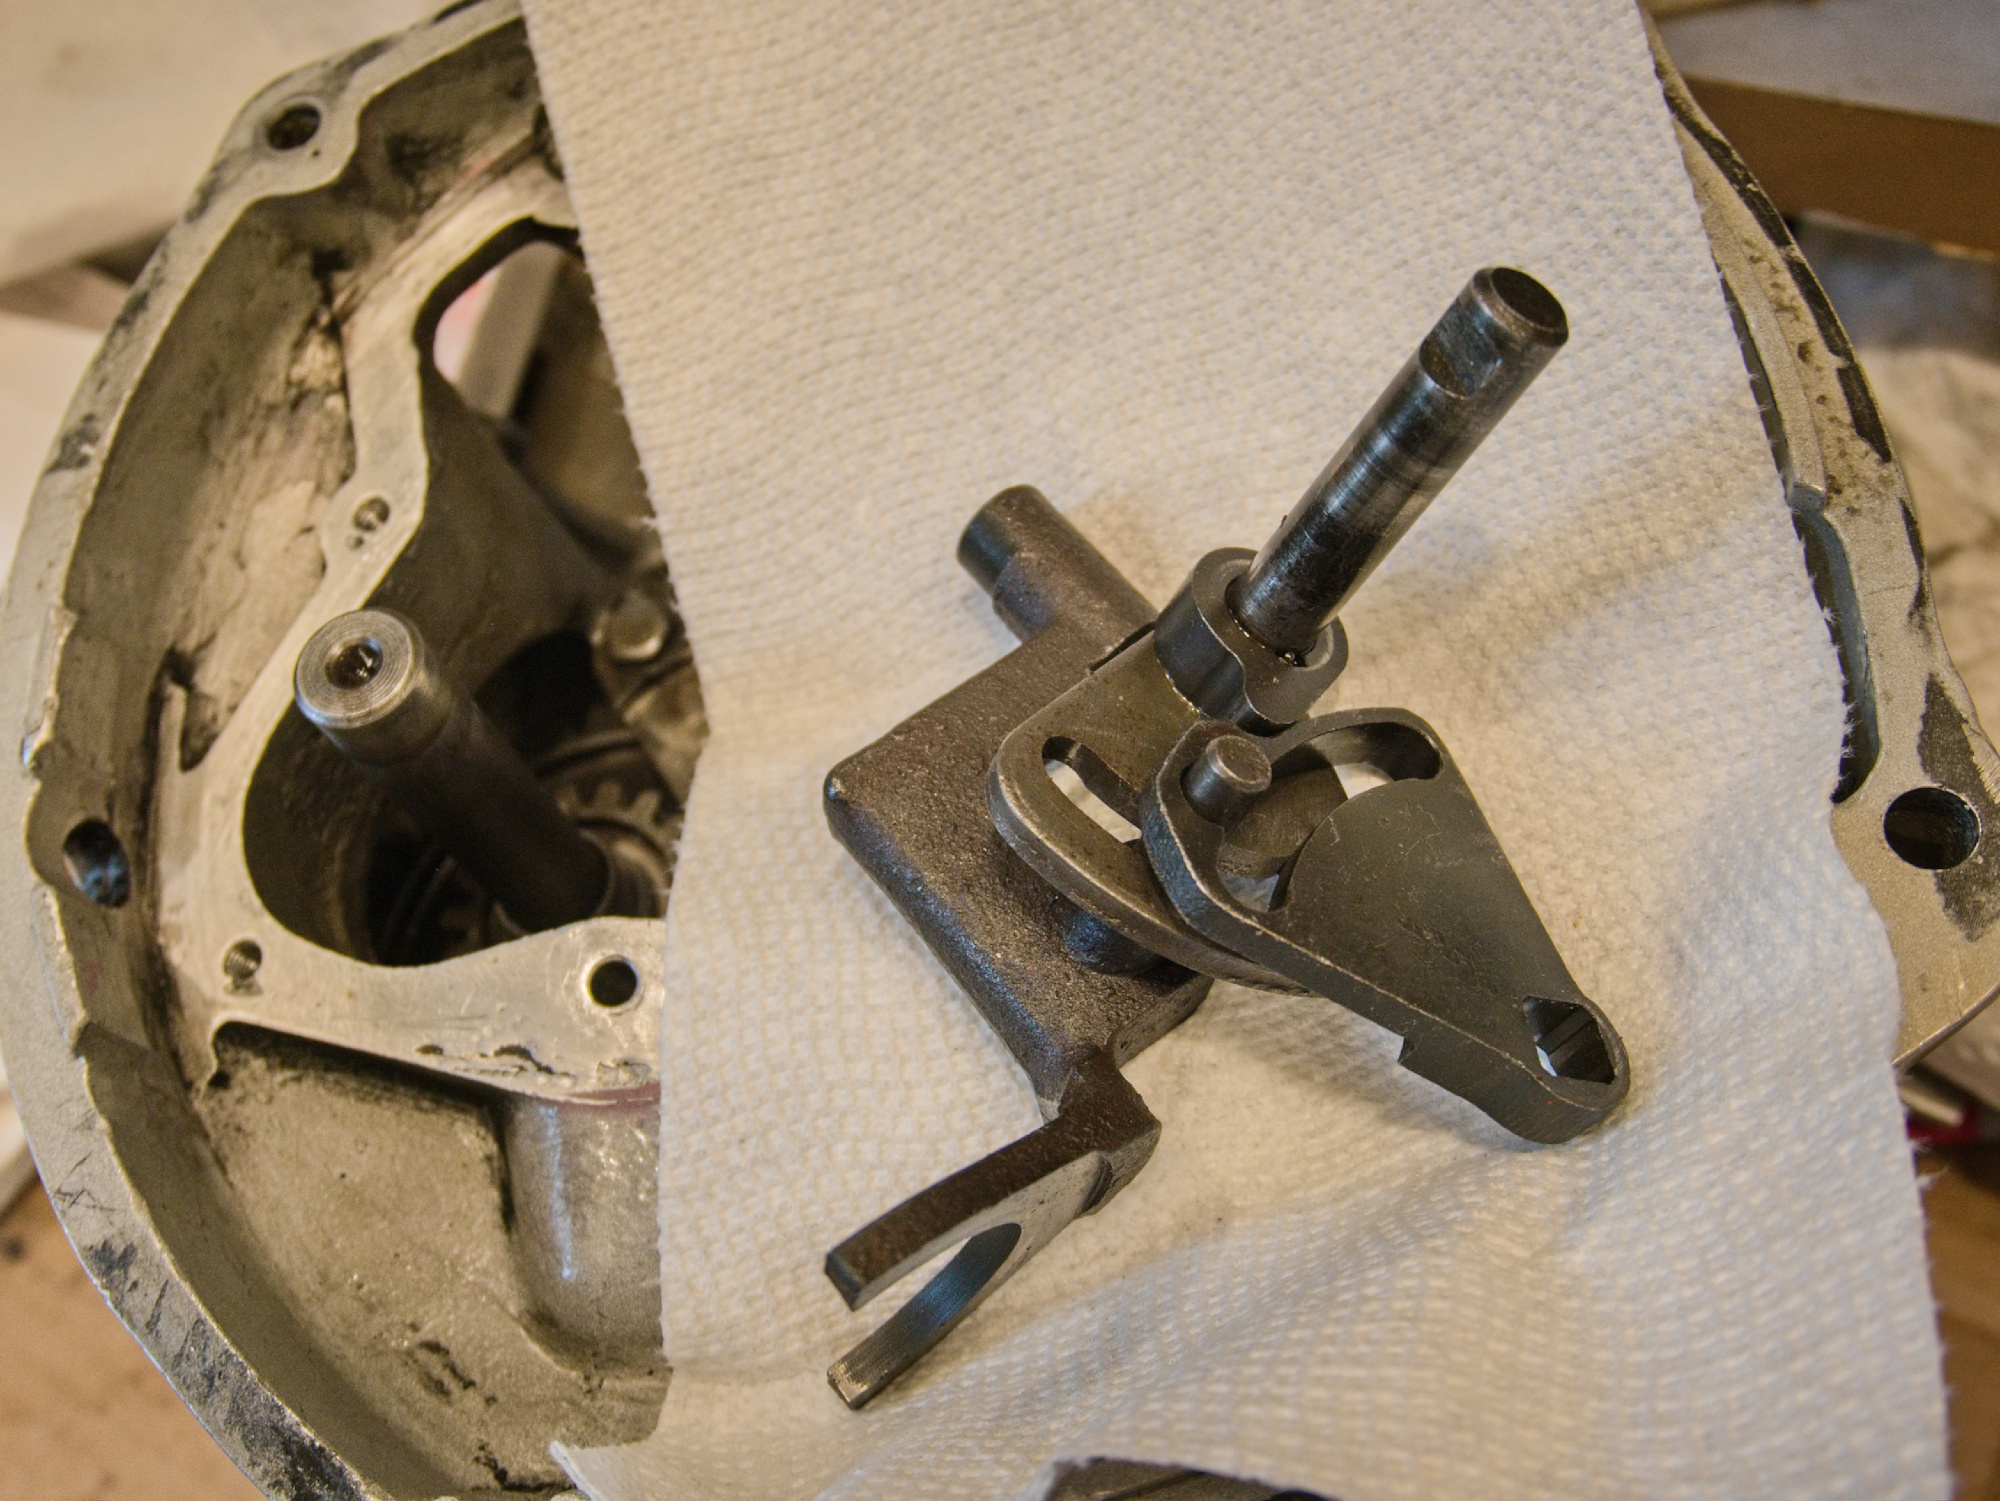
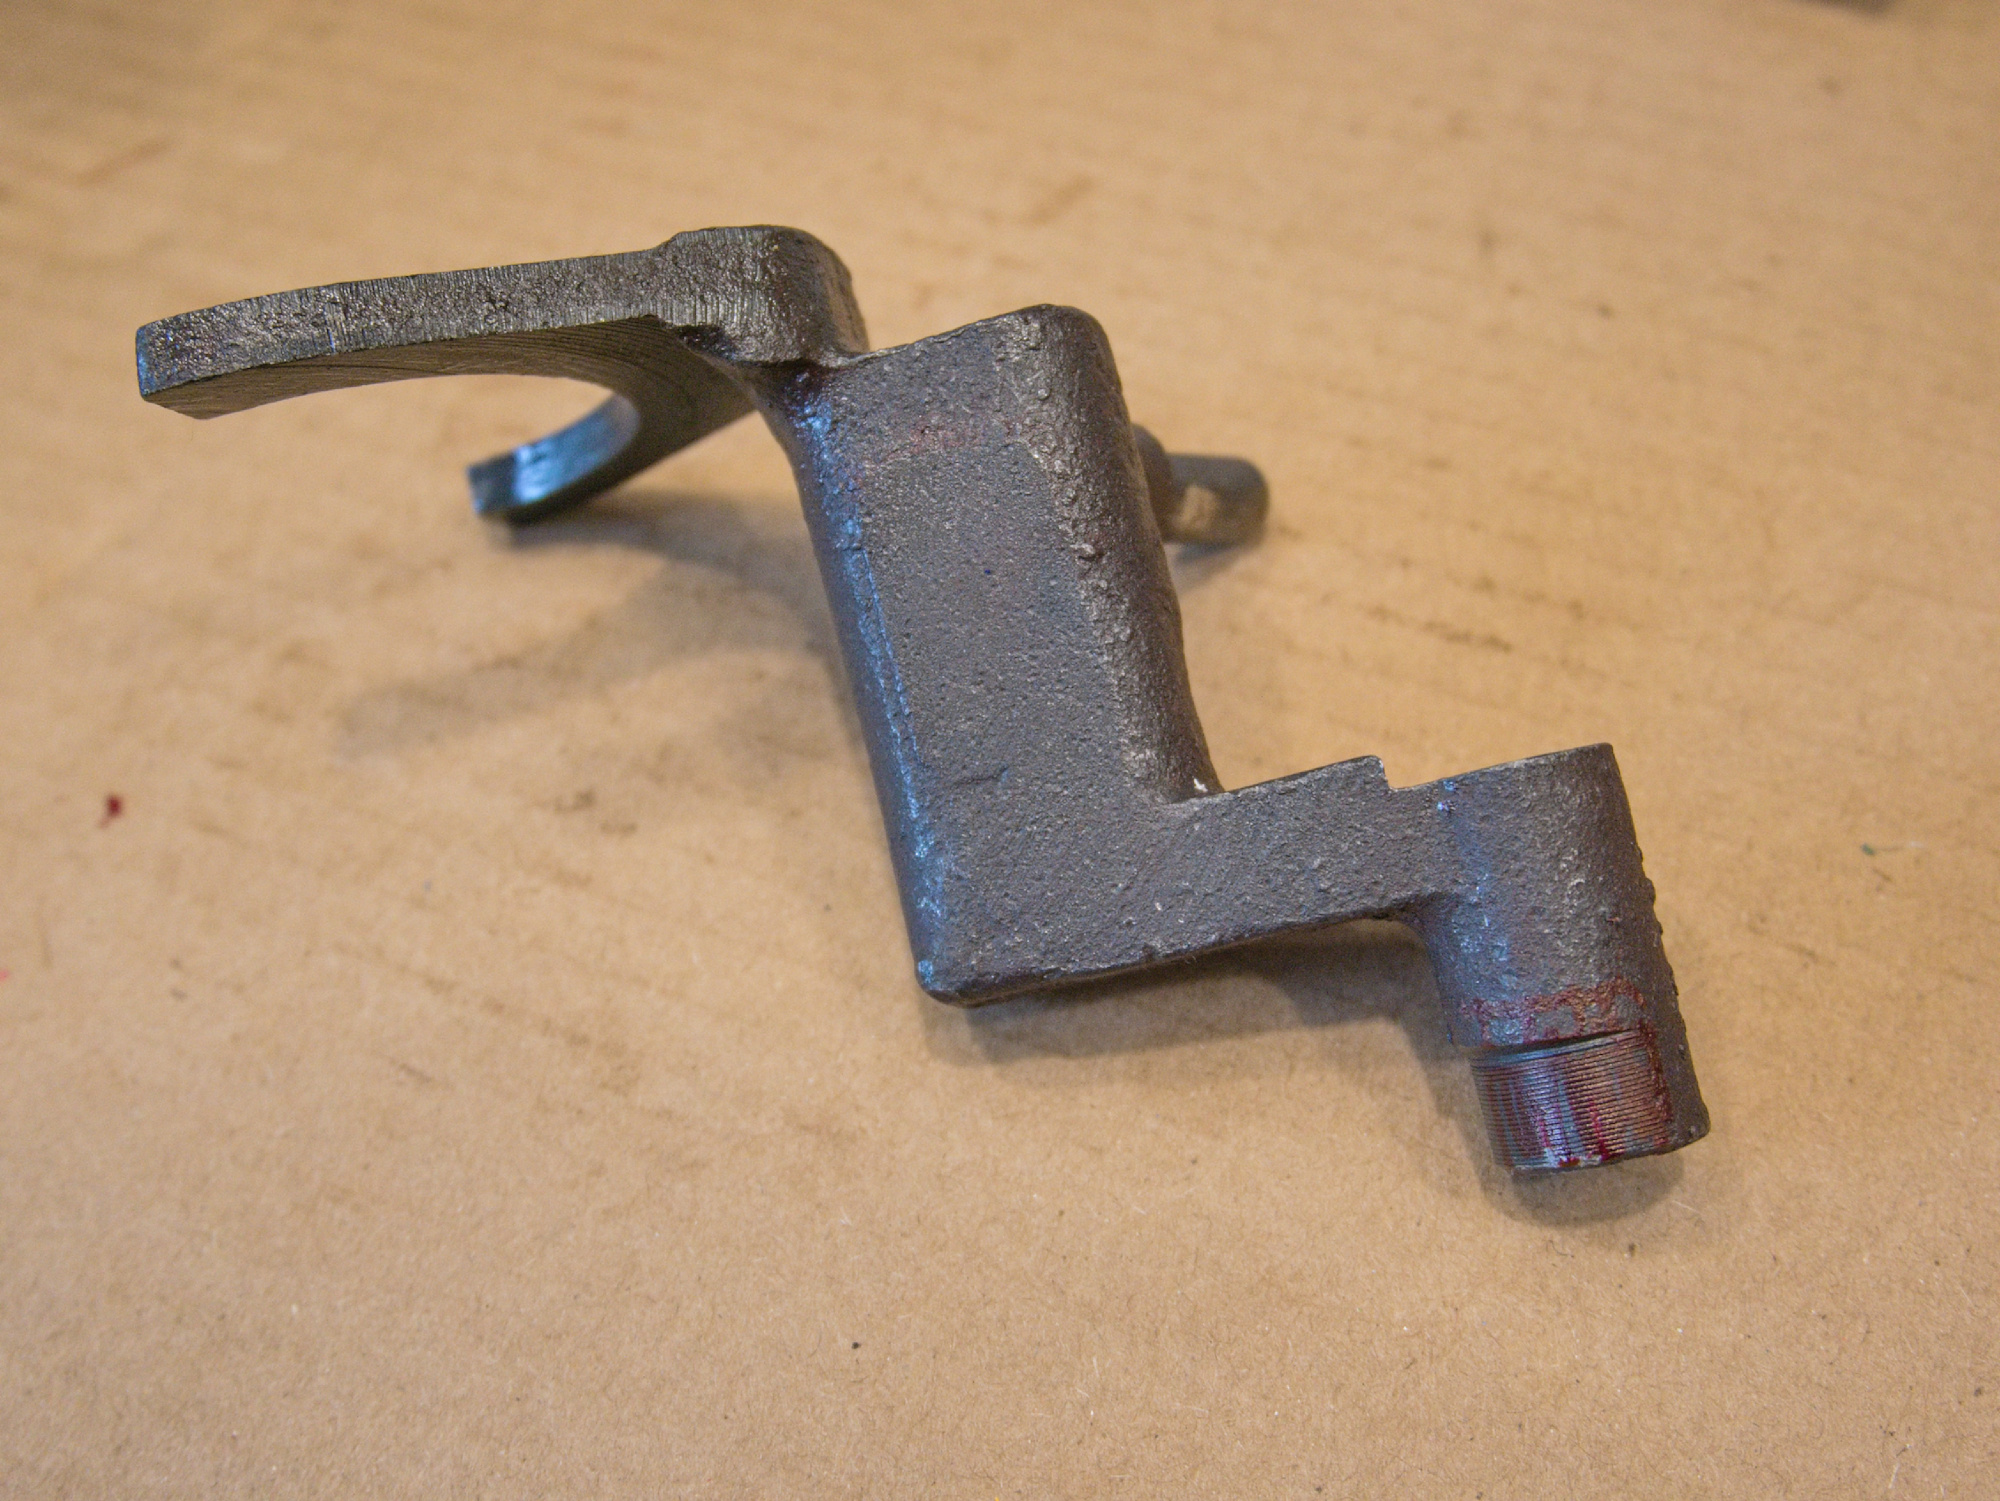
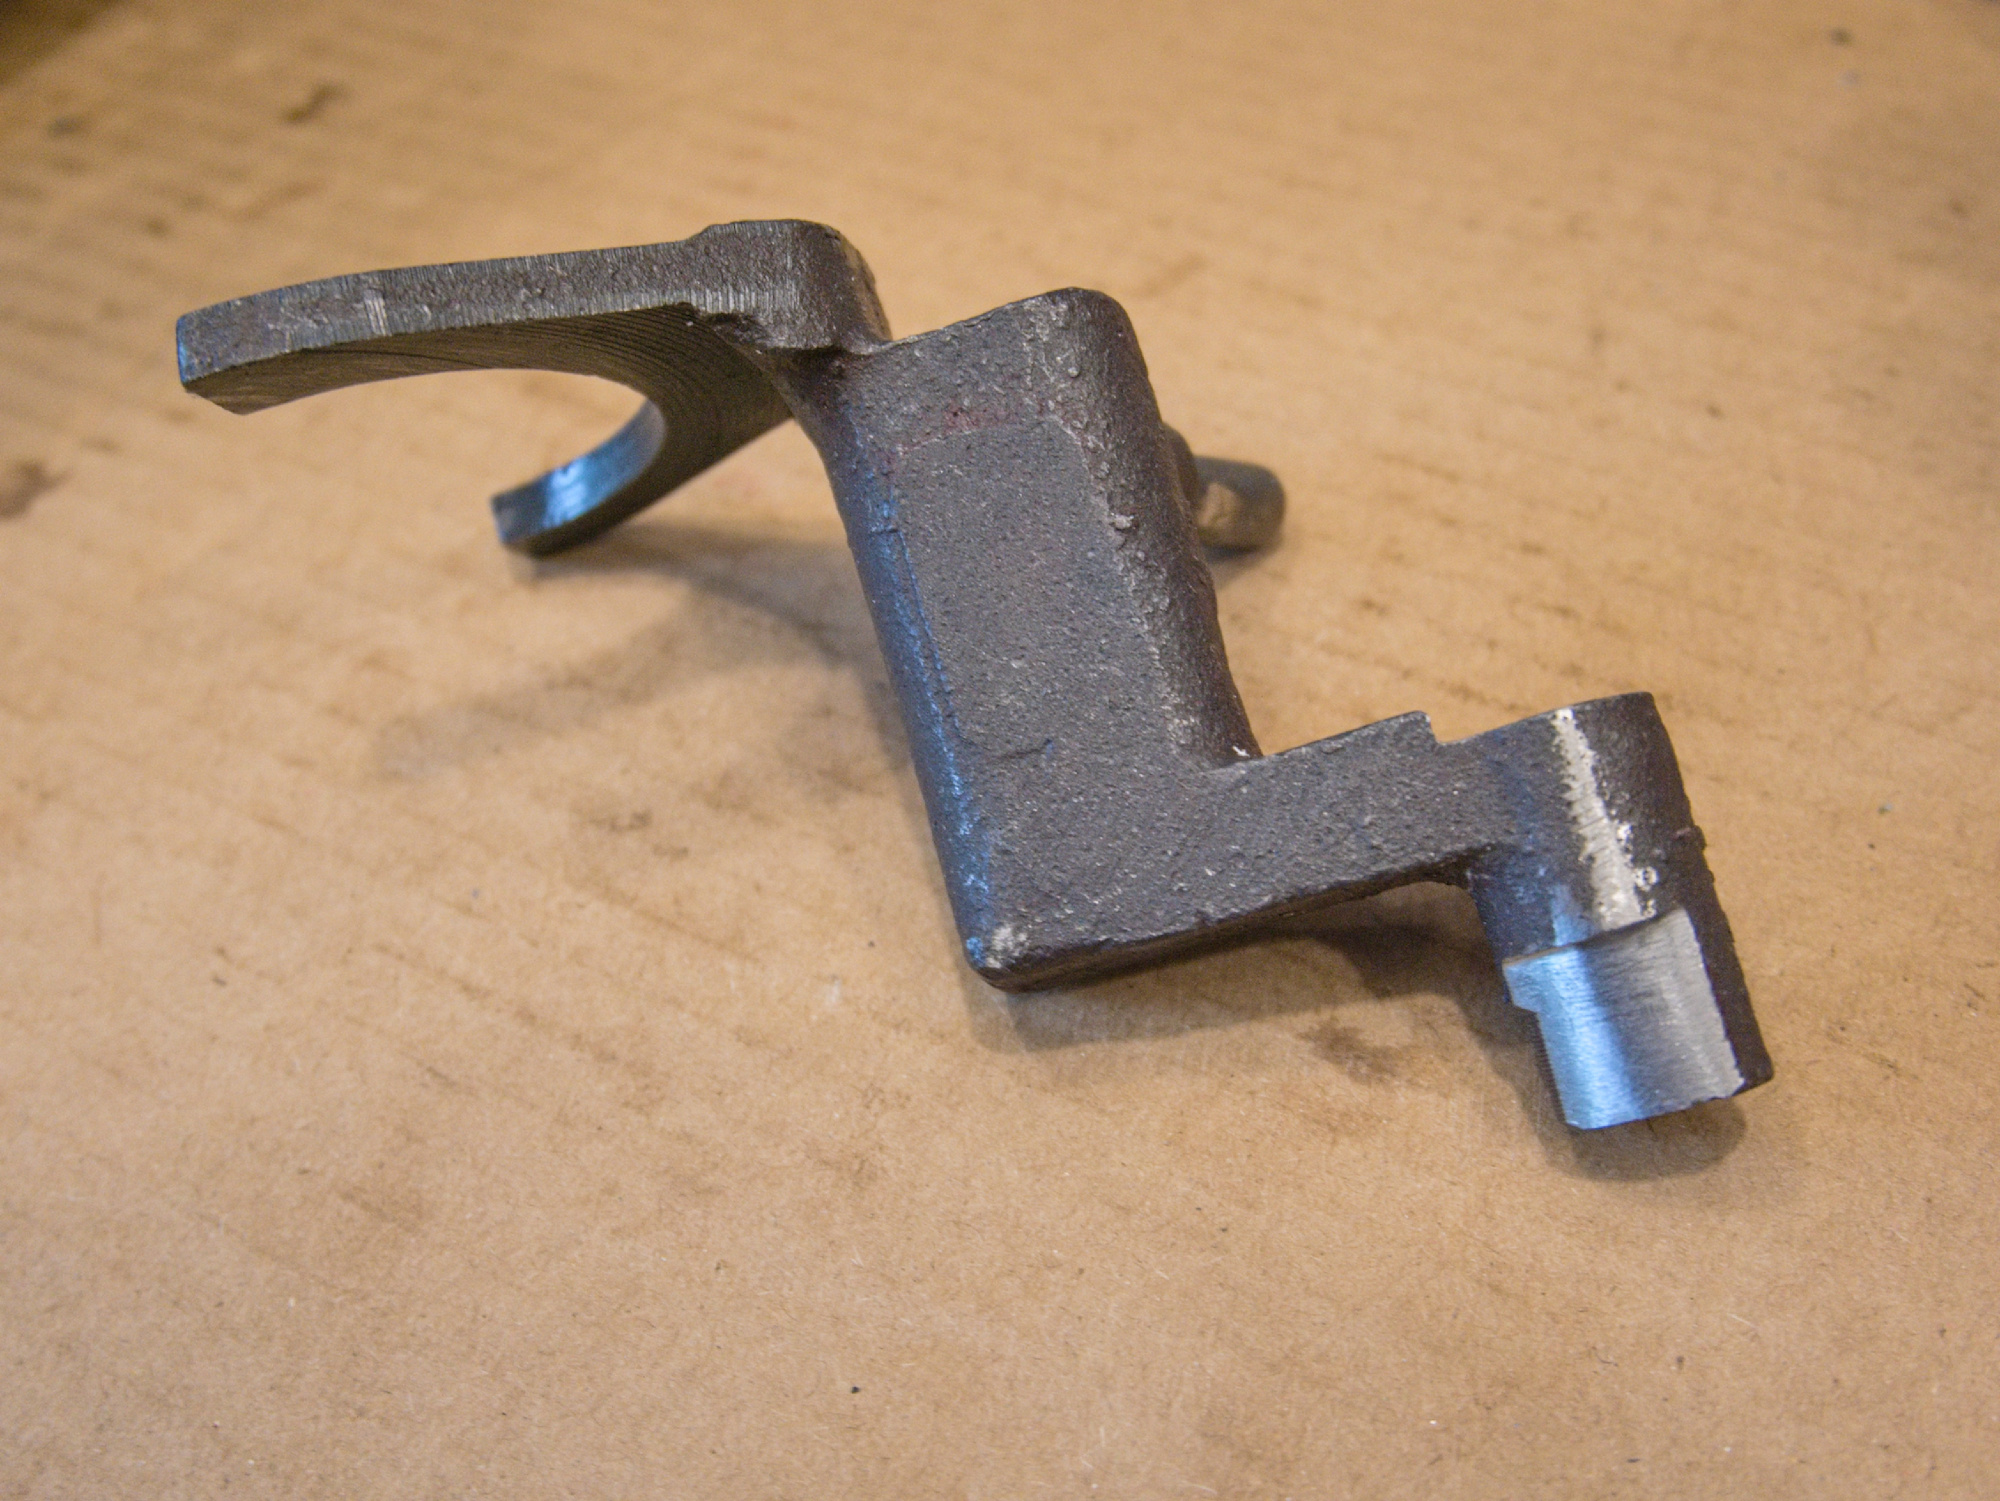
The reverse shifter needs to be adjusted to make room for the wider 4th gear.
Check the clearance with grease.

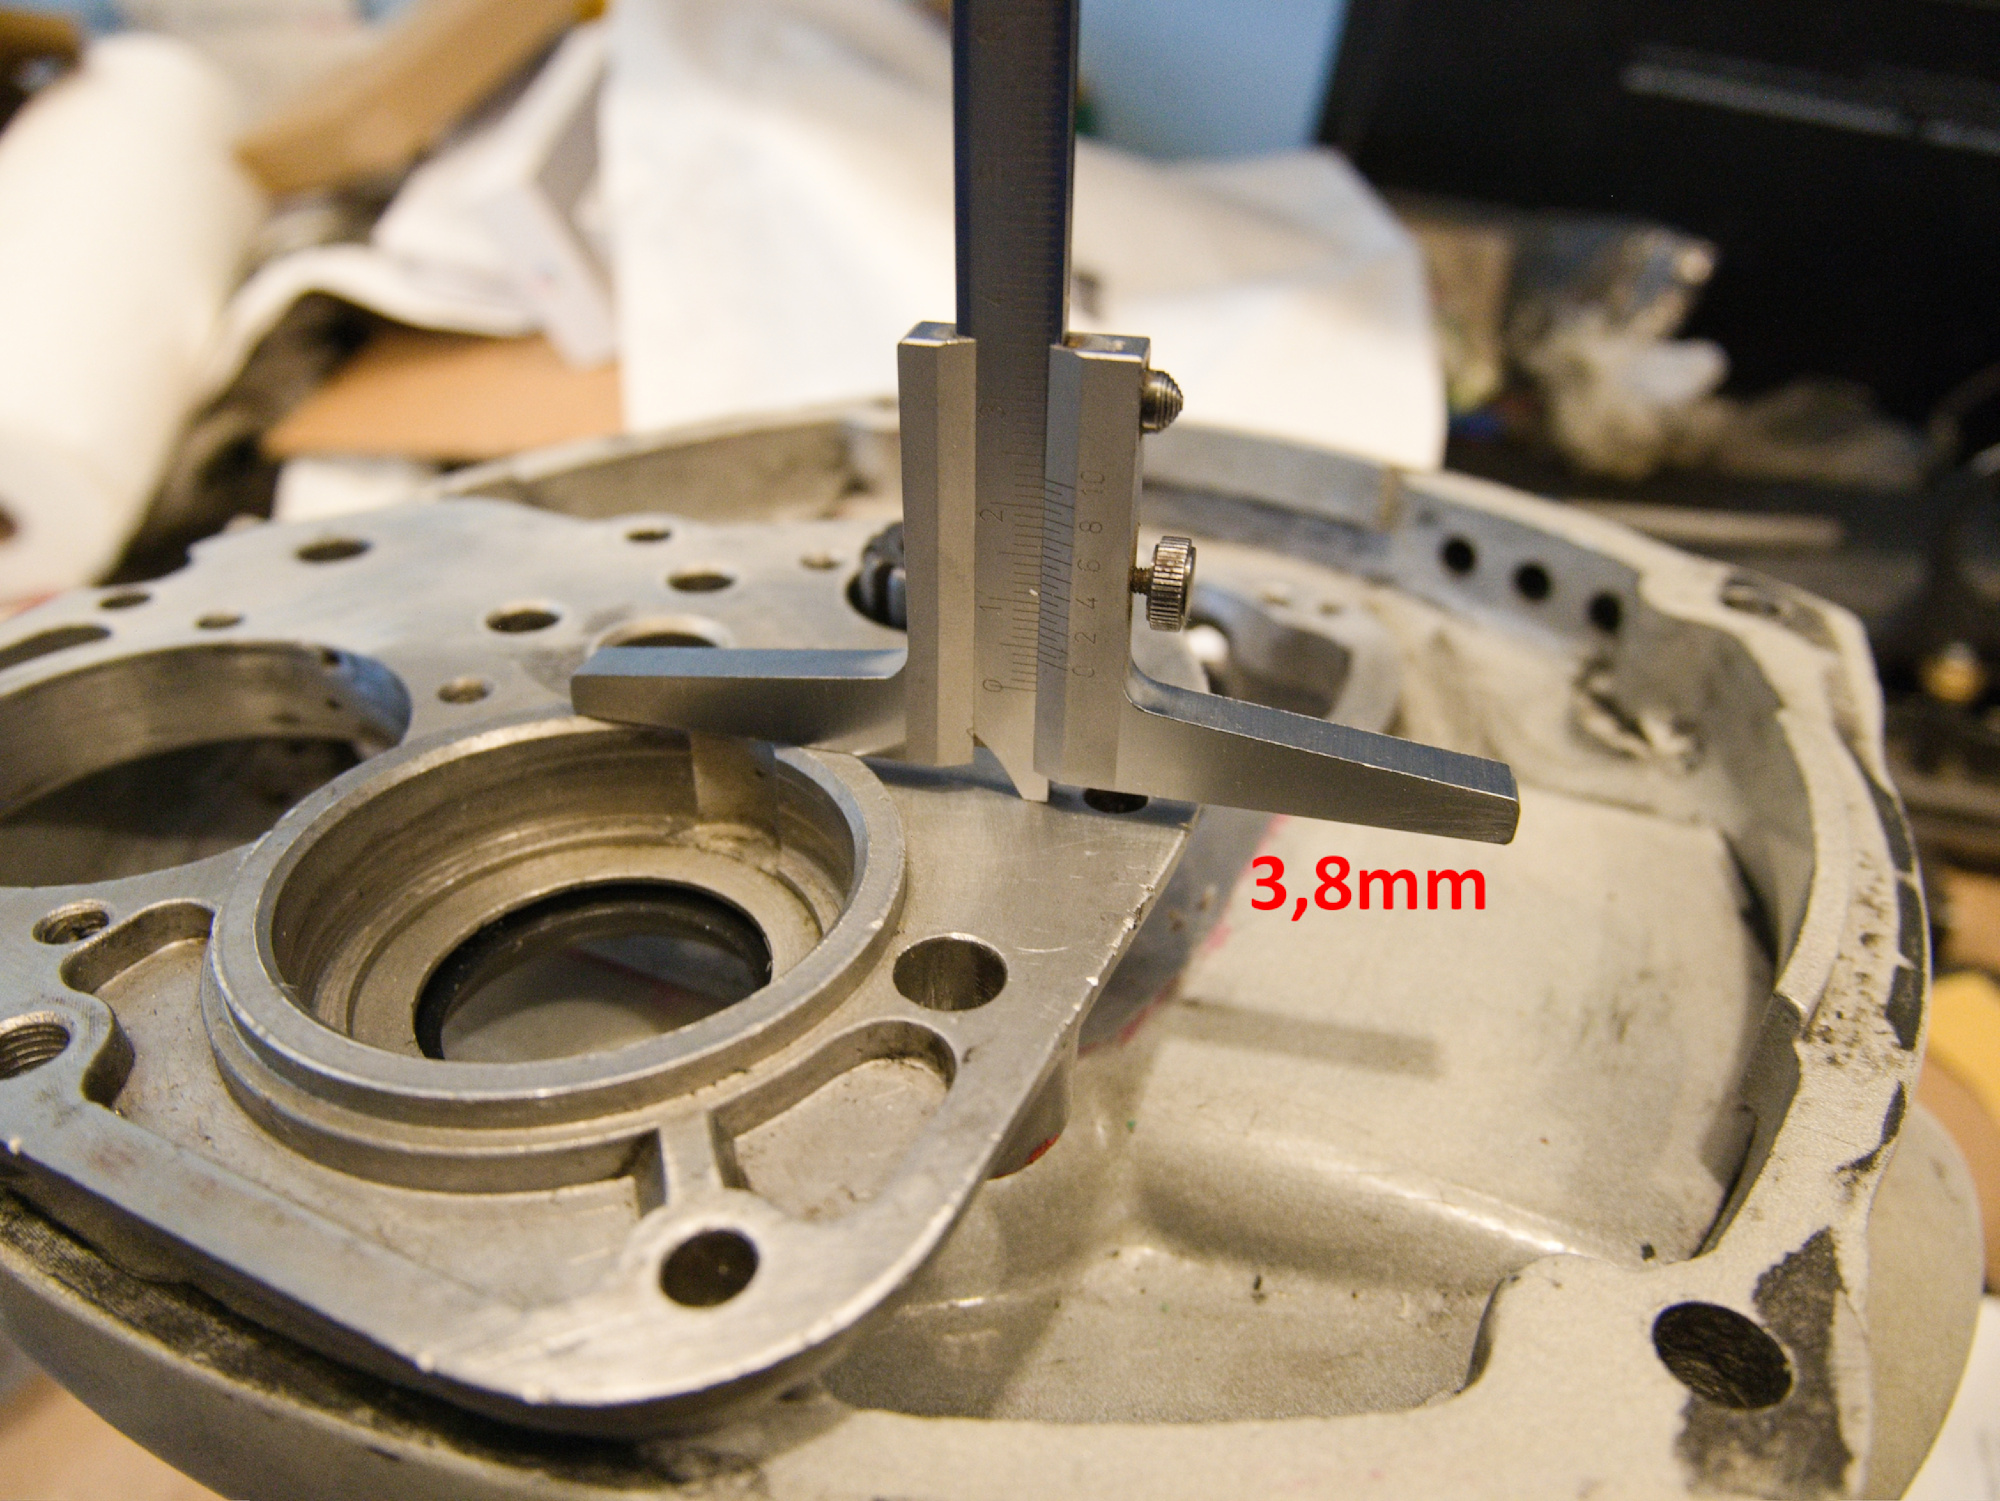
The input shaft should have a 0.2mm clearance.
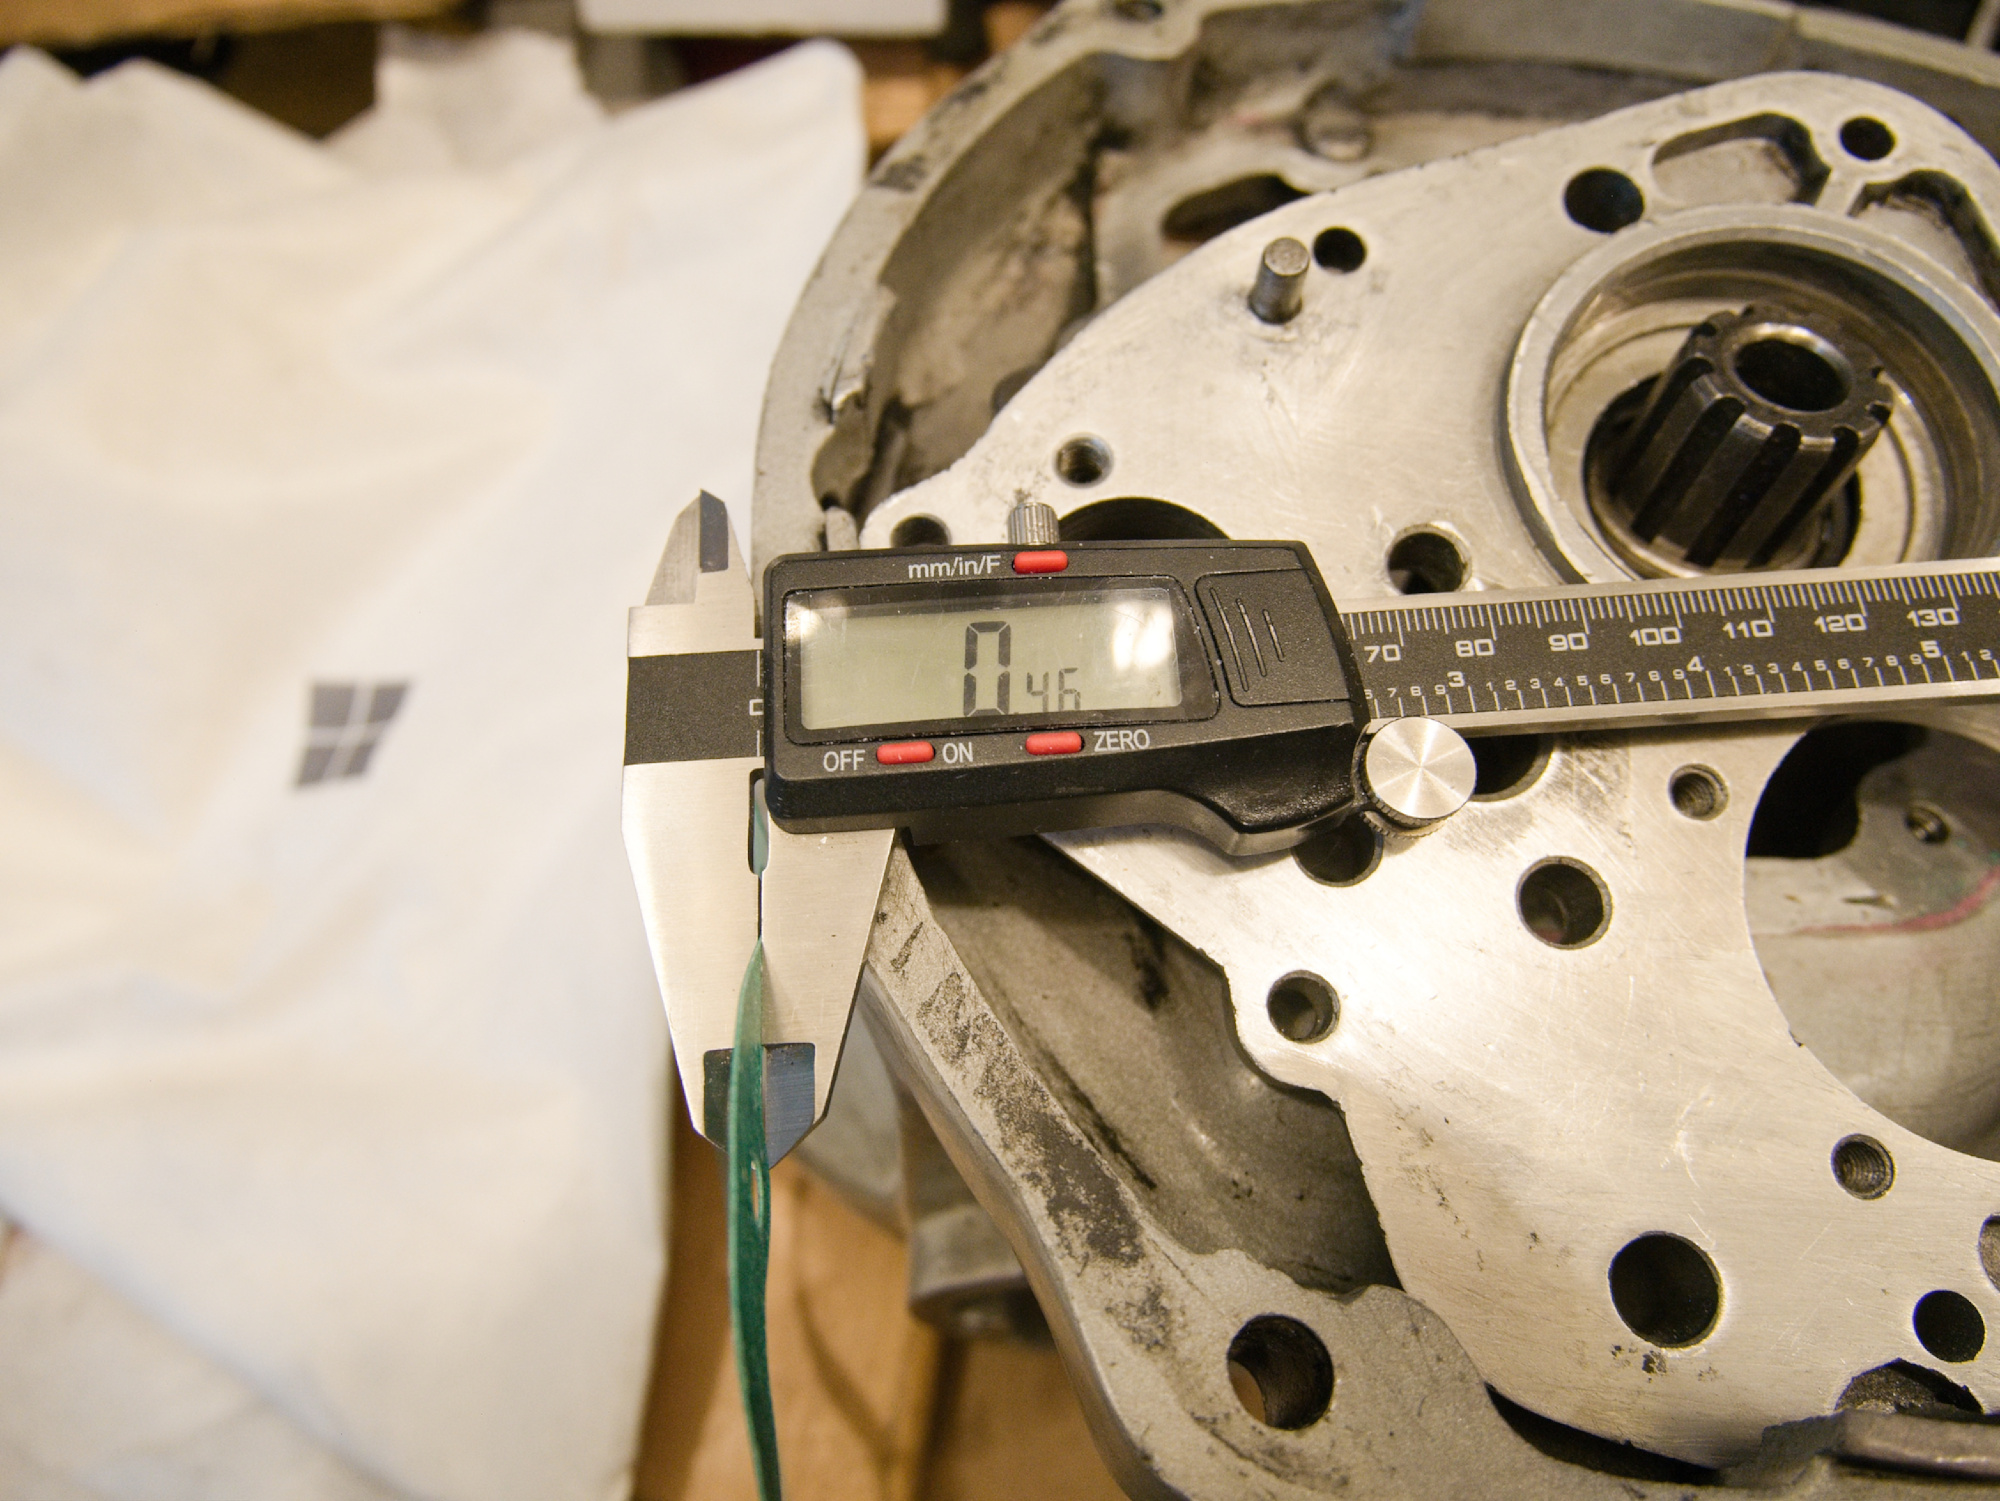
First start with the measurement from the bearing to the housing.
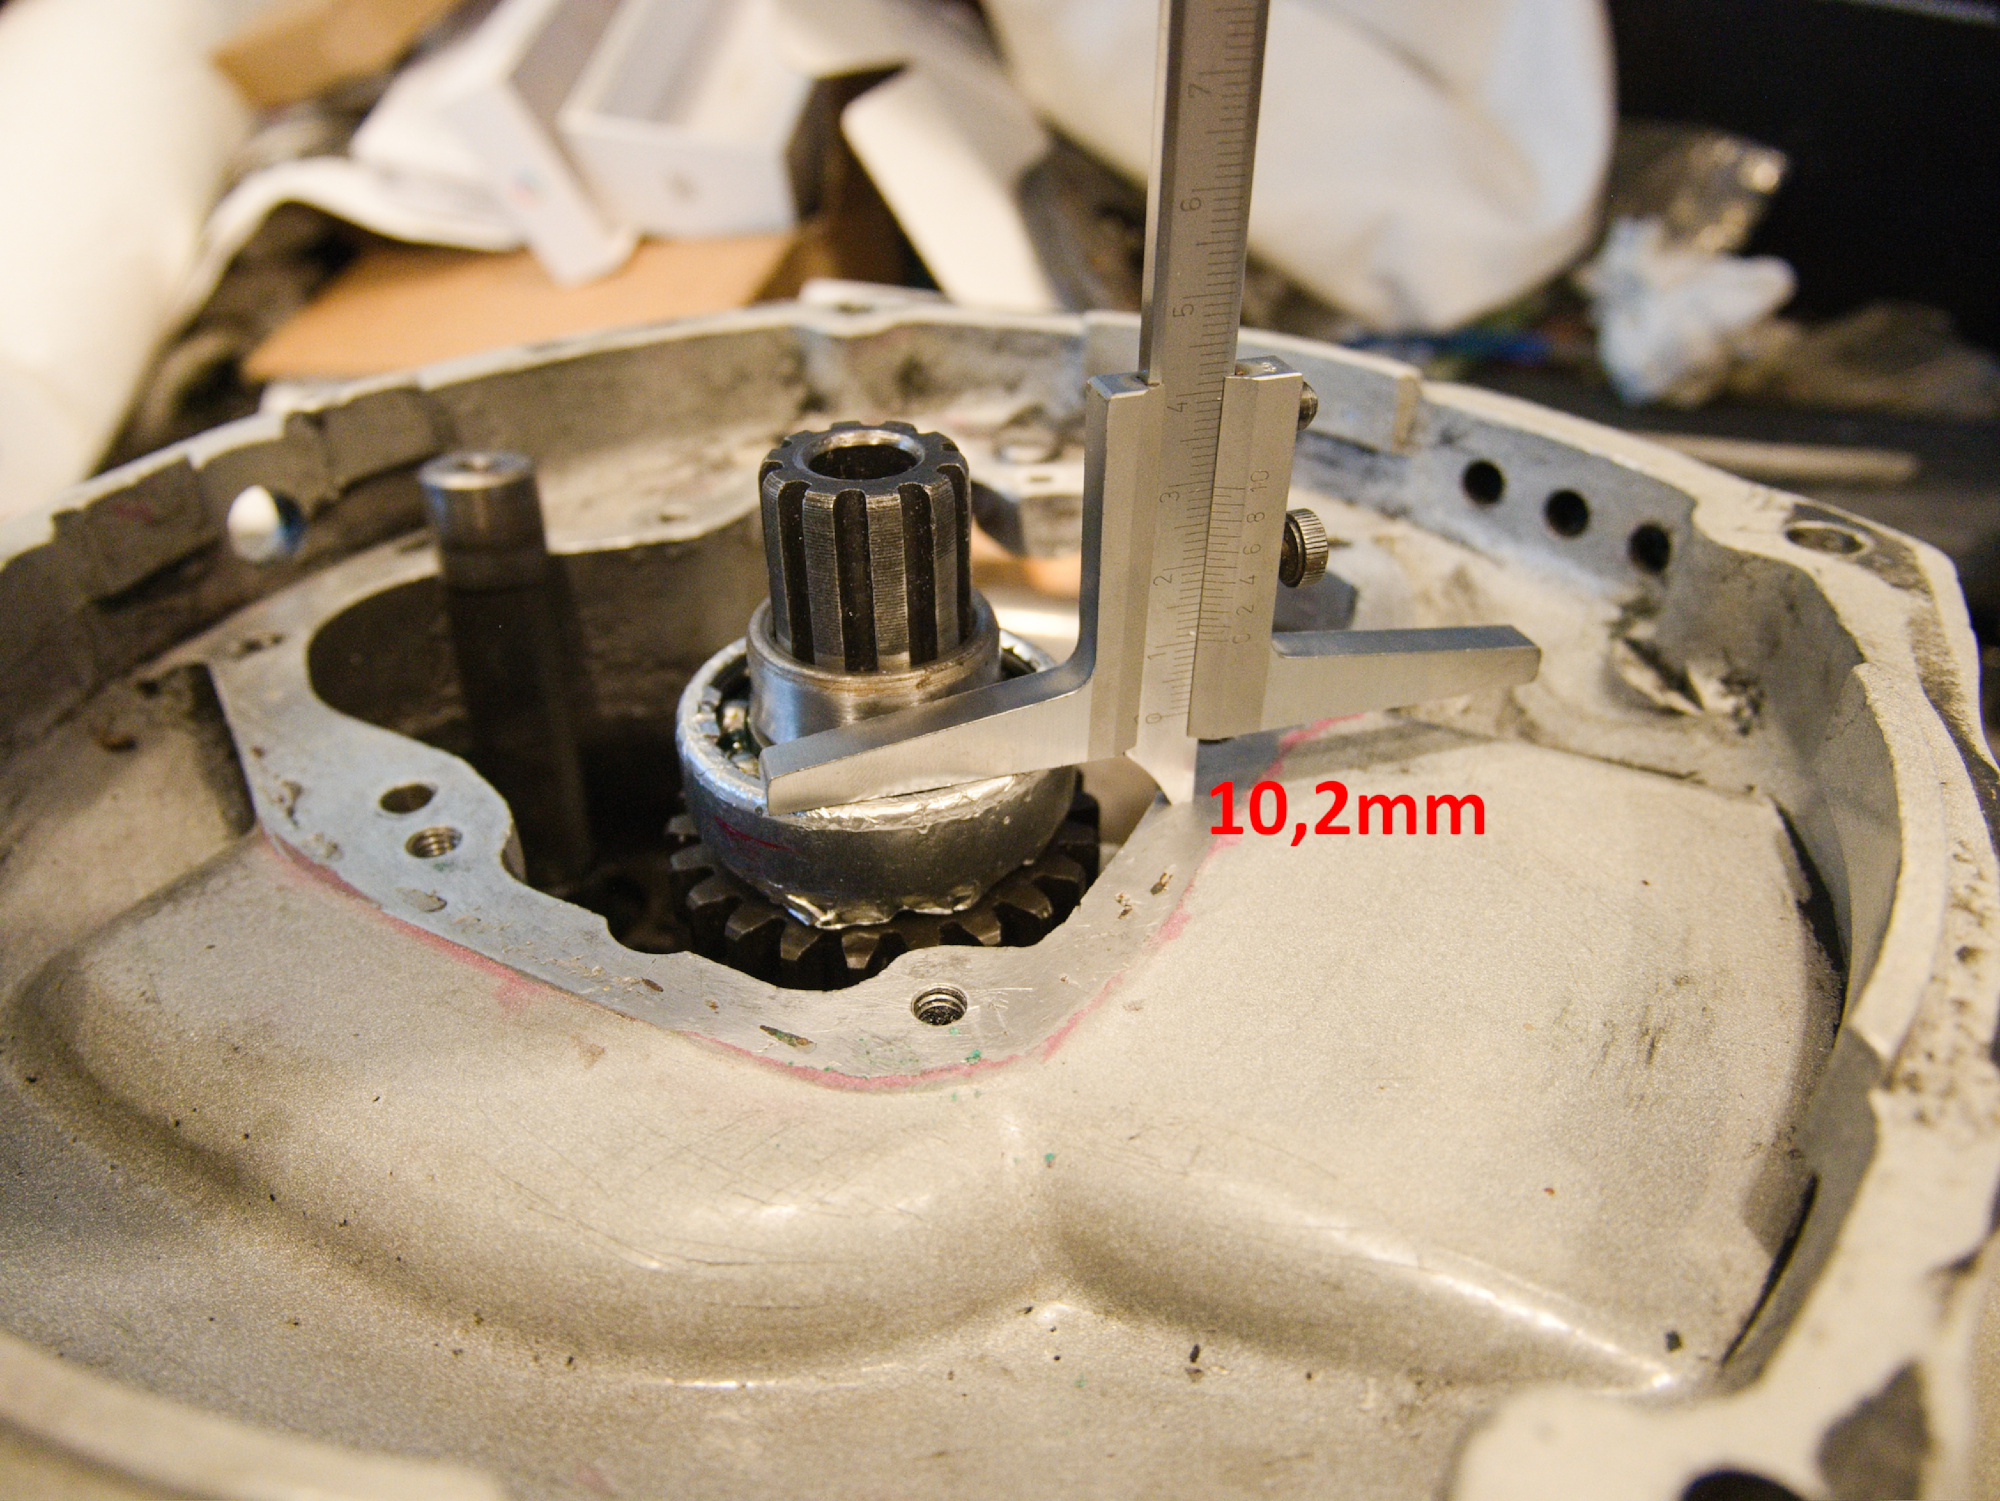
Take the measurement of the depth of the bearing reception.
The gasket is available in two different thicknesses, so make sure to measure it.
Now adjust the position of the bearing. Moving the bearing to the measured length can be challenging as the bearing does not slide but rather jump in steps. To solve this, place a gauge block with a feeler gauge of matching thickness between the bearing and the gear as a stop block. Adjust the gauge size for each measurement cycle to achieve precise positioning.
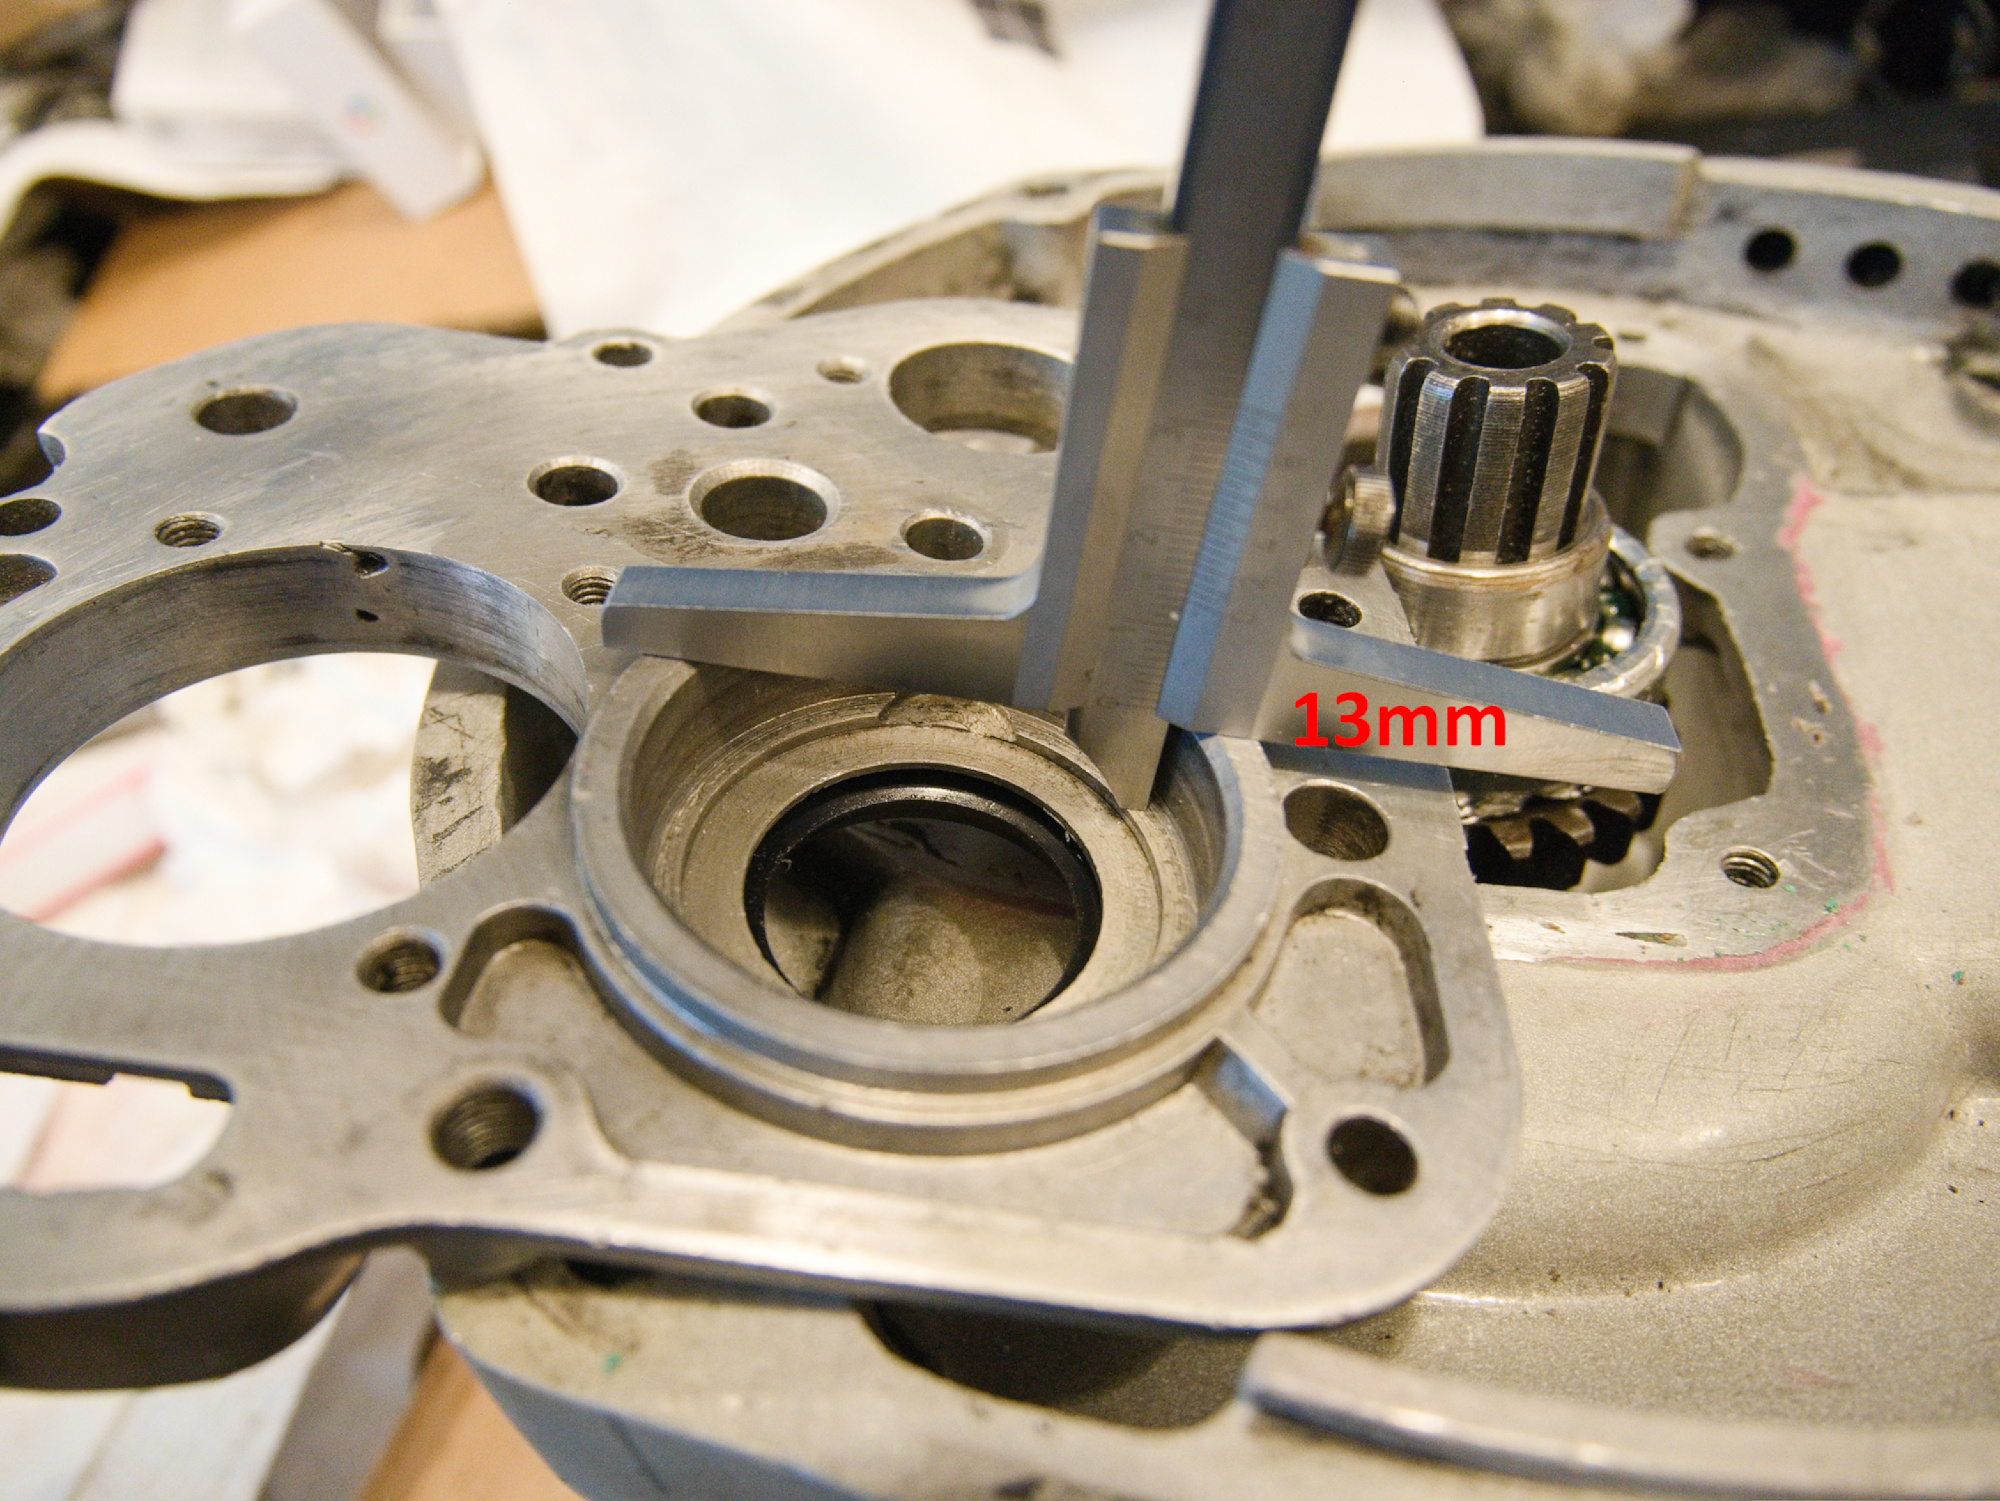
Check the measurement again and verify the play with the cover and gasket (dry) on.
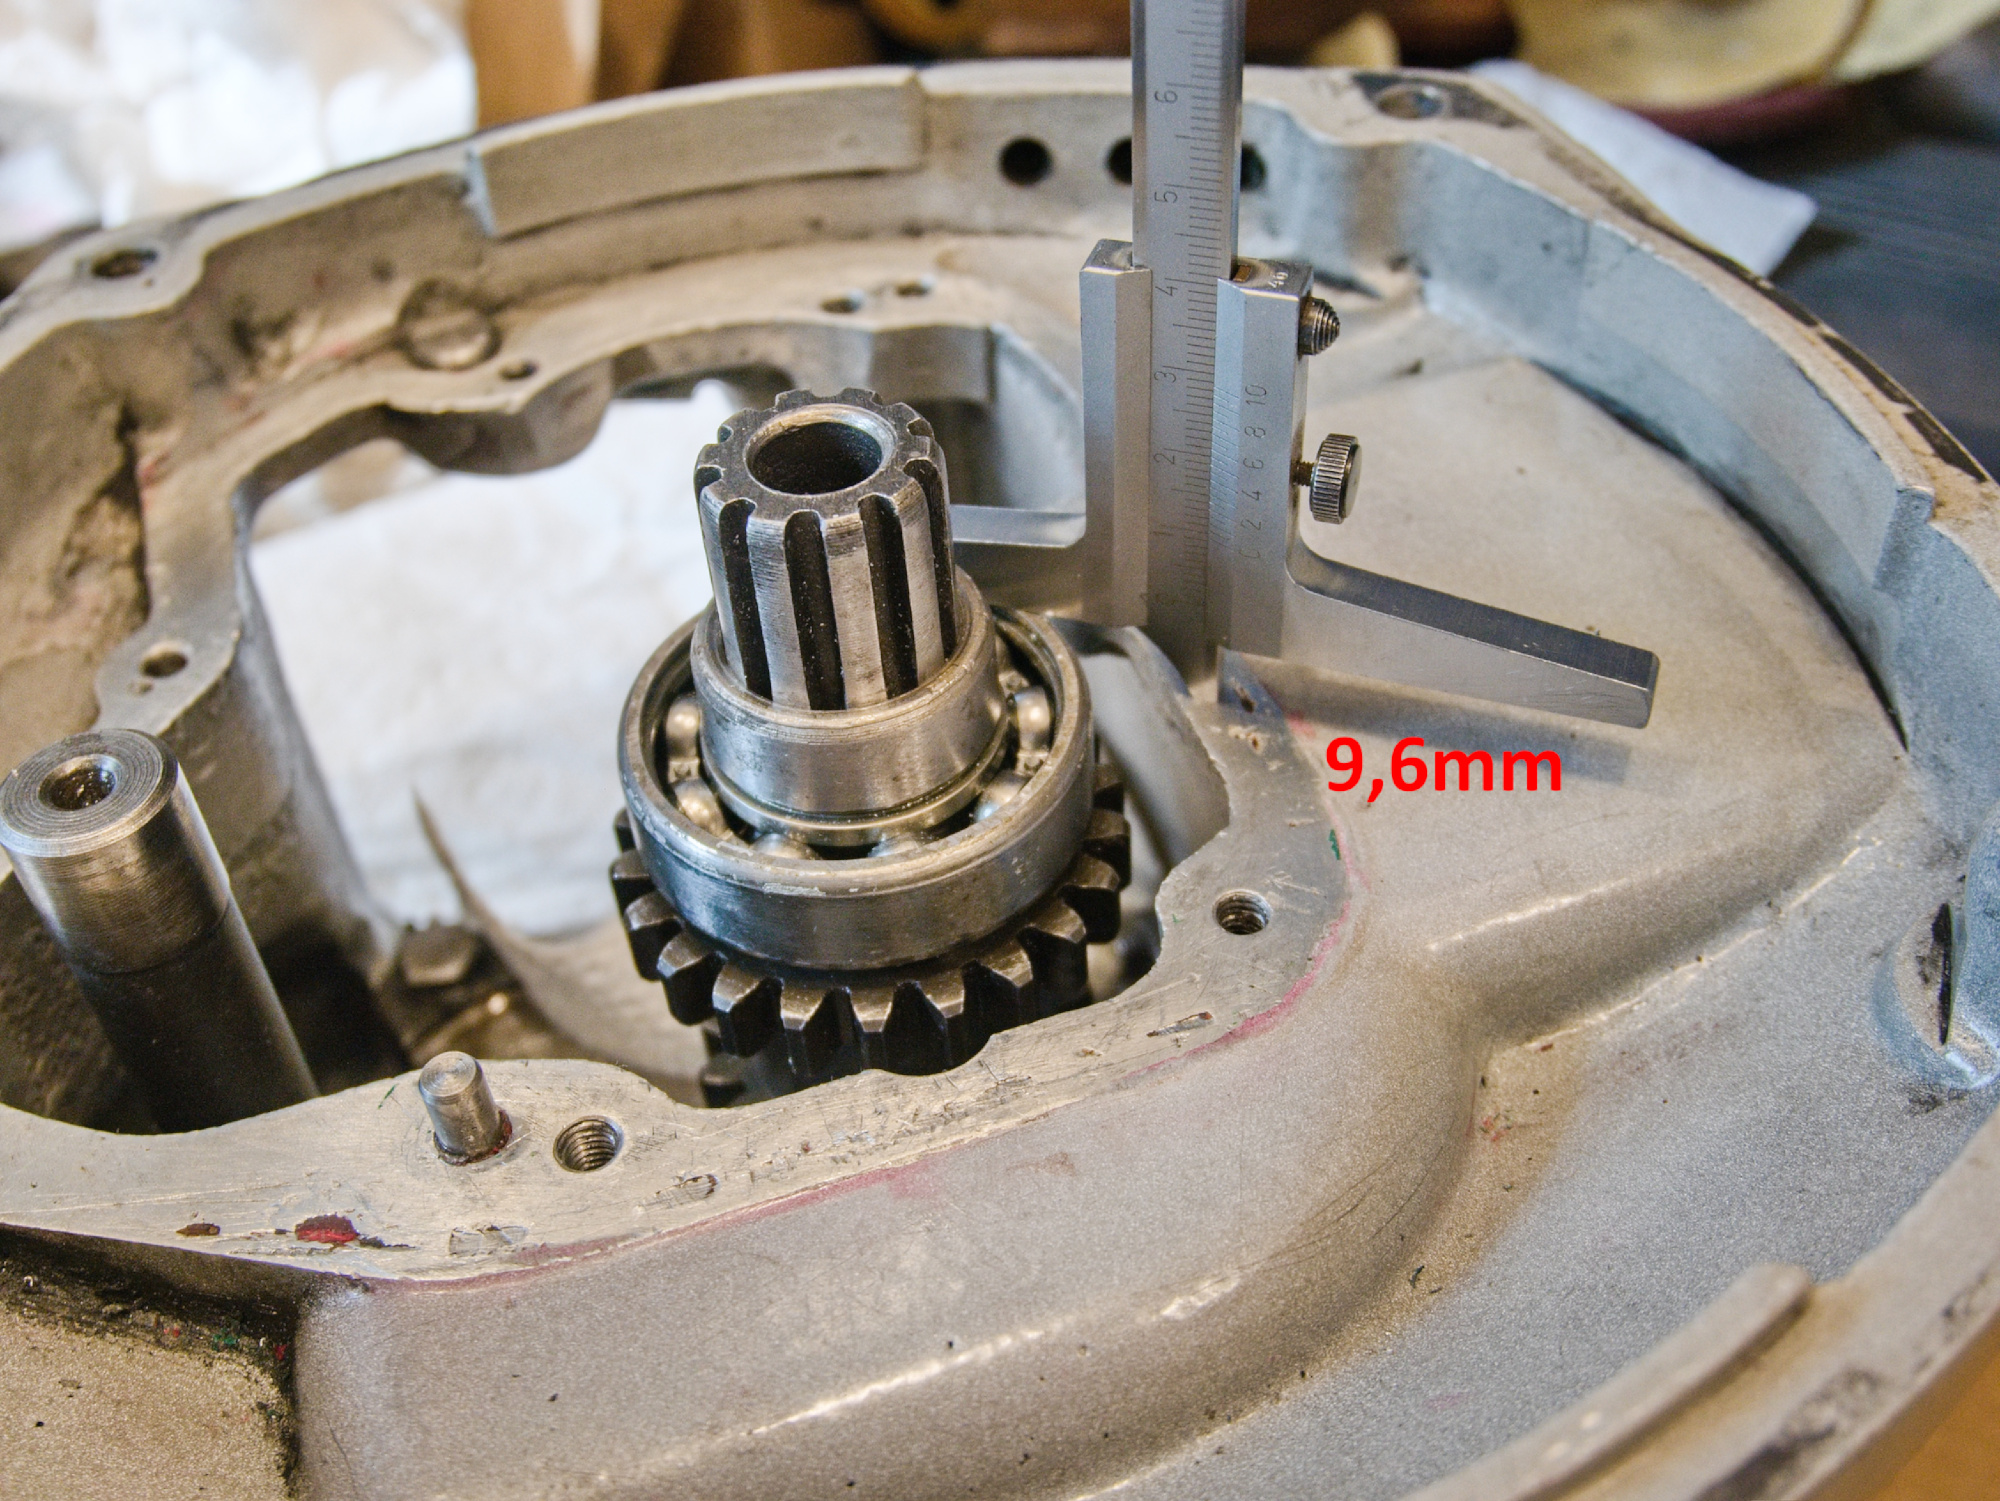
The same for the output shaft to make sure the smaller back cover does not push against the bearing and also has a 0.2mm clearance.
The position at the input shaft for the 3rd gear is usually not oversized so the 3rd gear could be easily pushed through and rotated to fit the 4th gear.
But I don't like any not-fixed part on the input shaft. It will just loosen over time and start wearing out. So thats why the input shaft is at a constant 3/100 oversize.
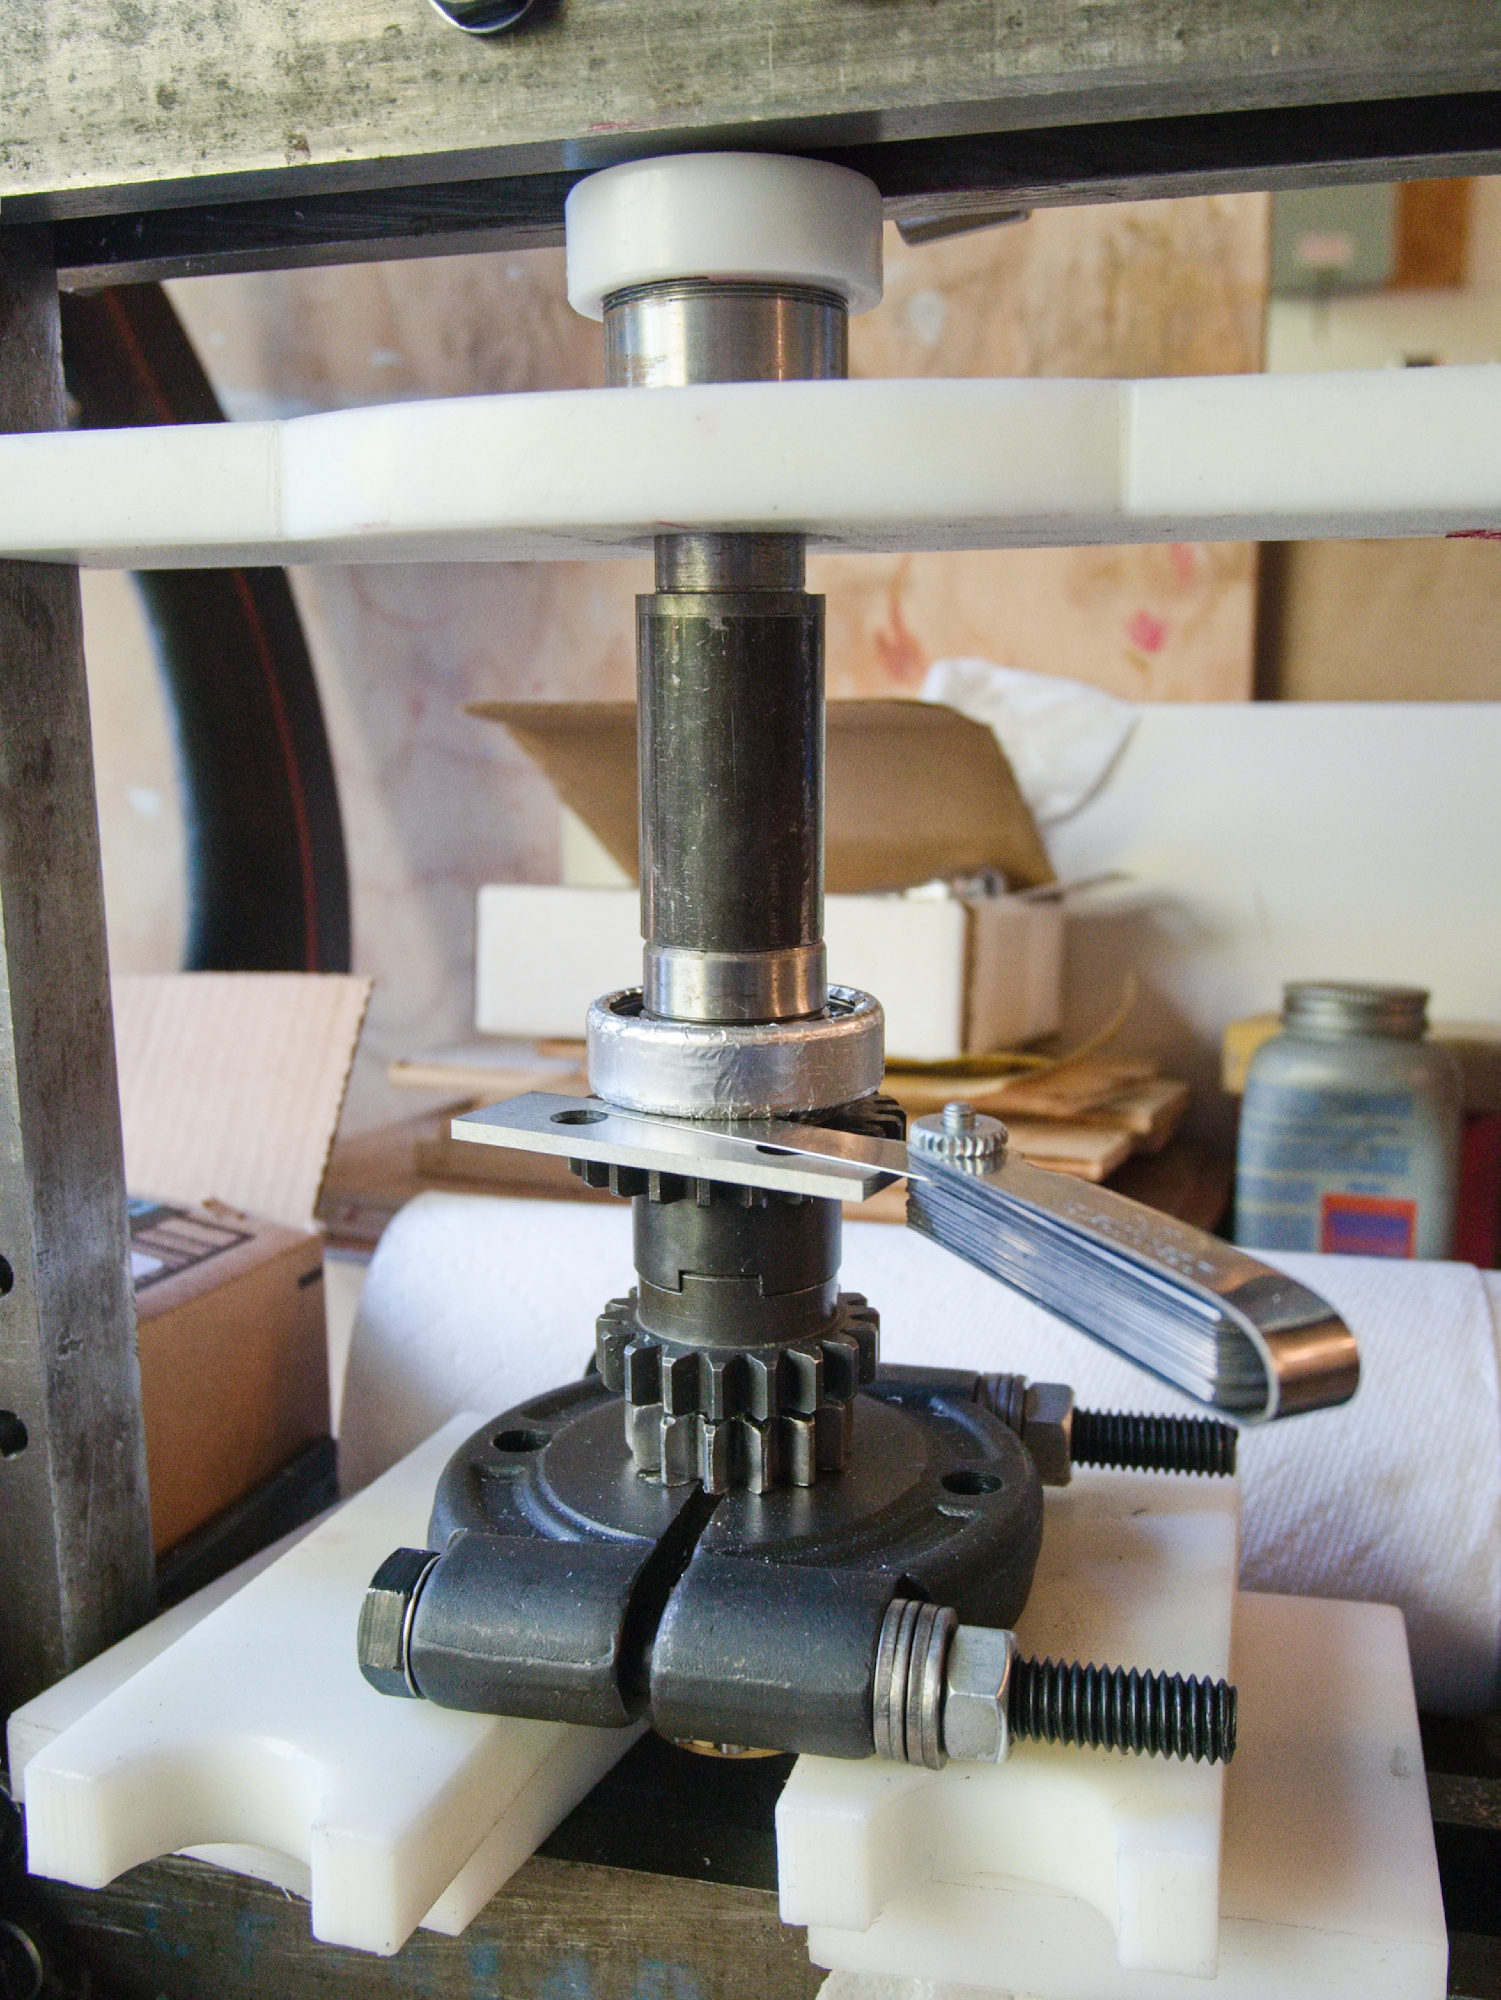
But twisting the 3rd gear was actually more difficult than I thought. Once the 3rd gear was pushed a bit on the shaft, I tried to make a small angular adjustment. I used a larger wrench made out of a high quality plastic to not scratch the gears. The wrench broke, and I had to come up with a different approach.
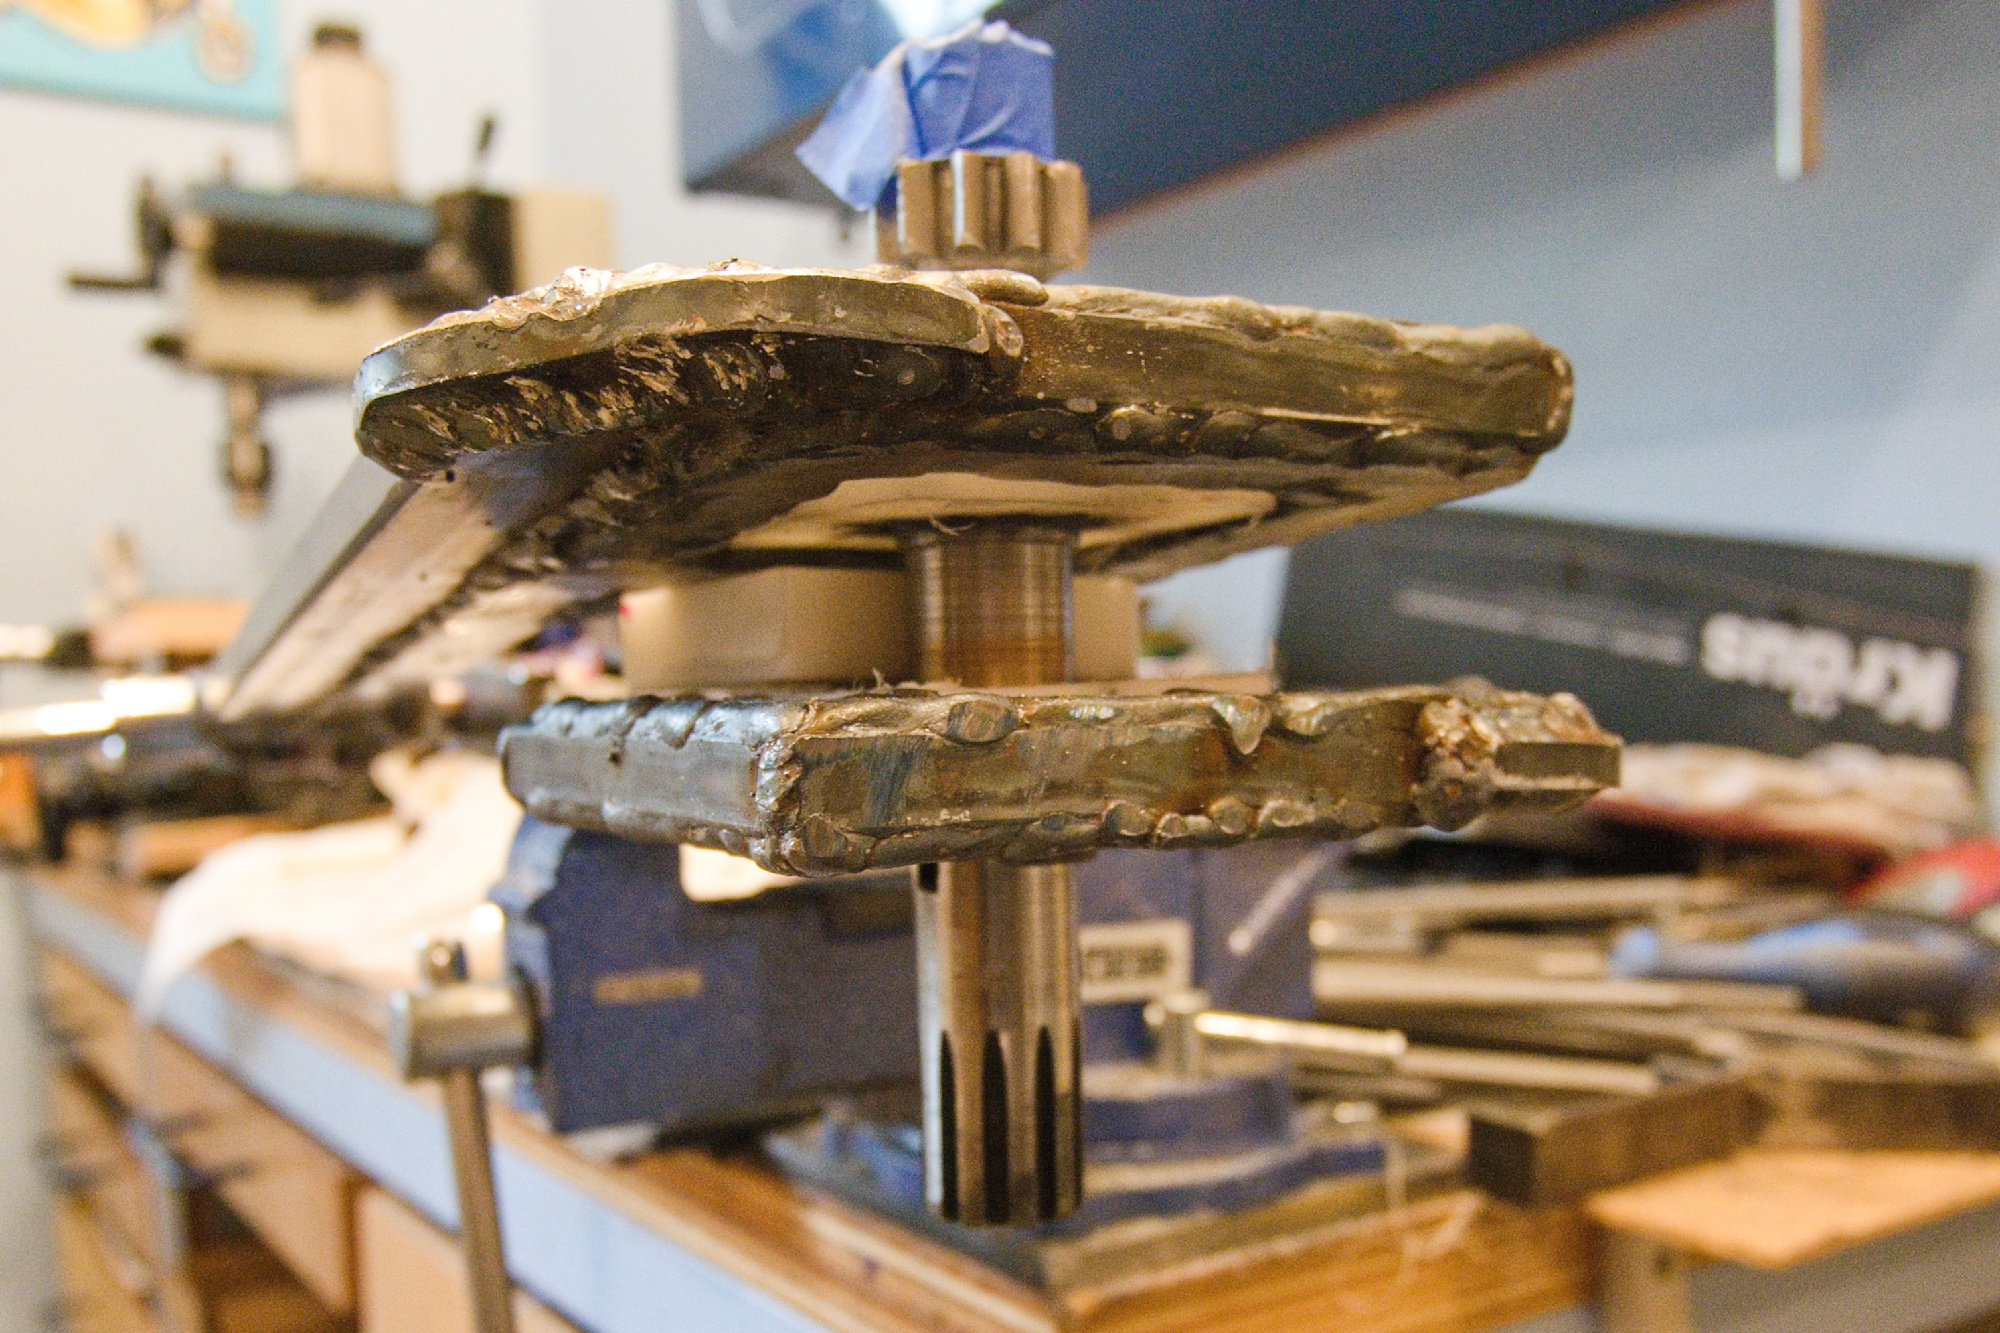
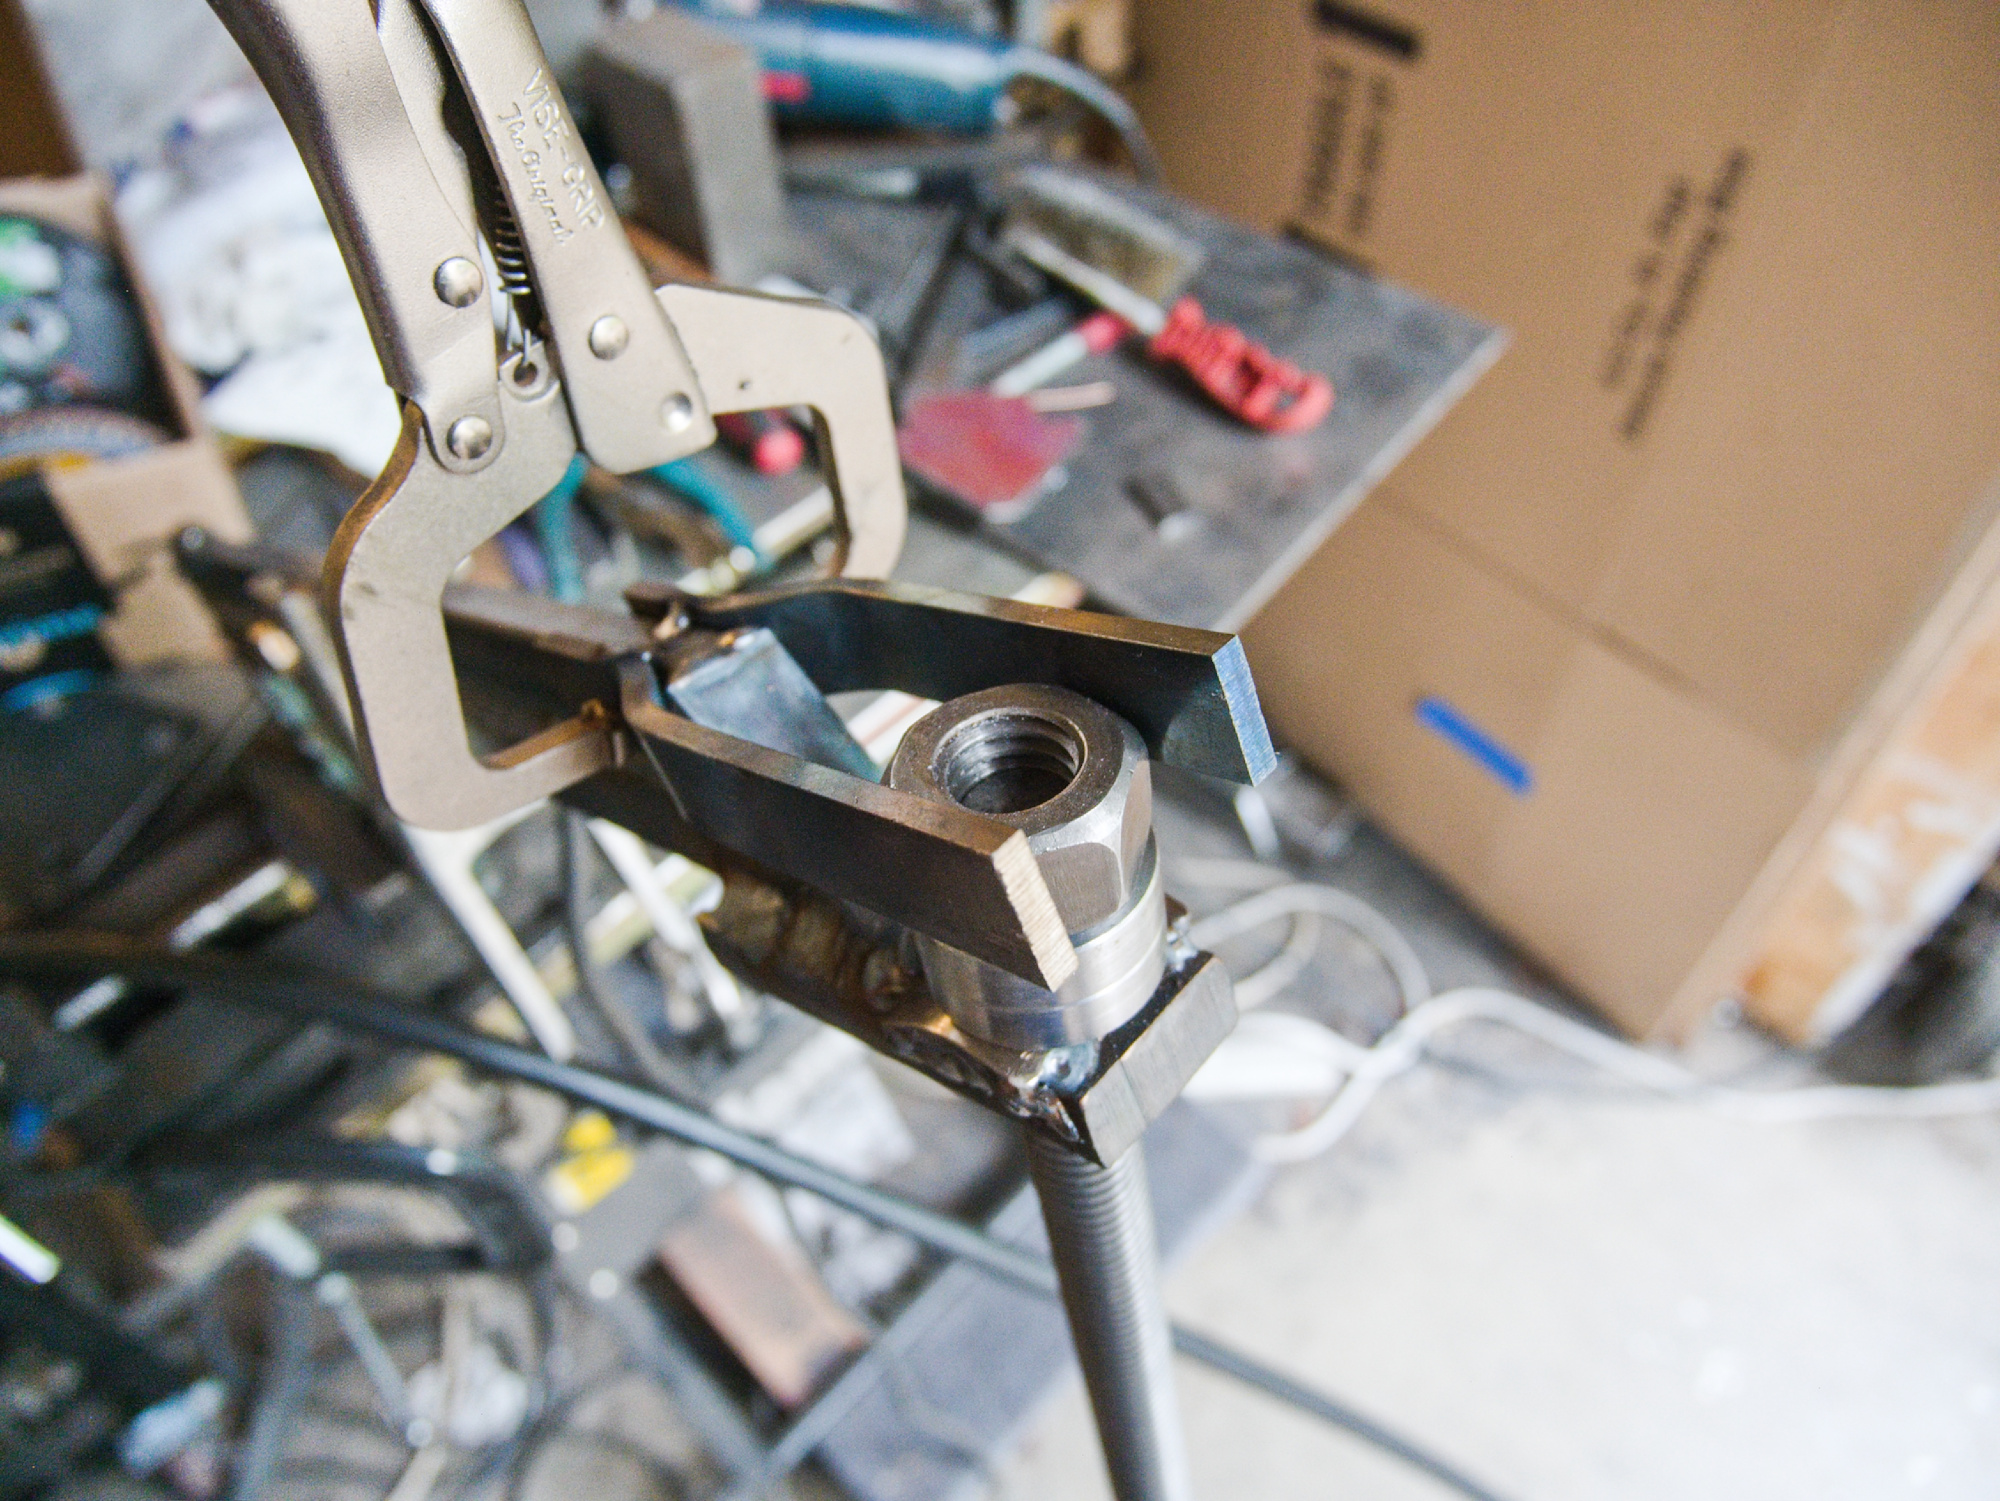
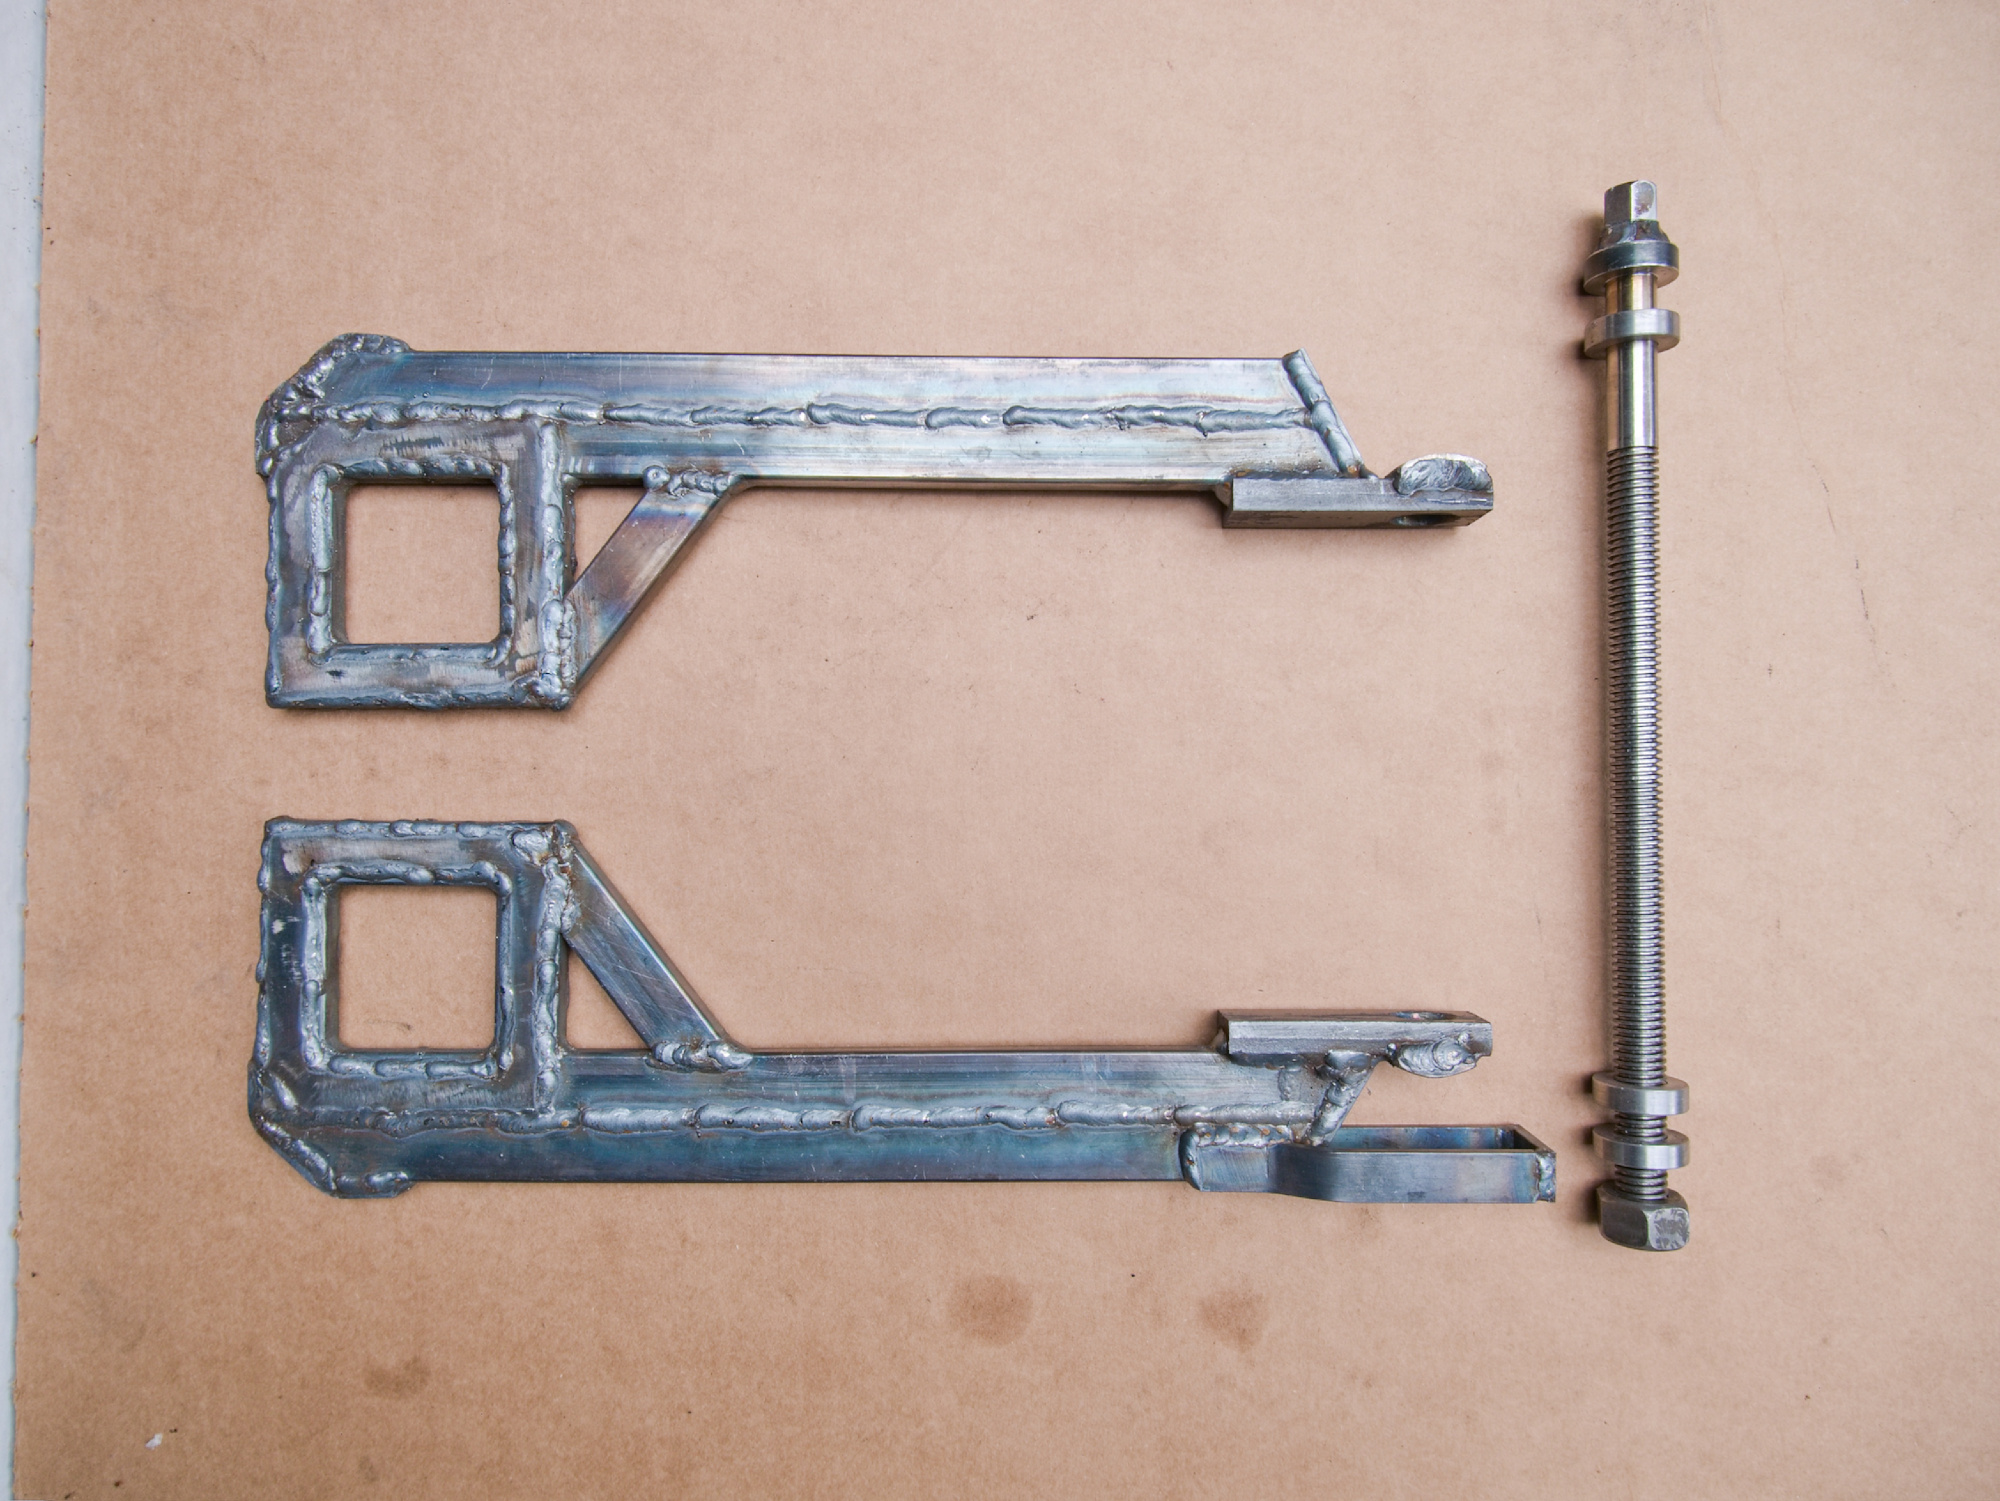
I fabricated two square holders that are connected with a 3/4" acme threaded rod to twist the gears. I made sure there would no breaking this time, and as it turned out, the aligning of the gears using the screw was easy.
The parts:
The square frames were cut out from a saw blade for additional strength using a plasma cutter.
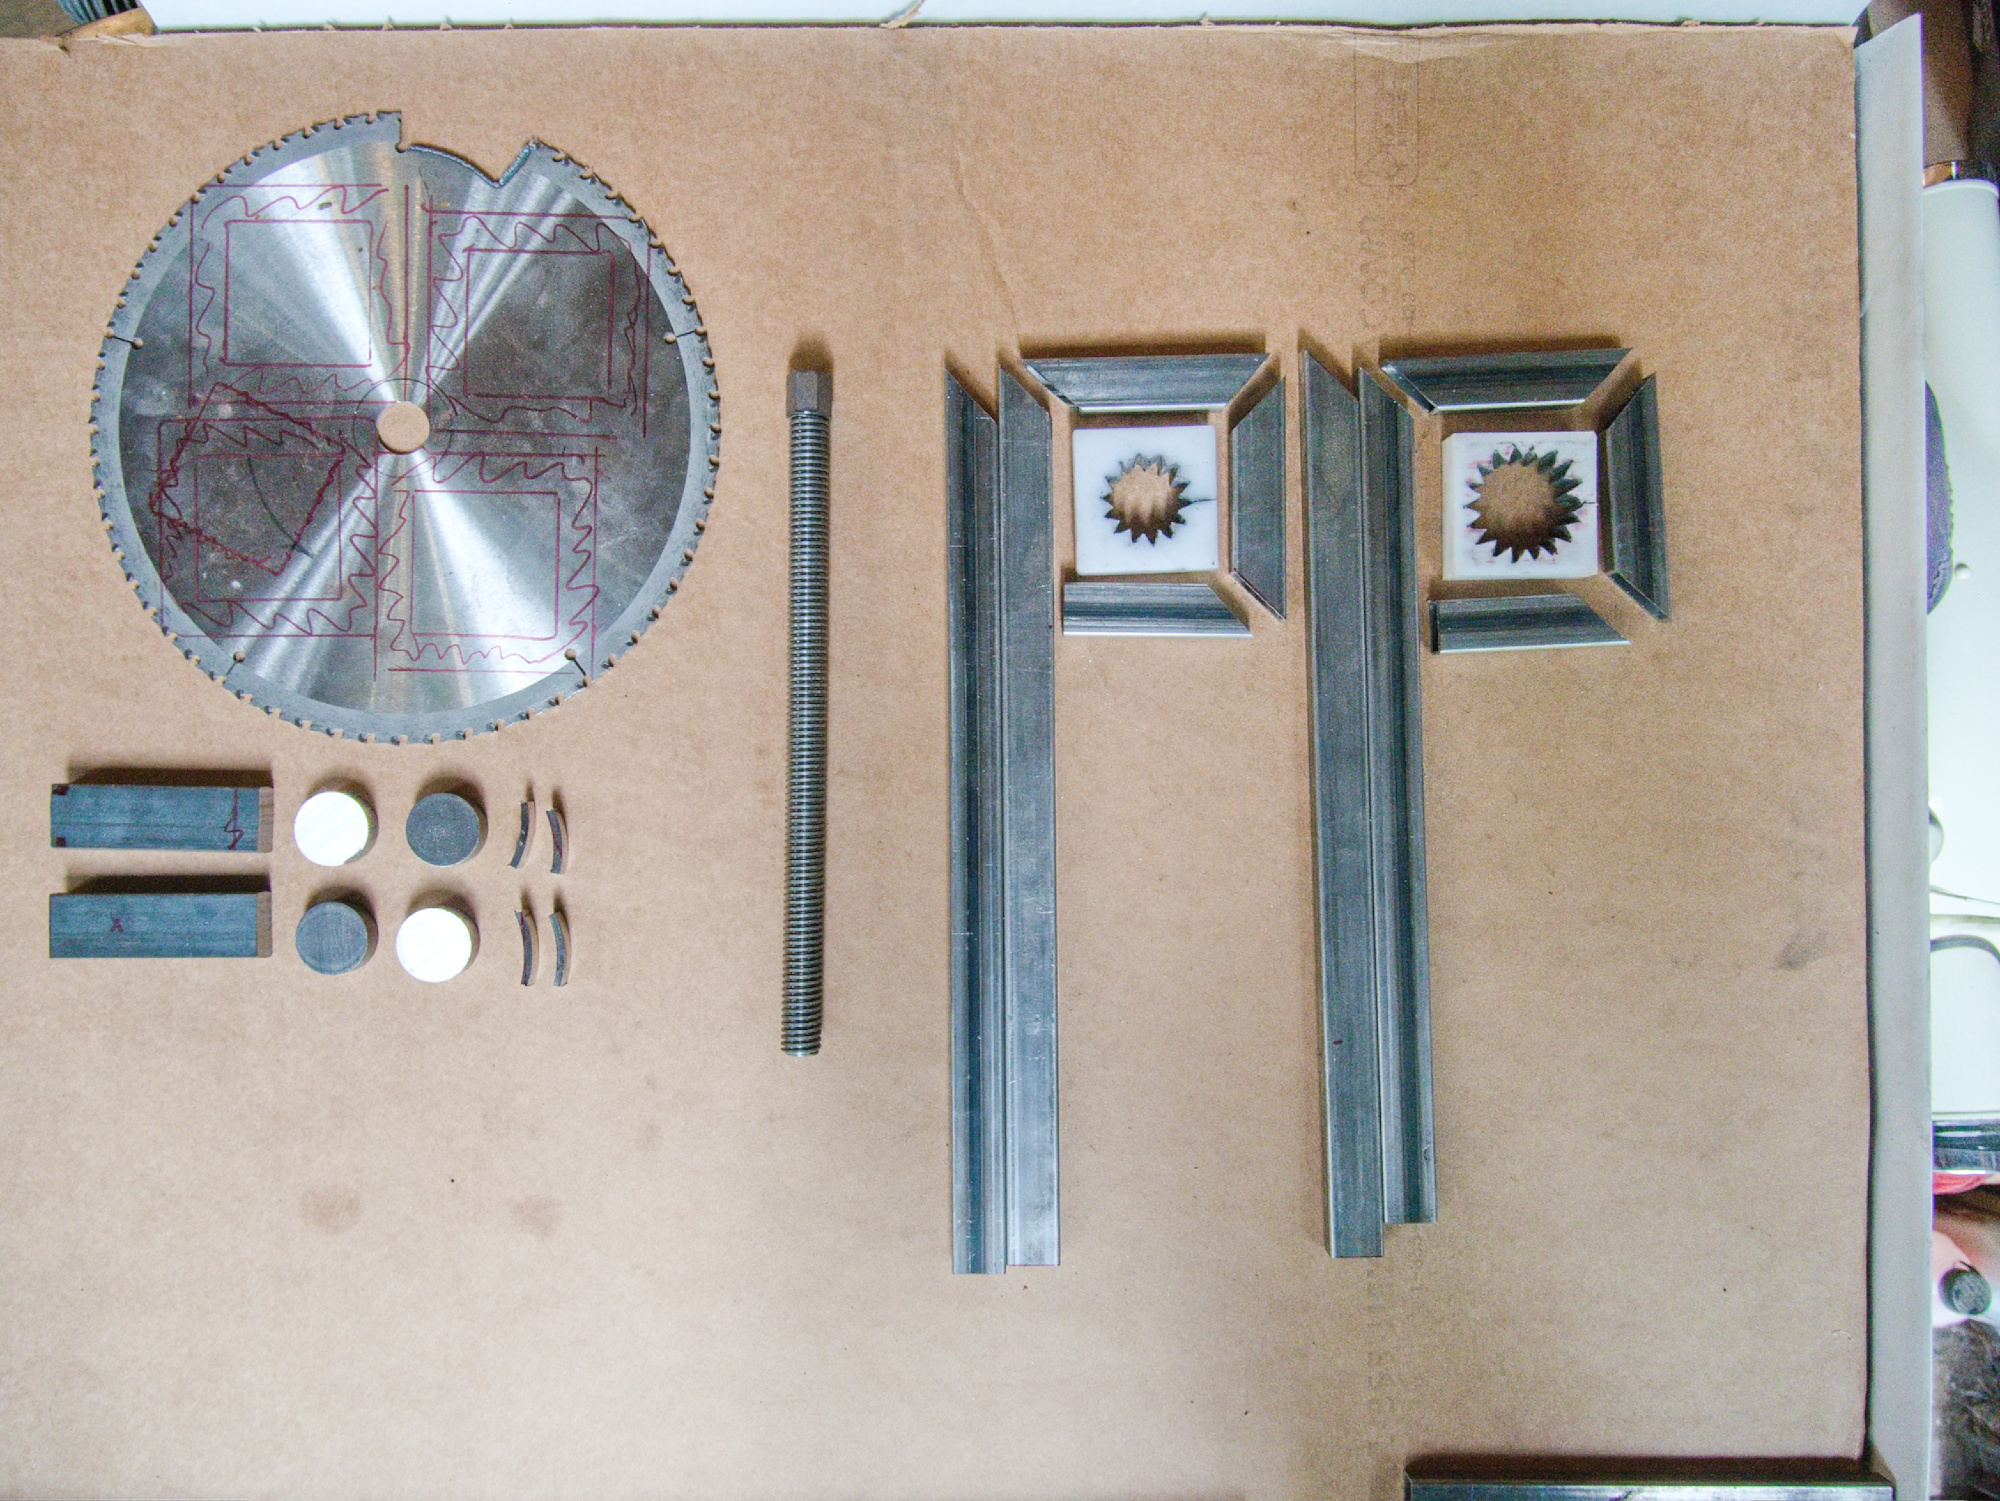
The inside of the square holder were cut on the saw to match the gear pattern, and then filled with JB-Weld, and then pressed on the gear while still wet for a perfect fit.
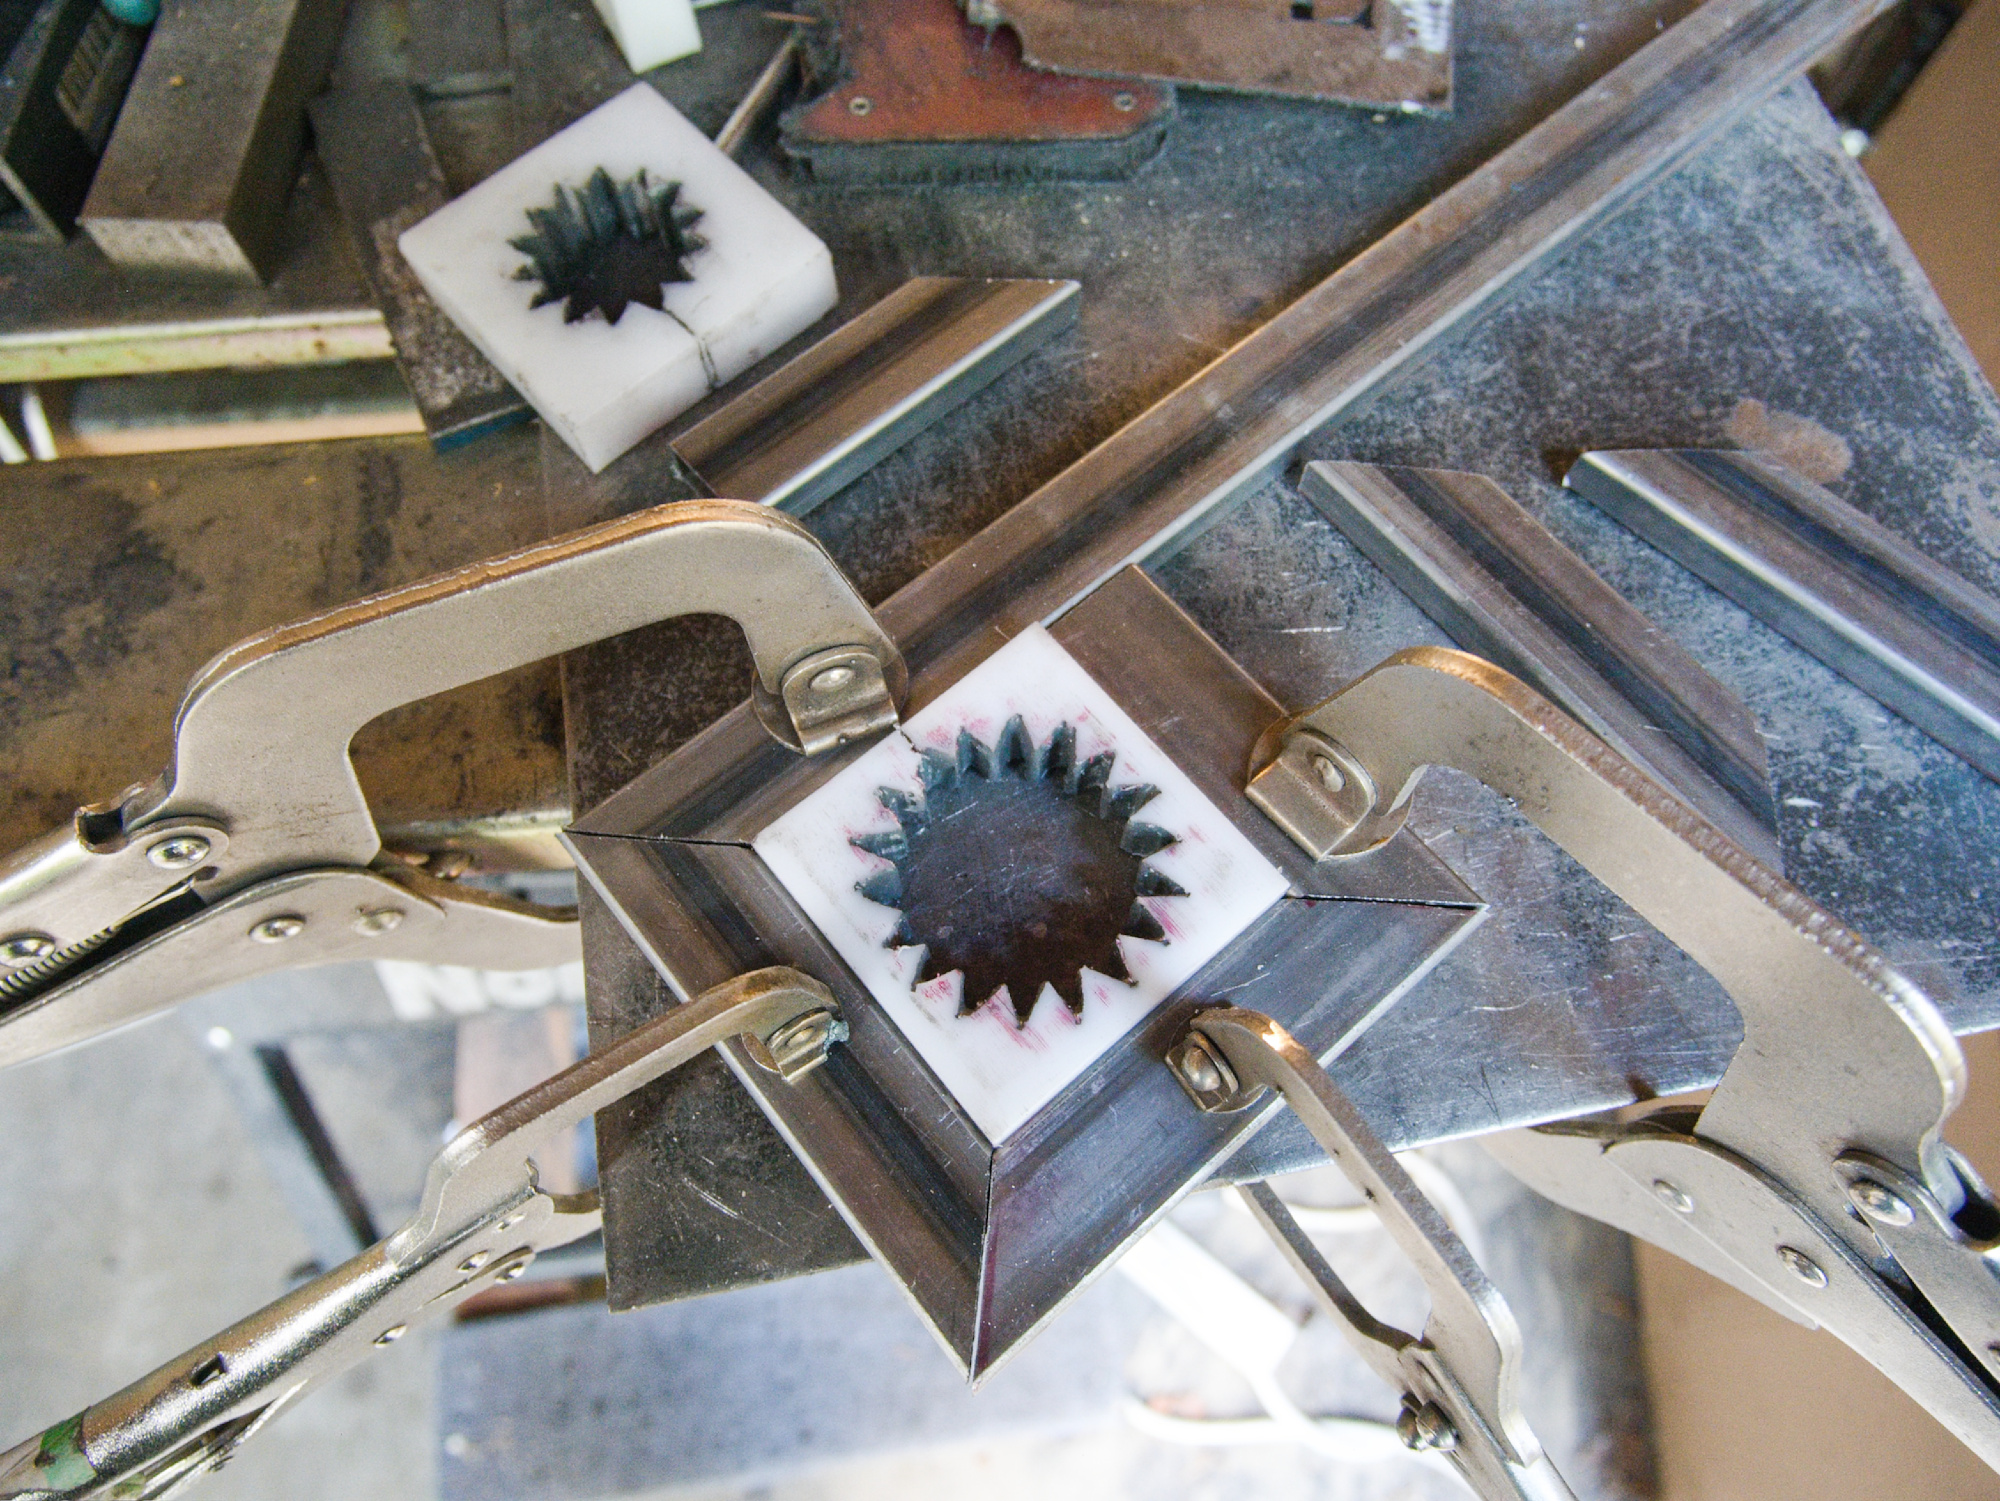
The Mega-Twister is ready.

I used axial bearings to take the load sitting on small curved stainless steel rails. Slightly over-engineered, but it worked so smoothly.
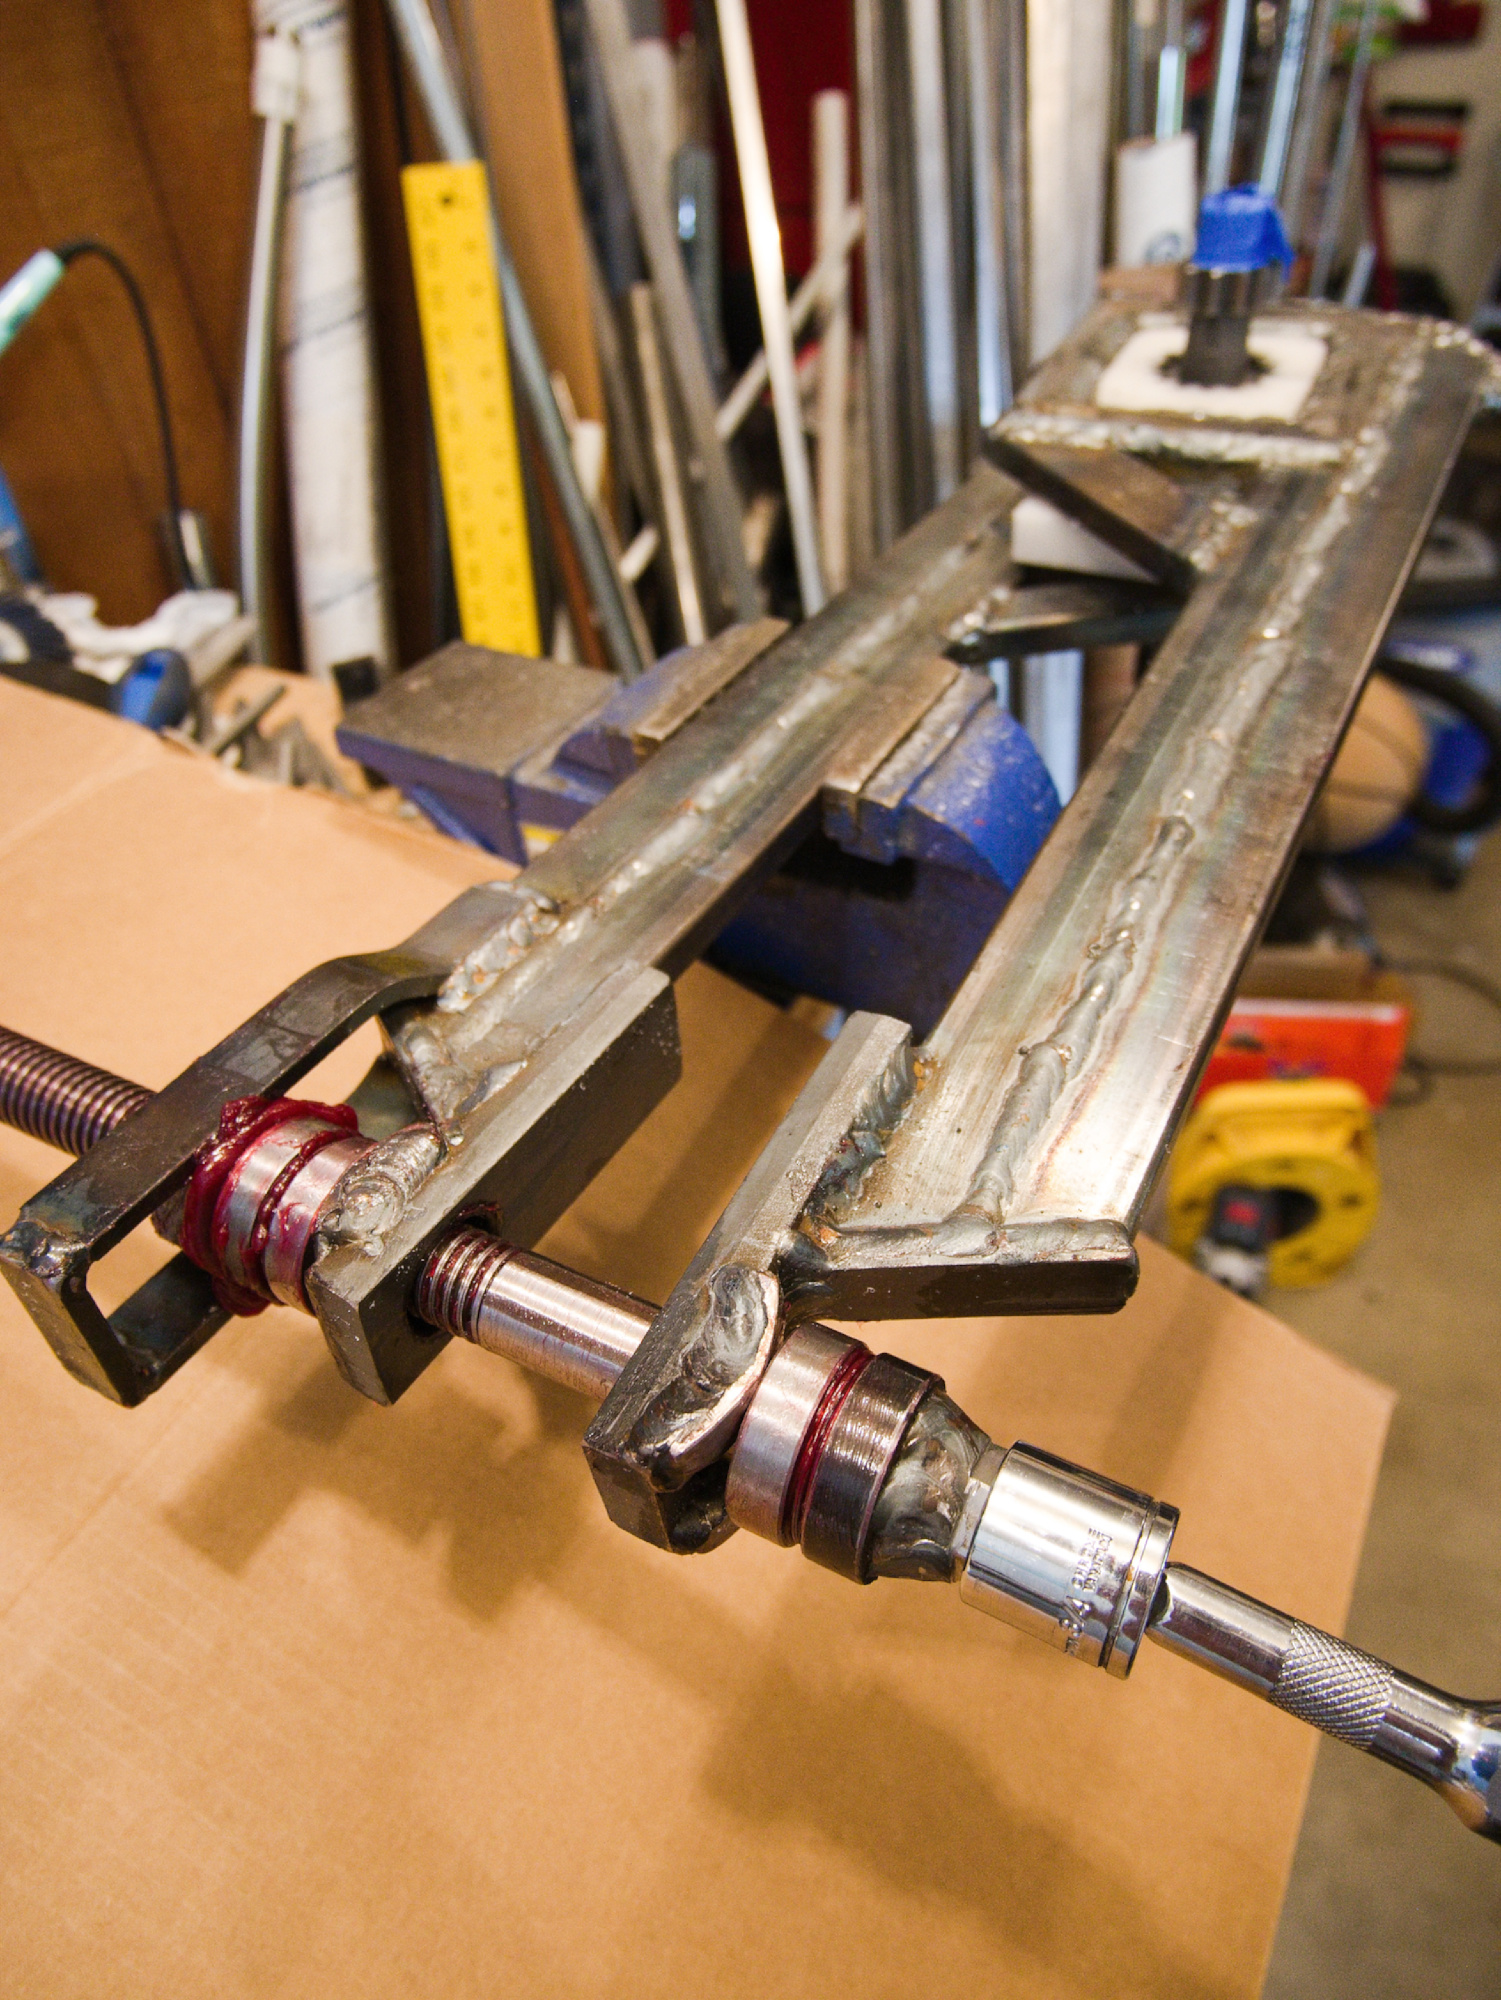
Used a piece of plastic to keep the distance between 3rd and 4th during the angular adjustment.