Sonnenuntergang 🌇
16 January, 2024
NIKON Z30, 18-140mm f/3,5-6,3 VR, neues Amazon-Gebäude, Bellevue
1/40s f/6,3 ISO100 f=110mm/165mm
Weißabgleich Tageslicht

1/500s f/8,0 ISO100
Bei Tageslicht

1/40s f/6,3 ISO2000 f=140mm/210mm
1:1
16 January, 2024
NIKON Z30, 18-140mm f/3,5-6,3 VR, neues Amazon-Gebäude, Bellevue
1/40s f/6,3 ISO100 f=110mm/165mm
Weißabgleich Tageslicht
1/500s f/8,0 ISO100
Bei Tageslicht
1/40s f/6,3 ISO2000 f=140mm/210mm
1:1
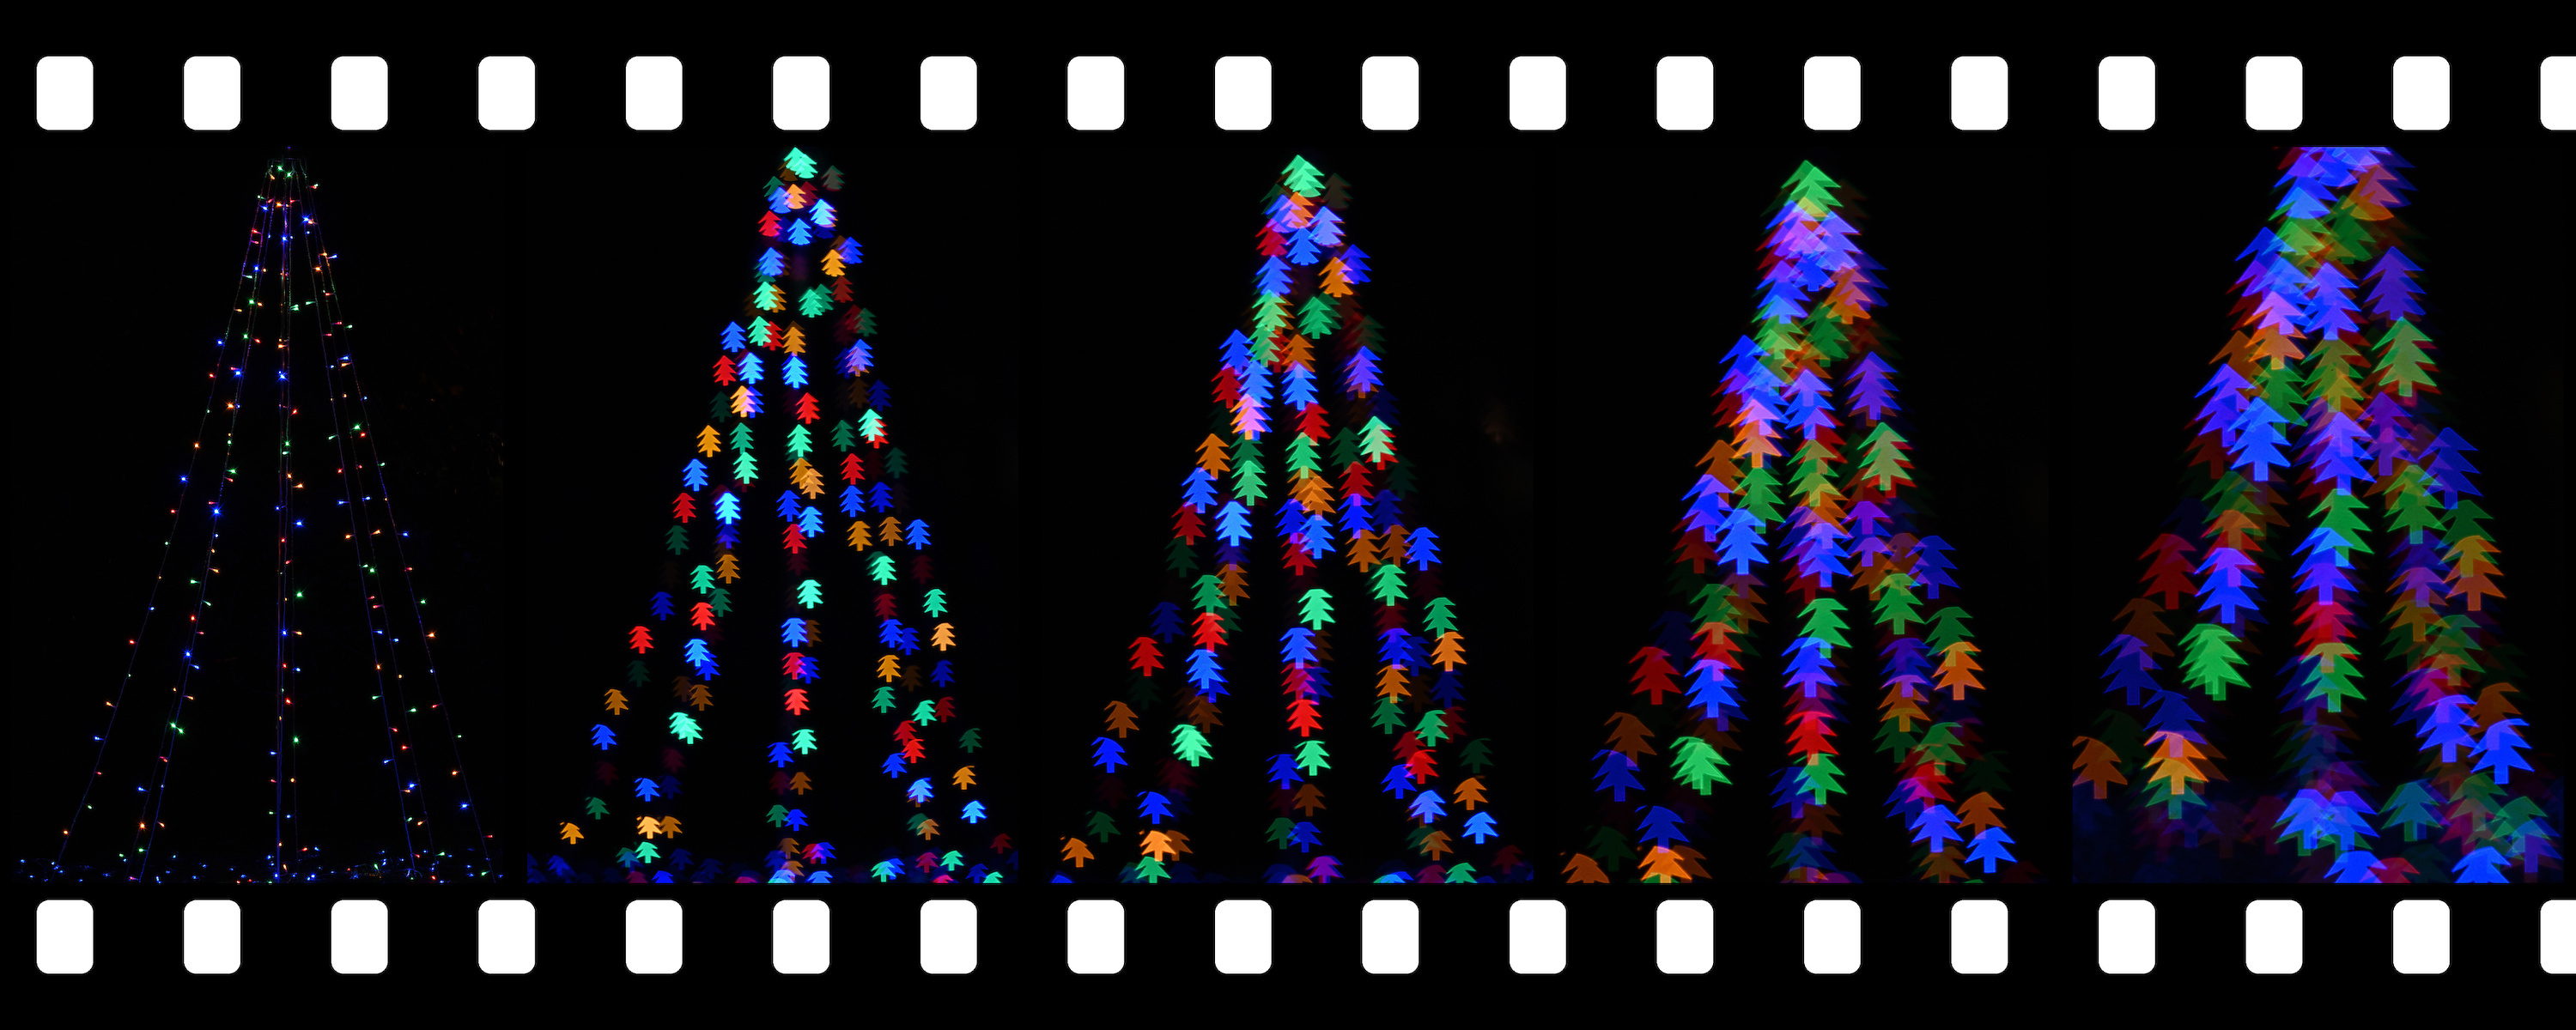
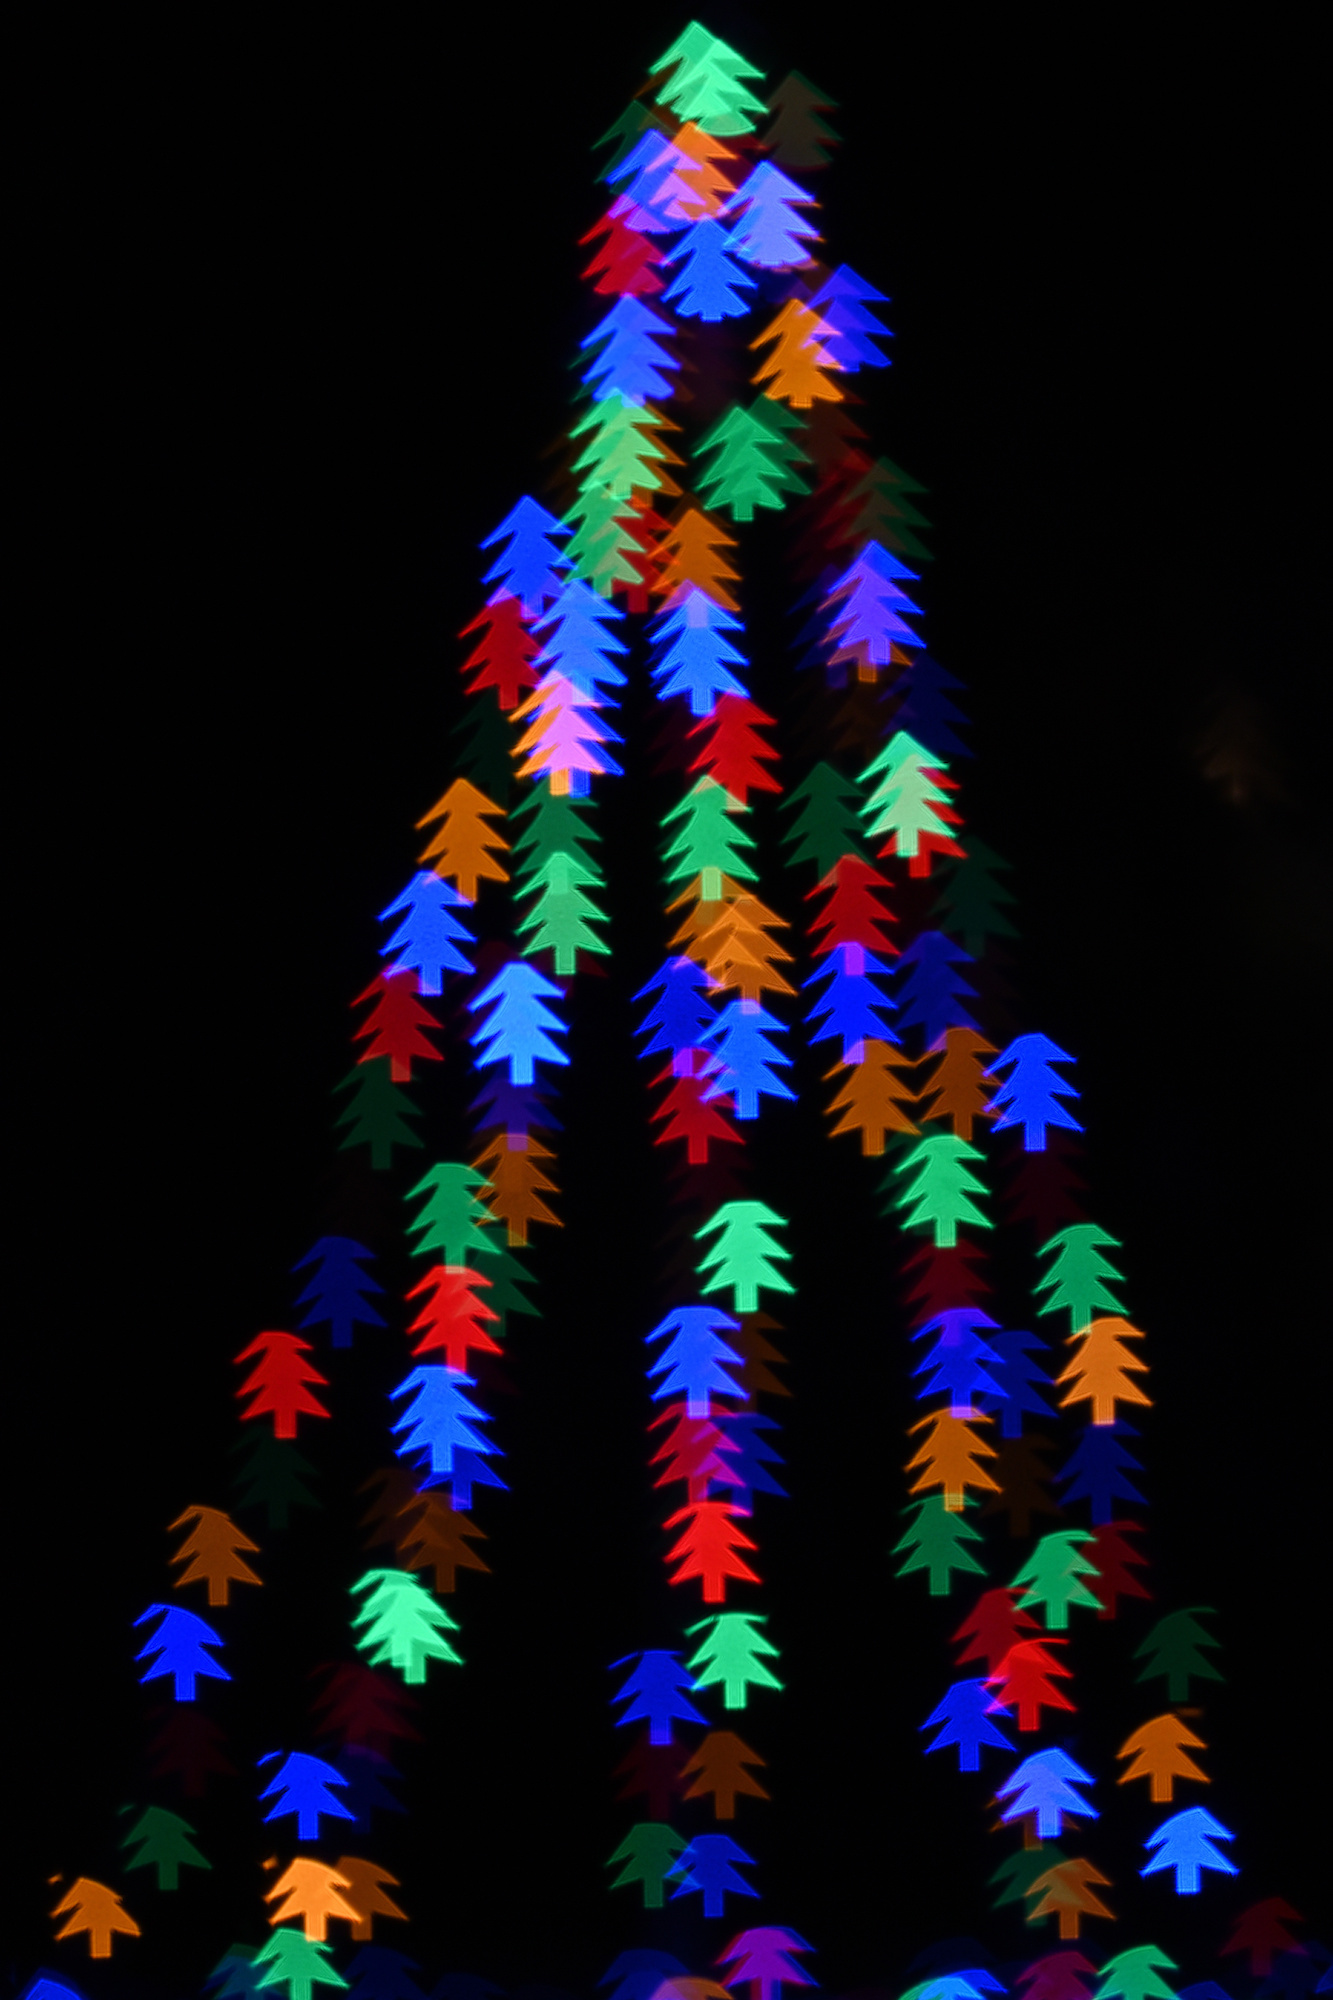
02 December, 2023
The out of focus circles are formed by the shape of the Aperture and Lens, which is a circle.
All pictures are 1/60s f3.2 but with different focus setting.


To change this, cut out a shape from cardboard and put it in front of the lens.
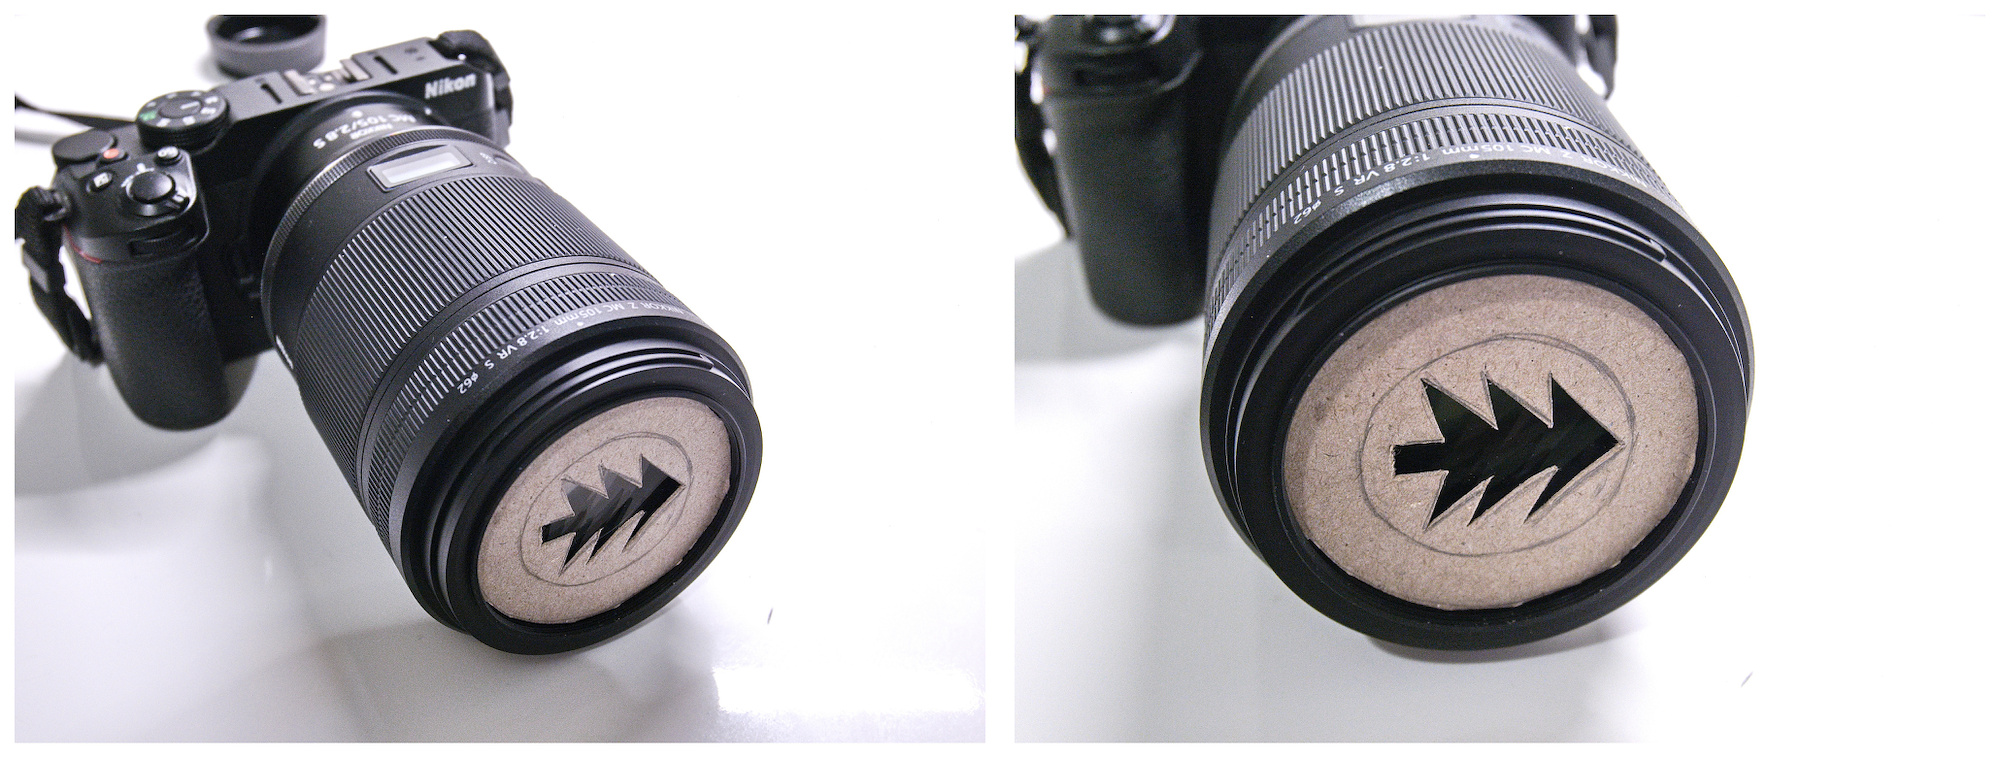
The out of focus circle now changed to the cardboard shape.
The ISO is increased from ISO400 to ISO640 to compensate for the light reduced by the shape.
21 October, 2023
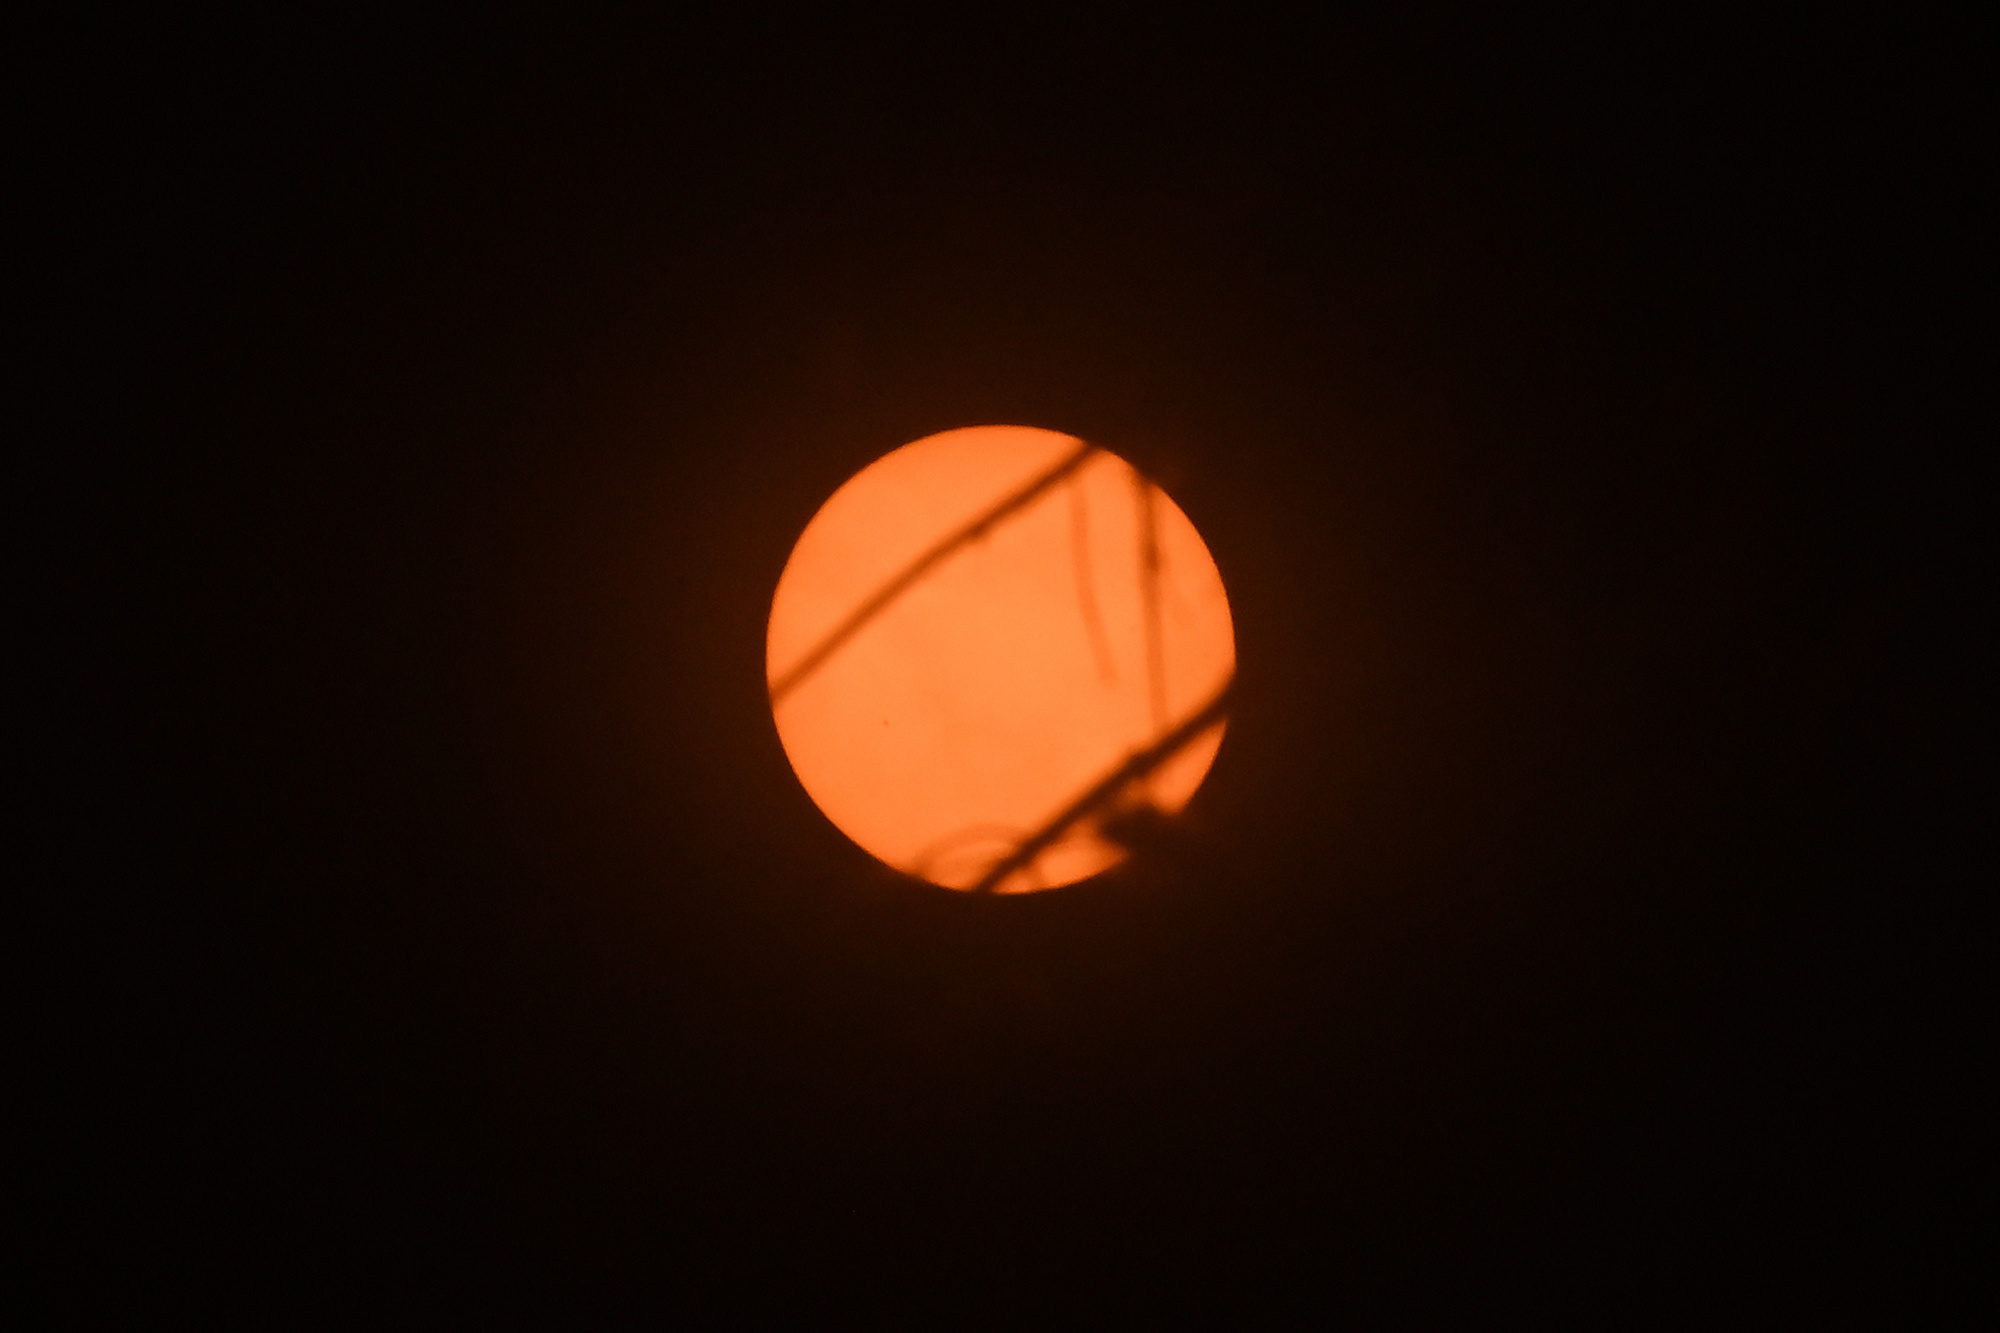
Bei der Sonnenfinsternis 2023 war die Belichtung mit 1/4000s f/32 ISO100 selbst mit einem ND7-Filter noch zu viel.
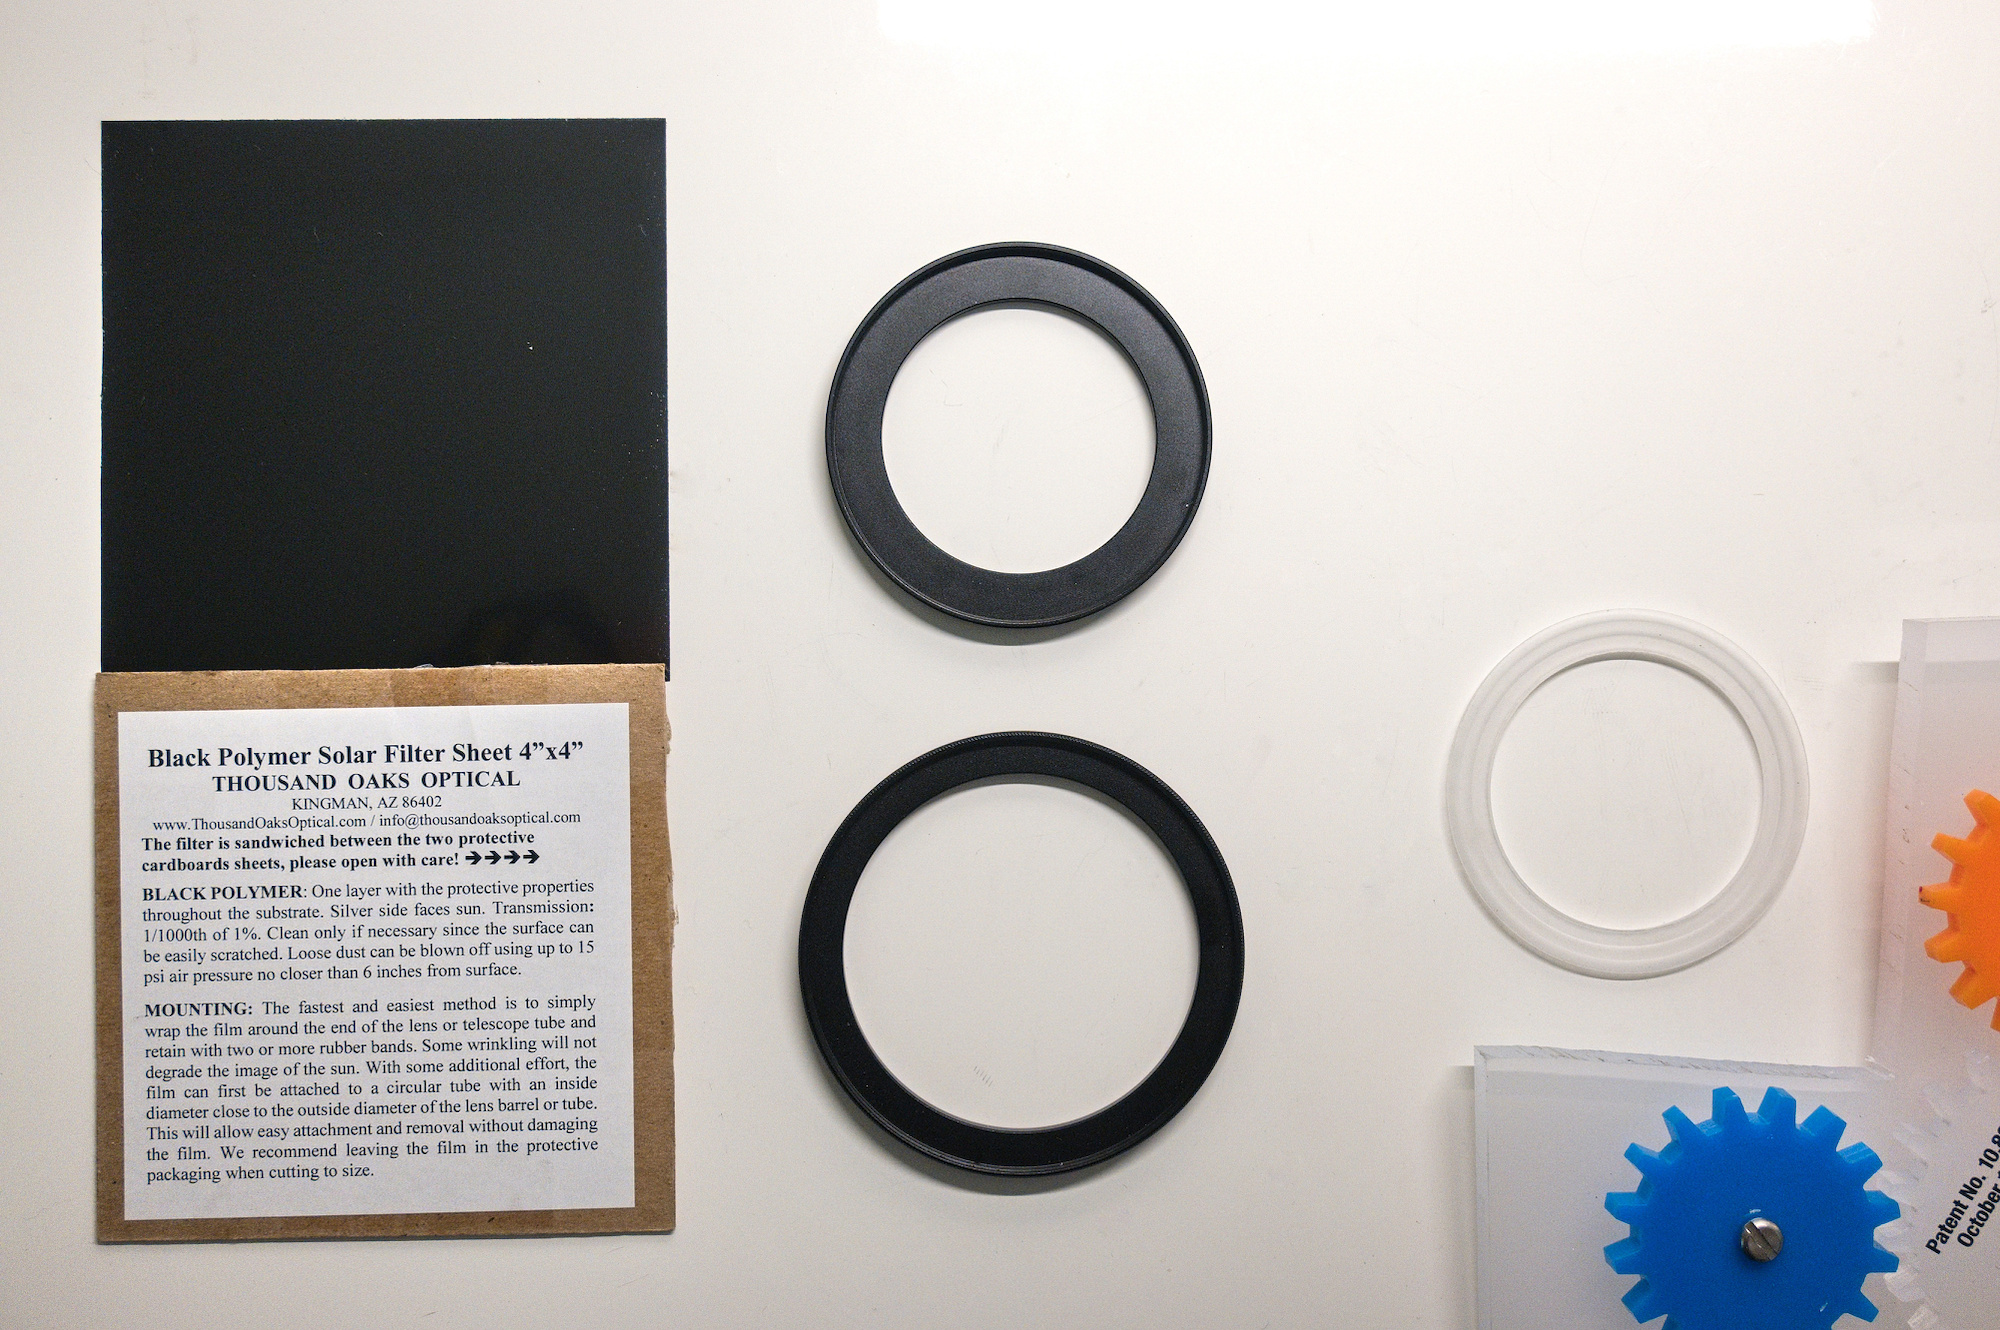
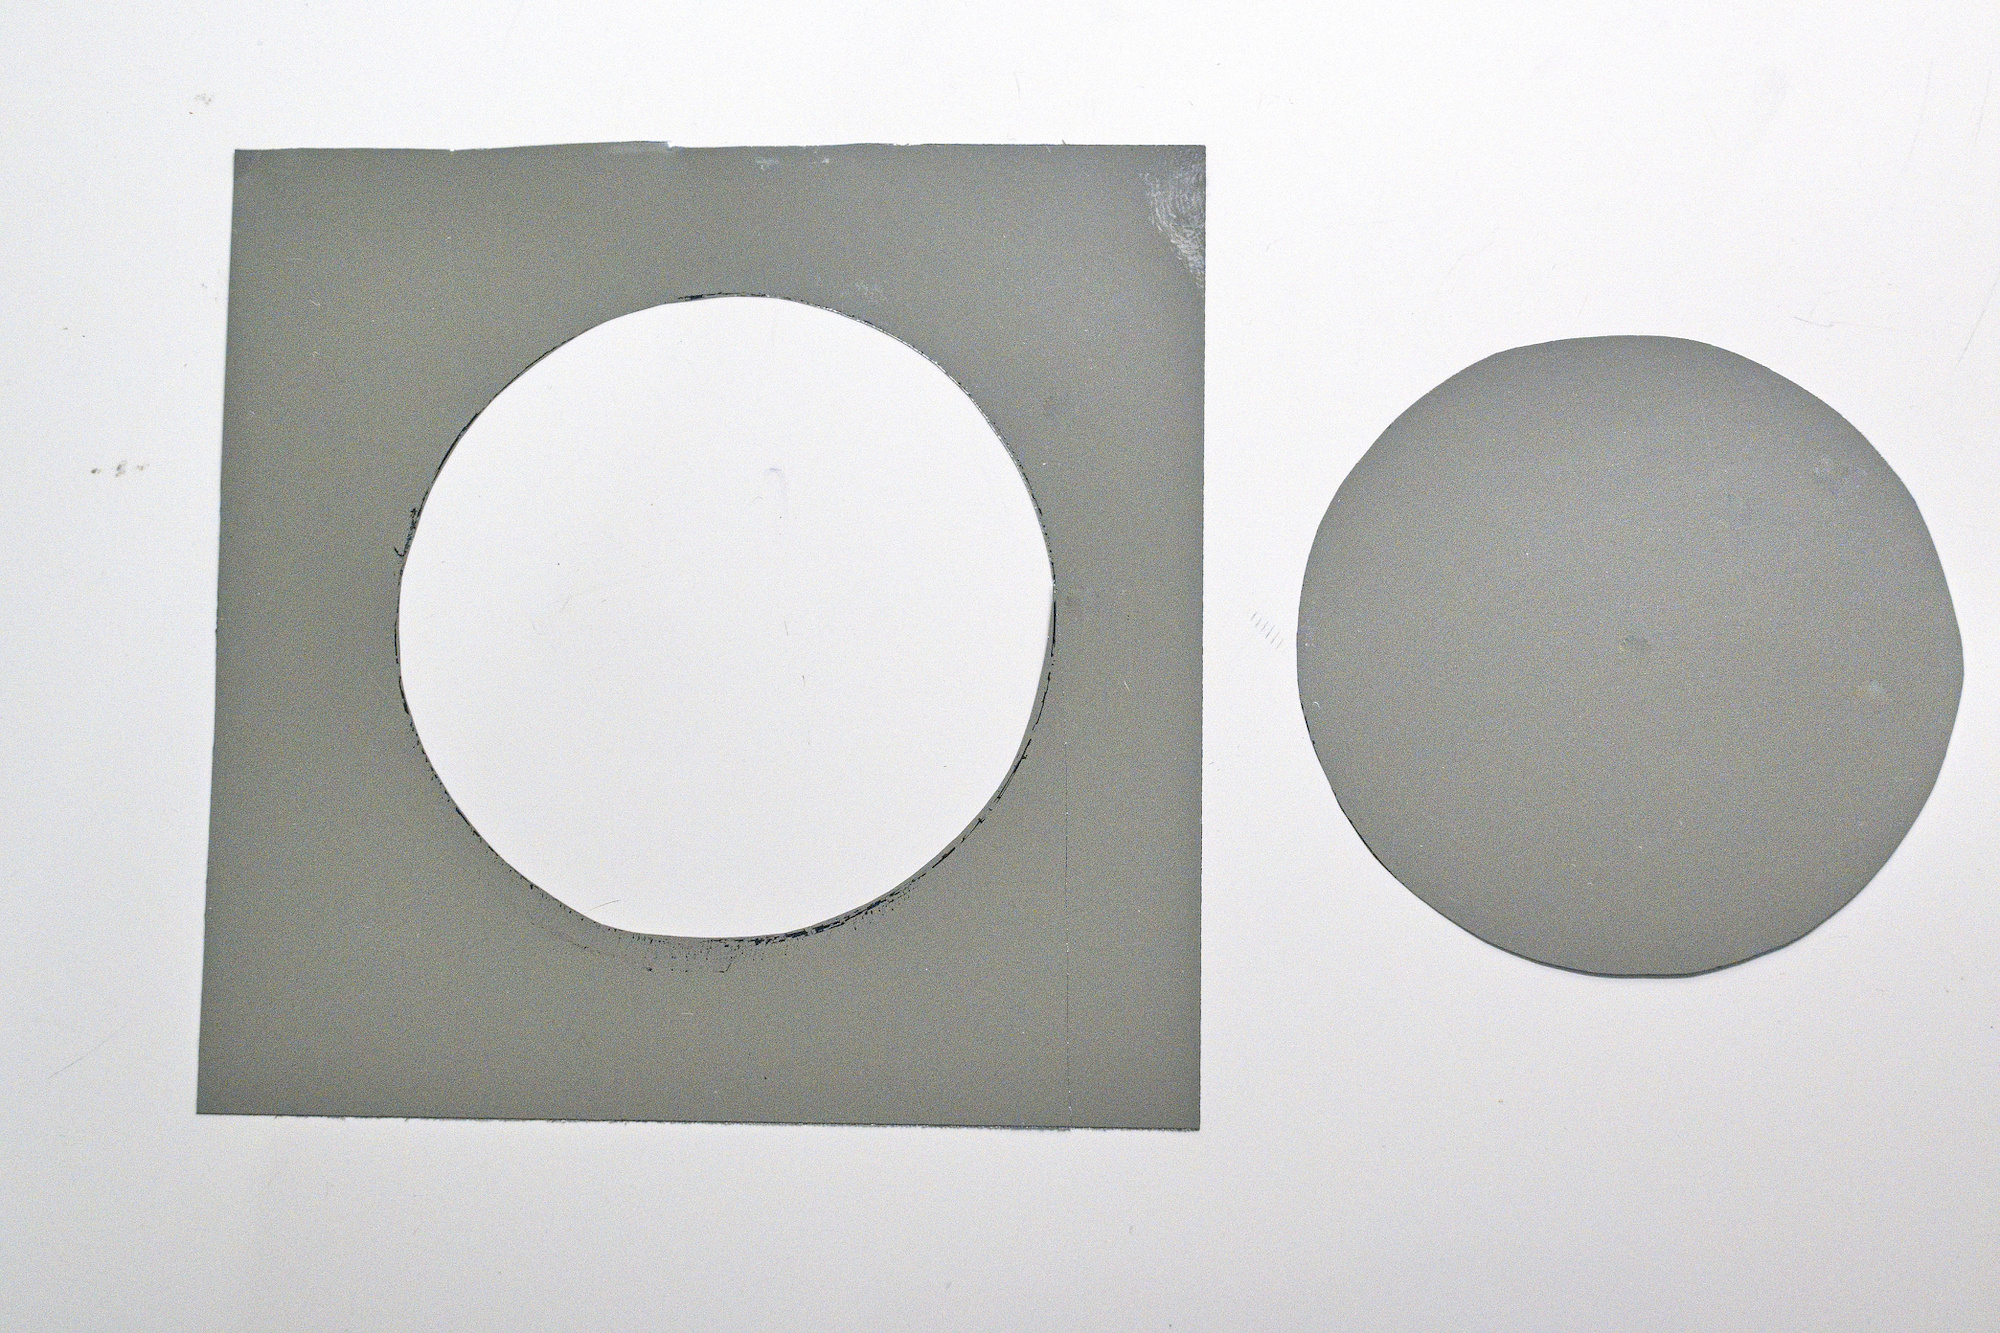
Spezielle Solarfilter sind notwendig, um die Sonne richtig belichtet zu fotografieren. Für ein paar Bilder lohnt es sich kaum solche Spezialfilter zu kaufen, denn die kann man ganz einfach selber in jeder Größe machen.
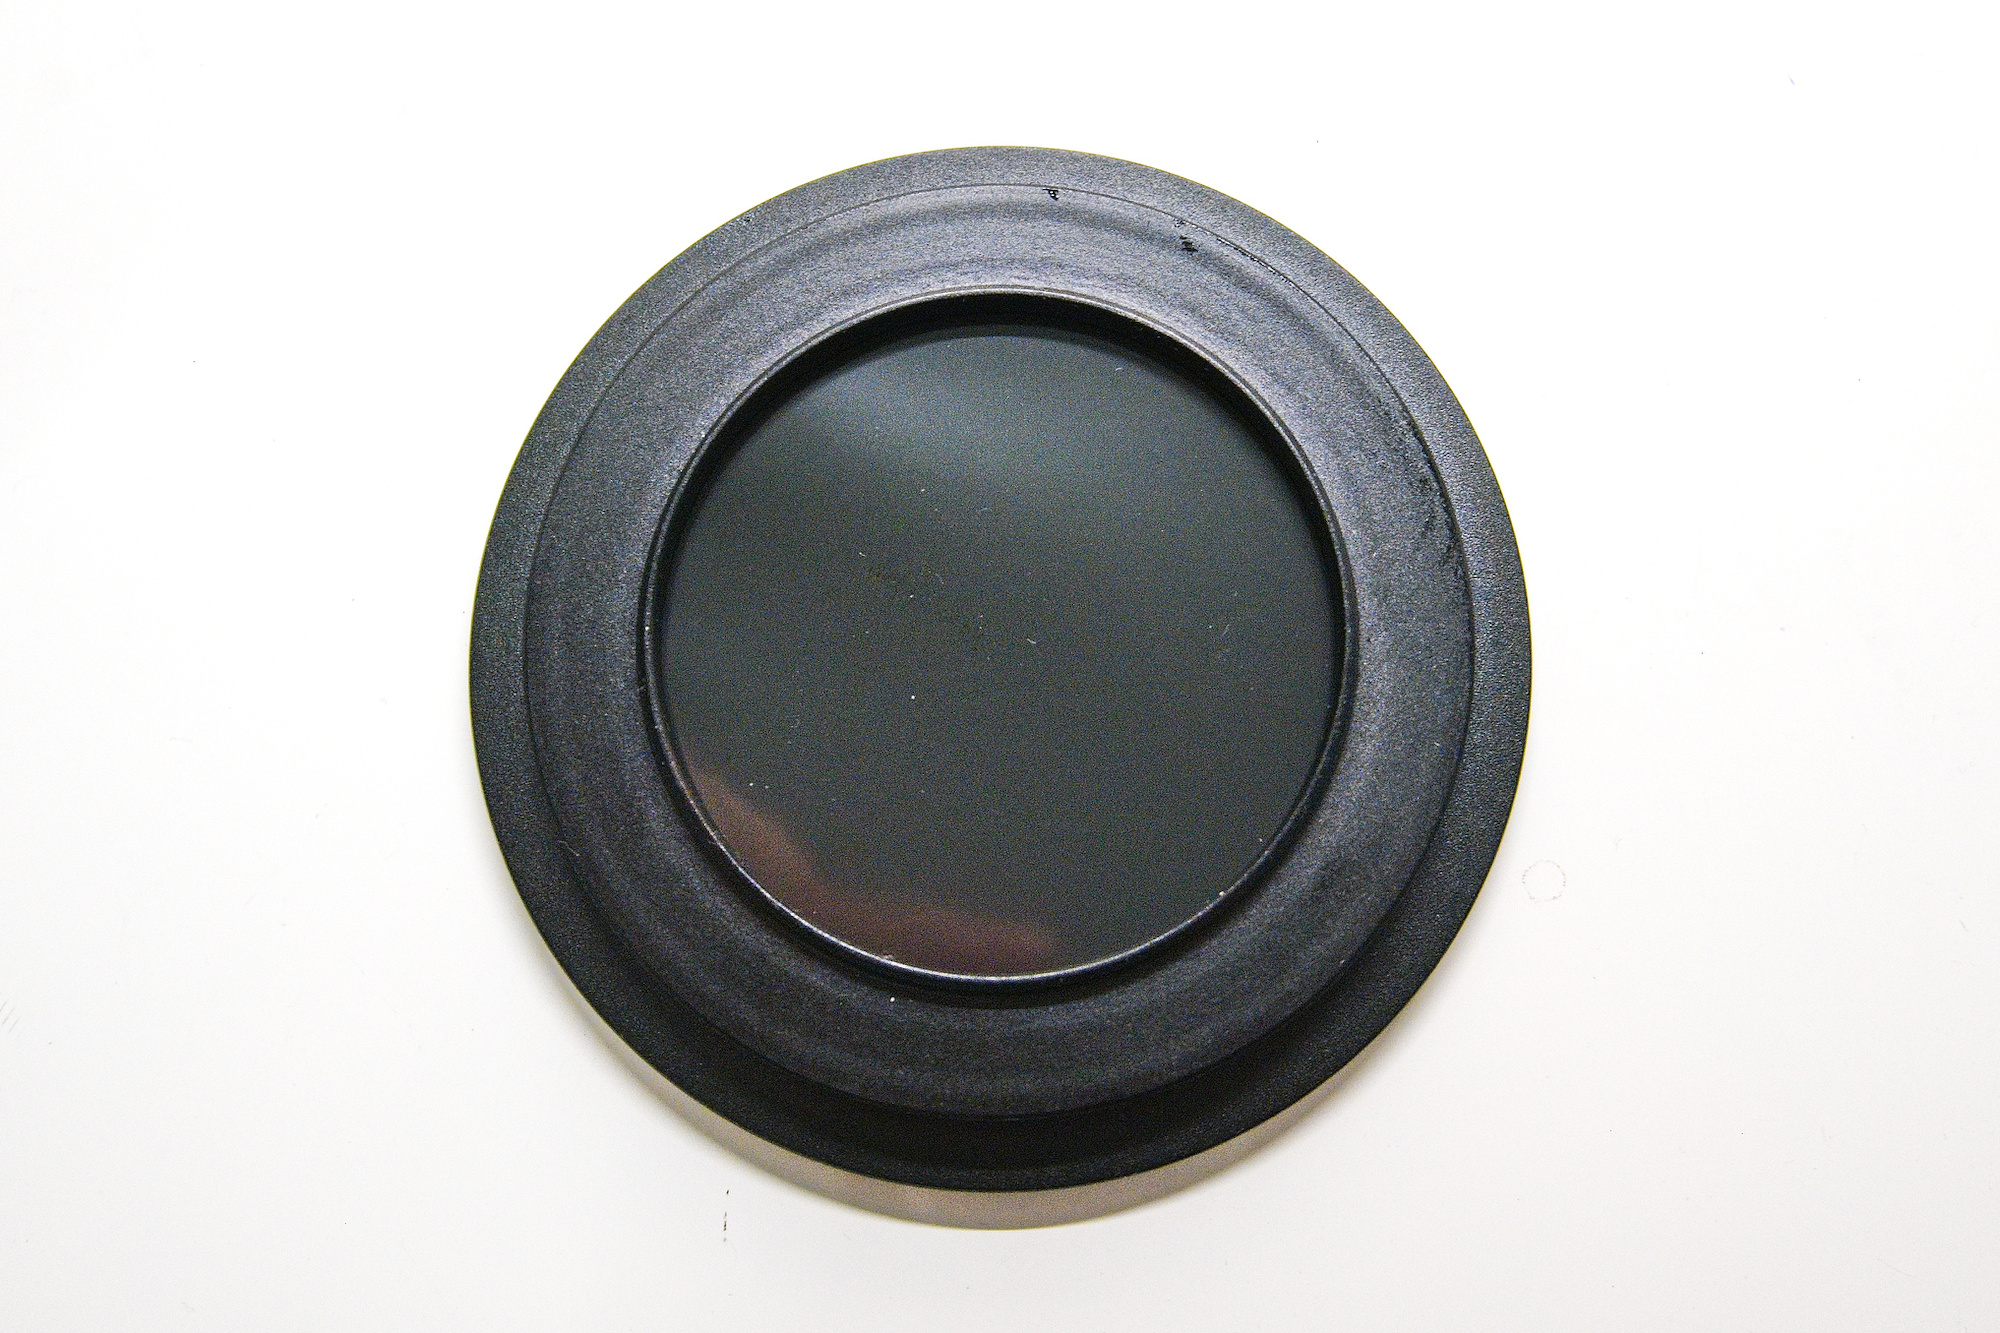
Dazu braucht man nur Filterfolie, die dem ISO 12312-2 Standard entspricht, und mit zwei Filterringen gehalten wird.
Die Filterringe müssen entsprechend dem zu verwendeten Objektiv ausgesucht werden. Für das verwendete Nikon 55-200mm ist das ein Filterring mit 52mm.
Mit einem Marker wird dann die Filterfolie zum Ausschneiden markiert. Am besten zieht man Einweghandschuhe an um Fingerabdrücke wie oben rechts in der Ecke demonstriert zu vermeiden. Interessanterweise aber haftet ein Permanentmarker nicht auf dieser Filterfolie.
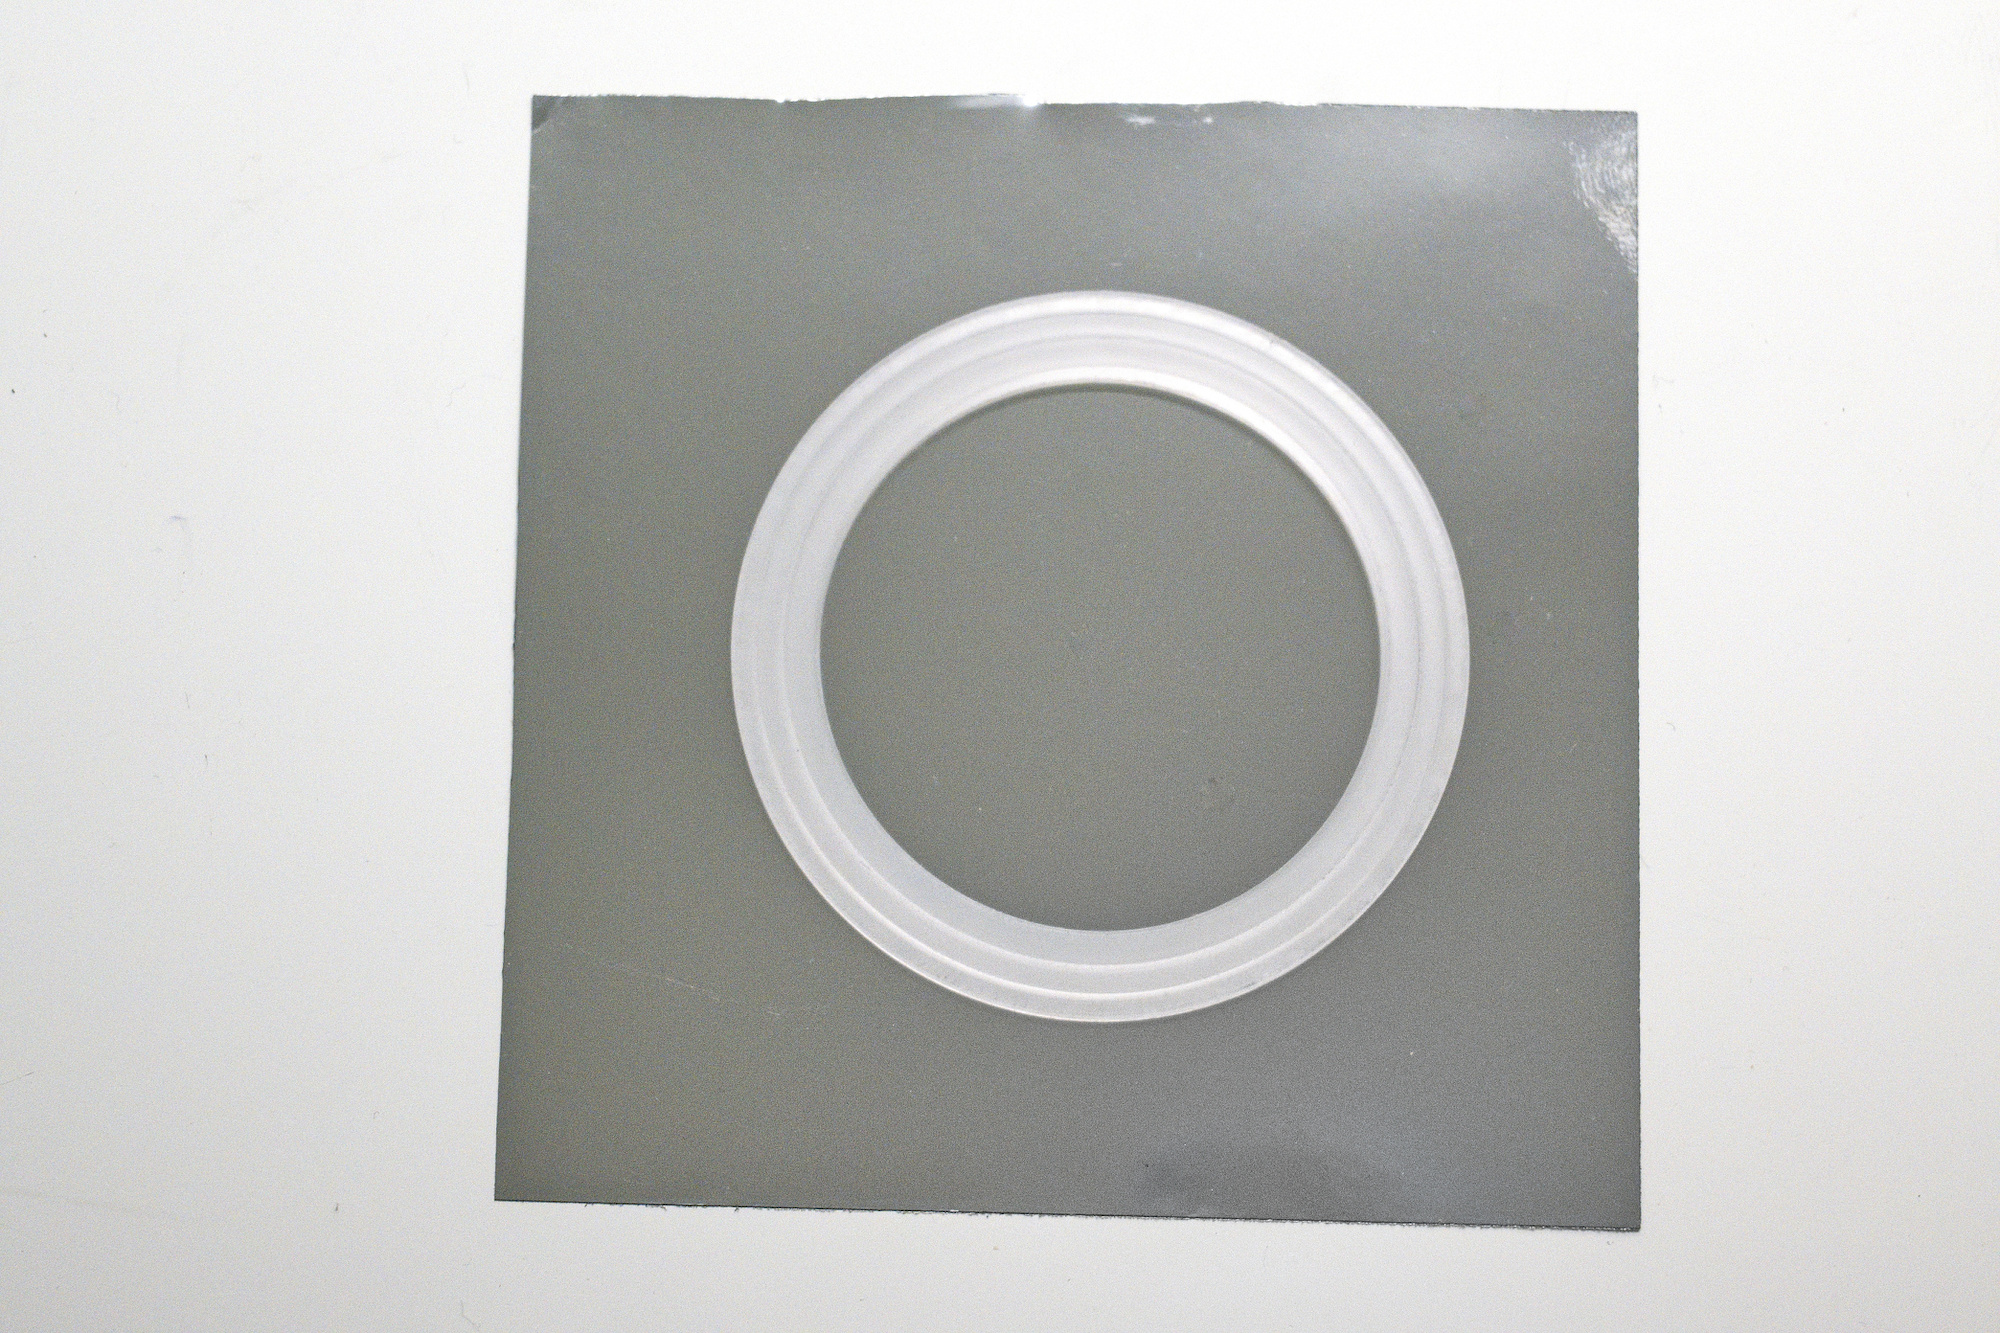
Die Filterfolie lässt sich ganz einfach mit der Schere schneiden.
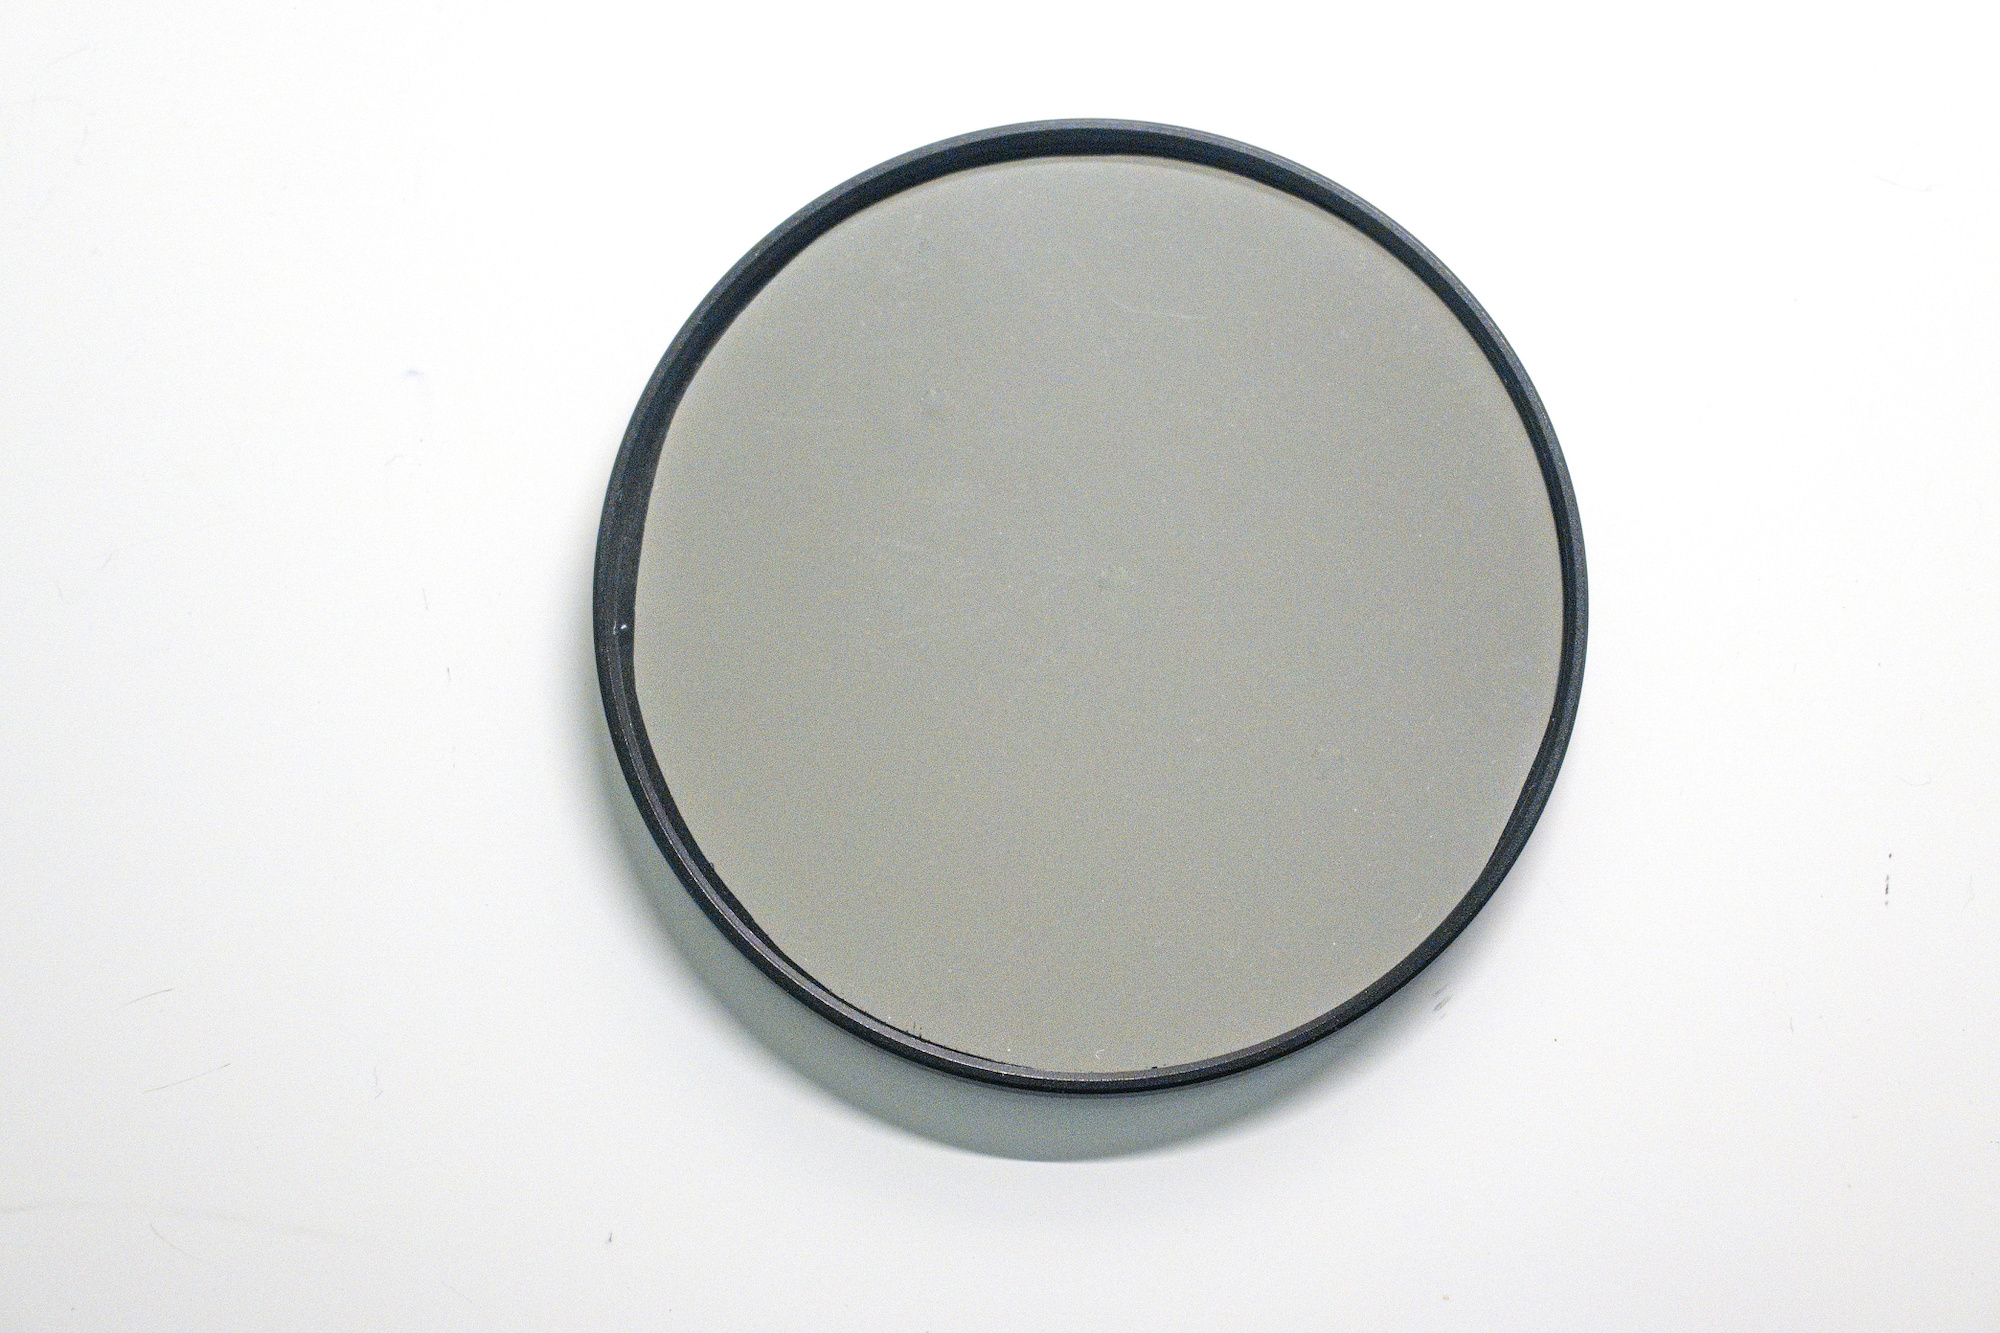
Die Filterfolie wird in den Filterring eingesetzt, der später auf das Objektiv geschraubt wird (52-67mm Filterring).
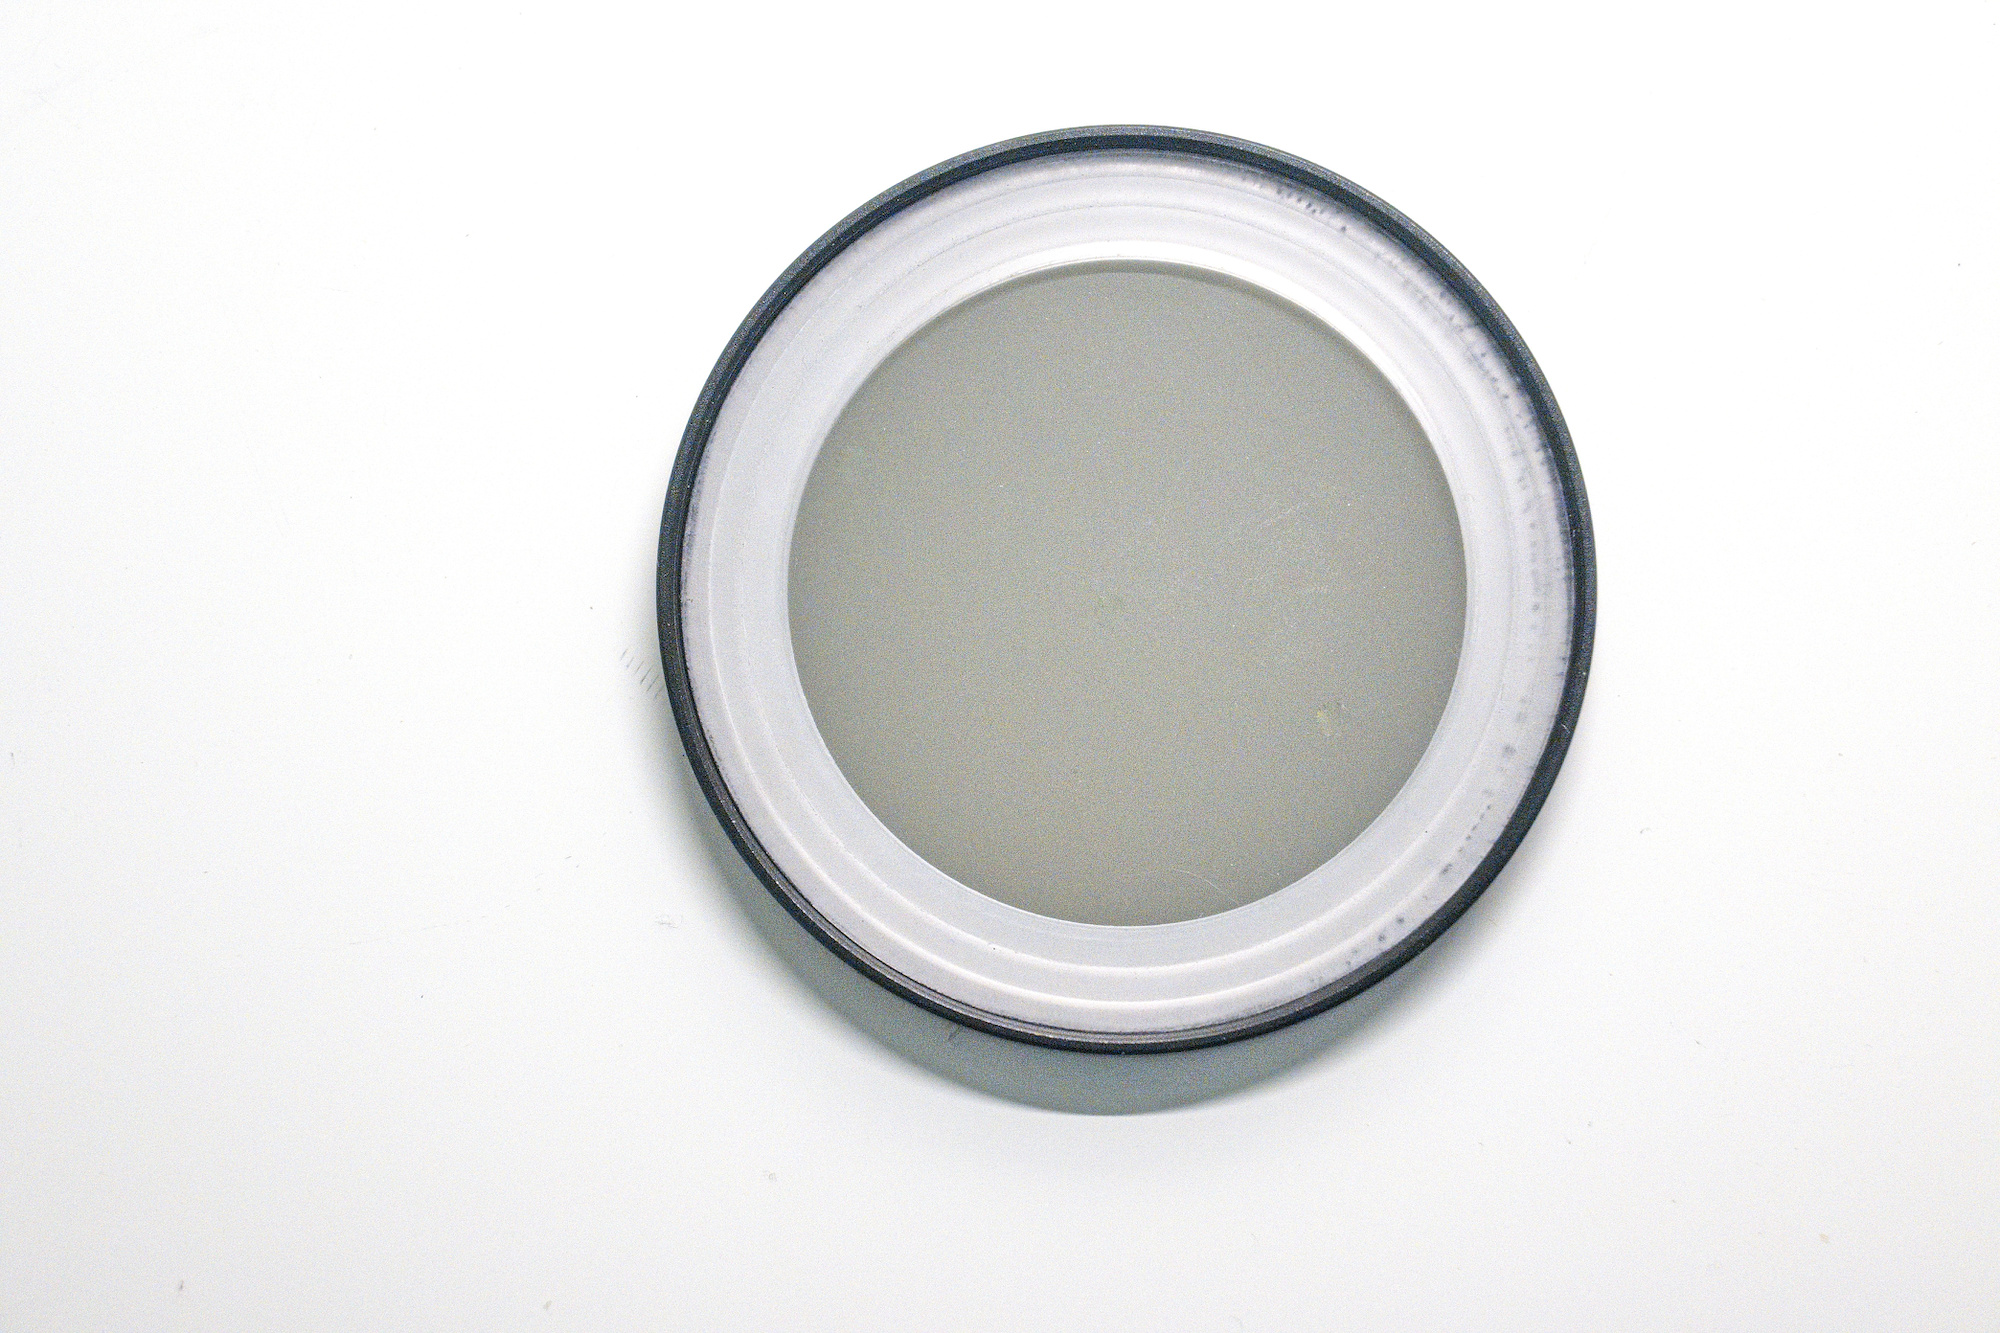
Dann wird der Zwischenring eingesetzt, der die Filterfolie festklemmt. Das dunkle auf der rechten Seite ist der gequetschte Permanentmarker, der nicht auf der Filterfolie haftete. Passiert mir auch nicht nochmal.
Und mit dem passenden zweiten Filterring festgeschraubt.
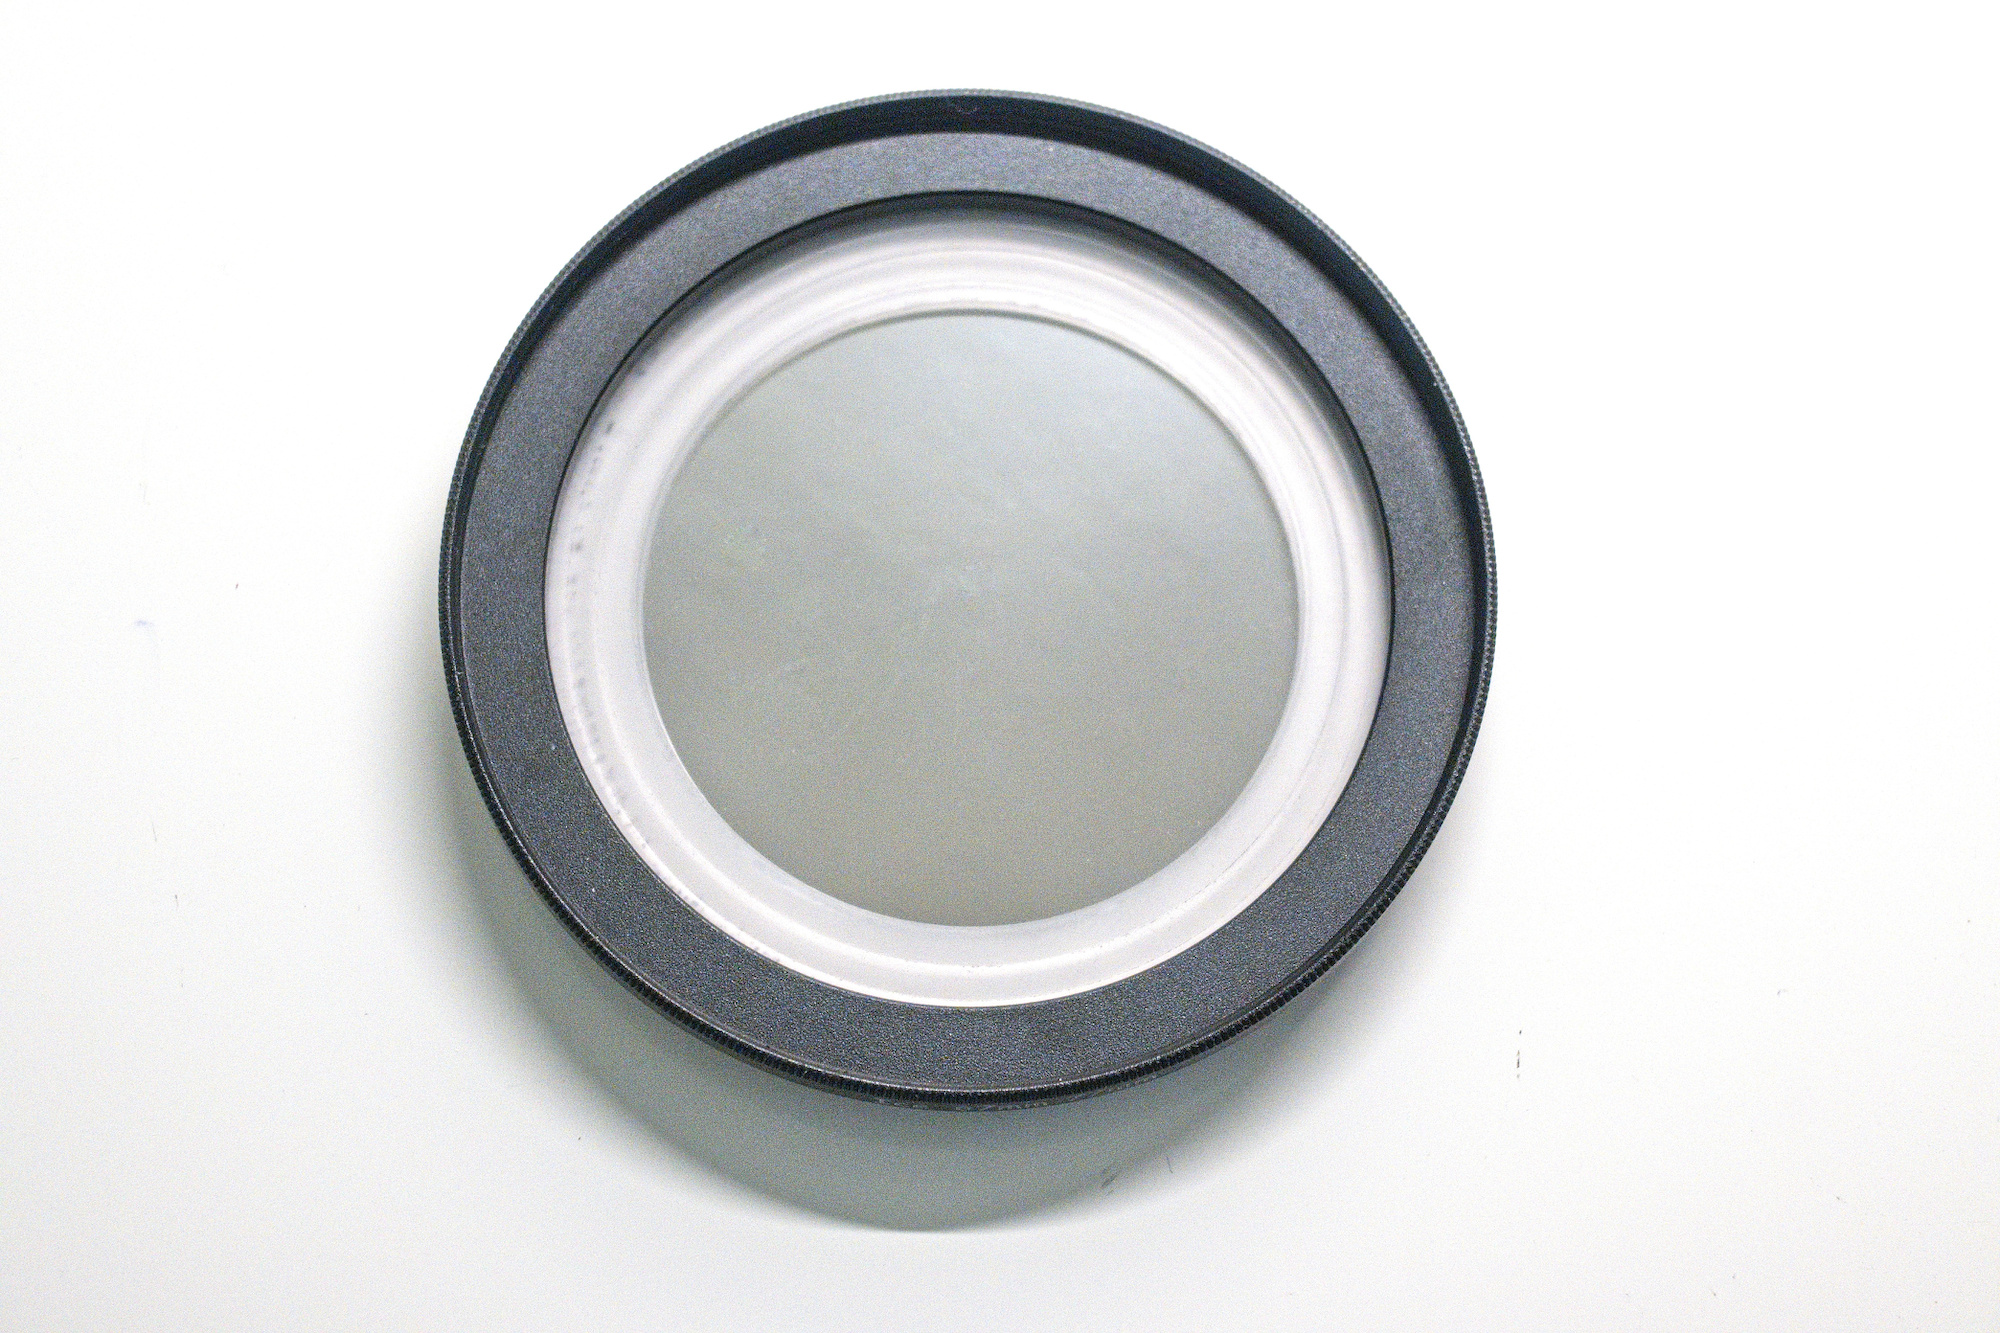
Die silberne Seite der Filterfolie zeigt zur Sonne.
Die dunkle Seite der Filterfolie ist auf der Objektivseite.
Das ganze wird auf das Objektiv aufgeschraubt.
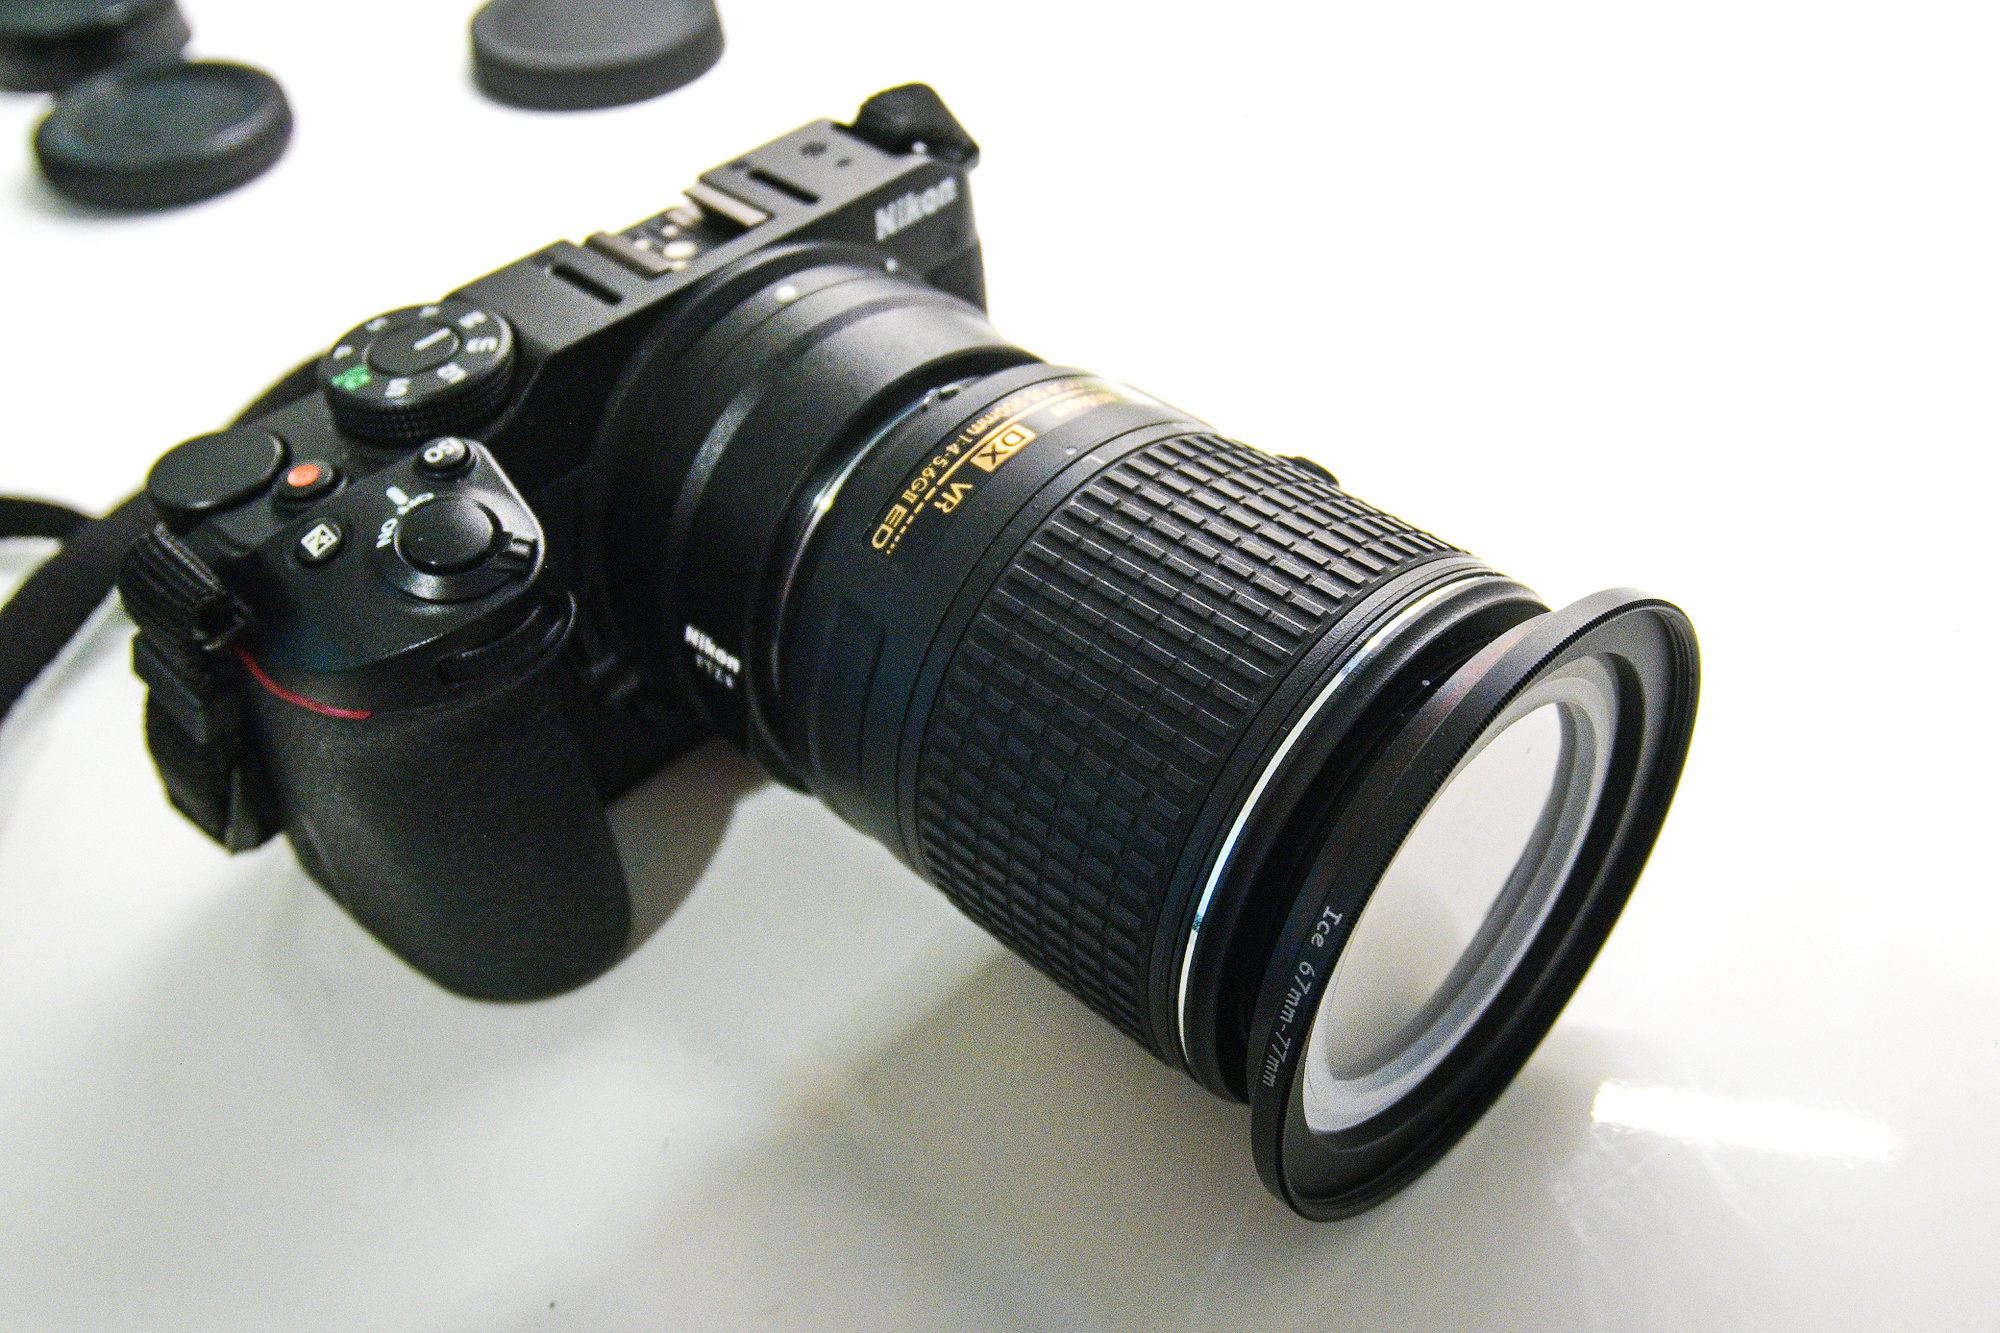
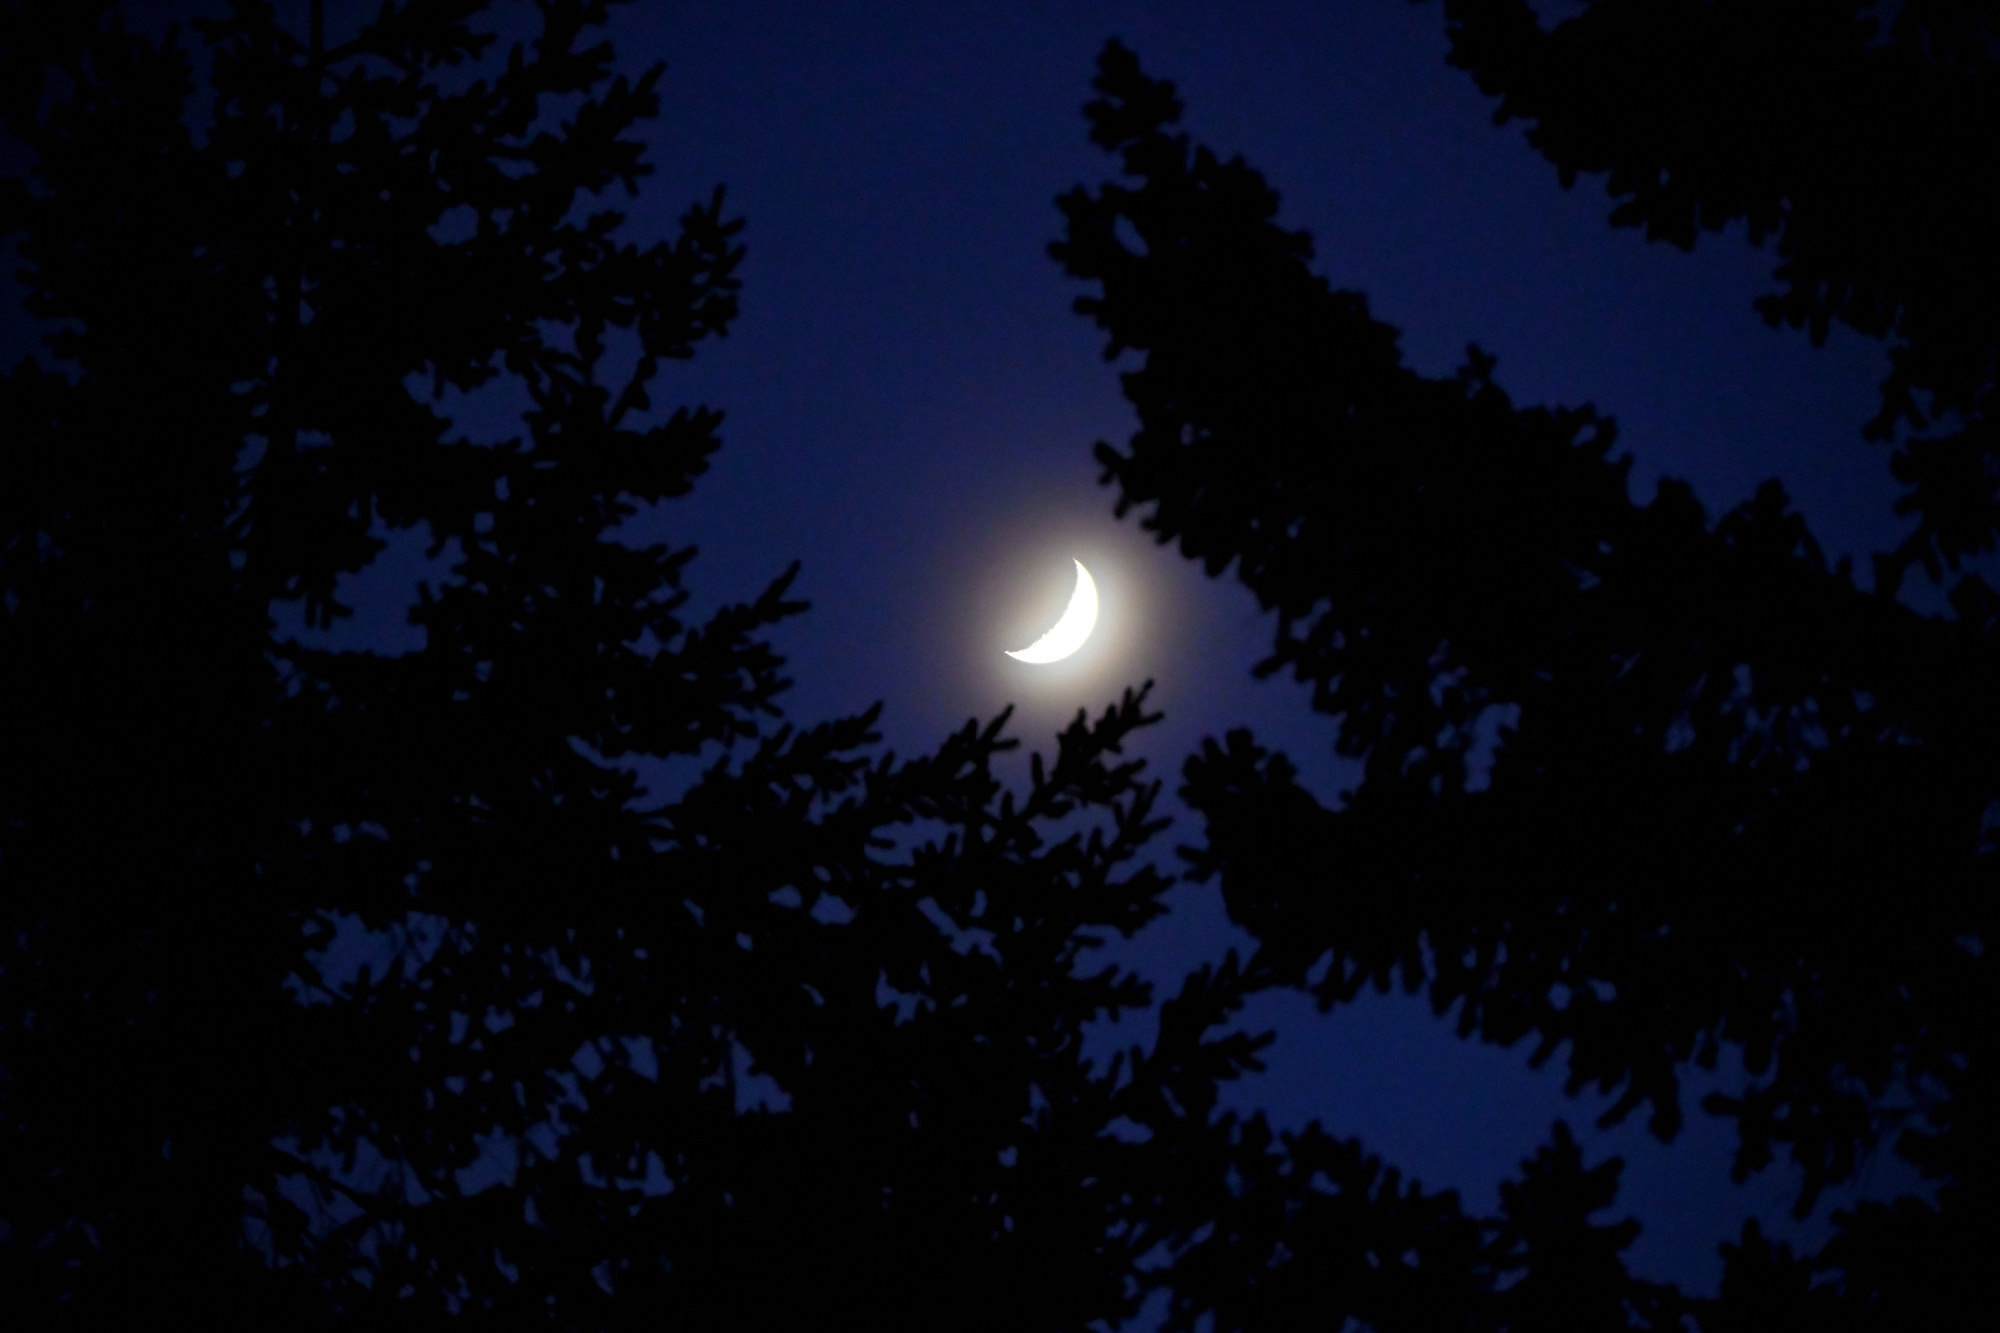
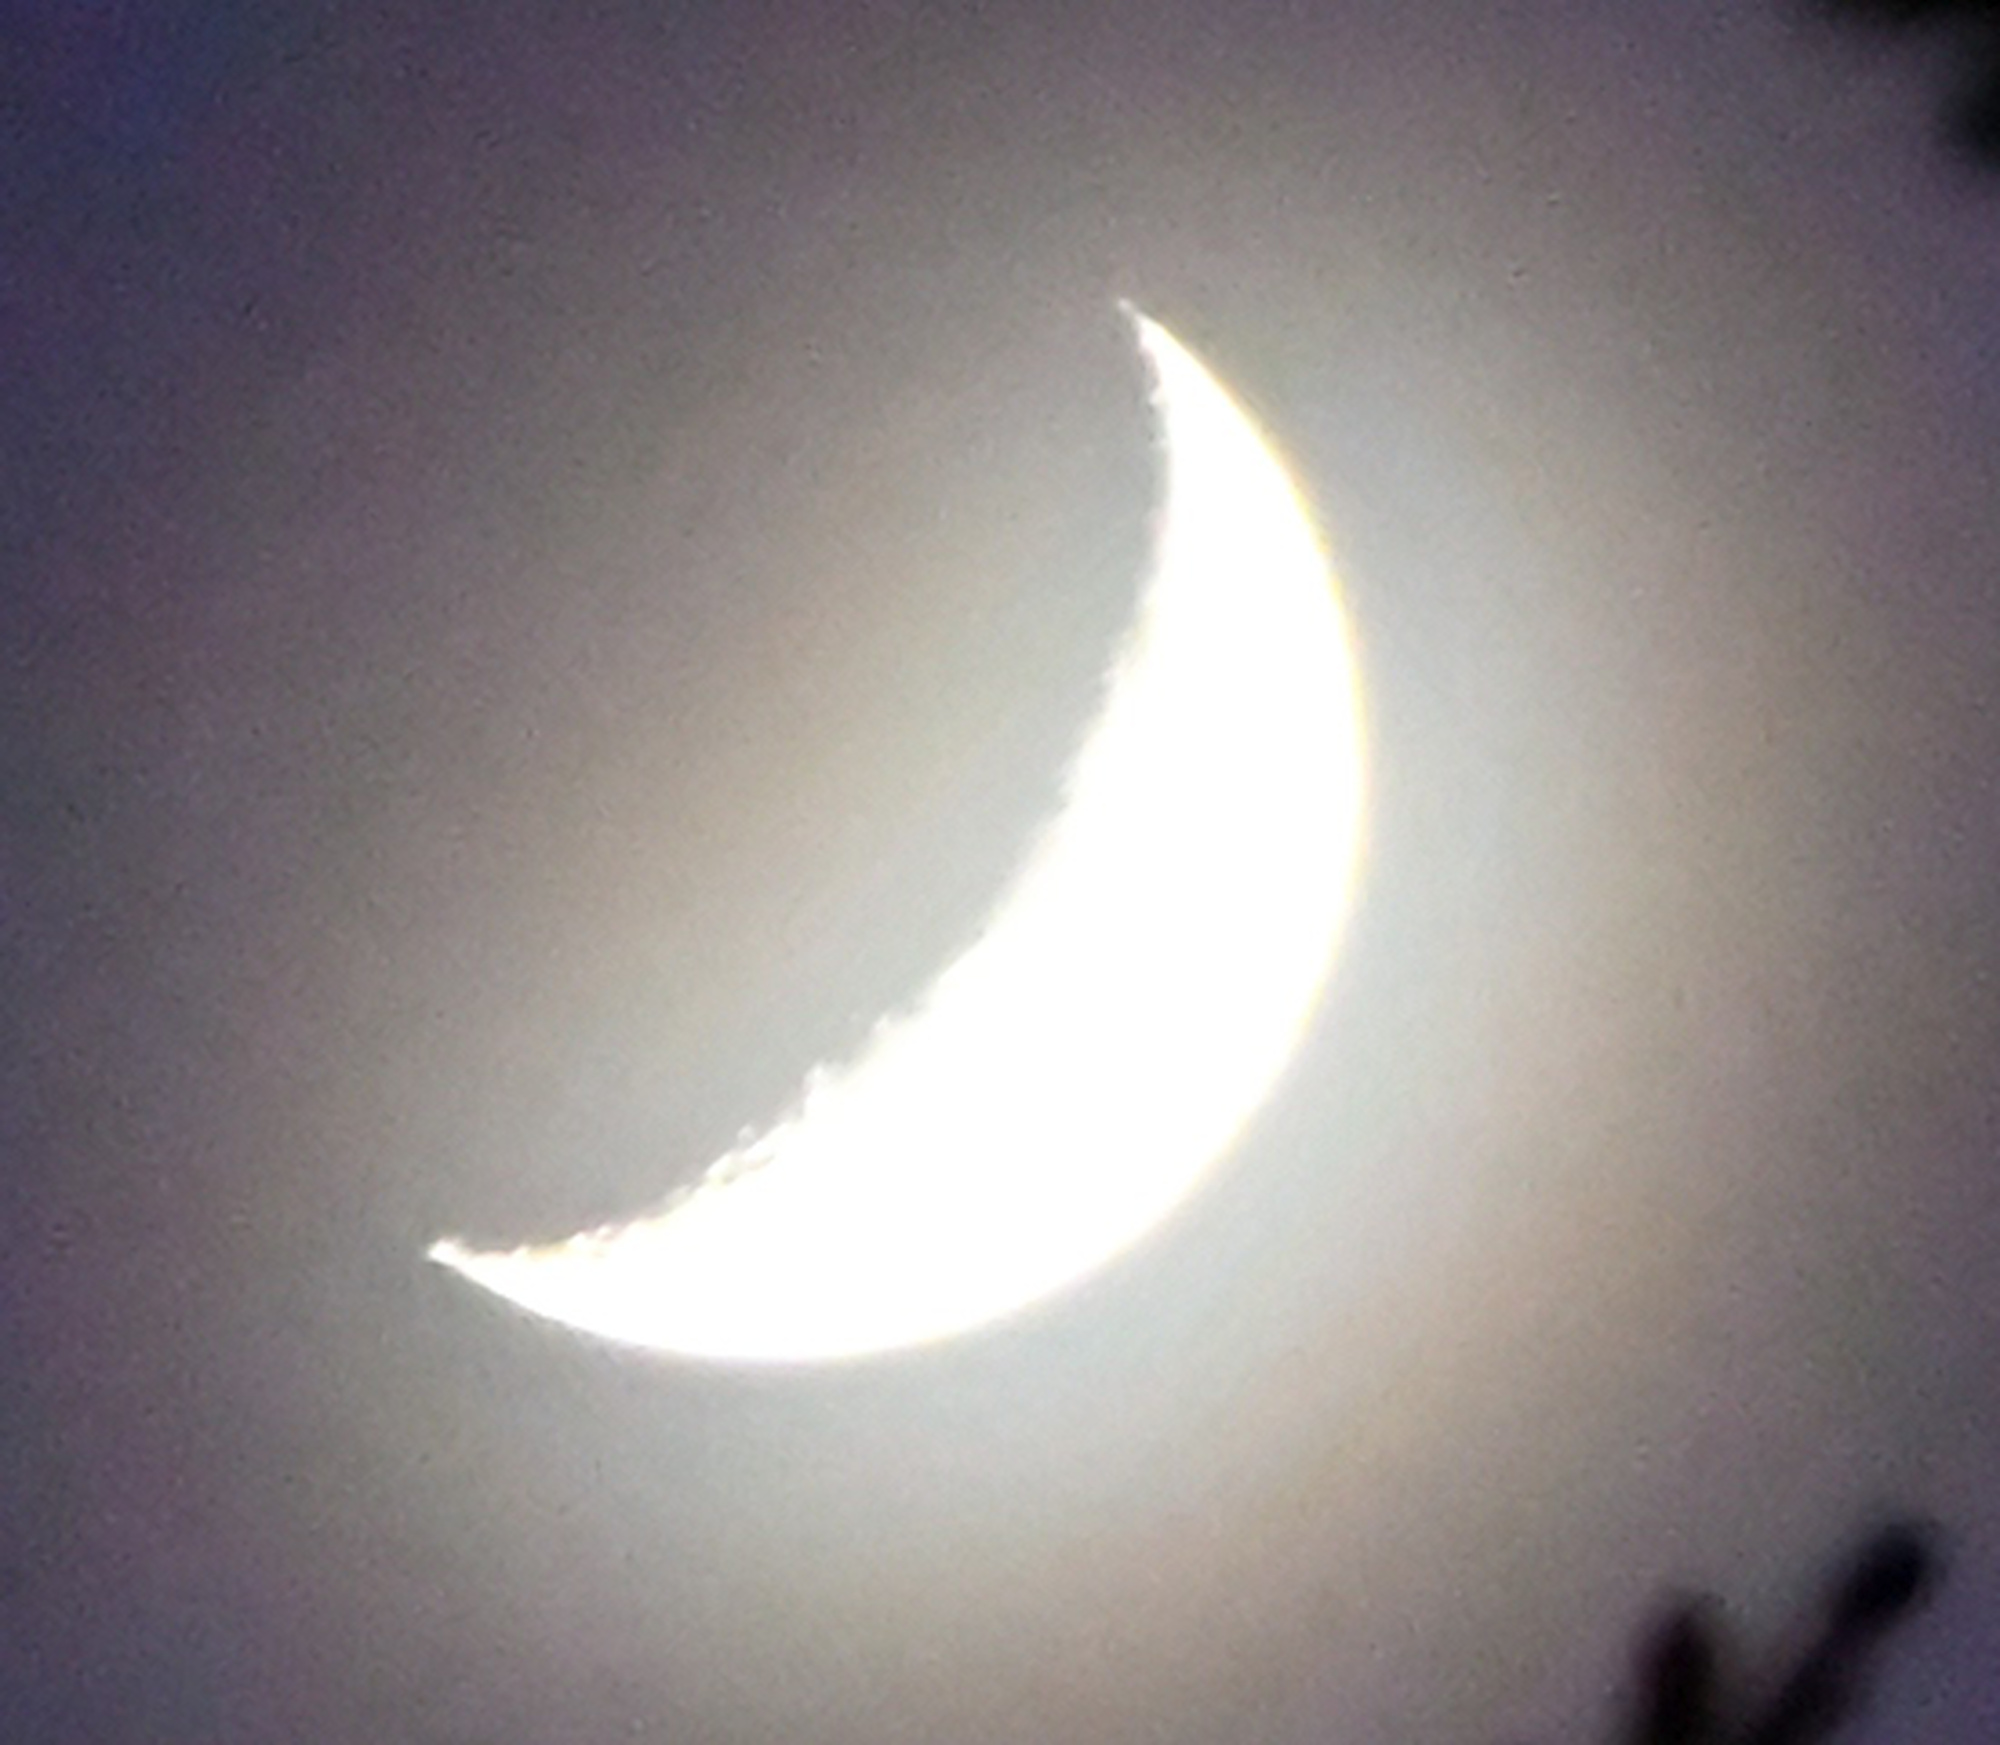
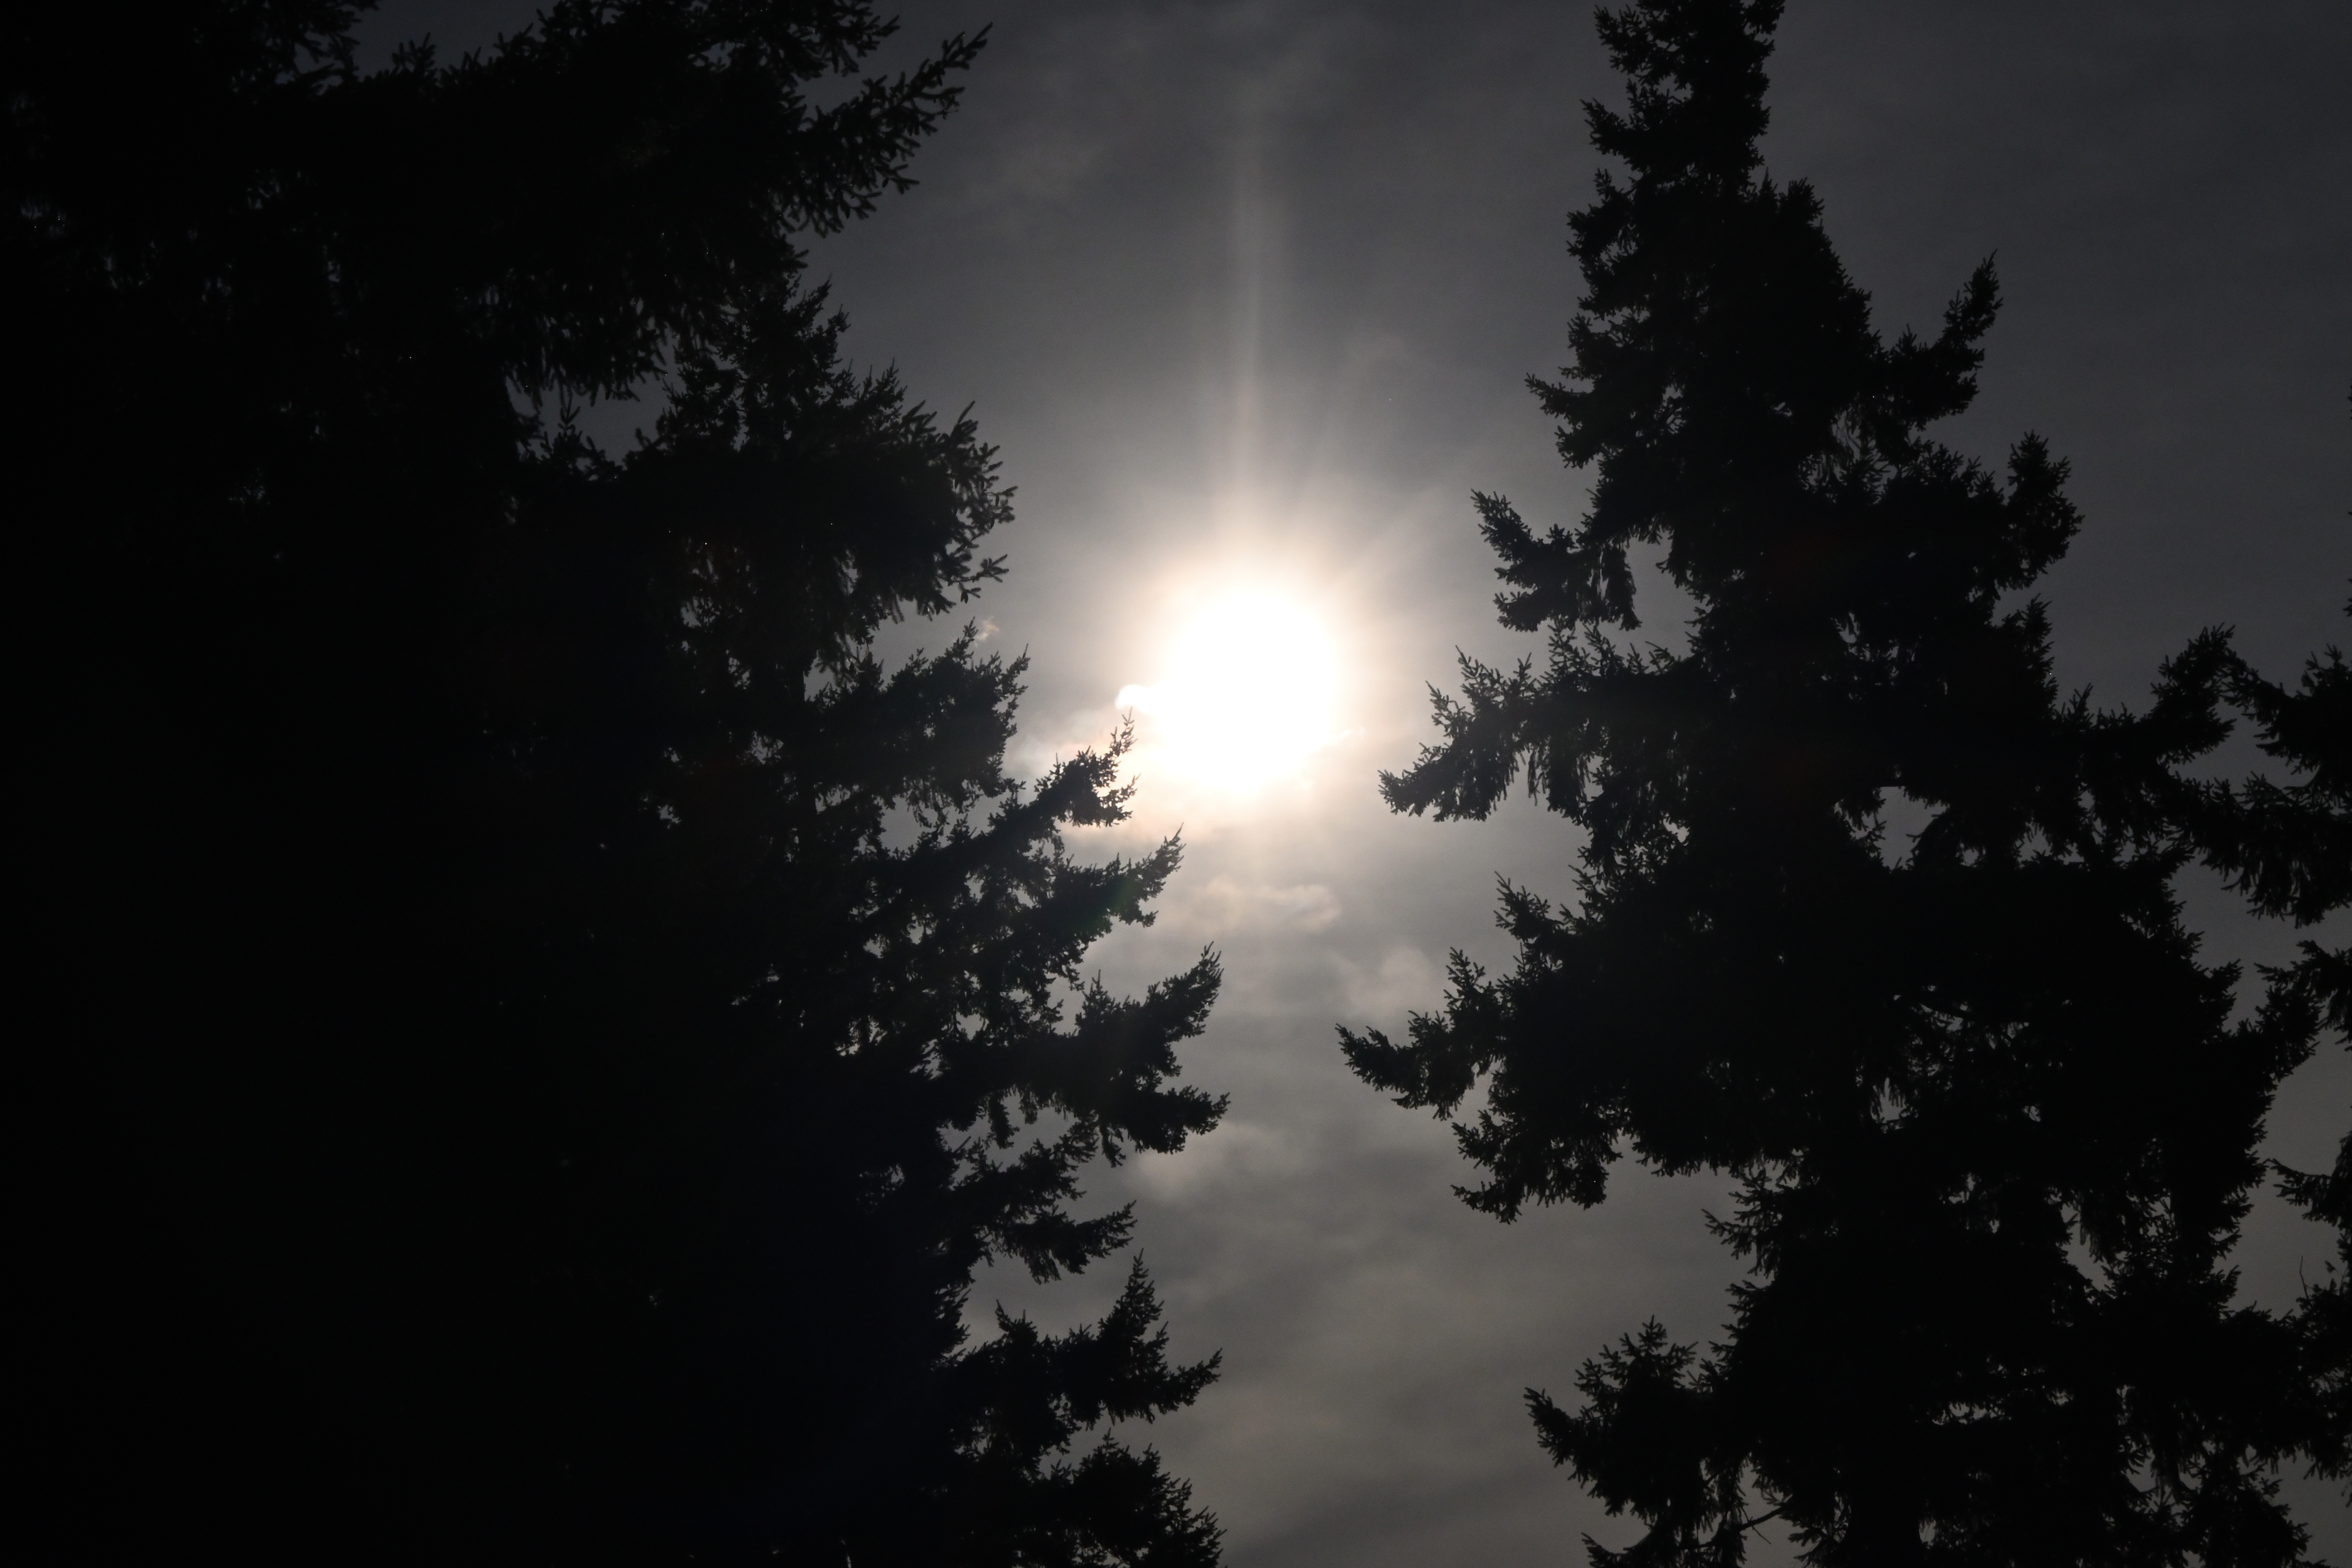
Mit 1/40s f/8 ISO100 wird dann ganz normal für die Mittagssonne hinter Bäumen belichtet.
14 October, 2023
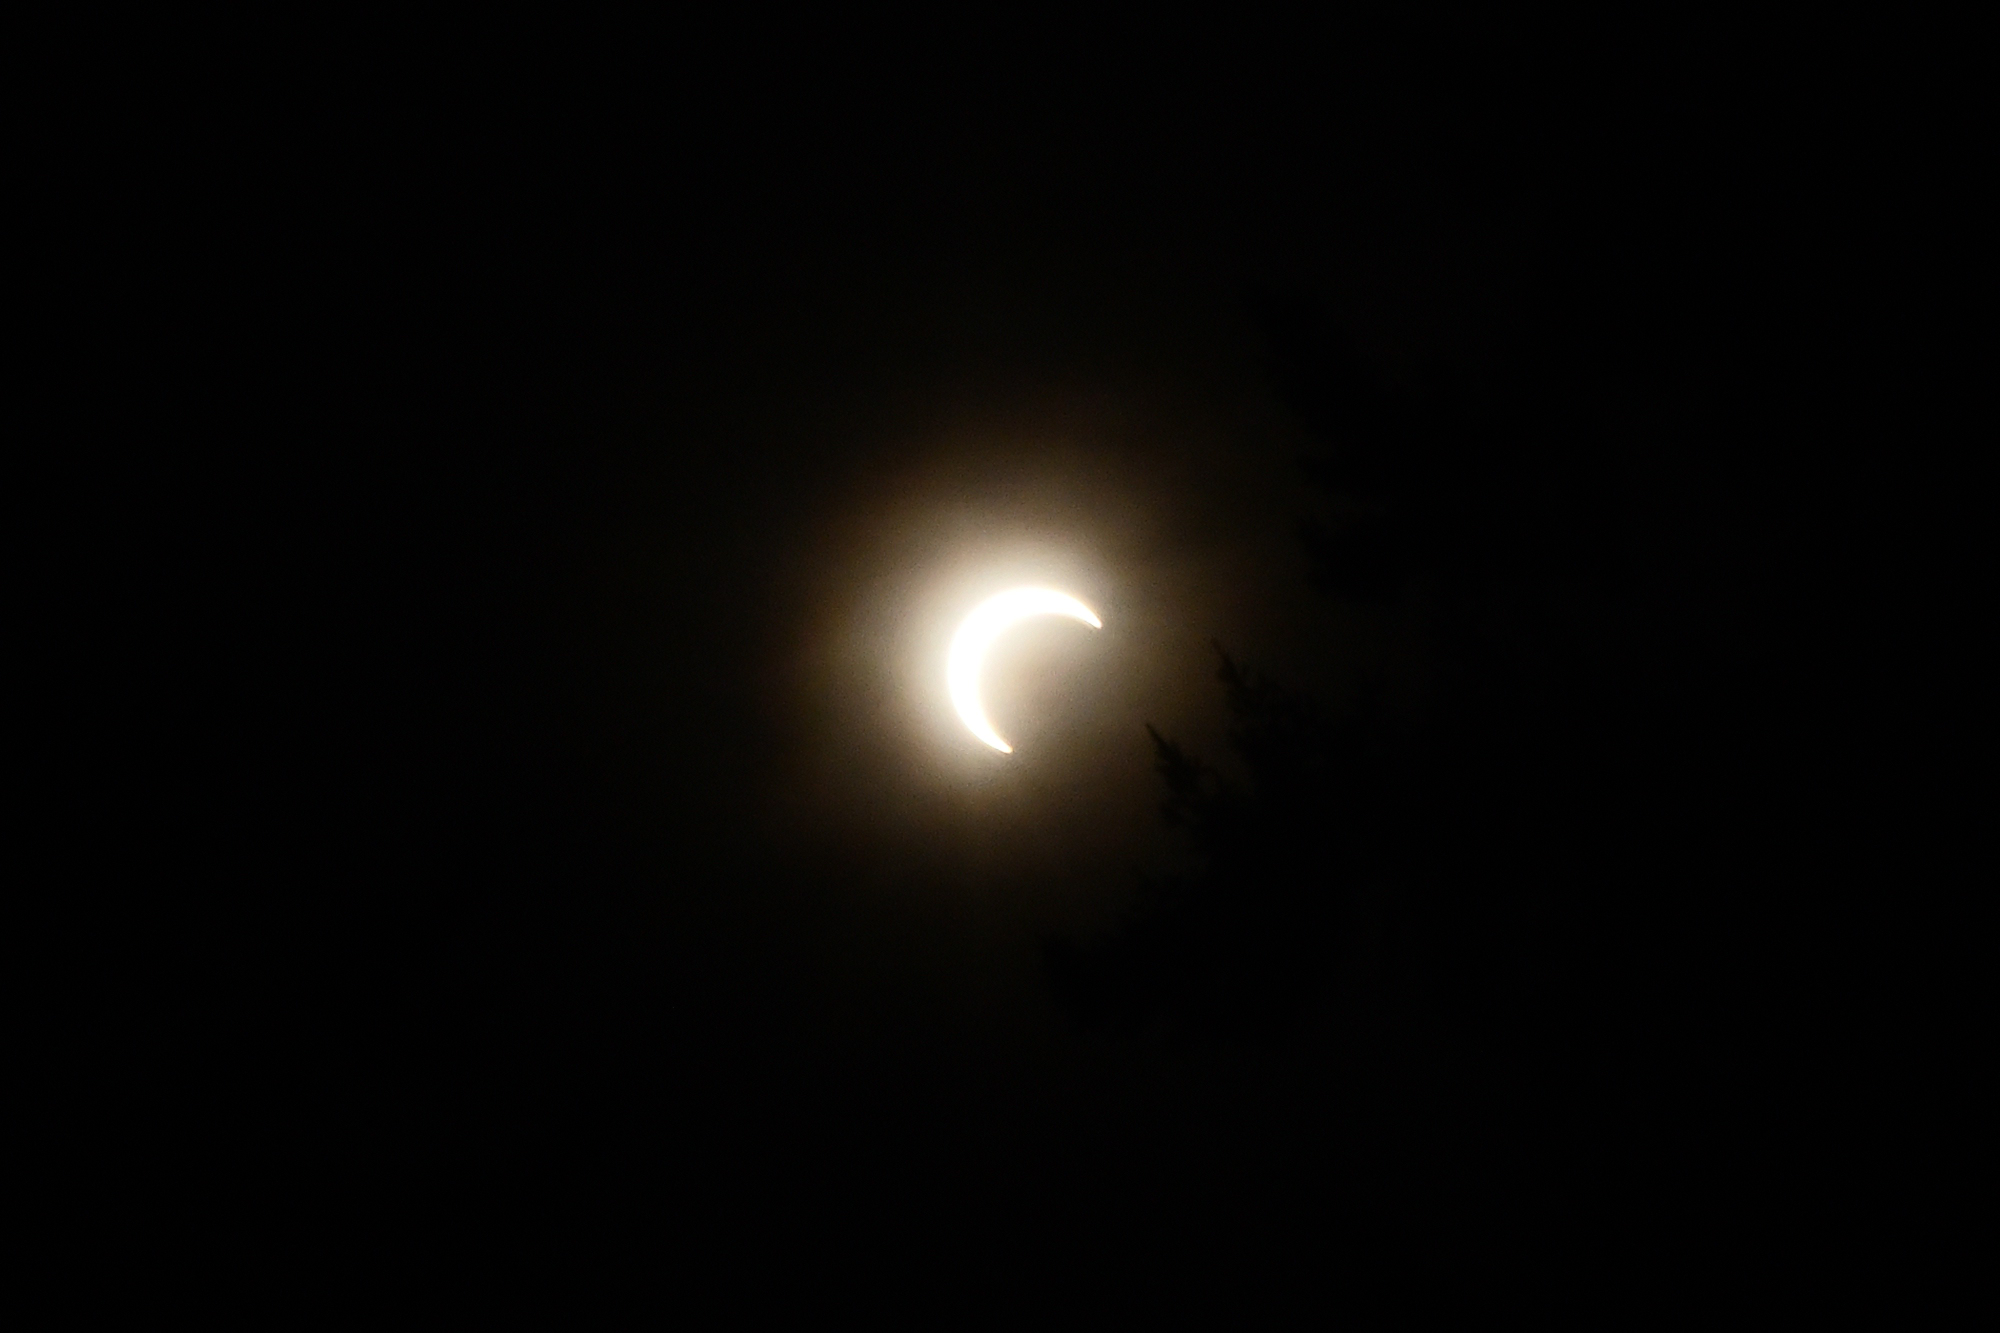
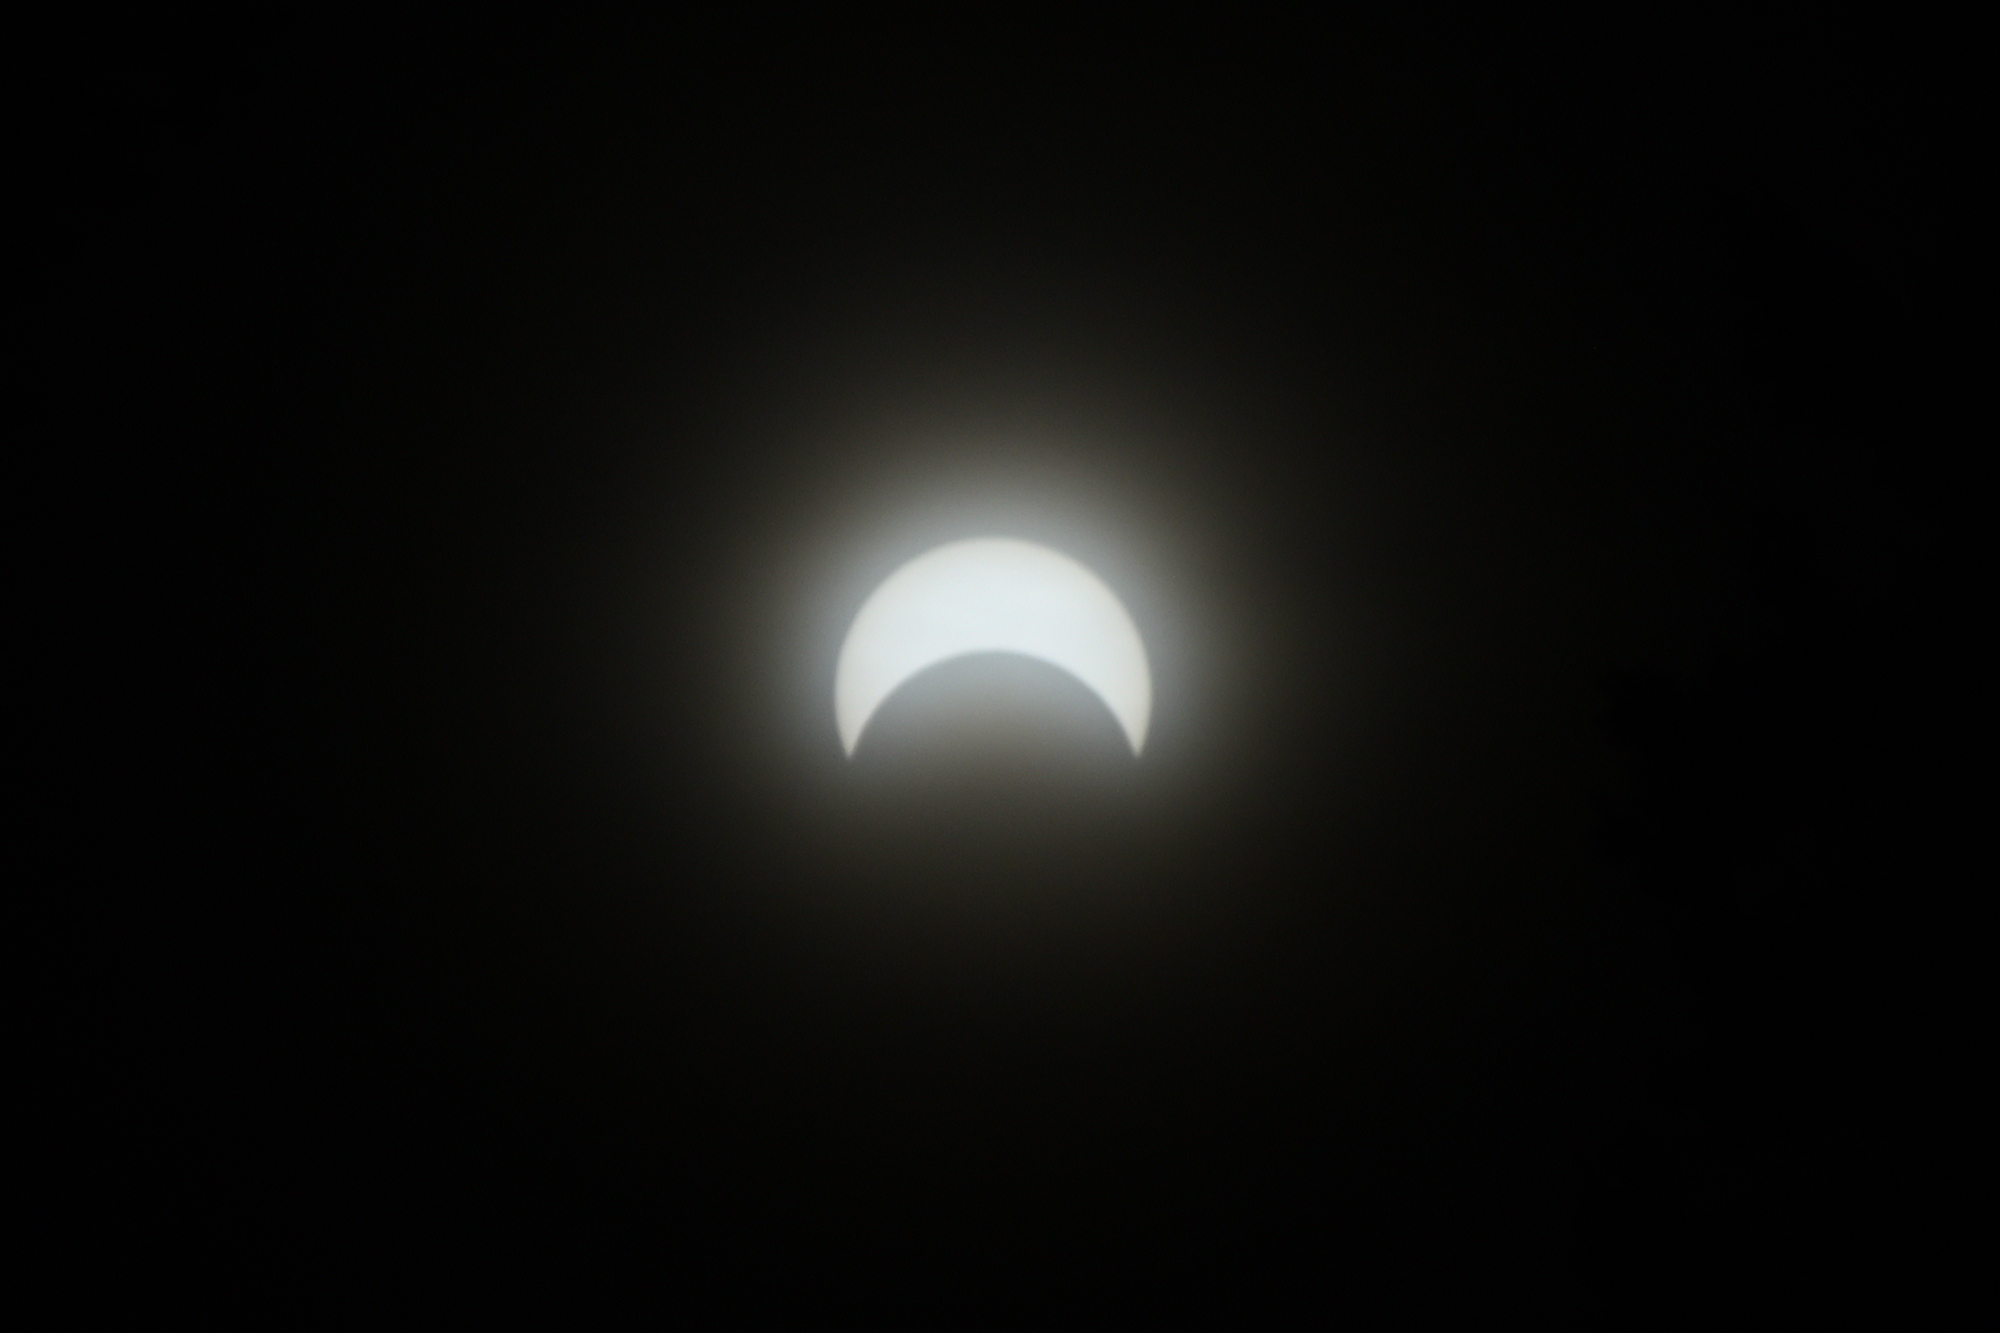
14. Oktober, eine ringförmige Sonnenfinsternis ist morgens bei uns mit 80% Abdeckung zu sehen. Der Mond ist weiter von der Erde entfernt und verdeckt die Sonne nicht komplett. Es bleibt ein Ring oder Feuerkranz sichtbar.
Alle Bilder sind mit einem Neutraldichtefilter (7 Blendenstufen, ND128) aufgenommen (Nikon Z30, 18-140mm VR) und ausgeschnitten, aber nicht nachbearbeitet. Leider sind die ersten beiden Bilder noch mit ISO800.
1/4000s f/22 ISO800
Maximale Verdunklung der Sonne (80%).
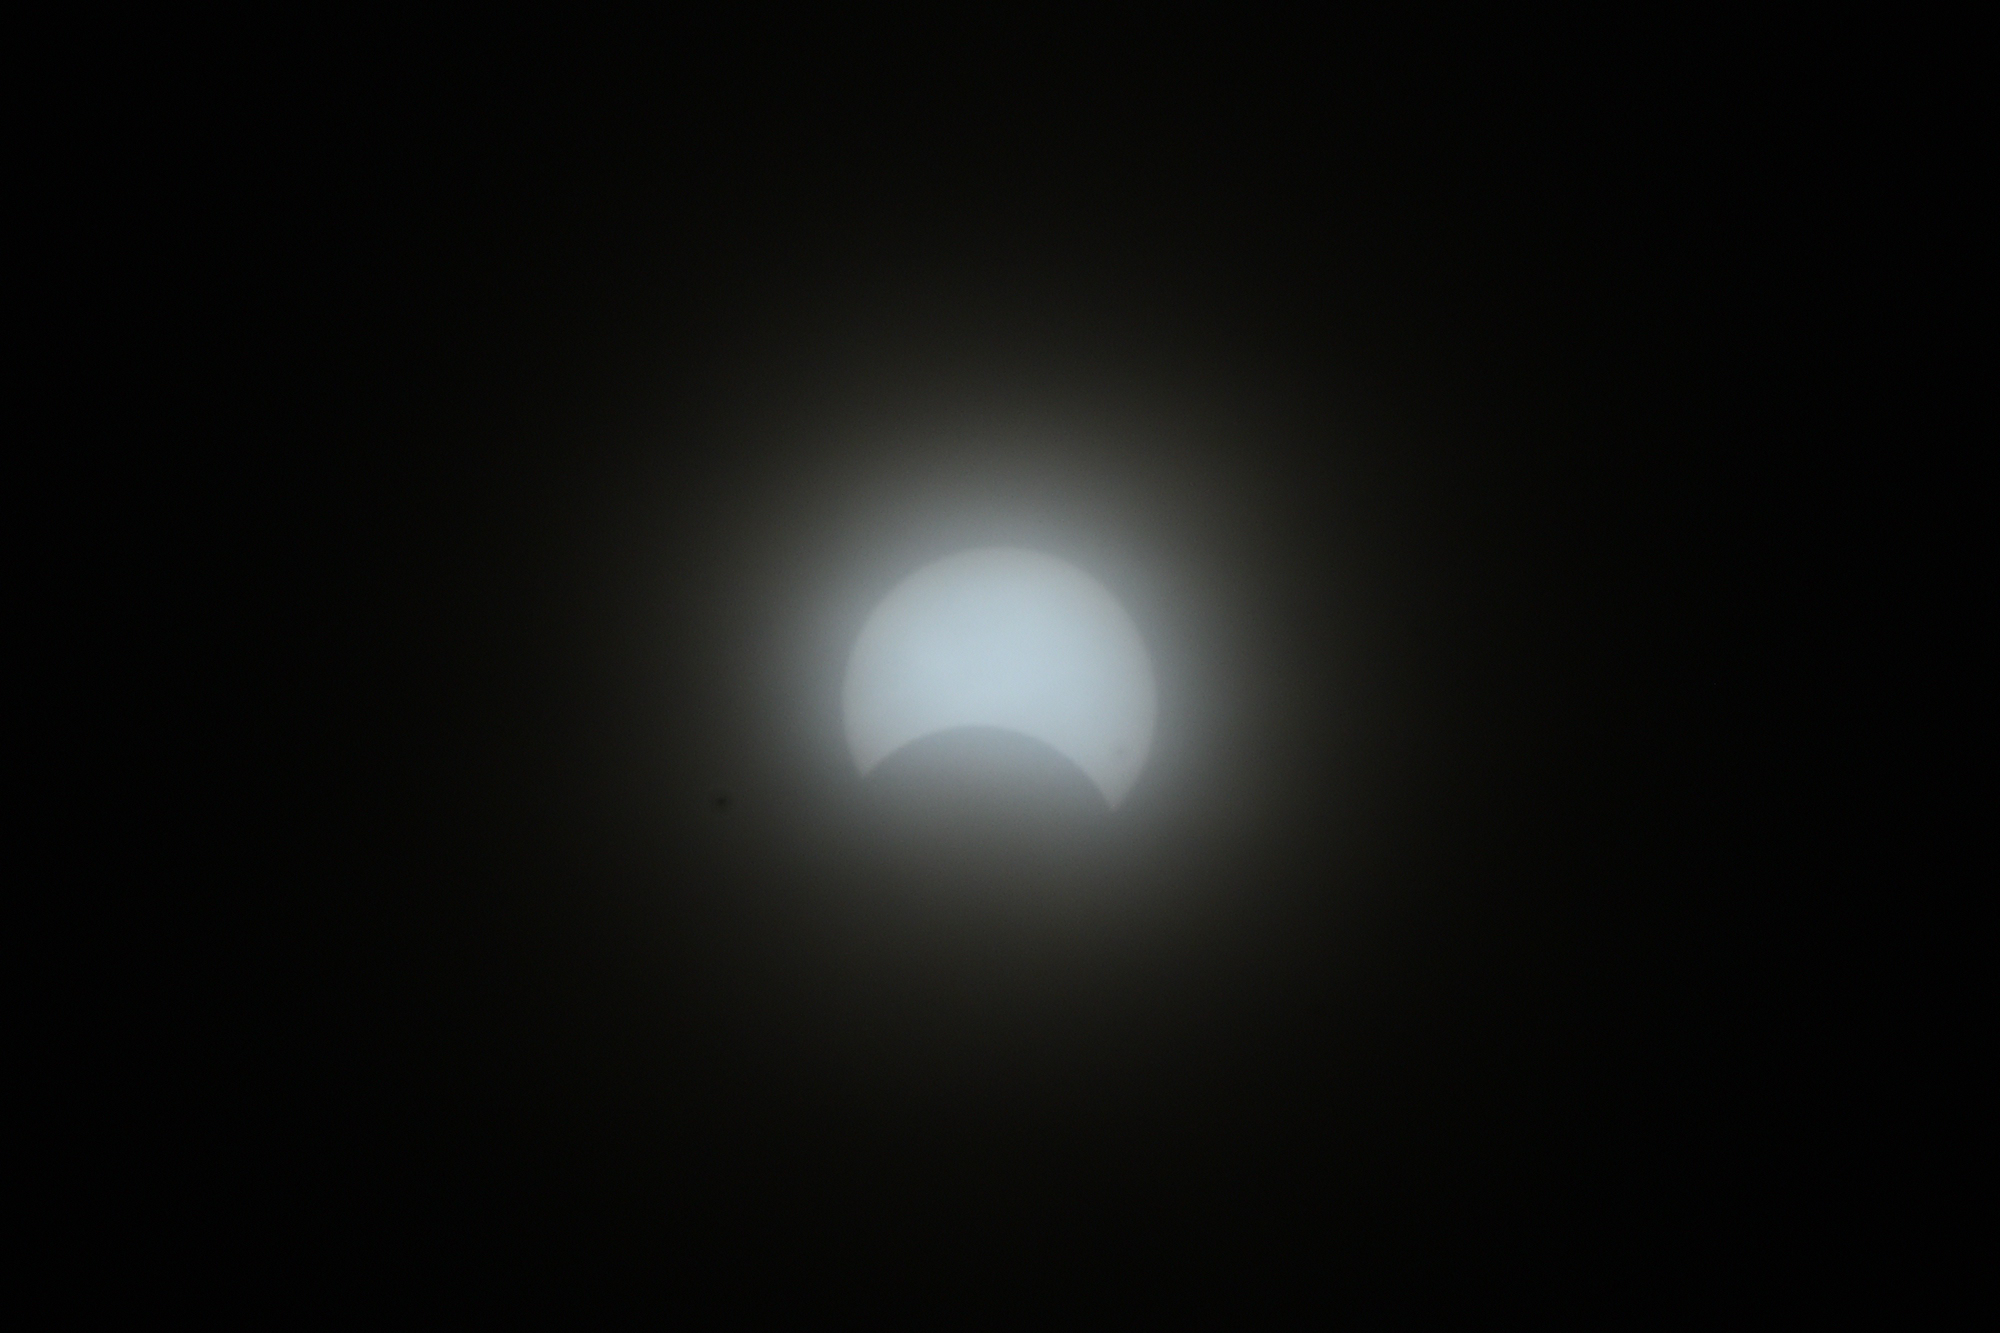
1/4000s f/32 ISO800
ISO auf min Wert, bessere Belichtung für die aktuelle Helligkeit. ND-Filter müsste noch stärker sein.
1/4000s f/32 ISO100
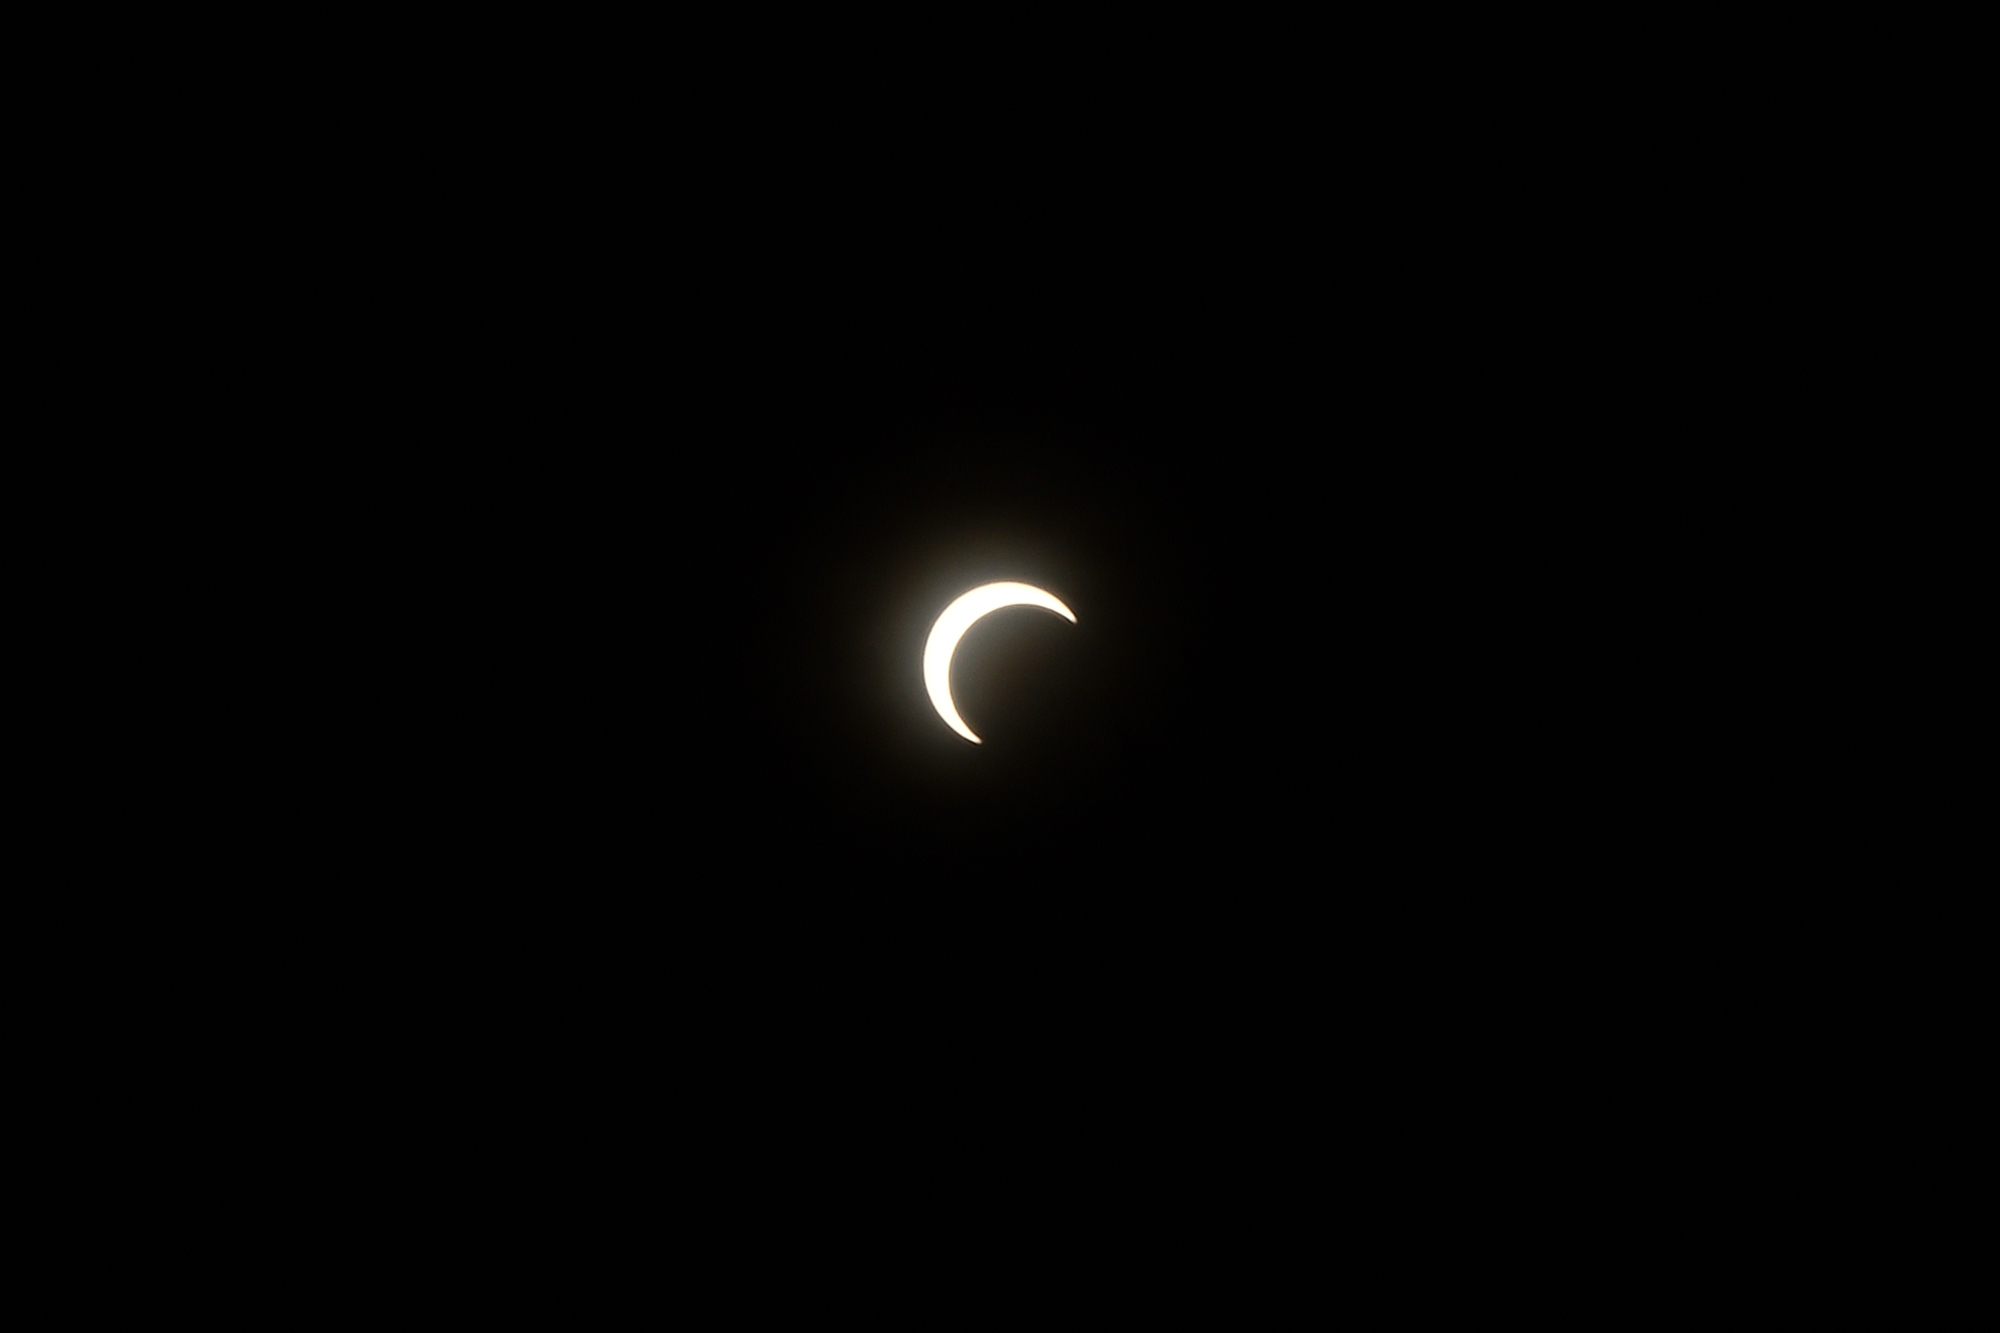
ND-Filter zurück auf 3 Blendenstufen, aber der Sonnenkranz überstrahlt sofort das ganze Bild.
1/4000s f/32 ISO100
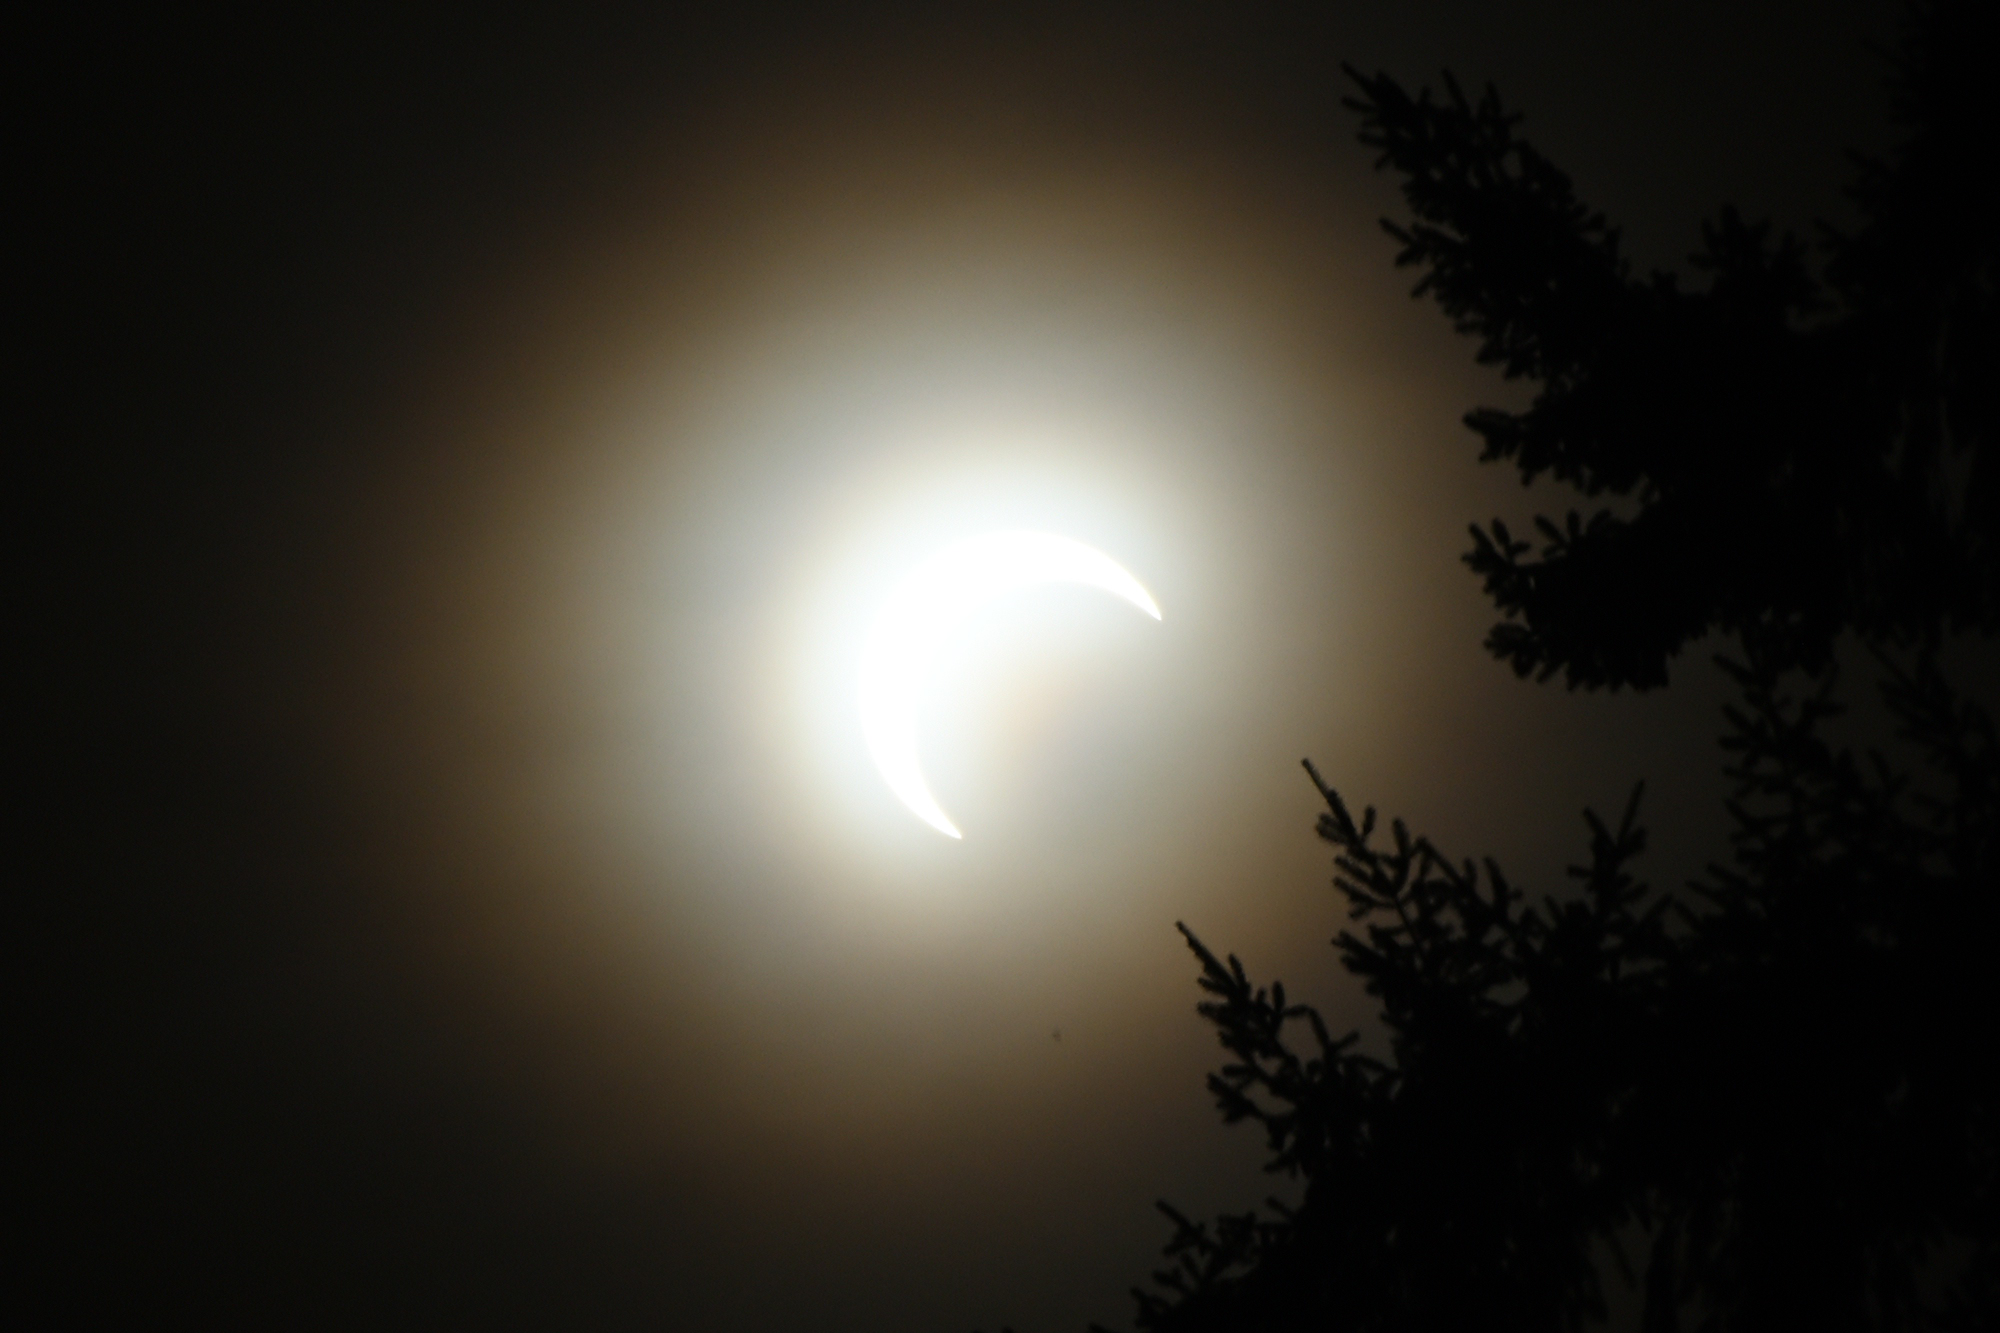
12 Minuten später, die maximale Verdunklung ist vorbei, ☉ und ☾ driften wieder auseinander.
1/4000s f/29 ISO100
24 Minuten später.
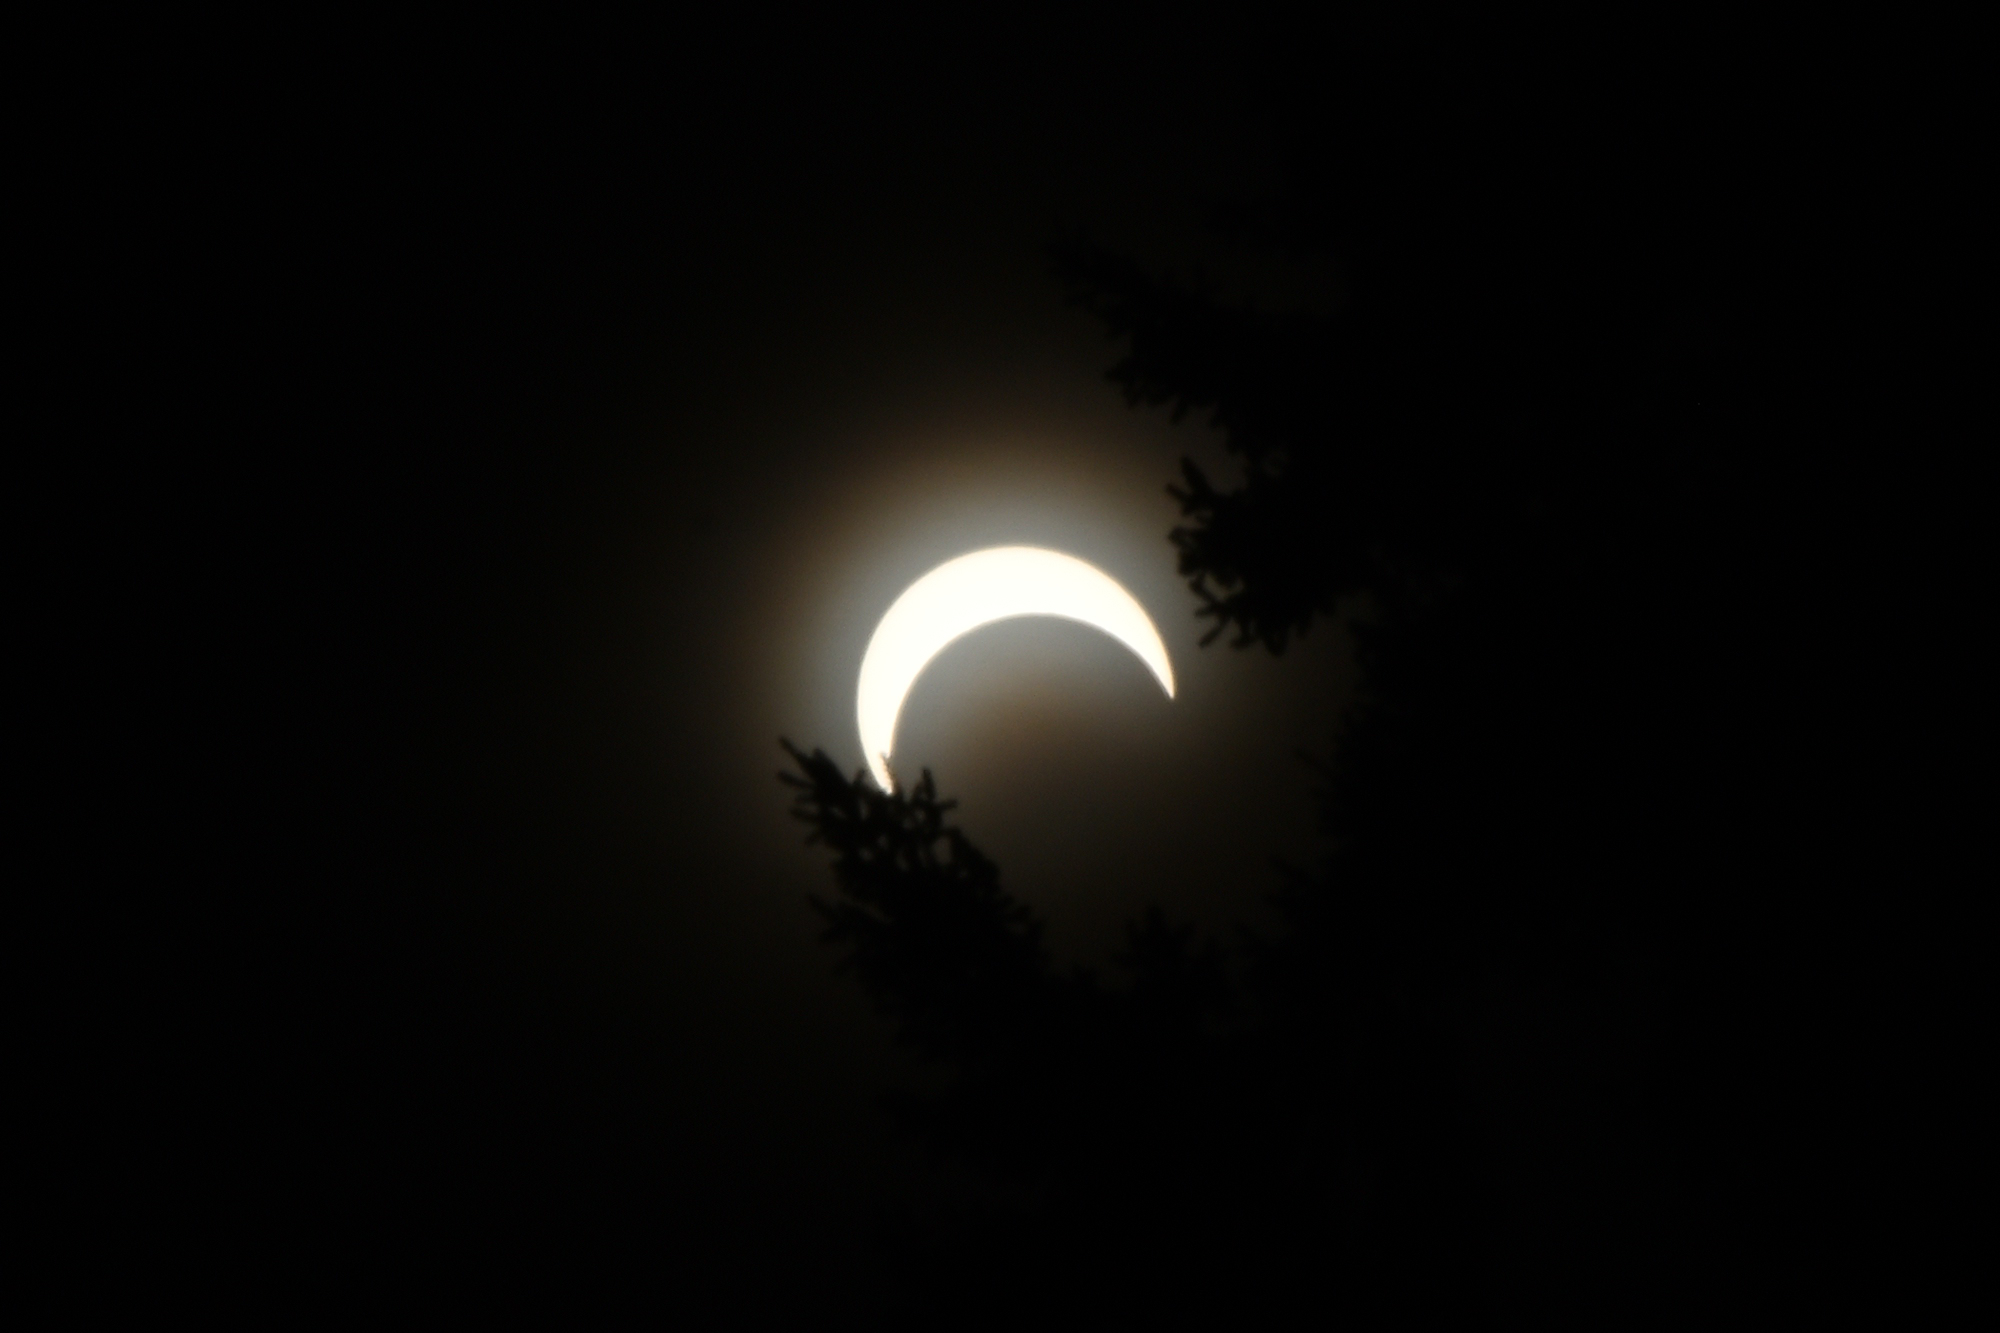
1/4000s f/20 ISO100
43 Minuten später, die ringförmige Sonnenfinsternis geht jetzt zu Ende.
1/4000s f/40 ISO100
27 August, 2023
Ein Apfelkuchen frisch aus dem Ofen von der besten 👩🏻🍳


Nikon Z30, DX Z 18-140mm f/3.5-6.3, SB-700
26 August, 2023
In 1977, Nikon started using the automatic indexing of the lenses. This replaces the manual indexing done before by alining the metal fork on the lens with the camera pin.
See this great article about the Nikon evolution.
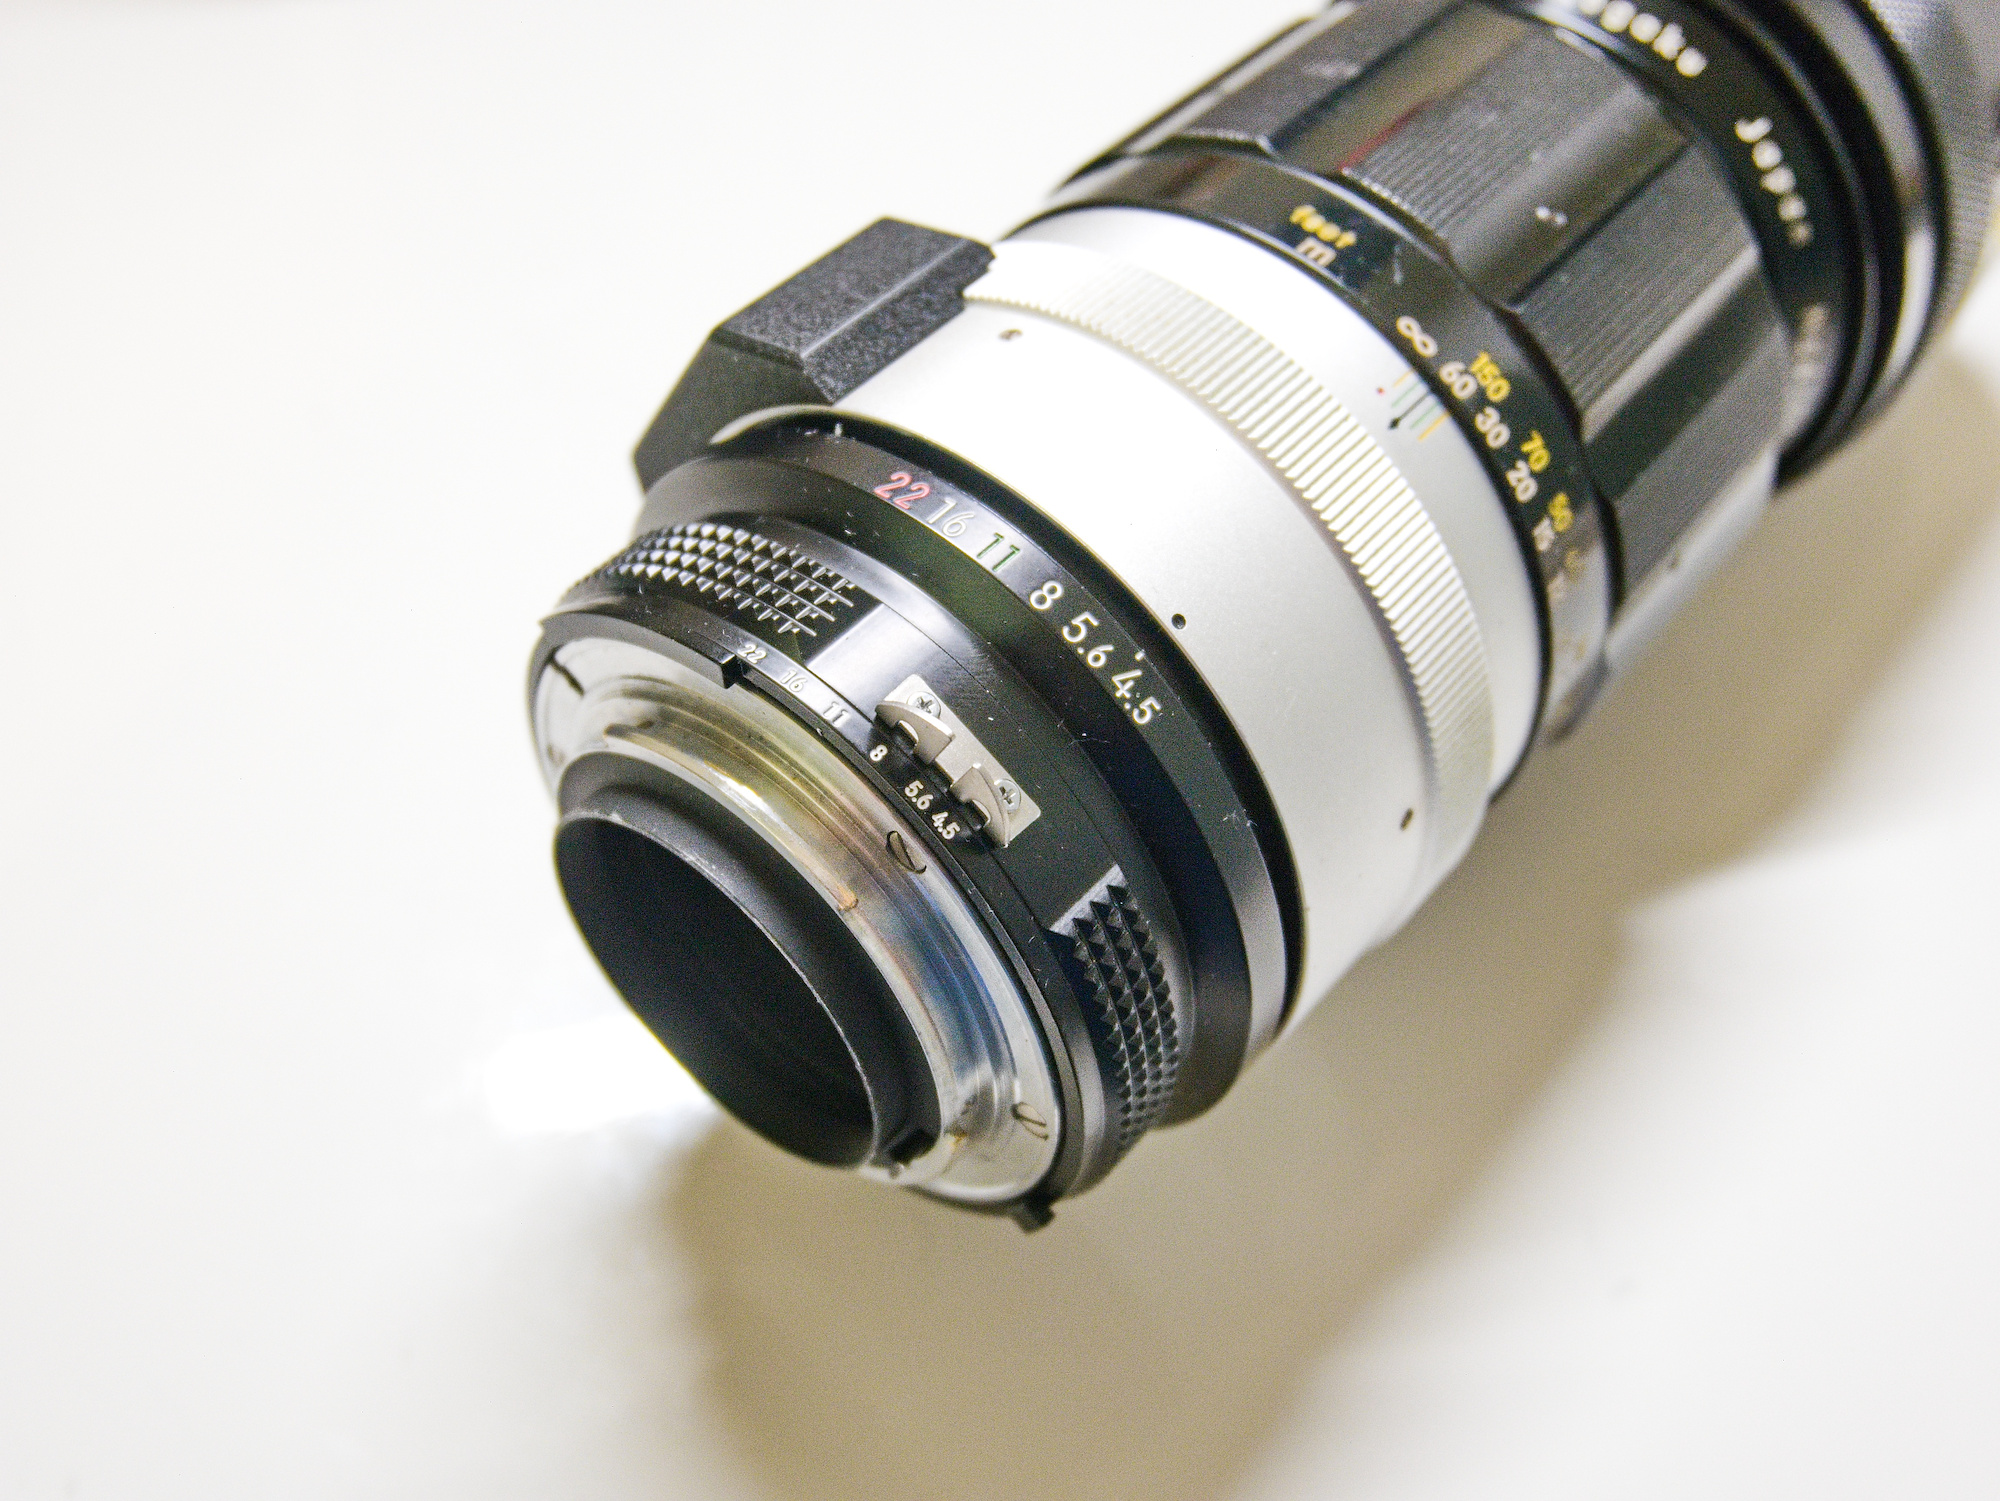
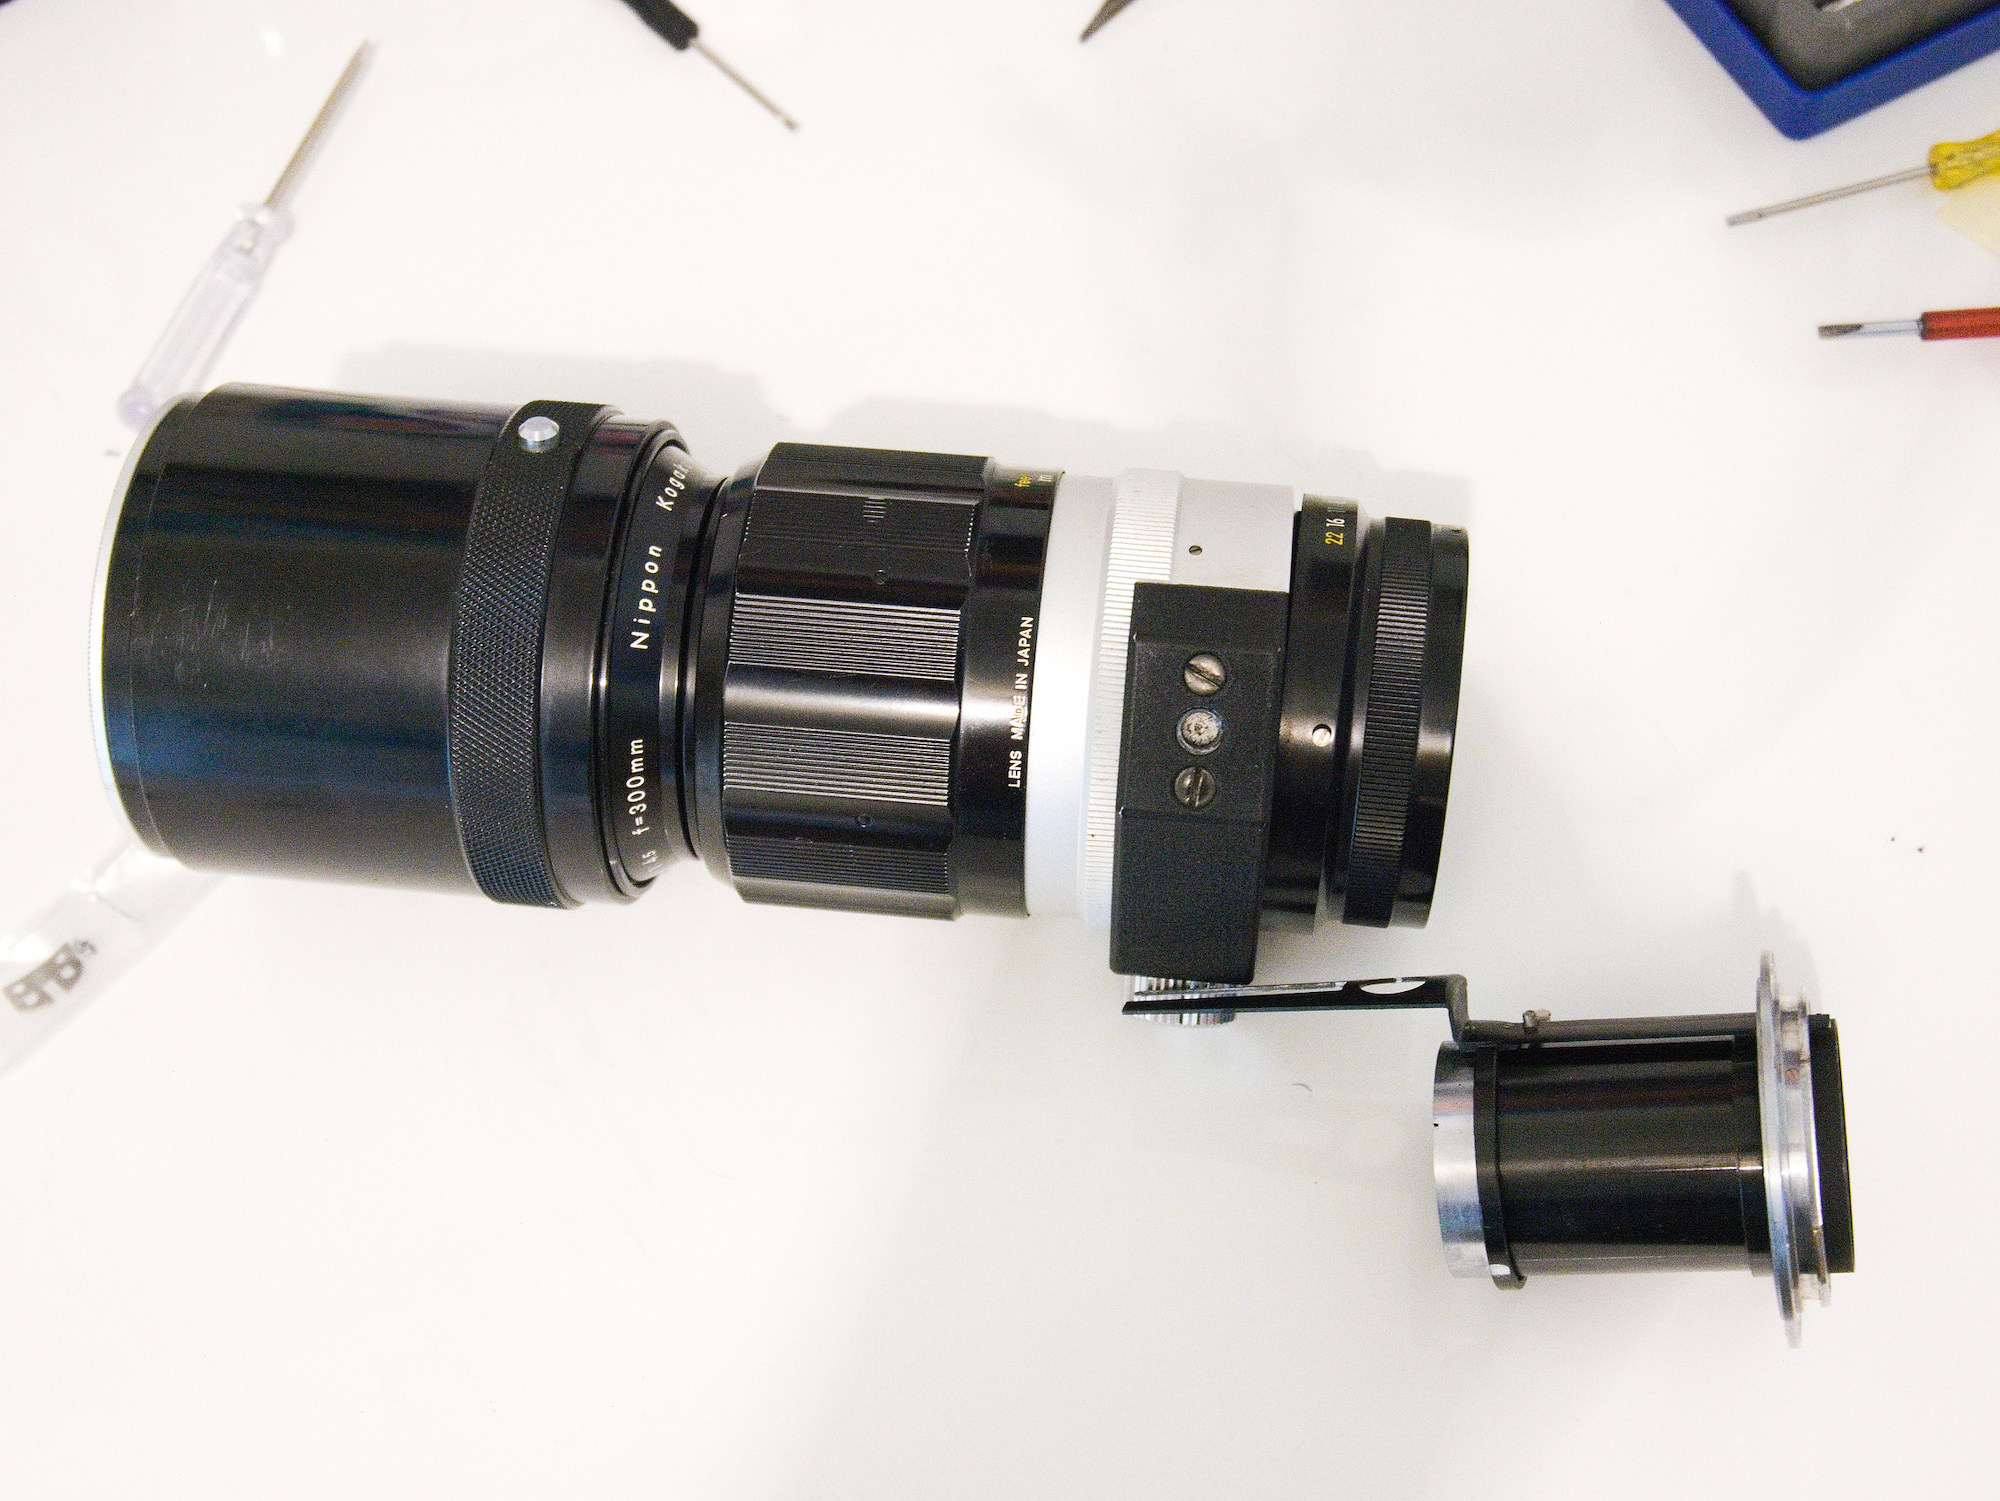
This is a original non-AI lens mount of a NIKKOR-H 300mm f/4.5:

Nikon provided conversion kits to convert lenses before 1977. According to the Nikon Lens List, this lens is from 1970 and requires the conversion kit #53.
I only found #52 in a camera store in Finland, which is for a newer model of this lens.

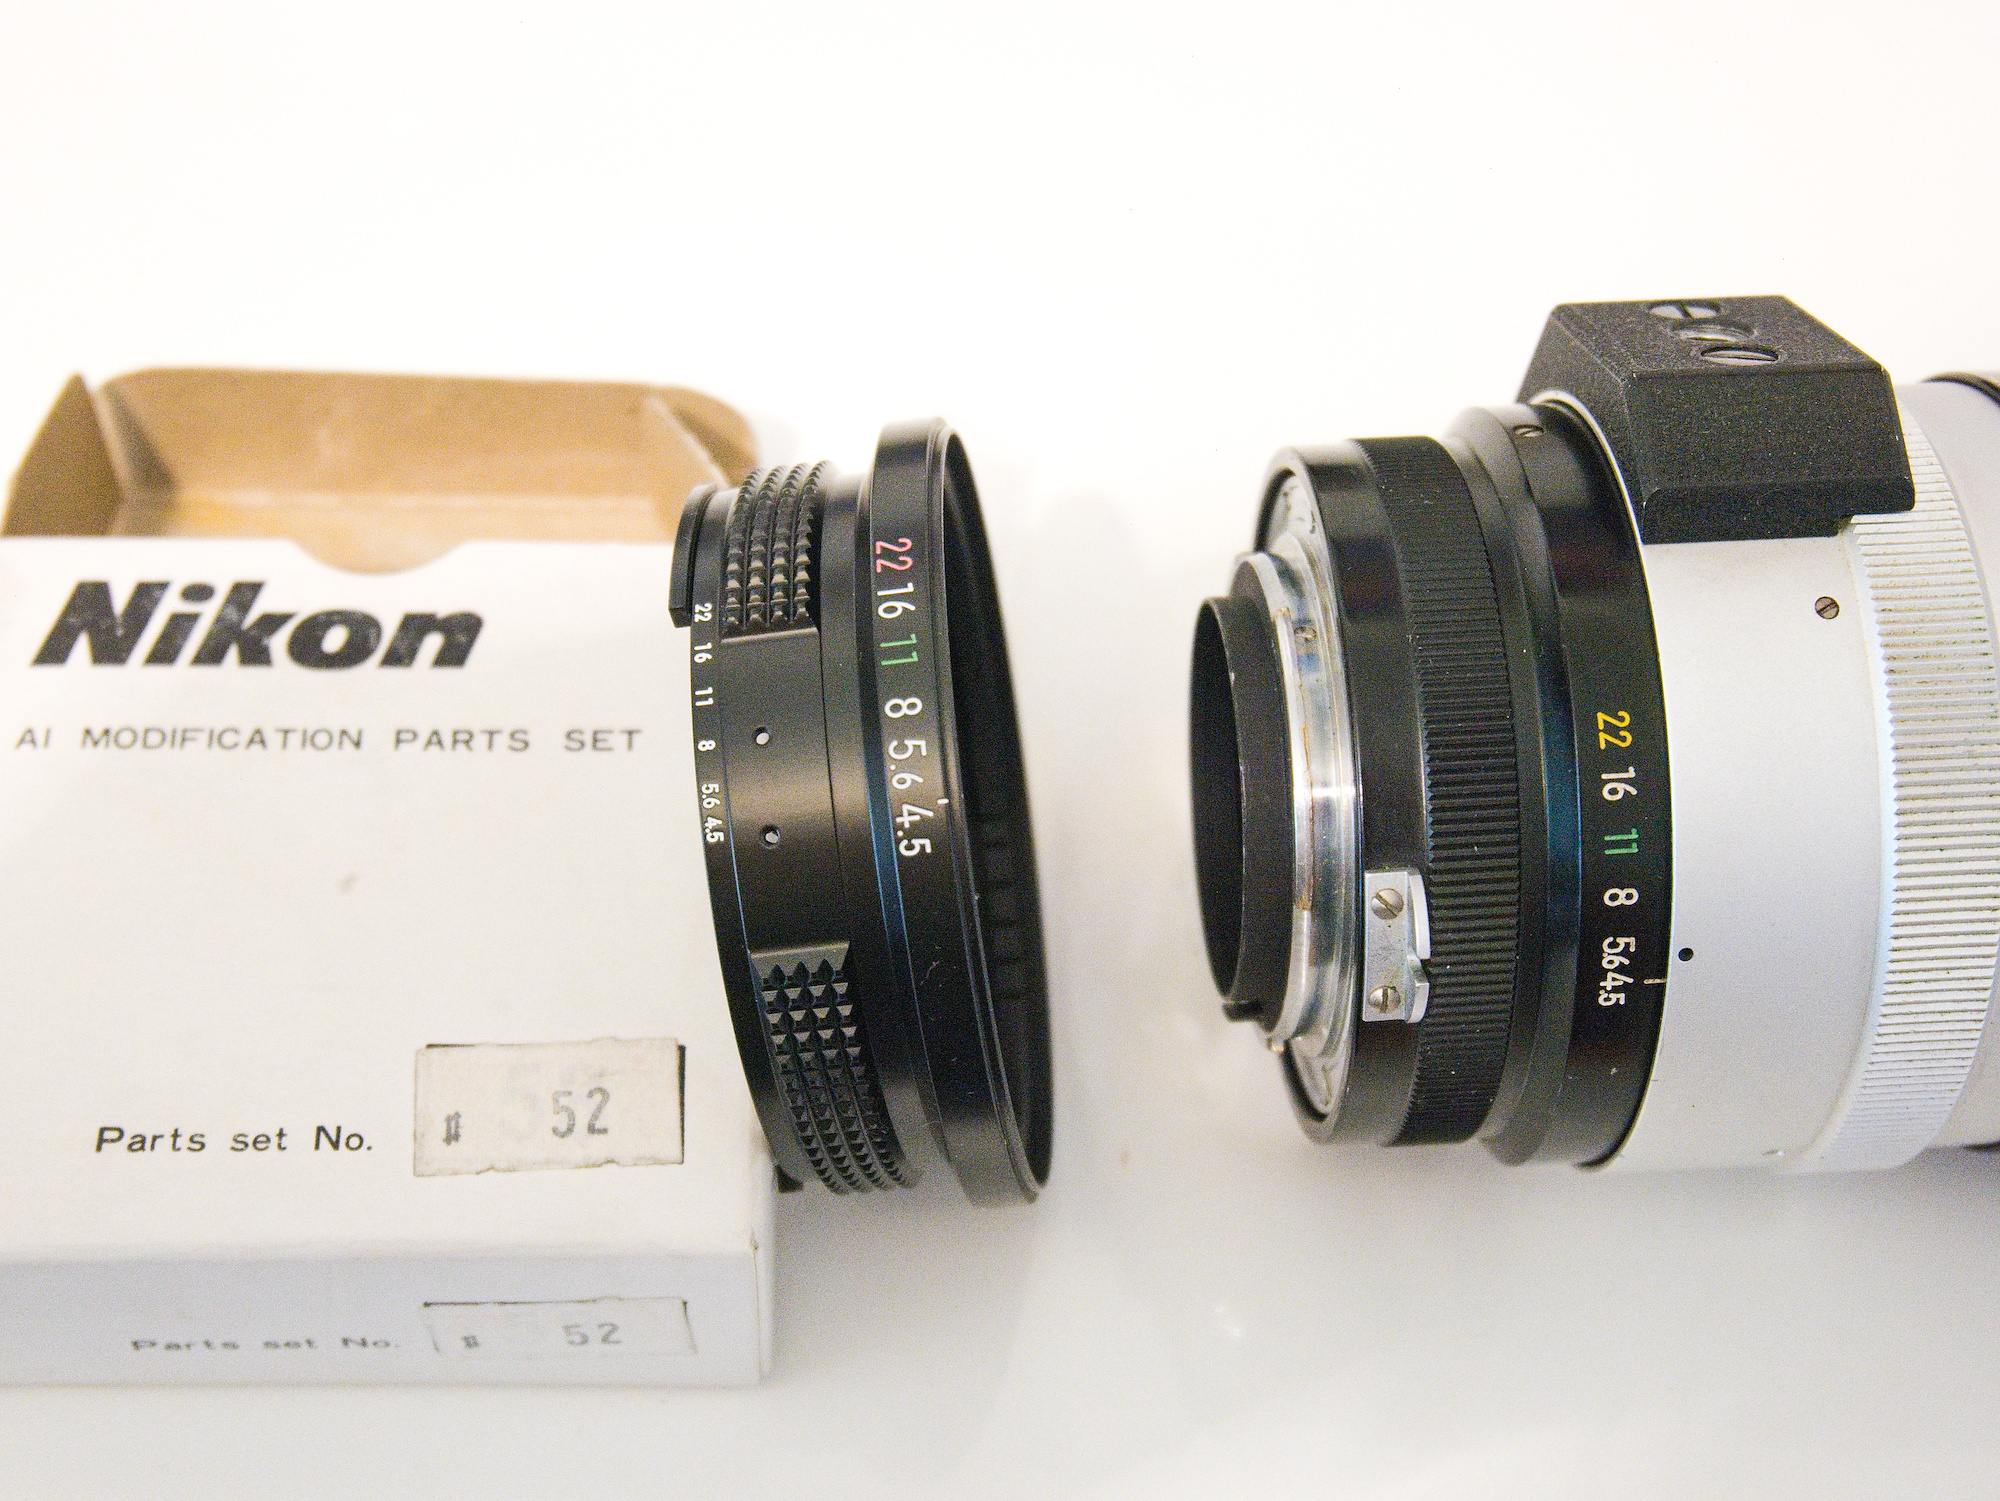
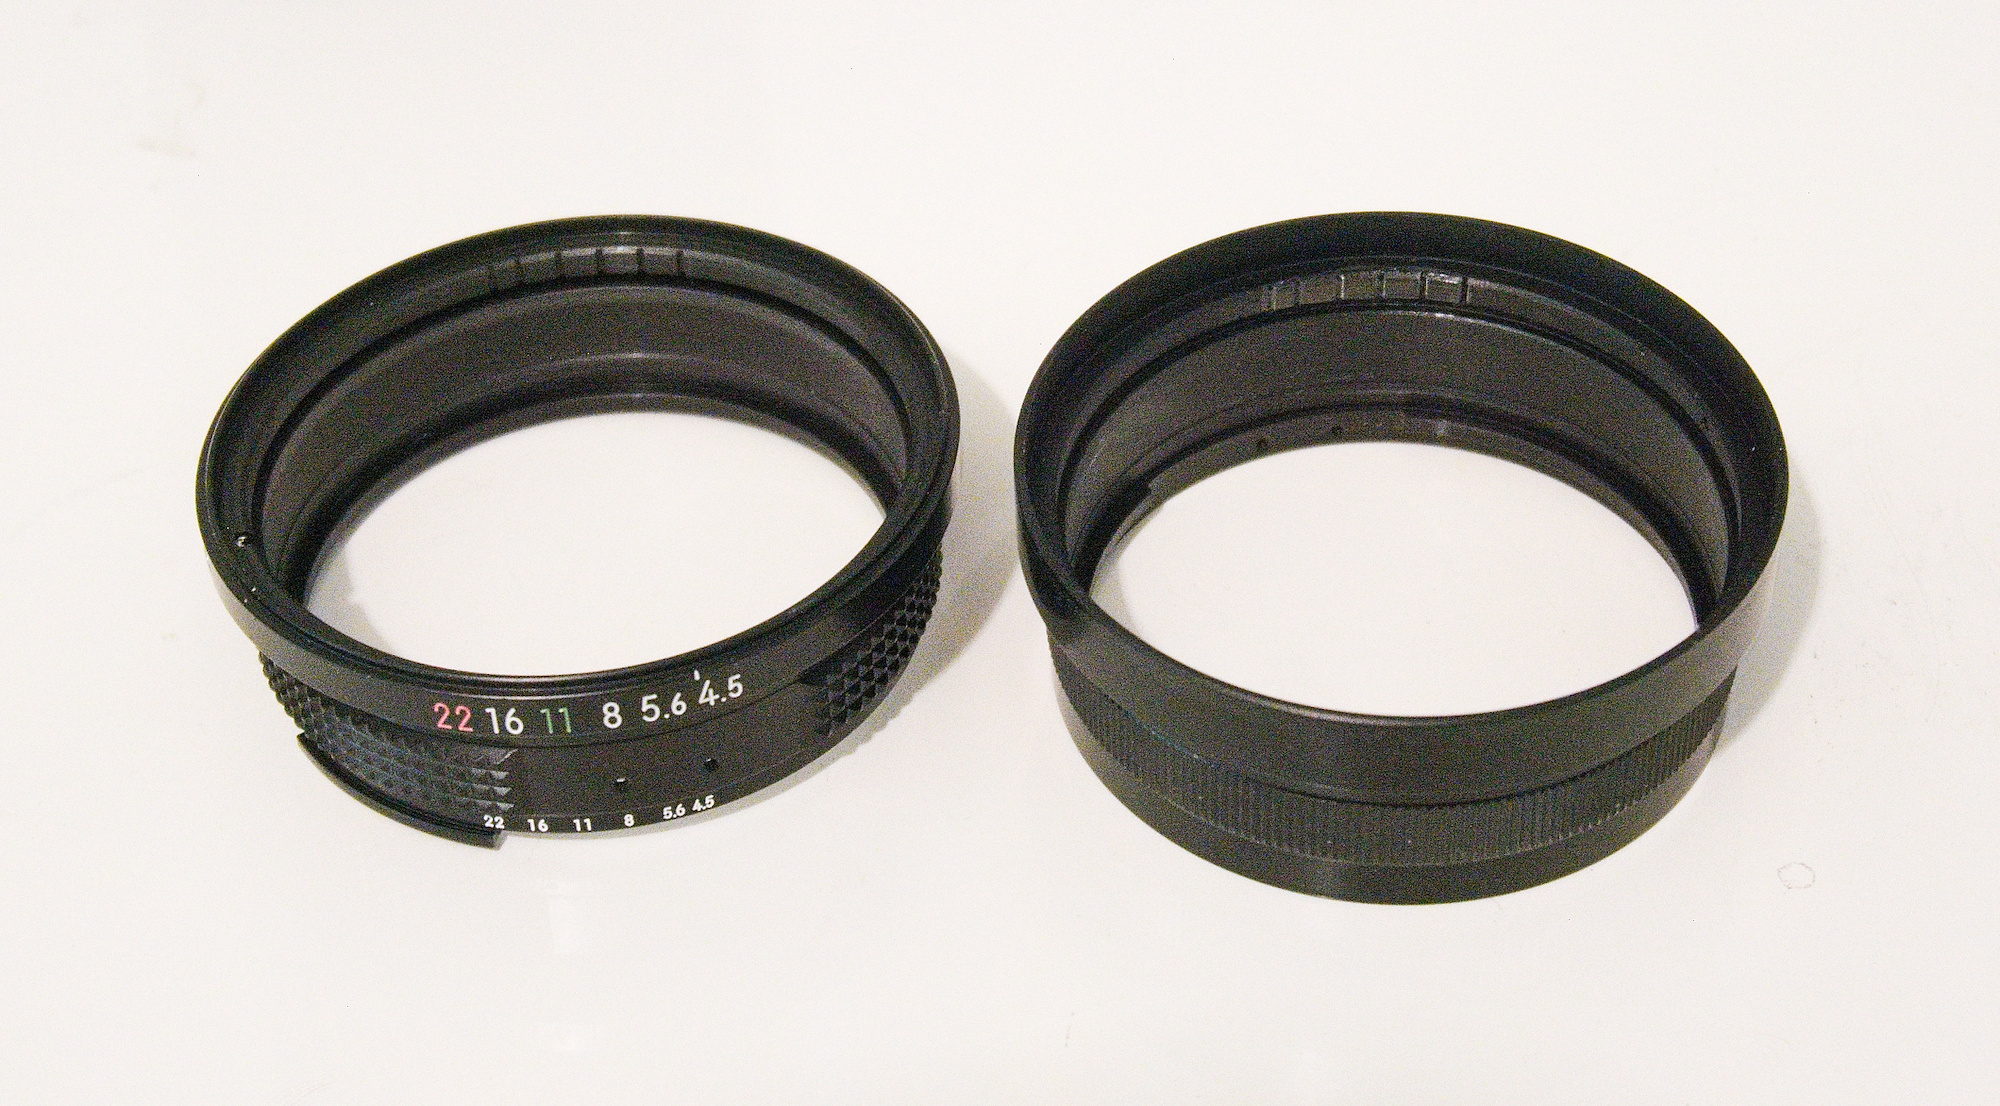
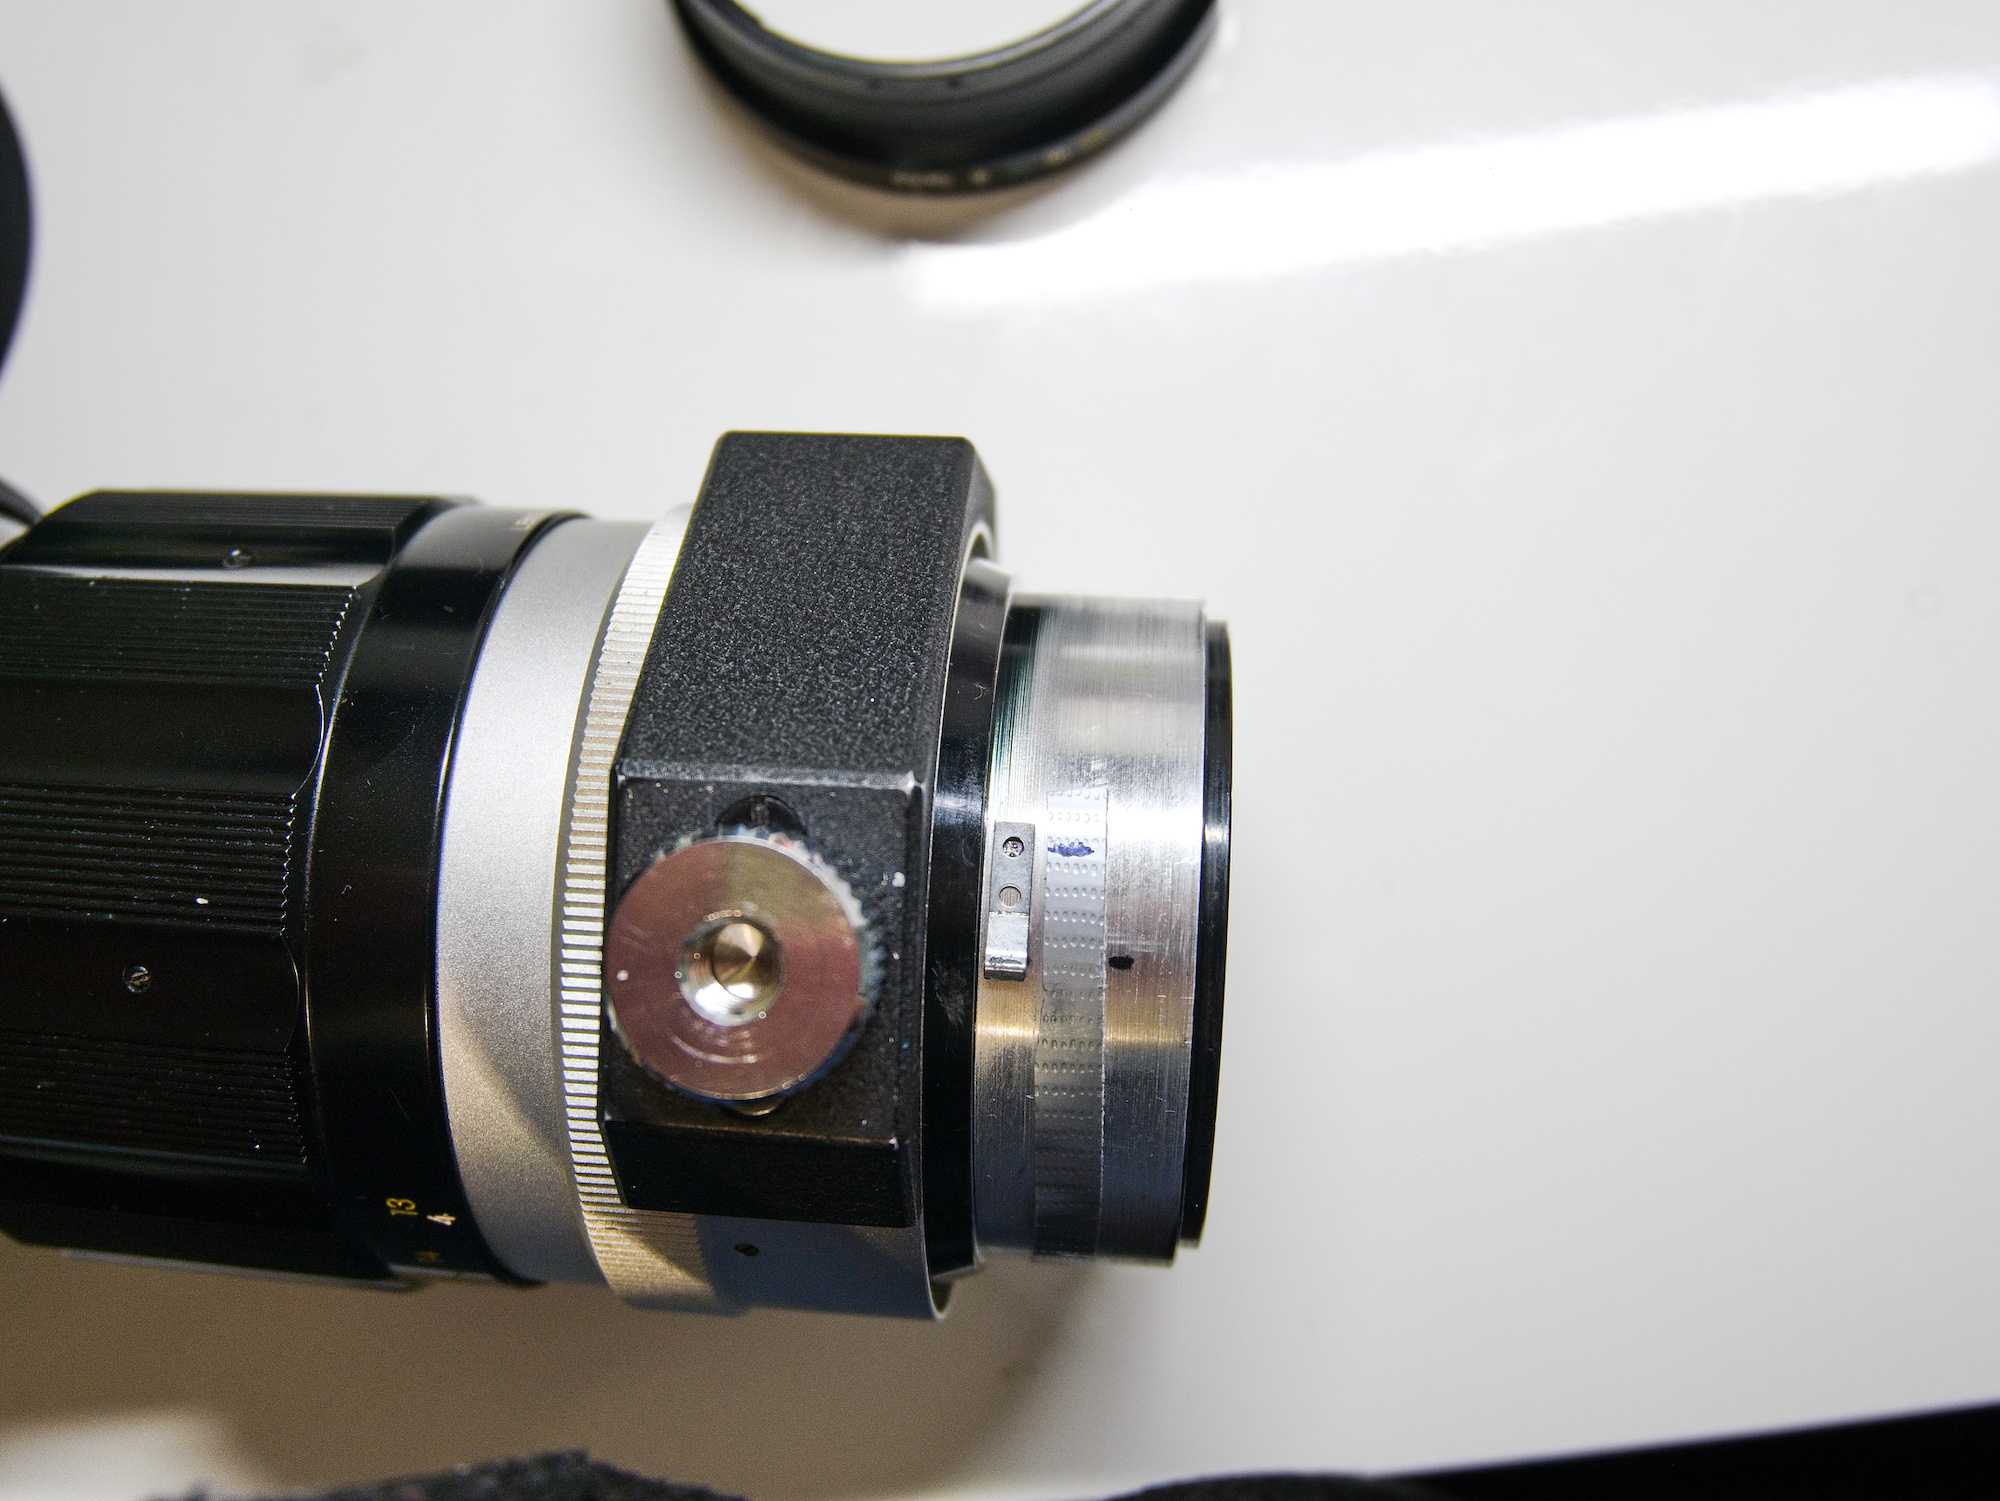
The kit #52 differs from #53 that the screw to connect to the aperture lever is not used anymore and replaced by a notch in the aperture ring at the same position. To make #52 work with this lens, a small hole is drilled and tapped to use the original screw:
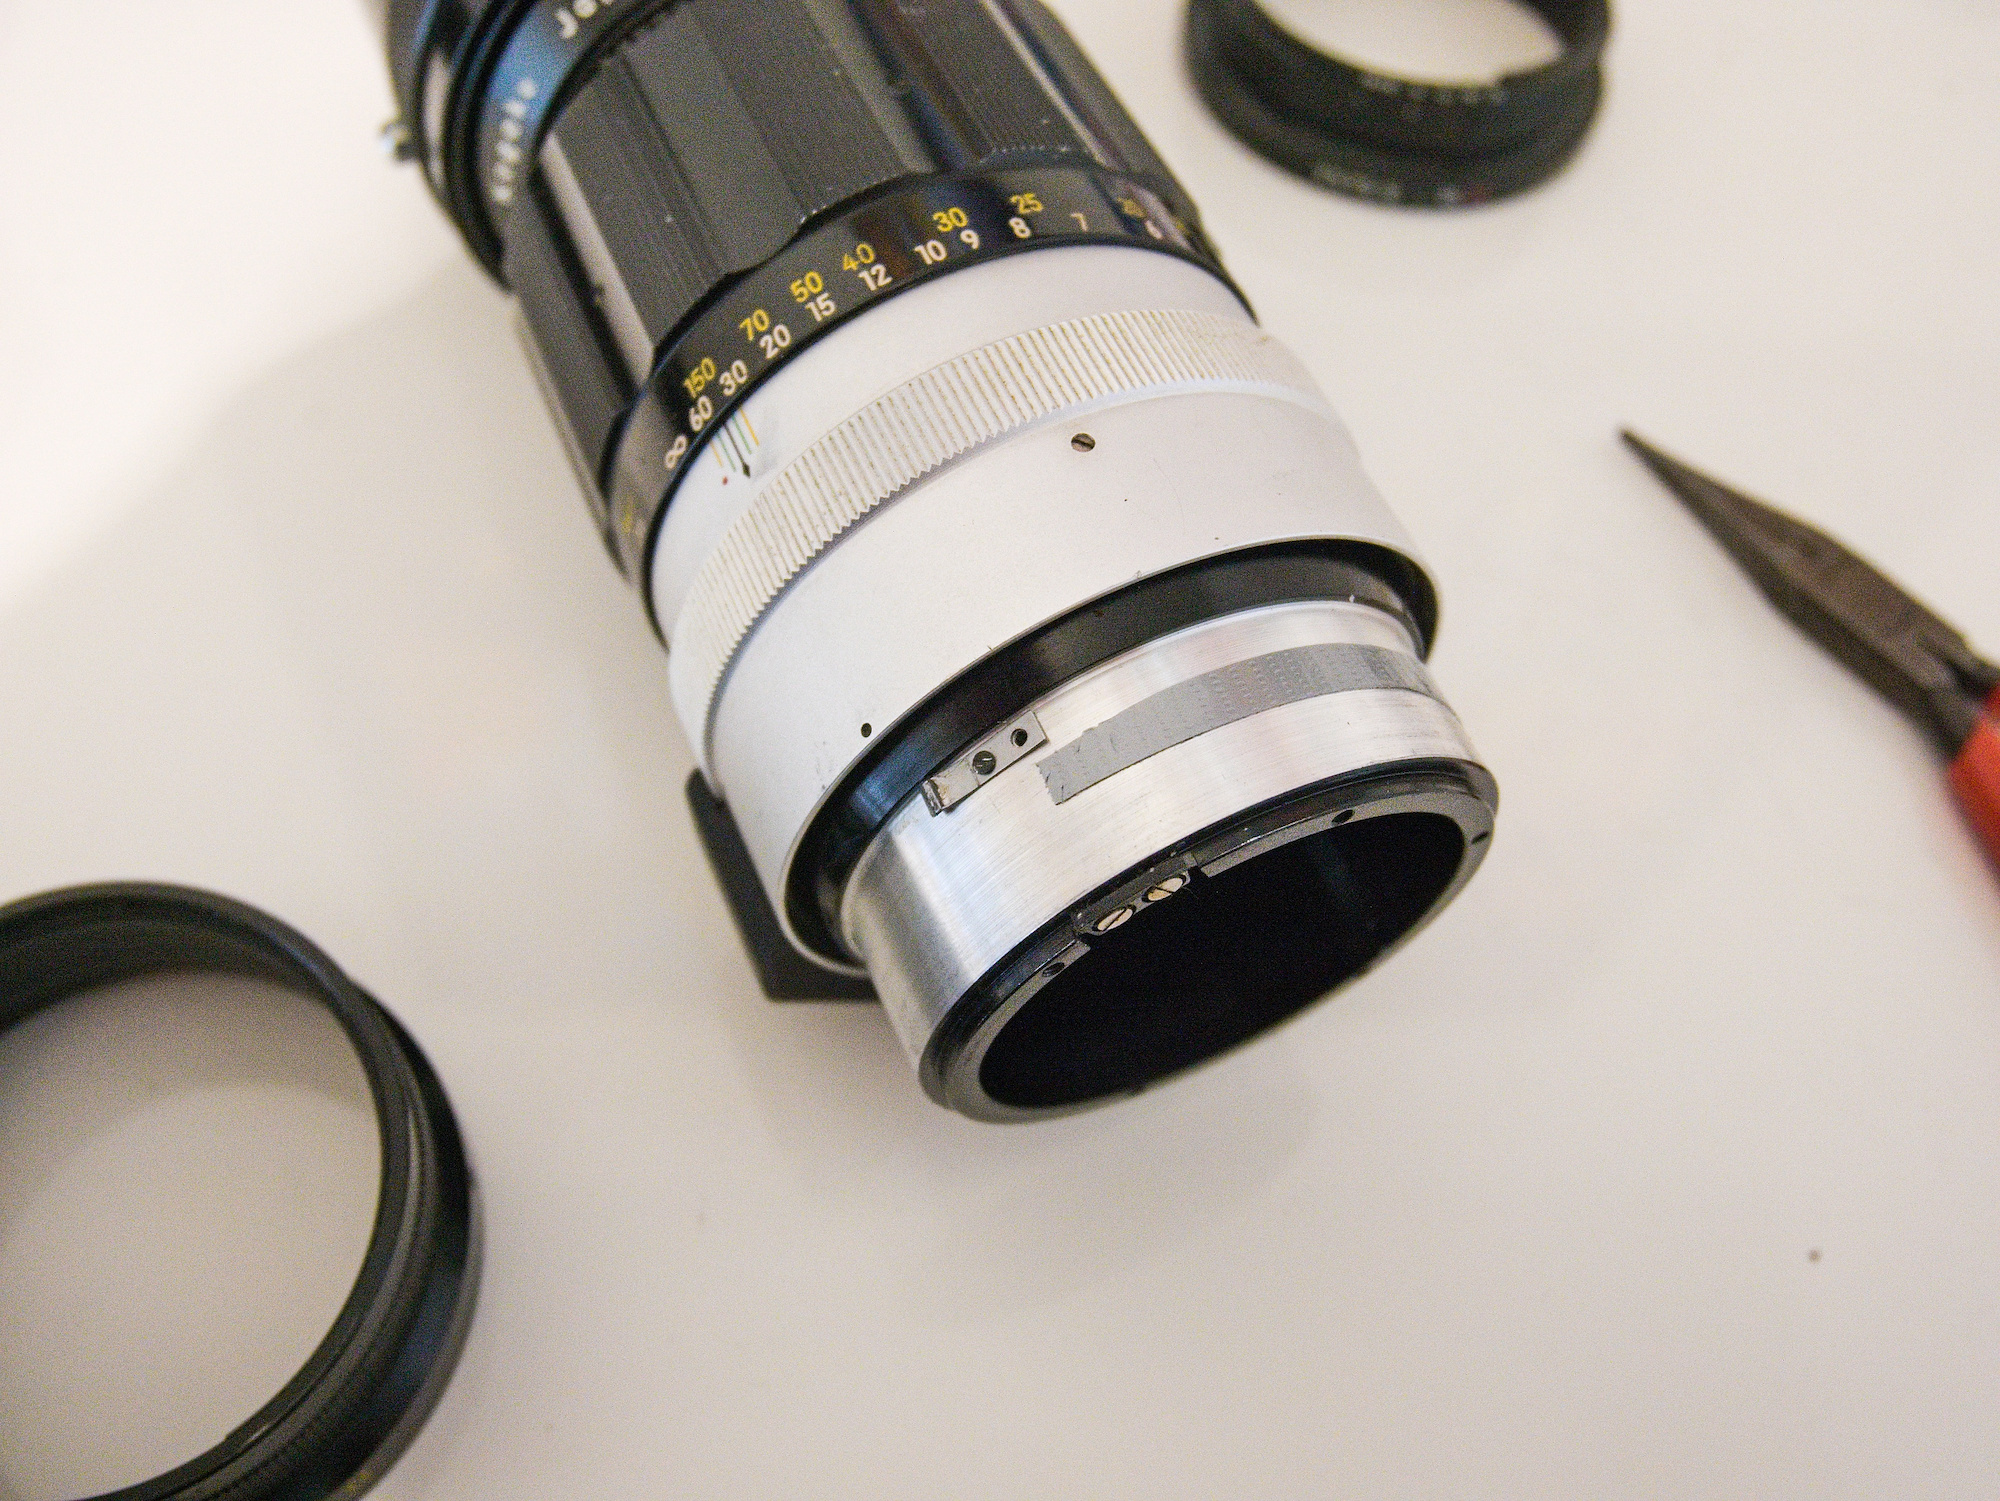
The lens mount is unscrewed and carefully pulled out:
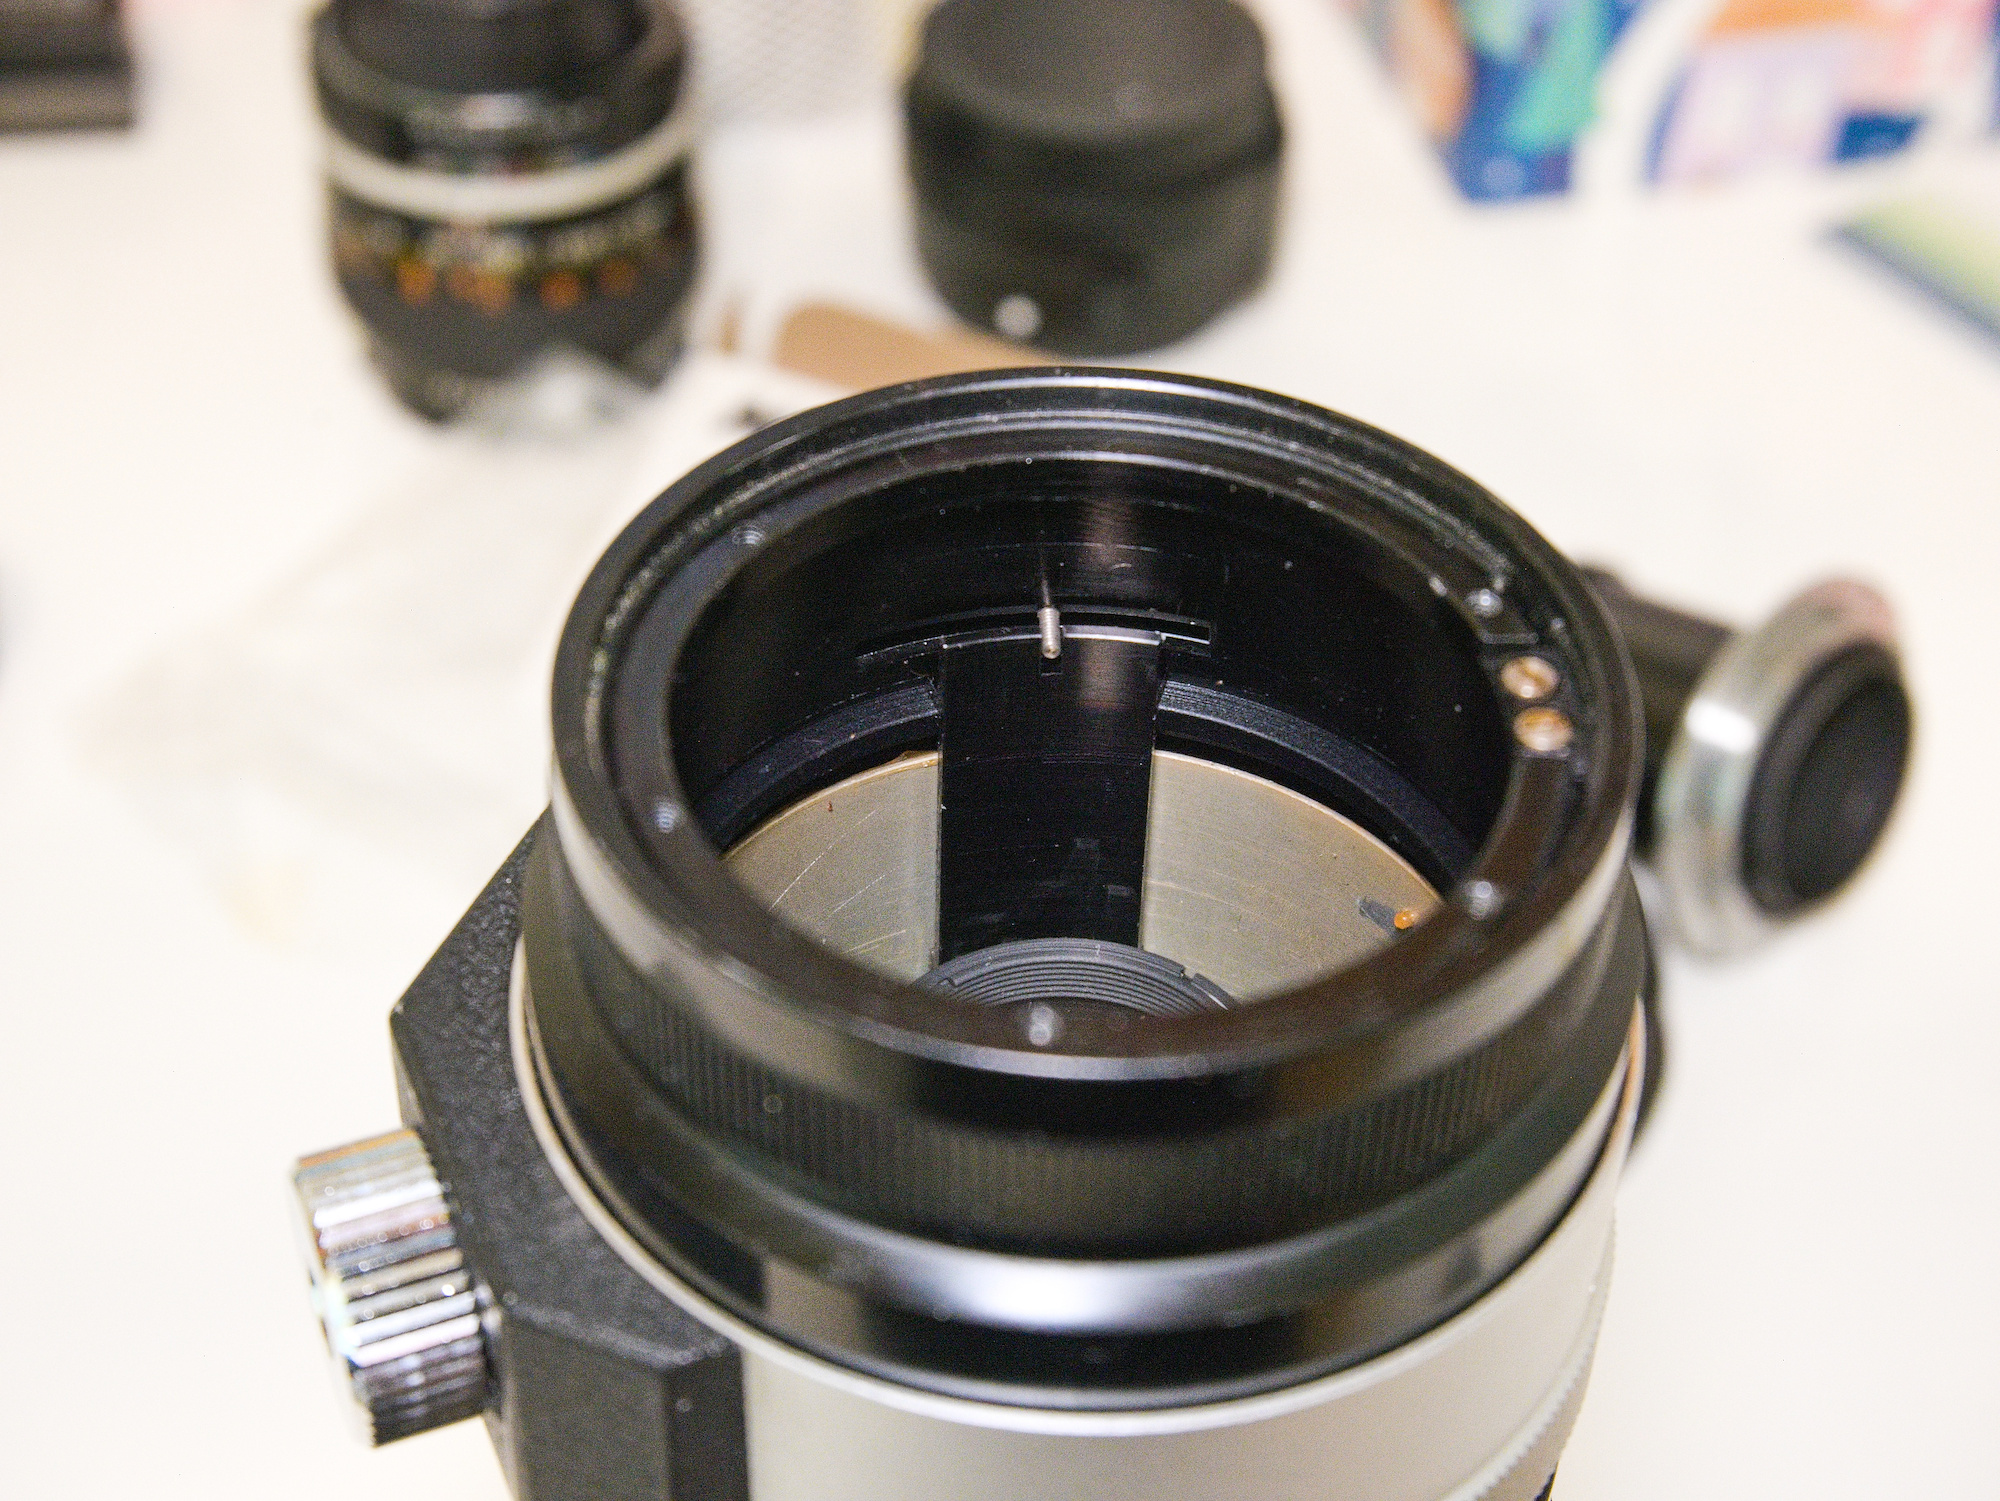
The screw for the aperture link is M1.7x0.35:
And connects to the lever on the inside:
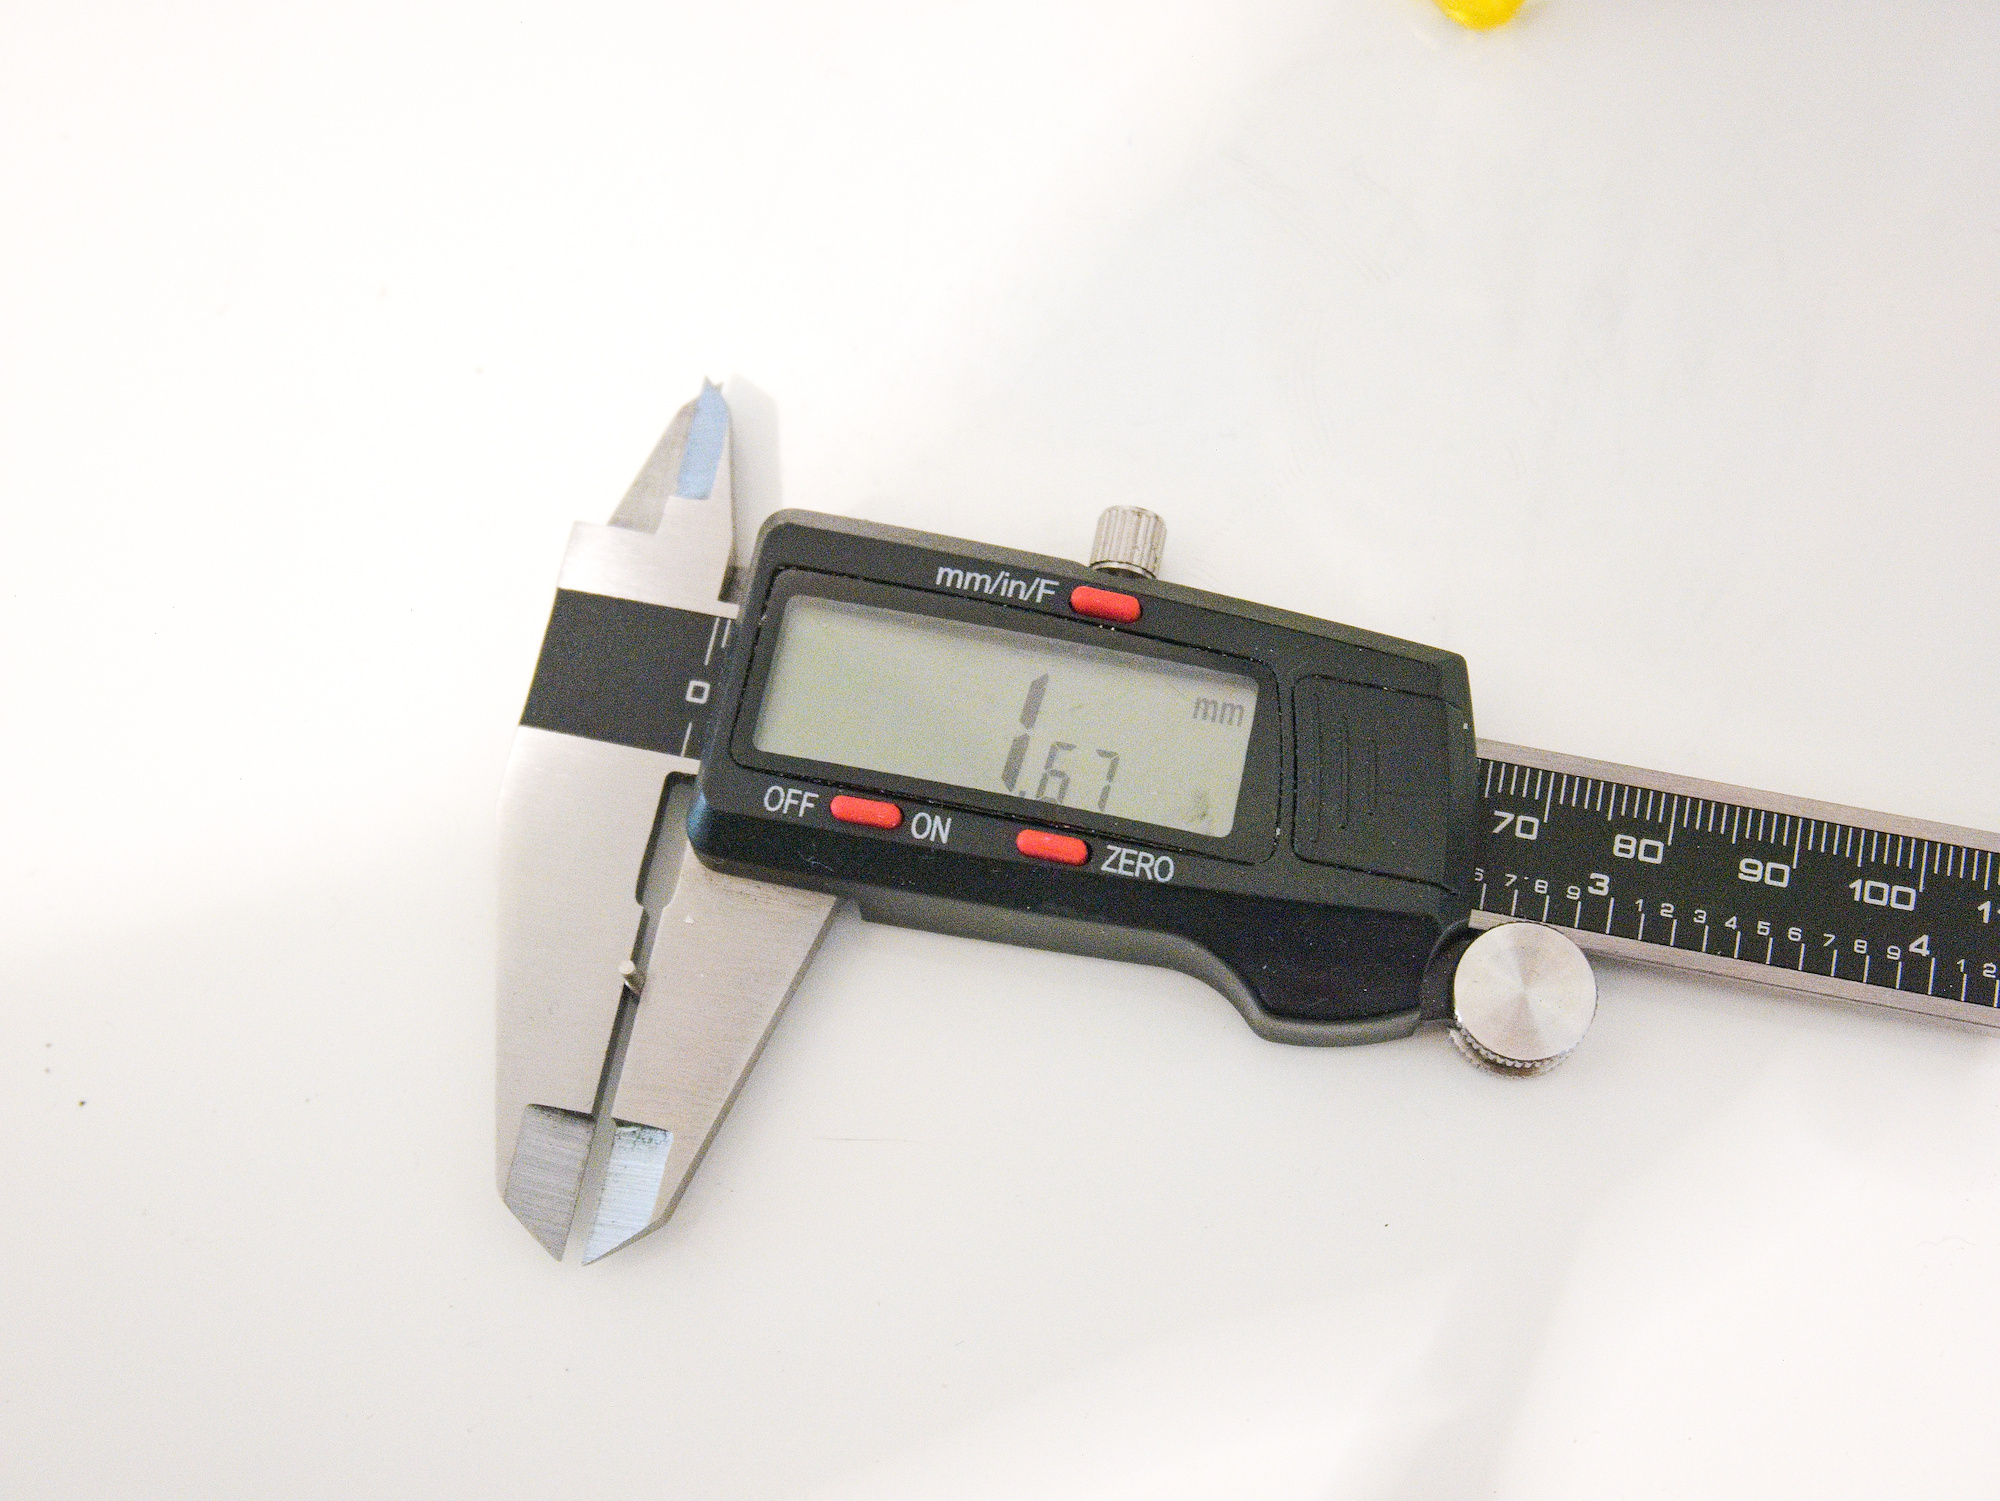
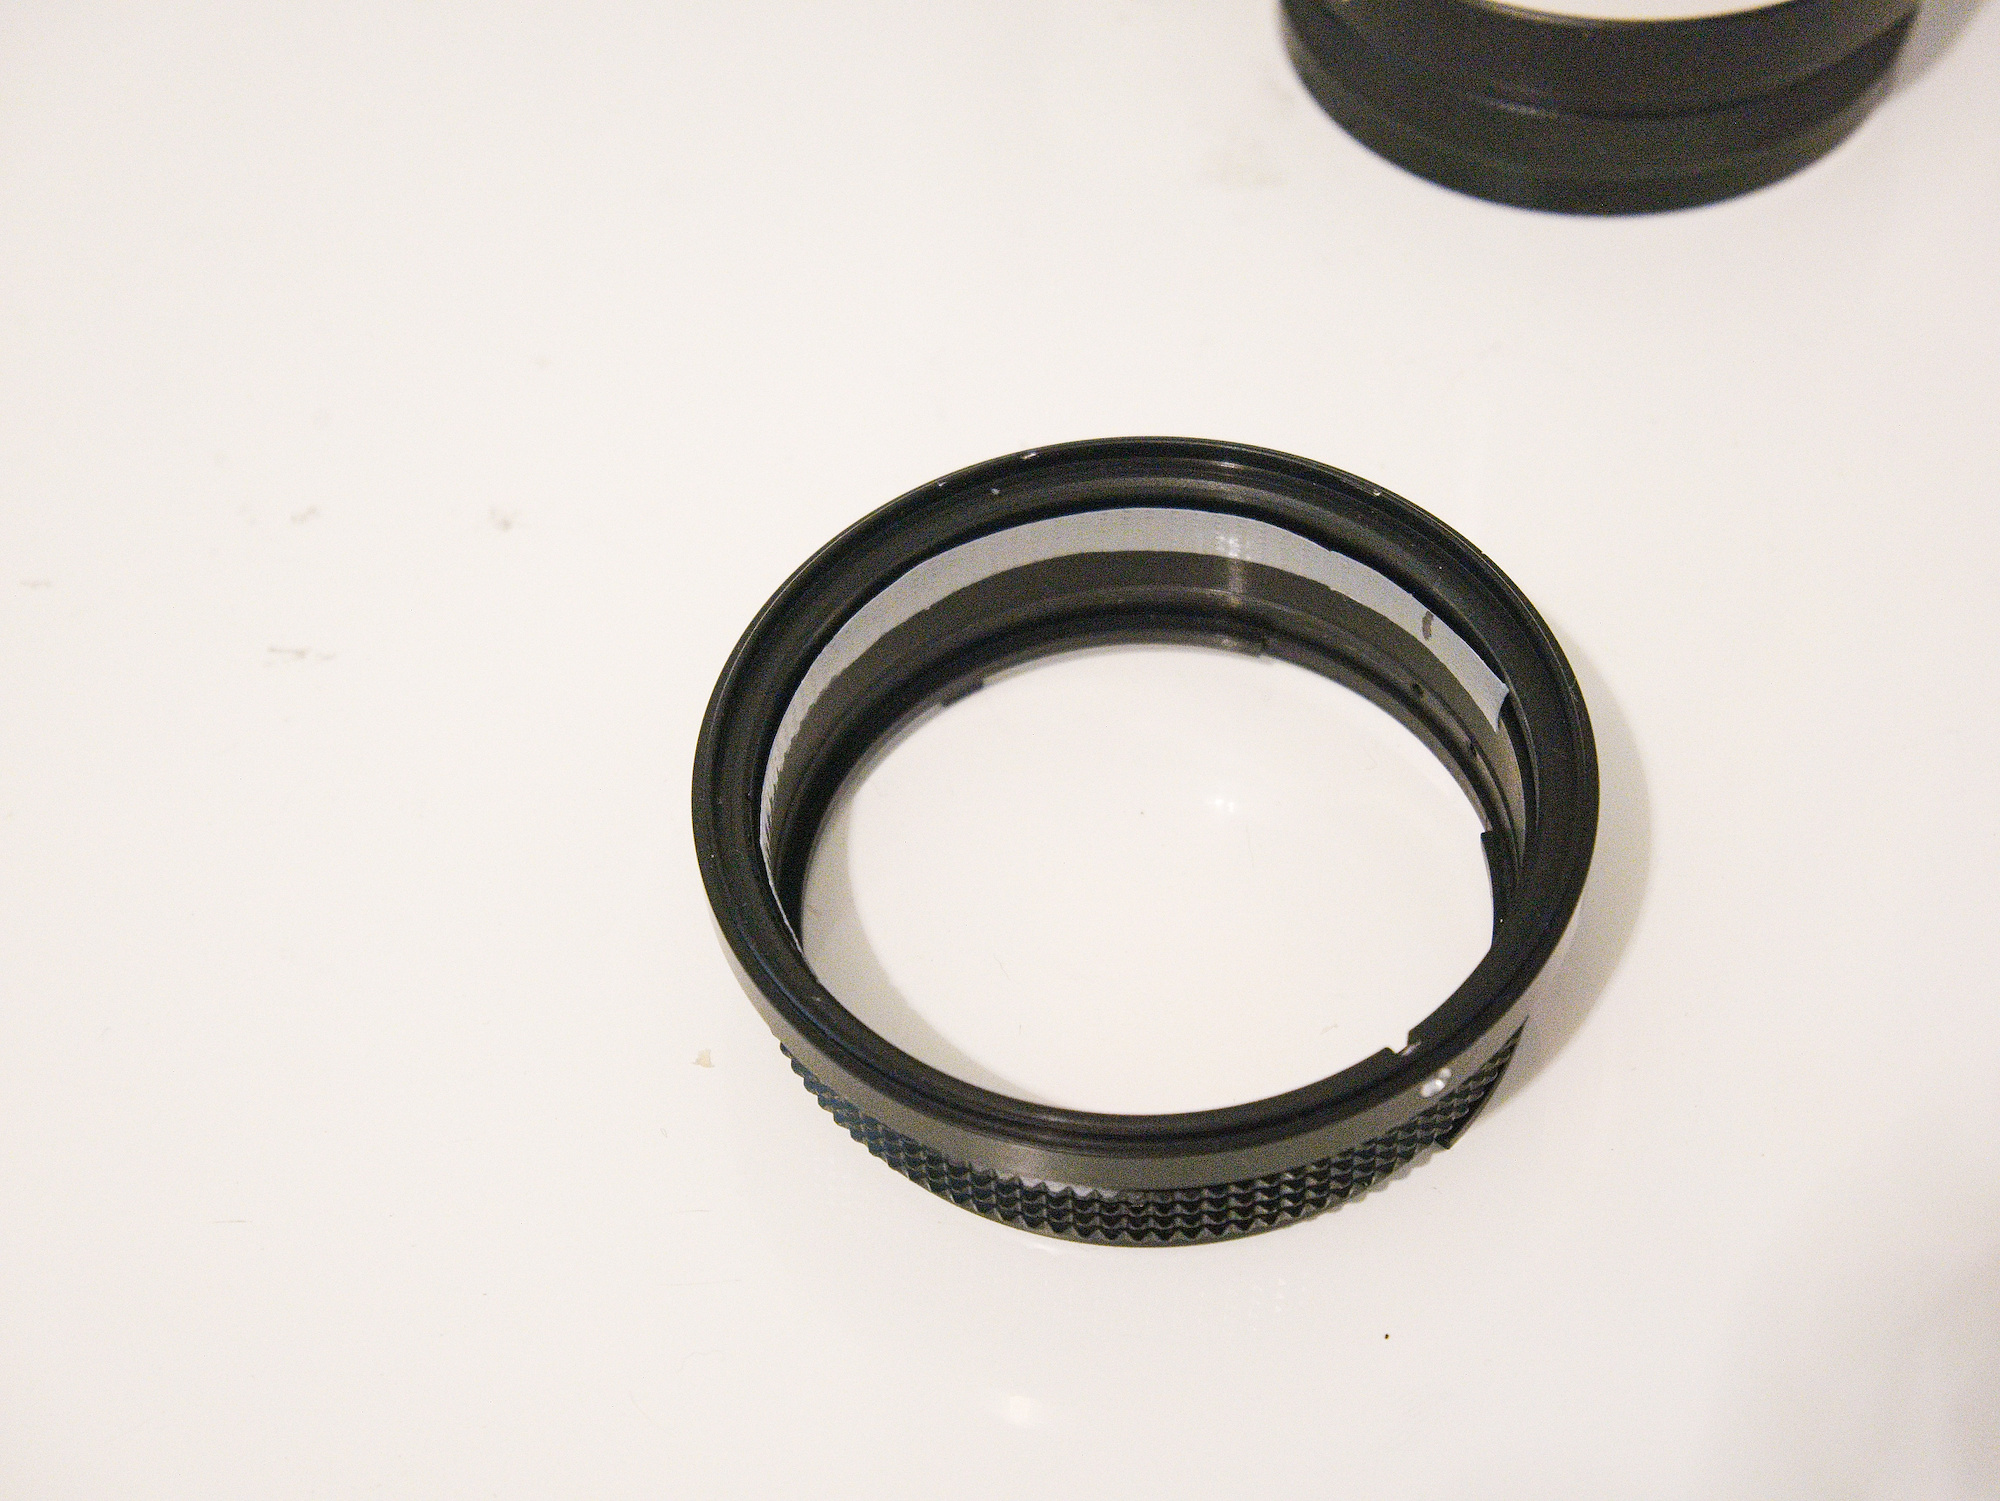
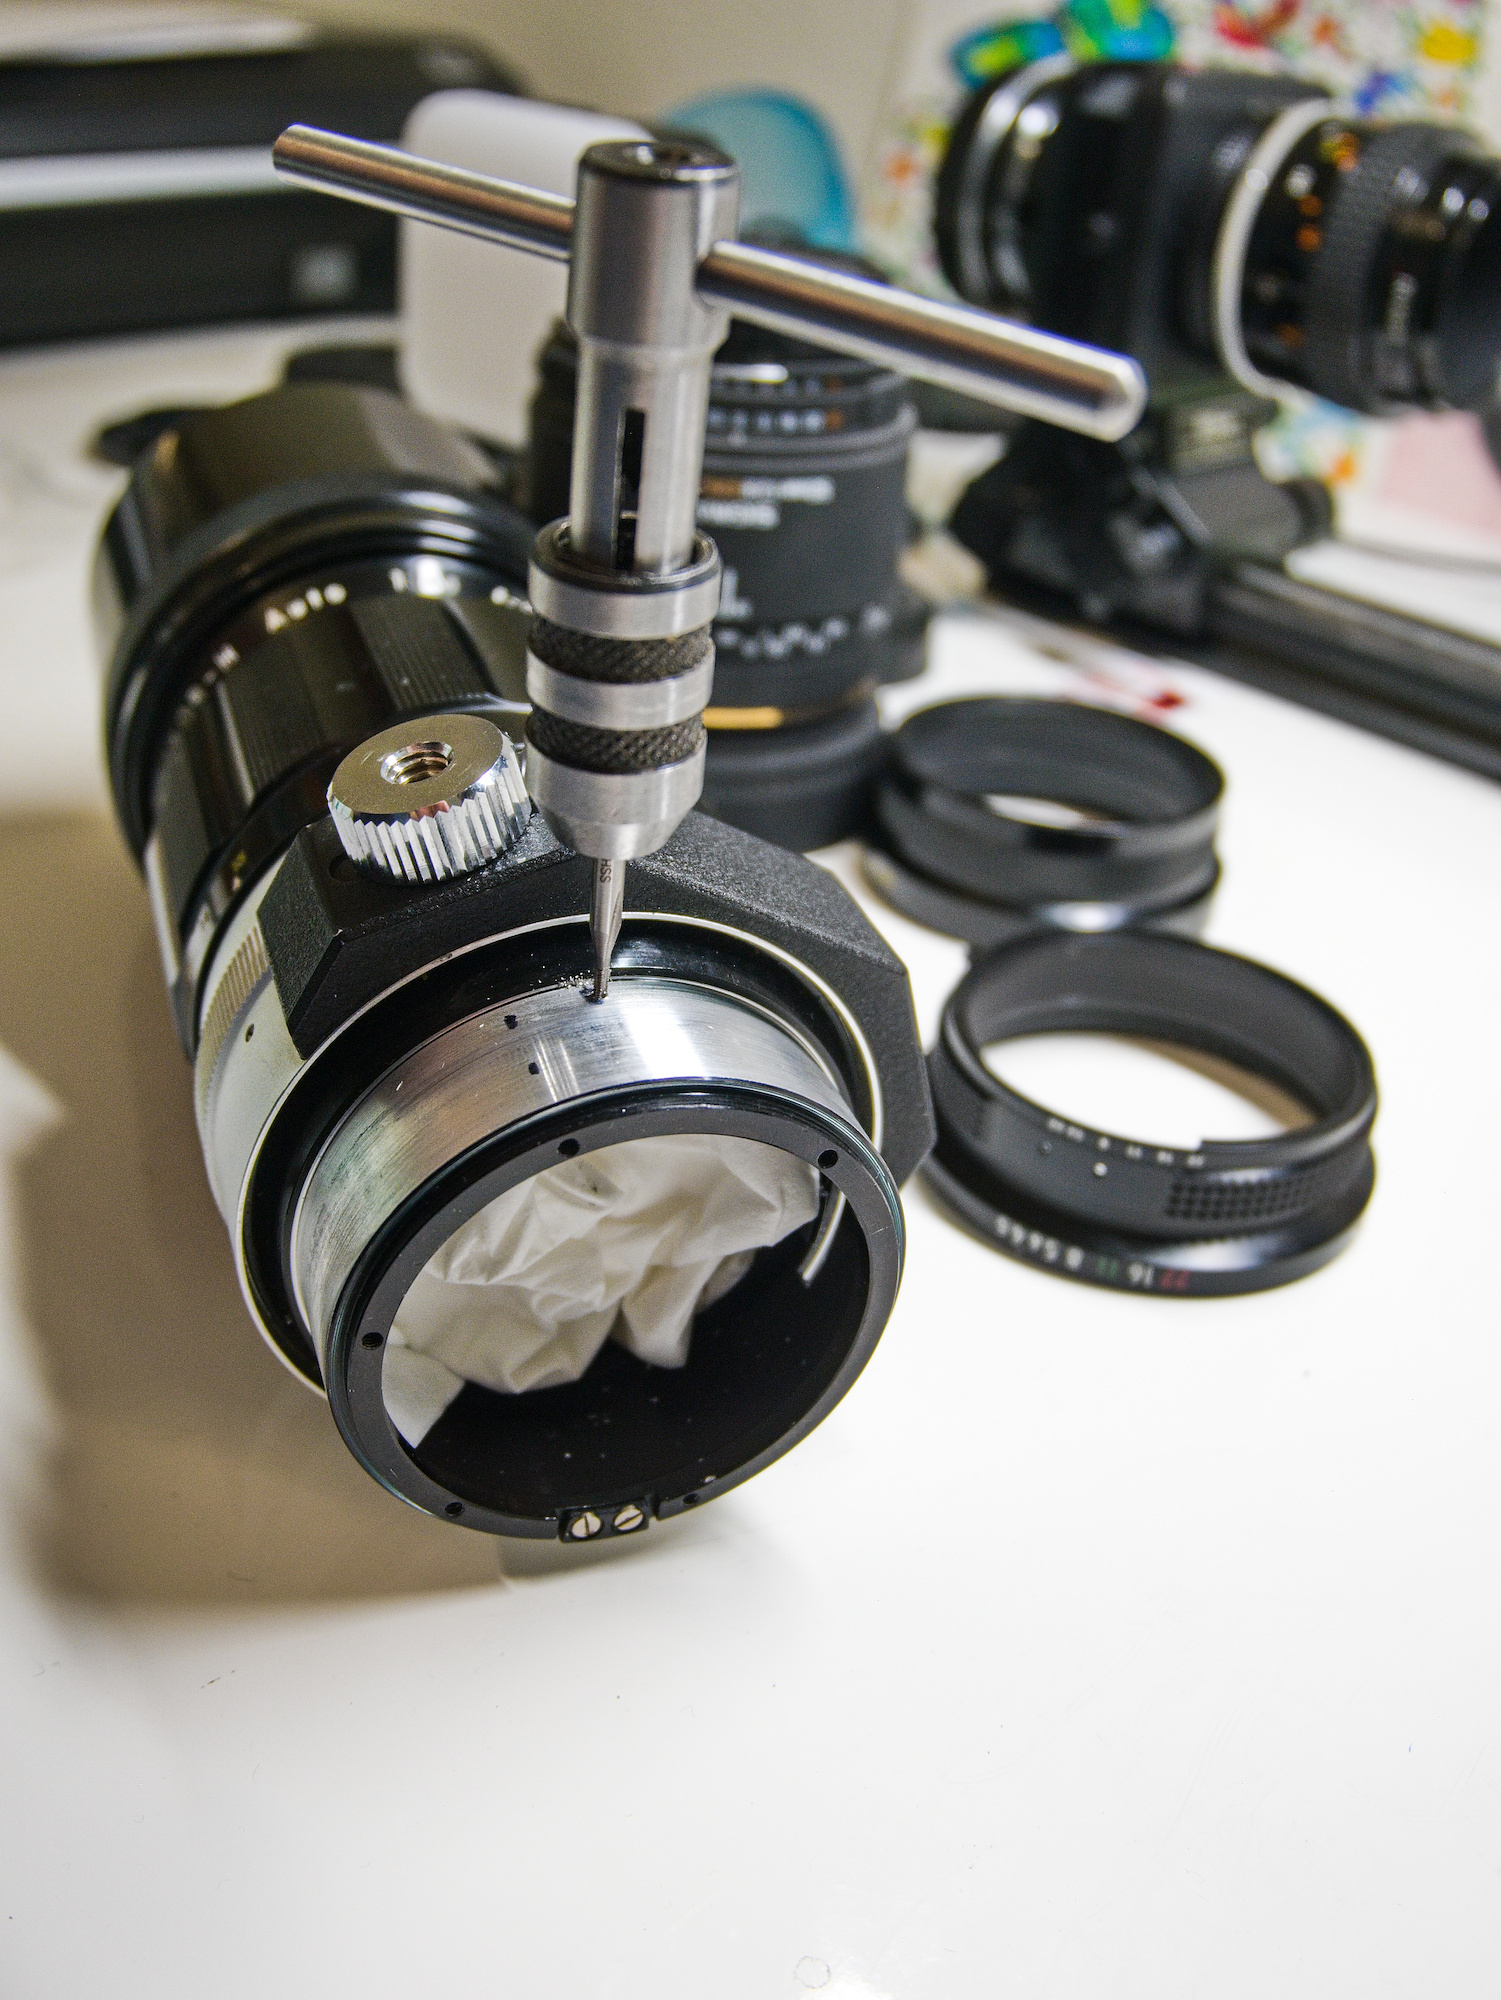
The 1.5mm hole is drilled at the notched position in the new aperture ring from conversion kit #52. Ideally the hole should be 1.35mm for a M1.7 thread but the 1.5mm drill was the closest I had and for this purpose good enough:

The hole must match the position of the original lens ring:
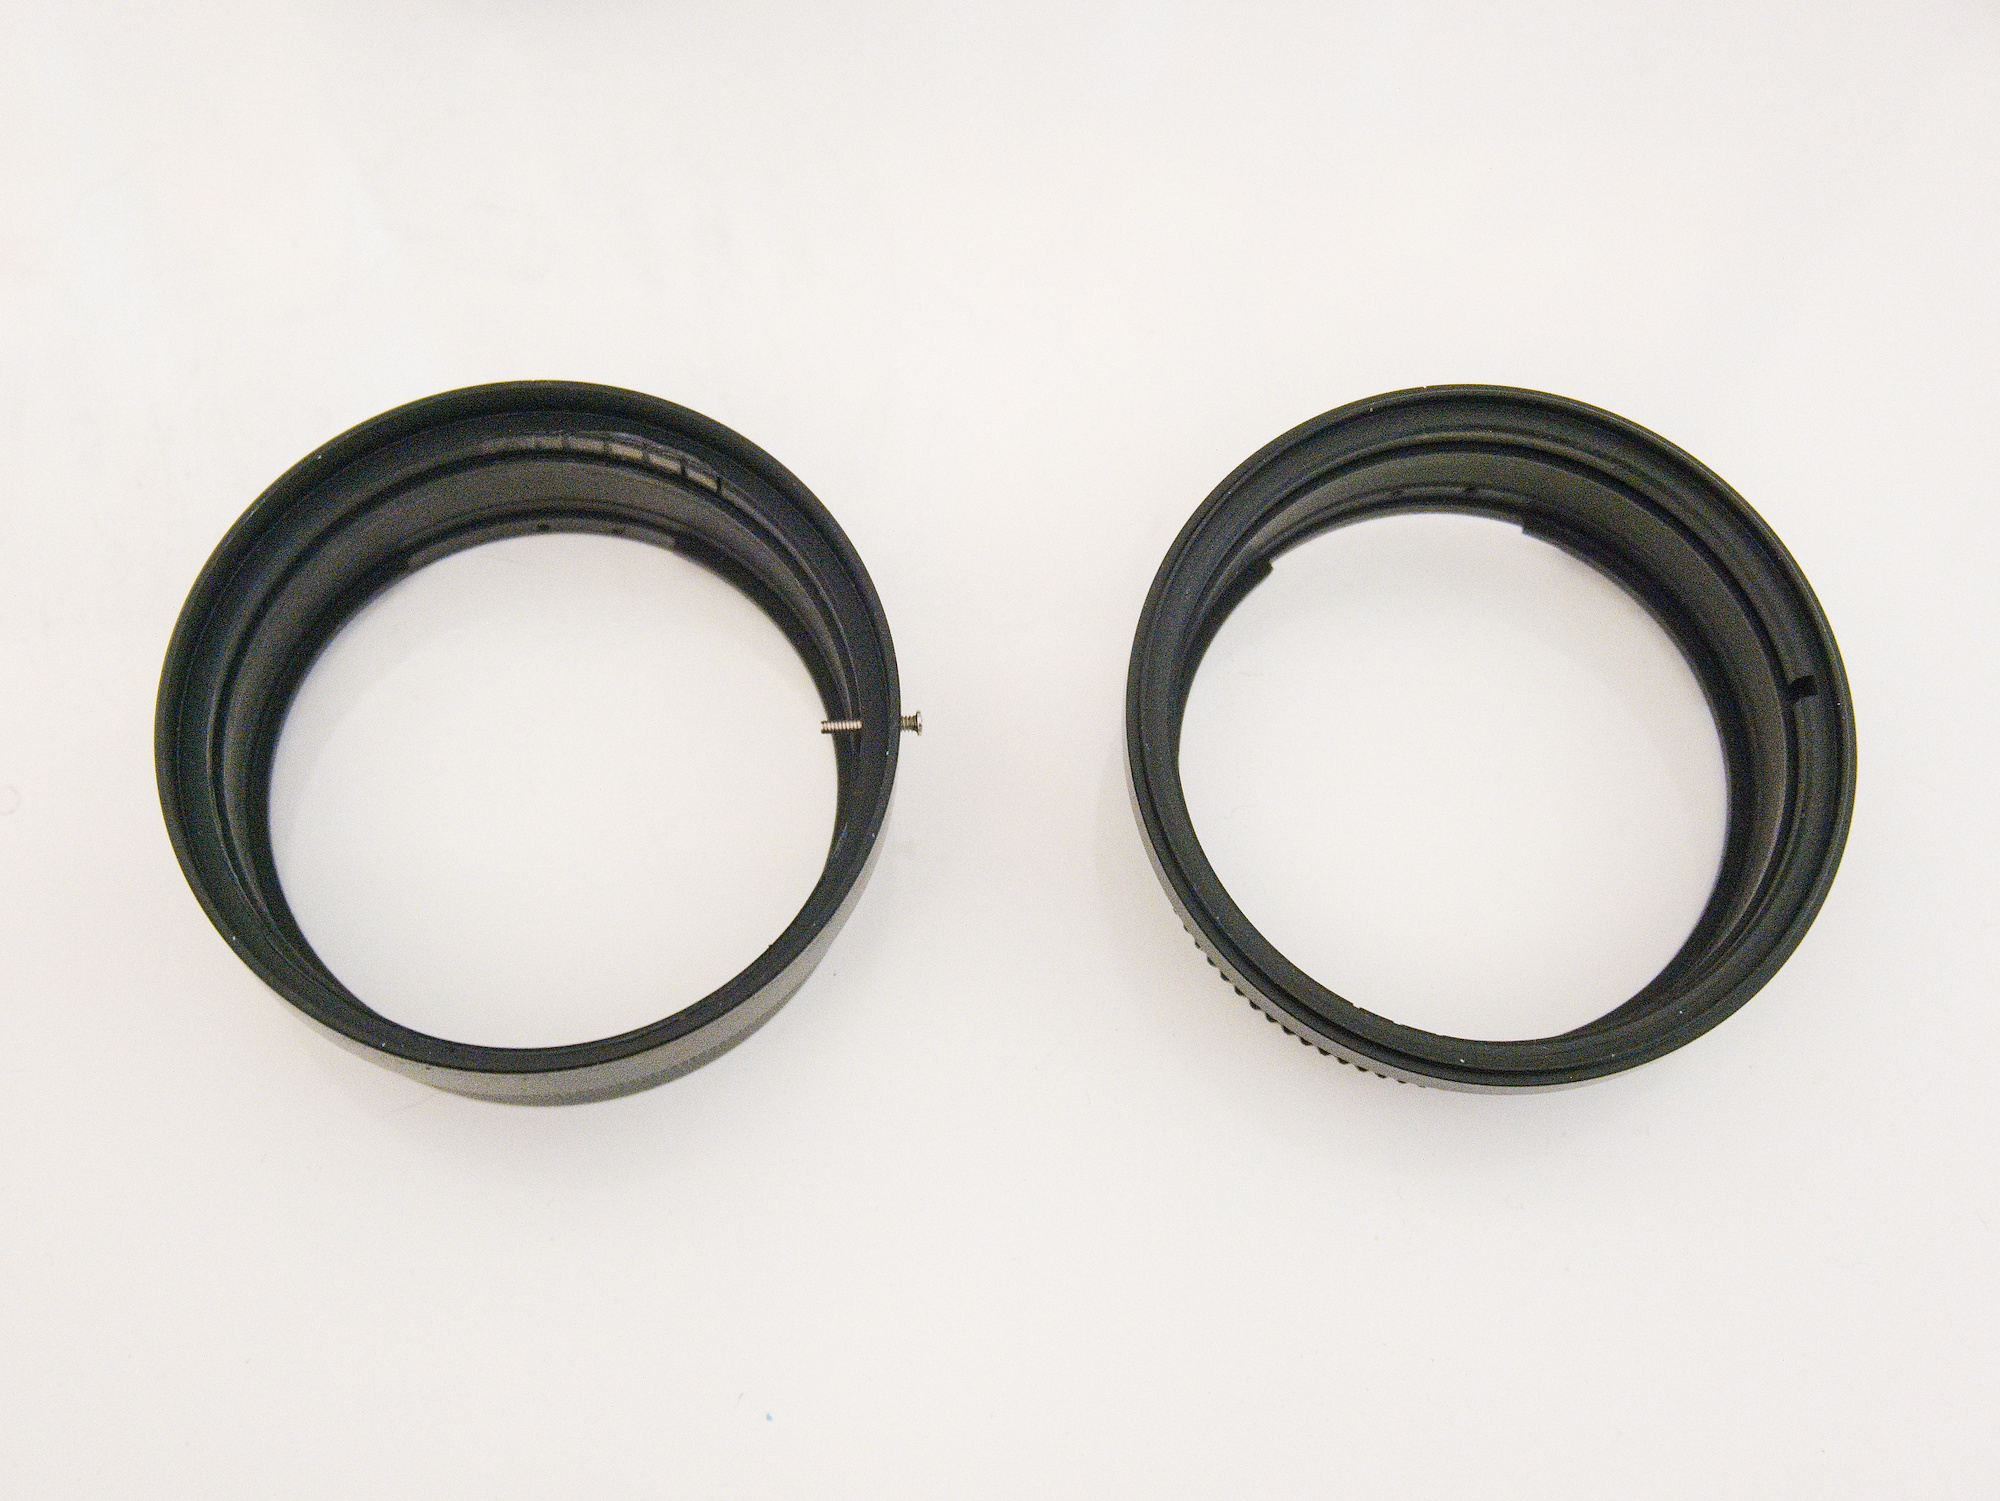
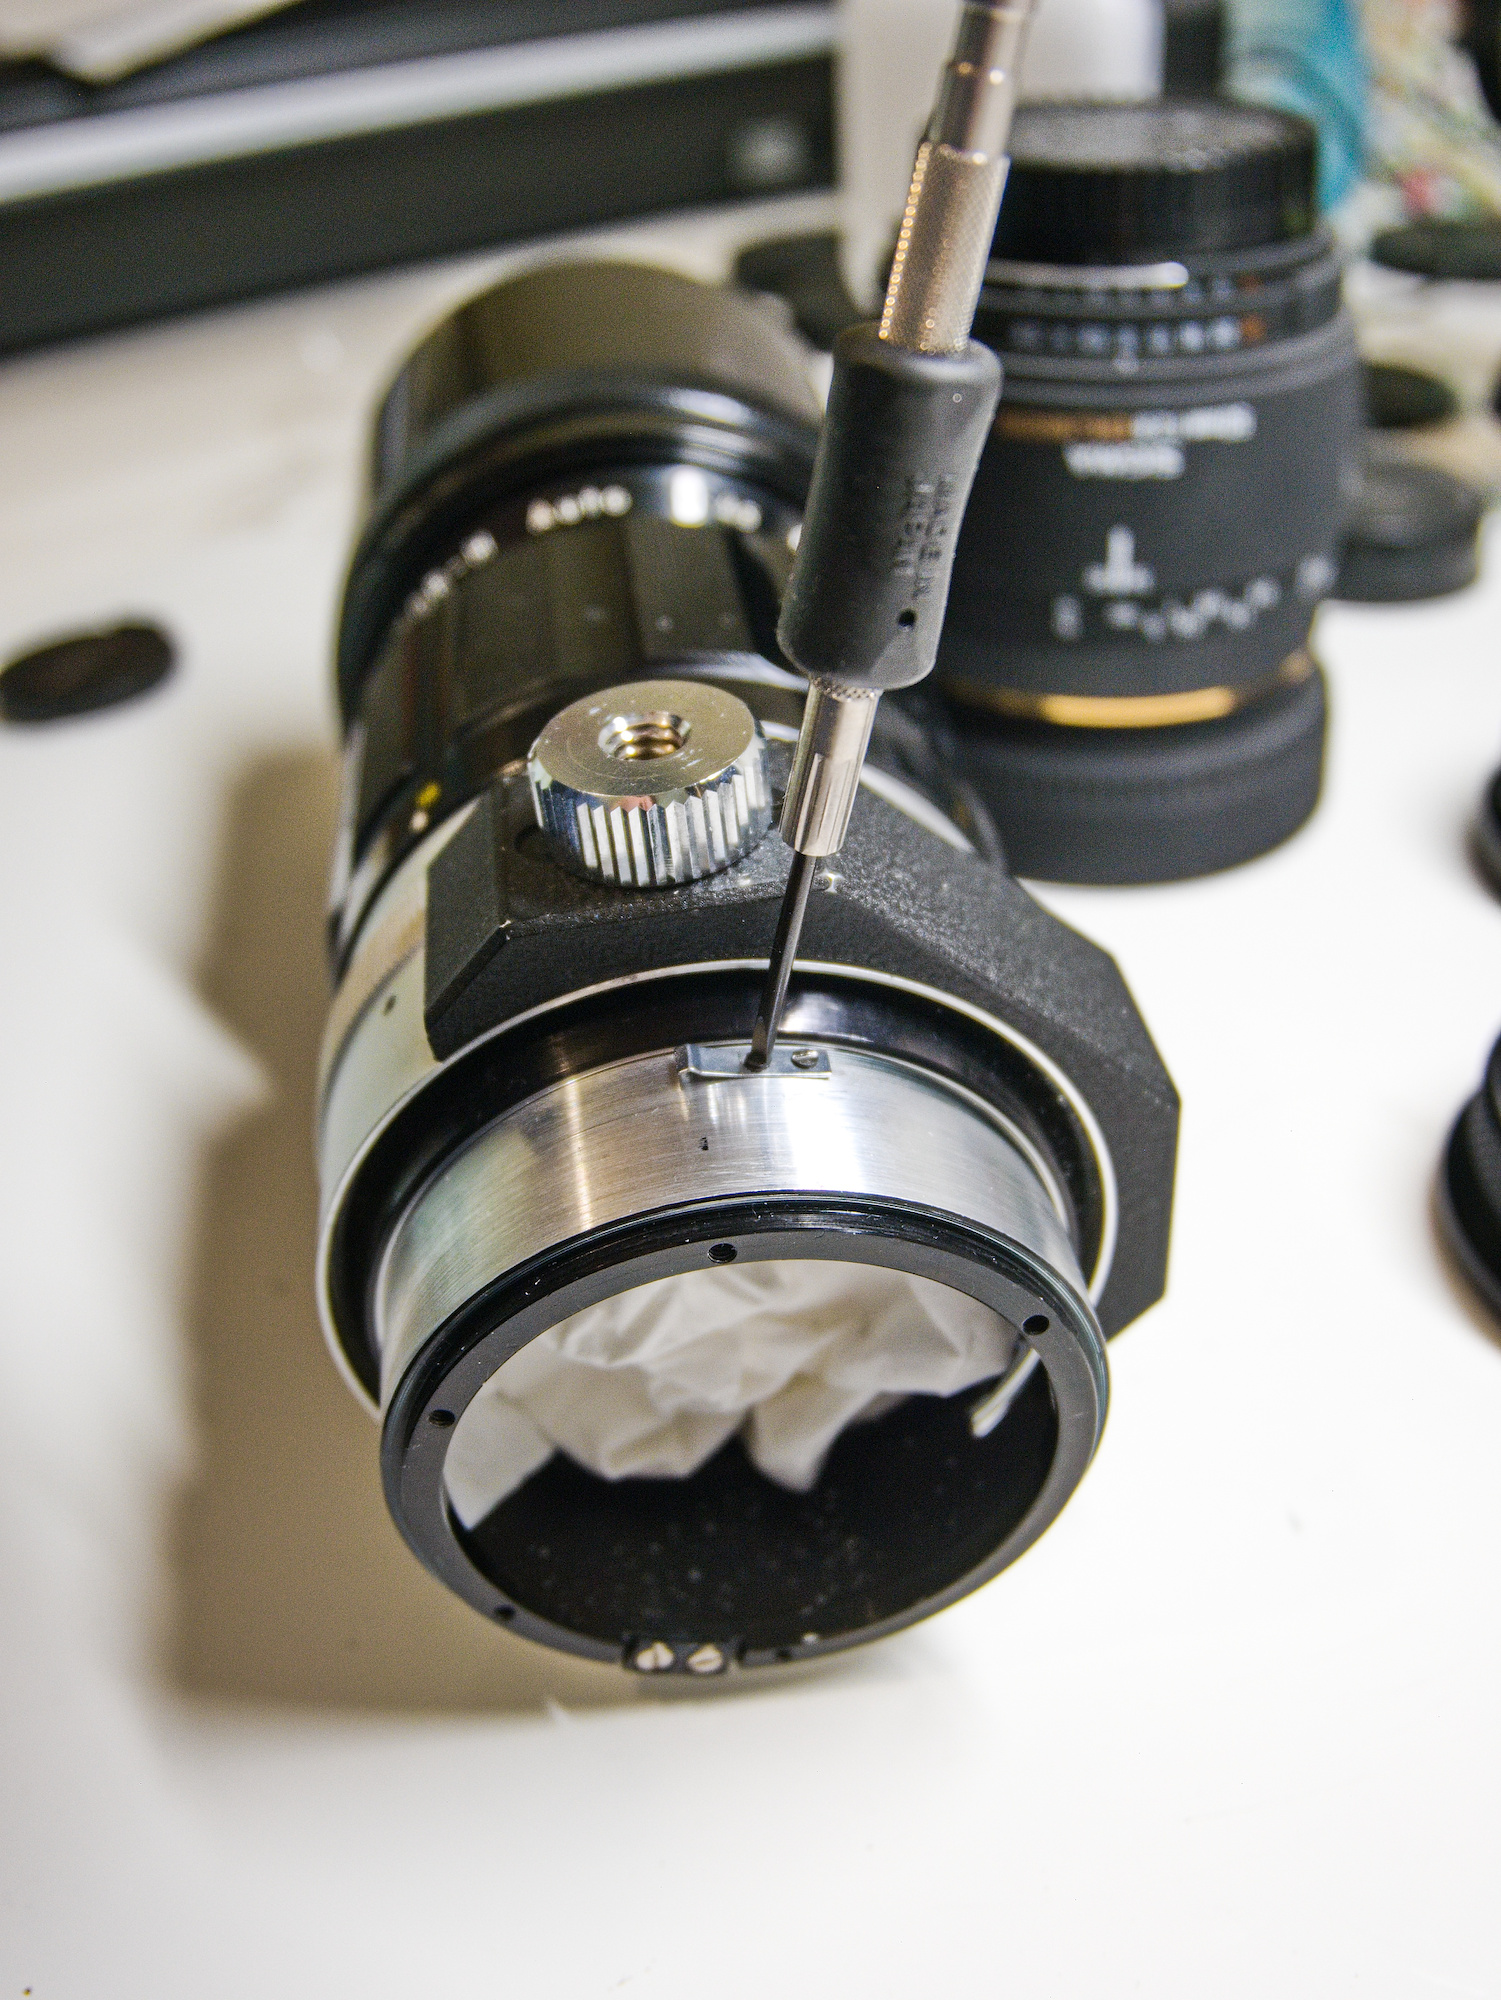
The other difference between kit #52 and #53 is that the aperture click notches are on the opposite side:
The aperture click spring needs to be moved. To get the correct distance, a non stretchy tape like 🦆 tape, is used to mark the position:
From the start of the first screw to the correct position:
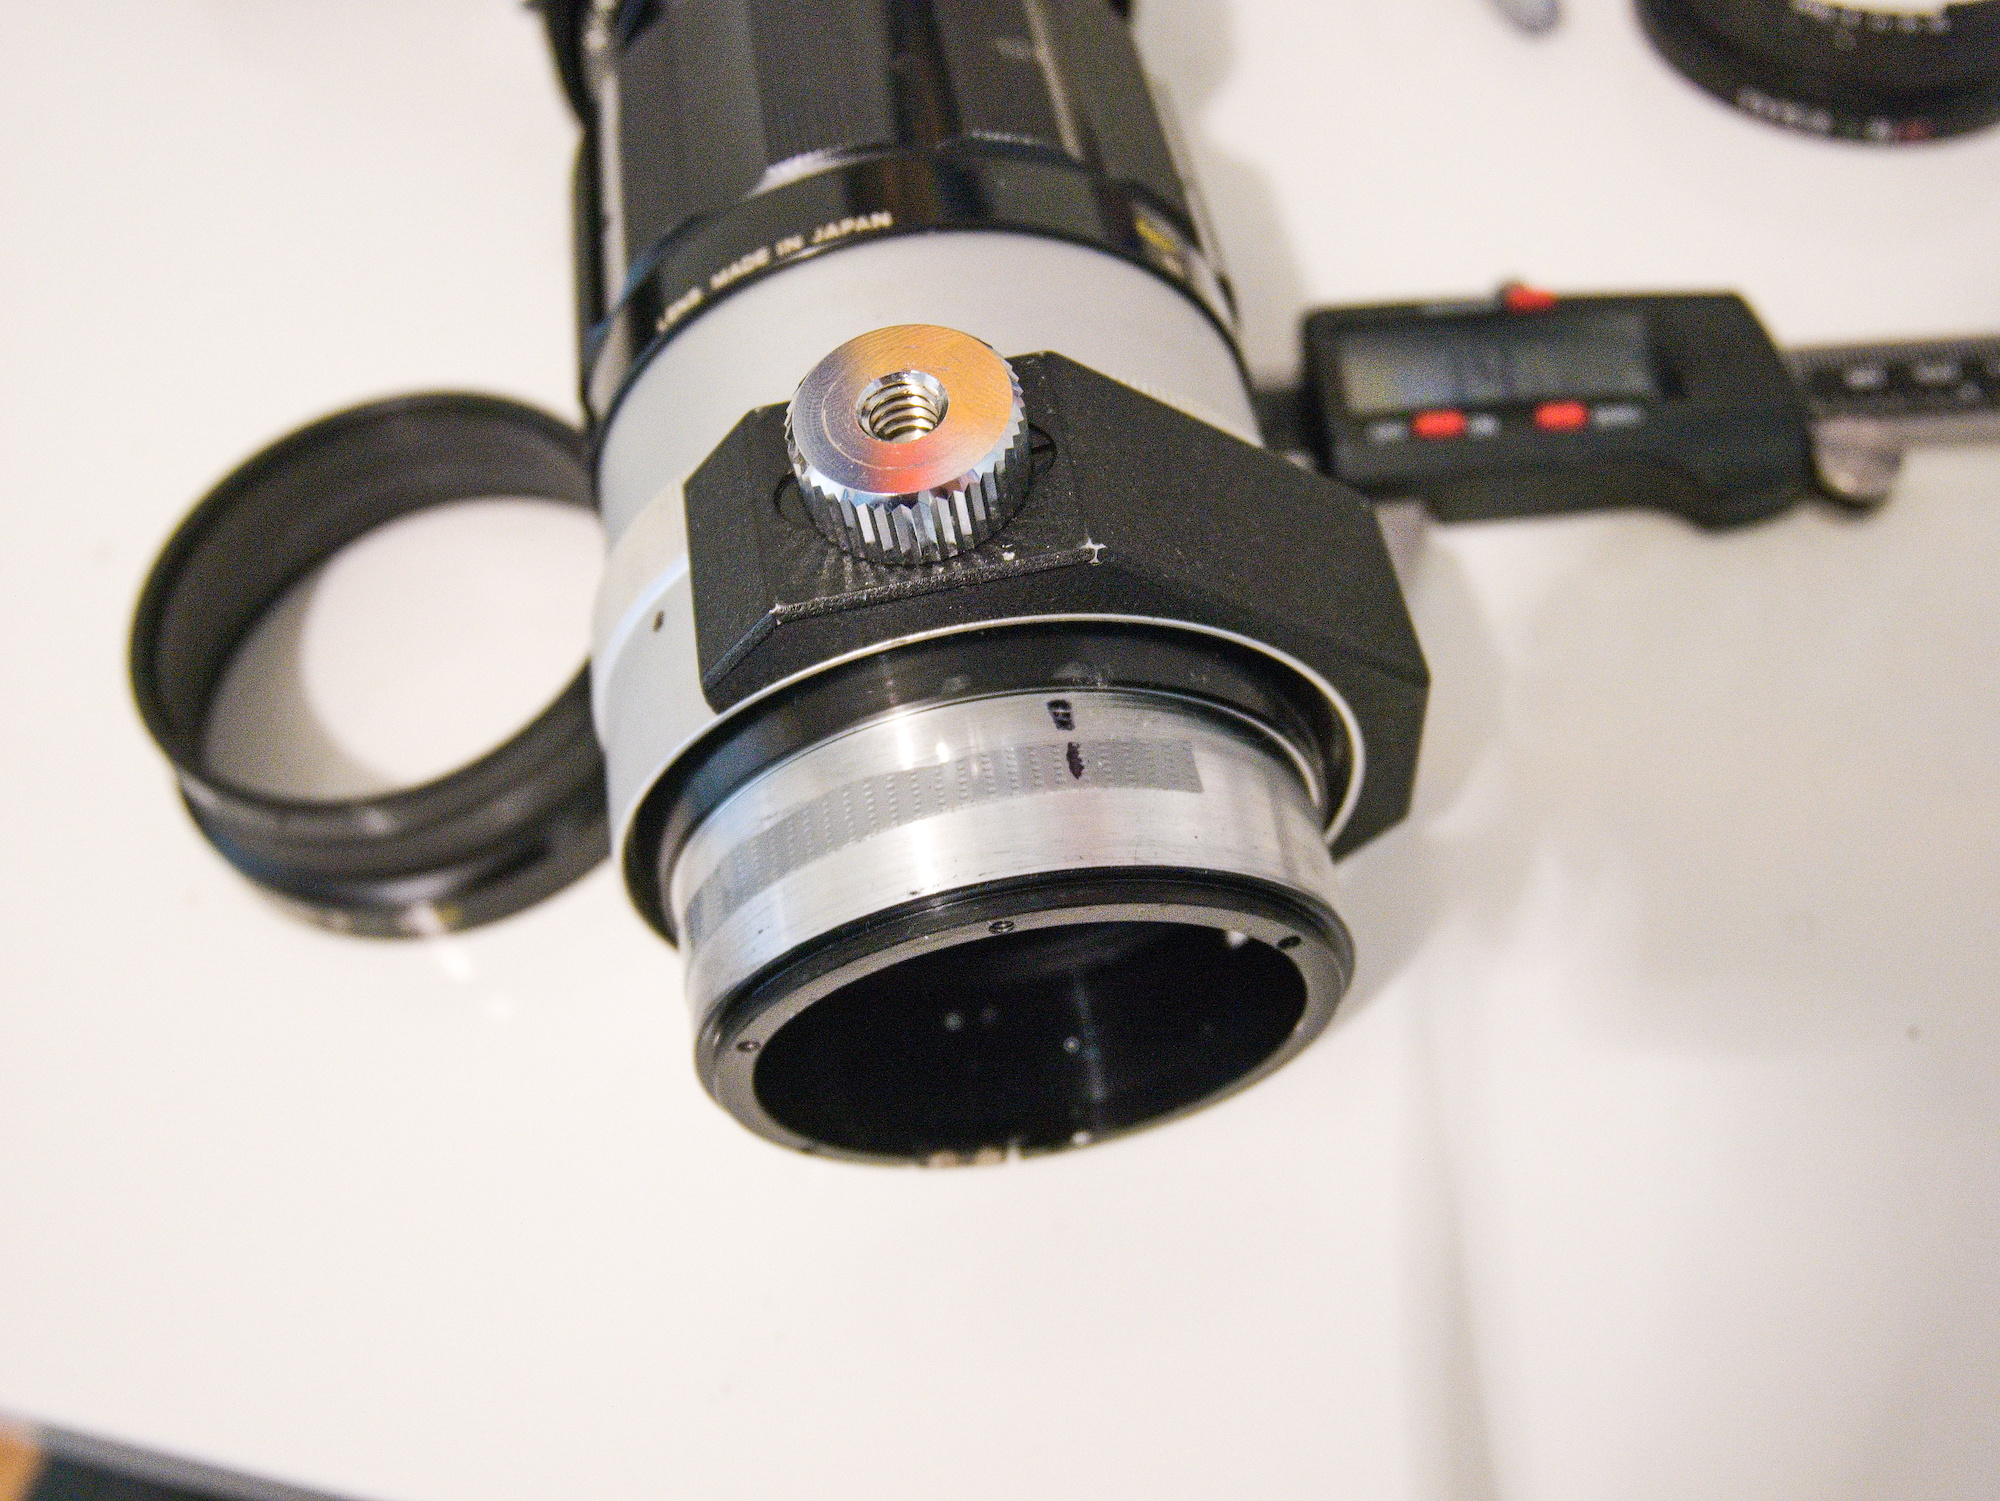
This is the position for the screw hole:
The screw size is M1.4. For this thread size, a 1.1mm for the thread hole should be used, but I don't have those drill sizes, so I used the 1mm as it will work too since it is soft Aluminium.
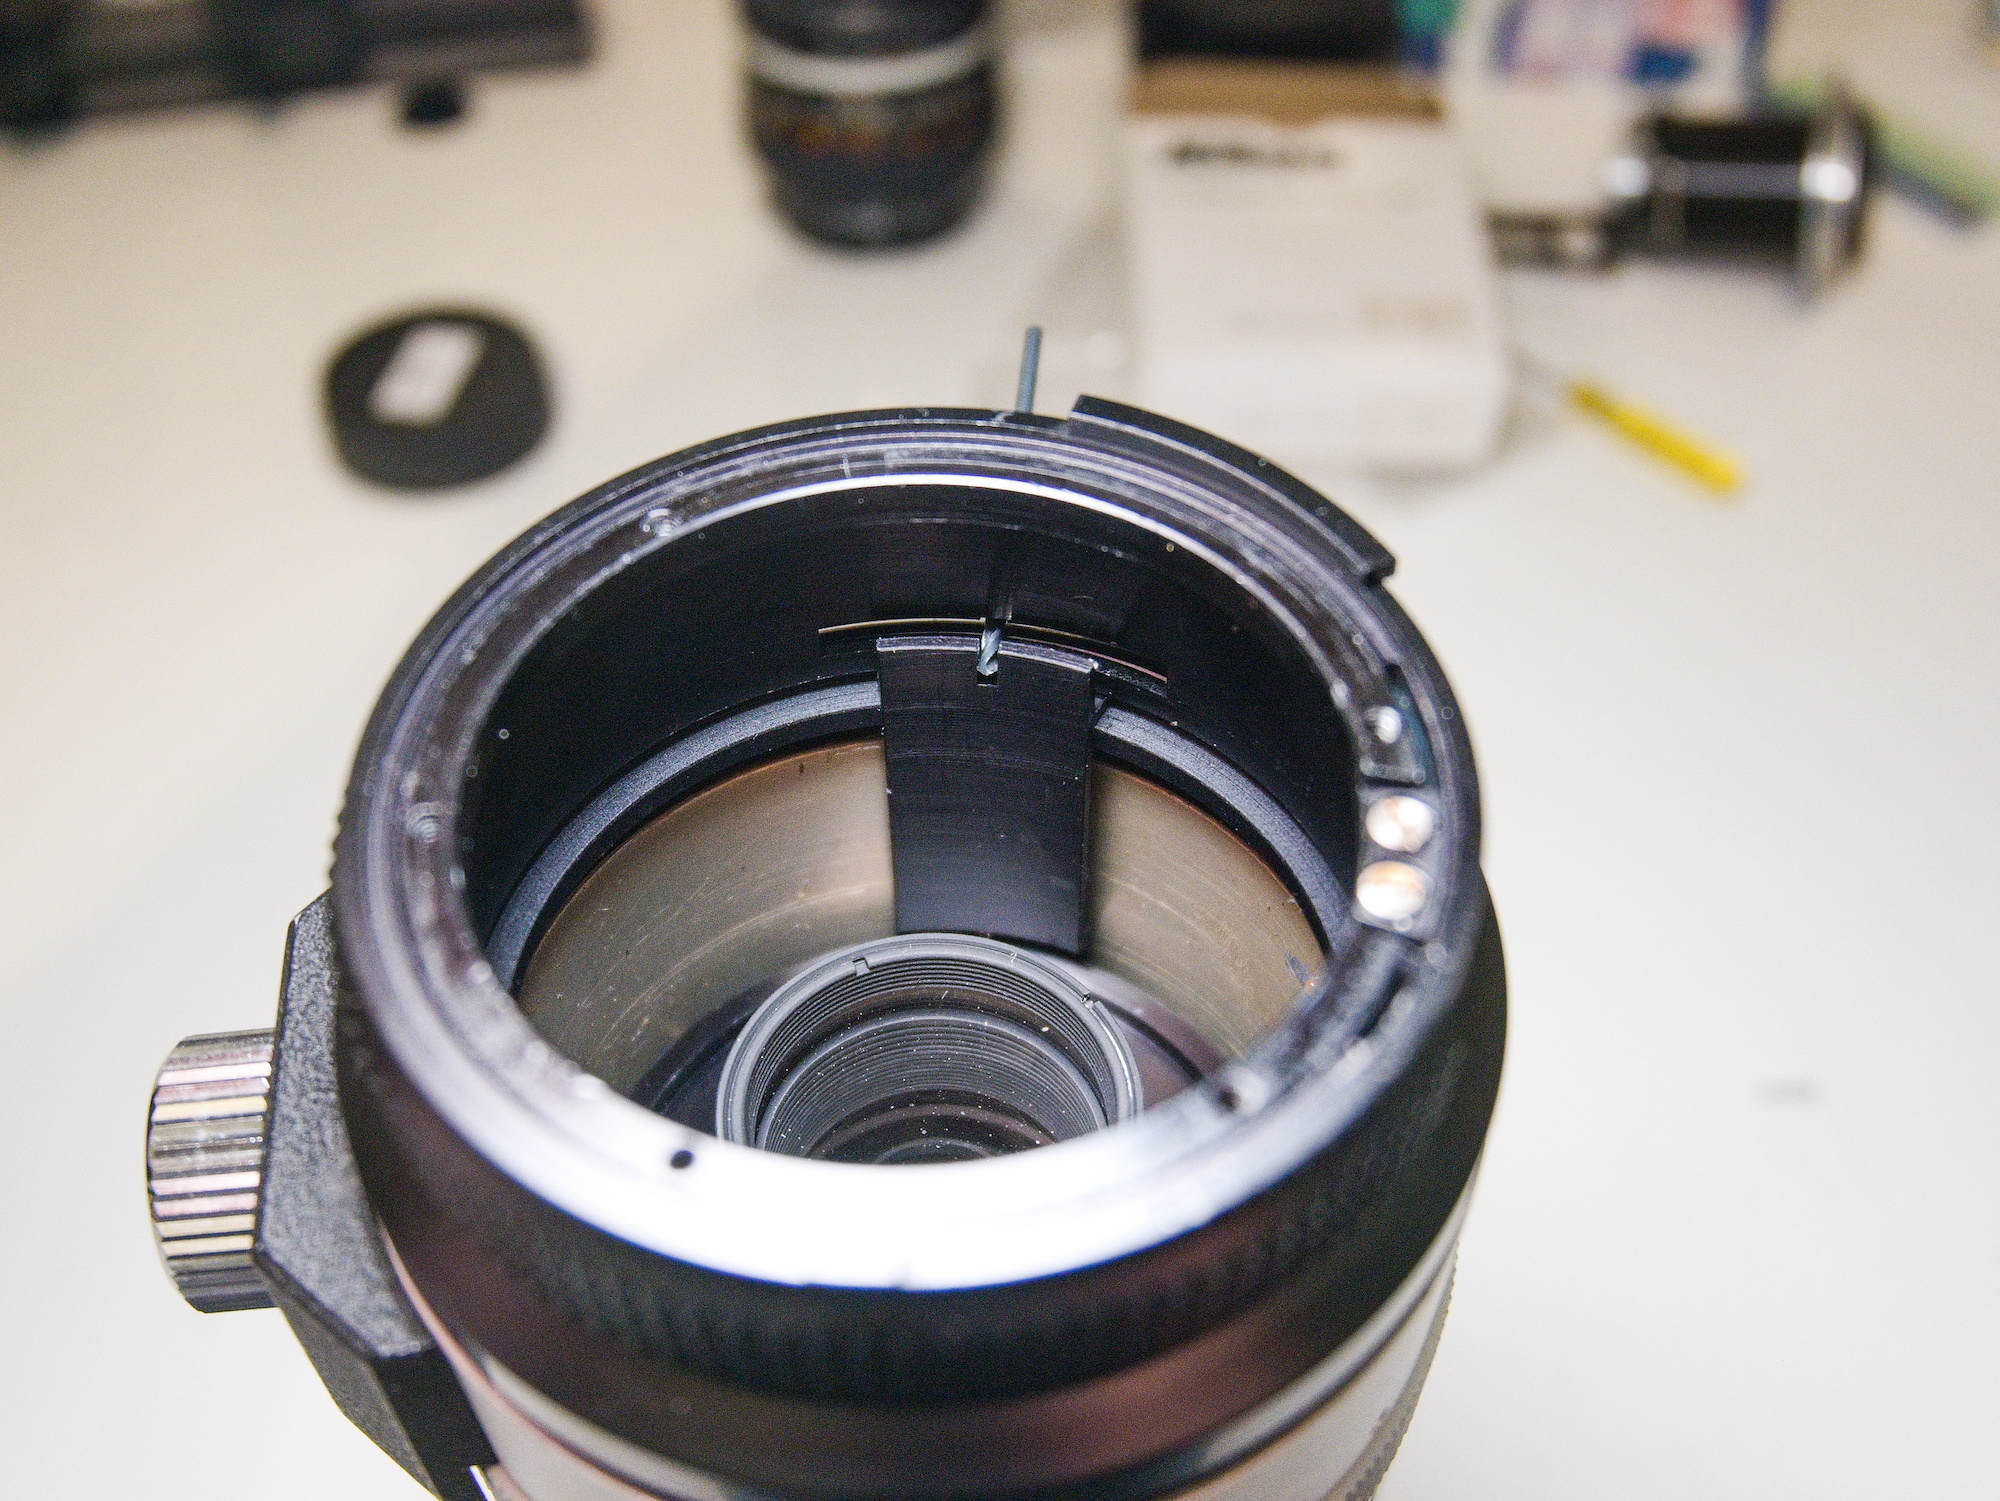
Attach the aperture click spring at the new position:
Add a little bit of grease to the inside the Aperture ring and put it on:
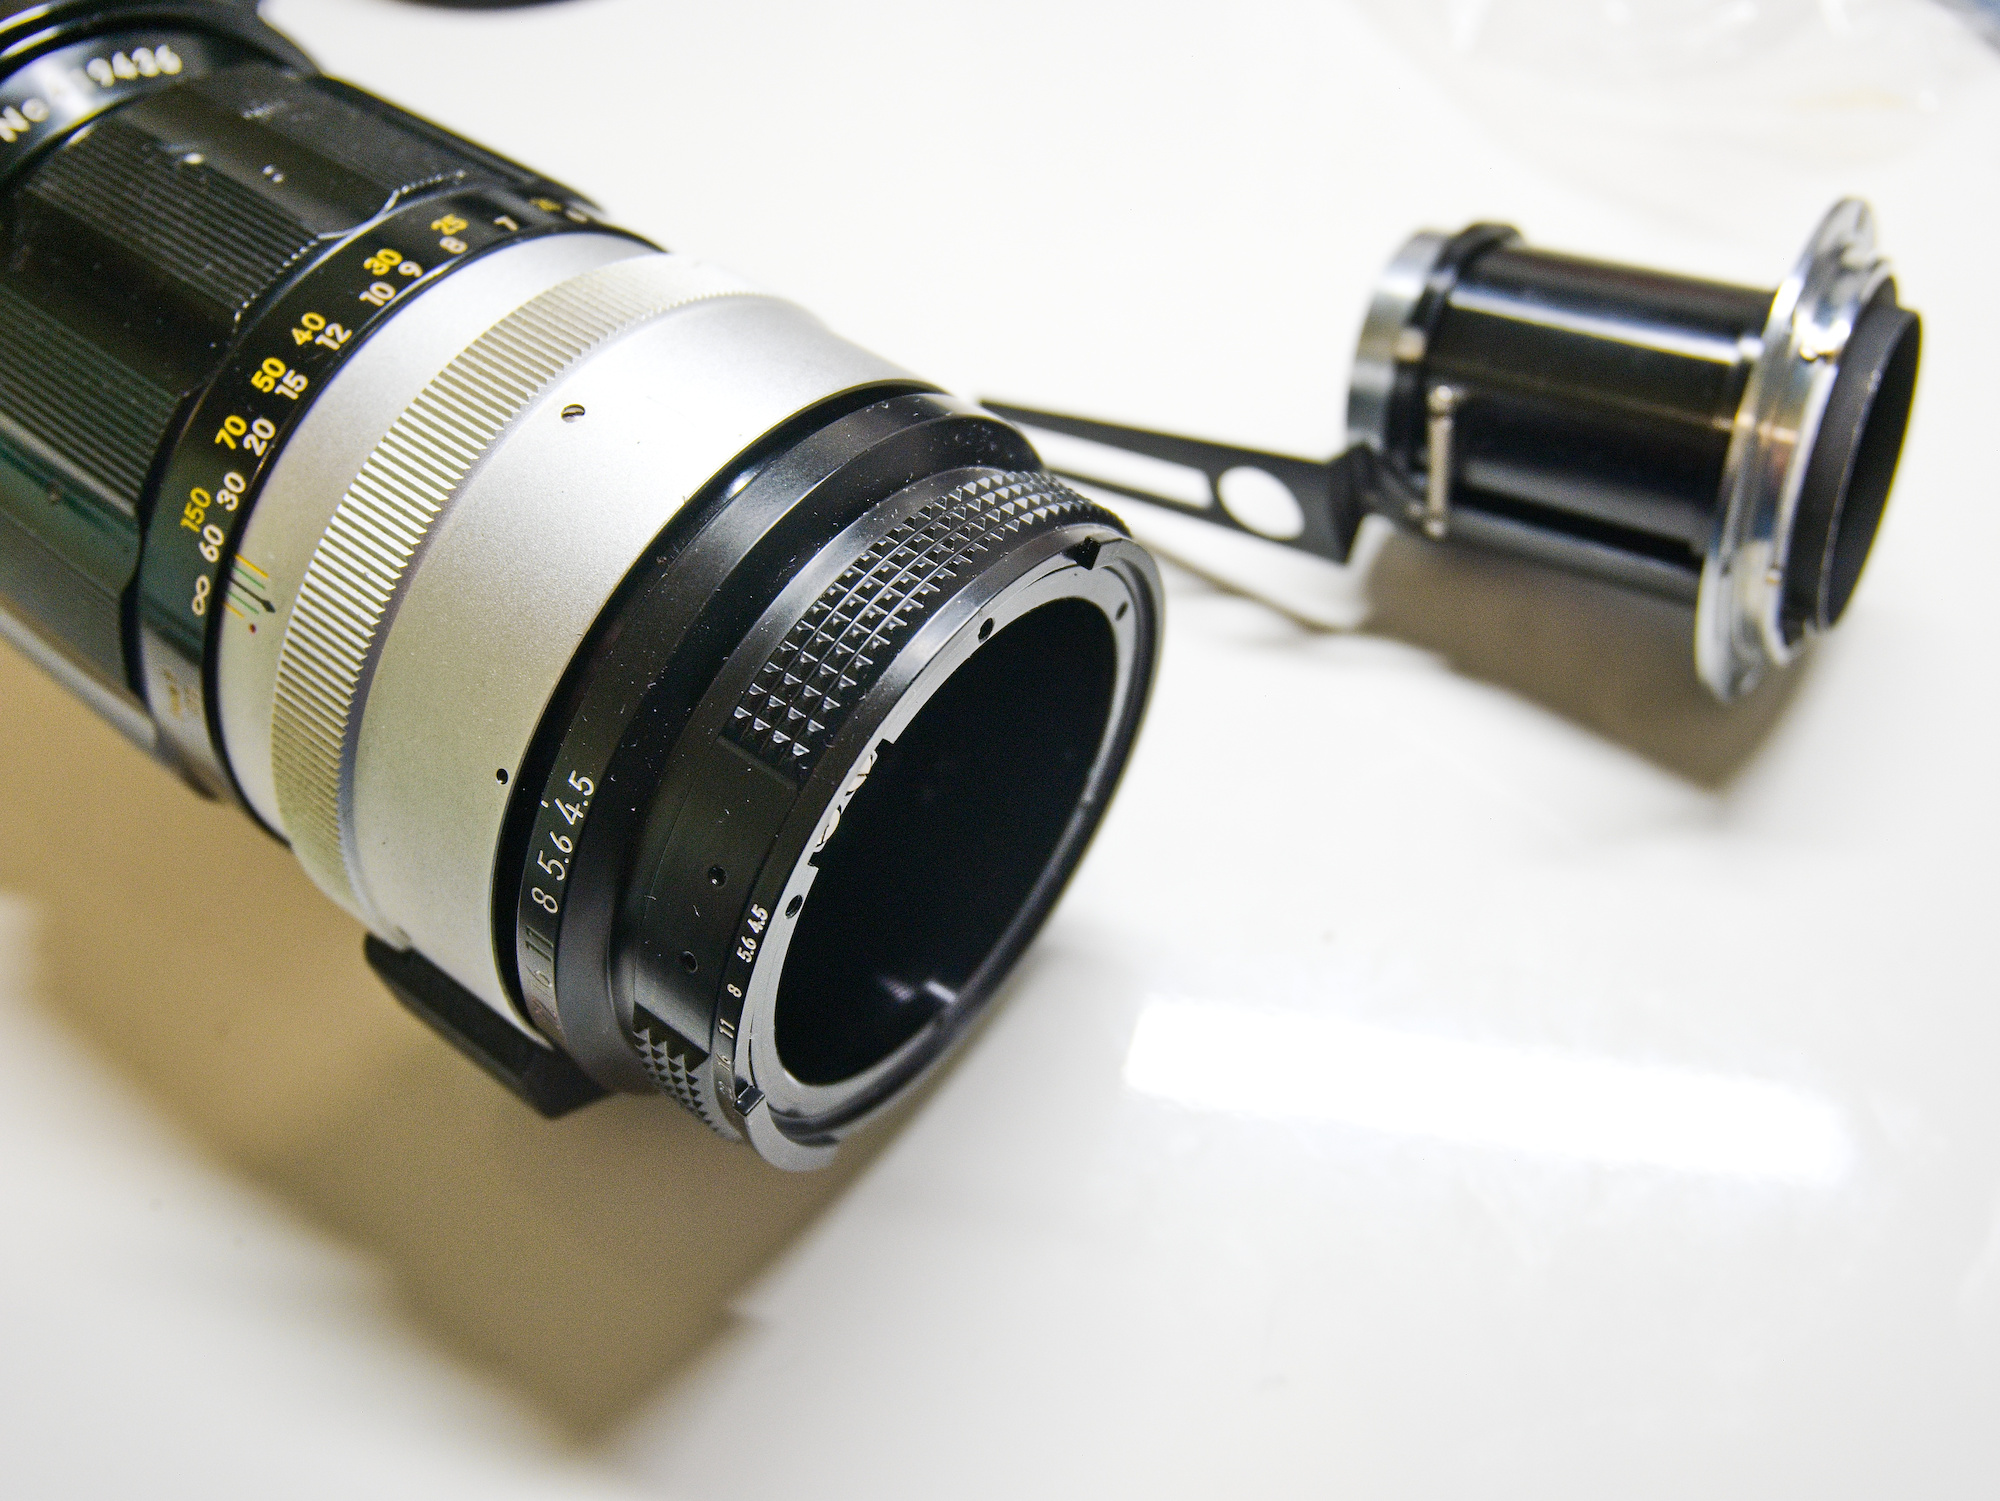
The new AI converted lens mount for the NIKKOR-H 300mm f/4.5: